AWS Physical AI Blog
Building Efficient Digital Twins in the Construction Industry
Introduction
The construction industry extensively utilizes the latest technologies, including robots, drones, and AI. In recent years, there has been a growing need for the use of digital twins to make the construction process more efficient and accurate, and AWS IoT TwinMaker Customers have already begun working on this. The benefits of digital twins in construction include improving the design process, construction site management, building operations, and many other phases.
BIM (Building Information Modeling) is widely employed throughout the modern construction industry to enhance the construction process. There is also a growing demand to utilize BIM data in digital twins. Additionally, many customers collect and utilize data from sensors attached to buildings and devices at construction sites on AWS.
AWS IoT TwinMaker is a fully managed AWS service that enables you to build digital twins with 3D models. You can import previously built 3D models such as CAD and Building Information Modeling (BIM) files or point cloud scans (optimized for the web and converted to glTF/glb format). However, it is currently not possible to import BIM 3D model directly in AWS IoT TwinMaker.
This blog demonstrates how to convert BIM 3D model and utilize it with AWS IoT TwinMaker.
Autodesk Revit is a software used to create BIM data. There are several methods available to convert BIM 3D model created in Revit to glTF, with the two popular approaches being:
- Incorporating Revit plug-ins to enable direct conversion and export from Revit.
- Utilizing the Autodesk Platform Service API for the conversion process.
This blog showcases how to use the Autodesk Platform Service.
Prerequisites
Prepare BIM data created in Revit
Create BIM data in Revit to be imported into AWS IoT TwinMaker. If you do not have BIM data, you can download it from the Revit Sample Project Files.
Use your Autodesk Platform Services account
The procedure described in this blog uses the Autodesk Platform Services (APS) API. If you do not have an APS account, register for one at https://aps.autodesk.com/.
Install VSCode
If you do not have VSCode installed in your PC, download from VSCode web site and install to your PC.
Step-by-step guide to integrate BIM 3D model into AWS IoT TwinMaker digital twin
Step 1: Register an App to create a Client ID/Secret
The APS API is used for BIM 3D model conversion. To use the API, you will need a Client ID and Secret. Register your application and create a Client ID and Secret by following the instructions Access Forge services. When choosing the application type, choose Traditional Web App.
Step 2: Set up the VSCode Extension
When converting using the APS API, the procedure involves converting from the rvt format to SVF format. The steps are in the tutorial Translate a Revit File, Generating Room and Space Information. Then you have to convert the SVF format to glTF format using open source tool forge-convert-utils. In this tool you have to run several commands to convert.
However, by utilizing the Autodesk Platform Services (VSCode Extension) provided by Autodesk, these steps are simplified, making the conversion process easier.
- Search for Autodesk Platform Services in the VSCode Extensions and proceed to install the extension.
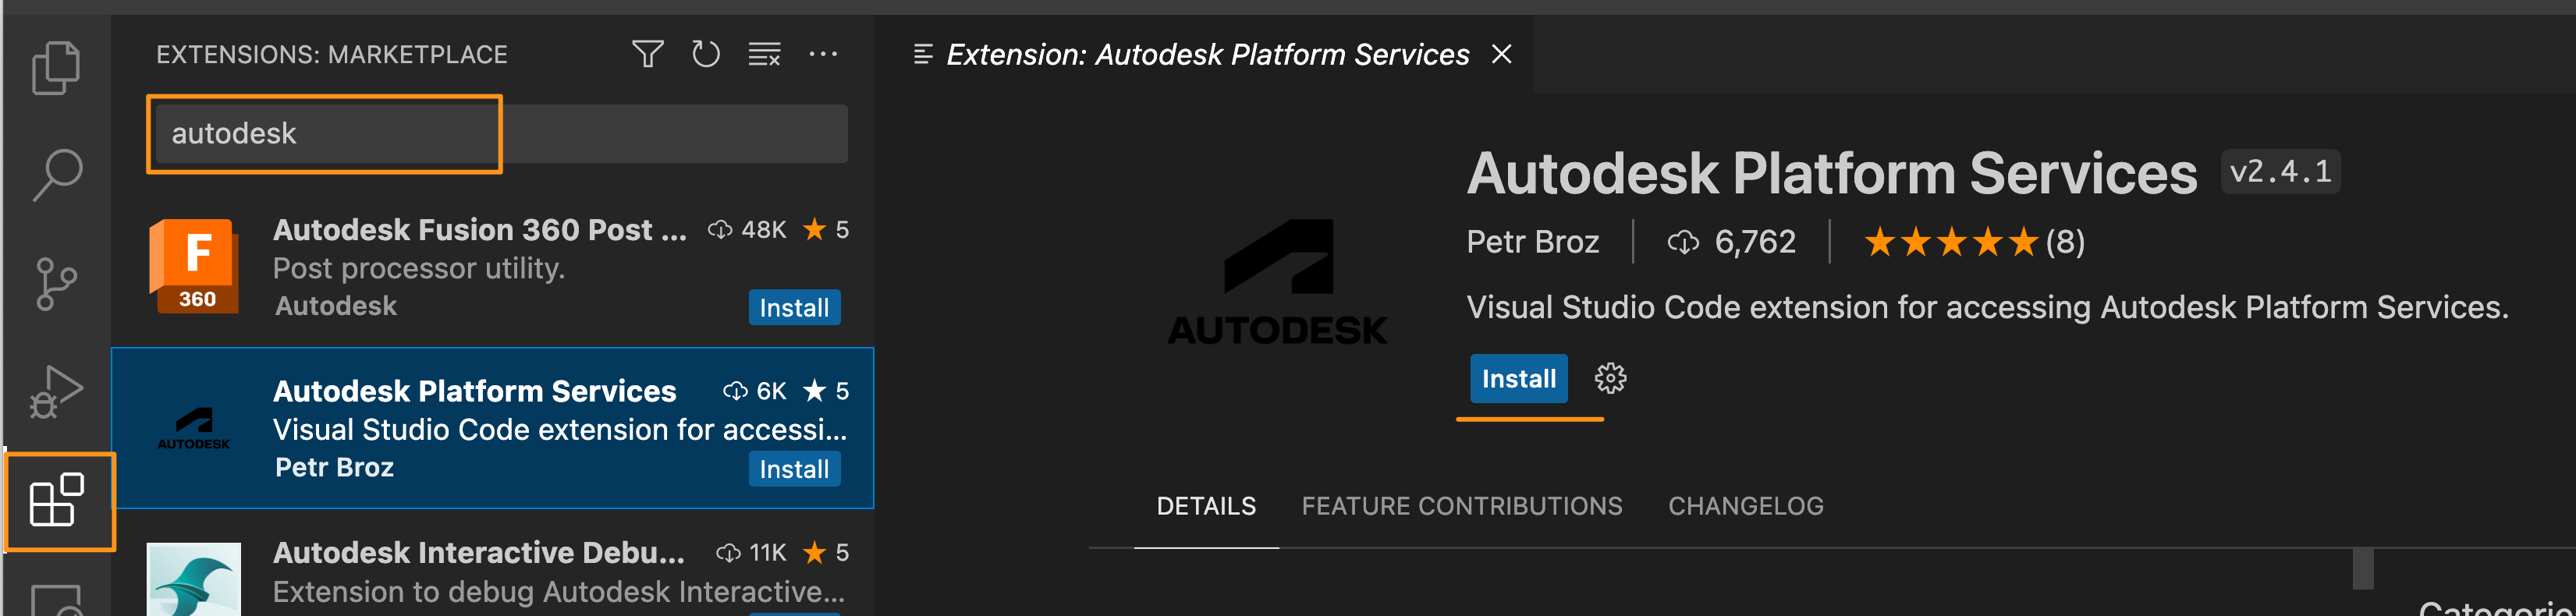
Figure 1. Looking at the listings extensions of VSCode, and searching for Autodesk Platform Services.
- Open VSCode settings panel. To open the Settings editor, navigate to Code, Preferences, Settings.
- Enter Autodesk Platform in the search box and choose Edit in settings.json in Autodesk, Forge: Environments section.

Figure 2. Search Autodesk Platform Service in VSCode settings panel.
- Add a new environment configuration to autodesk.forge.environments as shown in the following sample. Replace
your client idyour secret
"autodesk.forge.environments": [
    {
      "title": "TwinMakerConvert",
      "clientId": "your client id", "clientSecret": "your secret", "region": "US" } ]
Step3: Convert Revit file to glTF data
- Choose the Autodesk Platform Services extension icon in the toolbar on the left side of VSCode.
- Choose the + symbol in the BUCKET & DERIVATIVES section.
- Enter a unique bucket name in the input form. The bucket name must be unique. If a 409 error occurs, try using a different name.
- Press the Enter key to confirm and choose the bucket retention policy to create the bucket.
- After successfully creating the bucket, the bucket name will appear under the BUCKET & DERIVATIVES section.
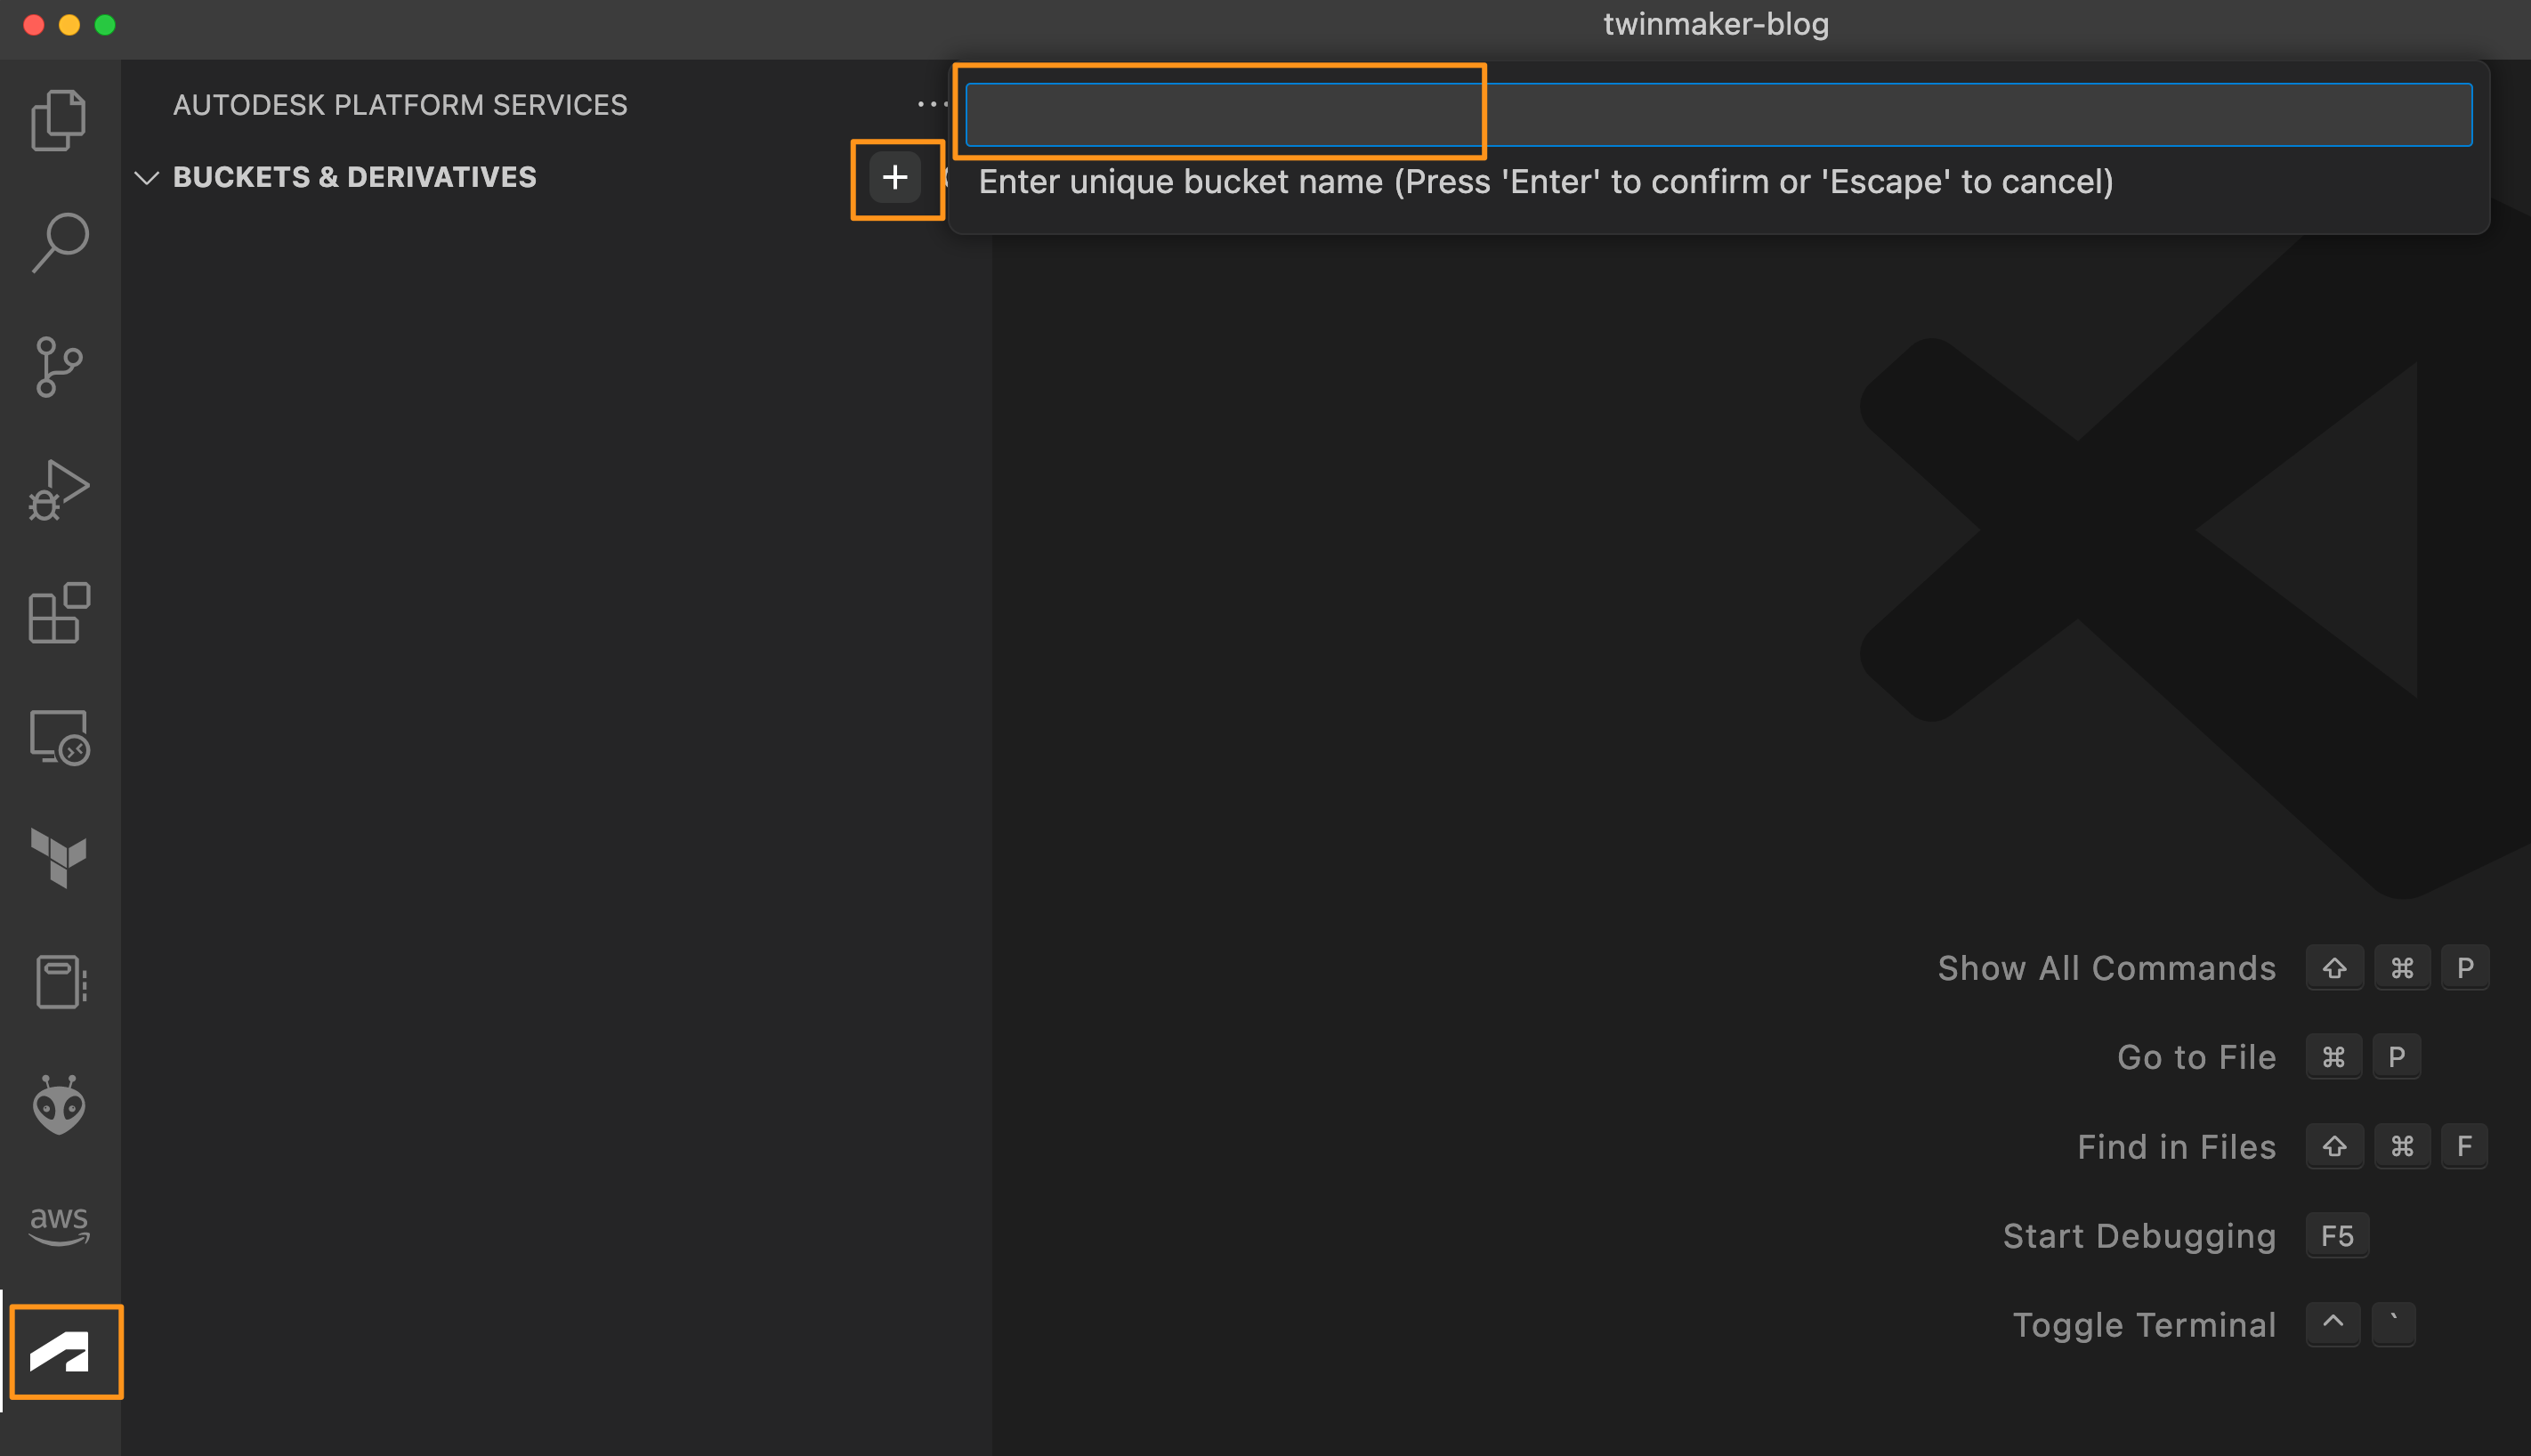
Figure 3. Add a bucket and enter a unique name to create a bucket.
- Open the context (right-click) menu, and choose Upload Object. Then, choose your RVT file to upload. After the upload is complete, you will see the RVT file name listed under your bucket name.
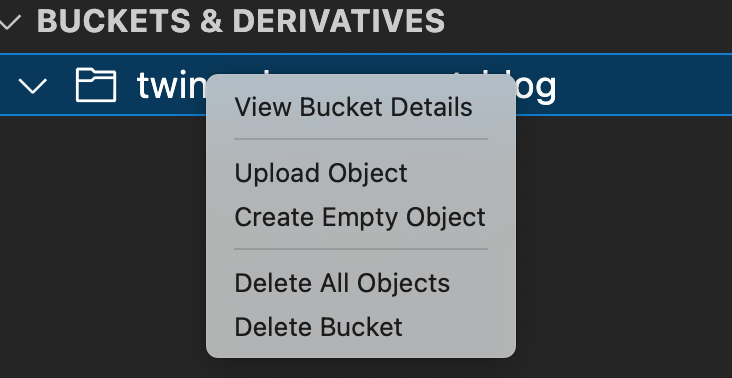
Figure 4. Upload local file from BUCKET & DERIVATIVES menu.
- Open the context (right-click) menu, and choose Translate Object (Custom).
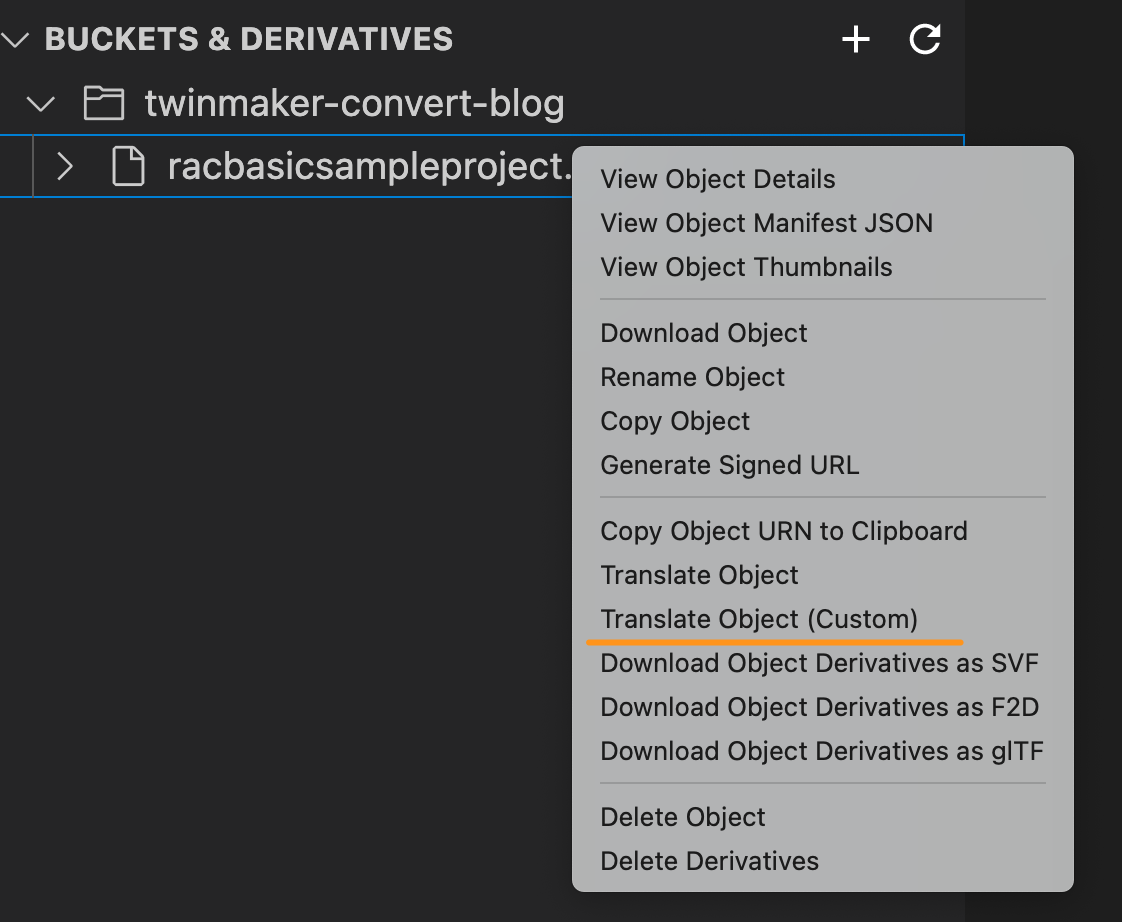
Figure 5. Execute Translate Object from uploaded file menu.
- Choose SVF as the Output Format and choose the Run button to start the conversion job. Please note that the conversion process may take few minutes (the duration will vary depending on the file size).
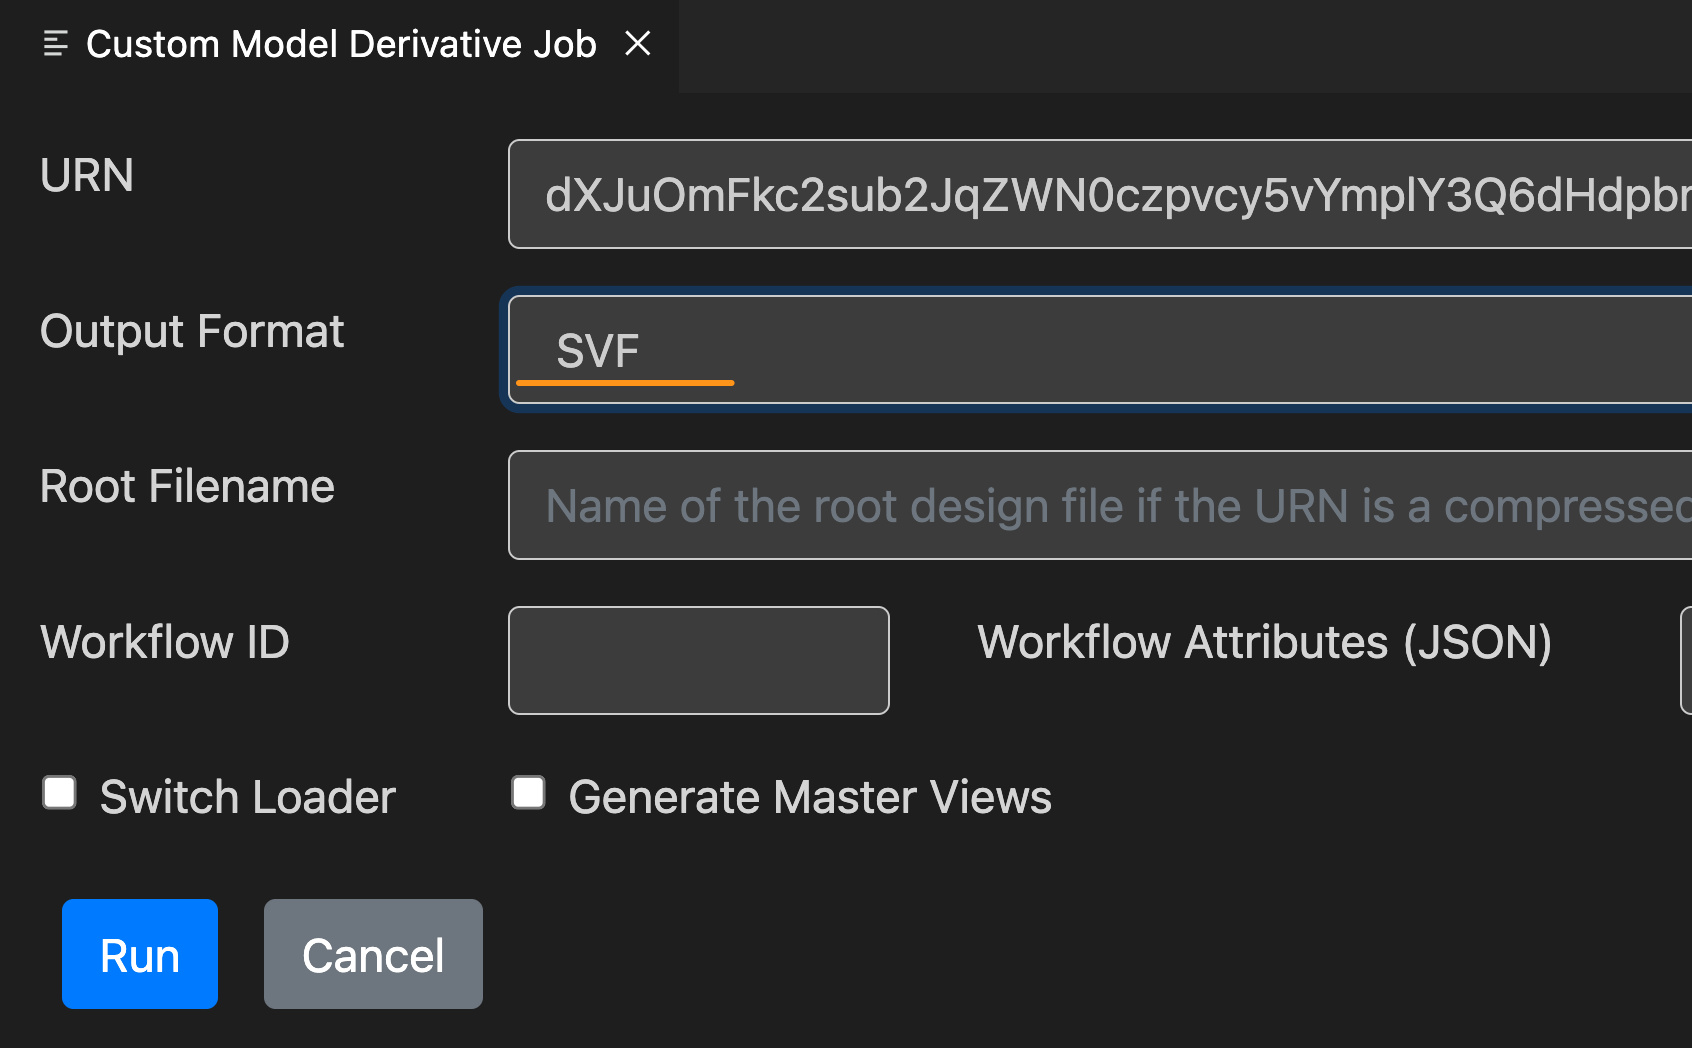
Figure 6. Specify the Output Format and run the conversion job in poped up window.
Note: SVF (Streaming Vector Format) is a file format that can be used with APS Viewer.
- You can see several files after the conversion is complete. Open the context (right-click) menu on {3D} and choose Preview Derivative.
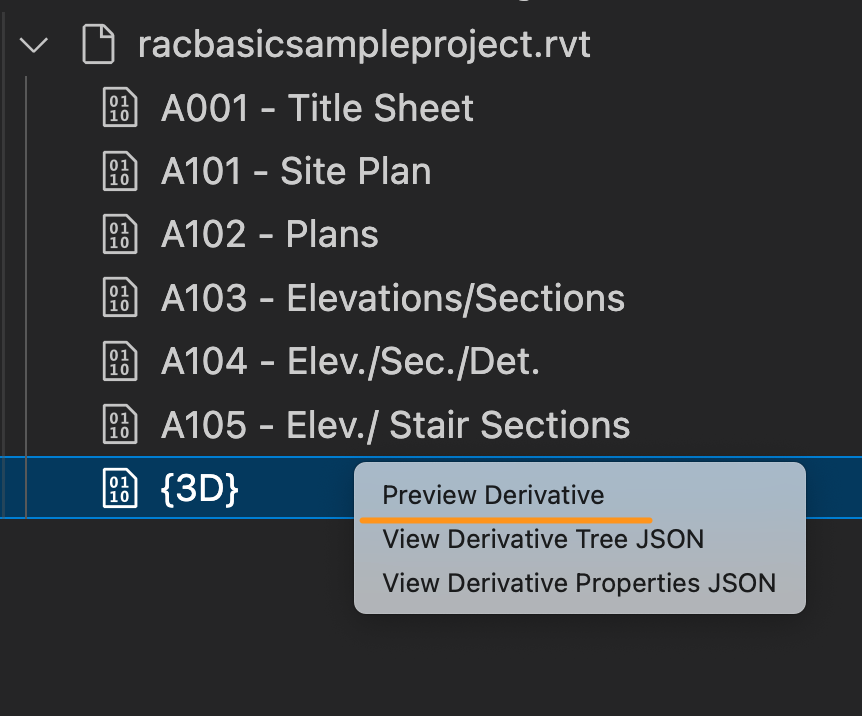
Figure 7. Preview derivative from generated file {3D} menu.
- You can see the 3D model in the viewer
Note: In Step 3 of this blog, the VS Code extension was used to simplify the process of converting RVT file. If you prefer to perform these steps programmatically, follow the instructions in Translate a Revit File, Generating Room and Space Information.
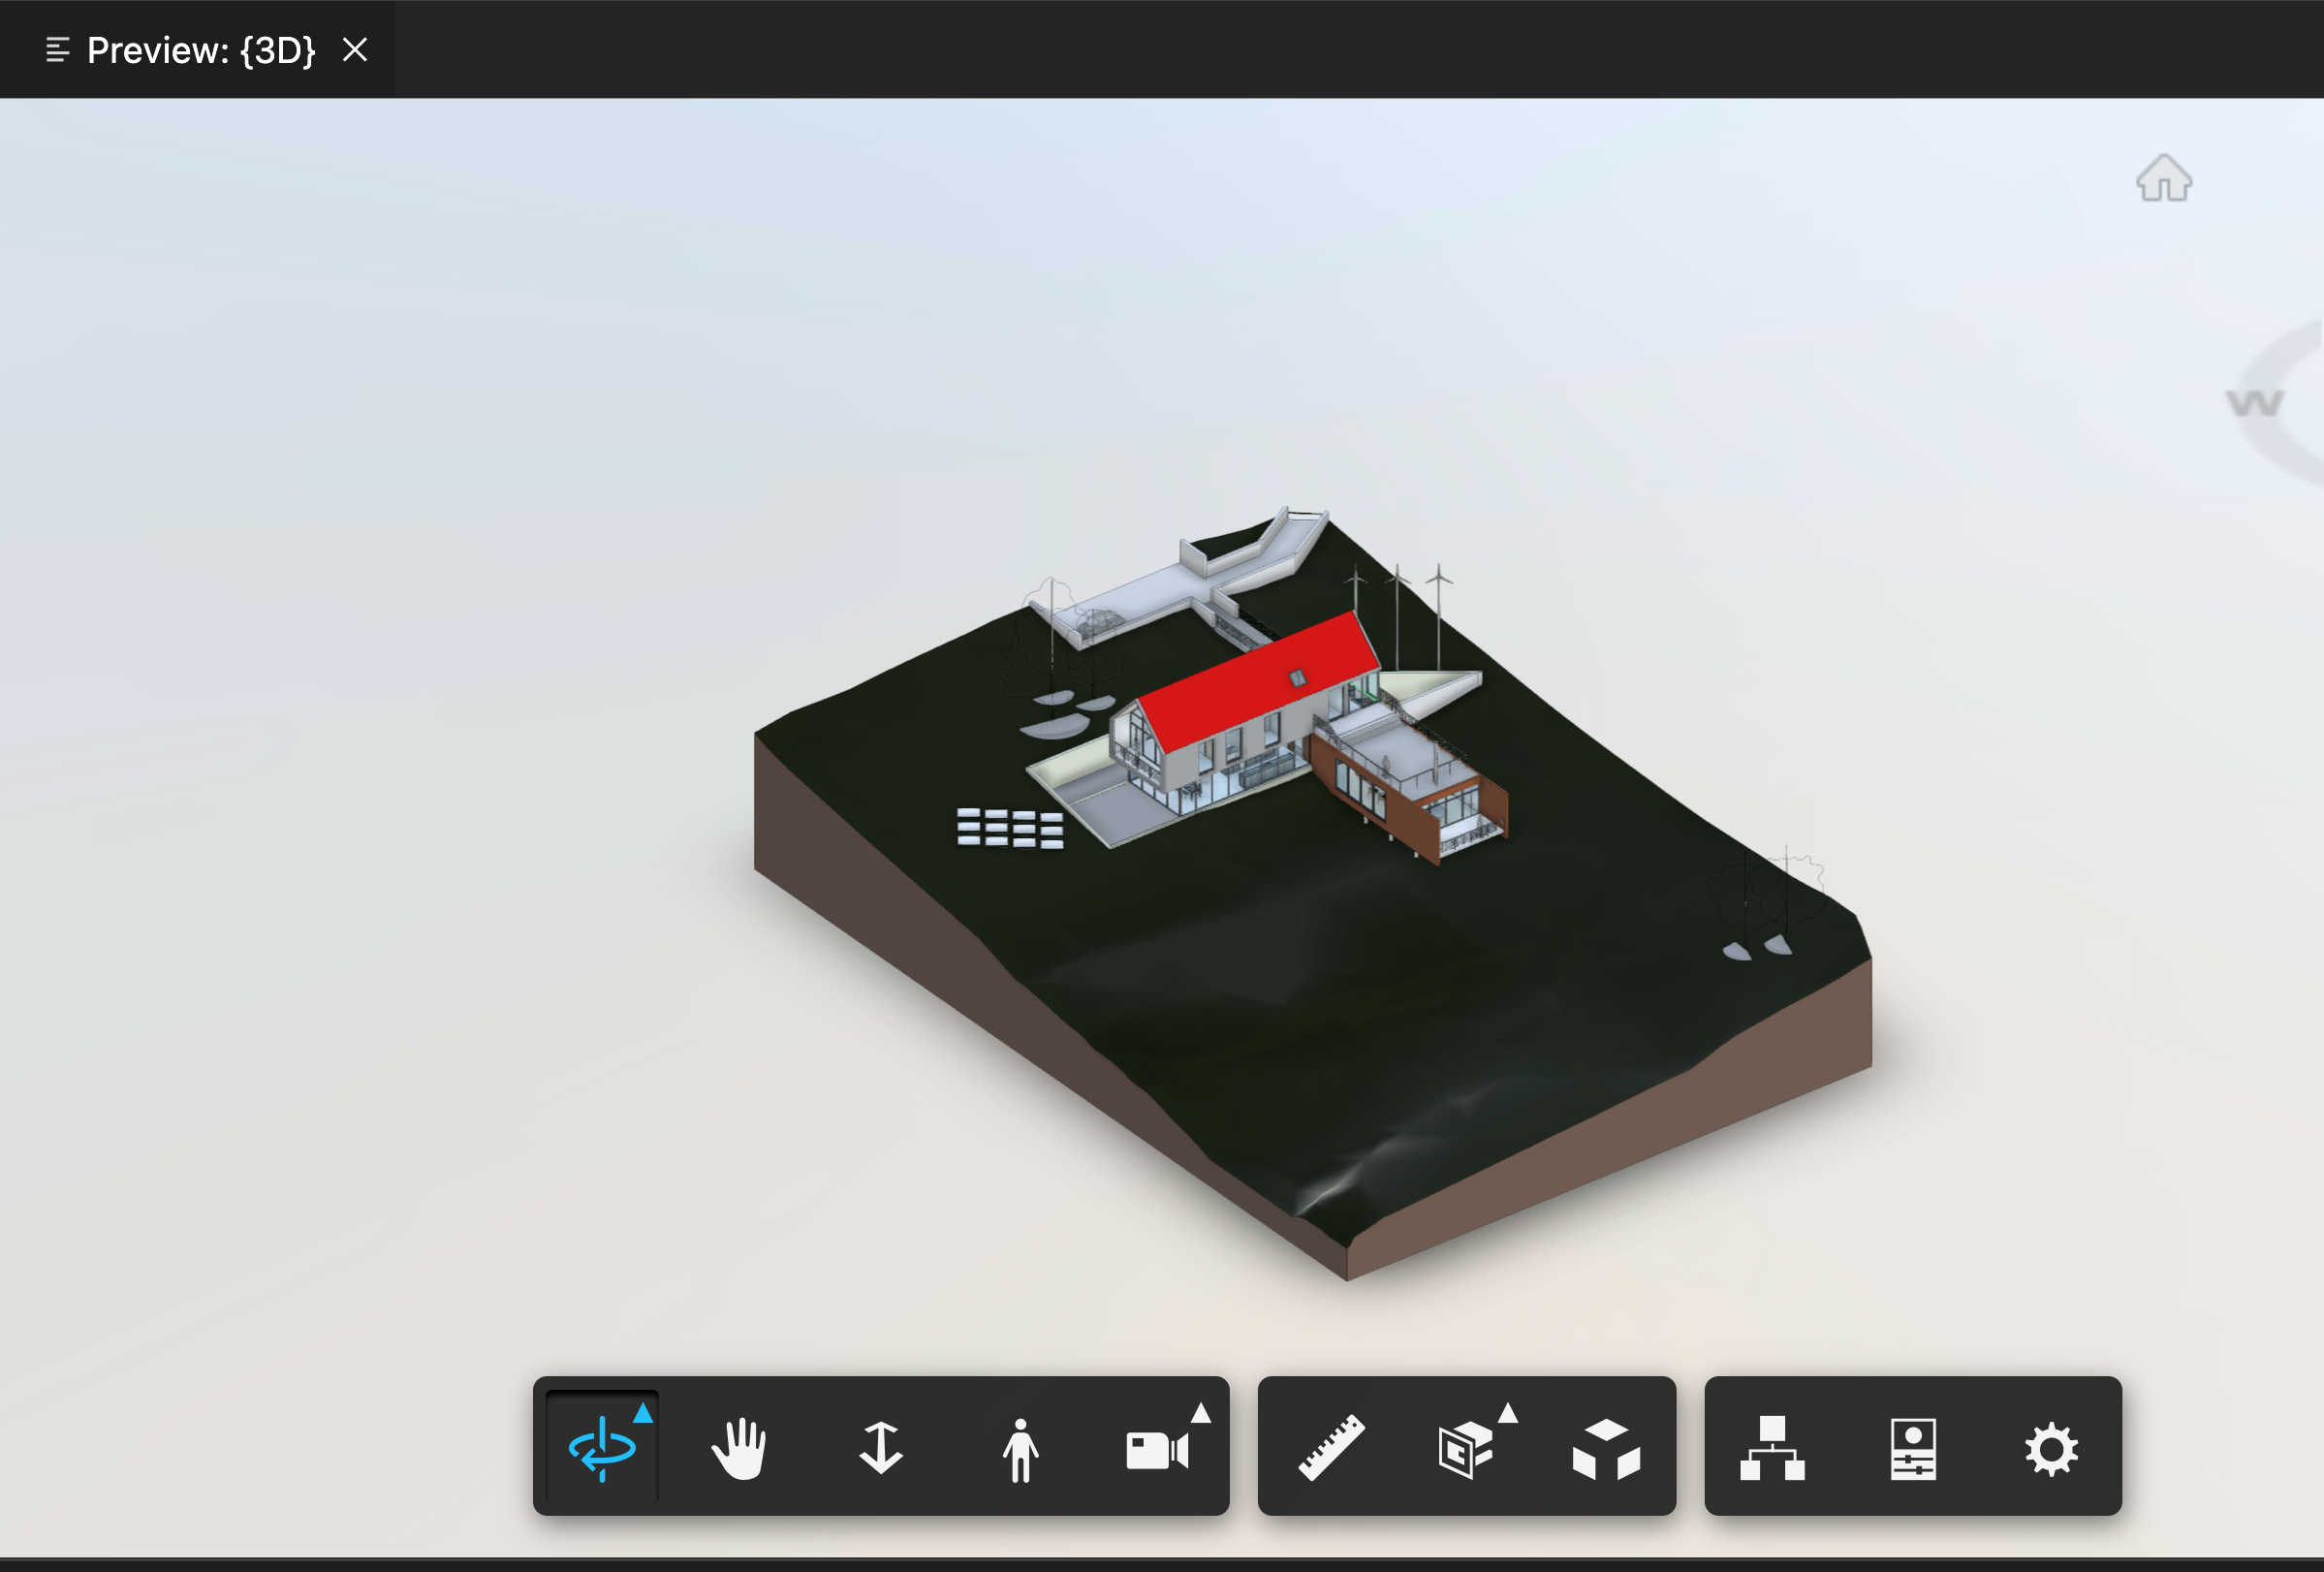
Figure 8. 3D model viewer.
- Open the context (right-click) menu on the RVT file name and choose Download Object Derivative as glTF to download the glTF file.
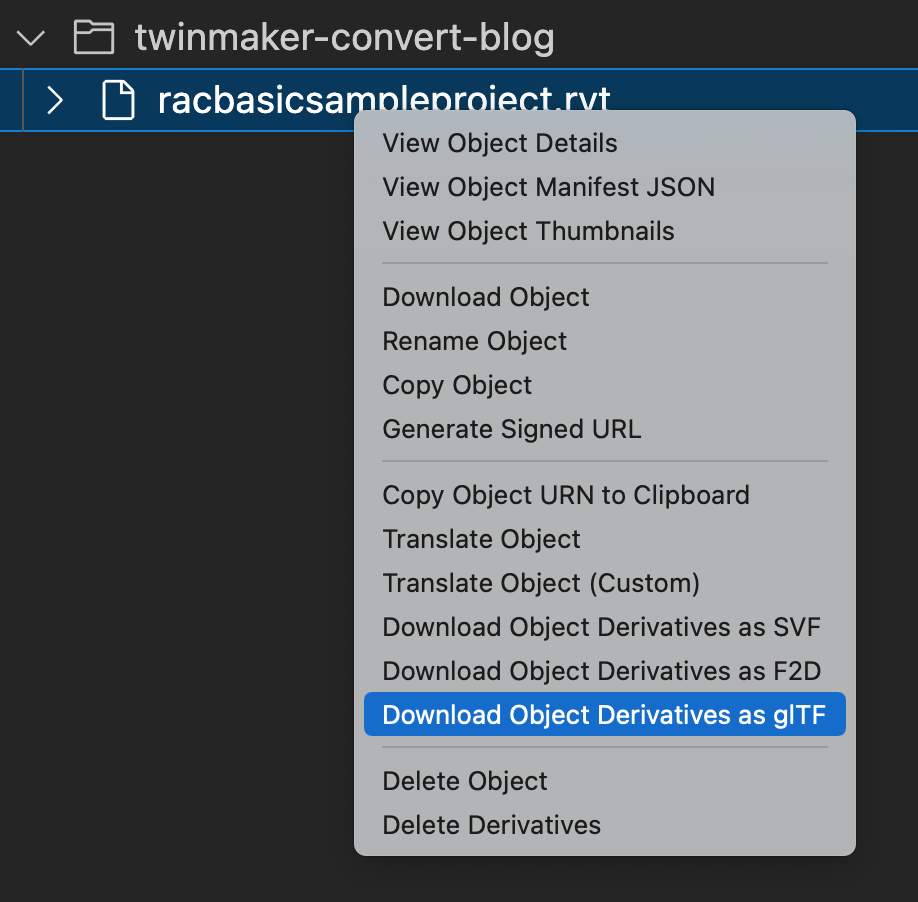
Figure 9. Download object derivative as glTF from RVT file menu
- After the download is complete, you will see that files with the extensions gltf and bin have been saved. Depending on the original file, additional files with png or jpeg extensions may also be created.
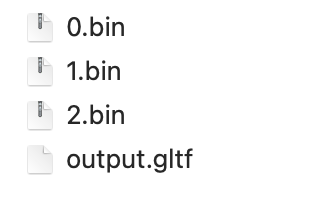
Figure 10. Downloaded files
Step 4: Convert glTF data to glb
AWS IoT TwinMaker supports glTF data but does not support referencing separate files such as bin. In this case, you need to convert the glTF data to glb format. glb is a binary format of glTF that includes both the bin and texture data (image files) in a single file.
In this step, the conversion process is performed using the open-source project gltf-pipeline.
- Open the terminal app (PowerShell for Windows) and run the command to install gltf-pipeline.
npm install -g gltf-pipeline- Convert glTF to glb.
gltf-pipeline -i output.gltf -o bim-data.glbStep 5: Import the file in the AWS IoT TwinMaker Workspace
- Sign in to the AWS Management Console and open the AWS IoT TwinMaker console.
- Choose the Workspace where you want to upload the glb file. If you do not have a Workspace, follow the instructions in Create a workspace to create one.
- Open the Resource library in the Workspace menu and choose Add resources. Then, upload your glb file.
- Open the Scene in the Workspace menu and choose Create scene to create a new scene.
- Choose +, Add 3D model from the Scene composer menu and choose the glb data, and then choose the Add button to add it to the scene.

Figure 11. Upload downloaded 3D model in AWS IoT Twinmaker Scene composer menu.
- Now you are ready to use your BIM 3D model in AWS IoT TwinMaker.

Figure 12. Converted RVT 3D model in AWS IoT TwinMaker.
Next Action
The next action is to embed AWS IoT TwinMaker’s Scene into Grafana to create a dashboard that displays data from sensors installed in the building. You can use the AWS IoT TwinMaker workshop for beginners to learn about data integration and get started with this workshop.
Clean Up
Autodesk Platform Services
- Open the context (right-click) menu on the bucket name in VSCode.
- Choose Delete All Objects to delete all files in the bucket.
- After the deletion is complete, open the context (right-click) menu on the bucket name again and choose Delete Bucket to delete the bucket.
AWS IoT TwinMaker
- Navigate to the Scene in the Workspace and Delete the Scene
- If you have created a new Workspace:
- Open Workspace Information and make note of the Amazon Simple Storage Service (Amazon S3) bucket name in the Amazon S3 resource.
- Delete the Workspace.
- Navigate to the Amazon S3 console.
- Search for the Amazon S3 bucket, empty the bucket, and delete the bucket. This bucket is used to store the assets (glb files, scene information).
- There is another bucket with the same name, ending with -log. This bucket is used to store the access log of the asset bucket. Empty the bucket and delete the bucket.
Conclusion
In this post, you learned how to import your BIM 3D model, which you usually use with BIM software, into AWS IoT TwinMaker. Now you understand that by reusing existing assets, you can quickly create a digital twin that can be used to verify conditions during construction and for post-construction building management. The steps in this blog demonstrate how it can be operated via a GUI to get started quickly. However, Autodesk Platform Services also provides a CLI that can be used with each API, enabling automation through programming.