AWS Storage Blog
Best practices for setting up your AWS DataSync agent
AWS DataSync is an online data transfer service that simplifies, automates, and accelerates copying large amounts of data between your on-premises environment and AWS Storage services. You can use DataSync to migrate active data to AWS, transfer data to the cloud for analysis and processing, archive data to free up on-premises storage capacity, or replicate data to AWS for business continuity.
To start using DataSync, you must deploy and activate an agent. You can deploy the agent as a virtual machine (VM) on your KVM, Hyper-V, or VMware environments, or launch the agent as an Amazon EC2 instance. After deploying the agent in your environment, you are ready to activate it and start transferring data between your on-premises storage and AWS. If you run into issues with agent activation or would like to configure the agent based on your networking requirements, the agent’s local console is a useful tool for accessing various configurations and diagnostic capabilities. You can use the local console to configure your agent’s DHCP and DNS settings, test its network connectivity, view the results of system resource checks, manage your Network Time Protocol (NTP) servers, and execute a number of other diagnostic commands.
We have recently made some enhancements to the agent setup experience and activation workflow to help you get started quickly and help troubleshoot any issues. In this blog, we walk you through these additional options and show you how to use the agent’s local console to do the following:
- Check system resources
- Check network connectivity
- Get agent activation key
- View the agent ID and AWS Region where the agent is activated
Checking system resources
Your DataSync agent automatically checks whether sufficient resources are allocated to it. If any failures are found during the system resource check at boot time, the agent shows a red banner as soon as you log in to the local console. The results of these checks indicate whether your agent complies with the minimum resource requirements. These resource requirements include things like the number of virtual processors, the amount of disk space, and the amount of RAM assigned to the agent VM.
For example, this DataSync agent displays a red banner at the top of the main menu with an error message due to insufficient virtual processors. You can also see the exact number of failures and warnings listed next to View System Resource Check:
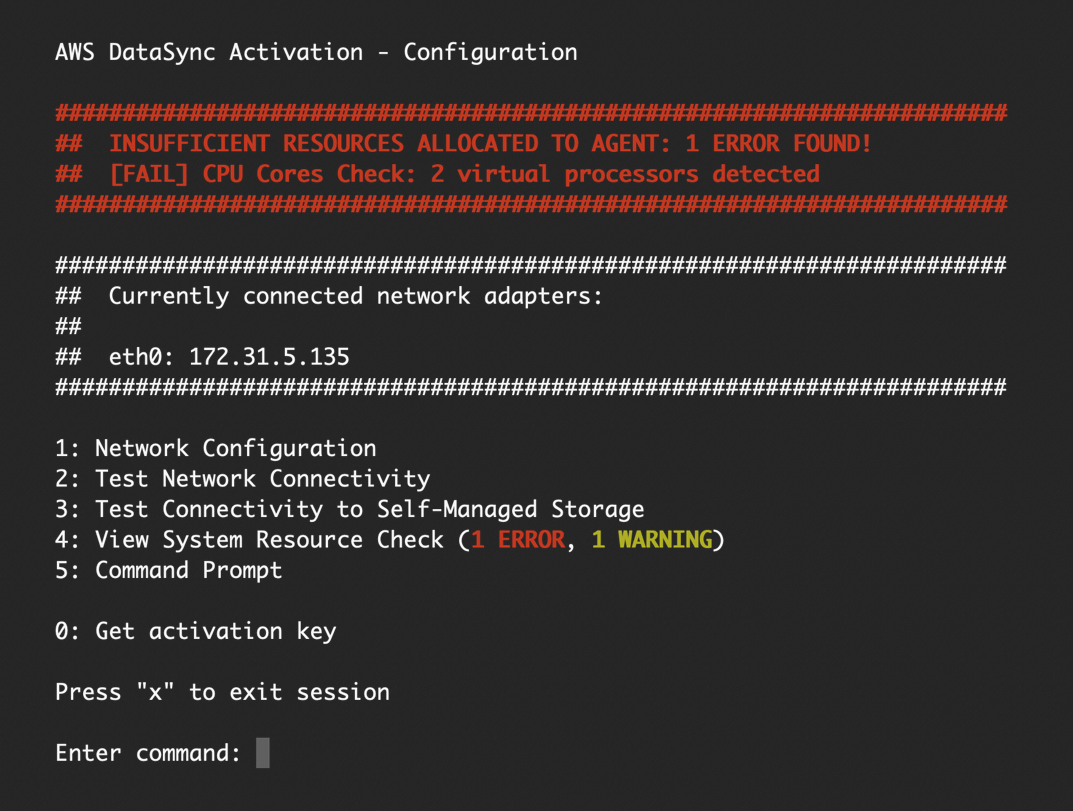
If any errors were detected, you can select View System Resource Check to see all of the infrastructure diagnostics in more detail. Each check performed on your agent shows up with one of three statuses: [OK], [WARN], or [FAIL], with further explanation about the status or issue.
![Each check performed on your agent shows up with one of three statuses - [OK], [WARN], or [FAIL], with further explanation about the status or issue.](https://d2908q01vomqb2.cloudfront.net/e1822db470e60d090affd0956d743cb0e7cdf113/2020/10/01/Each-check-performed-on-your-agent-shows-up-with-one-of-three-statuses-OK-WARN-or-FAIL-with-further-explanation-about-the-status-or-issue..png)
The resource checks displayed in the local console make it easier for you to diagnose infrastructure-related issues that may prevent DataSync from executing tasks properly. We recommend addressing any failures or warnings that appear in the system resource check before activating your agent to help avoid issues when you start transferring data. For more information on the minimum system resource requirements for a DataSync agent, see the agent requirements documentation.
Checking network connectivity
Now that you confirmed that your agent has the appropriate host machine resources, the next item to check is its network connectivity. The agent can connect to three different endpoint types – public service endpoints, Federal Information Processing Standard (FIPS) endpoints, and Amazon Virtual Private Cloud (VPC) endpoints. For each of the three different endpoint types, your agent must be able to communicate with AWS through certain network ports. When using Amazon VPC endpoints, your agent does not need to have any internet connectivity in order to use the DataSync service – the agent must only allow traffic to your VPC endpoint.
Select Test Network Connectivity from the main menu to get started. First, choose the endpoint type that your agent will connect to. Then enter the AWS Region if you are using public or FIPS endpoints, or your VPC endpoint’s Elastic IP address (created in step 4 here) if you are using Amazon VPC endpoints.
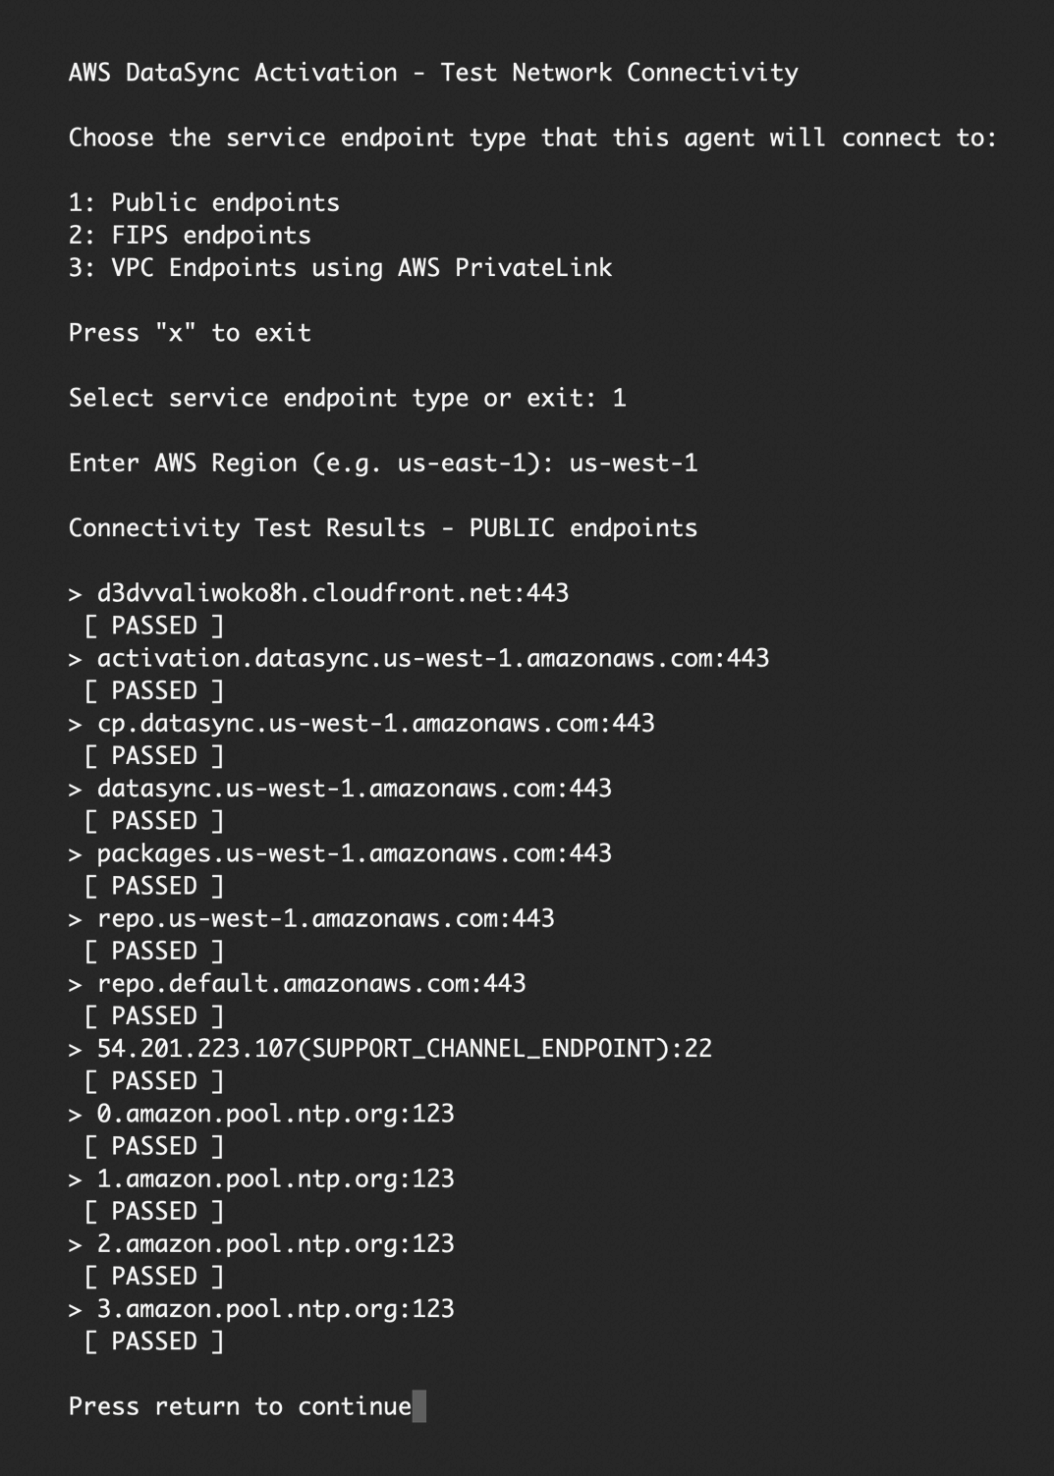
If any of the network connectivity tests fail, verify that the required ports are open and that your firewall allows the connections. Note that for activated agents, you do not need to provide the endpoint type, Region, or Amazon VPC endpoint in order to run the connectivity tests.
In addition to testing the agent’s ability to contact AWS, you can select Test Connectivity to Self-Managed Storage from the main menu to ensure that your agent can communicate with your local NFS server, SMB server, or self-managed object storage through ports specific to the type of storage. This way, you can be sure that your agent is able to access your source storage system in order to transfer data.
Select the location type and provide the server’s IP address or hostname to run the connectivity tests.

The last network connectivity test you might want to perform, especially if you are using a custom DNS configuration, is checking that your agent is able to perform a DNS lookup on local DNS hostnames. Select Command Prompt from the main menu to use the dig command for these lookups.
Type h <ENTER> for a list of the available commands and dig -h for guidance on how to use the command.

For more information on network requirements, see Network Requirements for DataSync. After confirming your agent’s host machine resources and network connectivity, you are on track to completing your agent setup.
Getting an activation key
To get started with activating your agent, you must first obtain an activation key through either the local console or the AWS Management Console. The activation key is used to securely associate your agent with your AWS account.
To get your activation key through the Management Console, click Get key on the Create agent page, as covered in this documentation. This requires your web browser to communicate with the agent via port 80. If you would like to avoid opening port 80 on your agent, you can obtain the activation key directly from the local console.
Select Get activation key at the bottom of the main menu when you are ready to activate your agent. Then enter the AWS Region and the service endpoint type that your agent will connect to, and the local console generates an activation key for your agent.
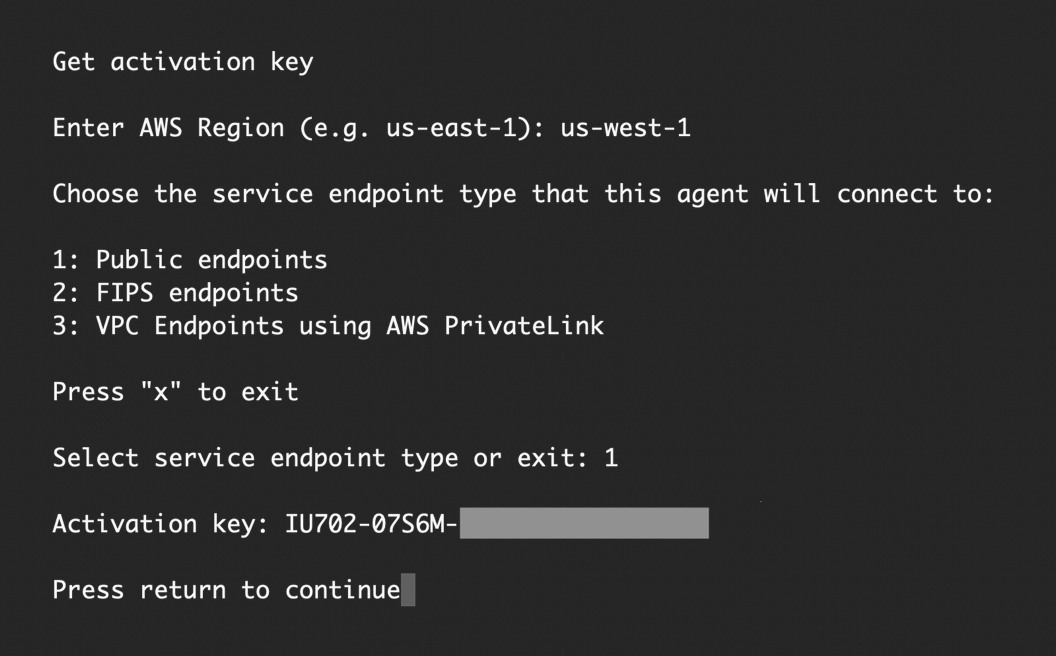
After getting your agent’s activation key, use the AWS Management Console or the AWS CLI to activate it. Now your agent is ready to start executing tasks!
Viewing agent ID and AWS Region
You can see all of your activated agents in the AWS Management Console, or you can use the list-agents AWS CLI command.
The AWS Management Console lists the newly activated agent along with its agent ID.

You can correlate the agent ID you see in the AWS Management Console or AWS CLI with your agent VM in the local console. When you log in, you can see the corresponding agent ID and AWS Region where the agent is activated displayed at the top of the main menu.

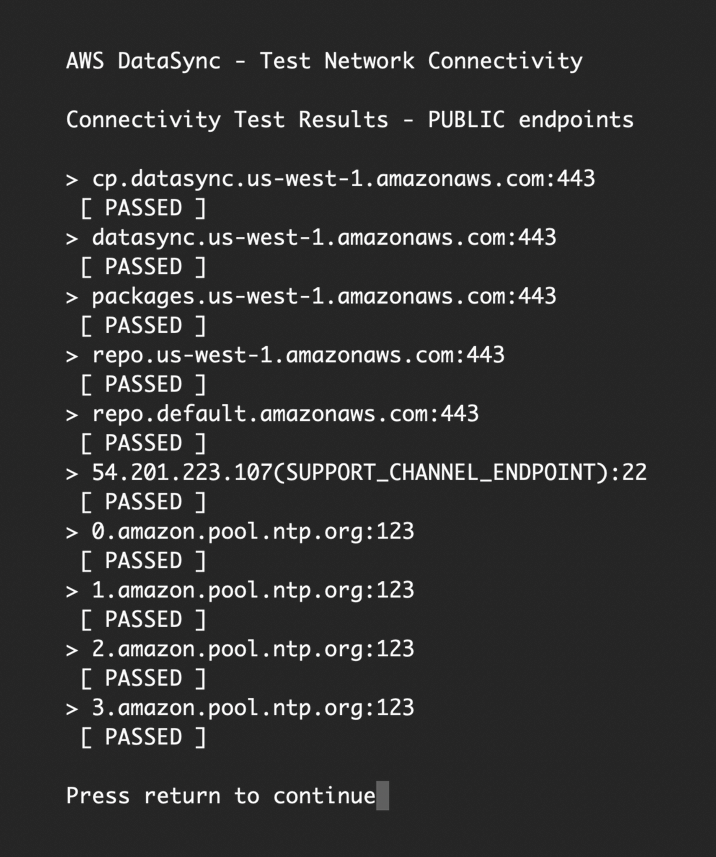
Once your agent is all set, you can always test its network connectivity from the main menu if you suspect any connectivity issues. To run the test, select Test Network Connectivity in the main local console menu. As noted previously, when you run network connectivity tests for activated agents, you do not need to manually enter in the endpoint type, Region, or Amazon VPC endpoint. The connectivity tests automatically run against the correct endpoints.
Summary
You are now well on your way to using AWS DataSync to copy your data! In this post, we highlighted new features and enhancements to the DataSync agent local console that will help you properly set up and activate your agent. We covered new self-service troubleshooting tools such as network tests and resources checks, as well as the ability to obtain an agent activation key from the agent’s console, without accessing it via port 80. Please see the documentation on configuring your agent on the local console for more information, and, as always, feel free to reach out through the DataSync developer forum, AWS Support, or via the comments section in this blog.