AWS Storage Blog
Migrating storage with AWS DataSync
AWS launched AWS DataSync at re:Invent 2018 to simplify and accelerate moving data between on-premises and AWS over the network. Customers are using DataSync for a number of use cases, such as migration, recurring transfers for data processing in AWS, disaster recovery, and one-off transfers of large datasets.
After the launch, I heard about how customers use DataSync to migrate their datasets to AWS. In this post, I share some best practices and tips.
Migrating your files to the cloud
Commonly, customers who use DataSync for migrations are running out of on-premises storage capacity. They might have storage licenses about to expire, or be in the middle of shutting down a data center.
Before embarking on a migration project, it’s easy to assume that moving files can be done with a single command or tool such as rsync. However, transferring a large number of files introduces multiple challenges, such as the length of time needed and the risk of the transfer failing before completion. When the transfer is done, how do you even verify that all data was moved successfully?
To send data from your data center to AWS, you also must make sure that the script can access both your on-premises data and your AWS account securely, without compromising security or creating unnecessary hurdles. AWS built DataSync to automate all of this, and create a fast, simple process for your data transfers.
This post walks you through the recommended steps for migrating files to AWS from an on-premises network file system (NFS) server, or network-attached storage (NAS) array to AWS. This includes cases where files on-premises are still being used during the migration.
The flow consists of the following steps:
- Perform an initial setup.
- Transfer all your files to AWS.
- Run periodic incremental transfers to catch up with changes and additions to your on-premises file system.
- When you’re ready to complete the migration, run one last data transfer to cover all file changes.
DataSync automatically takes care of the data integrity verification, by doing a full comparison of source files to destination files.
Initial agent setup
You start with a one-time setup process to deploy an on-premises agent. The agent is deployed as a virtual machine, and is securely associated with your AWS account. This can be done in the console or using the AWS CLI.
When it’s activated, the DataSync agent becomes a resource associated with your account. It is listed in the DataSync console and APIs, and is managed and updated automatically by AWS.
The agent should be deployed on-premises, in proximity to the source file system, to minimize the distance traveled via native protocols (such as NFS). This ensures that files travel over the WAN using our purpose-built, accelerated protocol. In other words, keep the distance traveled via native, slower protocols to a minimum, and you significantly speed up the transfer.
Creating a task for file transfer
Now that your agent is all set up, you are ready to create your migration task.
Start by configuring your source location. DataSync reads from a path exported by your NFS server. To ensure that DataSync has permissions to read all of your files, export with no_root_squash, or explicitly enable file and directory level permissions. To ensure that the path itself is exported by the server, run the following command from any NFS client that has access to your server, or from the server itself:
showmount -e <nfs-server-address>For more information about NFS gotchas to avoid, see Create an NFS Location. When you finish creating the task, the agent automatically mounts the path that you provided.
To create an NFS source location, choose a location type of NFS, choose the agent that you deployed earlier, enter the address of your NFS server, and then enter the mount path to be exported by your NFS server.

Next, configure your destination. This could be an Amazon S3 bucket or an Amazon EFS file system. In both cases, DataSync securely accesses the destination location. If you’re transferring data to S3, DataSync can automatically generate an IAM role that enables secure access to your bucket. If you’re transferring data to EFS, DataSync mounts your file system from within your VPC using elastic network interfaces. DataSync fully manages the creation, use, and deletion of these ENIs on your behalf.
To create an S3 destination location, choose a location type of Amazon S3 bucket, choose a destination S3 bucket, optionally enter a folder prefix, and then autogenerate an IAM role to access the bucket.

Configuring the task
The last piece is configuring the task. DataSync supports multiple configuration options, including the following :
- Enabling verification
- Copying different types of metadata
- Handling files that were deleted at the source
- Setting a bandwidth limit
- Configuring Amazon CloudWatch logging
In this post, I look at verification, setting a bandwidth limit, and configuring a CloudWatch log group in more detail.
DataSync automatically performs the in-transfer data integrity validation of each packet. At the end of the transfer, DataSync can optionally compare all files at the source to all files at the destination. If your data is constantly changing, you could initially uncheck Enable verification, because you already know that files at the source are slightly different from files at the destination. Check this box during the final cut-over from on-premises to AWS. If this is a one-time transfer and your data is not changing, then leave Enable verification checked.
Your internet connection might be used for multiple workloads at the same time. In this case, you can limit the bandwidth that DataSync uses by choosing the Set bandwidth limit option. This limits the rate at which you transfer data, but prevents transfers from consuming bandwidth reserved for other applications.
I also recommend setting up a CloudWatch log group, where DataSync can log information about task execution and file-level errors it may run into.
When you’re done, choose Next to review your configuration, and Next again to finish the task creation.
Run your task by choosing Start. Sit back and relax while your files are being securely transferred!
Incremental transfer – catch up with changes to your on-premises files
If you’re still using your on-premises server, some changes or additions to your files occur during and after the initial transfer of the entire dataset. You can re-run your task to copy these incremental changes. DataSync only transfers the files that were added or changed in the source since the last task execution.
Final cut-off and integrity verification
When you’re ready to complete the migration, and you no longer use the source server, run one last data transfer to catch up with the latest file changes. This time, I recommend enabling verification. This compares all your files and metadata on the source file system to copies stored on the destination – your S3 bucket or EFS file system.
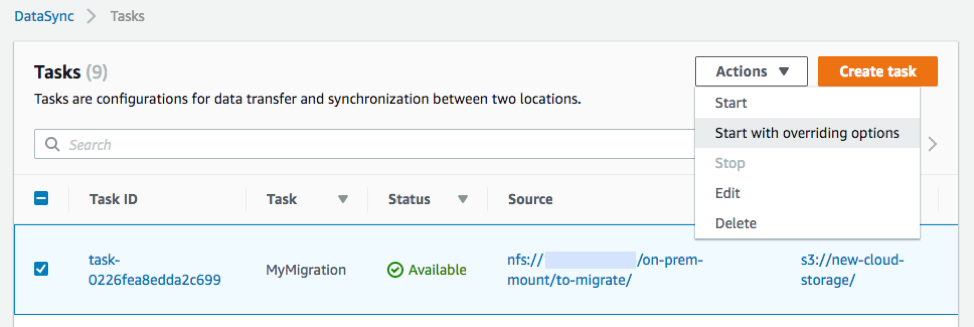
To enable verification for a single task execution, on the Tasks table, choose Actions, Start with overriding options.
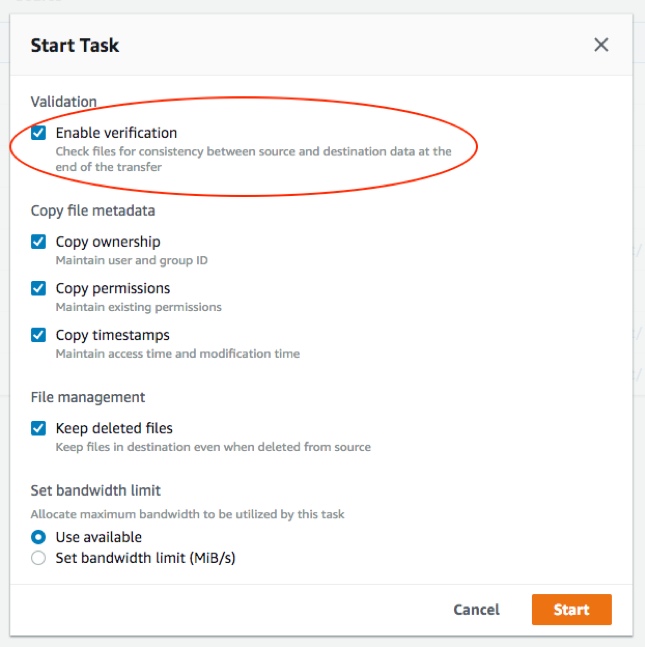
Check the Enable verification box and keep all other settings as is.
After the last data transfer verification has completed successfully, you can safely retire the source server.
Summary
That’s it! As you can see, DataSync automates the manual work and scripting associated with migrating your files. There’s no need to monitor a command line tool and no extra effort to parallelize and scale the transfer. And no need to write another script to read and checksum all the files on the source and at the destination!
AWS is working on many new features, and as always, I’d love to hear your feedback and ideas. Contact my team through the DataSync developer forum, AWS Support, or comment below.