AWS Compute Blog
Creating a searchable enterprise document repository
September 8, 2021: Amazon Elasticsearch Service has been renamed to Amazon OpenSearch Service. See details.
Enterprise customers frequently have repositories with thousands of documents, images and other media. While these contain valuable information for users, it’s often hard to index and search this content. One challenge is interpreting the data intelligently, and another issue is processing these files at scale.
In this blog post, I show how you can deploy a serverless application that uses machine learning to interpret your documents. The architecture includes a queueing mechanism for handling large volumes, and posting the indexing metadata to an Amazon Elasticsearch Service domain. This solution is scalable and cost effective, and you can modify the functionality to meet your organization’s requirements.

The application takes unstructured data and applies machine learning to extract context for a search service, in this case Elasticsearch. There are many business uses for this design. For example, this could help Human Resources departments in searching for skills in PDF resumes. It can also be used by Marketing departments or creative groups with a large number of images, providing a simple way to search for items within the images.
As documents and images are added to the S3 bucket, these events invoke AWS Lambda functions. This runs custom code to extract data from the files, and also calls Amazon ML services for interpretation. For example, when adding a resume, the Lambda function extracts text from the PDF file while Amazon Comprehend determines the key phrases and topics in the document. For images, it uses Amazon Rekognition to determine the contents. In both cases, once it identifies the indexing attributes, it saves the data to the Amazon Elasticsearch Service.
The code uses the AWS Serverless Application Model (SAM), enabling you to deploy the application easily in your own AWS Account. This walkthrough creates resources covered in the AWS Free Tier but you may incur cost for large data imports. Additionally, it requires an Amazon Elasticsearch Service domain, which may incur cost on your AWS bill.
To set up the example application, visit the GitHub repo and follow the instructions in the README.md file.
Creating an Amazon Elasticsearch Service domain
This application requires an Amazon Elasticsearch Service development domain for testing purposes. To learn more about production configurations, see the Amazon Elasticsearch Service documentation.
To create the test domain:
- Navigate to the Amazon Elasticsearch Service console. Choose Create a new domain.
- For Deployment type, choose Development and testing. Choose Next.
- In the Configure Domain page:
- For Elasticsearch domain name, enter serverless-docrepo.
- Change Instance Type to t2.small.elasticsearch.
- Leave all the other defaults. Choose Next at the end of the page.
- In Network Configuration, choose Public access. This is adequate for a tutorial but in a production use-case, it’s recommended to use VPC access.
- Under Access Policy, in the Domain access policy dropdown, choose Custom access policy.
- Select IAM ARN and in the Enter principal field, enter your AWS account ID (learn how to find your AWS account ID). In the Select Action dropdown, select Allow.
- Under Encryption, leave HTTPS checked. Choose Next.
- On the Review page, review your domain configuration, and then choose Confirm.
Your domain is now being configured, and the Domain status shows Loading in the Overview tab.

It takes 10-15 minutes to fully configure the domain. Wait until the Domain status shows Active before continuing. When the domain is ready, note the Endpoint address since you need this in the application deployment.

Deploying the application
After cloning the repo to your local development machine, open a terminal window and change to the cloned directory.
- Run the SAM build process to create an installation package, and then deploy the application:
sam build

sam deploy --guided - In the guided deployment process, enter unique names for the S3 buckets when prompted. For the ESdomain parameter, enter the Amazon Elasticsearch Service domain Endpoint from the previous section.
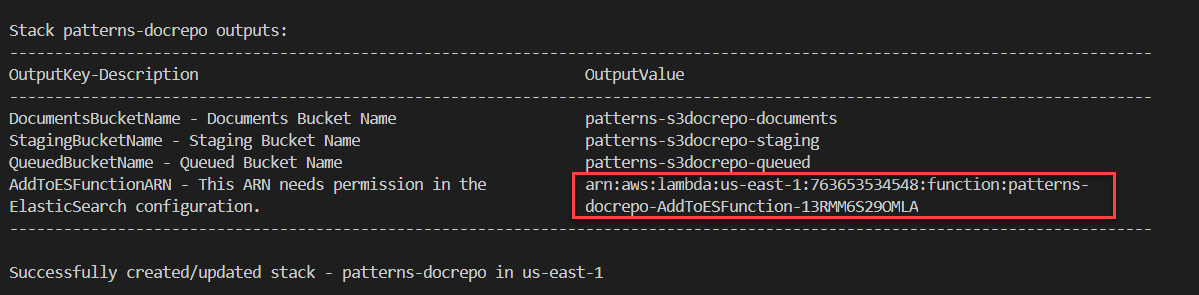
- After the deployment completes, note the Lambda function ARN shown in the output:

- Back in the Amazon Elasticsearch Service console, select the Actions dropdown and choose Modify Access Policy. Paste the Lambda role ARN as an AWS Principal in the JSON, in addition to the root user, as follows:

- Choose Submit. This grants the Lambda function access to the Amazon Elasticsearch Service domain.

Testing the application
To test the application, you need a few test documents and images with the file types DOCX (Microsoft Word), PDF, and JPG. This walkthrough uses multiple files to illustrate the queuing process.
- Navigate to the S3 console and select the Documents bucket from your deployment.
- Choose Upload and select your sample PDF or DOCX files:

- Choose Next on the following three pages to complete the upload process. The application now analyzes these documents and adds the indexing information to the Amazon Elasticsearch Service.

To query Elasticsearch, first you must generate an Access Key ID and Secret Access Key. For detailed steps, see this documentation on creating security credentials. Next, use Postman to create an HTTP request for the Amazon Elasticsearch Service domain:
- Download and install Postman.
- From Postman, enter the Amazon Elasticsearch Service endpoint, adding /_search?q=keyword. Replace keyword with a search term.
- On the Authorization tab, complete the Access Key ID and Secret Access Key fields with the credentials you created. For Service Name, enter es.

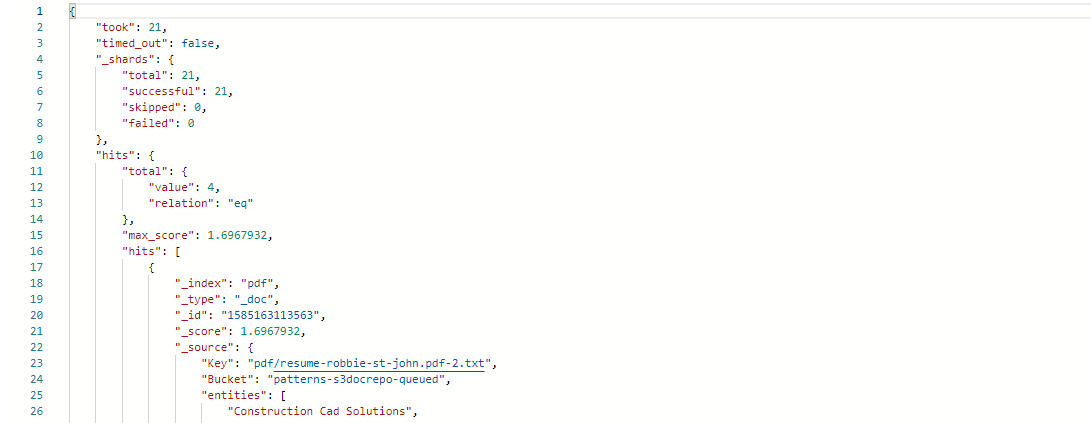
- Choose Send. Elasticsearch responds with document results matching your search term.


How this works
This application creates a processing pipeline between the originating Documents bucket and the Amazon Elasticsearch Service domain. Each document type has a custom parser, preparing the content in a Queuing bucket. It uses an Amazon SQS queue to buffer work, which is fetched by a Lambda function and analyzed with Amazon Comprehend. Finally, the indexing metadata is saved in Elasticsearch.
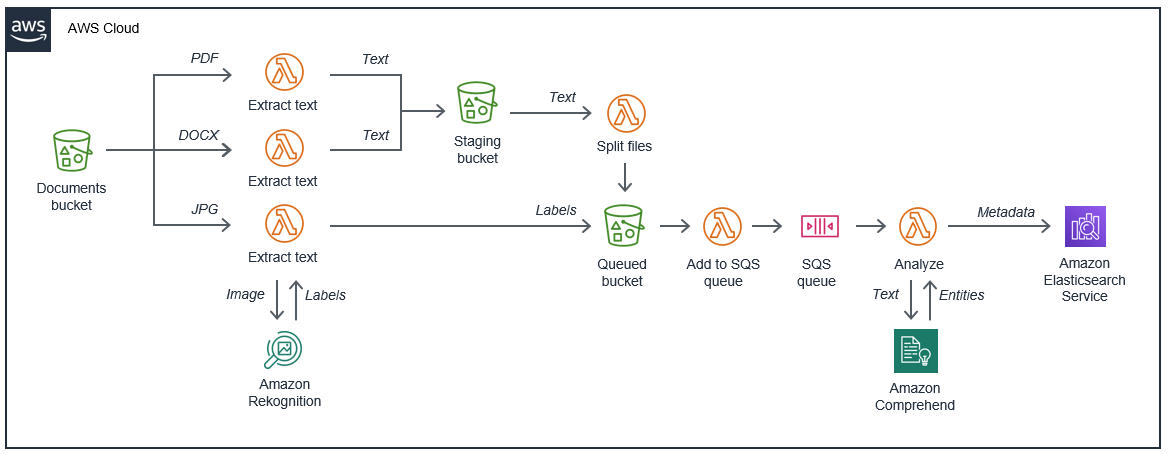
- Documents and images are saved in the Documents bucket.
- Depending upon the file type, this triggers a custom parser Lambda function.
- For PDFs and DOCX files, the extracted text is stored in a Staging bucket. If the content is longer than 5,000 characters, it is broken into smaller files by a Lambda function, then saved in the Queued bucket.
- For JPG files, the parser uses Amazon Rekognition to detect the contents of the image. The labeling metadata is stored in the Queued bucket.
- When items are stored in the Queued bucket, this triggers a Lambda function to add the job to an SQS queue.
- The Analyze function is invoked when there are messages in the SQS queue. It uses Amazon Comprehend to find entities in the text. This function then stores the metadata in the Amazon Elasticsearch Service.
S3 and Lambda both scale to handle the traffic. The Amazon Elasticsearch Service domain is not serverless, however, so it’s possible to overwhelm this instance with requests. There may be a large number of objects stored in the Documents bucket triggering the workflow, so the application uses SQS couple to smooth out the traffic. When large numbers of objects are processed, you see the Messages Available increase in the SQS queue:

For the Lambda function consuming messages from the SQS queue, the BatchSize configured in the SAM template controls the rate of processing. The function continues to fetch messages from the SQS queue while Messages Available is greater than zero. This can be a useful mechanism for protecting downstream services that are not serverless, or simply cannot scale to match the processing rates of the upstream application. In this case, it provides a more consistent flow of indexing data to the Amazon Elasticsearch Service domain.
In a production use-case, you would scale the Amazon Elasticsearch Service domain depending upon the load of search requests, not just the indexing traffic from this application. This tutorial uses a minimal Elasticsearch configuration, but this service is capable of supporting enterprise-scale use-cases.
Conclusion
Enterprise document repositories can be a rich source of information but can be difficult to search and index. In this blog post, I show how you can use a serverless approach to build scalable solution easily. With minimum code, we can use Amazon ML services to create the indexing metadata. By using powerful image recognition and language comprehension capabilities, this makes the metadata more useful and the search solution more accurate.
This also shows how serverless solutions can be used with existing non-serverless infrastructure, like the Amazon Elasticsearch Service. By decoupling scalable serverless applications, you can protect downstream services from heavy traffic loads, even as Lambda scales up. Amazon Elasticsearch Service provides a fast, easy way to query your document repository once the serverless application has completed the indexing process.
To learn more about how to use Amazon Elasticsearch Service for production workloads, see the documentation on managing domains.