AWS Partner Network (APN) Blog
AWS Single Sign-On Service Integration Guide for CloudHealth
By Shashiraj Jeripotula, Sr. Partner Solutions Architect at AWS
 End users can now configure AWS Single Sign-On (AWS SSO) to access CloudHealth with a single sign-on experience using the same credentials they use with their Amazon Web Services (AWS) account.
AWS Single Sign-On provides administrators a simple way to assign users and groups access to AWS accounts, roles, and SAML-based applications. This makes it easy for end users to sign into the AWS Console to access AWS resources, and also have a single sign-on experience to applications with a single set of credentials.
Customers can choose to create their user identities and groups in AWS SSO, or they can connect AWS SSO to use the identities and groups they already administer in Active Directory or an external identity provider like Okta or Azure AD.
CloudHealth is an AWS Partner Network (APN) Advanced Technology Partner with AWS Competencies in Cloud Management Tools, Security, Migration, and Education. CloudHealth makes it possible for enterprises to control and analyze the costs, compliance, and performance of their computing environments across their own data centers and public clouds.
Until now, customers had to sign in to the AWS Console to work with AWS resources, and they had to sign in separately to CloudHealth to analyze and manage their computing environment or the resources in their environment.
AWS SSO includes a simple way to connect CloudHealth, enabling users to have one portal to access their AWS accounts and CloudHealth. CloudHealth will then work with the same identities you choose to use within AWS SSO, and it’s easier to administer the users.
In this post, I will show you how to connect CloudHealth with AWS SSO using SAML 2.0, so your users have a single experience to access both the AWS Console and CloudHealth.
Prerequisites
For this walkthrough, you should have the following prerequisites:
- AWS account.
- Access to the AWS SSO console with permissions to manage applications.
- CloudHealth account with administrative permissions to configure SAML SSO.
Step 1: Configuring AWS SSO (Part 1)
- Log in to the AWS Console and navigate to AWS SSO.
- In the AWS SSO console, select Applications.
- Choose Add a new application.
- On the Configure page in the Add New Application page, in the AWS SSO Application Catalog, enter CloudHealth into the search bar.
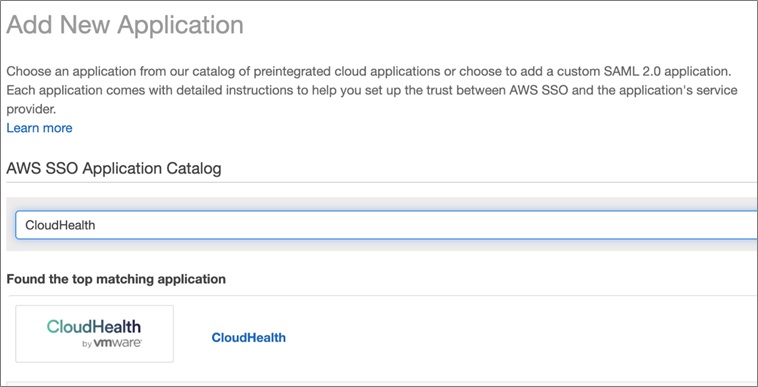
- Select CloudHealth, and then choose Add Application.
- On the Configure CloudHealth page, in the Details section, you may optionally update the default application name and description. We suggest you choose a unique display name, if you plan to have more than one of the same application.
- In the AWS SSO metadata section, scroll to the AWS SSO sign-in URL section, choose Copy URL, and store it for future use. Then, scroll to AWS SSO certificate section, choose the Download certificate link, and save a copy of the AWS SSO certificate to your computer for future use.
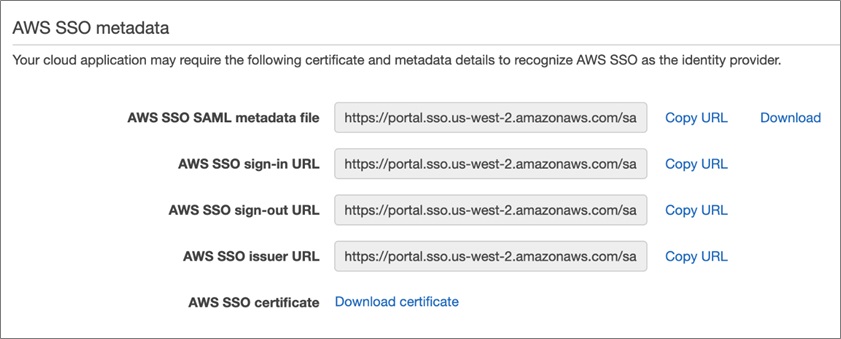
- Please note, in the Application metadata section at the bottom of the screen, we have a required field to upload the Application SAML metadata file and the Save changes button is disabled. Don’t close this browser, as we’ll come back to this page after completing the Configuring CloudHealth setup.
Step 2: Configuring CloudHealth for Use with AWS SSO
- Open a new browser and log in to https://apps.cloudhealthtech.com as an administrator.
- Enter Email Address and click Next.
- Enter Password and click Sign In.
- In the left navigation, select Setup, expand Admin, and then choose Single Sign-On.
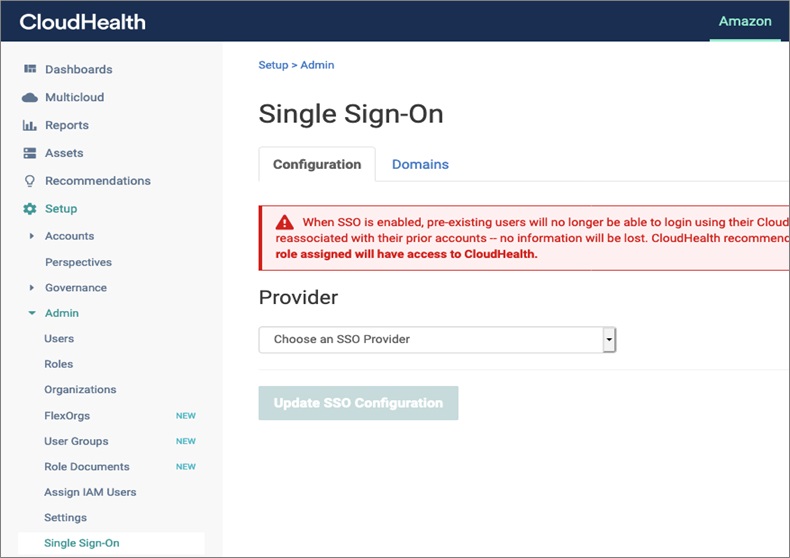
- On the Single Sign-On page, under the Provider drop-down list in the Configuration tab, choose an SSO Provider and select SAML.
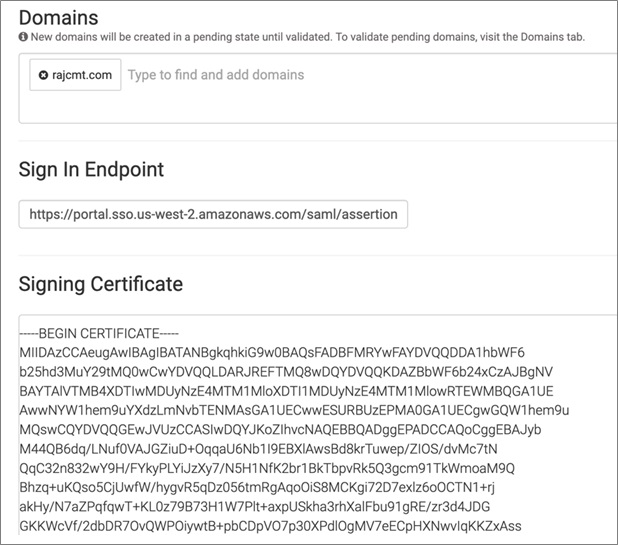
- In the Domains field, enter your domain. Ensure a space is added after your domain name.
- Next, in the Sign In Endpoint field, insert the value, previously copied from Configuring AWS setup (this could be the AWS SSO sign-in URL).
- Copy the previously downloaded AWS SSO certificate from your computer and paste into Signing Certificate field.
- Click the Domains tab to validate the Domain.
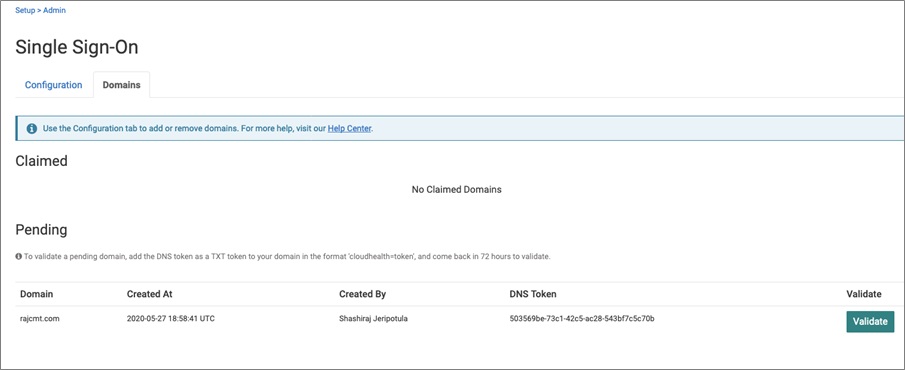
- Under the Claimed section, your Domain will be under Pending status.
- Follow the instructions to update your DNS Record: To validate a pending domain, add the DNS token as a TXT token to your domain in the format ‘cloudhealth=token’, and come back in 72 hours to validate.
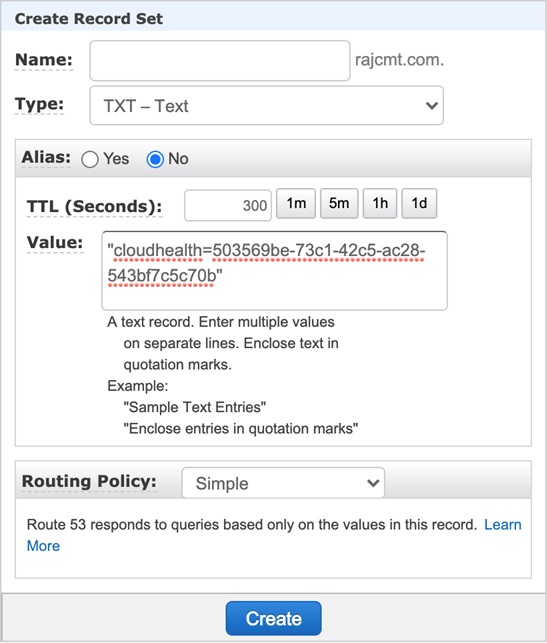
- Go to your Domain Registrar (my domain is registered in Amazon Route 53; details shown in the screenshot below) and create an Type = TXT record with an Value = “cloudhealth=” Replace token with the DNS Token that is generated above.
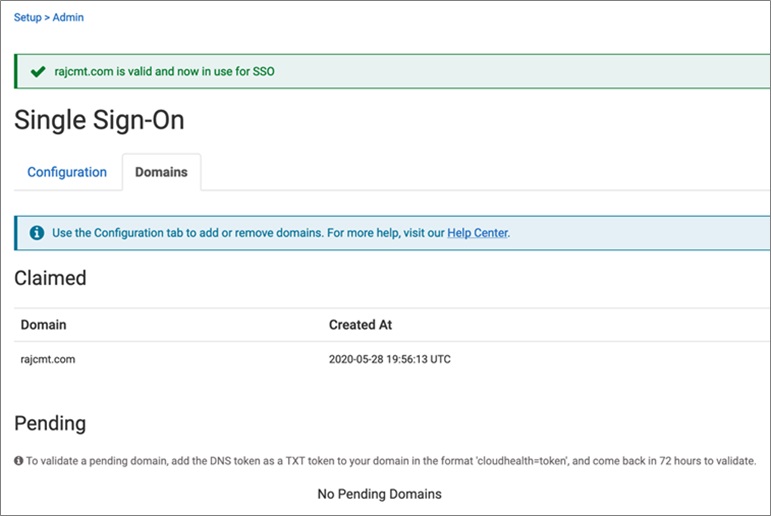
- Go back to the CloudHealth screen and click Validate. A success message is displayed as below.
- Scroll down to the Identity Provider Data section, download the Metadata file, and save it to your computer.
- Click on Update SSO Configuration, and a success message is displayed.
Step 3: Configuring AWS SSO (Part 2)
- Go back to the AWS SSO console page where you are configuring the CloudHealth application.
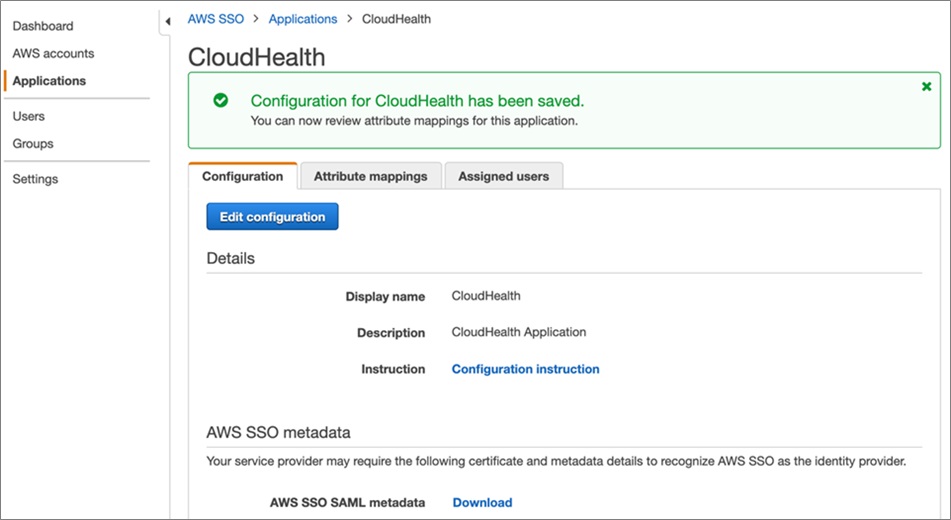
- Under Application metadata, for the field Application SAML metadata file, browse and upload the CloudHealth metadata file that you saved as part of Configuring CloudHealth setup.
- Click on Save.
Step 4: Assign a User to the Application
- To learn how, see the AWS SSO documentation.
Step 5: Sign into CloudHealth with Your Identity Configured with AWS SSO
- Access the AWS SSO User Portal (example: https://domainname.awsapps.com/start/). You can find this URL by going to the AWS SSO Console’s Settings page.
- Sign in using your credentials.
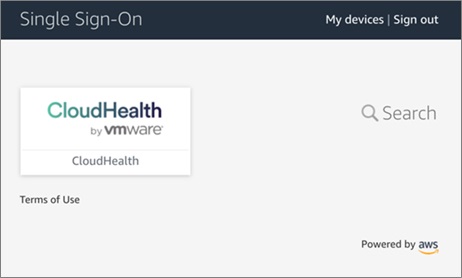
- In the list of applications, choose CloudHealth to initiate a login to CloudHealth.
- If login is successful, you will be redirected to the CloudHealth home page.
Step 6: Verifying Service Provider Initiated SSO from CloudHealth
- Access CloudHealth using the following URL: https://apps.cloudhealthtech.com, and then enter Email Address and click Next.
- You will be redirected to the AWS SSO Console. Type the credentials of a user assigned to the application and a user which exists in CloudHealth.
- Choose Sign In.
- If login was successful, you will be redirected to the CloudHealth home page.
- Verify that both CloudHealth and AWS SSO are logged in with the same user.
Summary
In this post, I demonstrated how to configure CloudHealth to use AWS Single Sign-On (AWS SSO) for authentication, which provides the ability for users to access CloudHealth applications by logging in to the AWS Console.
This eliminates the need for users to log into CloudHealth separately. Previously, users did not have the ability to navigate to CloudHealth directly from AWS account.
In addition, AWS SSO manages single sign-on access to multiple AWS accounts and business applications. AWS SSO will also help you create SAML2.0 integrations to extend SSO access to any of your SAML-enabled applications.
To learn more about AWS SSO Service, see the AWS SSO home page. If you have any questions, please post them on AWS SSO service forum.
.

.
CloudHealth Technologies – APN Partner Spotlight
CloudHealth is an AWS Competency Partner. CloudHealth gives enterprises the ability to effectively optimize and govern their on-premises and AWS environments to drive confident decision-making and smarter growth.
Contact CloudHealth | Solution Overview | AWS Marketplace
*Already worked with CloudHealth? Rate this Partner
*To review an APN Partner, you must be an AWS customer that has worked with them directly on a project.