AWS Architecture Blog
Building SaaS Services for AWS Customers with PrivateLink
With the advent of AWS PrivateLink, you can provide services to AWS customers directly in their Virtual Private Networks by offering cross-account SaaS solutions on private IP addresses rather than over the Internet.
Traffic that flows to the services you provide does so over private AWS networking rather than over the Internet, offering security and performance enhancements, as well as convenience. PrivateLink can tie in with the AWS Marketplace, facilitating billing and providing a straightforward consumption model to your customers.
The use cases are myriad, but, for this blog post, we’ll demonstrate a fictional order-processing resource. The resource accepts JSON data over a RESTful API, simulating an interface. This could easily be an existing application being considered for a PrivateLink-based consumption model. Consumers of this resource send JSON payloads representing new orders and the system responds with order IDs corresponding to newly-created orders in the system. In a real-world scenario, additional APIs, such as authentication, might also represent critical aspects of the system. This example will not demonstrate these additional APIs because they could be consumed over PrivateLink in a similar fashion to the API constructed in the example.
I’ll demonstrate how to expose the resource on a private IP address in a customer’s VPC. I’ll also explain an architecture leveraging PrivateLink and provide detailed instructions for how to set up such a service. Finally, I’ll provide an example of how a customer might consume such a service. I’ll focus not only on how to architect the solution, but also the considerations that drive architectural choices.
Solution Overview

N.B.: Only two subnets and Availability Zones are shown per VPC for simplicity. Resources must cover all Availability Zones per Region, so that the application is available to all consumers in the region. The instructions in this post, which pertain to resources sitting in us-east-1 will detail the deployment of subnets in all six Availability Zones for this region.
This solution exposes an application’s HTTP-based API over PrivateLink in a provider’s AWS account. The application is a stateless web server running on Amazon Elastic Compute Cloud (EC2) instances. The provider places instances within a virtual private network (VPC) consisting of one private subnet per Availability Zone (AZ). Each AZ contains a subnet. Instances populate each subnet inside of Auto Scaling Groups (ASGs), maintaining a desired count per subnet. There is one ASG per subnet to ensure that the service is available in each AZ. An internal Network Load Balancer (NLB) sits in front of the entire fleet of application instances and an endpoint service is connected with the NLB.
In the customer’s AWS account, they create an endpoint that consumes the endpoint service from the provider’s account. The endpoint exposes an Elastic Network Interface (ENI) in each subnet the customer desires. Each ENI is assigned an IP address within the CIDR block associated with the subnet, for any number of subnets in any number of AZs within the region, for each customer.
PrivateLink facilitates cross-account access to services so the customer can use the provider’s service, feeding it data that exist within the customer’s account while using application logic and systems that run in the provider’s account. The routing between accounts is over private networking rather than over the Internet.
Though this example shows a simple, stateless service running on EC2 and sitting behind an NLB, many kinds of AWS services can be exposed through PrivateLink and can serve as pathways into a provider’s application, such as Amazon Kinesis Streams, Amazon EC2 Container Service, Amazon EC2 Systems Manager, and more.
Using PrivateLink to Establish a Service for Consumption
Building a service to be consumed through PrivateLink involves a few steps:
- Build a VPC covering all AZs in region with private subnets
- Create a NLB, listener, and target group for instances
- Create a launch configuration and ASGs to manage the deployment of Amazon
- EC2 instances in each subnet
- Launch an endpoint service and connect it with the NLB
- Tie endpoint-request approval with billing systems or the AWS Marketplace
- Provide the endpoint service in multiple regions
Step 1: Build a VPC and private subnets
Start by determining the network you will need to serve the application. Keep in mind, that you will need to serve the application out of each AZ within any region you choose. Customers will expect to consume your service in multiple AZs because AWS recommends they architect their own applications to span across AZs for fault-tolerance purposes.
Additionally, anything less than full coverage across all AZs in a single region will not facilitate straightforward consumption of your service because AWS does not guarantee that a single AZ will carry the same name across accounts. In fact, AWS randomizes AZ names across accounts to ensure even distribution of independent workloads. Telling customers, for example, that you provide a service in us-east-1a may not give them sufficient information to connect with your service.
The solution is to serve your application in all AZs within a region because this guarantees that no matter what AZs a customer chooses for endpoint creation, that customer is guaranteed to find a running instance of your application with which to connect.
You can lay the foundations for doing this by creating a subnet in each AZ within the region of your choice. The subnets can be private because the service, exposed via PrivateLink, will not provide any publicly routable APIs.
This example uses the us-east-1 region. If you use a different region, the number of AZs may vary, which will change the number of subnets required, and thus the size of the IP address range for your VPC may require adjustments.
VPC and Subnet Creation
Start by creating a new VPC:
The example above creates a VPC with 128 IP addresses starting at 10.3.0.0. Each subnet will contain 16 IP addresses, using a total of 96 addresses in the space.
Allocating a sufficient block of addresses requires some planning (though you can make adjustments later if needed). I’d suggest an equally-sized address space in each subnet because the provided service should embody the same performance, availability, and functionality regardless of which AZ your customers choose. Each subnet will need a sufficient address space to accommodate the number of instances you run within it. Additionally, you will need enough space to allow for one IP address per subnet to assign to that subnet’s NLB node’s Elastic Network Interface (ENI).
In this simple example, 16 IP addresses per subnet are enough because we will configure ASGs to maintain two instances each and the NLB requires one ENI. Each subnet reserves five IP addresses for internal purposes, for a total of eight IP addresses needed in each subnet to support the service.
Next, create the private subnets for each Availability Zone. The following demonstrates the creation of the first subnet, which sits in the us-east-1a AZ:
Repeat this step for each remaining AZ. If using the us-east-1 region, you will need to create private subnets in all AZs as follows:

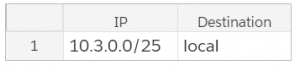
For the purpose of this example, the subnets can leverage the default route table, as it contains a single rule for routing requests to private IP addresses in the VPC, as follows:
In a real-world case, additional routing may be required. For example, you may need additional routes to support VPC peering to access dependencies in other VPCs, connectivity to on-premises resources over DirectConnect or VPN, Internet-accessible dependencies via NAT, or other scenarios.
Security Group Creation
Instances will need to be placed in a security group that allows traffic from the NLB nodes that sit in each subnet.
All instances running the service should be in a security group accepting TCP traffic on the traffic port from any other IP address in the VPC. This will allow the NLB to forward traffic to those instances because the NLB nodes sit in the VPC and are assigned IP addresses in the subnets. In this example, the order processing server running on each instance exposes a service on port 3000, so the security group rule covers this port.
Create a security group for instances:
Step 2: Create a Network Load Balancer, Listener, and Target Group
The service integrates with PrivateLink using an internal NLB which sits in front of instances that run the service.
Create the internal NLB:
The NLB must have a target group within which instances will be placed. Create the target group:
Step 3: Create a Launch Configuration and Auto Scaling Groups
Each private subnet in the VPC will require its own ASG in order to ensure that there is always a minimum number of instances in each subnet.
A single ASG spanning all subnets will not guarantee that every subnet contains the appropriate number of instances. For example, while a single ASG could be configured to work across six subnets and maintain twelve instances, there is no guarantee that each of the six subnets will contain two instances. To guarantee the appropriate number of instances on a per-subnet basis, each subnet must be configured with its own ASG.
New instances should be automatically created within each ASG based on a single launch configuration. The launch configuration should be set up to use an existing Amazon Machine Image (AMI).
This post presupposes you have an AMI that can be used to create new instances that serve the application. There are only a few basic assumptions to how this image is configured:
1. The image containes a web server that serves traffic (in this case, on port 3000)
2. The image is configured to automatically launch the web server as a daemon when the instance starts.
For more information on how to create a new AMI, see Creating an Amazon EBS-Backed Linux AMI.
Create a launch configuration for the ASGs, providing the AMI ID, the ID of the security group created in previous steps (above), a key for access, and an instance type:
Next, create an ASG in each private subnet. The following demonstrates creation of an ASG in the first subnet:
Repeat this process to create an ASG in each remaining subnet, using the same launch configuration and target group.
In this example, only two instances are created in each subnet. In a real-world scenario, additional instances would likely be recommended for both availability and scale. The ASGs use the provided launch configuration as a template for creating new instances.
When creating the ASGs, the ARN of the target group for the NLB is provided. This way, the ASGs automatically register newly-created instances with the target group so that the NLB can begin sending traffic to them.
Step 4: Launch an endpoint service and connect with NLB
Now, expose the service via PrivateLink with an endpoint service, providing the ARN of the NLB:
This endpoint service is configured to require acceptance. This means that new consumers who attempt to add endpoints that consume it will have to wait for the provider to allow access. This provides an opportunity to control access and integrate with billing systems that monetize the provided service.
For more information on this concept, see: Accepting and Rejecting Interface Endpoint Connection Requests
Step 5: Tie endpoint request approval with billing system or the AWS Marketplace
If you’re maintaining your service as a private service, any account that is intended to have access must be whitelisted before it can find the endpoint service and create an endpoint to consume it.
For more information on listing a PrivateLink service in the AWS Marketplace, see How to List Your Product in AWS Marketplace (https://aws.amazon.com/blogs/apn/how-to-list-your-product-in-aws-marketplace/).
Most production-ready services offered through PrivateLink will require acceptance of Endpoint requests before customers can consume them. Typically, some level of automation around processing approvals is helpful. PrivateLink can publish on a Simple Notification Service (SNS) topic when customers request approval.
Setting this up requires two steps:
1. Create a new SNS topic
2. Create an endpoint connection notification that publishes to the SNS topic.
Each is discussed below.
Create an SNS Topic
First, create a new SNS Topic that can receive messages relating to endpoint service access requests:
This creates a new topic with the name “service-notification-topic”. Endpoint request approval systems can subscribe to this Topic so that acceptance can be automated.
For more information on SNS, see: Amazon Simple Notification Service Documentation.
Create an Endpoint Connection Notification
Next, create a new Endpoint Connection Notification, so that messages will be published to the topic when new Endpoints connect and need to have access requests approved:
A billing system may ultimately tie in with request approval. This can also be done manually, which may be less useful, but is illustrative. As an example, assume that a customer account has already requested an endpoint to consume the service. The customer can be accepted manually, as follows:
At this point, the consumer can begin consuming the service.
Step 6: Take the Service Across Regions
In distributing SaaS via PrivateLink, providers may have to have to think about how to make their services available in different regions because Endpoint Services are only available within the region where they are created. Customers who attempt to consume Endpoint Services will not be able to create Endpoints across regions.
Rather than saddling consumers with the responsibility of making the jump across regions, we recommend providers work to make services available where their customers consume. They are in a better position to adapt their architectures to multiple regions than customers who do not know the internals of how providers have designed their services.
There are several architectural options that can support multi-region adaptation. Selection among them will depend on a number of factors, including read-to-write ratio, latency requirements, budget, amenability to re-architecture, and preference for simplicity.
Generally, the challenge in providing multi-region SaaS is in instantiating stateful components in multiple regions because the data on which such components depend are hard to replicate, synchronize, and access with low latency over large geographical distances.
Of all stateful components, perhaps the most frequently encountered will be databases. Some solutions for overcoming this challenge with respect to databases are as follows:
1. Provide a master in a single region; provide read replicas in every region.
2. Provide a master in every region; assign each tenant to one master only.
3. Create a full multi-master architecture; replicate data efficiently.
4. Rely on a managed service for replicating data cross-regionally (e.g., DynamoDB Global Tables).
For more information on selecting an appropriate architecture for multi-regional stateful components such as databases, see AWS re:Invent 2017: How to Design a Multi-Region Active-Active Architecture (ARC319).
Stateless components can be provisioned in multiple regions more easily. In this example, you will have to re-create all of the VPC resources—including subnets, Routing Tables, Security Groups, and Endpoint Services—as well as all EC2 resources—including instances, NLBs, Listeners, Target Groups, ASGs, and Launch Configurations—in each additional region. Because of the complexity in doing so, in addition to the significant need to keep regional configurations in-sync, you may wish to explore an orchestration tool such as CloudFormation, rather than the command line.
Regardless of what orchestration tooling you choose, you will need to copy your AMI to each region in which you wish to deploy it. Once available, you can build out your service in that region much as you did in the first one.
Copy the AMI using the console:
This copies the AMI used to provide the service in us-east-1 into us-east-2. Repeat the process for each region you wish to enable.
Consuming a Service via PrivateLink
To consume a service over PrivateLink, a customer must create a new Endpoint in their VPC within a Security Group that allows traffic on the traffic port.
Start by creating a Security Group to apply to a new Endpoint:
Next, create an endpoint in the VPC, placing it in the Security Group:
The response will include an attribute called VpcEndpoint.DnsEntries. The service can be accessed at each of the DNS names in the output under any of the entries there. Before the consumer can access the endpoint service, the provider has to accept the Endpoint.
Access Endpoint Via Custom DNS Names
When creating a new Endpoint, the consumer will receive named endpoint addresses in each AZ where the Endpoint is created, plus a named endpoint that is AZ-agnostic. For example:
The consumer can use Route53 to provide a custom DNS name for the service. This not only allows for using cleaner service names, but also enables the consumer to leverage the traffic management features of Route53, such as fail-over routing.
First, the the consumer must enable DNS Hostnames and DNS Support on the VPC within which the Endpoint was created. The consumer should start by enabling DNS Hostnames:
Next, the consumer must enable DNS Support:
After the VPC is properly configured to work with Route53, the consumer should either select an existing hosted zone or create a new one. Assuming one has not already been created, the consumer should create one as follows:
In the request, the consumer specifies the DNS name, VPC ID, region, and flags the hosted zone as private. Additionally, the consumer must provide a “caller reference” which is a unique ID of the request that can be used to identify it in subsequent actions if the request fails.
Next, the consumer should create a JSON file corresponding to a batch of record change requests. In this file, the consumer can specify the name of the endpoint, as well as a CNAME pointing to the AZ-agnostic DNS name of the Endpoint:
Next, the consumer should provide the batch file in a request to change resource record sets:
At this point, the Endpoint can be consumed at http://order-processor.endpoints.internal.
Conclusion
AWS PrivateLink is an exciting way to expose SaaS services to customers. This article demonstrated how to expose an existing application on EC2 via PrivateLink in a customer’s VPC, as well as recommended architecture. Finally, it walked through the steps that a customer would have to go through to consume the service.
For more information on setting up AWS PrivateLink, see Interface VPC Endpoints AWS PrivateLink.