AWS Compute Blog
Decoding protobuf messages using AWS Lambda
This post is written by Ennio Pastore, Data Lab Architect.
Protobuf is short for protocol buffers, which are language- and platform-neutral mechanisms for serializing structured data. Compared to XML or JSON the size of the messages is smaller, so the network transfer is faster, reducing latency in the interactions between applications. They are commonly used in communications protocols like RPC systems, for persistent storage of data in a variety of storage systems, and in use-cases ranging from data analysis pipelines to mobile clients.
Since the protobuf messages are encoded in a binary format, they are non-human readable and in order to be processed you have to decode them. You define how you want your data to be structured once, then you can use generated source code to read and write structured data more easily. You can use a variety of languages to read and write data from a variety of data streams. Currently the supported languages are C++, C#, Dart, Go, Java, Kotlin, Python.
This blog post shows you how to decode protobuf messages in a data stream processing application using AWS Lambda functions.
Overview

This example assumes you are already receiving protobuf messages in an Amazon Kinesis Data Streams.
You will learn how to deploy a Lambda function that decodes protobuf messages and store them in JSON format in an Amazon S3 bucket.
To achieve this, create an AWS Lambda layer (step 1) containing the protobuf libraries that are required for the decoding. You can use any development environment where you can install Python 3.x and pip to create the Lambda layers.
After creating the layer, you can include it in the Lambda function (step 2) and you can implement the logic to decode the messages.
Prerequisites
You need the following prerequisites to deploy the solution:
- AWS account
- AWS CLI
- AWS Serverless Application Model (AWS SAM) CLI
- Python 3.9
- An AWS Identity and Access Management (IAM) role with appropriate access.
- Python source code for protobuf
To generate the Python source code required to decode protobuf data, you need a development environment with Python (3.x) and pip already installed.
You can use a local machine, an Amazon EC2 instance, or if you cannot install Python locally, use AWS Cloud9.
Generation of the Python source code for protobuf
Generate the Python source code required for the protobuf encoding and decoding, starting from the proto definition file. This code can be generated using the protobuf compiler from the proto definition file.
- Create the proto definition file:
cat > /home/ec2-user/environment/demo.proto << ENDOFFILE syntax = "proto3"; message demo { optional int32 id = 1; optional string name = 2; optional int32 timevalue = 3; optional string event = 4; } ENDOFFILE - Compile this file with the protobuf compiler (protoc) to generate the Python source code required for the protobuf encoding/decoding. The generated code only works for the classes defined in the proto definition file.
wget
https://github.com/protocolbuffers/protobuf/releases/download/v3.19.1/protoc-3.19.1-linux-x86_64.zip

unzip protoc-3.19.1-linux-x86_64.zip

mkdir /home/ec2-user/environment/output

/home/ec2-user/environment/bin/protoc -I=/home/ec2-user/environment/ --python_out=/home/ec2-user/environment/output demo.proto
Create the Lambda layer
- In your development environment, in the output directory, create a new directory named protobuf. Install the protobuf libraries locally:
mkdir -p ~/environment/output/protobuf cd ~/environment/output/protobuf mkdir python cd python pip3 install protobuf --target . - Include the Python source code to the libraries installed locally:
mkdir custom cd custom cp ~/environment/output/demo_pb2.py . echo 'custom' >> ~/environment/output/protobuf/python/protobuf-3.19.1.dist-info/namespace_packages.txt echo 'custom/demo_pb2.py' >> ~/environment/output/protobuf/python/protobuf-3.19.1.dist-info/RECORD echo 'custom' >> ~/environment/output/protobuf/python/protobuf-3.19.1.dist-info/top_level.txt - Zip the Python folder:
cd ~/environment/output/protobuf zip -r protobuf.zip . - The Lambda layer is ready. If you built it on a remote instance, you must download it in your local machine.
Step 4: Adding the Protobuf Layer to Lambda
Add the layer created in the previous steps to Lambda:
- From the AWS Management Console select the Lambda service and choose Create a Layer:

- Enter the name protobuf-lambda and upload the protobuf.zip that you created in the previous step.
- Once the upload is complete, select
x86_64compatible architecture and select the corresponding Python runtime versions.

Implementation
The full source of the solution is in the GitHub repository and is deployed with AWS SAM.
- Clone the solution repository using git:
git clone https://github.com/aws-samples/lambda-protobuf-decoder - Build the AWS SAM project:
sam build - Deploy the project using AWS SAM and the AWS SAM CLI. Follow the prompts, entering:
- The name of the Kinesis Data Stream containing the protobuf messages
- The name of the S3 Bucket that will be used to store the decoded messages
- The name of your previously created AWS Lambda layer.For all other prompts select “Y”.
- Deploy the project using AWS SAM:
sam deploy --guided --capabilities CAPABILITY_NAMED_IAM

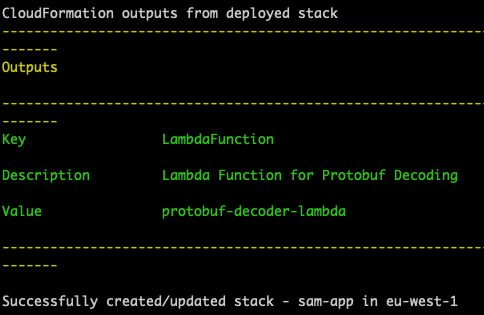
The stack is complete when the message “Successfully created/updated stack”. If the stack fails, find the resources that failed to create and troubleshoot any issues.
Testing the AWS SAM stack
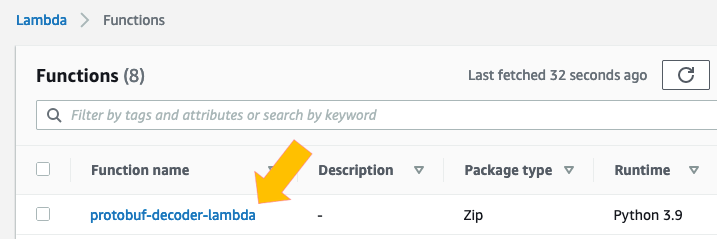
- Once the AWS SAM stack is successfully deployed, navigate to the Lambda service and choose “protobuf-decoder-lambda”.
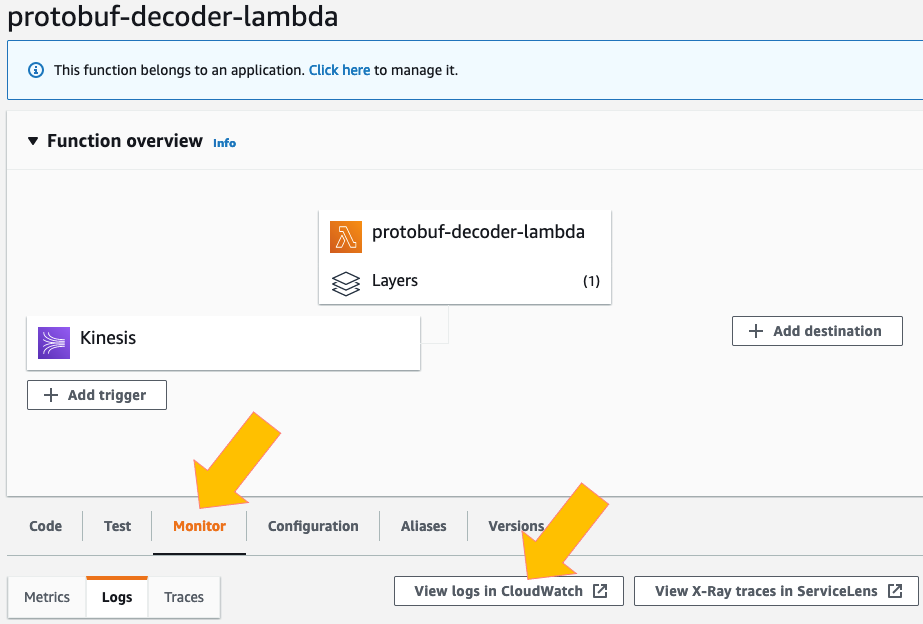
- Choose the “Monitoring” tab, then “View logs in CloudWatch”:
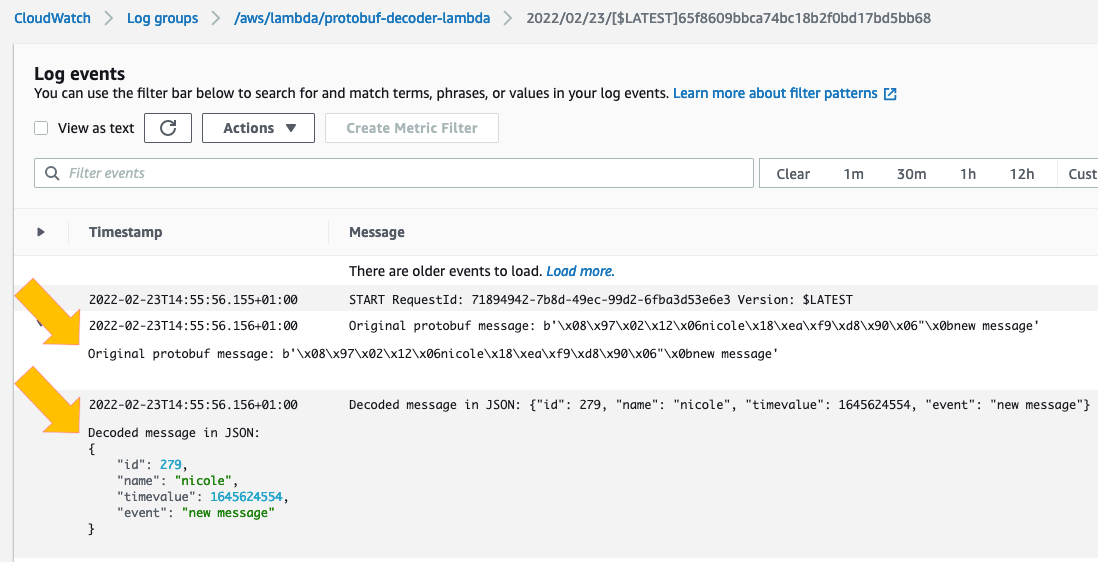
- Select the top Log stream from the list. The logs show for each message the original protobuf message and the decoded message:

Check that all the messages are stored correctly in JSON format in the S3 bucket:
- Navigate to the Amazon S3 console and find the destination bucket you specified in the AWS SAM template.
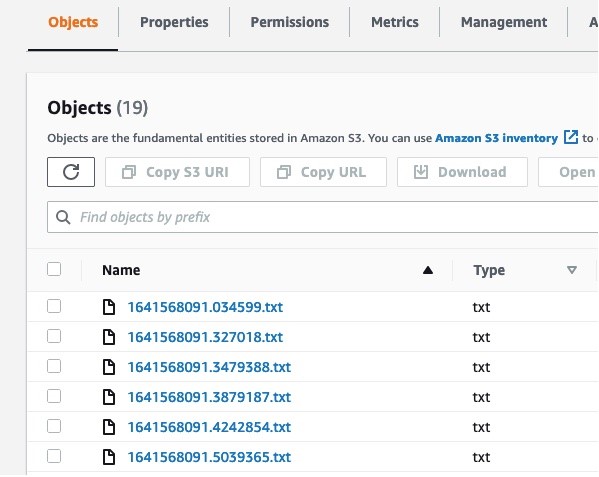
- There are multiple files. Select one and choose Actions -> Query with S3 Select.

- In the “Input settings” panel and “Output settings” panels, for the “Format” options, select the value JSON.

- In the “SQL query” panel, using the default query, choose Run SQL Query. You can see that the content of the object in the S3 bucket is a JSON message.

Cleaning up
If you have generated any events, empty the S3 bucket before deleting the entire stack. If you do not, the data will not be deleted.
To delete the stack, use the AWS SAM CLI. Assuming the stack name is protodecoder, run:
sam delete --stack-name protodecoderConclusion
This post shows how to create a Lambda function to decode in real-time protobuf messages. You import the proto message definition in a development environment and compile it to generate the Python source code.
You create the Lambda layer for the protobuf decoding Lambda function, integrating the Python source code previously created with the protobuf libraries. Using AWS SAM, you create the Lambda function including the protobuf libraries.
If you want to dig deeper into Lambda functions, see What is AWS Lambda? To extend the Lambda function to interact with multiple AWS services, see the Boto3 documentation.
For more serverless learning resources, visit Serverless Land.