AWS Database Blog
Migrate SQL Server Reporting Services content to Amazon RDS for SQL Server
If you are looking to move your Microsoft SQL Server Reporting Services (SSRS) workloads to Amazon Relational Database Service (Amazon RDS) for SQL Server , you will need to migrate your existing reports and SSRS content before you can start running your workloads. In Amazon RDS for SQL Server, just lifting and shifting an existing Report Server database to be used as the SSRS database isn’t supported, so you need to migrate items one by one. This can be a simple task if you have a few items in your existing SSRS instance, but can get tedious and challenging for large numbers of items. You can simplify this process by following the guidelines outlined in this post, to make migrating SSRS content to Amazon RDS for SQL Server seamless.
In this post, we discuss how you can migrate existing SSRS content to an Amazon RDS for SQL Server instance using a PowerShell module. The content that can be migrated includes reports, data sources, folders, and all other items that you can create and store on SSRS. The source of the SSRS content can be any SSRS instance, including another RDS instance with SSRS enabled. We will also show you how to handle items that contain data source credentials so that your data source connections will work after migration. Finally, we will show you how to configure the permissions for your items after you migrate.
Prerequisites
You need to have the following prerequisites before migrating SSRS items:
- An Amazon RDS for SQL Server instance that has SSRS enabled on it. For instructions, see Configuring Microsoft SQL Server Reporting Services on Amazon RDS for SQL Server. This database instance serves as the destination of the items you migrate.
- A domain user with access to SSRS on the RDS instance you created. For more information, see the section Connecting to the Report Server web portal of Configuring Microsoft SQL Server Reporting Services on Amazon RDS for SQL Server
- A client instance. This can be any computer with the following requirements:
- Is domain joined to the same Active Directory (AD) domain as your RDS instance or joined to an AD domain with a forest trust to the AD domain of your RDS instance. Whichever AD your client instance is joined to, it must have the domain user you specified in the preceding prerequisite. If you don’t want to use a domain joined instance, ensure that you can run programs (such as PowerShell) from the machine that has the RunAs user as this domain user.
- Has access to the SSRS items you wish to migrate
- Has PowerShell version 3.0+ installed. Run the
$PSVersionTablecommand in a PowerShell console to check which version is installed.
You’re now ready to deploy SSRS items from an SSRS instance to Amazon RDS using PowerShell.
Extract SSRS items from your SSRS source
To extract your SSRS items, complete the following steps:
- On your client instance, install the ReportingServicesTools
To check if the ReportingServicesTools module is installed, open a PowerShell console as administrator then run the following code:If installed, a result is returned. If there is no result, then run the following PowerShell command to install it:
- Open a PowerShell console as the domain user that has access to your pre-existing SSRS instance.
- Download your items into a folder on your client instance using the
ReportingServicesToolsmodule in PowerShell
The following PowerShell example code downloads all items and other content in an SSRS instance to a local file path:
Replace https://my-on-prem-ssrs-endpoint with the endpoint of your SSRS instance with which you wish to migrate items and content from. This can be an on-premises SSRS instance or even an RDS SSRS instance that you have existing items uploaded to already.
Replace D:\SSRS\SSRS-Downloaded-Reports with the file path on your client instance that you will temporarily save the SSRS items to.
The following screenshot shows an example SSRS web portal with items in it.

The following screenshot shows what the downloaded file folder looks like after running the preceding PowerShell commands.

Upload extracted content to your SSRS RDS instance
To upload the extracted content, complete the following steps:
- Use the ReportingServicesTools module to connect to your RDS for SQL Server instance with SSRS enabled.The following PowerShell example code connects to the SSRS web service proxy on a target SSRS instance:
Replace
https://my-rds-db-instance-endpoint.us-west-2.rds.amazonaws.com:8443with the endpoint of your RDS for SQL Server DB instance, and the port you configured for SSRS (for example, 8443). If you have any issues connecting to the RDS SSRS instance, make sure your security group has a rule to allow inbound access for the client instance IP to the SSRS port. Also make sure you’re running the PowerShell console as the domain user that you granted SSRS portal access to (you should be able to view the SSRS portal in a web browser with the domain user’s credentials). - Create a folder for the uploaded items in your RDS for SQL Server instance (this step is optional):
This command creates a folder in your RDS SSRS instance called
UPLOADED_CONTENT. After you run the PowerShell, your SSRS web portal hosted on your RDS for SQL Server DB instance looks like the following screenshot.
- Upload the items to the RDS for SQL Server instance:
Replace
D:\SSRS\SSRS-Downloaded-Reportswith the local file path that your items are stored under, and replace/UPLOADED_CONTENTwith the folder you want to upload your items to (for example,/for just the root folder). When the command is complete, you can verify all the items are uploaded by checking the folder on the SSRS web portal.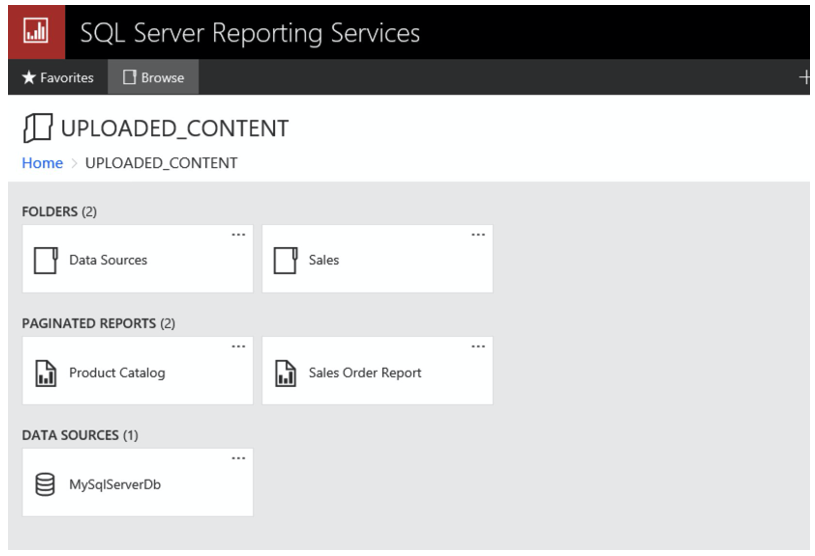
Data sources
Using the migration method outlined in this post doesn’t migrate any credentials you may have stored in data source objects or reports with embedded data sources. In SSRS on Amazon RDS for SQL Server, you have the same options to configure your data source as on premises by choosing the … icon at the top right of an object and choosing Manage (then choosing the Data Sources tab if it’s a report object). You should have four options for credentials, as in the following screenshot.

If you use any option except Using the following credentials, no change is needed. If you want to keep credentials stored in the data source, you need to reenter credentials in each data source or embedded data source. When entering credentials, choose Test Connection to ensure it works and choose Save so the credentials are persisted.

If your data source is on the same RDS for SQL Server instance that you’re hosting SSRS on and you’re trying to use Windows authentication, you should set the data source in the connection string to the loopback interface (for example, localhost or .) or the fully qualified domain name (FQDN) of the RDS instance. The FQDN of an RDS instance is the instance name suffixed by the FQDN of the domain (for example, my-instance.my.domain.com, where my-instance is the instance name and my.domain.com is the name of the domain).
Permissions
As you migrate your SSRS content to your RDS for SQL Server instance, the item-level permissions are inherited from the root level folder, which by default has the domain user that you added to the portal in the beginning. If you want to change the permission of an object, you can do so going to the Security tab on the object management page.

Summary
This post showed you how to migrate existing SSRS content to an RDS for SQL Server instance running SSRS. With the Reporting Services PowerShell module, you can automate item migration from an existing SSRS instance to an RDS for SQL Server instance. If you have a large number of items in your existing SSRS instance that you wish to migrate, this process can simplify your migration so that you can bulk migrate all of your items with just a few PowerShell commands. Try out SSRS today on the AWS Management Console, and share your thoughts and experiences in the comments.
About the author
 Christian Imbrogno is a Software Development Engineer with Amazon Web Services.