Front-End Web & Mobile
Building a full-stack chat application with AWS and NextJS
June 27, 2024: This blog post covers Amplify Gen 1. For new Amplify apps, we recommend using Amplify Gen 2. You can learn more about Gen 2 in our launch blog post.
Modern chat apps require a rich set of features. These features include file storage, real-time updates, and the ability to fetch data on both the client and the server.
Traditionally, this has meant stitching together many third-party services, or spending development time creating a custom solution. Furthermore, this slows down the time-to-market and introduces multiple failure points.
To showcase these features and how AWS solves for traditional pain points, we’ve updated our real-time chat application. This version has been redesigned to emphasize how simple it can be for teams to assume full control over how their application is managed both locally as well as on AWS.
This version of the application is made up of the following tech-stack:
Frontend
- React Framework: NextJS
- UI Library: AWS Amplify UI Primitives
- API bindings: AWS JavaScript library
- Hosting: Amplify Hosting
- Repo to get started
Backend
- Authentication: Amazon Cognito
- API: AWS AppSync
- Database: Amazon DynamoDB
- File Storage: Amazon Simple Storage Service (Amazon S3)
- IaC: AWS CDK
- Repo to get started
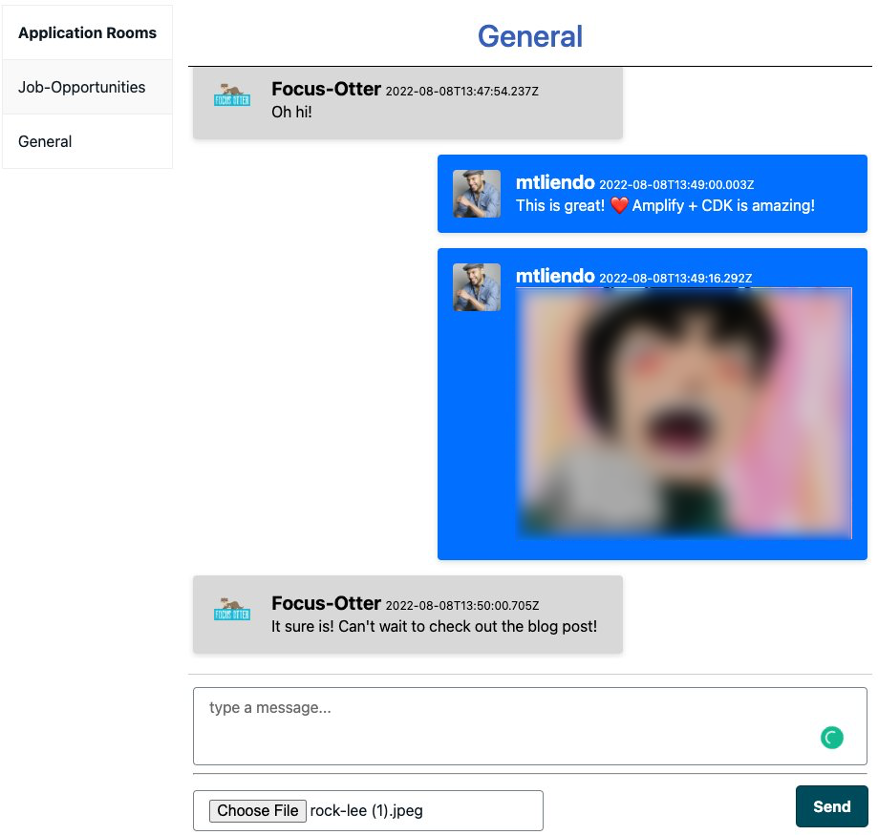
figure 1. Frontend chat UI
Backend architecture overview
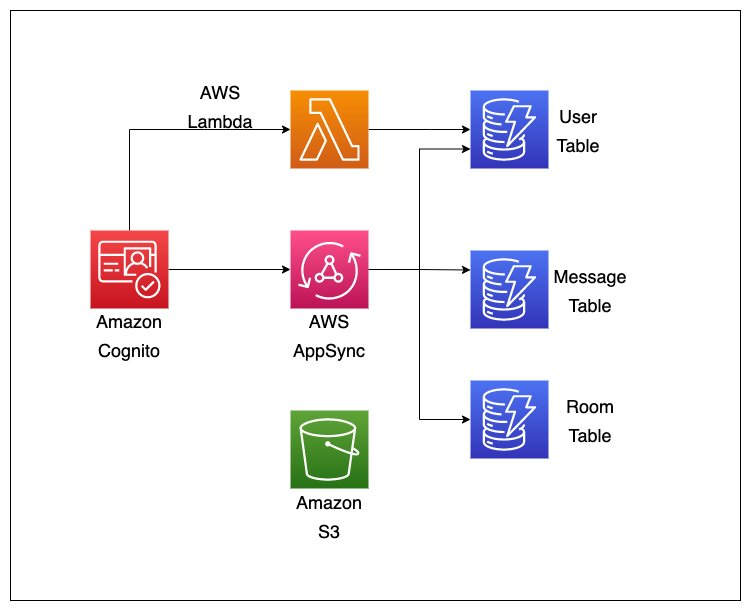
Figure 2. Backend architecture diagram
Overview
Here is an overview of how we’ll be using our backend services:
- Amazon Cognito: This project utilizes User Pools, Identity Pools, and User Pool groups.
- AWS Lambda: When a user signs up for our application, we use a
postConfirmationtrigger on Amazon Cognito to add them to a database. This allows users to query for other chat members. - AWS AppSync GraphQL and Pub/Sub APIs: Utilizing its coupling with Cognito, we develop an API with
AMAZON_COGNITO_USER_POOLSset as the auth mode. With AWS AppSync Resolvers, we create direct mappings from our API to our Database. In addition to creating our API endpoint, AWS AppSync also creates a serverless WebSockets endpoint to enable real-time notifications. All of this is fully-managed, which means that we don’t have to setup a server or manage connection pools. - Amazon S3: We’ll allow users to upload images that only signed-in users can access.
- Amazon DynamoDB: As seen from the above screenshot, this application uses a multi-table design architecture as opposed to single-table design. A
Usertable will contain information about our authenticated users. TheMessagetable contains details on not only text messages, but also image IDs for Amazon S3. TheRoomtable is used to scope both messages and real-time message subscriptions. In addition, this application sets up a global secondary index (GSI) to allow for a different access pattern.
From an Infrastructure-as-Code (IaC) perspective, this application leverages the AWS CDK to create the above-mentioned services. The CDK supports many different programming languages. However, teams that have a frontend component will likely benefit from TypeScript, as it can be used on the frontend as well as the backend.
Through the use of constructs, developers can compose their services into reusable stacks of code. To see this in action, here is a snippet from the backend repository:
Understanding our API
AWS AppSync enables the creation of serverless GraphQL APIs that simplify app development by providing a single endpoint to securely query or update data from multiple data sources. Furthermore, GraphQL subscriptions allow for engaging real-time application experiences whenever data is updated.
On the backend, AWS AppSync connects to its data sources through the use of mapping templates. A request mapping template creates a JSON document that tells how the data is sent to its data source (DynamoDB in our case). A response mapping template does the opposite: its document tells how the data from the datasource is sent back to the API.
We can see this in action in by viewing the Auth Stack:
The requestMappingTemplate transforms our request to DynamoDB through the use of the Mutation.updateMessage.req.vtl file:
Above, we take the argument id found on the incoming arguments object (shorthanded to args) and set it as the key. This tells DynamoDB which item we’re wanting to update.
Through the use of an expression, we tell DynamoDB to update both when a message is updated and what the new content should be.
Because sending data back to the client is often a matter of sending one item or sending many items, the AWS AppSync CDK construct comes with several built-in methods of getting those responses:
responseMappingTemplate: MappingTemplate.dynamoDbResultItem()
Leveraging Amplify Libraries to connect your frontend to your backend
After signing up, a user can create chat rooms for other users to join. Once in a chat room, they can send text messages or pictures. AWS AppSync automatically authorizes valid users and forwards valid requests to DynamoDB to store both the message and room data.
To enable this functionality, the frontend must be configured to utilize the exported values from our backend. For complete instructions on how to setup our frontend, checkout the getting started guide found on the readme of the repo.
By utilizing Amplify frontend libraries, both API calls and user interface (UI) development become easier. For example, the following is an overview of how we’ll use various methods:
Storage.get(ITEM_KEY): Fetches an item from our S3 bucket. This method returns a signed-URL.Auth.currentAuthenticatedUser(): Parses the JWT for the user and returns an object containing their sign-in details and attributes from Cognito.API.graphql({query, variables, authMode}): Make an authenticated request to our GraphQL API. This method works for queries, mutations, and it can be extended to allow for subscriptions.
Managing user sign-ups
Our API was created with Amazon Cognito as the default authorization strategy.
To authenticate our users on the frontend, we utilize the withAuthenticator component from the @aws-amplify/ui-react package.
By extending the configuration, we can adjust the UI to fit our use case:
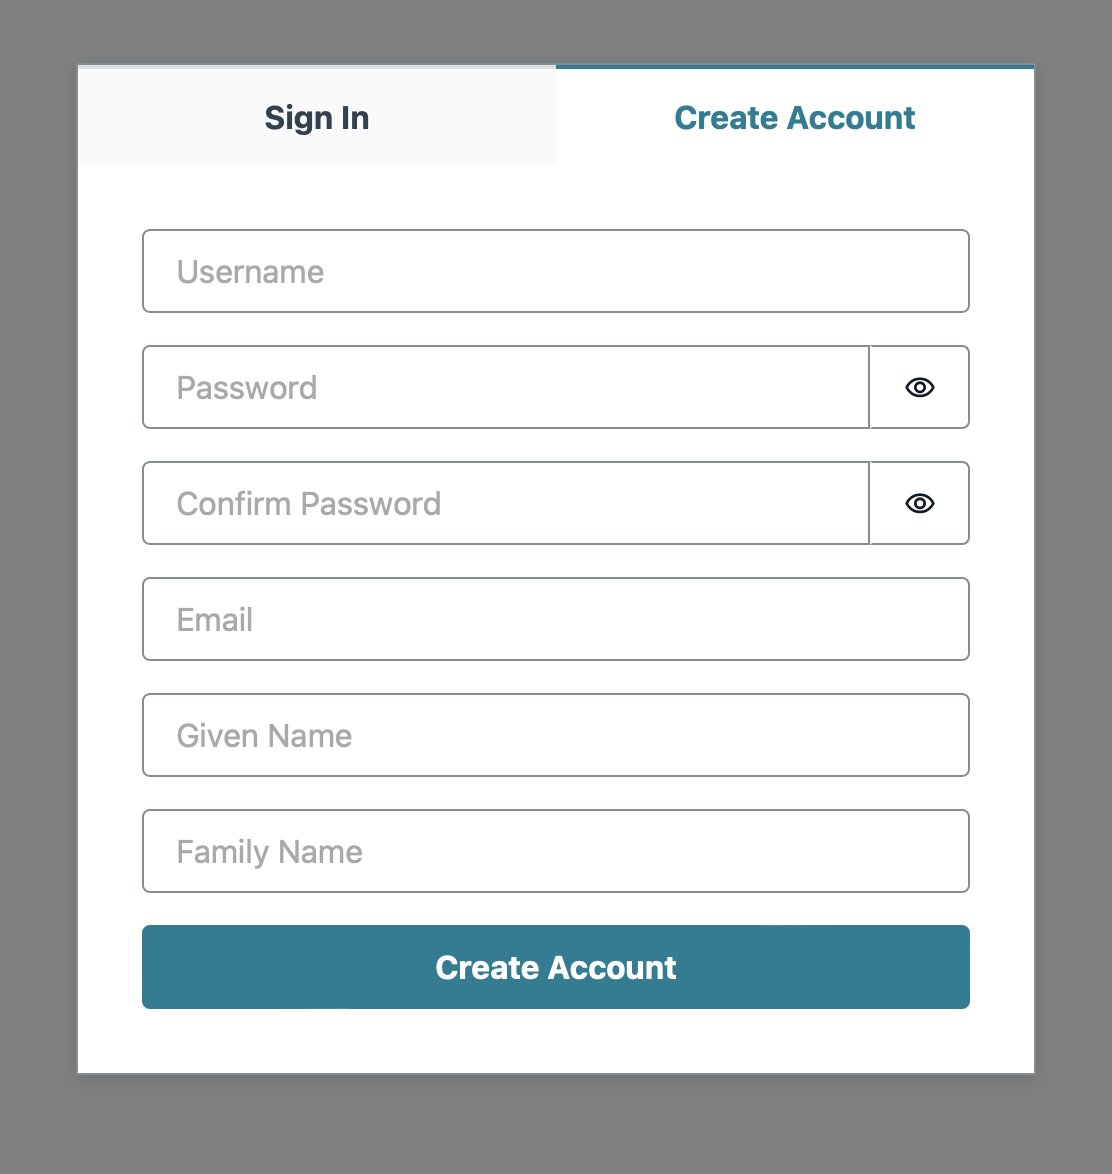
Figure 3 caption: Amplify create account screen
Sending and receiving messages using GraphQL
Once our users are authenticated in our application, they can begin making calls to our API. For example, on the homepage users may like to be presented with a list of available rooms in which they can chat:
Making authenticated calls client-side works well. However, there are times when calling our API server-side is easier. To demonstrate how this works, we leverage the withSSRContext function to access details stored from our cookie session:
Above, we check if there is a user, and then list the rooms. If there’s an error in doing so, then we redirect the user back to the frontend.
Managing image uploads
A key visual part of our application is allowing our users to upload images. In our backend stack, we create managed policies for the S3 bucket that follow the Amplify best practices. These policies block anonymous access to our files and allow signed in users to fetch and upload files to a public directory..
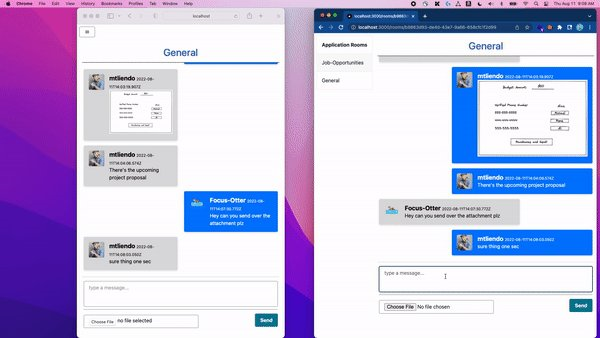
Figure 4. Two separate chat apps side by side, sending message
To accomplish this, our schema defines a Message as a type where its MessageContent can contain either an imageId or text.
We specify a key for the image because the Storage module from Amplify will automatically put our image in Amazon S3 as long as we give it a name for the file, as well as the file data itself.
Conclusion
In this post, we showcased how teams can build scalable chat applications that contain the rich set of features that customers have come to expect. By leveraging the AWS CDK, teams have the flexibility of frontend and backend teams working on their respective stacks, while still allowing full-stack developers to manage both stacks in a common language.
We also saw how AWS AppSync exposes a single endpoint to frontend teams without needing to worry about servers or create complex backend abstractions. Frontend teams can easily reason with a strongly typed data model provided by the GraphQL schema, thereby allowing them to focus on the end-user experience.
On the frontend, teams can focus on using the created backend services with Amplify UI primitives and JavaScript bindings.
As we’ll see in future posts, this application can be extended to allow notifications and enhanced subscription handling.
To read more on how you can leverage AWS AppSync in your next project, visit the overview page of the service and see the Amplify Library docs for frontend usage and setup.
About the author: