Microsoft Workloads on AWS
Using AWS Launch Wizard to deploy SQL Server Always On Failover Cluster Instances with Amazon FSx for NetApp ONTAP
In this blog post, we will walk you through the steps required to deploy a SQL Server Always On Failover Cluster (FCI) using AWS Launch Wizard, with Amazon FSx for NetApp ONTAP providing you with a shared storage solution.
Introduction
In our previous blog post, we described how to set up SQL Server FCI with Amazon FSx for NetApp ONTAP manually. In this blog post, we will show you how the AWS Launch Wizard simplifies this process.
AWS Launch Wizard is a service that guides you through the sizing, configuration, and deployment of third-party applications on AWS, such as Microsoft SQL Server. Launch Wizard supports the deployment of SQL Server both as a single instance or in a high availability configuration. Launch Wizard uses Amazon FSx as shared storage for SQL Server Always On FCI deployments. In this walkthrough, we focus on Amazon FSx for NetApp ONTAP, but you can also use Amazon FSx for Windows File Server.
Walkthrough
Step 1: Choose AWS Launch Wizard Application
1.1 — Sign in to AWS Launch Wizard
- Log in to the AWS Management Console, and choose the Region where you want to create your deployment.
- Open the Launch Wizard console.
1.2 – Choose application
Select Choose application (as shown in Figure 1) and select the MS SQL Server option in the left pane.
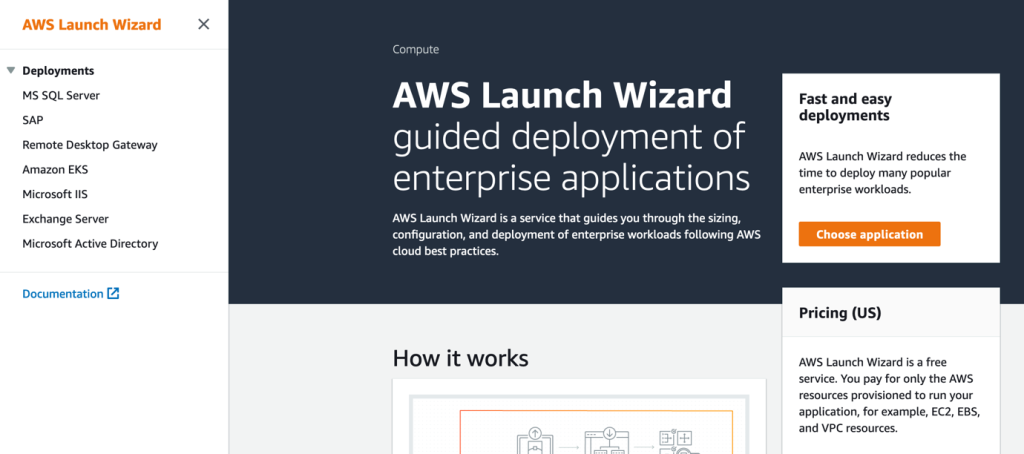
Figure 1 AWS Launch Wizard Landing Page
On the Choose application screen, select Create deployment (Figure 2):
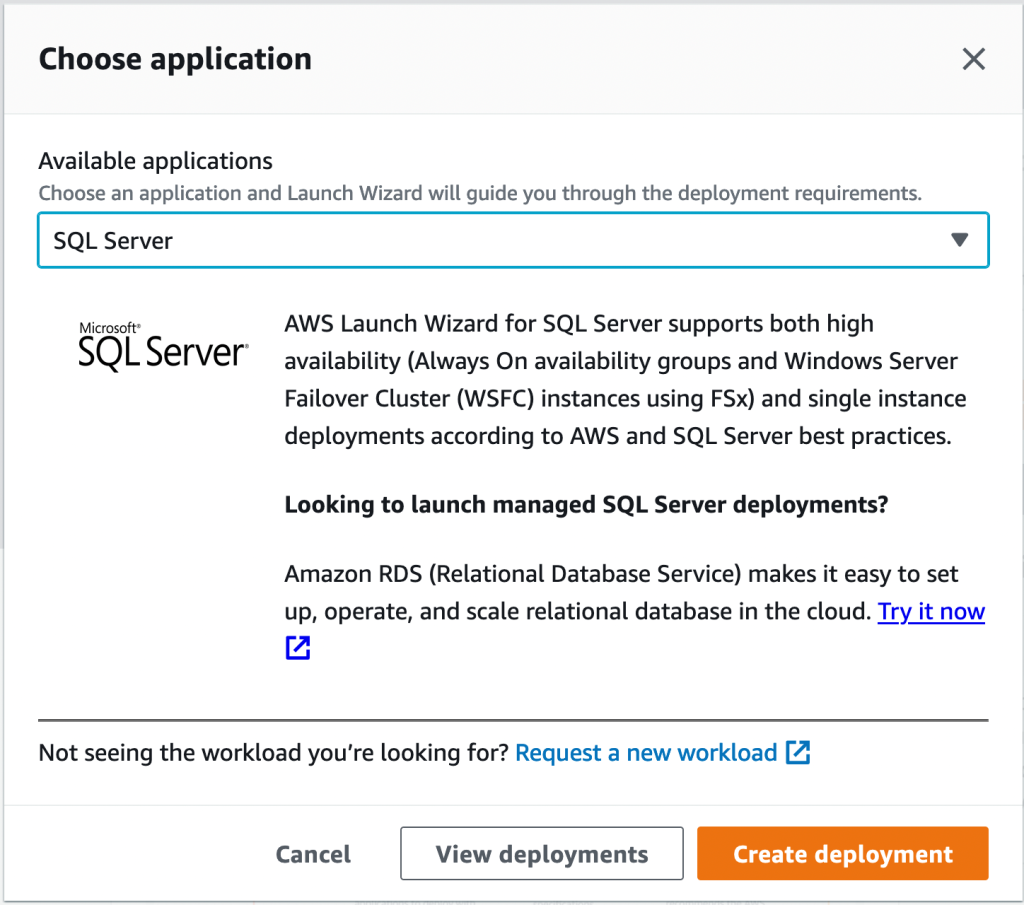
Figure 2 Choose application screen
Step 2: Configure SQL Server Always On FCI with Amazon FSx for NetApp ONTAP
2.1. Review Permissions – IAM Role
The Review Permissions screen of the Launch Wizard creates a default IAM role (AmazonEC2RoleForLaunchWizard) in your account that grants AWS Launch Wizard access to other AWS services on your behalf, as shown in Figure 3. Select Next.
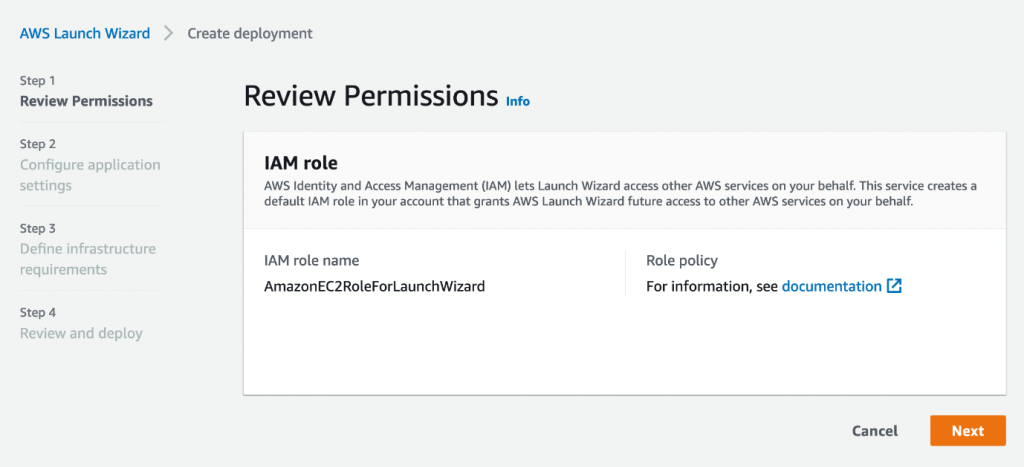
Figure 3 Review Permissions screen
2.2 Configure Application settings
Figure 4 shows the Configure application settings step. This is where you provide the configuration options for your SQL Server deployment.
2.2.1 Operating system
Choose Windows as the operating system.
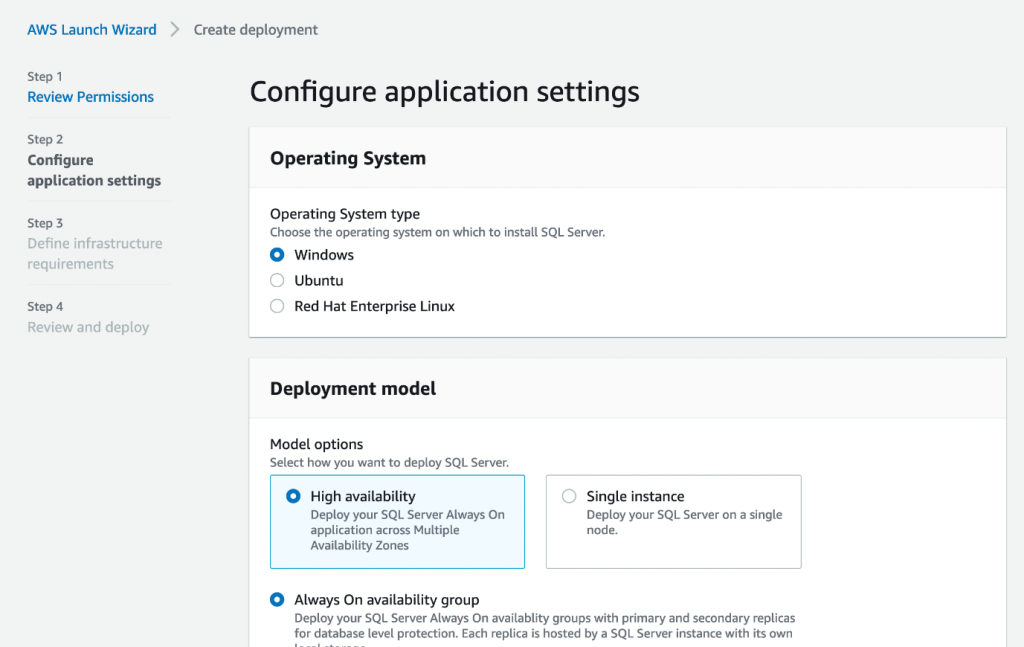
Figure 4 Configure application settings
2.2.2 Deployment Model
The deployment model section allows you to choose between high availability and single instance deployments and their corresponding settings. For this walkthrough, choose High availability deployment, as shown in Figure 5. Select the Always On Failover Cluster Instances option. For Shared storage, choose Amazon FSx for NetApp ONTAP from the dropdown menu.

Figure 5 Deployment model screen
2.2.3 General Settings
Figure 6 shows the General settings:

Figure 6 General settings
Provide a unique name for this deployment in the Deployment name box. Configuring a Simple Notification Service (SNS) topic and setting up CloudWatch application monitoring are optional. Checking the Enable rollback on failed deployment option allows you to choose whether you want to keep or delete resources associated with a failed deployment. If you would like to export the AWS CloudFormation templates and application configuration scripts from this deployment, provide an appropriate Amazon S3 file location in the S3 file path box.
2.2.4 Connectivity
Figure 7 shows the Connectivity section:
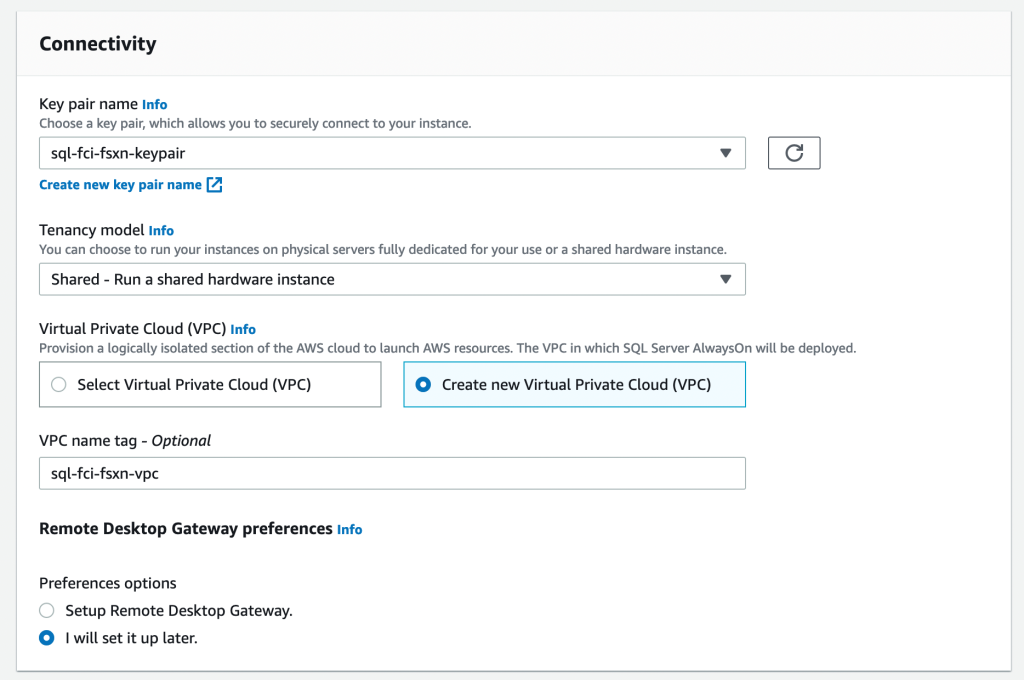
Figure 7 Connectivity settings
Choose a Key pair name or create a new key pair. On the Tenancy model drop-down menu, you can choose to run your instances on either shared tenancy or dedicated hosts. Next, choose the Virtual Private Cloud (VPC) you want to use or create a new VPC. The Remote Desktop Gateway preferences section is optional. Choose a Public subnet for your deployment. In the Availability Zone (AZ) and private subnets section, select the AZs and subnets that you would like to use for your SQL Server nodes.
2.2.5 Active Directory
Figure 8 shows the Active Directory section:

Figure 8 Active Directory settings
You can choose to use your existing Active Directory or you can create and connect to a new AWS Managed Microsoft AD. In this walkthrough, we choose to create a new AWS Managed Microsoft AD. Provide a domain name and a complex password for the admin user.
2.2.6 SQL Server Settings
Figure 9 shows the SQL Server section:
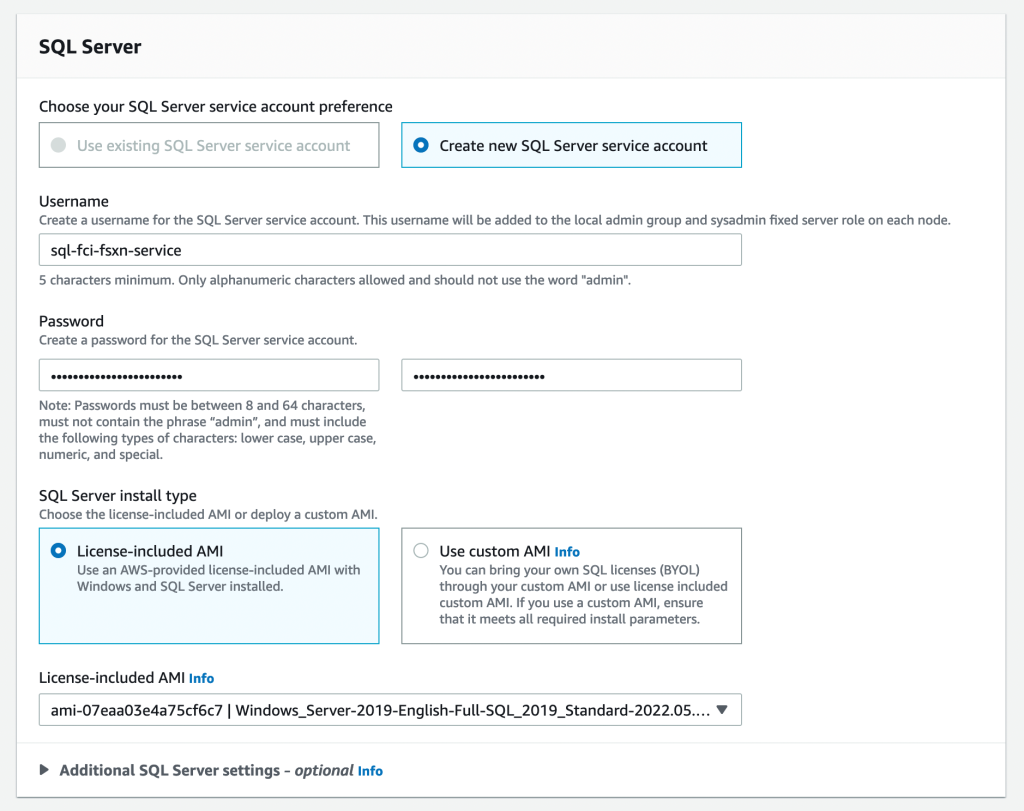
Figure 9 SQL Server parameters
This section enables you to configure various SQL parameters, such as username, password, and SQL Server installation type.
Under Additional SQL server settings shown in Figure 10, you can optionally specify SQL Server node and cluster names.
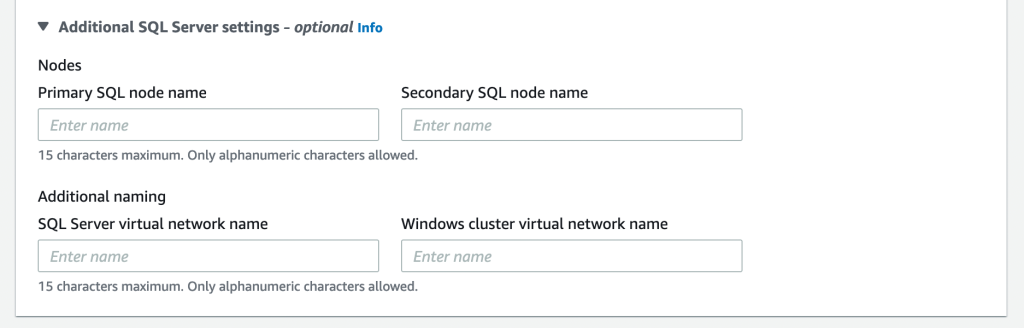
Figure 10 Additional SQL server settings
Select Next to go to next screen.
Step 3: Define infrastructure requirements
The Define infrastructure requirements section (Figure 11) allows you to choose storage and compute options to match your requirements.
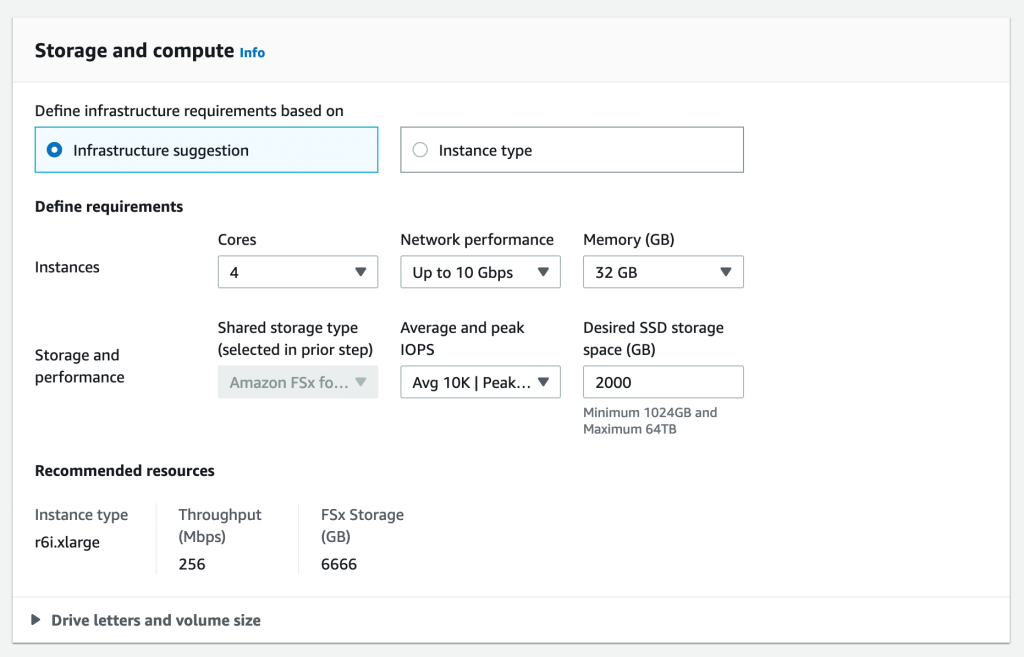
Figure 11 Compute selection using infrastructure suggestion
3.1 Storage and compute
You can either specify the number of cores, network performance, and amount of memory you require – in which case, Launch Wizard will recommend an instance type – or you can specify the exact instance type you require. You must also select the desired size and performance for your shared storage. You may also configure drive letters and volume sizes for your shared storage.
Launch Wizard uses the formulas provided in the table (Figure 12) to calculate volume and LUN storage size for deployments leveraging Amazon FSx for NetApp ONTAP. For example, if you choose to provision 1024 GB of FSx storage, your SQL data volume size will be 522.24 GB and SQL transaction log volume size will be 139.264 GB.
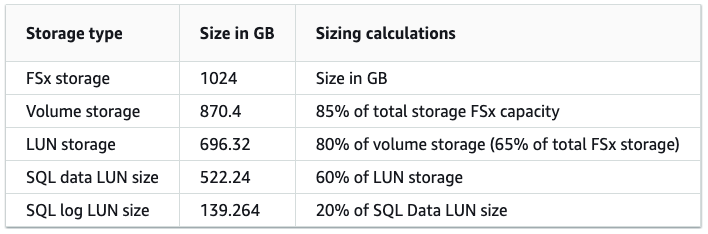
Figure 12 ONTAP sizing example
Alternatively, you can choose to specify the Amazon EC2 instance type and size for the deployment, as shown in Figure 13:

Figure 13 Compute selection using Amazon EC2 Instance type
LUN storage section (Figure 14) allows users to customize the data and log drive sizes.
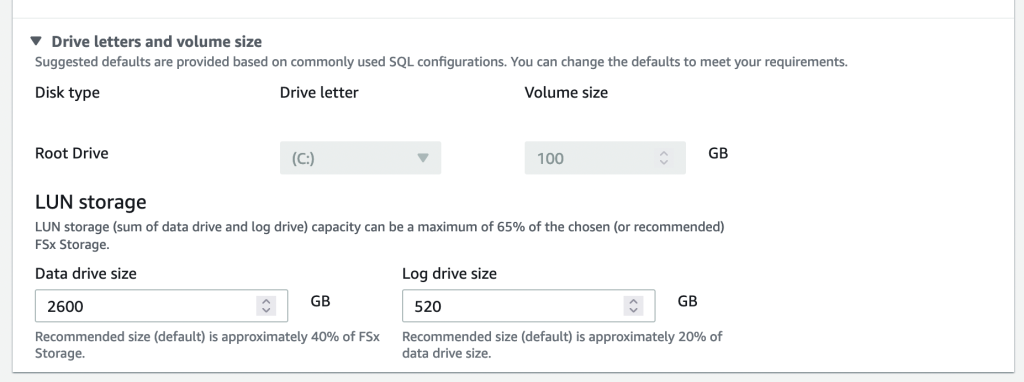
Figure 14 Storage configuration
3.2 Tags (Optional)
Lastly, you may optionally configure any desired tags (Figure 15) for the resources that Launch Wizard will create.

Figure 15 Optional Tags
Step 4: Estimated Cost to deploy resources
After reviewing and acknowledging all the options and costs related to your deployment (Figure 16), select Deploy.
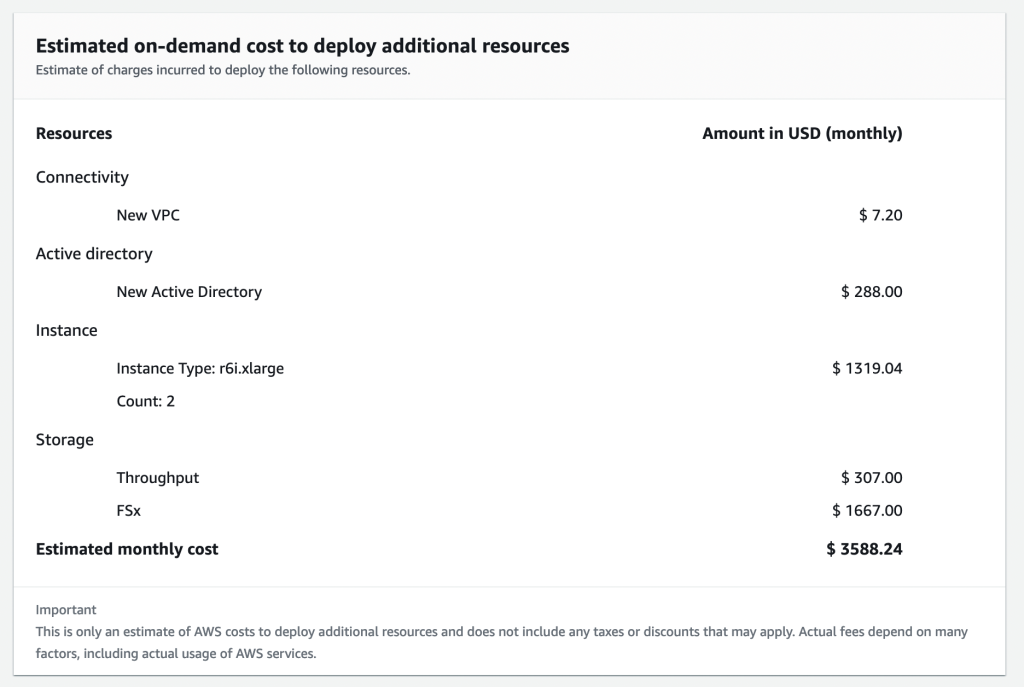
Figure 16 Cost summary screen
The review and deploy screen (Figure 17), displays a summary of the options that are currently selected.
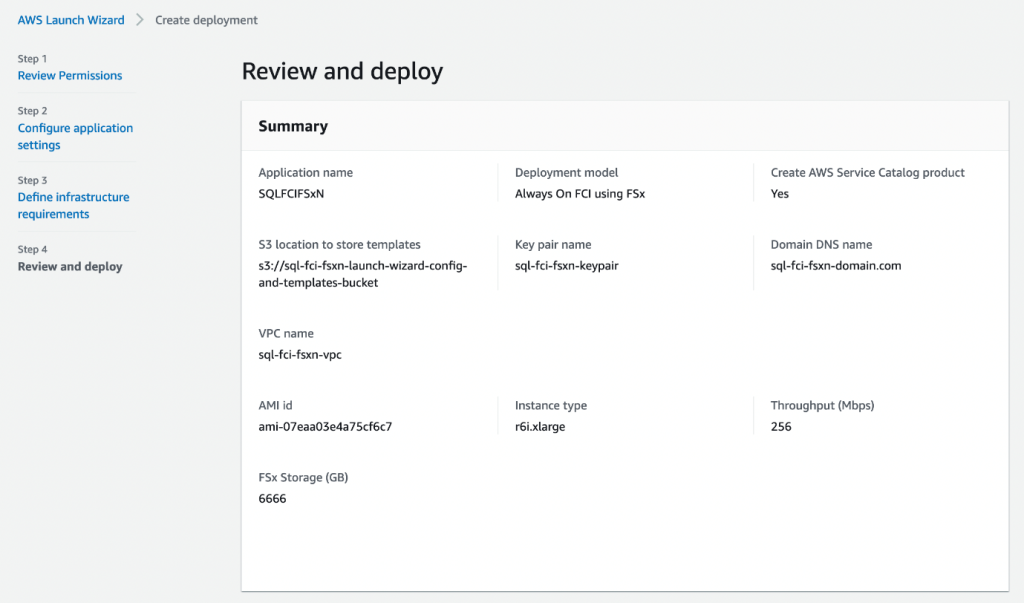
Figure 17 Review and deploy screen
Click Deploy (Figure 18) to start the deployment.

Figure 18 Acknowledgement notice
This will take you to the AWS Launch Wizard console, where you can track the progress of your deployment. Please note that deployments may take up to 2 hours to complete. You may check the status of your deployment by selecting the name of your deployment on the SQL page (Figure 19).
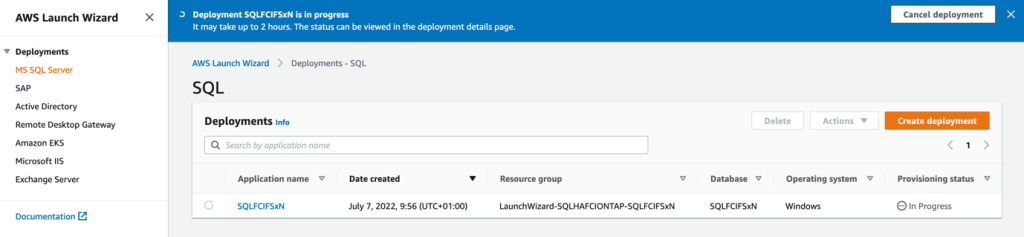
Figure 19 Review deployment in progress
You can view the individual deployment events as Launch Wizard progresses by selecting the application name in the list of deployments (Figure 20).

Figure 20 Launch Wizard deployment steps
Step 5: Post deployment
5.1 Review Launch Wizard Deployment
When your deployment has completed, you can select the name of your deployment to confirm that it was successful (Figure 21).

Figure 21 Launch Wizard deployment events
You can visit the CloudFormation page to review the CloudFormation stack that was created by the AWS Launch Wizard for this deployment (Figure 22).
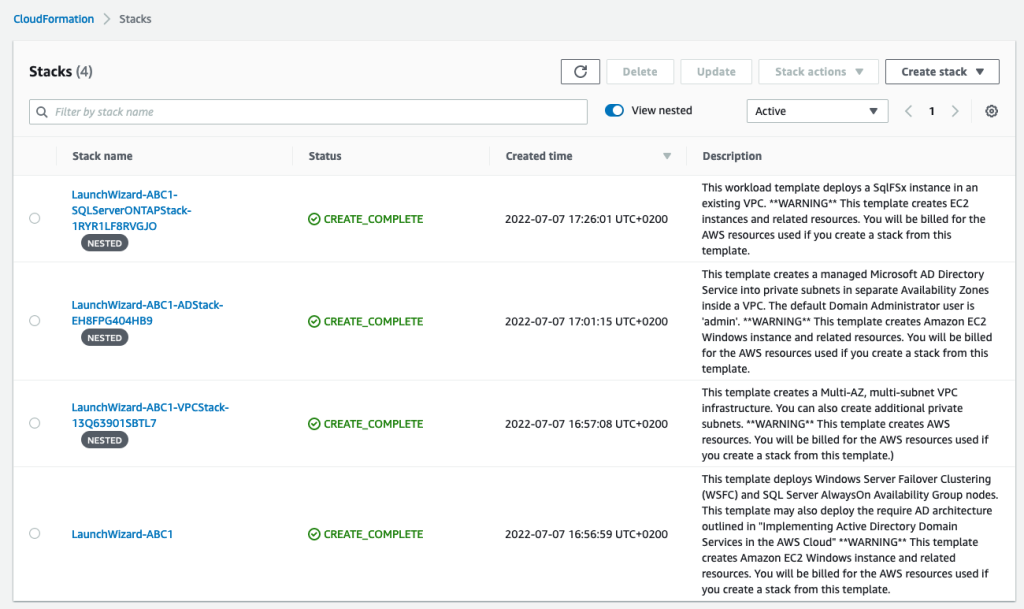
Figure 22 CloudFormation page
You may now log in to your new SQL Server nodes via the usual methods, such as via AWS Systems Manager Fleet Manager in the AWS Management Console, or direct RDP (provided that you have the appropriate network and security group access).
Cleanup
It is good practice to delete resources you are no longer using so that you do not incur unintended charges. The AWS Launch Wizard deployment may create the following resources, depending on the options you choose:
- Amazon EC2 instances
- Amazon EBS volumes
- Amazon FSx for NetApp ONTAP
- AWS Managed Microsoft AD
- Remote Desktop Gateway
- VPC
To delete everything at once, go to the Launch Wizard section of the console, and select MS SQL Server in the left-hand navigation menu (Figure 23).
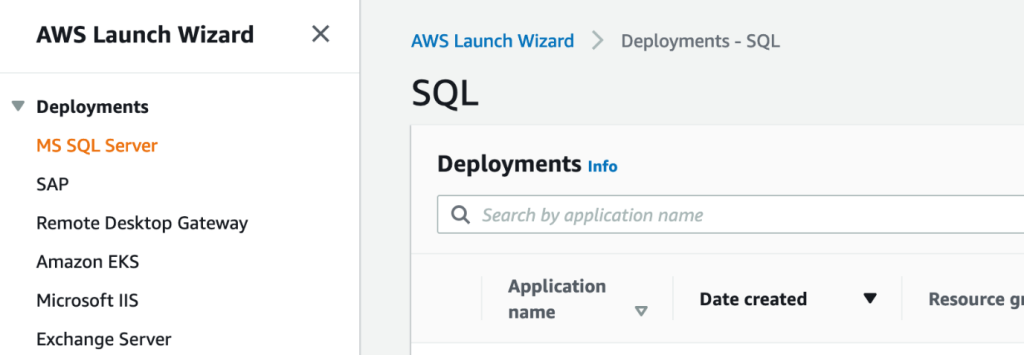
Figure 23 Deployments screen
Select your SQL Server deployment, and then select the Delete button (Figure 24).
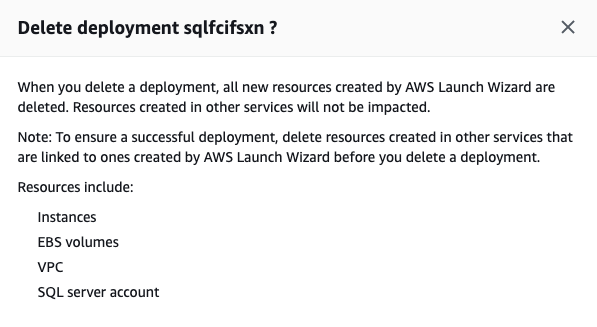
Figure 24 Delete deployment
As part of the deletion process, a backup of your Amazon FSx for NetApp ONTAP system is taken. If your SQL Server Launch Wizard deployment was purely for testing purposes, you should delete this backup to avoid incurring storage charges. If the deployment was used for any other purpose, you should treat this backup in the same way as you would treat any of your other backups.
To delete your Amazon FSx for NetApp ONTAP backups, visit the Amazon FSx section of the console, and select Backups in the left-hand navigation menu (Figure 25).
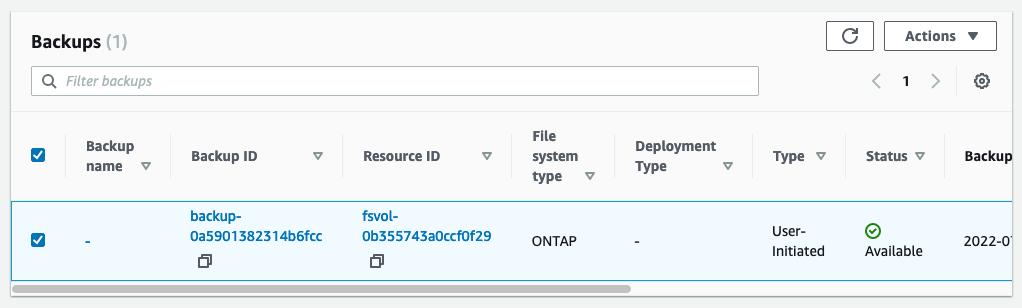
Figure 25 Backups screen
Select the relevant backup, then select Actions and select Delete backup from the drop-down menu (Figure 26). Select Delete backups to permanently delete your backup.
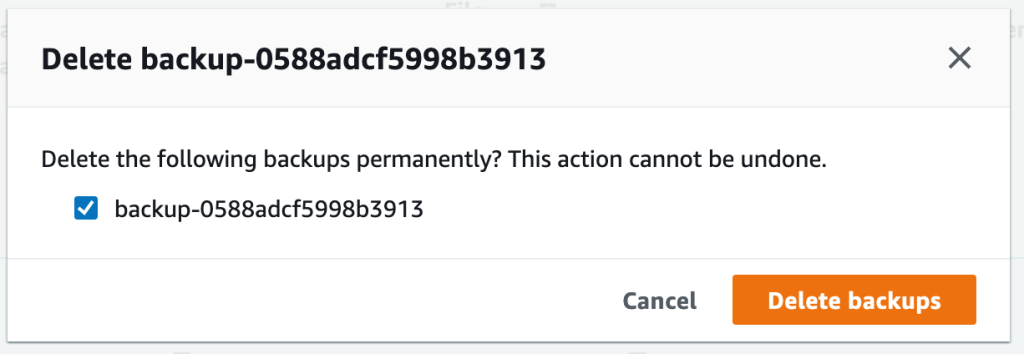
Figure 26 Delete backup
Conclusion
Customers have been deploying Microsoft SQL Server Failover Cluster Instances (FCIs) on NetApp storage on-premises successfully for many years. With Amazon FSx for NetApp ONTAP, customers can now deploy and configure SQL Server FCIs on fully managed storage built on NetApp’s ONTAP file system in the AWS Cloud. AWS Launch Wizard offers a simple way to deploy SQL Server Always On FCIs with Amazon FSx for NetApp ONTAP, reducing the need to perform multiple manual configuration steps.
In this blog post, we walked you through how to use AWS Launch Wizard to set up a SQL Server Always On FCI with Amazon FSx for NetApp ONTAP shared storage. If you would like to learn more about deploying such a configuration manually, please see our blog post on SQL Server High Availability Deployments Using Amazon FSx for NetApp ONTAP.
AWS can help you assess how your company can get the most out of cloud. Join the millions of AWS customers that trust us to migrate and modernize their most important applications in the cloud. To learn more on modernizing Windows Server or SQL Server, visit Windows on AWS. Contact us to start your migration journey today.