AWS Open Source Blog
Deploying OpenMRS Electronic Health Record (EHR) system on AWS
Digitization in the healthcare industry, led by electronic health record (EHR) system adoption, has positively impacted the workflow of healthcare professionals (HCP) and patient care. Now EHR systems are a critical tool in healthcare delivery. The design and functionality of a good EHR system closely follows the overall healthcare system design. In his book The Innovator’s Prescription: A Disruptive Solution for Health Care, author and professor Clayton Christensen placed the EHR system in the center for bringing the disruptive value network in healthcare delivery systems.
Over the past decade, EHR systems from leading vendors such as Cerner, Epic, Philips, and Dedalus have been rapidly adopted by healthcare providers across developed geographies. In the resource-constrained environments and developing countries, open source EHR systems such as OpenMRS are making a difference. With their user-centered, open, and community-driven approach, OpenMRS (OpenMRS Atlas) has driven the adoption of EHR systems in approximately 6,520 healthcare facilities across 40 countries, improving the care of 14.6 million patients.
Driven by the need to democratize data access, improve healthcare services, implement precision medicine, and save cost, healthcare providers together with vendors have started to migrate and modernize EHR solution based to the cloud. Wellforce is migrating its digital healthcare ecosystem to create a digital platform on Amazon Web Services (AWS). This platform consists of the infrastructure for Epic, as well as a complex integration of more than 300 supporting healthcare and business applications.
In this post, we explore how to deploy a OpenMRS EHR system on a single Amazon Elastic Compute Cloud (Amazon EC2) t2.medium Ubuntu instance. This will support hundreds of concurrent HCP users and tens of thousands of patients. We also will provide a reference architecture through which OpenMRS deployment could be made scalable, resilient, and secure, making it suitable for production deployments.
Through modular design, therapeutic area focus, adopting the latest technology trends, and an open source community-driven approach, OpenMRS has been able to stand out among other open source EHR systems. For example, with the latest progress on FHIR module, OpenMRS provides HL7 FHIR interoperability capability to exchange healthcare data in a widely used, standards-based format. This eases the integration with external systems and enables a referral pathway and collaboration with other healthcare practitioners.
Solution overview

Figure 1: Reference architecture for OpenMRS deployment on AWS.
Walkthrough
In the following sections, we will cover four steps:
- Set up Java/OpenJDK, Tomcat, and MySQL on an Amazon EC2 Ubuntu instance.
- Deploy and configure/install OpenMRS Core 2.4.0 for Enterprise.
- Deploy EHR modules with OpenMRS Reference Application 2.11.0.
- Login, user creation, and navigation.
Prerequisites
Prerequisites to complete this tutorial are:
- AWS account: To provision AWS Cloud infrastructure and technology services over the internet for this tutorial.
- Recent modern browser, such as Firefox or Chrome.
- DNS provider: To access OpenMRS application through URL of our choice, we should register a domain name through the Amazon Route 53 service or any other DNS providers. For the purpose of this tutorial, we will not be using OpenMRS through URL.
- A basic understanding of and experience with Linux and MySQL.
Note: If you intend to deploy OpenMRS for your healthcare practice, obtaining an SSL certificate through AWS Certificate Manager (or an SSL certificate provider of your choice) and enabling HTTPS for accessing an OpenMRS application URL is highly recommended.
Step 1: Set up Java/OpenJDK, Tomcat, and MySQL on Amazon EC2 Ubuntu instance.
Set up and launch an Amazon EC2 instance
To start, we must set up an Amazon EC2 instance of type t2.medium with the Ubuntu latest Amazon Machine Image (AMI) in the AWS account with the following user data:
After the Amazon EC2 instance’s state and status checks change to running and 2/2 checks passed respectively, connect to Amazon EC2 instance through the SSH client using an SSH key pair.
Configure Tomcat and MySQL from the AWS Command Line Interface (CLI)
- Update the
tomcat-use.xmlfile by removing all existing entries and add new roles, smf update the password (replace***with password of your choice) and role assignment for the admin user as shown in the following screenshot.

Figure 2: Update tomcat-use.xml.
- Modify the
tomcat9.service.dfile to add following entries.
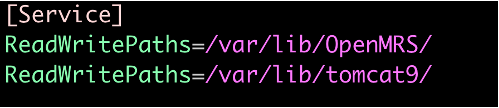
Figure 3: Update tomcat9.service.
- Restart Tomcat service.
- Update MySQL
rootuser password (replace***with a password of your choice) and permission.
Step 2: Deploy and Configure/Install OpenMRS Core 2.4.0 for Enterprise.
- Deployment steps:
To deploy OpenMRS Core 2.4.0, run following commands from the AWS CLI:
- Configuration steps:
To start OpenMRS configuration, open a web browser and log into the following address (replace localhost with IPv4 Public IP of the Amazon EC2 instance):
The following OpenMRS Core 2.4.0 installation wizard should be shown:
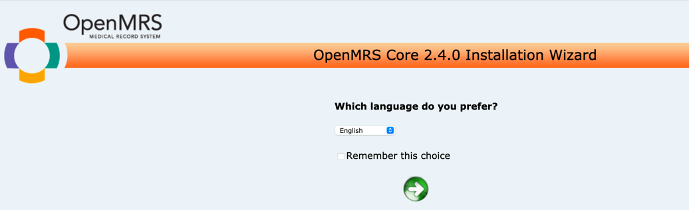
Figure 4: OpenMRS Core 2.4.0 Installation Wizard.
Follow the documentation installation steps to complete Advance type of OpenMRS installation, which is suitable for a production environment.
After completing the installation wizard, open your web browser and log in to http://localhost:8080/openmrs.
The following OpenMRS login page should be shown:
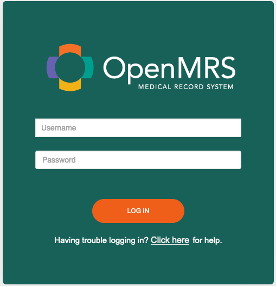
Figure 5: OpenMRS login page.
Use the admin password set during the installation process to log in.

Figure 6: Landing page after logging into OpenMRS Core 2.4.0.
The preceding screenshot shows that the OpenMRS core system has been deployed and installed successfully. The next step is to add EHR modules to the deployed core setup.
Step 3: Deploy EHR modules with OpenMRS Reference Application 2.11.0.
To deploy all EHR modules bundled in the release OpenMRS Reference Application 2.11.0 to OpenMRS Core 2.4.0, run the following commands from the AWS CLI. Alternatively, these modules could be added individually based on the practice requirements.
After running the preceding steps, log into OpenMRS again by entering the following address from a web browser and using admin user credentials:
The following OpenMRS login page should appear:

Figure 7: OpenMRS login page after deployment of OpenMRS Reference Application.
Step 4: OpenMRS Navigation and HCP user details.
OpenMRS application navigation
Logging into OpenMRS using admin credentials brings you to the main landing page.
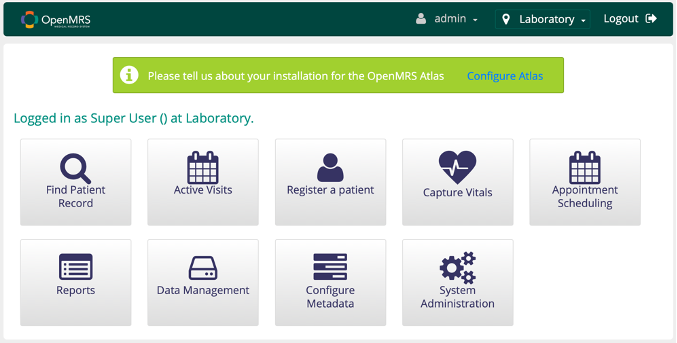
Figure 8: Main landing page for admin user.
To check and set up a healthcare practice regular user details and permissions, navigate into System Administrator, Advanced Administration to get the main Administration panel.

Figure 9: Main Administration panel for OpenMRS admin.
Check HCP user details and login permissions
From the Administration panel, you can perform user management and other healthcare practice administration tasks. In the User Management panel, you can add new users and select user credentials, roles, permissions, and more.

Figure 10: Navigation to access and modify default user credentials.

Figure 11: Main login page for a physician or general practitioner.
Cleanup
To clean up the resources used for this tutorial:
- Navigate to the Amazon EC2 console.
- Stop the Amazon EC2 instance by selecting Instance state, Stop instance.
- After the instance stops, select Terminate instance under Instance state to shut down this Amazon EC2 instance.
Conclusion
In this post, we shared end-to-end deployment steps for OpenMRS EHR system on AWS. We also provided the reference architecture for AWS best practices for security, scalability, and high availability, which should be followed for deploying this EHR system for a healthcare practice or production landscape.
The OpenMRS global community provides extensive documentation for new releases, and the community’s technical team actively supports the issues shared by practices using the OpenMRS EHR system. Thus, if there is an issue with OpenMRS major release or any of its reference application modules, OpenMRS would support it. If there is an issue with Amazon EC2 or other AWS services, then AWS would be supporting the customer.
If you would you like to explore capturing patient vitals from Internet of Medical Things (IoMT) devices to EHR systems running on the AWS Cloud, read Building IoMT solutions to accelerate patient outcomes on the AWS Cloud. You could also securely store, transform, and query OpenMRS health data by using OpenMRS FHIR module and Amazon HealthLake.
Check out the OpenMRS documentation to learn more about the latest versions and features. Visit GitHub to access and contribute to the OpenMRS source code and community.