AWS Open Source Blog
Managing Amazon EKS Clusters with Rancher
中文版 – Rancher is a popular open-source tool used by many organizations to manage Kubernetes clusters. Rancher has extended support for Amazon Elastic Container Service for Kubernetes (Amazon EKS). With this capability, Rancher users no longer need to directly manage their own Kubernetes clusters on AWS.
Using Amazon EKS with Rancher combines the ease of use you have grown accustomed to in Rancher with the features, reliability, and performance you expect from AWS. With EKS, Amazon’s managed Kubernetes solution, you can quickly create a scalable Kubernetes instance in the cloud. Combined with the advanced Kubernetes management features and quality of life improvements found in Rancher, the duo is a powerful combination.
This blog is suitable for the audience who are new to both EKS and Rancher. For those who have EKS experience and are looking for a way to manage EKS using open-source software, this is a good read too.
This blog post will walk you through how to set up an EKS cluster with Rancher, deploy a publicly accessible app to test the cluster, and deploy a sample project to track real-time geospatial data using a combination of other open-source software such as Grafana and InfluxDB.
Prerequisites
This guide assumes that you already have the following:
- A host VM, laptop or server with a public internet IP address, and port 22, 80 and 443 unblocked.
- Docker installed on the host VM, laptop or server.
- An AWS account with adequate permission to access Amazon EKS. See detailed instructions here.
Once the above prerequisites are met, you are ready to install Rancher.
Starting a Rancher Docker Container
On your VM host, issue the following command to start a Rancher container (Rancher version should be equal to or later than 2.0):
docker run -d --restart=unless-stopped --name rancher --hostname rancher -p 80:80 -p 443:443 rancher/rancher:latest
Above command should create a Rancher container version 2.16 or later (https://hub.docker.com/r/rancher/rancher).
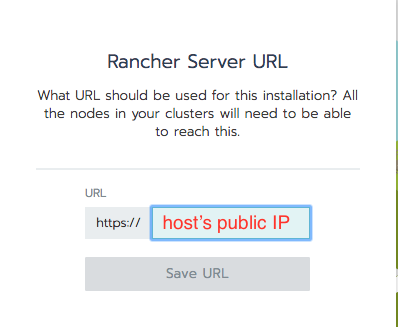
Now point your browser at the host’s public IP; you should get a Rancher welcome page. Note that you might get a cert-authority-invalid warning which is normal due to self-signed certificate for https. Please ignore this warning for now and proceed. If you want to eliminate this warning completely, please follow this blog to obtain a valid certificate before proceeding.

In the following window, type in your host’s public IP so that EKS can notify Rancher of installation progress:
Create an EKS Cluster
You’ll first need to create secret credentials for your account. Do this by going to IAM > Users > (Your Username) > Security Credentials.
Then click on Create access key; a popup like this should appear:
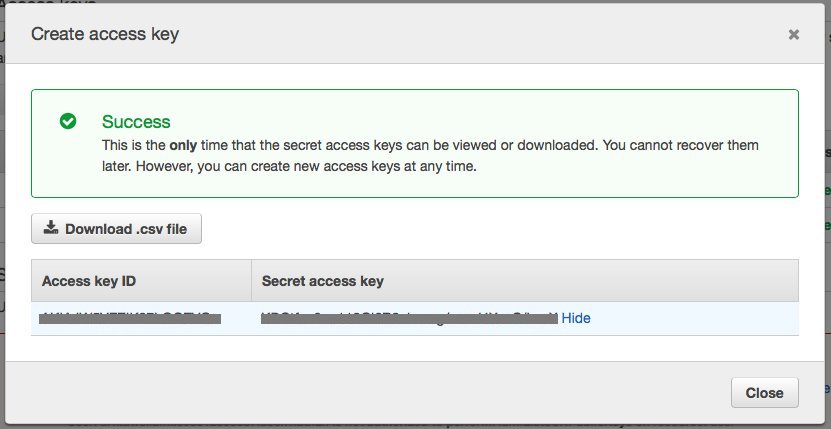
Record the Access Key ID and the Secret Access Key; you will need these when creating your EKS cluster in Rancher.
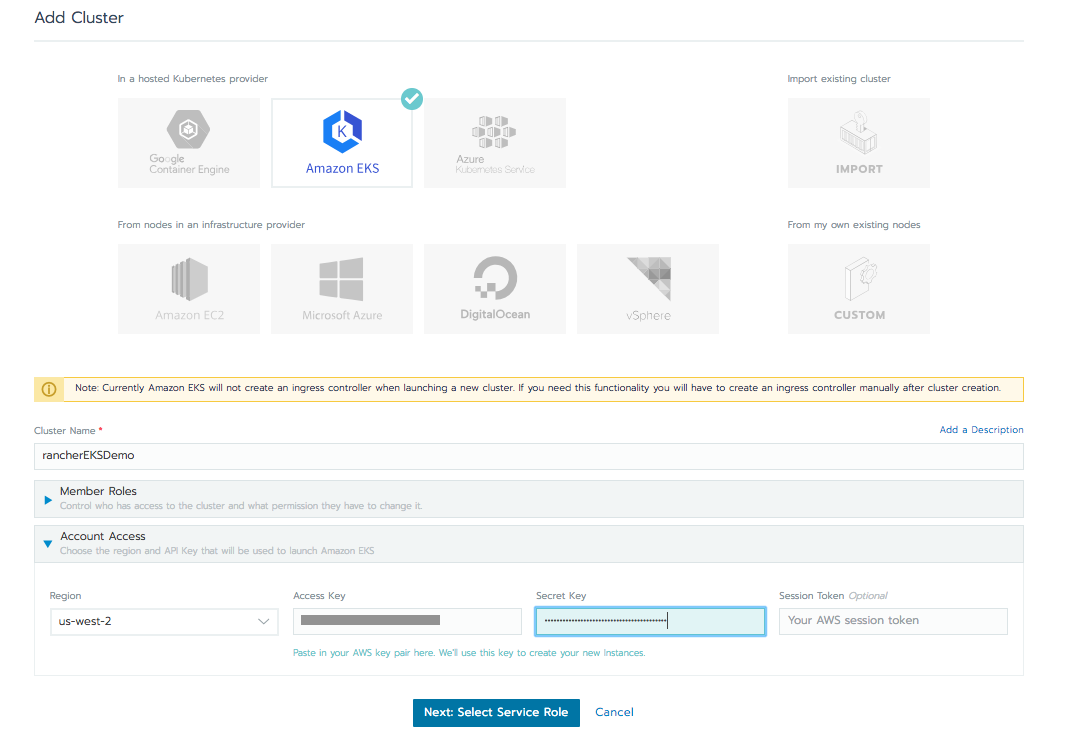
Next, go into your instance of Rancher, click the Add Cluster button, and select the Amazon EKS option. Now give the cluster a name, e.g. ‘rancherEKSDemo,’ and input the Access Key ID and Secret Access Key you recorded in the previous step.
In the ‘Region’ drop-down menu, there are only two regions available to choose from: us-east-1 and us-west-2. (Note, EKS itself is available in many regions globally, refer to this map for details) Select the region where you want to deploy your EKS cluster, leave everything set to the defaults, then click Next: Select Service Role. Rancher will verify that the Key ID and Secret you submitted are authorized.
On the next screen, check the ‘Standard’ service role generated by Rancher and click Next: Select VPC & Subnet. You will be prompted to pick IPs for the worker nodes, VPC, and Subnets. Simply pick the default value and click Next: Select Instance Options. For demonstration purpose, pick the default instance type ‘m4.large’ and leave the min and max ASG (Autoscaling group) values as default. Once verification is completed, click the Create button.
It will take 10 to 15 minutes for the EKS cluster to be created; in the meantime, you will see the cluster status as ‘Provisioning’ on the console.
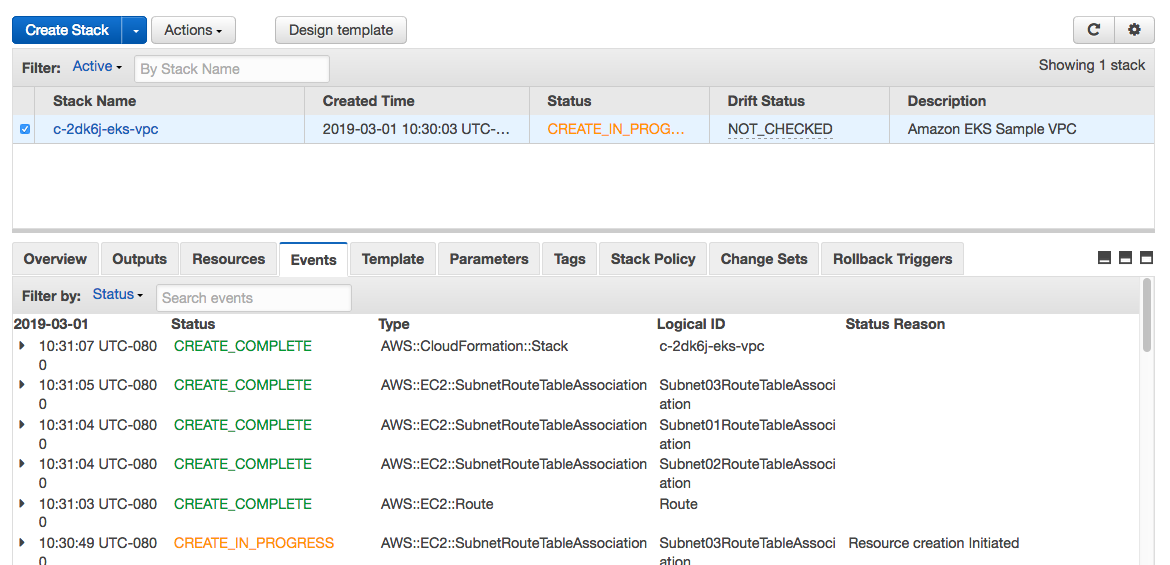
Rancher kicks off the installation by using Cloudformation templates on the AWS back-end. You can monitor these detailed events by going to the Cloudformation console, as shown in the screenshot below:
You can also visit the EKS console and verify that a cluster is being created, as in the screenshot below:
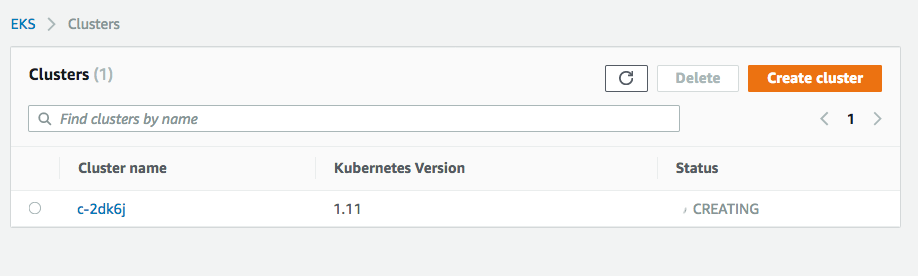
Once the cluster has finished provisioning, you should see the status in the Rancher console turn to “Active:”

Testing Your EKS Cluster by Deploying an nginx Pod
Now you’re ready to deploy pods/containers on the cluster. To get started, try deploying an nginx pod. Click the drop-down menu located at top-left corner and select the ‘Default’ project.

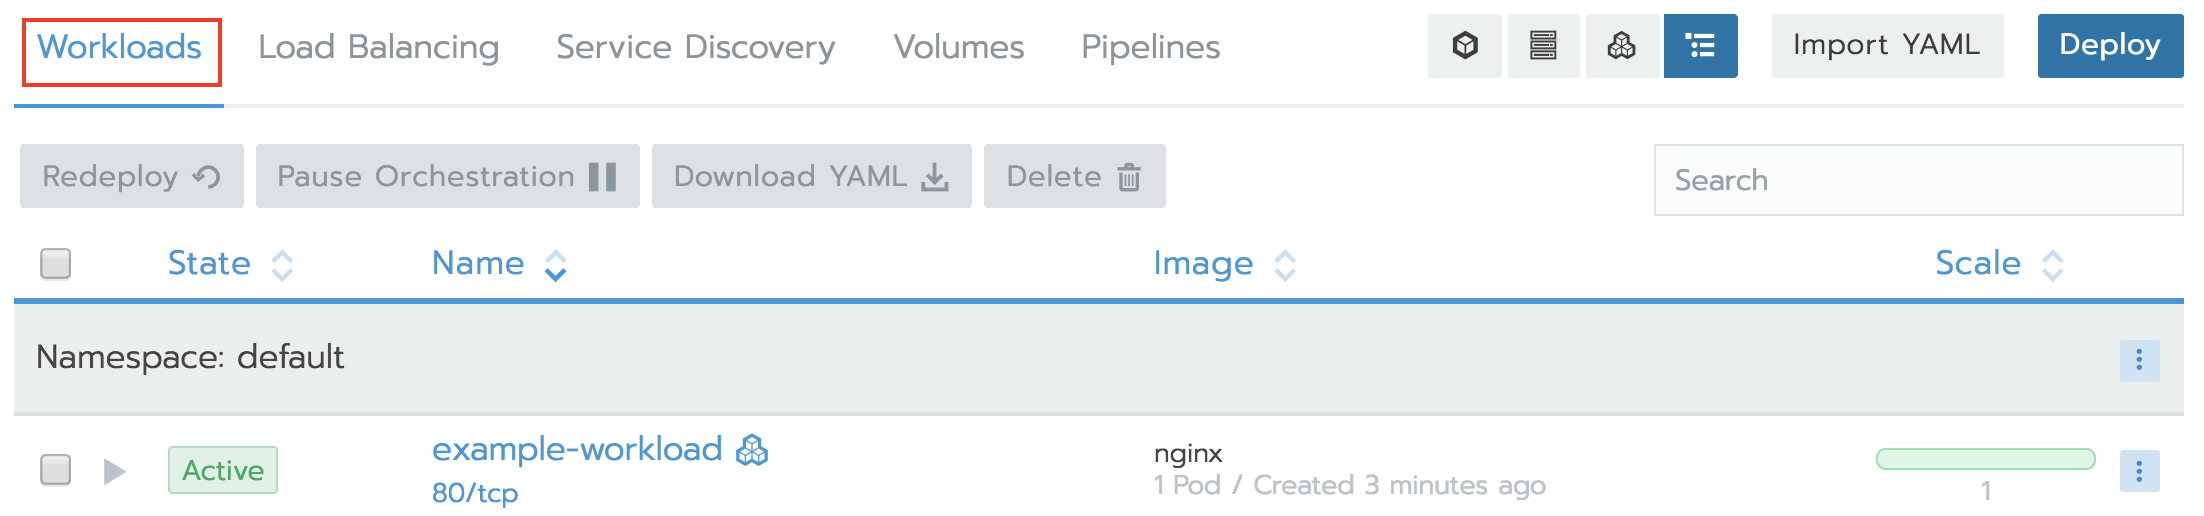
Next you will see the workload screen, click Deploy button located at the top-right corner of the screen:

Now give your workload a name and specify the “nginx” Docker Image. Click Add Port, publish the container port “80” and specify listening port “80,” and specify a Layer-4 Load Balancer. This will allow you to access your nginx instance over the public internet.

Click Launch and wait for the workload and load balancer to finish provisioning by checking both the Workloads and Load Balancing tabs for status until they show ‘Active.’

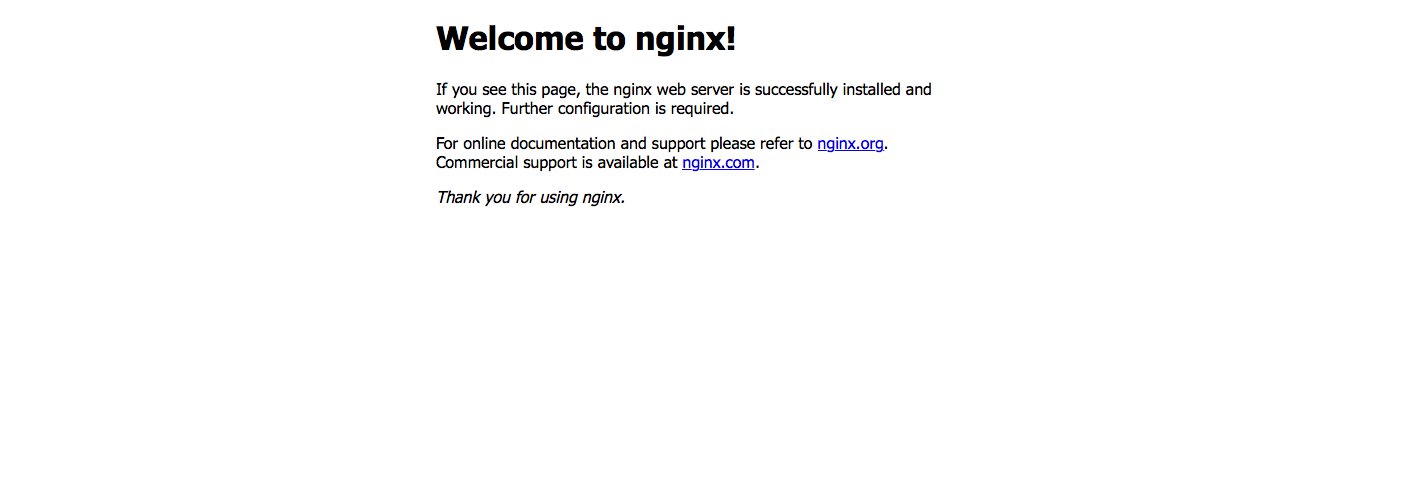
Once the load balancer has finished provisioning, a clickable link will appear beneath the workload. Note that AWS will create a DNS entry for this EKS cluster, which may take several minutes to propagate. If you get a 404 error after clicking the link, wait a few more minutes for the Elastic Load Balancer DNS record to be updated, and try again.
Clicking the link ‘80/tcp’ should take you to the default nginx page:

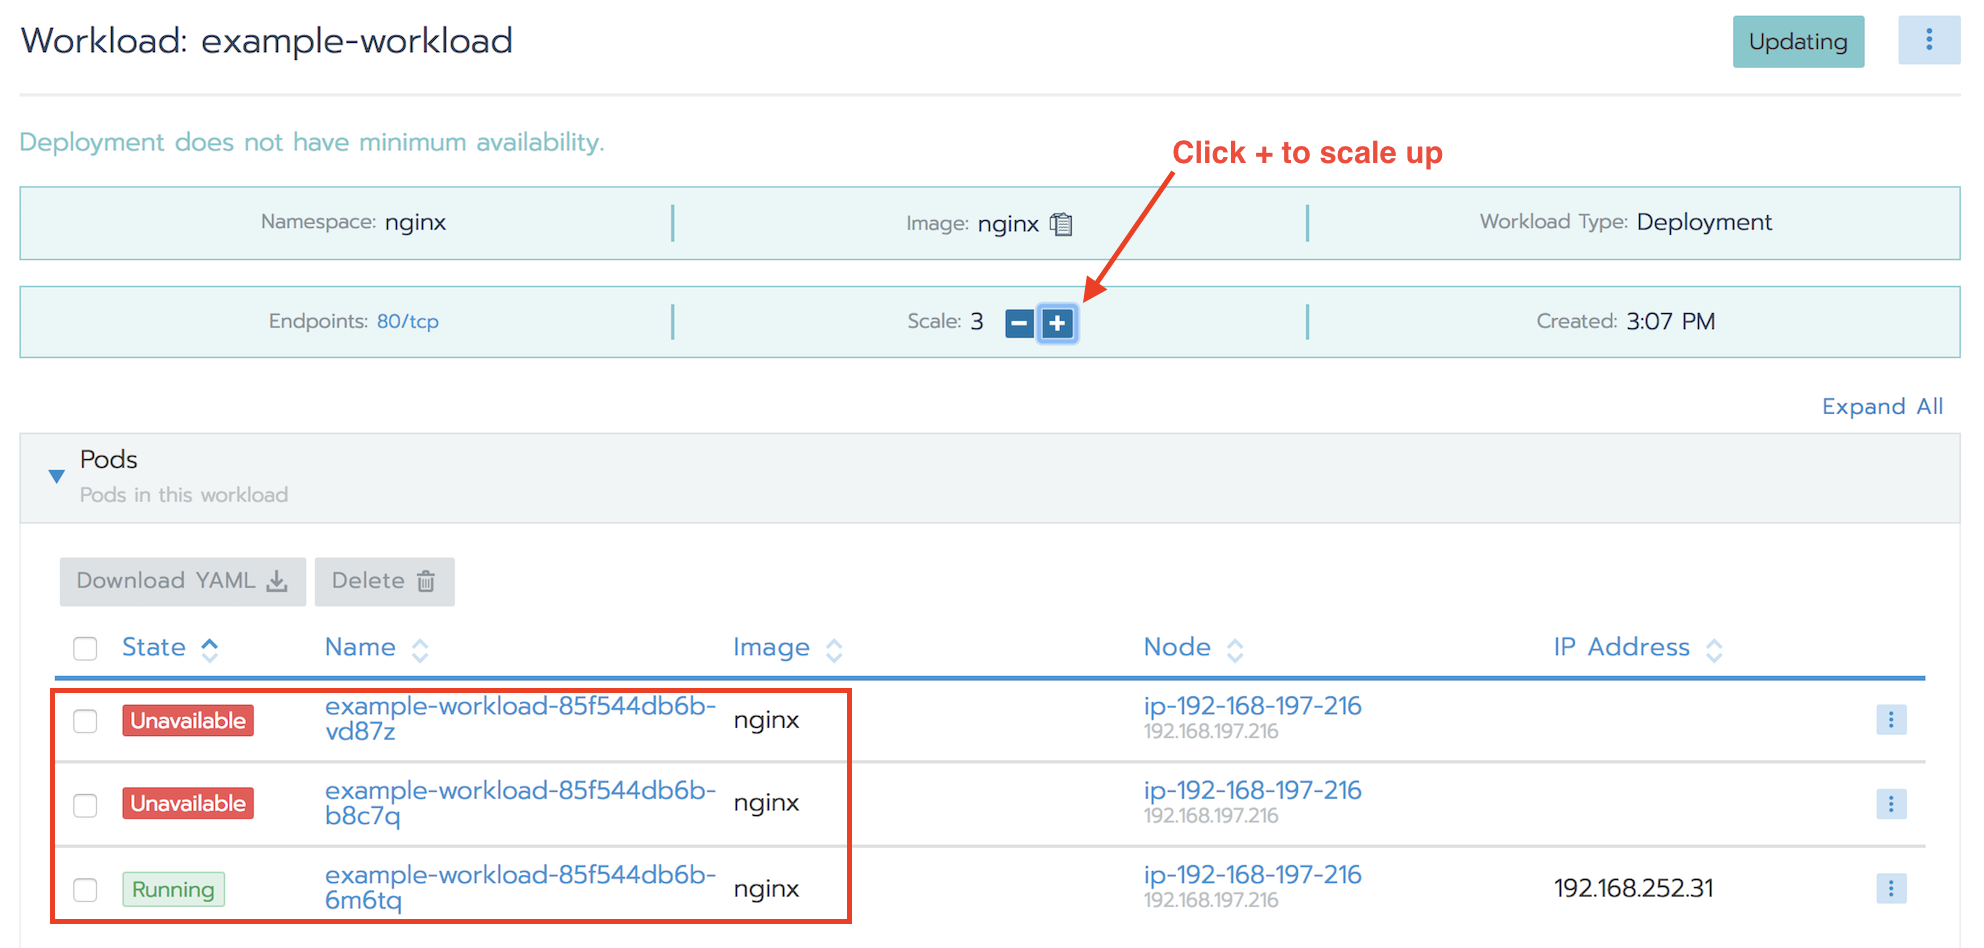
Scale up your nginx deployment
You can scale up the number of containers to adjust to workload spikes very easily. Just select the workload in the default project, and click the +/- signs to scale up and down the deployment to accommodate your workload dynamically:
Deploy a Sample Project to Track the Real-Time Data of NYC Citi Bike
Now let’s make this demo a bit more fun by deploying a Rancher project to track the ridership of NYC Citi Bike in real-time. You will provision three pods:
- Data ingestion pod: This pod contains a script to periodically query the real-time data published by Citi Bike in json format and save it to an InfluxDB database via API.
- Time-series DB pod with InfluxDB: This pod has InfluxDB installed to handle real-time data trickling in from Citi Bike site. InfluxDB is a popular open-source database optimized for query and search time-series. Additionally the pod also has a local mount point where the AWS EBS gp2 storage class is used to provide the persistent volume needed to archive the historical data.
- Grafana pod: This pod uses Grafana to visualize the data that was collected.
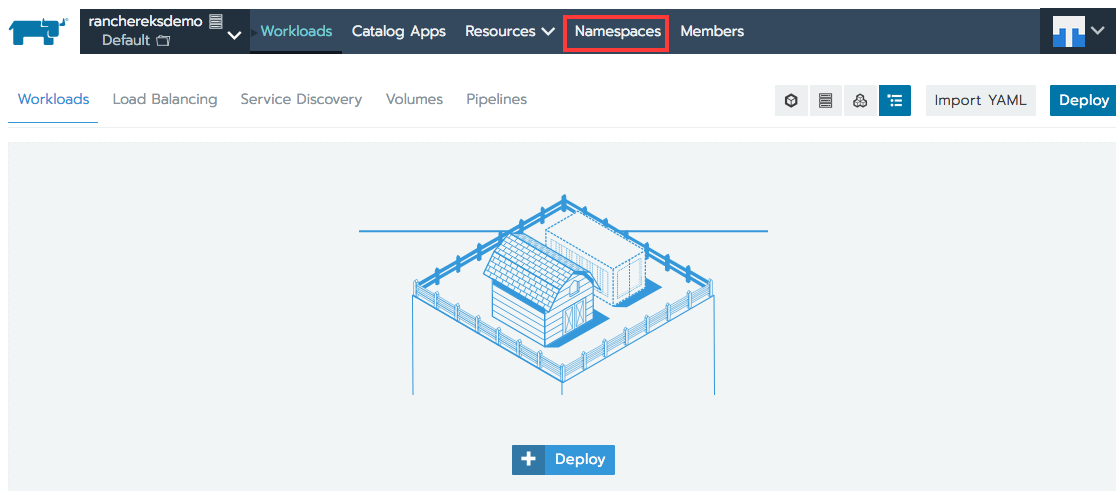
Your next step is to create a Kubernetes namespace for your project. Select Default namespace from the drop-down menu located at the top-left corner, then click Namespaces. Click Add Namespace and type ‘ns-citibike’, then hit Create.
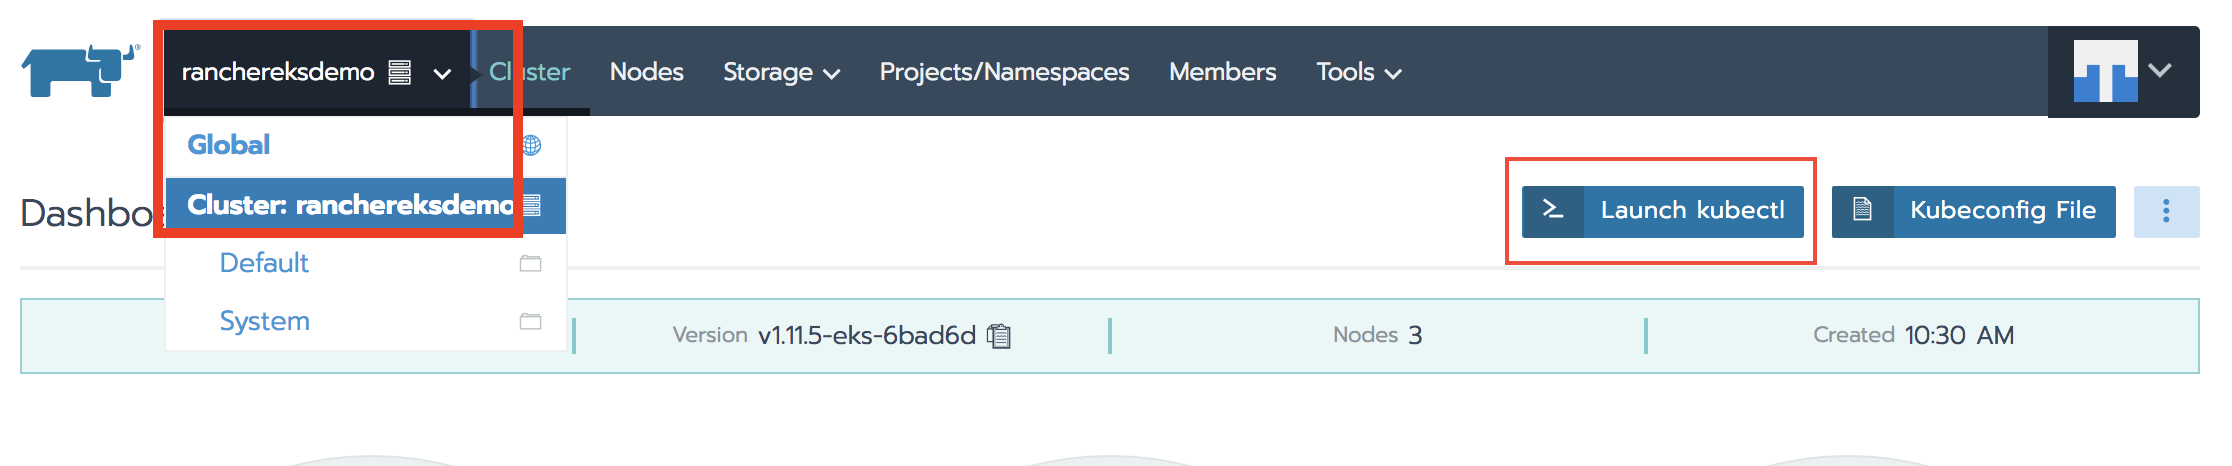
Go back to the cluster console by selecting the drop-down menu in the top-left corner, screenshot below. Then select Launch kubectl.
In the shell window, type ‘kubectl get nodes -o wide’ to see the worker nodes status; they should all be ‘Ready’.

Now issue the following command to launch the project:
curl 'https://raw.githubusercontent.com/aws-samples/managing-eks-clusters-with-rancher/master/run' | bash
Feel free to download the script to see the steps involved. I have added comments in the scripts for you to review.
Wait a couple of minutes for the script to finish executing.

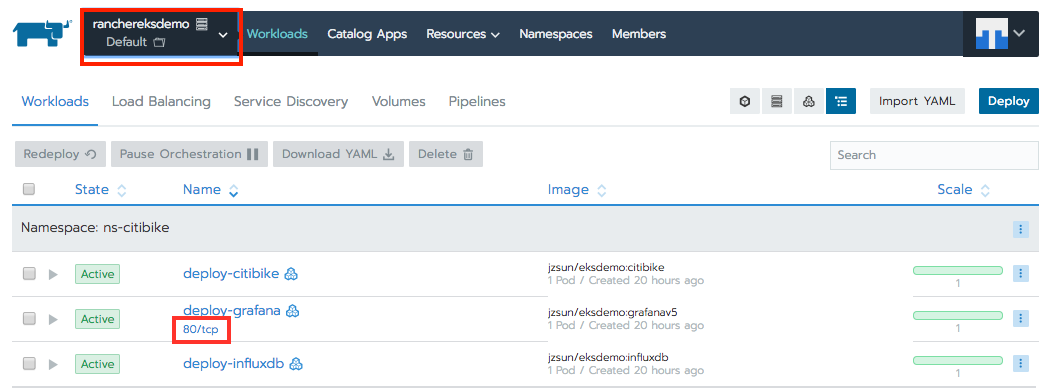
In the default project, you should see that the three pods have been provisioned. Wait a few more minutes for the DNS record of the load balancer to be updated before clicking 80/tcp to go to Grafana:
On the Grafana login page, type in ‘admin’ for username and ‘admin’ for password to log in.
Now you’re ready to configure the dashboard to visualize the data.
Configure Data Source
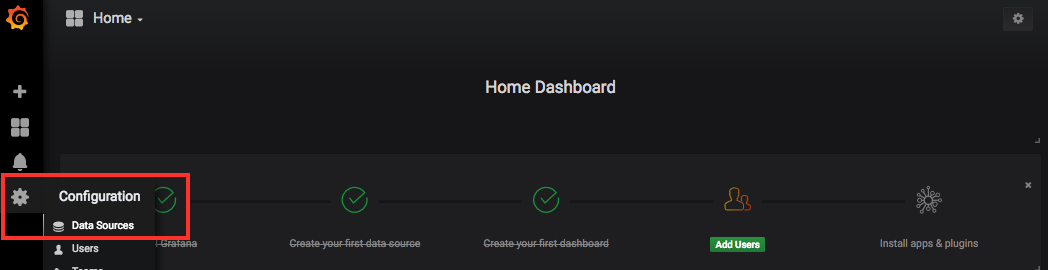
Select the gear icon on the left pane, click Data Source, then click + Add data source located on the right side of the window:
Fill in the name of the data source (e.g. citibike), select influxDB as the type, fill in ‘coordinates’ as the Database name:
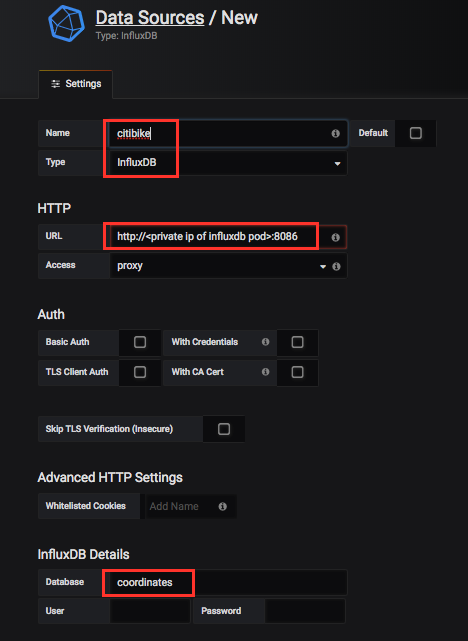
Then, in the URL field, find the private IP address of the influxDB pod and fill in http://<ip of influxdb pod>:8086.
You can find the private IP address of influxdb by going to the default namespace page in Rancher and click the deploy-influxdb pod:
Click Save and Test to add the data source.
Import Dashboard Template
Download this dashboard template and save it to your desktop:
In Grafana, click + on the left pane and select Import. Click Upload json File located on the right side of the window, and select the template you just downloaded to your desktop:

Now you can start to track the real-time status of every Citi Bike station throughout NYC. You can select a bike station ID and look at its historical demand trend as shown in the line chart. You can also specify a time window to track the long term demand trend of a station. The current bike capacity of all stations is also shown in a map which is color coded; green means there are more than 30 bikes available, while red indicates that numbers of bikes are running low:
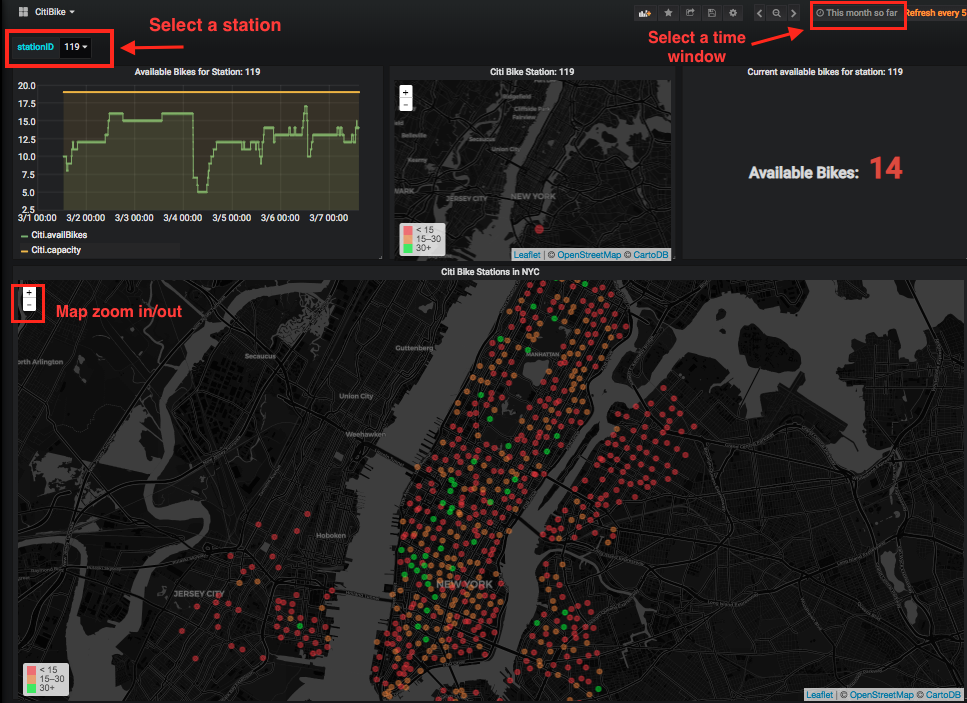
City planners could use this information to grow/shrink bike station capacities to better serve the New Yorkers who are relying on bikes for their daily transportation needs.
Integration with AWS EBS for Larger Storage Capacity Needs
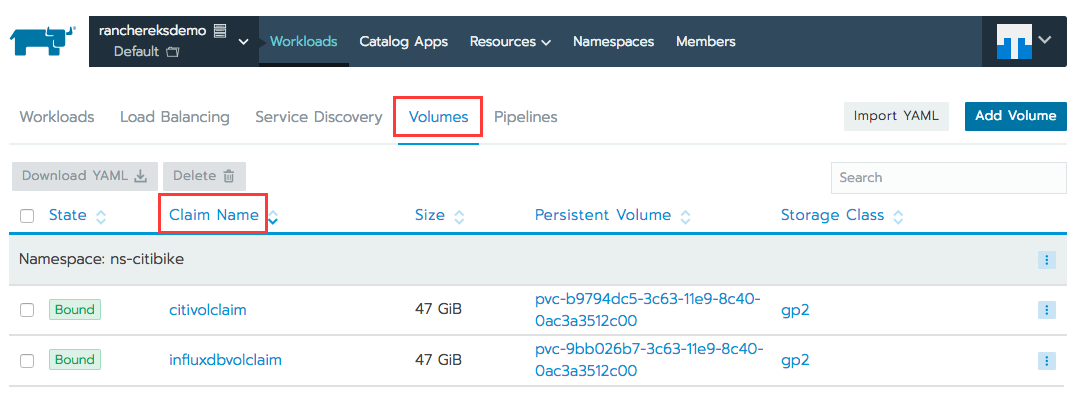
When launching the project command above you have also created two persistent volumes (50GB each) using the gp2 storage type in EBS for InfluxDB and the ingestion pods, as the containers’ local storage is not big enough to hold the data that keeps trickling in. To see these persistent volumes and their persistent volume claims, go to the default namespace and select the Volumes tab at the top.
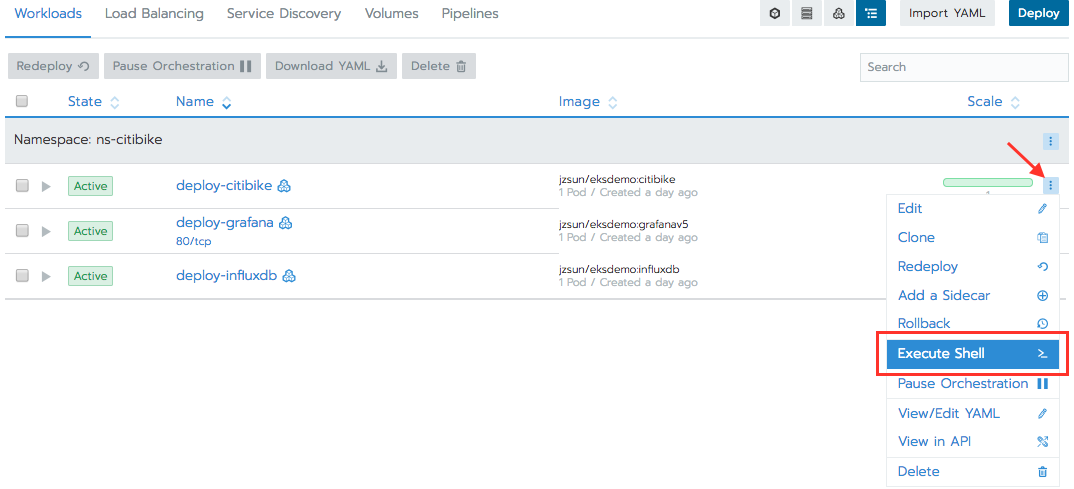
Now have a look inside the ingestion pod by clicking the Workloads tab, then click the ‘deploy-citibike’ container’s drop-down menu located at the far-right side of the window, and select Execute Shell.
Now you are at the container’s shell prompt. Type ‘mount | grep citibike’ and you will see that a volume device /dev/xvdxx is mounted on /citibike with the ext4 filesystem.
Do a ‘ls /citibike’ – you will see that all the raw json files are archived there.

Conclusion
In this blog post, you have learned how to use Rancher to create and manage an EKS cluster. You have also successfully deployed a sample project to track the real-time geospatial data for Citi Bike in NYC using popular open-source tools such as Grafana and InfluxDB which are containerized.