AWS Physical AI Blog
Apple Vision Pro and AWS Amplify Part 2 – Storage
Continuing our series on Getting Started with Vision Pro on AWS, in this post we show how you can use AWS Amplify to quickly get started building with the Apple Vision Pro using Xcode and Amazon Web Services (AWS).
This is Part 2 of the three part tutorial series. If you have not previously followed Apple Vision Pro and AWS Amplify Part 1 – Authentication, I recommend going back and following that before continuing.
This second post is going to focus on storage of 3D model assets, and associated logic. You will use Amplify Storage, which leverages Amazon Simple Storage Service (Amazon S3) under the hood. You will also learn how to create logic to facilitate the download and instantiation of those 3D assets, at runtime, into your Vision Pro application. Let’s dive in.
Add Amplify Storage
Step 1. Configure Amplify Storage Locally
You can find more information on Amplify Storage at the Amplify Dev Center.
- Open a terminal in your project directory and execute command
amplify add storageand choose Content (Images, audio, video, etc).
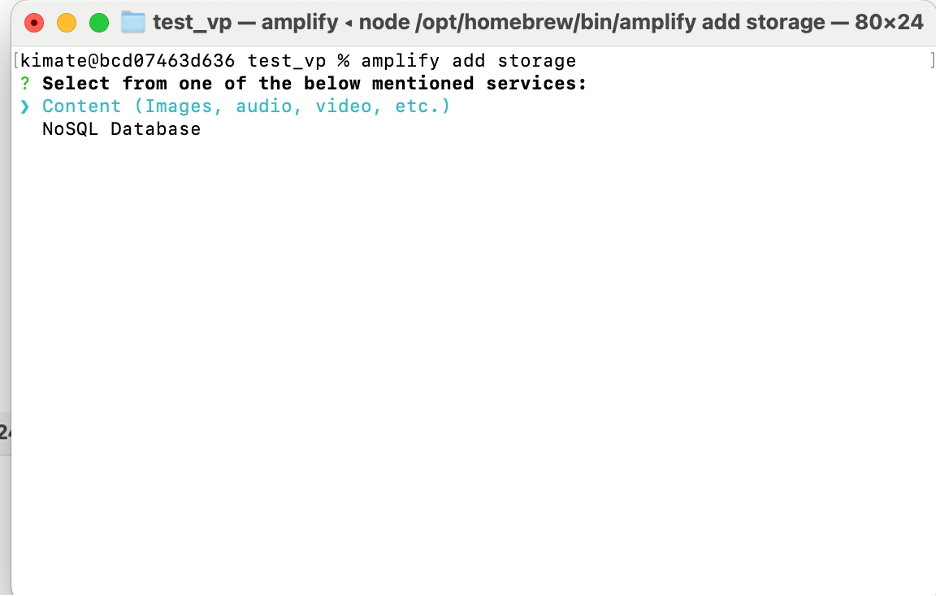
Add amplify storage: choose Content option.
2. Provide a friendly name for these new resources. I am using visionprodata.

Add amplify storage: provide resource name.
3. Provide an Amazon S3 bucket name. I am using vision-pro-amplify-gs.
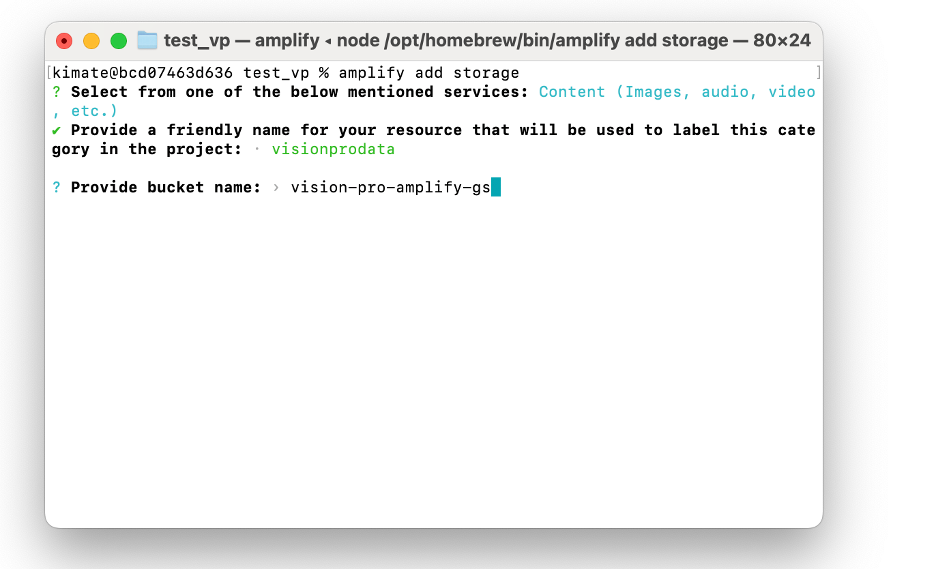
Add amplify storage: provide S3 bucket name.
4. Choose Auth users only. This will ensure that only securely authenticated users can access these resources.
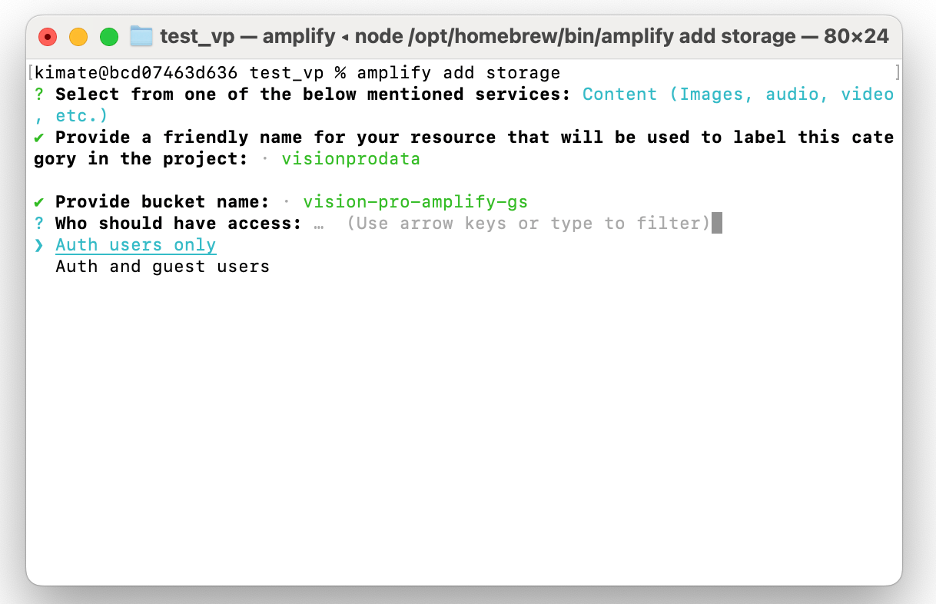
Add amplify storage: configure access settings.
5. Choose which permissions you would like to allow. This will allow authenticated users to create, read, update and delete content within these resources. I chose all three, create/update, read and delete.
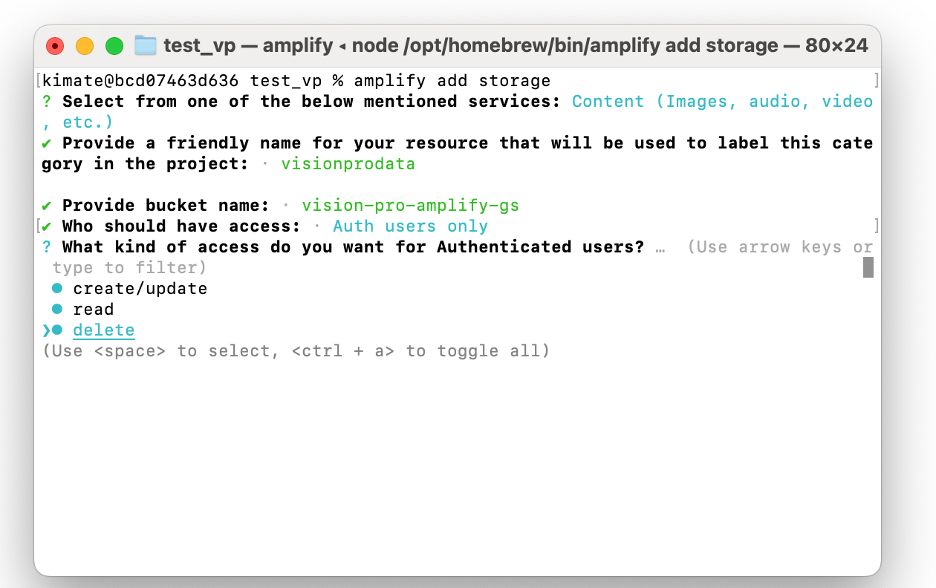
Add amplify storage: specify CRUD logic set.
6. Say no to the Lambda Trigger for now.
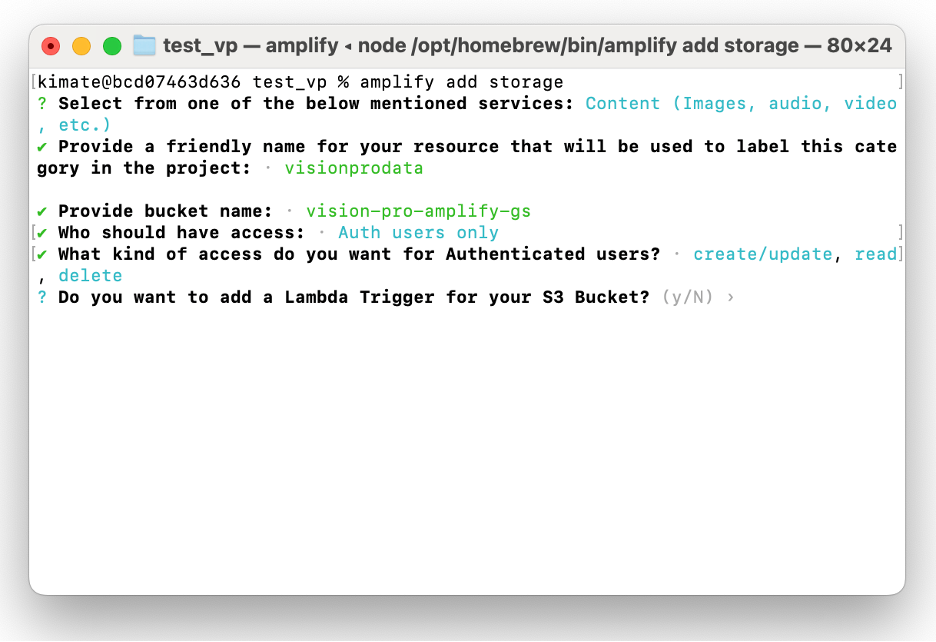
Add amplify storage: decline using Lambda Triggers.
7. This was the last step in the Amplify Storage local configuration process. Your output will look similar to this.
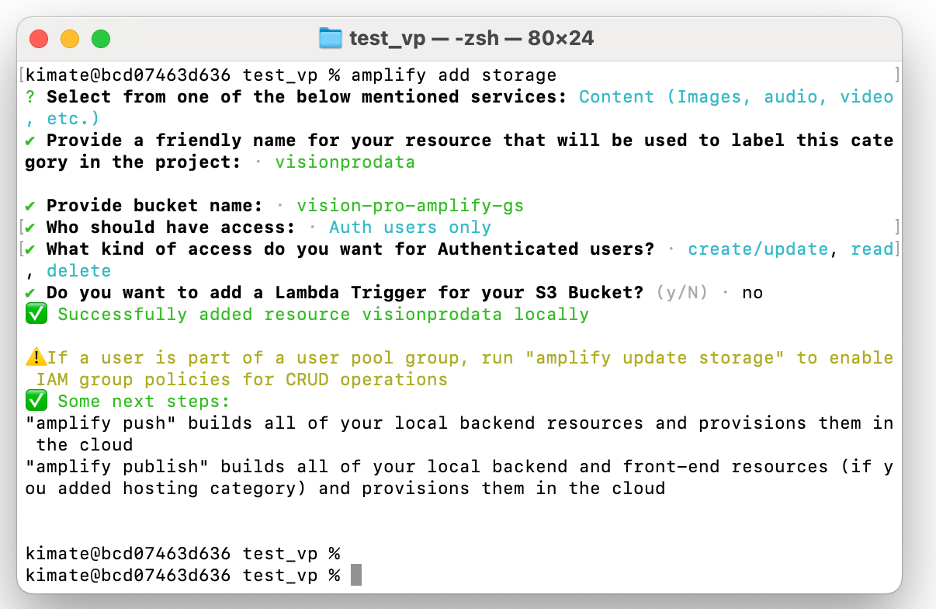
Add amplify storage: complete setup.
Step 2. Deploy Amplify Storage Configuration to AWS
- Deploy this local configuration to your AWS account to provision the remote resources. Execute command
amplify push.

Add amplify storage: deploy local configuration to AWS account.
2. You will see a deployment process output like the above. Input Y (for Yes) to confirm and move forward with the deployment.
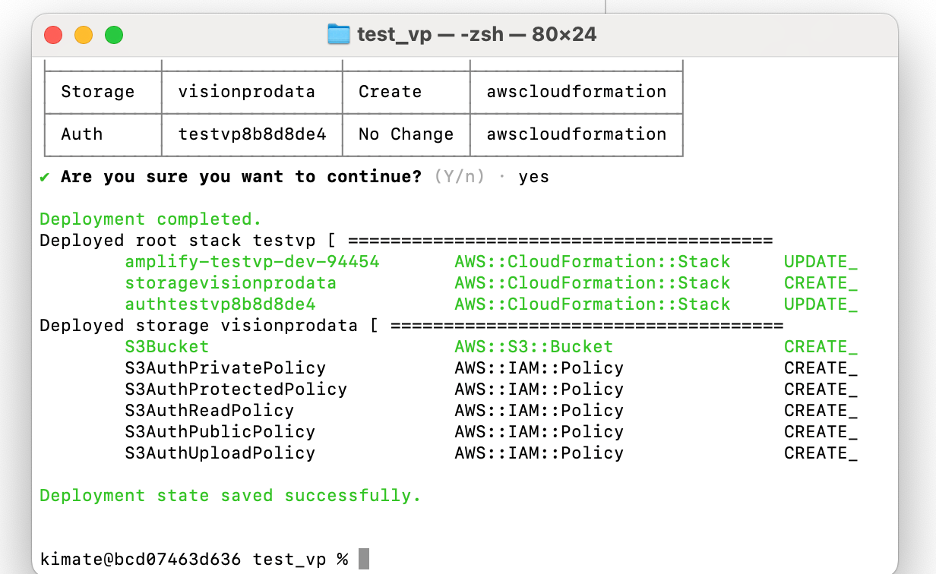
Add amplify storage: successful deployment message.
Your resources will now begin to deploy. You will see progress in the terminal, and eventually a Deployment state saved successfully message. This confirms that everything worked correctly. You are ready for the next step!
Step 3. Implement Xcode Storage Logic
- Let’s check that you have at least the following code in your App entry point file and the required library dependencies. My entry point file is called
test_vpApp.
import Amplify
import AWSCognitoAuthPlugin
import AWSS3StoragePlugin

@main
struct test_vpApp: App {
    var body: some Scene {
        WindowGroup {
            ContentView()
        }
    }

    init() {
        do {
            try Amplify.add(plugin: AWSCognitoAuthPlugin())
            try Amplify.add(plugin: AWSS3StoragePlugin())
            try Amplify.configure()
            print("Amplify configured with Auth and Storage plugins")
        } catch {
            print("Failed to initialize Amplify with \(error)")
        }
    }
}
2. Create a new Swift file for your S3 tasks. Right click on your ViewModel folder and choose New File.
3. Choose Swift File as the file type to create.
4. Name your new Swift file. We named ours StorageViewModel.
The logic that will be held in this class will allow you to upload files, download files, delete files and execute other S3 tasks. You can find more information and code snippets to facilitate this at Amplify Storage within the Amplify Dev Center.
Step 4. Upload a 3D model into Amplify Studio
In order to download a 3D model from S3 into the Vision Pro, you need a 3D model in storage. Lets put one there.
- Go to AWS Amplify in the AWS Management Console, select your application and choose Launch Studio.
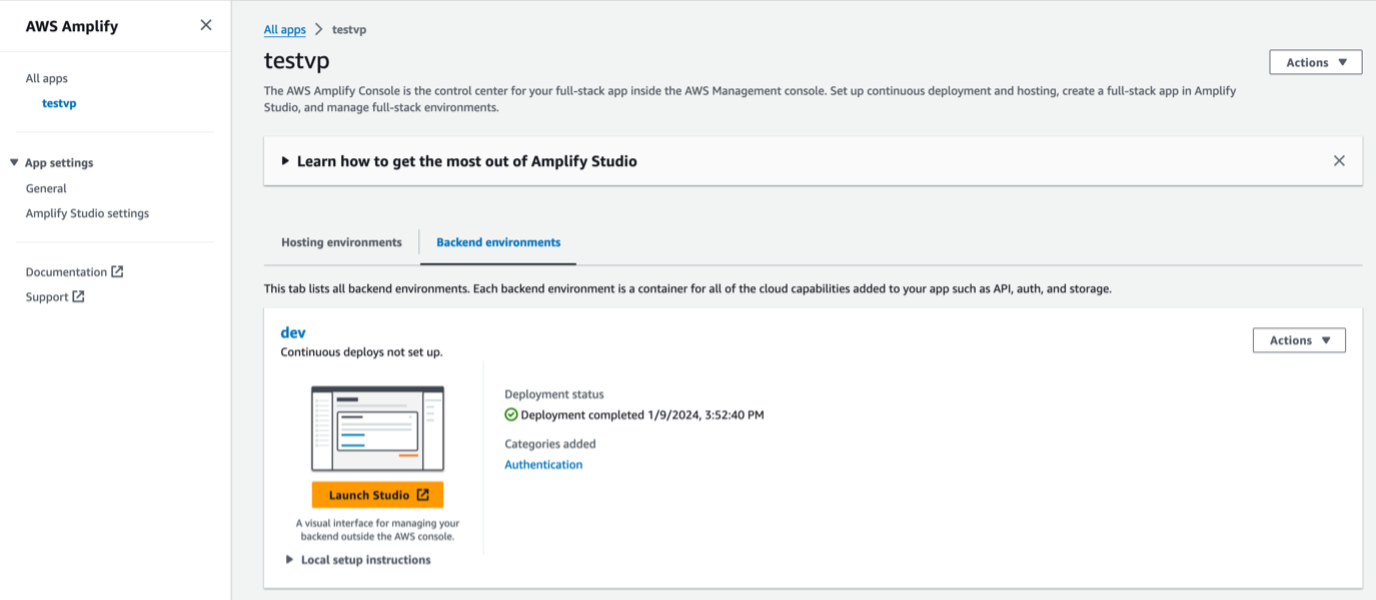
Launch Amplify Studio to upload 3D model.
2. Open the Storage page inside Amplify Studio.
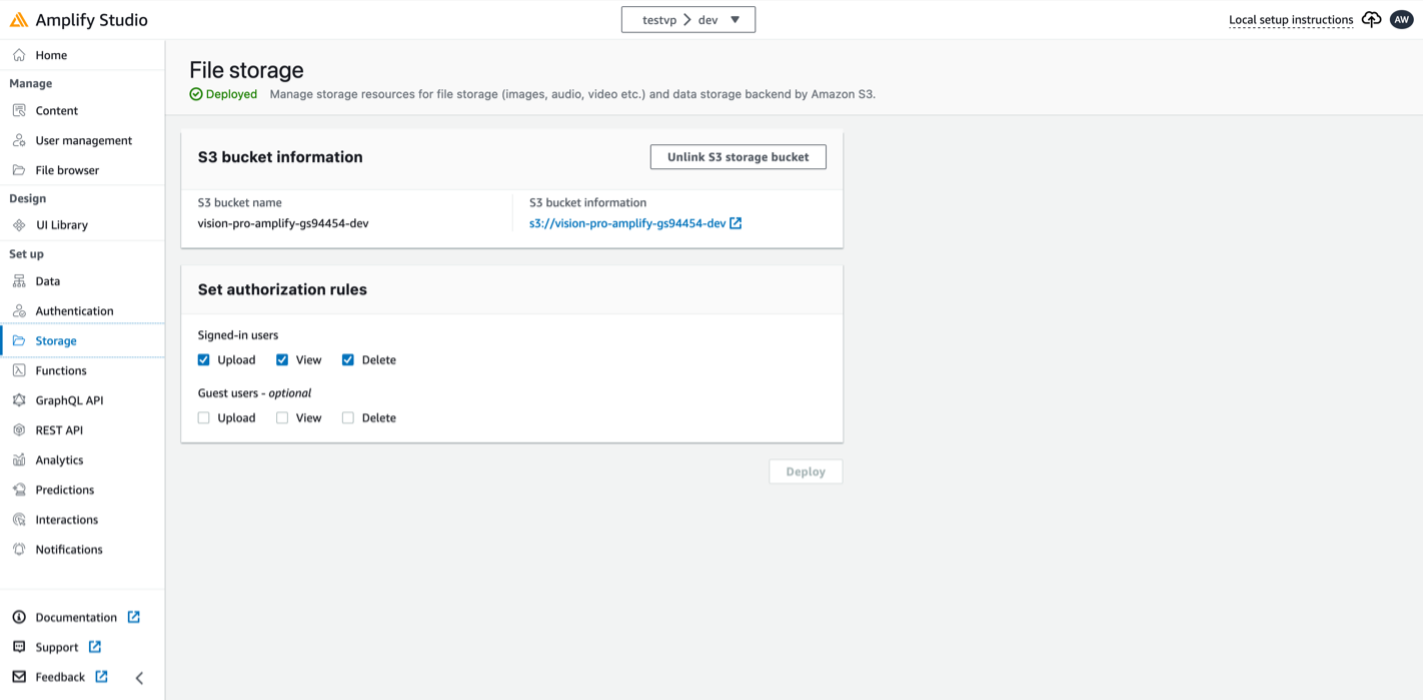
Amplify Studio Storage page.
3. Choose the S3 bucket information link to open the associated S3 bucket.
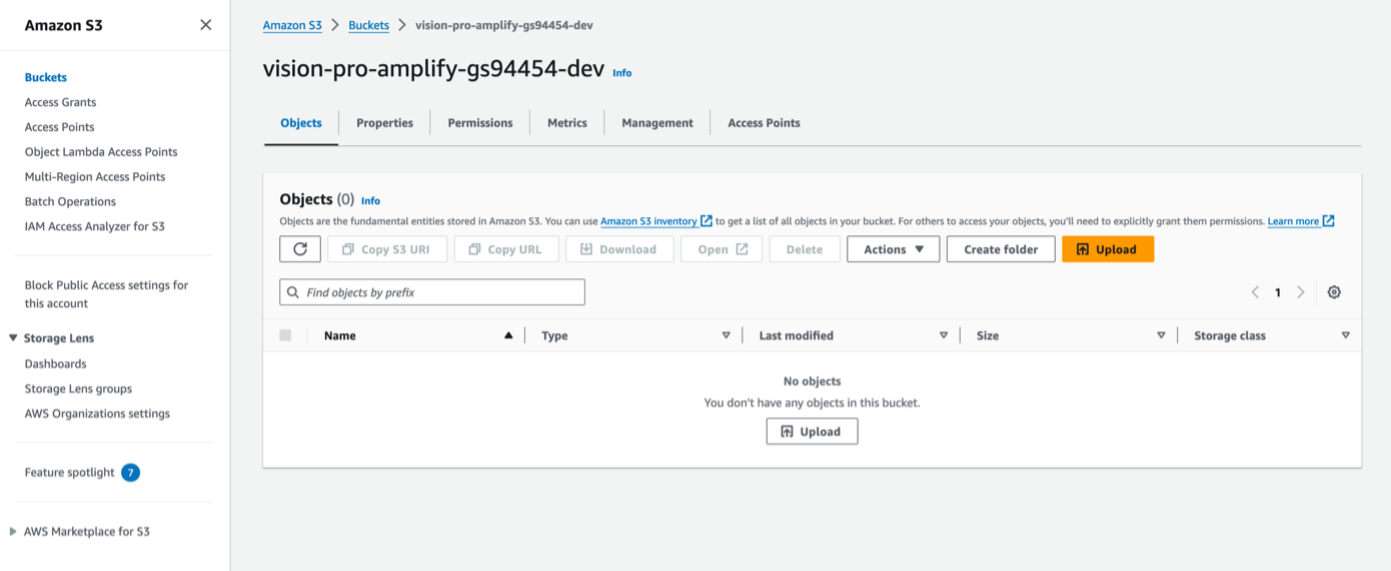
Amazon S3 bucket that was created by Amplify Storage deployment.
This S3 bucket location is where you will upload a 3D model to later use in the Vision Pro. Let’s go grab a 3D model (or multiple) to upload. Apple has sample USDZ (Universal Scene Description Zip) files on their developer website, choosing any of the models will download it to your Downloads folder. Once downloaded, upload it back to that S3 bucket.
Step 5. Download 3D model into Vision Pro
Now let’s go back to Xcode and add the download functionality. There are several ways to add the download functionality including an in-memory buffer, async/await, combine, or triggering lambda functions (doing something when a file is accessed or changed). For this walk-through you will simply download a file and view it using Combine.
- Go to your new
StorageViewModelclass and create a function. Your code will look like this.
import Combine
import Amplify
import Foundation

@MainActor
class StorageViewModel: ObservableObject {
    @Published var downloadedFileURL: URL?
    // this function is for basic file download
    func downloadFromS3(filename:String, bucketName:String) async {
        let downloadToFileName = FileManager.default.urls(
            for: .documentDirectory,
            in: .userDomainMask
        )[0].appendingPathComponent(filename)

        let downloadTask = Amplify.Storage.downloadFile(
            key: bucketName,
            local: downloadToFileName,
            options: nil
        )
        Task {
            for await progress in await downloadTask.progress {
                print("Progress: \(progress)")
            }
        }
        do {
            try await downloadTask.value
            print("Completed")
        }
        catch{
            print("error")
        }
    }
}- Add a breakpoint at line 16.
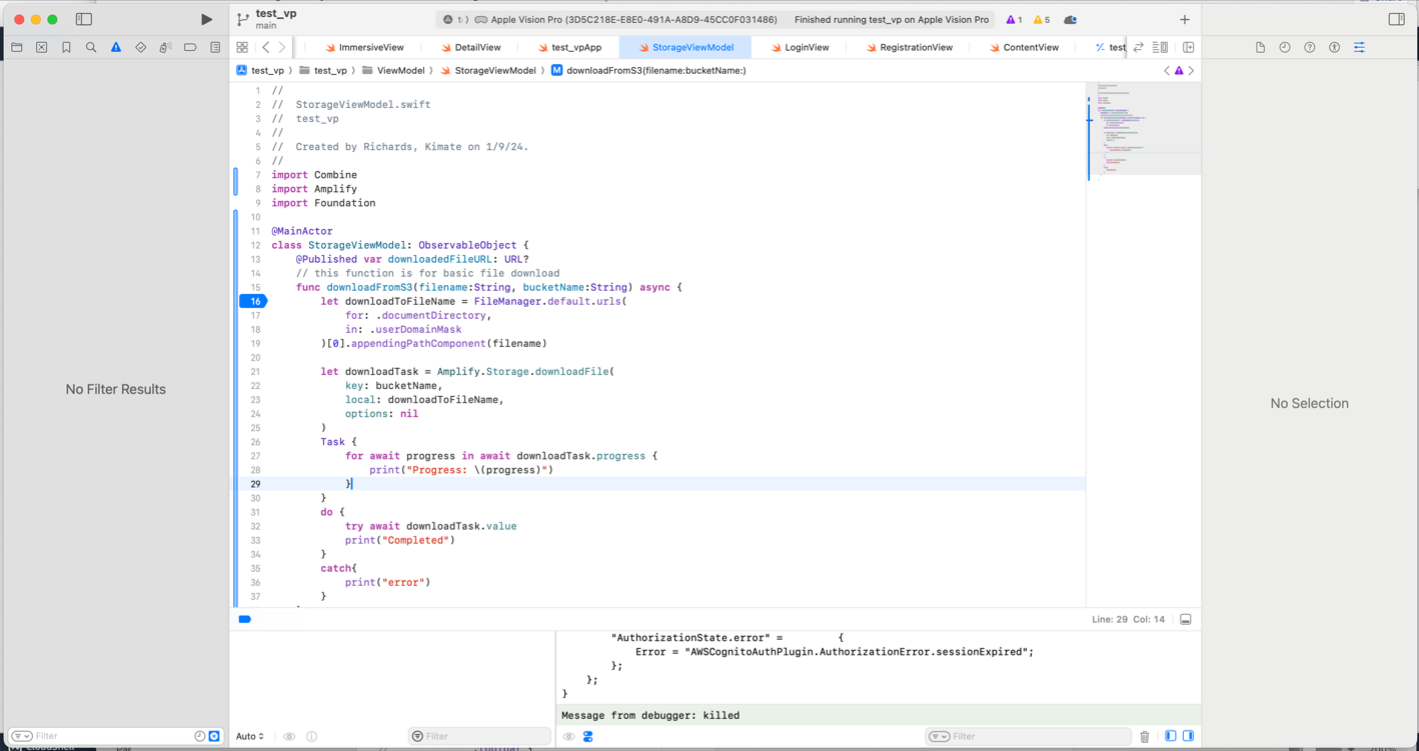
Adding download logic in Xcode.
3. Make the observable object available to the application. You need to add a state object to the application file and an environment object to any subsequent views that are parents of the immersive view. You will notice some additional code implemented below relating to ImmersionStyle and ImmersiveView. The full implementation of this is out of scope for this tutorial, however you can learn more at ImmersionStyle within the SwiftUI docs, as well as at Immersive Spaces.
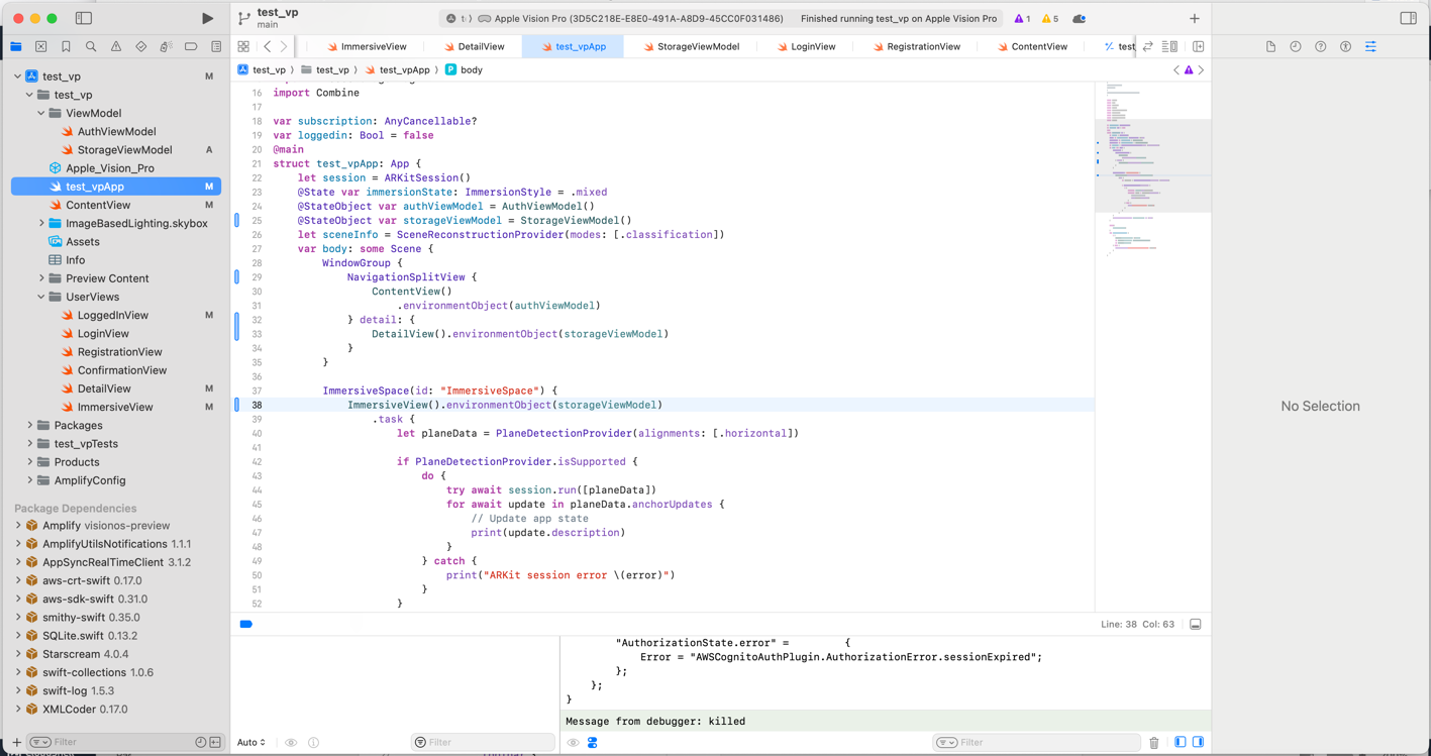
View of Xcode logic to add environment object to view.
4. Login to the application with your username and password.

Login to the Xcode Vision Pro application.
5. Once logged in, you will see your simple home screen.
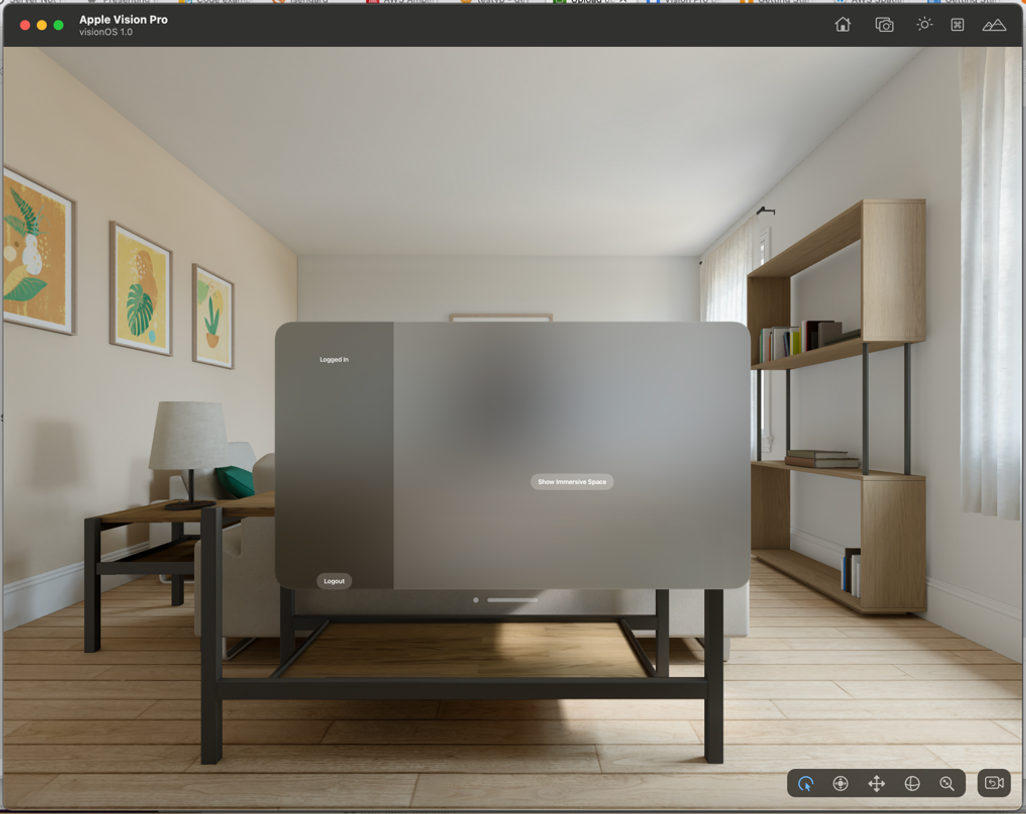
Simple home screen of Vision Pro application after login.
6. After choosing the Show Immersive Space button, the application will connect to AWS to download the 3D models. With the previous breakpoint at the downloadToFileName variable, you will catch the local download file path in Xcode when a 3D model is downloaded.
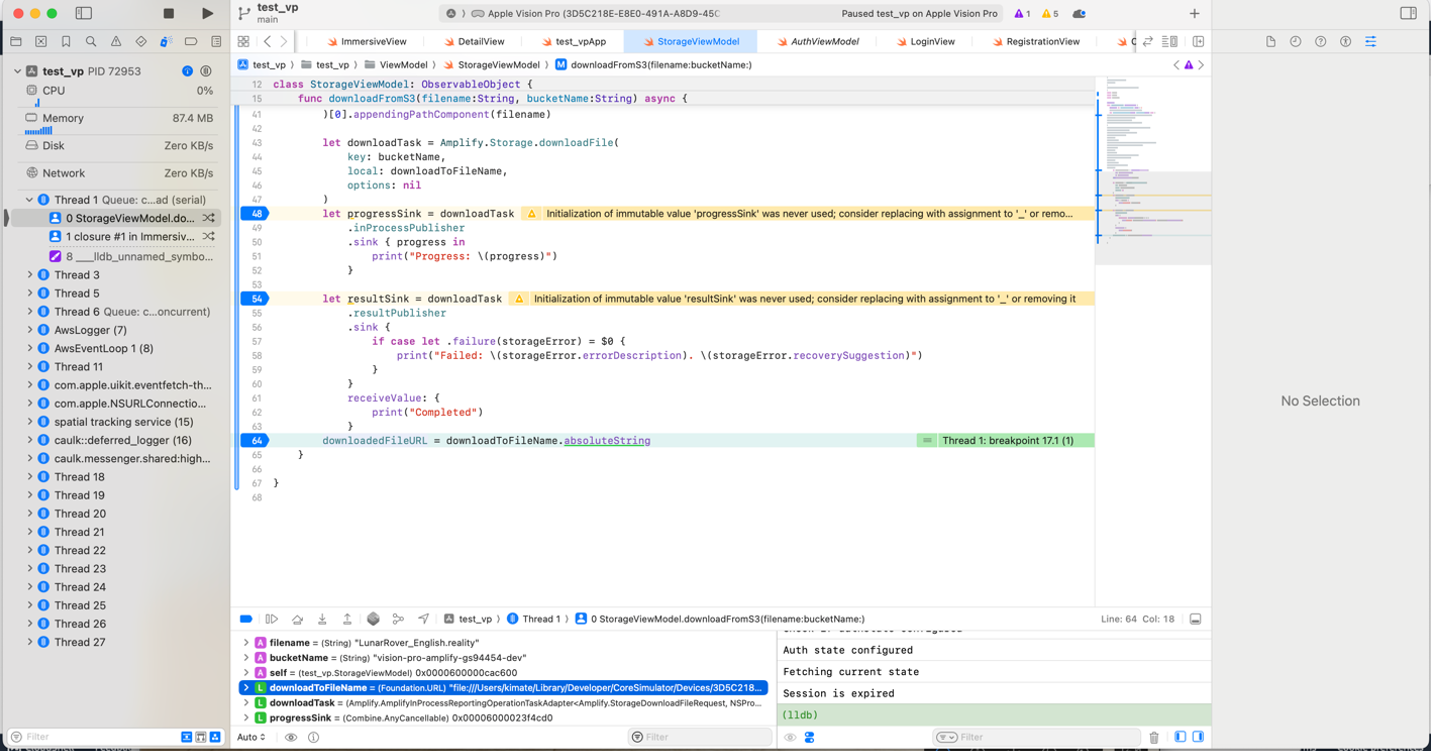
Getting back to 3D model download file path.
After the download and instantiation is complete, you now see the 3D models in your Vision Pro Xcode simulator. You are able to move around the space and interact with the downloaded objects.
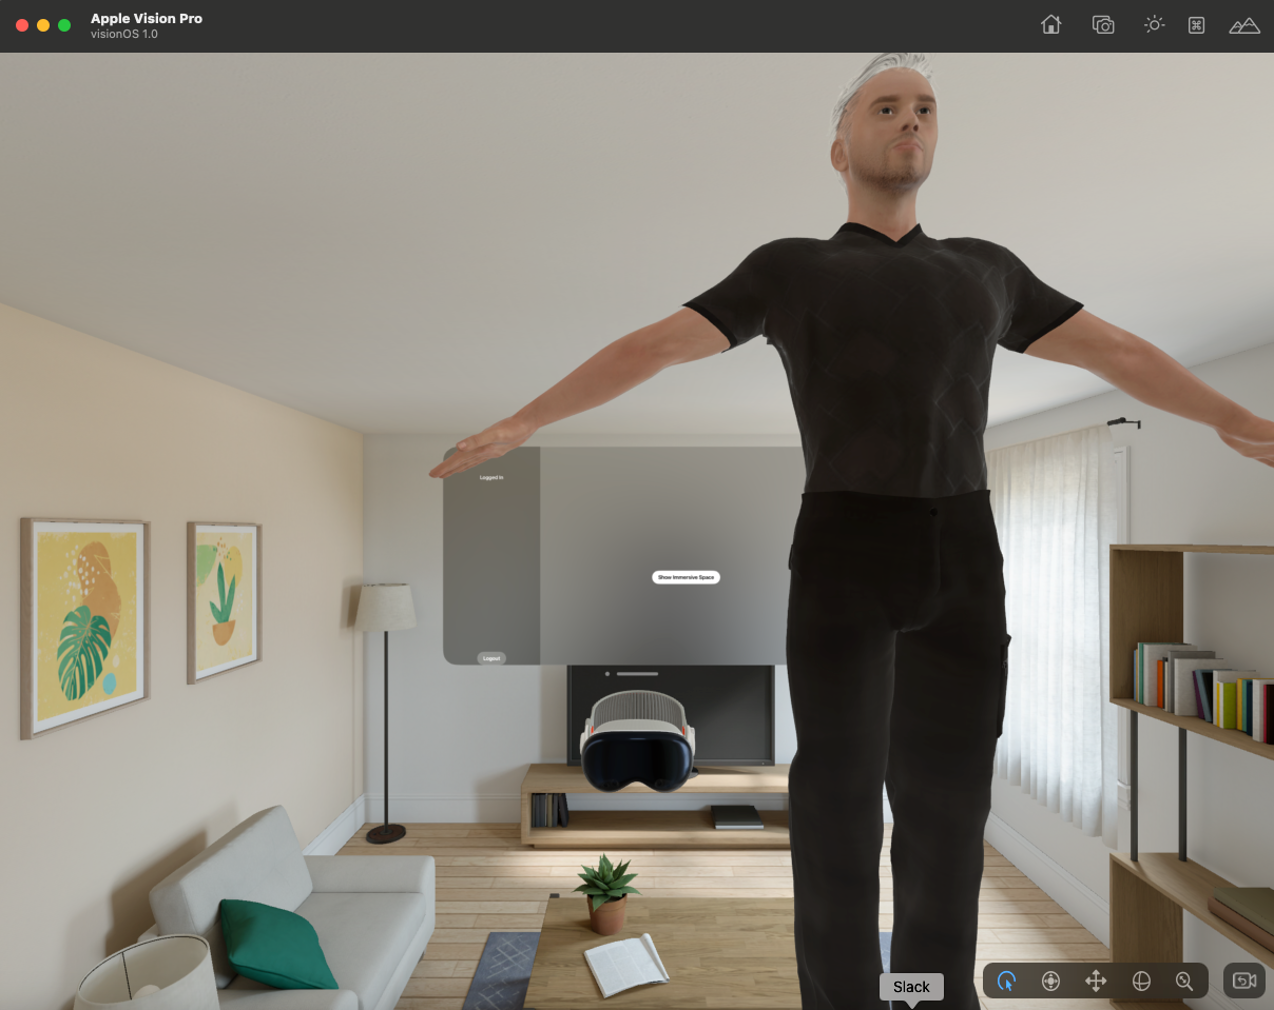
Successfully downloaded 3D models inside the Vision Pro Xcode simulator.
And that’s it for Part 2 of this three part tutorial series! You have successfully used AWS Amplify to authenticate and facilitate runtime 3D model asset delivery into an Apple Vision Pro application. In part 3 you will add a database to store 3D model metadata and create and API to query that metadata from your Vision Pro application.
Asset management is a critical component to immersive applications at scale. When companies need to track and manipulate many 3D model assets, it can become cumbersome to use typical data aggregation techniques. AWS has built and open sourced a solution to help with this 3D model asset management, called the Visual Asset Management System (VAMS). VAMS is a purpose-built, AWS native solution for the management and distribution of specialized visual assets used in spatial computing.