AWS Physical AI Blog
Apple Vision Pro and AWS Amplify Part 3 – Database
Continuing our series on Getting Started with Vision Pro on AWS, in this post we show how you can use AWS Amplify to quickly get started building with the Apple Vision Pro using Xcode and Amazon Web Services (AWS).
This is Part 3 of the three part tutorial series. If you have not previously followed Apple Vision Pro and AWS Amplify Part 1 – Authentication and Apple Vision Pro and AWS Amplify Part 2 – Storage of this tutorial series, we recommend going back and following those before continuing.
This third post is going to focus on the creation of a database and API in order to demonstrate how to associate metadata to your 3D models and pull that data into your Vision Pro application. You will use Amplify to help facilitate this, which will leverage Amazon DynamoDB and Amazon API Gateway under the hood. Let’s dive in.
Datastore and API
Now that you have logged in and downloaded files from the cloud, the next step is to pull information about these 3D models from a database. To continue with a real world use-case, let’s think about some typical metadata information that is associated to 3D models, animation data. Adding animation to your 3D environment can be critical to creating dynamic immersive experiences. It can be important to store 3D model metadata, such as associated animation metadata, into a database in order to query and leverage within your applications downstream.
To take a step back, you can imagine how you might expand on this tutorial past humanoid characters and animations. Your use case could be entirely different. These 3D model assets could be anything and the associated metadata could be any applicable metadata associated to your use case. Maybe the 3D assets are related to automotive, aerospace, architecture, real-estate, or robotics, and the metadata could include thermal properties, structural properties, or material information. You can image how enterprise digital twin and other use cases fit in here. Let’s dive in.
Step 1. Add Amplify API
- Let’s start by adding a datastore from AWS Amplify. You can follow along with the complete documentation at GraphQL API on the Amplify Dev Center.
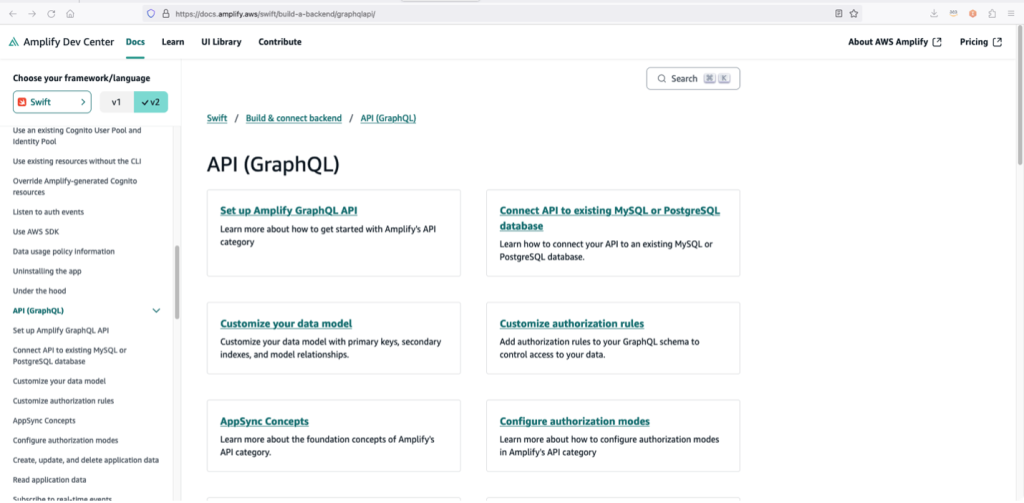
Amplify Dev Center API(GraphQL) page.
You will first add a GraphQL API in your Amplify project.
2. Let’s continue using the terminal starting with command amplify add api, then follow the prompts to configure the default Todo API with a schema of single object with fields. This will create the API and associated files in your Amplify backend.
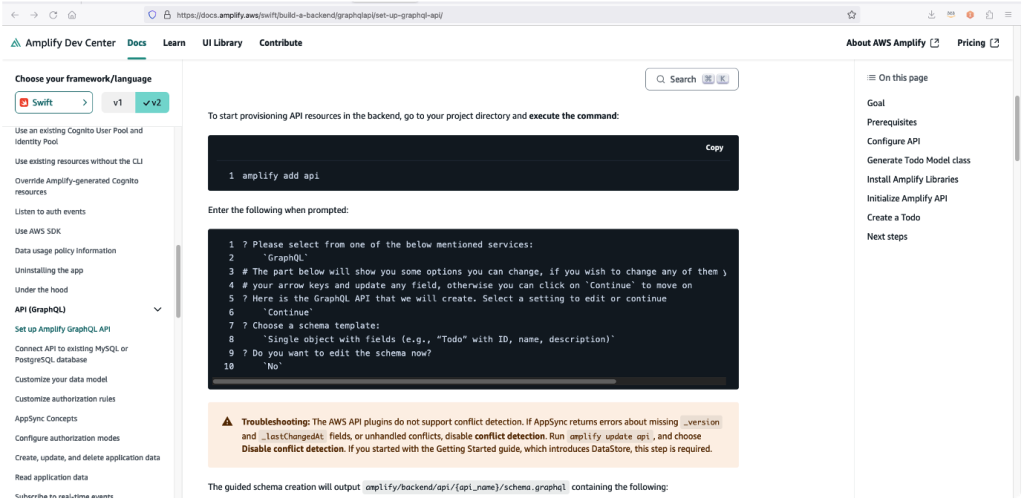
Amplify Dev Center documentation showing how to add an amplify api.
Once your API has been created, lets add a data model for your database. You can learn more about Amplify data models at Data Modeling within the Amplify Dev Center. Launch Amplify Studio, and go to the project you have created.
Step 2. Create and Deploy a Data Model
You are going to create a database that has two data models. One model is a ModelAsset, which represents a 3D model asset, and the other is an AnimationResource model. As you can imagine, the Model Asset will hold information about the 3D model asset, while the Animation Resource holds information about the associate animation. We will then be able to tie your Animation Resources to your Model Assets. This will allow us to create a library of these Model Asset items and associated animation metadata items.
- Choose Create data model. If you don’t see this button, in left navigation panel you can choose the Data tab.
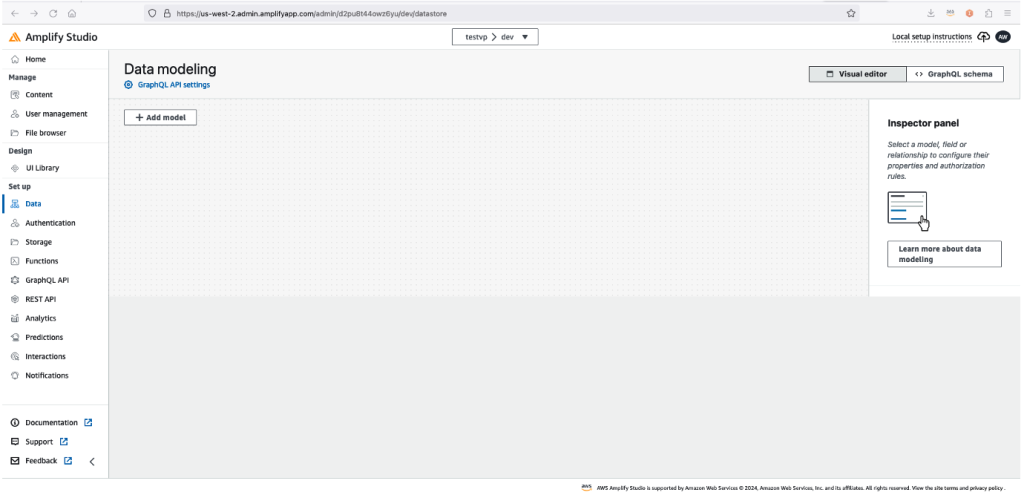
Amplify Studio Data model tab
Let’s give an example of what this metadata could be used for downstream. In your Vision Pro app, you will be able to check if a specific 3D model has any associated animation data. If it does, you can download it and leverage it in your application. For example, the human character that you downloaded in Part 2 of this tutorial series. That character could have been selected from a dropdown list in your Vision Pro application, at which time all animations could have be downloaded with it, as well as any other associated assets like audio files, voices, accessories, etc. To keep it simple, lets create one relationship between two models.
2. Choose Add model and add a few attributes, for the purposes of this walk-through the model only needs to have limited values. You can use the key value pairs seen below if desired.
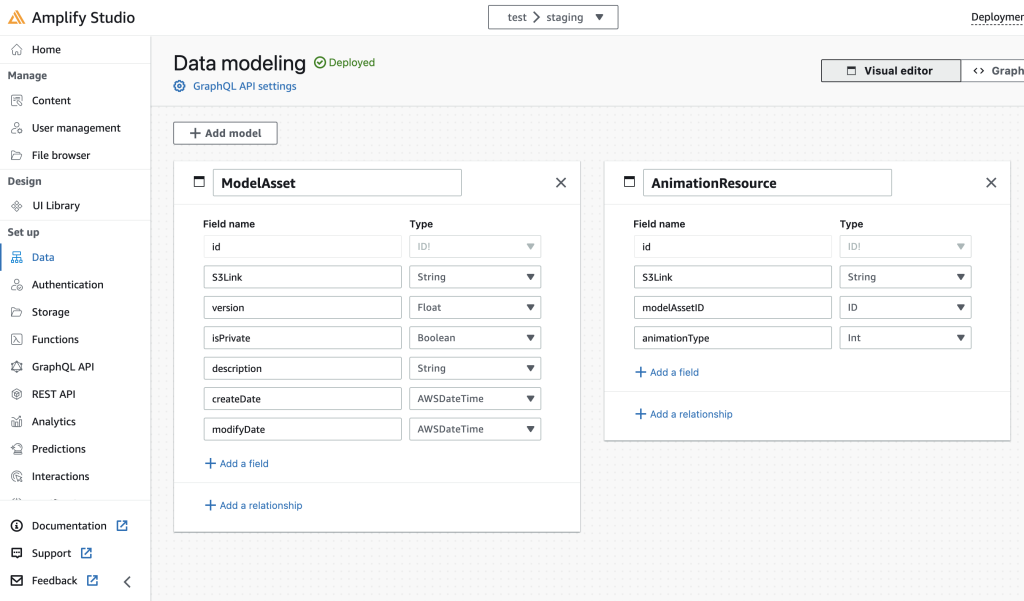
Data model configuration in Amplify Studio
3. Now let’s add a relationship between the models. On the Model Asset data model, choose Add a relationship.

4. Choose AnimationResource from the Select related model dropdown. You will notice that choosing the child relationship yields the correct one ModelAsset to many Animation Resources.

5. Choose Save, you will notice now that a relationship is described in the data model of ModelAsset.
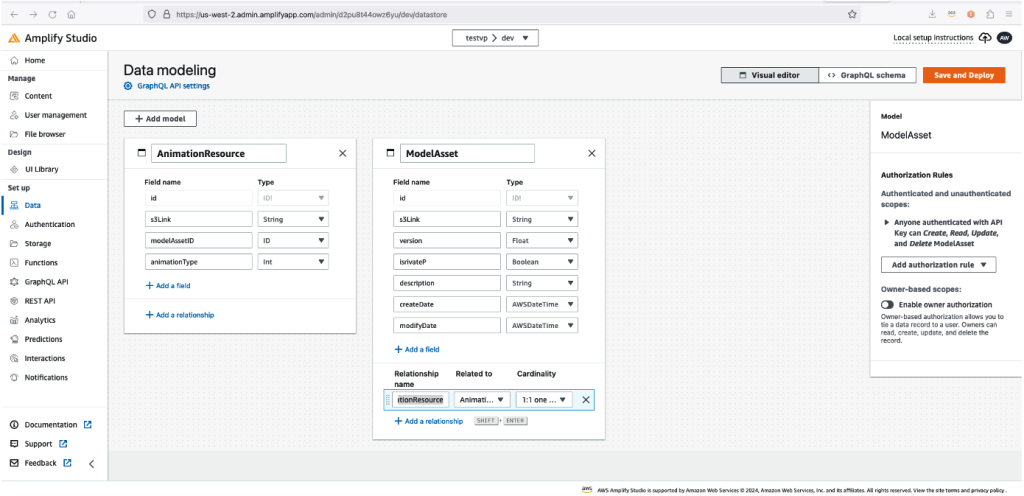
Add data models in Amplify Studio
On the right you can see the authorization rules for the model that you have selected. This allows control over who has access to the model and permissions to read, write, update and delete items. Let’s skip this for simplicity.
6. Choose Save and Deploy, you will see a confirmation screen.
7. Choose Deploy and wait until the deployment completes.
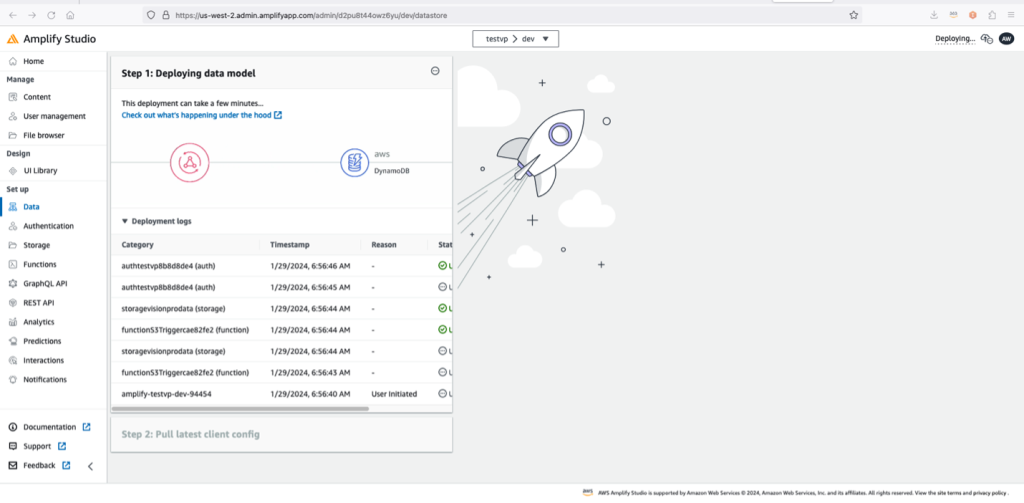
Deployment Logs dialogue in Amplify Studio
8. Expand the Deployment Logs expandable section. You will see all of the resources being deployed and the status of their deployment. Once the data model has been deployed you will see a success message.
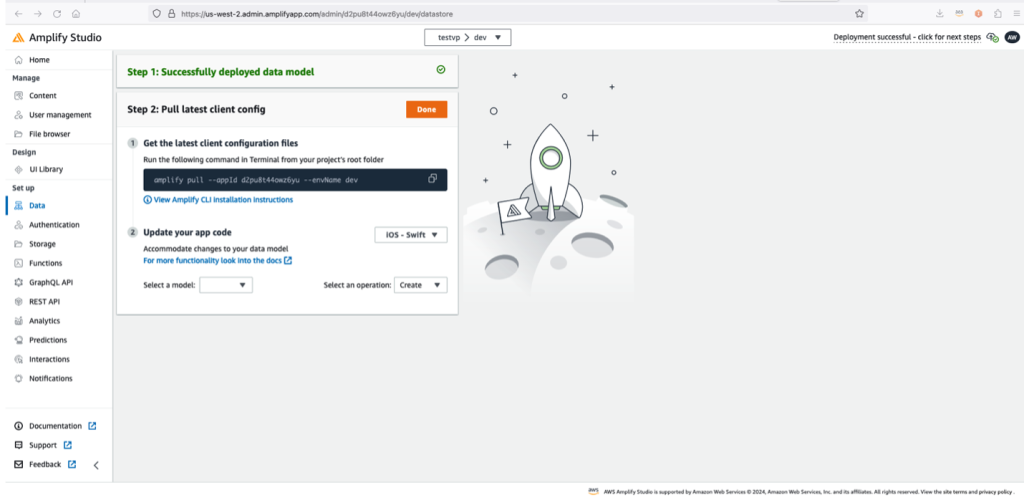
Step 3. Pull Data Model Configuration to Local Xcode Project
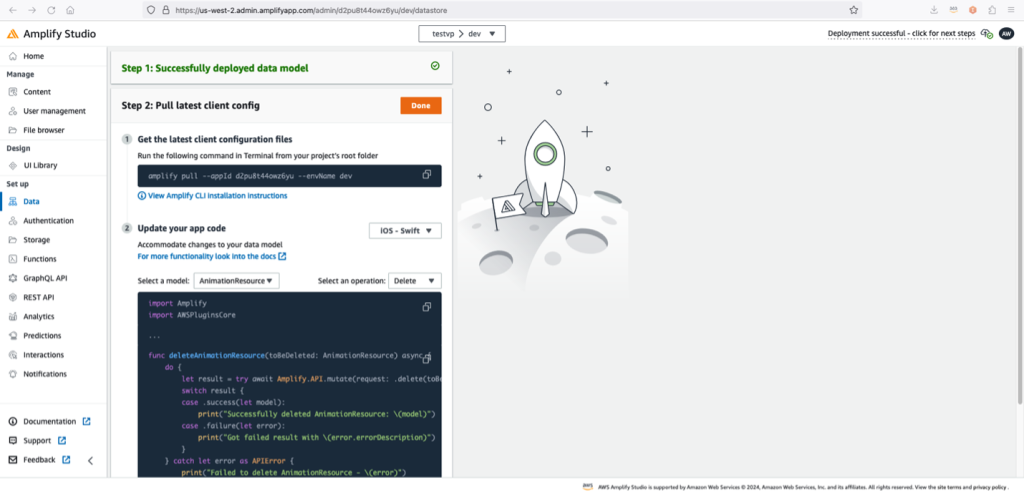
After a successful deployment of your data model(s) in Amplify Studio, within the Step 2: Pull latest client config menu you will see a terminal command.
Amplify Studio terminal command to pull remote configuration locally.
- Copy the terminal command you see on this page. This command will pull the remote data model configuration you just created in browser into your local project. Go to the terminal project root and run this command.
- You will notice that an AmplifyModels folder has not been created locally. Run
amplify codegen modelsto create the folder. You can read more about Amplify codegen at Client Code Generation in the Amplify Dev Center.
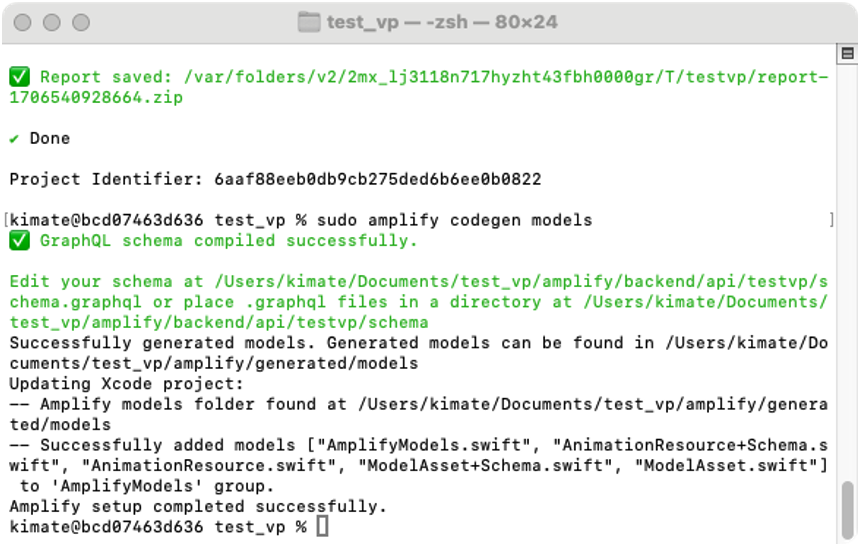
Create models folder locally with Amplify codegen.
4. Open your project and you will now see a folder in the directory called AmplifyModels with your new model assets described in Swift.
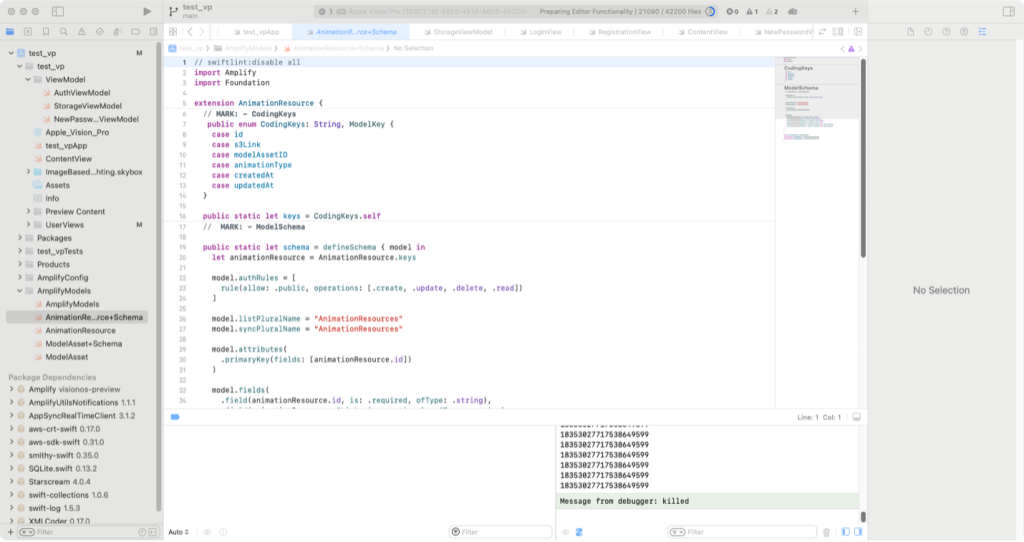
Within AmplifyModels folder AnimationResource data model
Awesome. Now the data model configuration created in Amplify Studio has been pulled locally into your Xcode project.
Step 4. Implement Model Asset CRUD Functions
- Go back to the AWS Amplify Studio to find additional documentation showing how to implement various types of functions such as CRUD (Create, Read, Update and Delete) using the examples in the dropdown list for Swift.
Amplify Studio CRUD samples
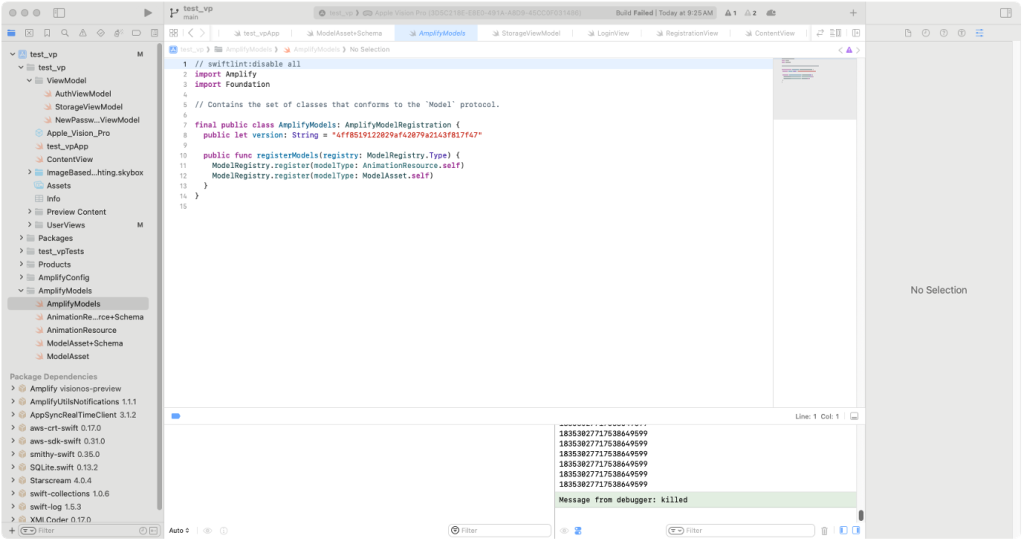
2. Back in Xcode, take a look at your model registry and you will see that the model is versioned for easy update from Amplify Studio.
Data model registry in Xcode
You will bring these example CRUD functions into Xcode. You can place these functions in a modelAssetFunctions class.
3. Create a new Swift file named DataStoreFunctions, within a new Functions folder within the root of your Xcode project.
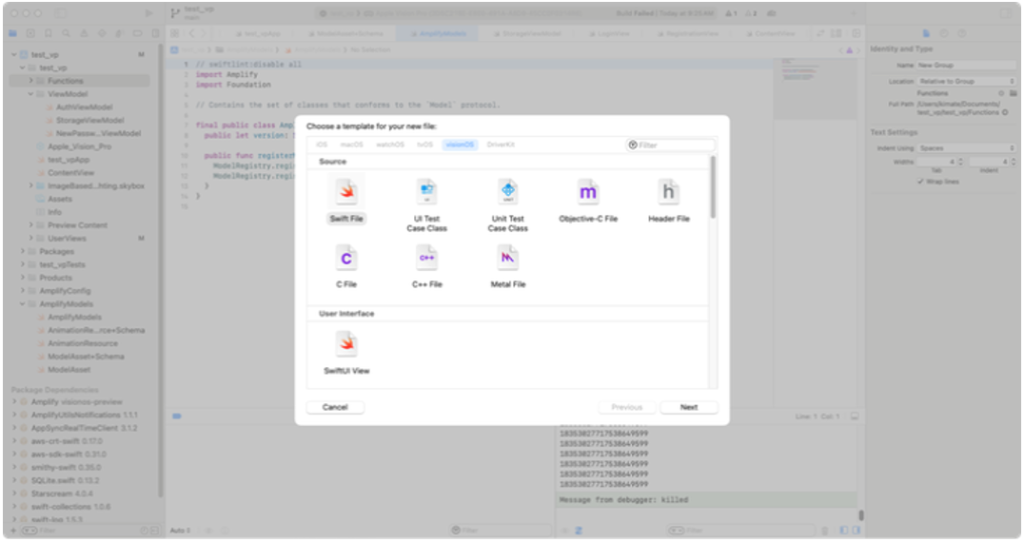
Create new Swift file dialogue in Xcode
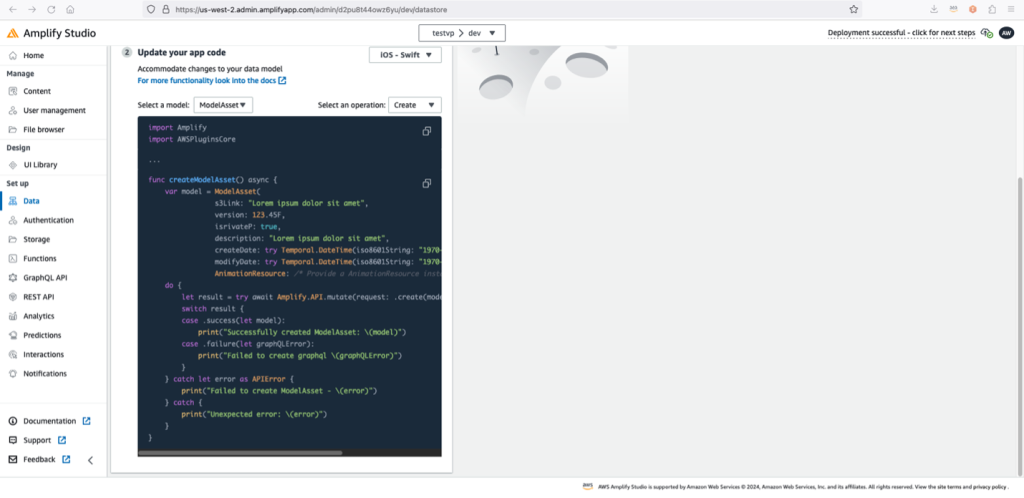
4. Copy and paste all of the CRUD examples into your new Swift class. You will notice that they are not perfect for all use-cases, but meant to give you a concise starting point.
Amplify Studio sample code to create a ModelAsset
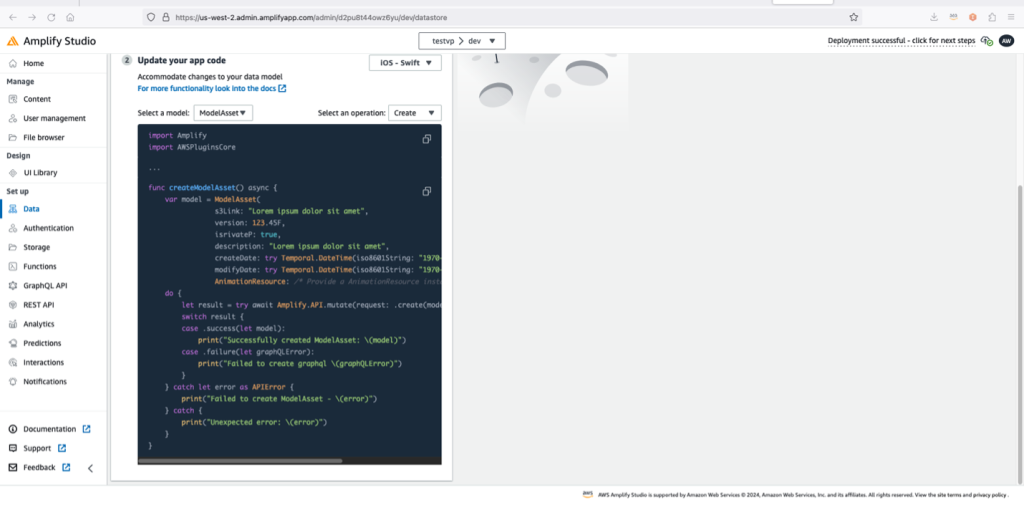
5. Modify the createModelAsset function to clear the error. It should look like the following code.
    func createModelAsset() async {
        var model = ModelAsset(
            s3Link: "Lorem ipsum dolor sit amet",
            version: 123.45,
            isrivateP: true,
            description: "Lorem ipsum dolor sit amet",
            createDate: try? Temporal.DateTime(iso8601String: "1970-01-01T12:30:23.999Z"),
            modifyDate: try? Temporal.DateTime(iso8601String: "1970-01-01T12:30:23.999Z"),
            AnimationResource: AnimationResource())
        do {
            let result = try await Amplify.API.mutate(request: .create(model))
            switch result {
            case .success(let model):
                print("Successfully created ModelAsset: \(model)")
            case .failure(let graphQLError):
                print("Failed to create graphql \(graphQLError)")
            }
        } catch let error as APIError {
            print("Failed to create ModelAsset - \(error)")
        } catch {
            print("Unexpected error: \(error)")
        }
    }
6. Continue on by creating the getModelAsset function.
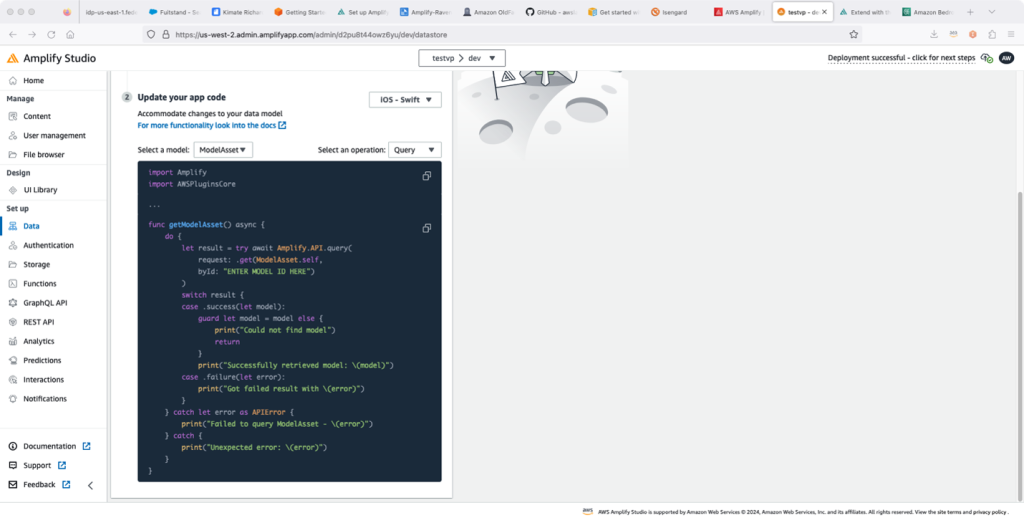
Amplify Studio sample code to get a ModelAsset
7. Pass a modelID into the getModelAsset query statement.
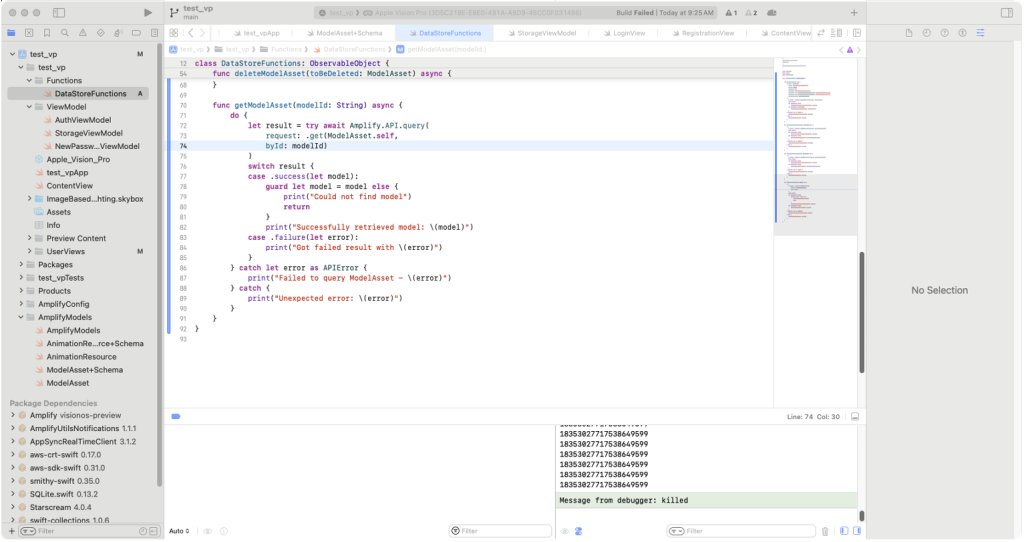
Get Model Asset Xcode implementation
    func getModelAsset(modelId: String) async {
        do {
            let result = try await Amplify.API.query(
                request: .get(ModelAsset.self,
                byId: modelId)
            )
            switch result {
            case .success(let model):
                guard let model = model else {
                    print("Could not find model")
                    return
                }
                print("Successfully retrieved model: \(model)")
            case .failure(let error):
                print("Got failed result with \(error)")
            }
        } catch let error as APIError {
            print("Failed to query ModelAsset - \(error)")
        } catch {
            print("Unexpected error: \(error)")
        }
    }
8. Continue and do the same for the deleteModelAsset function.
Amazing! You have implemented CRUD functions to act on your Model Asset data model. Now lets add CRUD functions to act on your Animation Resource data model.
Step 5. Implement Animation Resource CRUD Functions
- Create a new swift class called
AnimationResourceFunctionswithin the sameFunctionsfolder to contain all of your CRUD operations for this data model. Again, these are not perfect but are extensible and a great starting point.
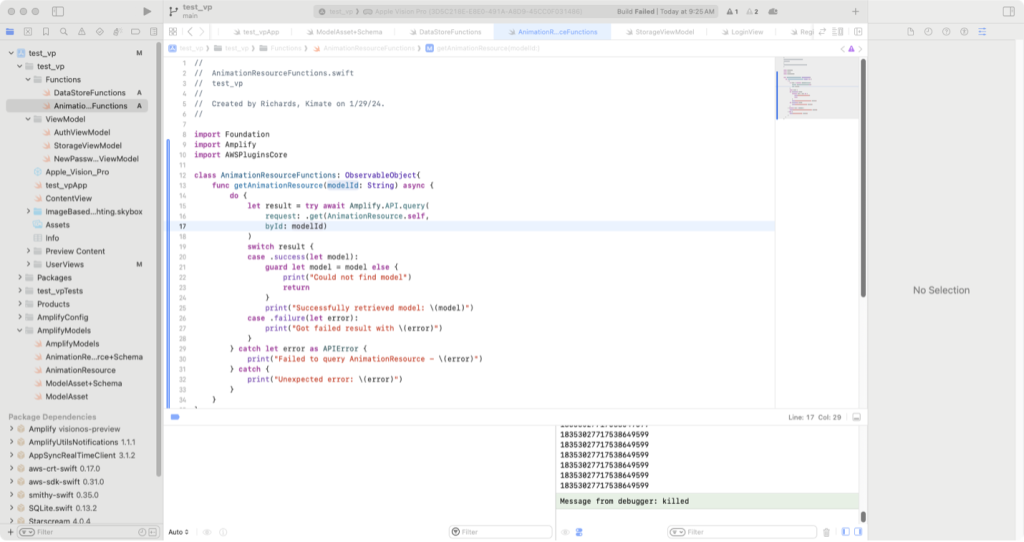
Xcode implementation to get an AnimationResource
2. Implement all of the Animation Resource CRUD functions, similarly to how you implemented the ModelAsset functions, and modify as necessary to compile. You will need to test these and implement any necesarry modifications.
After you have implemented all CRUD functions in Xcode, you check your 3D model assets, then create and associate your ModelAsset to an existing Amazon Simple Storage Service (Amazon S3) object in Amplify Studio.
Step 6. Check 3D Model Animations
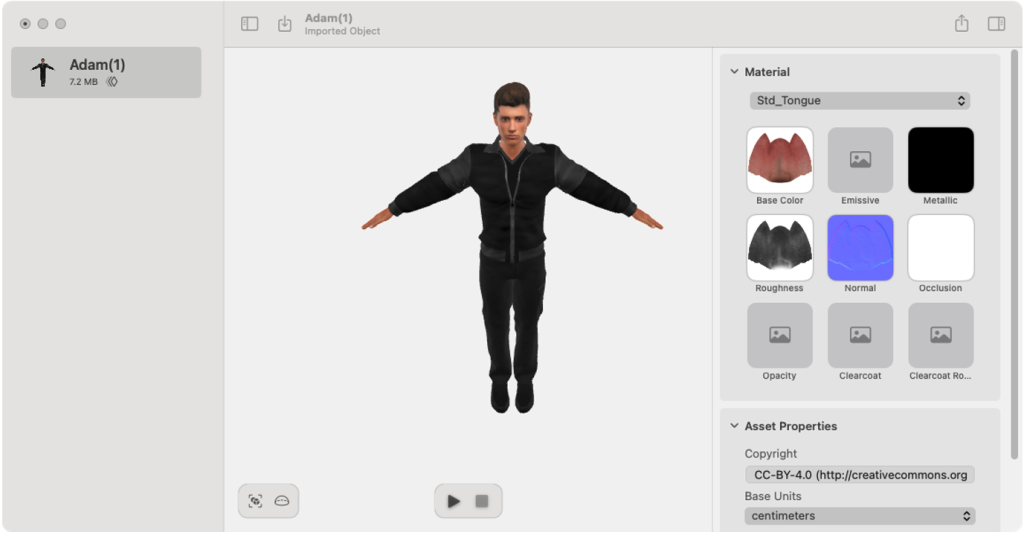
Before continuing the tutorial to create a data model link to your 3D model assets, you want to inspect your 3D model assets to determine whether they contain embedded animations or not.
There is a growing ecosystem around the USD 3D model file type. One very helpful tool is Apple’s Reality Converter. Among other functionality, Reality Converter allows you to preview, convert and inspect 3D models and their associated animations. It is available on Apple developer resources for download.
- Download and install Reality Converter.

Apple developer website Reality Converter page.
2. Open your 3D model file with Reality Converter to inspect the file assets, animations and materials.
Reality Converter software to view and inspect 3D models
3. Choose play in the lower center of the screen. This allows you to check if the 3D model asset contains an embedded animation. If so, you will see the animation begin.
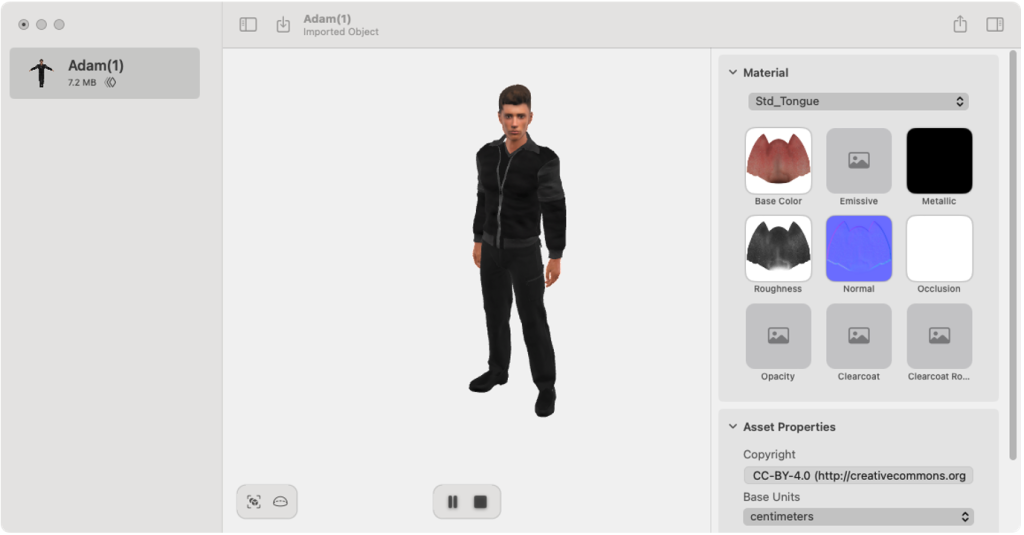
Testing 3D model animation in Reality Converter software.
Determining whether or not your 3D models contain embedded animations will determine what information we need to input when creating our associated data models.
Step 7. Create Asset Model Link To 3D Assets
You need to create a link between your 3D model assets in S3, and their associated ModelAsset data model items in your Amplify database.
- Choose Done in Amplify Studio to see what you can do next.
Amplify Studio sample code to delete and AnimationResource
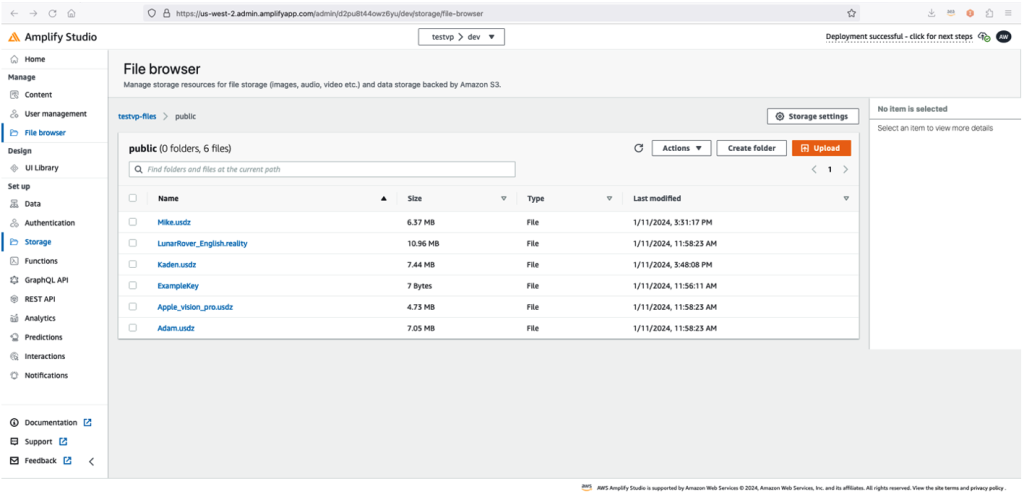
2. Recall that you have an assortment of files in S3 from Part 2, you can view these files in the AWS Amplify Studio Console by choosing File Browser in the left navigation panel.
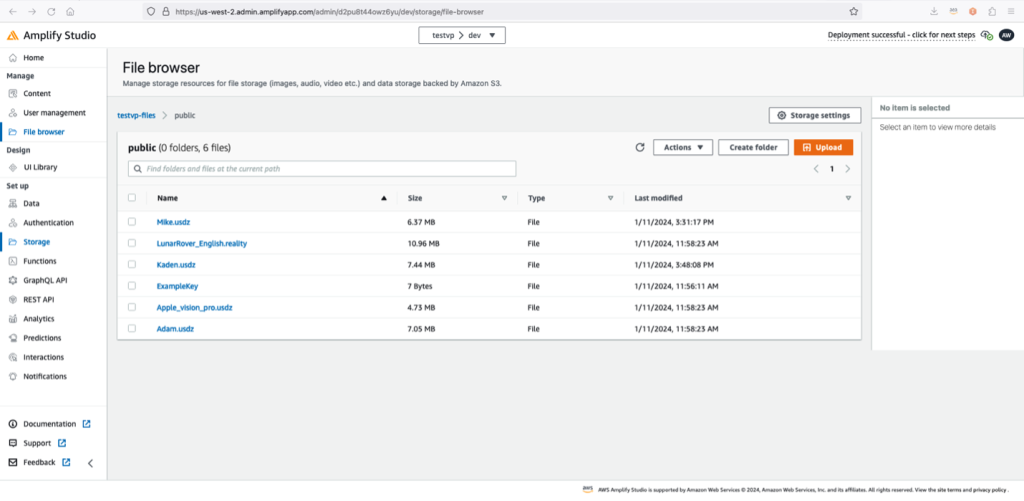
Amplify Studio Amazon S3 storage file browser
You will create and associate database records in the datastore to your 3D models in S3, and call these models from your GraphQL API within your Vision Pro application. This will allow you to query and find all of the associated information about these models and their animation resources.
You will add two records, using your previously created data models. One ModelAsset data item which will be associated to a specific usdz file stored in S3, and one AnimationResource item. Apple Vision Pro allows a Universal Scene Description (USD) file to have at most one animation resource. In order to switch animations, you must grab another USDZ file animation, instantiate and trigger it. See Advanced Animations in SwiftUI at WWDC23 for more information and read further about AnimationResources.
3. In the left navigation menu, under the Manage section, choose Content.
4. From the Table Heading dropdown list, choose ModelAsset.
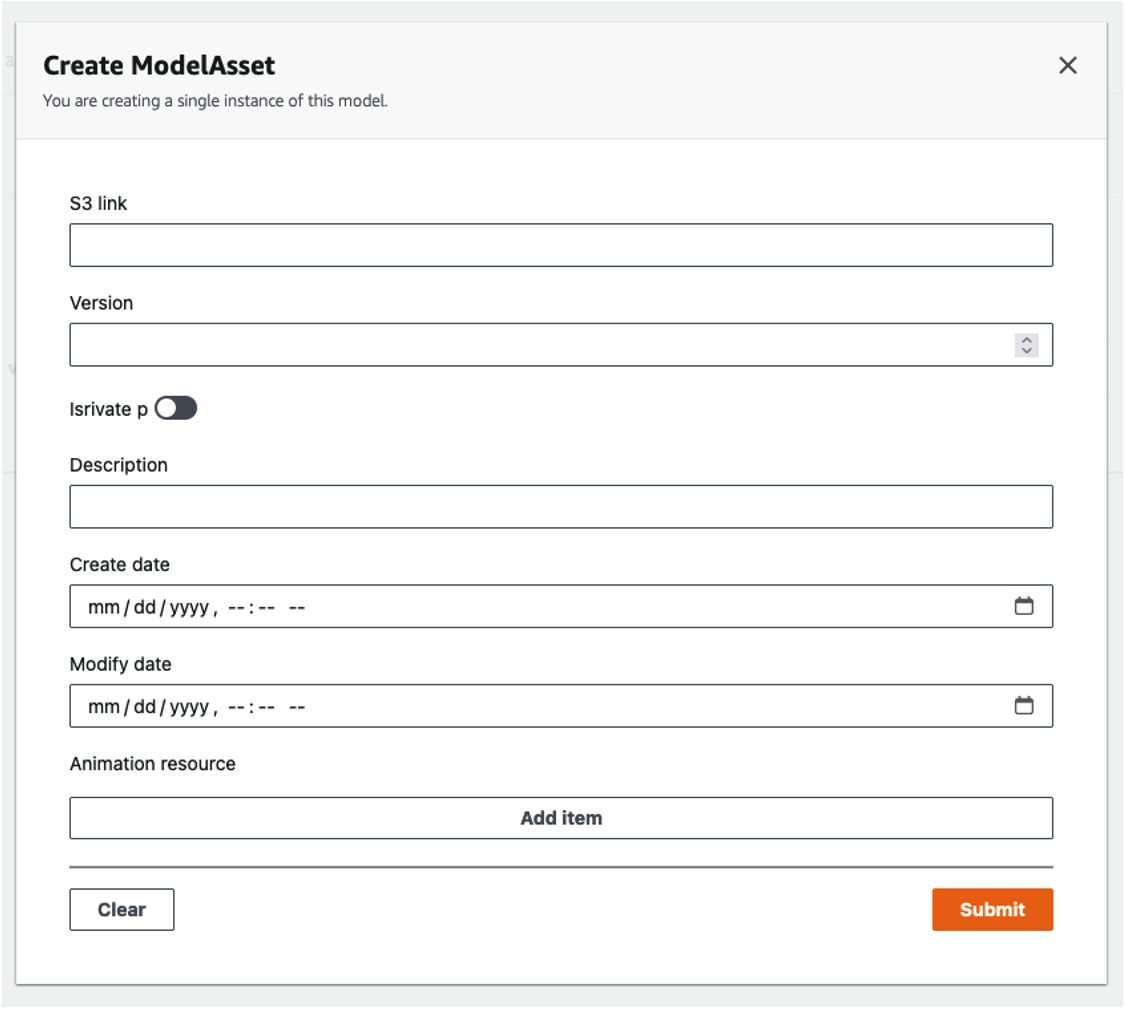
5. Choose Create ModelAsset, and fill in the model attribute fields.
Create Model Asset dialogue
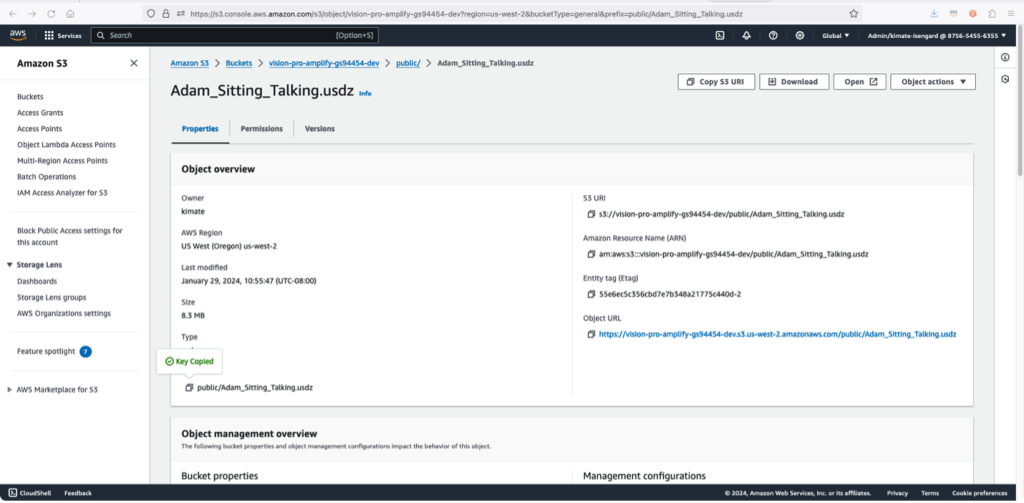
You need the S3 link for the model or some unique identifier for the S3 object, to associate it to the record. Let’s copy the S3 key for your model.
6. You can use any of the key value, entity tags or ARN (Amazon Resource Number) to identify the unique file. I will use the Key value found in the Properties tab of your selected 3D model asset within S3.
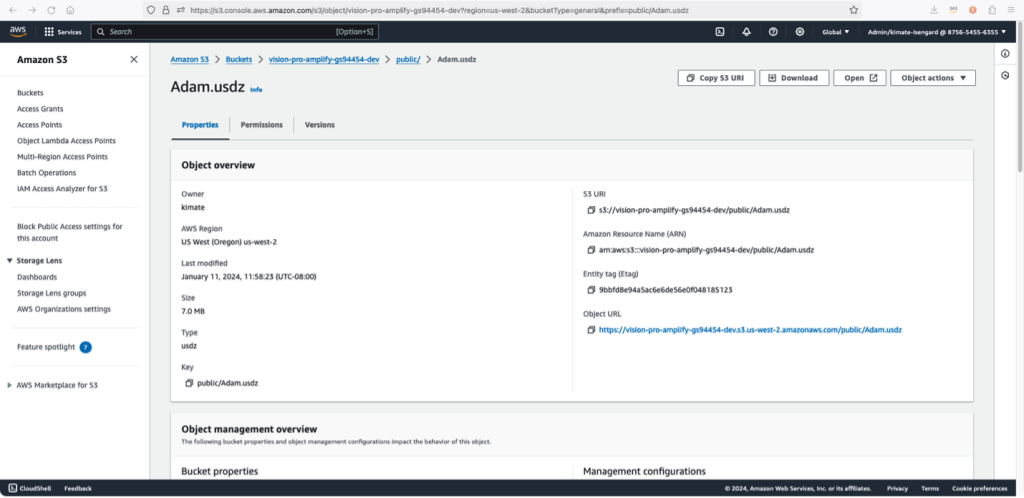
Amazon S3 object information dialogue
7. Since this 3D model file asset you are using does have an embedded animation, you can leave the Animation Resource blank in the ModelAsset database item.
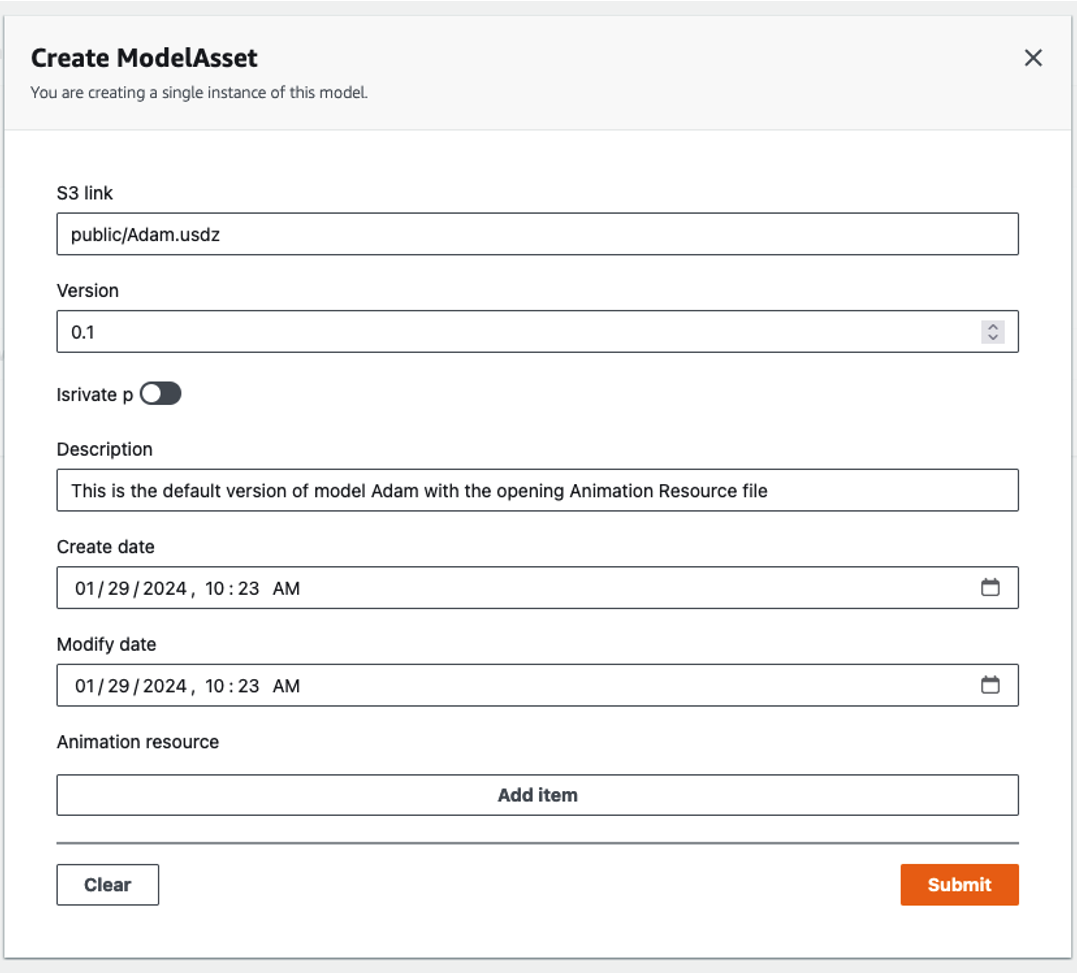
Create Model Asset, leave animation resource empty
8. Choose Submit to add the record to the database.

Amplify Studio Data Manager page.
Awesome! You have created a database record and associated it to a 3D model asset in S3.
Step 8. Create Animation Resource Link To 3D Assets
The end to end process of switching animations is out of scope for this tutorial, however high level you would add a duplicate 3D model to your S3 bucket with a different associated animation. Thus you will have two identical 3D model assets in S3 which each have unique animations associated. You can then overlay them in your application and smoothly transition between them.
Let’s find a 3D model with multiple animation resources associated. You can use SketchFab or other 3D model repositories to find models with multiple animations for free as long as you follow licensing guidelines. Find one with multiple animations that can be downloaded as a USDZ file or can be converted with Apple’s Reality Converter.
- From the navigation menu in Amplify Studio, choose Storage.
- Choose Upload to add your desired 3D model(s) to S3.
Amazon S3 upload from Amplify Studio
3. Copy the desired 3D model asset Key for use in a new AnimationResource record.
Amazon S3 object properties
4. In the navigation menu, choose Content, then choose Create AnimationResource.
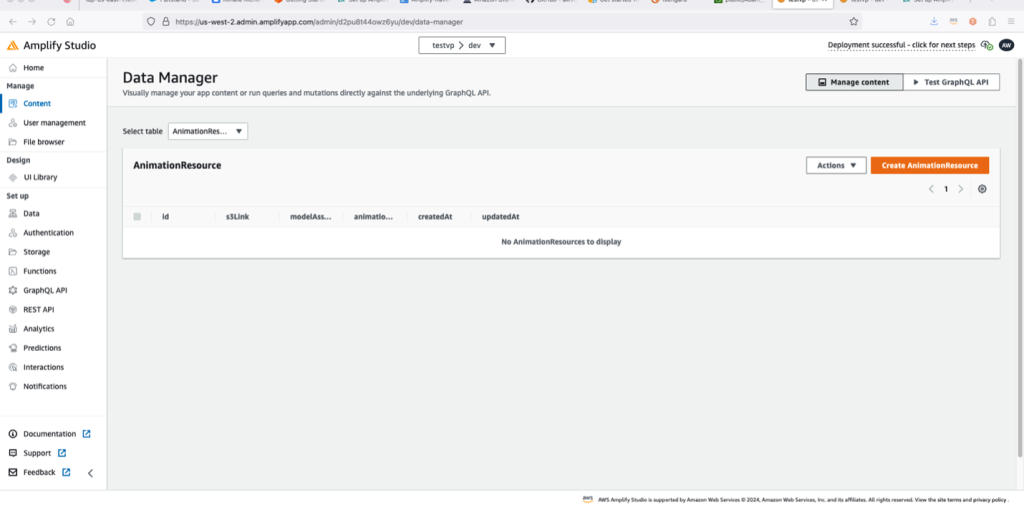
Amplify Studio Data manager page.
5. You can leave the Model Asset Id blank or you can add it explicitly. For animation type you will likely create an enum if this were a real app, you can use simple integers for testing.
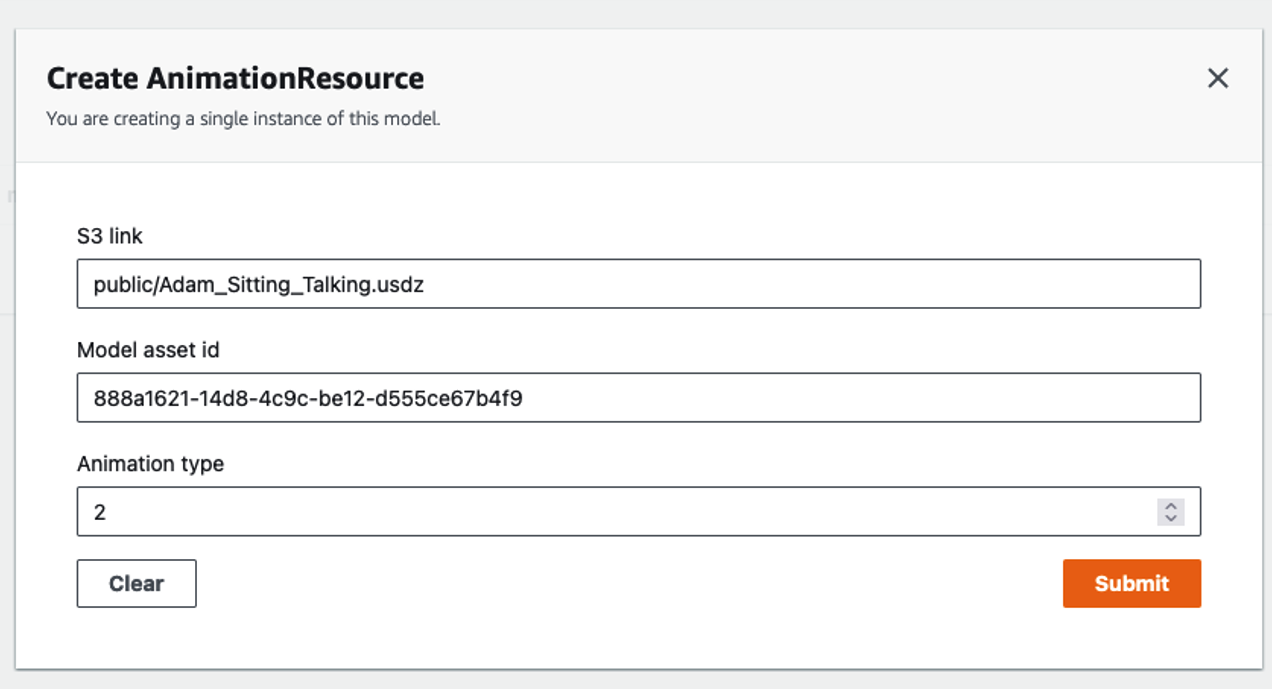
Create Animation Resource dialogue
6. Choose Submit to finish the creation of your AnimationResource record.
Step 9. Link Animation Resource to Model Asset
- Back in the Amplify Studio Data Manager page, from the Select Table dropdown, select ModelAsset.
- Choose your previously created 3D model asset record to edit its values.

Edit Model Asset dialogue
2. Associate your new AnimationResource record to your ModelAsset record by choosing Add Item. Search for the name of your 3D model to bring up its associated AnimationResource.
3. Choose that AnimationResource to associate it to your 3D model ModelAsset item.
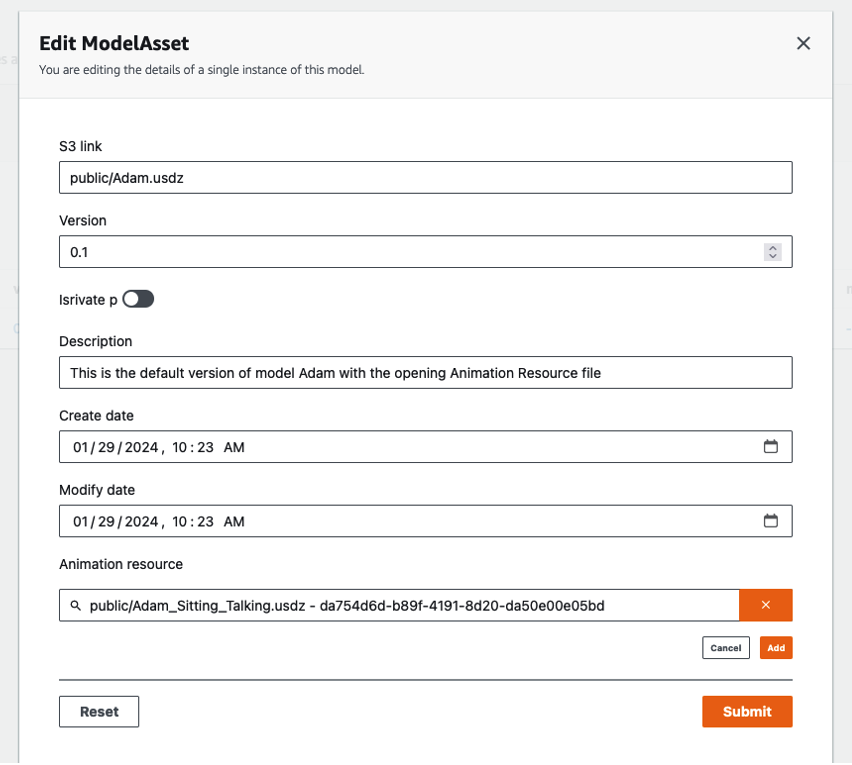
Edit Model Asset dialogue
4. Choose Add and finally Submit.
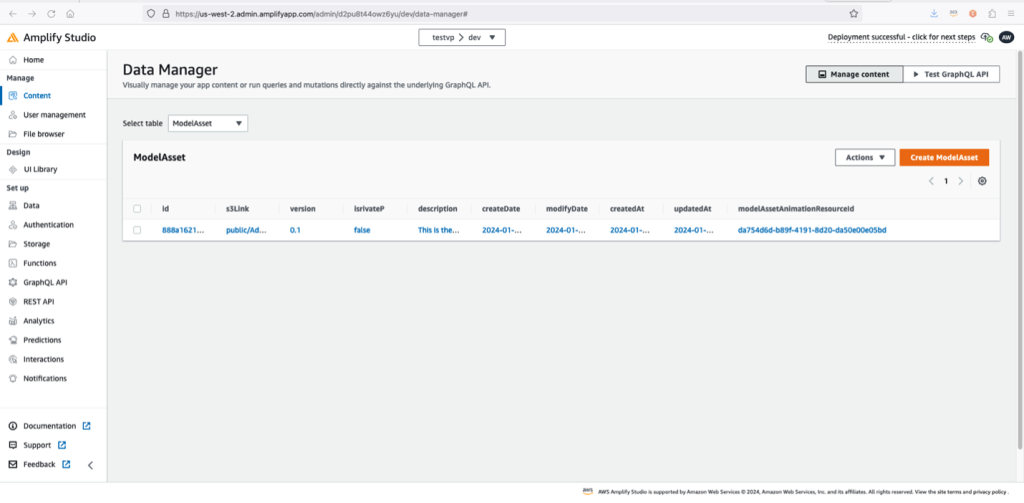
Amplify Studio Data Manager after creating a ModelAsset item.
Looking at your record now you see a key with a unique identifier for that relationship, as other AnimationResources are added to the ModelAsset the record resourceId changes to represent the new record.
Step 10. Add AWSAPI Plugin to Xcode Application
Finally back in Xcode lets modify the application entry point to allow the Amplify GraphQL API to pull in your Amplify data model items, using the AWS API plugin.
- Import the AWSAPIPlugin and add it in the model registry, as shown on line 66 of the code.
Xcode implementation of Amplify sample code to bring in AWSAPIPlugin.
2. Build and run to confirm everything is compiling. This tutorial will end with pulling in a record to your Vision Pro application, using your Amplify API.
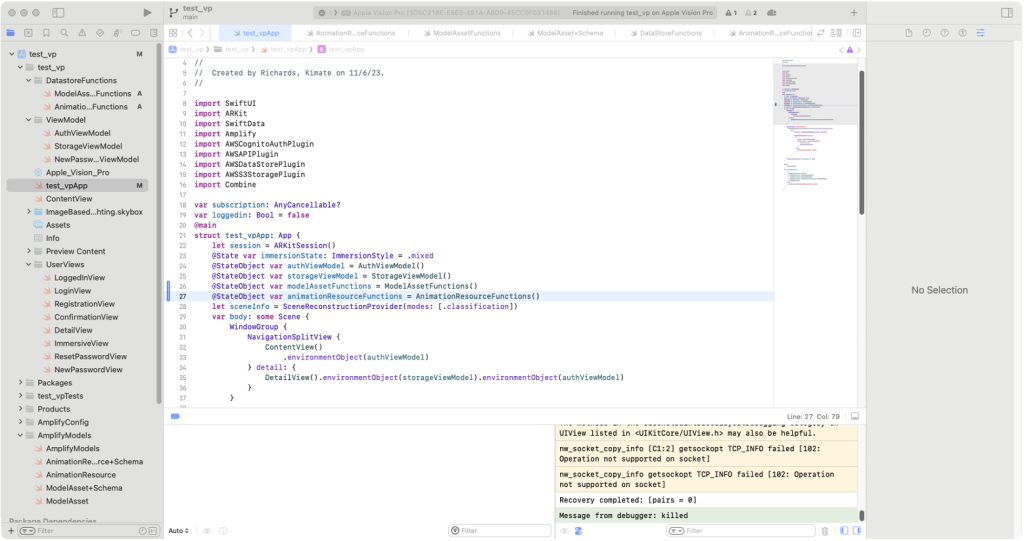
3. Update the application entry point to include your new ModelAssetFunctions as a state object. Also add the state object for your AnimationResourcesFunctions while you are here, as shown on lines 26 and 27.
Adding model asset functions as a state object in Xcode.
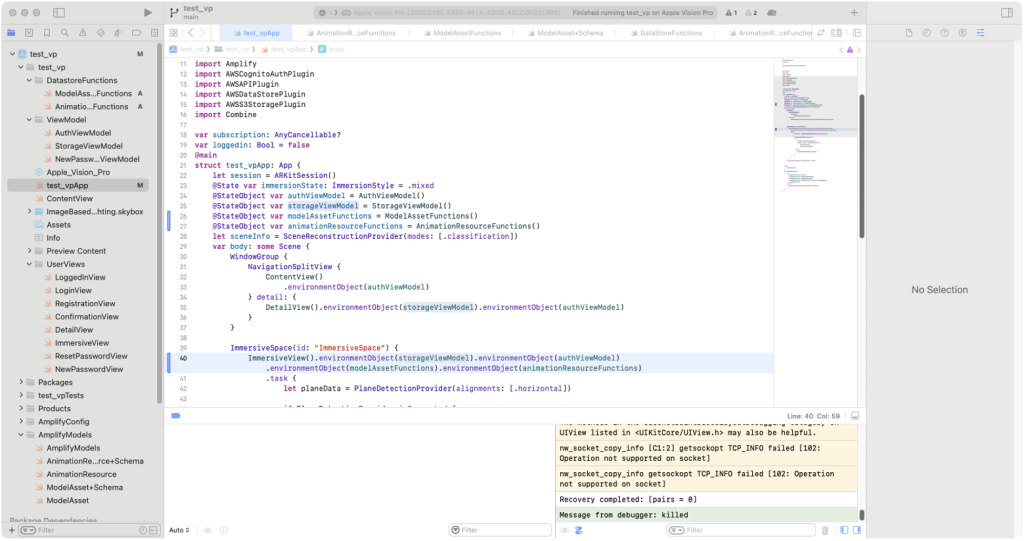
3. Add the environment objects to the immersive view that will consume it, as shown on line 40.
Adding environment objects to the immersive view in Xcode.
Now within the immersive view you can retrieve your model data when you query your 3D model. If you wanted, you could build a view that contains all of the model assets. You could then allow a user to select a specific model to query using the skills you just learned, and even subscribe to change events for the datastore.
4. Now add two environment objects for your new classes, as shown on line 18.
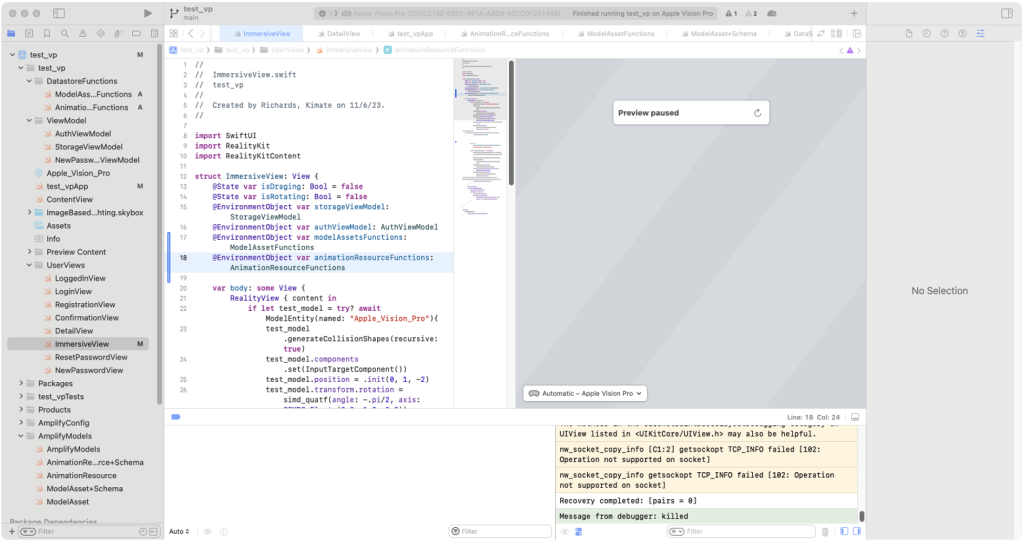
Adding Environment Object for new classes to immersive view struct.
5. Add a breakpoint and call the functions with your public/Adam.usdz (or other 3D model name) file key, as shown on line 77.
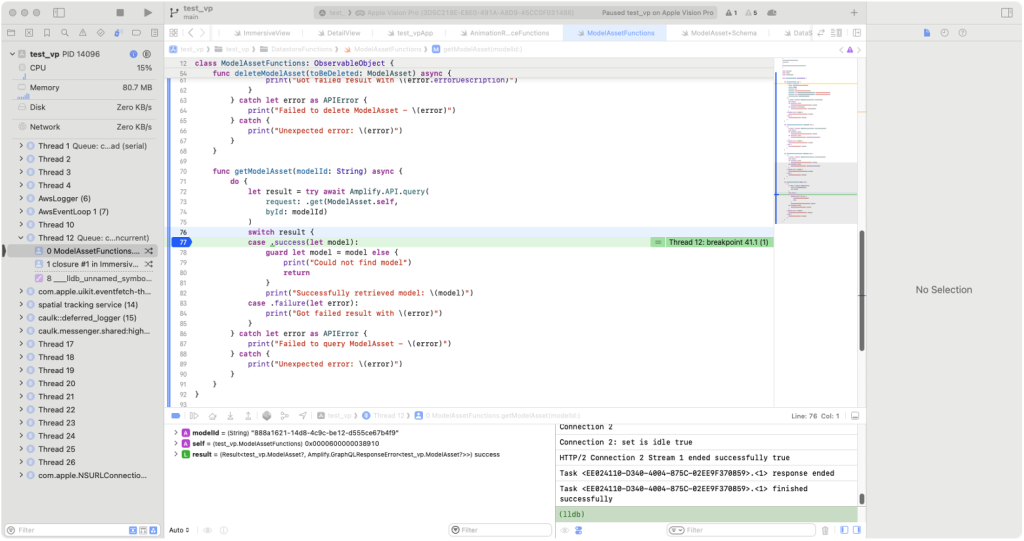
Breakpoint in Xcode with success from API call.
Success! As seen in the Xcode console below you are now able to pull in that 3D model metadata using the Amplify API you created.
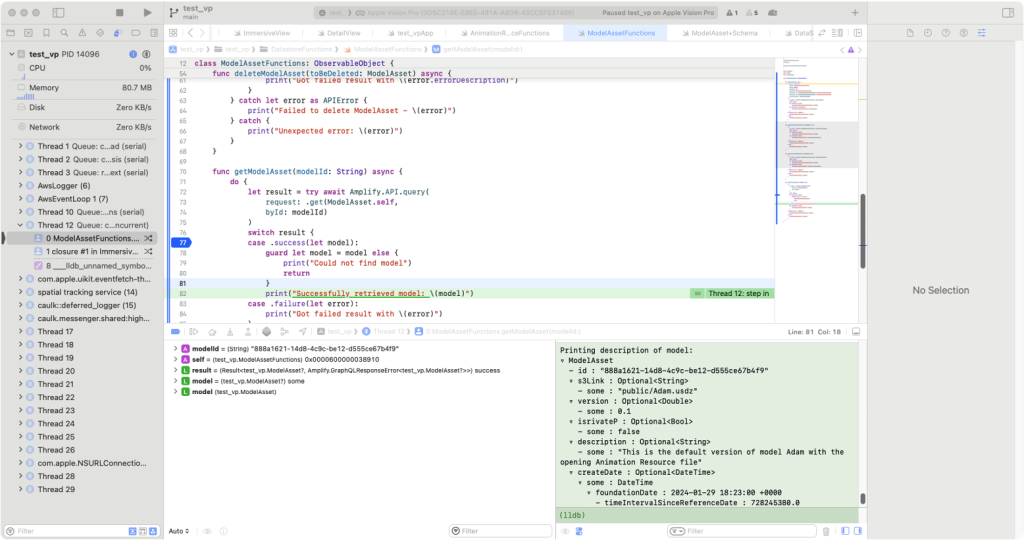
Successfully received back animation data from Amplify database using the API.
There are many ways that you can expand from here. Possibly associating additional 3D model metadata to your models, or triggering those specific animations in the Vision Pro, based on that information received back from your API.
And that’s it, thank you for following along on this tutorial! There are a several additional samples provided in the visionOS Documentation which you can follow to get more familiar with best practices. These samples include a project called Swift Splash which shows how to reveal and hide different sections within a 3D model entity hierarchy (including animation), based on the applications state. Also, if you want to create a cloud based build and deployment pipeline for your Vision Pro app, go and check out Amazon EC2 Mac instances. And don’t forget to read our other posts in the AWS Spatial Computing Blog.