AWS Physical AI Blog
Apple Vision Pro and AWS Amplify Part 1 – Authentication
Continuing our series on Getting Started with Vision Pro on AWS, in this post we show how you can use AWS Amplify to quickly get started building with the Apple Vision Pro using Xcode and Amazon Web Services (AWS).
AWS Amplify is a great tool to deploy an AWS backend with a visionOS front-end quickly. In this three part tutorial you will develop an application for the Vision Pro device. This application will allow a user to log-in, download 3D models from cloud storage, and query associated metadata via an Amplify API into your Vision Pro Xcode application.
The three parts of this tutorial series include authentication, storage and database. Part 1, this first post, is focused on development environment setup, AWS Amplify configuration, and authentication to allow users to securely log in and out of the application. Amplify authentication uses Amazon Cognito under the hood to facilitate this. The second post will focus on Amazon Simple Storage Service (Amazon S3) for storage and runtime asset delivery. The third post will focus on setting up a database to store 3D model asset metadata and an API to allow you to query that data from your Vision Pro application.
Disclaimer: This is a technical tutorial style blog post. Some previous software development experience with Swift and Xcode is recommended. This post tries to dive deep with each piece of functionality, but does not cover all frontend logic and edge cases. We will provide links to resources and documentation to allow you to read further where needed. In this tutorial you will be manually creating all functionality using Swift, a programming language for Apple platforms. If you have not used SwiftUI, you can learn more at SwiftUI Tutorials. If you have limited experience with AWS Amplify, you can find additional resources as well as courses at Learn Amplify. Similarly, if you are new to development with Apple’s visionOS you can find resources at Learn visionOS. As always, make sure to follow security best practices including items such as input validation, and make sure that any code used in production is tested and approved by your security team.
AWS Amplify
Amplify has front-end and back-end builder tools with CLI (Command Line Interface) and AWS Management Console (Console) support.
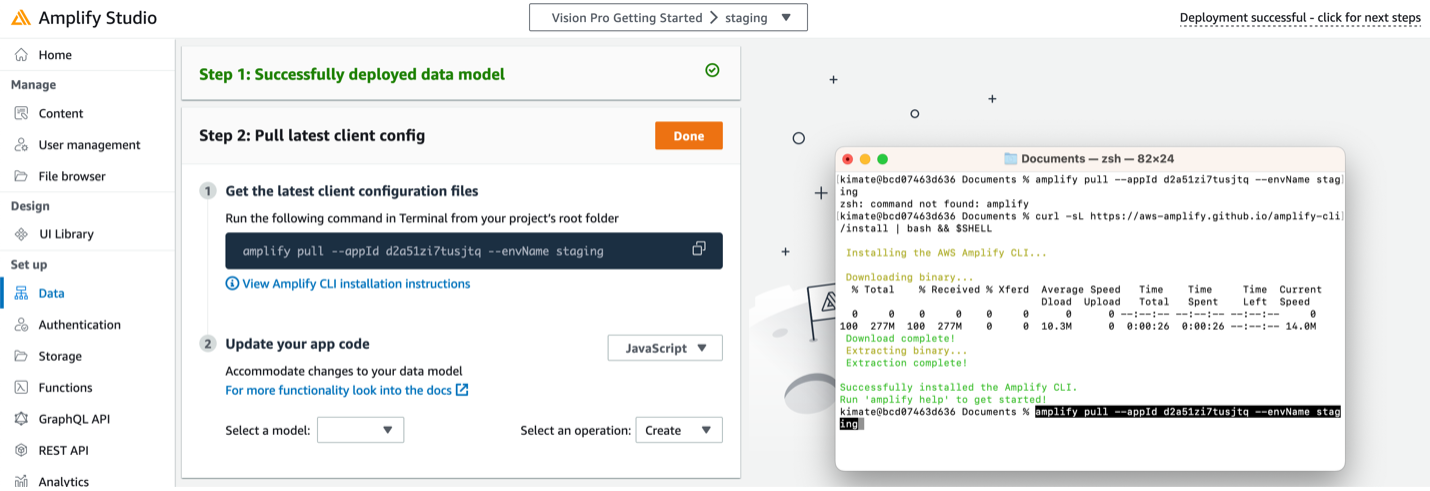
AWS Amplify Console and CLI Screenshot
For this project you will only need the AWS Console and the Xcode Amplify dependencies. You will walk through the setup of those in this tutorial.
This initial install process of Xcode is similar to the process shown in the previous blog post, Getting Started with Vision Pro on AWS, however this time you will be using Amplify which gives you everything you need to build a full-stack web or mobile application on AWS.
Xcode Download and Project Set Up
Step 1. Confirm you have what you need
- Confirm that you have met the pre-requisites from the previous blog post Getting Started with Apple Vision Pro on AWS. You will need to have an Apple developer account ID for the next steps.
- Navigate to the Apple Developer Website and install the latest version of Xcode. This tutorial is based on Xcode version 15.2.
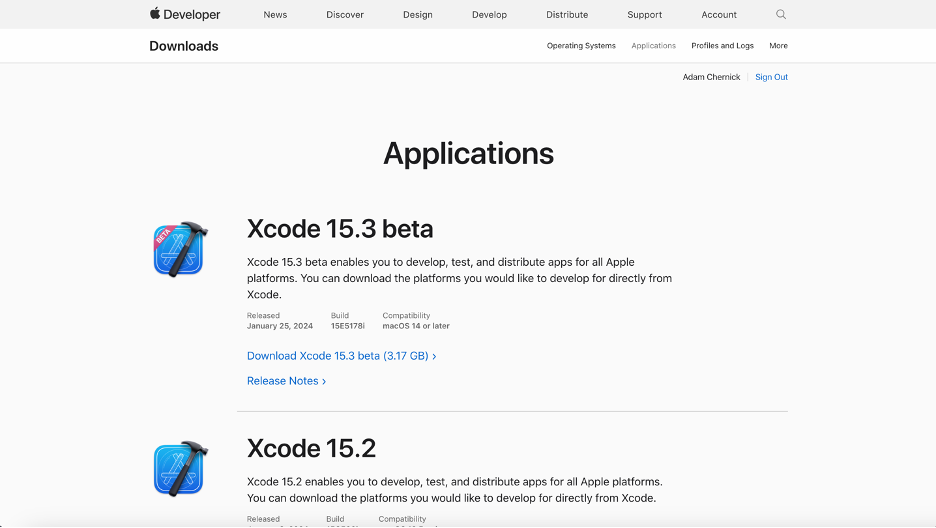
Xcode download
There are great tutorials, code samples and blogs related to the Vision Pro at developer.apple.com and in the visionOS Documentation. This blog will focus on the AWS implementation. Next, install both the Xcode Vision Pro and iOS Simulators.
Step 2. Install Simulators
- After downloading Xcode, during the installation process, Xcode will ask you which platforms you will be targeting. Check the platforms you would like to install, at a minimum for this tutorial please choose iOS and visionOS.

2. Choose Download & Install.
Step 3. Create Application
- After installation is complete, you will now create an app using a visionOS template as the starting point. Choose Create New Project.
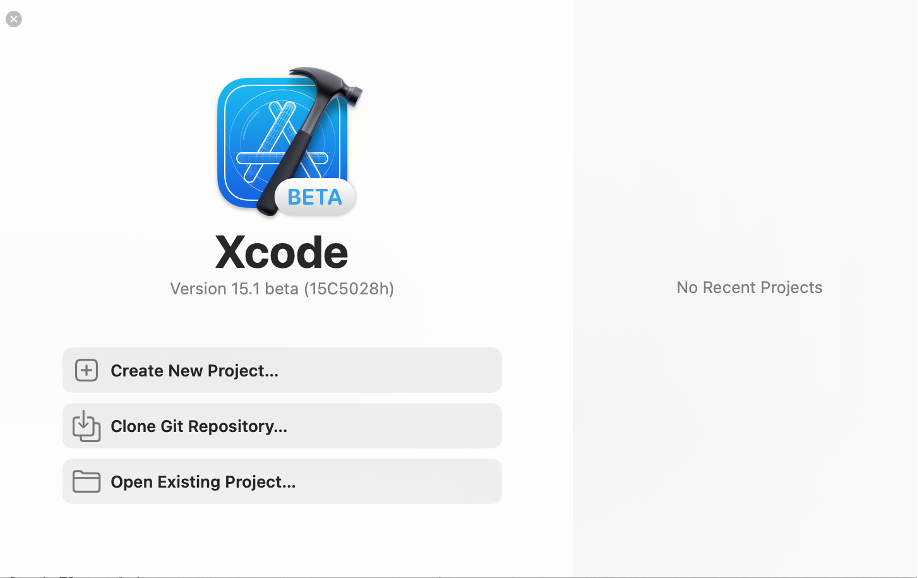
Create Xcode Project
2. Under the visionOS tab of the dialogue, choose the template App option, and choose Next.
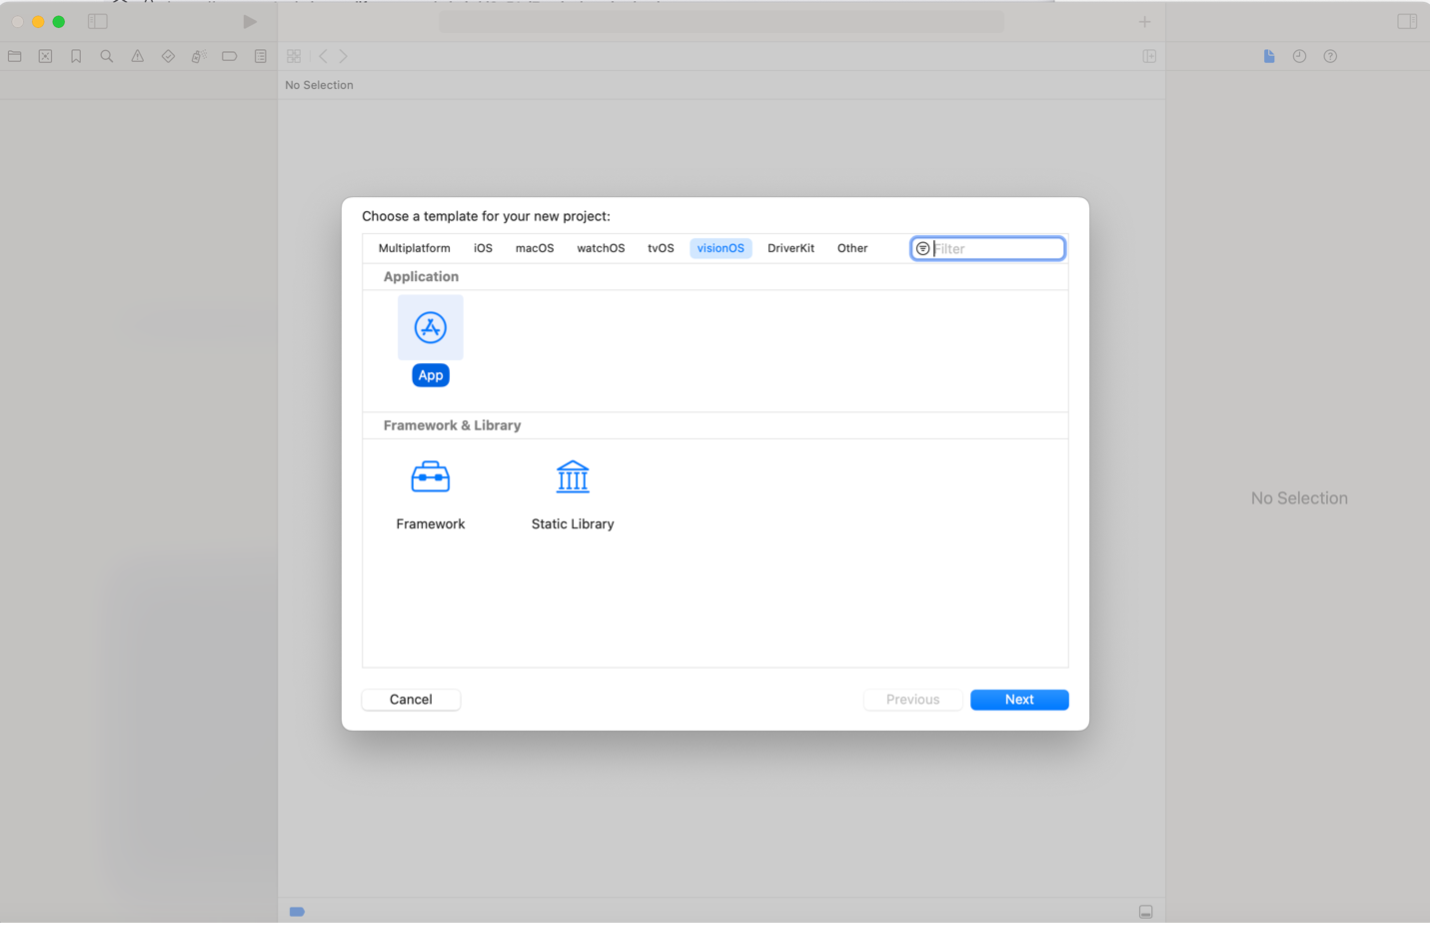
Create new Xcode Project from template
3. Enter a name for your project, and leave other settings default. I used test_vp, choose Next.
4. Choose a location to save your project on your local machine and choose Create.
5. Read through the Vision Pro template code. This default starter application displays a usdz 3D model of a sphere. The sphere model is declared in the ContentView struct.

Initial Vision Pro Xcode template application
AWS Amplify Configuration
Amplify has built a preview repository for Swift dependencies that allows AWS services to work great with the Vision Pro.
Now that you have your project set up, lets continue. You will configure Amplify initially to allow authentication for this first blog post, as well as storage and database for usage in Part 2 and Part 3 respectively. There is a handy Amplify package with a GitHub repository, Amplify UI Authenticator for SwiftUI, and a helpful associated blog post, Amplify SwiftUI-based Authenticator Component. To learn more about AWS Amplify Authentication, you can visit Set Up Amplify Auth in the Amplify Dev Center.
Let’s create an AWS Amplify application. First, go to the AWS Management Console and sign in or create an account. You will need to supply a payment option. You can find pricing and cost information for each of the services you use in this blog post series within AWS Pricing. Once signed in, go to the AWS Amplify console page and follow the below steps.
Step 1. Setup Amplify Studio Application
- Search for Amplify in the AWS Management Console search bar and choose AWS Amplify from the dropdown list.
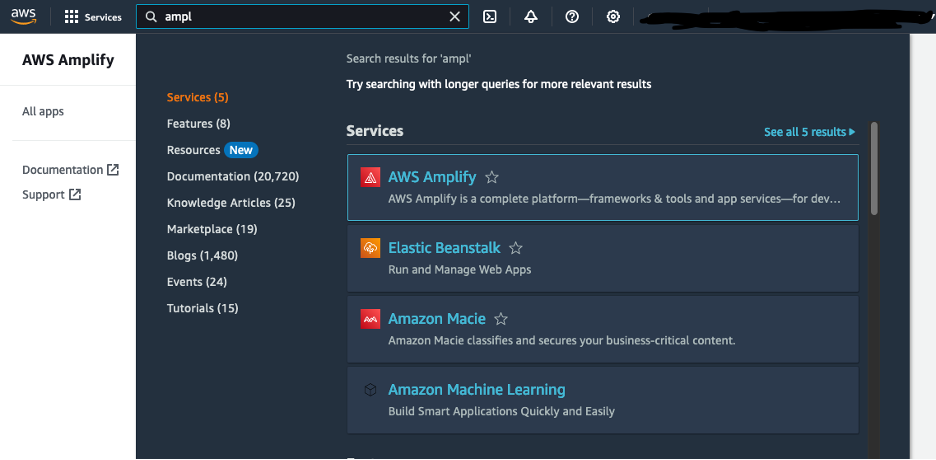
AWS Management Console – Search for AWS Amplify
2. Choose Get Started.
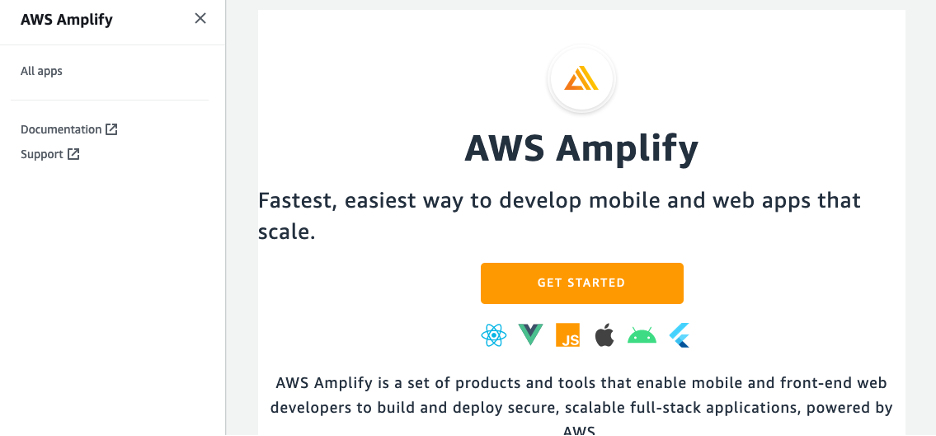
Getting started with AWS Amplify
3. Choose Get Started under the left Amplify Studio section.
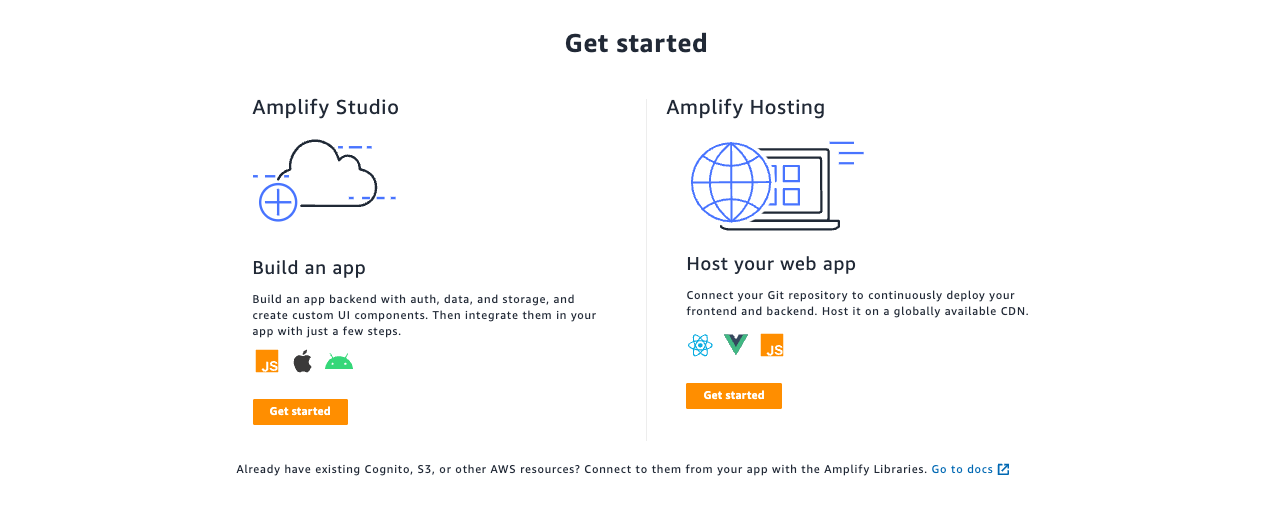
Amplify Studio getting started dialogue
4. Pick a name for your new Amplify Studio application. For this blog post I chose testvp as the application name.
Step 2. Setup Amplify CLI
- Complete initial Amplify CLI setup following the steps detailed in Set up Amplify CLI and pay attention to the operating system you using. I am on an M1 MacBook Pro.
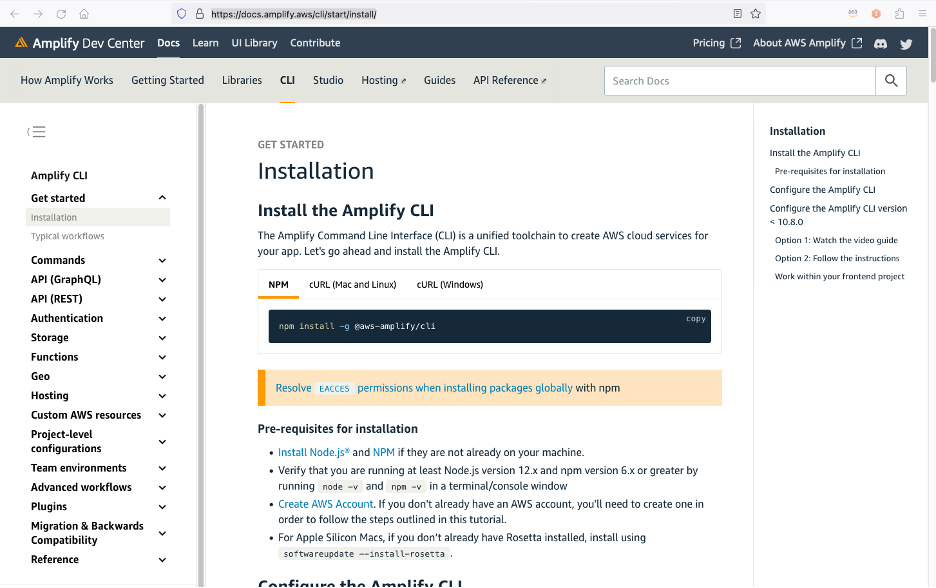
Amplify docs CLI installation page
2. Configure Amplify. Run amplify configure in terminal from your project directory and follow the prompted steps. There is a detailed outline of this configuration process at Set up Amplify CLI. Configuring Amplify will set up your local machine to connect to your AWS account. This allows you to link your application to your various AWS account resources such as authentication, database and storage.
Step 3. Add Amplify packages to your project in Xcode.
- Choose File in the Xcode top bar menu, then choose Add Package Dependencies, and enter the url for the Amplify Swift Library Git repository,
https://github.com/aws-amplify/amplify-swift. Be sure to select Dependency Rule: Branch ->visionos-preview.

Add Xcode Amplify visionOS packages
2. Choose which of the libraries you want added to your project by choosing test_vp under Add to Target for each package. I selected the following packages to install into the project.
-
-
- API: AWSAPIPlugin
- Analytics: AWSPinpointAnalyticsPlugin
- Auth: AWSCognitoAuthPlugin
- DataStore: AWSDataStorePlugin
- Geo: AWSLocationGeoPlugin
- Storage: AWSS3StoragePlugin
-
3. Choose Add Package to add those Amplify packages to your Vision Pro Xcode project.
Step 4. Confirm everything is working.
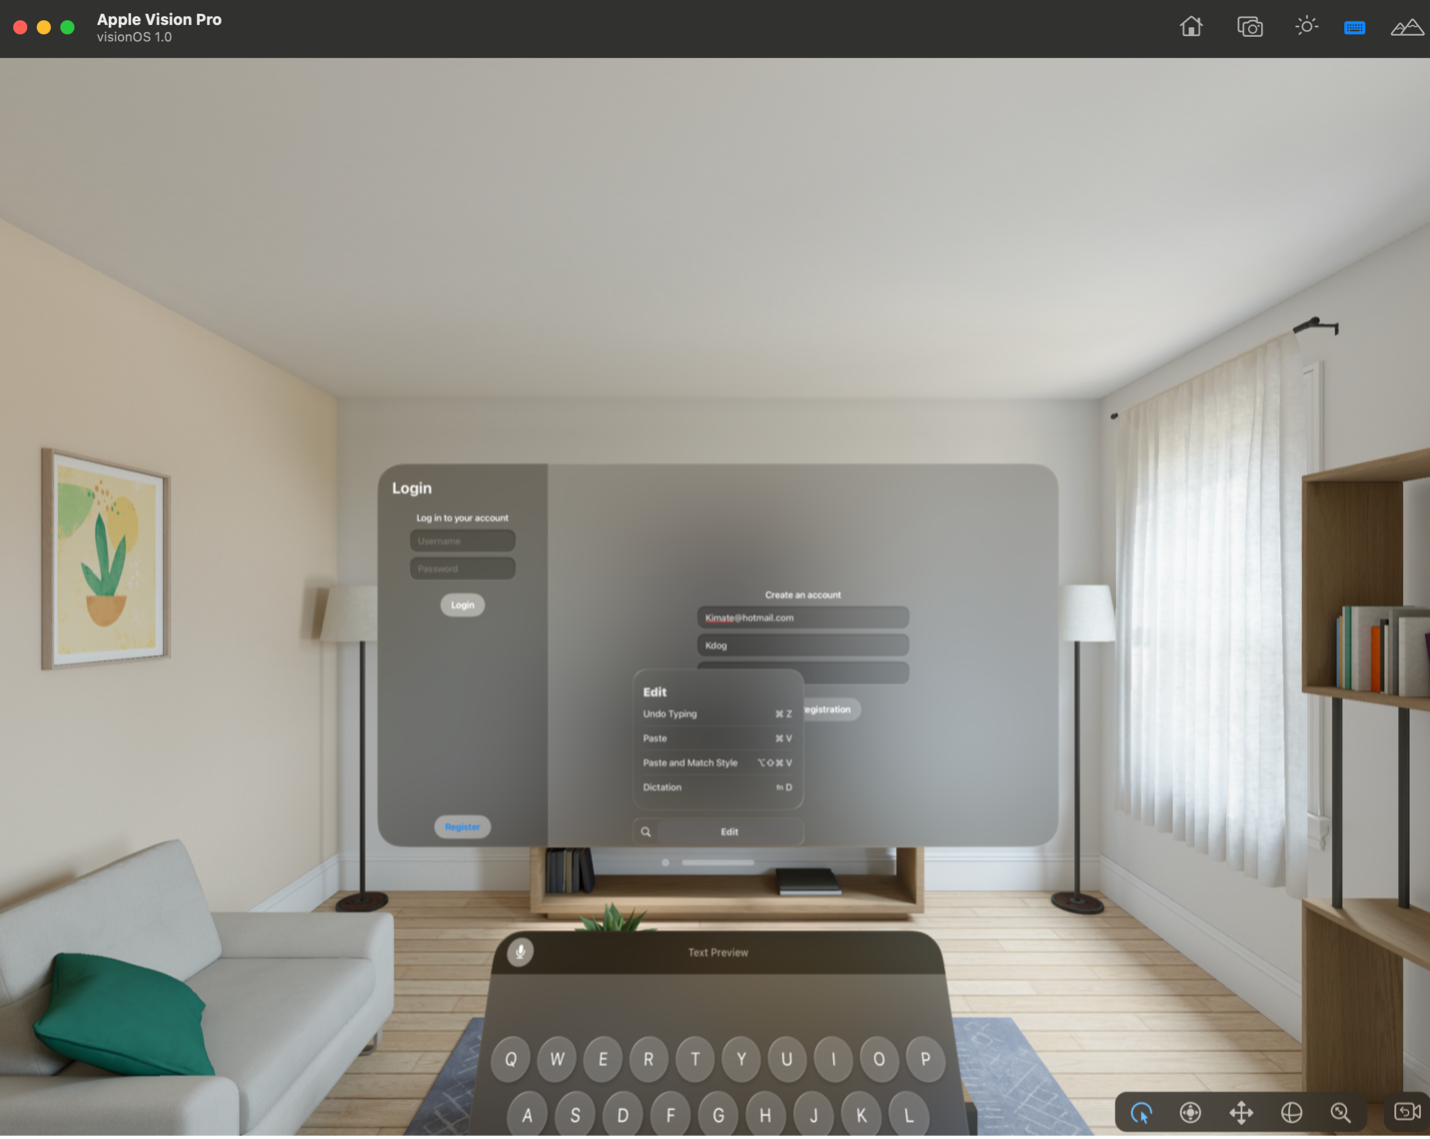
- Open the Vision Pro simulator, on the menu bar, choose Xcode from the top ribbon, then choose Open Developer Tool, Simulator. When running the app with the simulator, you can move in all directions, and rotate/pan the user’s view angle to simulate how the application will react on the Vision Pro in real life. The background world environment (with couch and TV) is of course simulated to overlay and test your Vision Pro content/application logic.
- Build the application and run it by choosing the play button in Xcode. After building, it will automatically run the application in the Vision Pro Simulator, if open.

Xcode Vision Pro Simulator window
3. Confirm your application builds and you see a 3D scene similar to the one shown.
Great, everything builds successfully! let’s move on to writing some code and adding some features.
Step 5. Add Authentication to your Xcode project
Creating a compelling user experience begins with a good log-in experience, AWS Amplify has a self-contained authenticator package but you are going to build a simple one from scratch, in order to follow more closely the aesthetic of the Vision Pro environment.
- Import the Amplify packages you just installed into the project.

Import Amplify packages into entry point struct
2. Build and run for a sanity check to make sure everything is working. Next let’s provision the Amplify CLI. There is a more in-depth walkthrough of this process in Create Your Application within the Amplify Dev Center.
Step 6. Initialize Amplify
- Open the terminal at your new local application directory and run
amplify init. - Enter a name for the project. I chose
testvpto match the Amplify Studio project. - Follow the prompts and questions. My choices are included below:
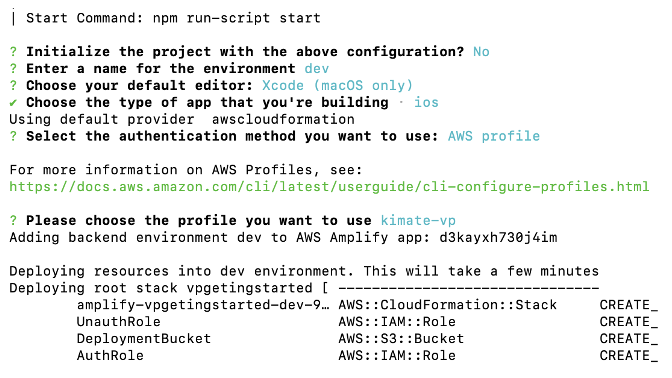
amplify init prompts
4. If everything goes successfully then you should see the message Amplify setup completed successfully.

5. You should see that two new files were created in your project directory within an AmplifyConfig folder, amplifyconfiguration.json and awsconfiguration.json. Lookin good!

After Amplify configuration in CLI you will see new configuration JSON files
Step 7. Deploy Authentication Resources
- Back to the terminal, let’s add Amplify authentication to your project. Run
amplify add auth, and follow the prompts.
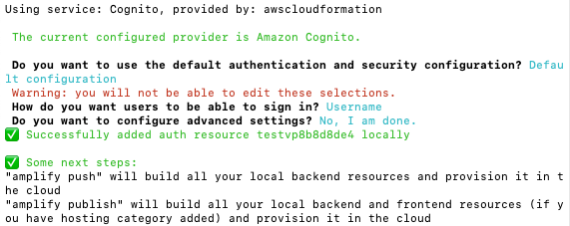
Configure Amplify authentication settings
2. Now that our Amplify authentication is configured locally, lets deploy that configuration to our AWS account. Run amplify push.
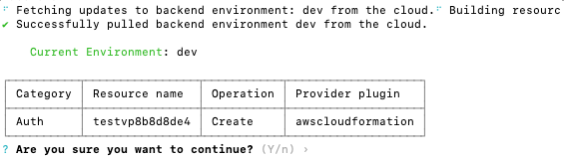
Push the authentication configuration to your AWS account.
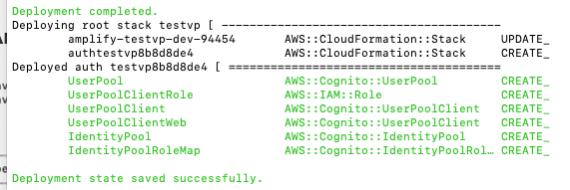
Successful deployment of authentication resources.
Great! Now your Amplify authentication has been deployed successfully.
3. In your browser tab for the Amplify project, check the status of your configuration.
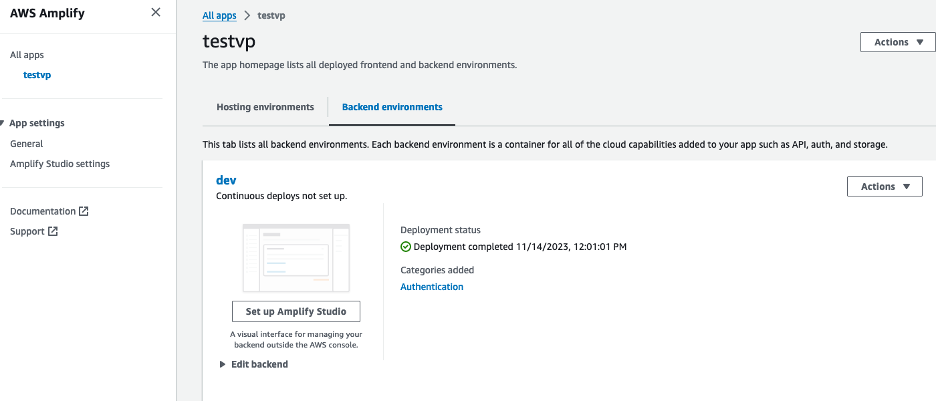
View of AWS Management Console for AWS Amplify, viewing newly deployed application.
The Amplify project provisions resources using AWS CloudFormation, let’s see what was deployed to CloudFormation.
4. Create a new AWS Management Console tab in your browser and search for and choose CloudFormation from the dropdown list.
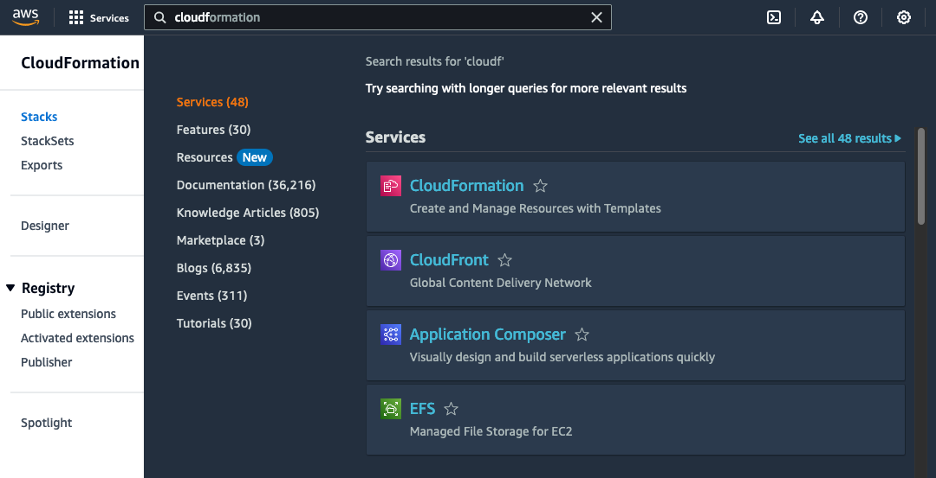
CloudFormation displayed in search within AWS Management Console
Within the CloudFormation Console you will notice that the stack had been created earlier, and updated more recently with these authentication changes. Every time you modify your Amplify project locally in the terminal and push as you did previously, it will update the underlying CloudFormation stacks. Similarly if your project backend is modified by another party or team member, you can use amplify pull to pull in the most recent environment configuration locally, just like any typical source control.
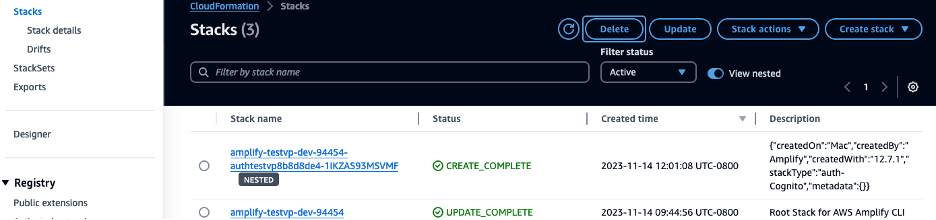
View of the AWS CloudFormation Console with deployed stacks.
Xcode Implementation
Step 1. Include Plugins into Xcode
Now let’s include the initializeAmplify function and authentication plugin for Amplify.
- Add the initialization logic to your entry point struct, ours is called
test_vpAppwithin the Xcode project directory.

Xcode authentication plugin logic
func initializeAmplify() {
    do {
        Amplify.Logging.logLevel = .verbose
        try Amplify.add(plugin: AWSCognitoAuthPlugin())
        try Amplify.configure()
    } catch {
        assertionFailure("Error initializing Amplify: \(error)")
    }
}
2. Add the Init function to call the initializeAmplify function from within the test_vpApp struct.
    init(){
        initializeAmplify()
    }
3. Build and run your application. You will notice output in the Xcode console in lower right, your auth plugin has been configured successfully.
Step 2. Add Authentication Logic
Now let’s add further authentication logic to your application. You can find best practice documentation on authentication methods using either Combine or Async/Await patterns at Enable Sign-in on the Amplify Dev Center.
- Next you will add an authentication UI component. A deep dive of SwiftUI to create these components is outside the scope of this tutorial. To learn more about SwiftUI, visit the SwiftUI Tutorials, and additional resources at Learn visionOS. I am going to follow the SwiftUI guidance Design for Spatial User Interfaces from WWDC 2023. You can also find additional information on SwiftUI at SwiftUI Developer Portal.
- Create a new Swift file named
LoginViewwith a struct to contain the UI elements displayed after a successful login.
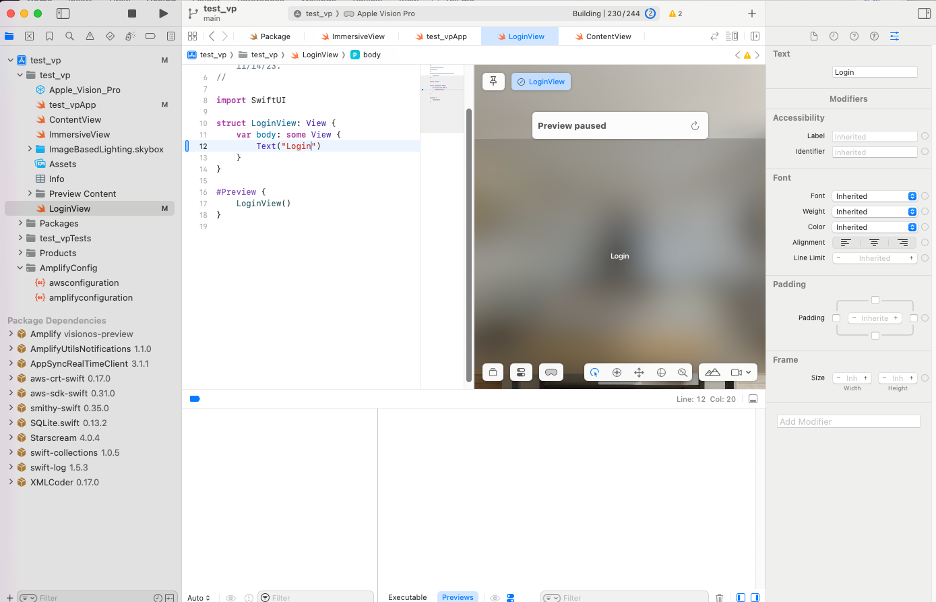
Create login view to allow user to authenticate into the Vision Pro application.
3. As your UI begins to grow, for organization, you can create additional view files. Create a new folder named UserView within the root of the project directory to contain all of the view structs for your SwiftUI elements. You will see the UserView folder throughout the rest of this tutorial series. You will see that I end up with several files in my UserView folder to handle the UI, including LoggedInView, LoginView, RegistrationView, ConfirmationView, DetailView, and ImmersiveView. You will notice that our naming conventions and application logic follow a Model, View, Controller (MVC) pattern. You can find additional resources online to learn about the MVC pattern or you can follow a different pattern.
Step 3. Add UI Elements and Expand Authentication Logic
- Add some additional UI elements for authentication. You will need at minimum two input fields for username and password, and two buttons for login and logout. If desired, you can also add elements to allow the creation of a new user account for a more robust experience.
Adding UI elements to facilitate user authentication.
2. Create a folder in the root project directory named ViewModel.
3. Create a new Swift class inside this folder called AuthViewModel.
4. Import Combine into your Swift file, as you will be using Combine in this tutorial series. Your AuthViewModel class containing your Amply authentication API calls should look like this.
import Amplify
import Combine

enum AppState {
    case loggedIn
    case loggedOut
    case confirmCode(email: String)
}

@MainActor
class AuthViewModel: ObservableObject {
    @Published var appState: AppState = .loggedOut
    var subscription: AnyCancellable?
    init(){
        fetchCurrentAuthSession()
    }

    func fetchCurrentAuthSession() {
        subscription  = Amplify.Publisher.create {
                try await Amplify.Auth.fetchAuthSession()
            }.sink {
                if case let .failure(authError) = $0 {
                    print("Fetch session failed with error \(authError)")
                }
            }
            receiveValue: { session in
                print("Is user signed in - \(session.isSignedIn)")
                self.appState = .loggedIn
            }
    }

    func login(username: String, password: String) {
        // Implement login logic using Amplify
        subscription = Amplify.Publisher.create {
            try await Amplify.Auth.signIn(
                username: username,
                password: password
                )
        }.sink {
            if case let .failure(authError) = $0 {
                print("Sign in failed \(authError)")
            }
        }
        receiveValue: { signInResult in
            if signInResult.isSignedIn {
                print("Sign in succeeded")
                self.appState = .loggedIn
            }else{
                self.appState = .loggedOut
            }
        }
        // On success, update appState to .loggedIn
    }

    func register(username: String, email: String, password: String) -> AnyCancellable {
        let userAttributes = [AuthUserAttribute(.email, value: email)]
        let options = AuthSignUpRequest.Options(userAttributes: userAttributes)

        return Amplify.Publisher.create {
            try await Amplify.Auth.signUp(
                username: username,
                password: password,
                options: options
            )
        }.sink(receiveCompletion: { completion in
            switch completion {
            case .finished:
                // Handle the completed flow
                break
            case .failure(let authError):
                print("An error occurred while registering a user: \(authError)")
            }
        }, receiveValue: { signUpResult in
            if case let .confirmUser(deliveryDetails, _, userId) = signUpResult.nextStep {
                print("Delivery details \(String(describing: deliveryDetails)) for userId: \(String(describing: userId))")
                self.appState = .confirmCode(email: email)
            } else {
                print("SignUp Complete")
                self.appState = .loggedOut
            }
        })
    }

    func confirmSignUp(username: String, confirmationCode: String) -> AnyCancellable {
        Amplify.Publisher.create {
            try await Amplify.Auth.confirmSignUp(
                for: username,
                confirmationCode: confirmationCode
            )
        }.sink {
            if case let .failure(authError) = $0 {
                print("An error occurred while confirming sign up \(authError)")
            }
        }
        receiveValue: { _ in
            print("Confirm signUp succeeded")
        }
    }

    func logout() -> AnyCancellable {
        // Implement logout logic
        Amplify.Publisher.create {
            try await Amplify.Auth.signOut()
        }.sink(receiveCompletion: { completion in
            switch completion {
            case .finished:
                print("Successfully logged out")
                // Handle the successful logout, e.g., update app state
                self.appState = .loggedOut
                break
            case .failure(let authError):
                print("An error occurred during logout: \(authError)")
                // Handle errors, e.g., show an error message
            }
        }, receiveValue: { _ in
            // In case you need to handle any value returned by the signOut operation.
            // Usually, there's no value to handle for logout, so this can be left empty or omitted.
        })
    }
}
5. You are now using signInResult.isSignedIn to populate your AppState as loggedIn or loggedOut. You can use this AppState to determine the visibility of your app content. Configure the application so that your ContentView is only shown when the user is logged in.
Step 4. Create a User in Amplify Studio
Let’s register a user with Amplify Studio, and confirm our user’s registration. This will allow us to sign into the Vision Pro application to test.
- Go to Amplify Studio from the AWS Management Console.
- Open Amplify Studio Settings in the left navigation panel.
- Turn on the Enable Amplify Studio toggle, for your Amplify application.
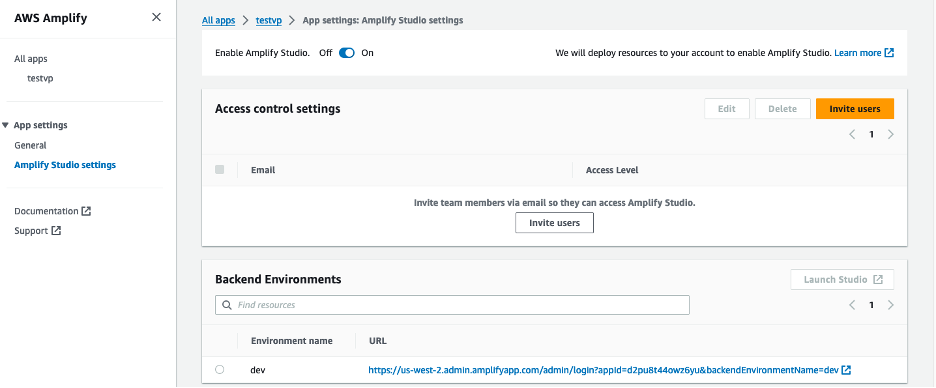
Enable Amplify Studio for your Amplify application.
2. Choose Invite users, to create and invite users to your application via email. You are going to create a user for yourself.
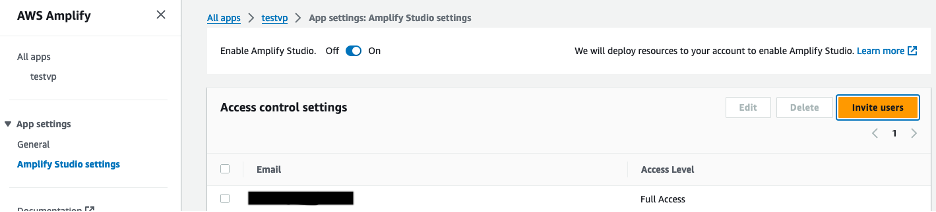
Invite user to project. This will send them an email to create an account
3. Check your email for a one-time password.
4. Login to Amplify Studio with this newly created user.
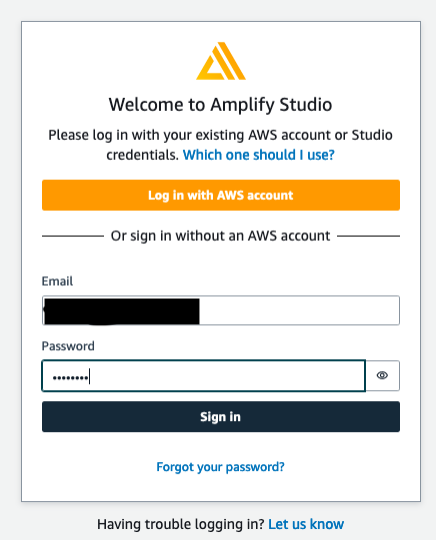
AWS Amplify Studio login dialogue.
5. Finally you will see your confirmed registrant! Success!
Step 5. Test Authentication in Xcode Vision Pro App
- Now that you have the user created, go back to Xcode, run your application and sign in using your new user.
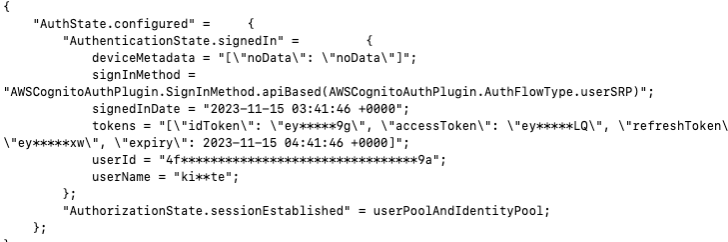
Successful sign in console output from Xcode with Amplify authentication.
2. Get excited for Part 2 of this tutorial series.
Awesome! You have now successfully brought in all necesarry Amplify plugins, created a simple UI for your Vision Pro application, and confirmed that all is working nicely. In Part 2 of this series you will add storage logic, using Amplify Storage with Amazon S3 under the hood, to allow runtime 3D model asset delivery into your application.