AWS News Blog
Launch: Amazon ElastiCache Launches Enhanced Redis Backup and Restore with Cluster Resizing

|
Most of us equate in-memory caching with improved performance and lower cost at scale when designing applications or building solutions. Now if there was only a service that would continually make it simpler to deploy and utilize in-memory cache in the cloud while increasing the ability to scale.
Okay no more joking around, the cloud service that provides this great functionality is, of course, Amazon ElastiCache. Amazon ElastiCache is an AWS managed service that provides a performant in-memory data store or cache in the cloud while offering a straightforward way to create, scale, and manage a distributed environment for low-latency, secure, access of I/O intensive or compute heavy data. Additionally, ElastiCache reduces the overhead of managing infrastructure for your in-memory data structure server or cache by detecting and replacing failed nodes while providing enhanced visibility into key performance metrics of the caching system nodes via Amazon CloudWatch. This exciting service is now launching support for Enhanced Redis Backup and Restore with Cluster Resizing.

For those of you familiar with Amazon ElastiCache, you are likely aware that ElastiCache currently supports two in-memory key-value engines:
- Memcached: an open source, high-performing, distributed memory object caching system developed in 2003 with the initial goal of speeding up dynamic web applications by alleviating database load
- Redis: an open source in-memory data structure store launched in 2009 developed as a broker for caching, messaging, and databases with built-in replication, atomic operation support, various levels of on-disk persistence, and high availability via Redis Cluster.
In October of 2016, support was added for Redis Cluster with Redis 3.2.4. This allowed ElastiCache Redis users to, not only take advantage of Redis clusters, but also gave users the ability to:
- Create cluster-level backups.
- Produce snapshots of each of the cluster’s shards contained within backups.
- Scale their workloads with 3.5TiB of data across up to 15 shards.
You can read more about using Redis with ElastiCache and the related features by reviewing the product page for Amazon ElastiCache for Redis.
With the launch of the Enhanced Backup and Restore with Cluster Resizing feature, ElastiCache is providing even deeper support for Redis with a clear-cut migration path to a managed Redis Cluster experience. There are several benefits of this enhancement for ElastiCache and Redis users alike, such as:
- Ability to restore backup into a Redis Cluster with a different number of shards and slot distribution
- Deliver the capability for users to resize Redis workloads
- Allow Redis database file (RDB) snapshots as input for creating a sharded Redis Cluster
- Offer option to use snapshot(s) of Redis on EC2 implementations (both Redis Cluster and single-shard Redis) as data input for sharded Redis Cluster creation
To accomplish these tasks, ElastiCache will parse the Redis key space across the backup’s individual snapshots, and redistribute the keys in the new Cluster according to the requested number of shards and hash slots. You would simply take your RDB snapshots and store them on S3, then provide ElastiCache with the desired number of shards and the snapshot file. ElastiCache handles the heavy lifting of restoring the Redis data store into a Redis cluster.
I am sure that you all may be thinking; Is it really that easy to leverage the Enhanced Redis Backup and Restore with Cluster Resizing feature in ElastiCache? Well, there is no time like the present to find out. Let’s take a trip to the AWS Management Console, and put this newly launched enhancement in action by restoring an external RDB snapshot to a new cluster using ElastiCache.
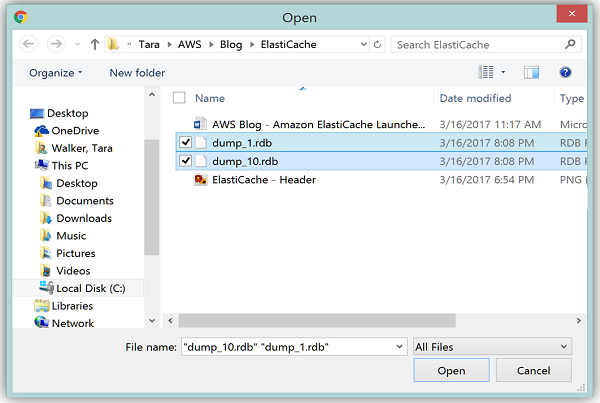
My first stop in the AWS Management console is to the Amazon S3 console. I have some Redis .rdb snapshot files I received from some of my peers here at AWS in order to test the restore of an external Redis snapshot to ElastiCache. I will need to put these files into Amazon S3 so that I can access the snapshots as input for my ElastiCache Redis cluster.
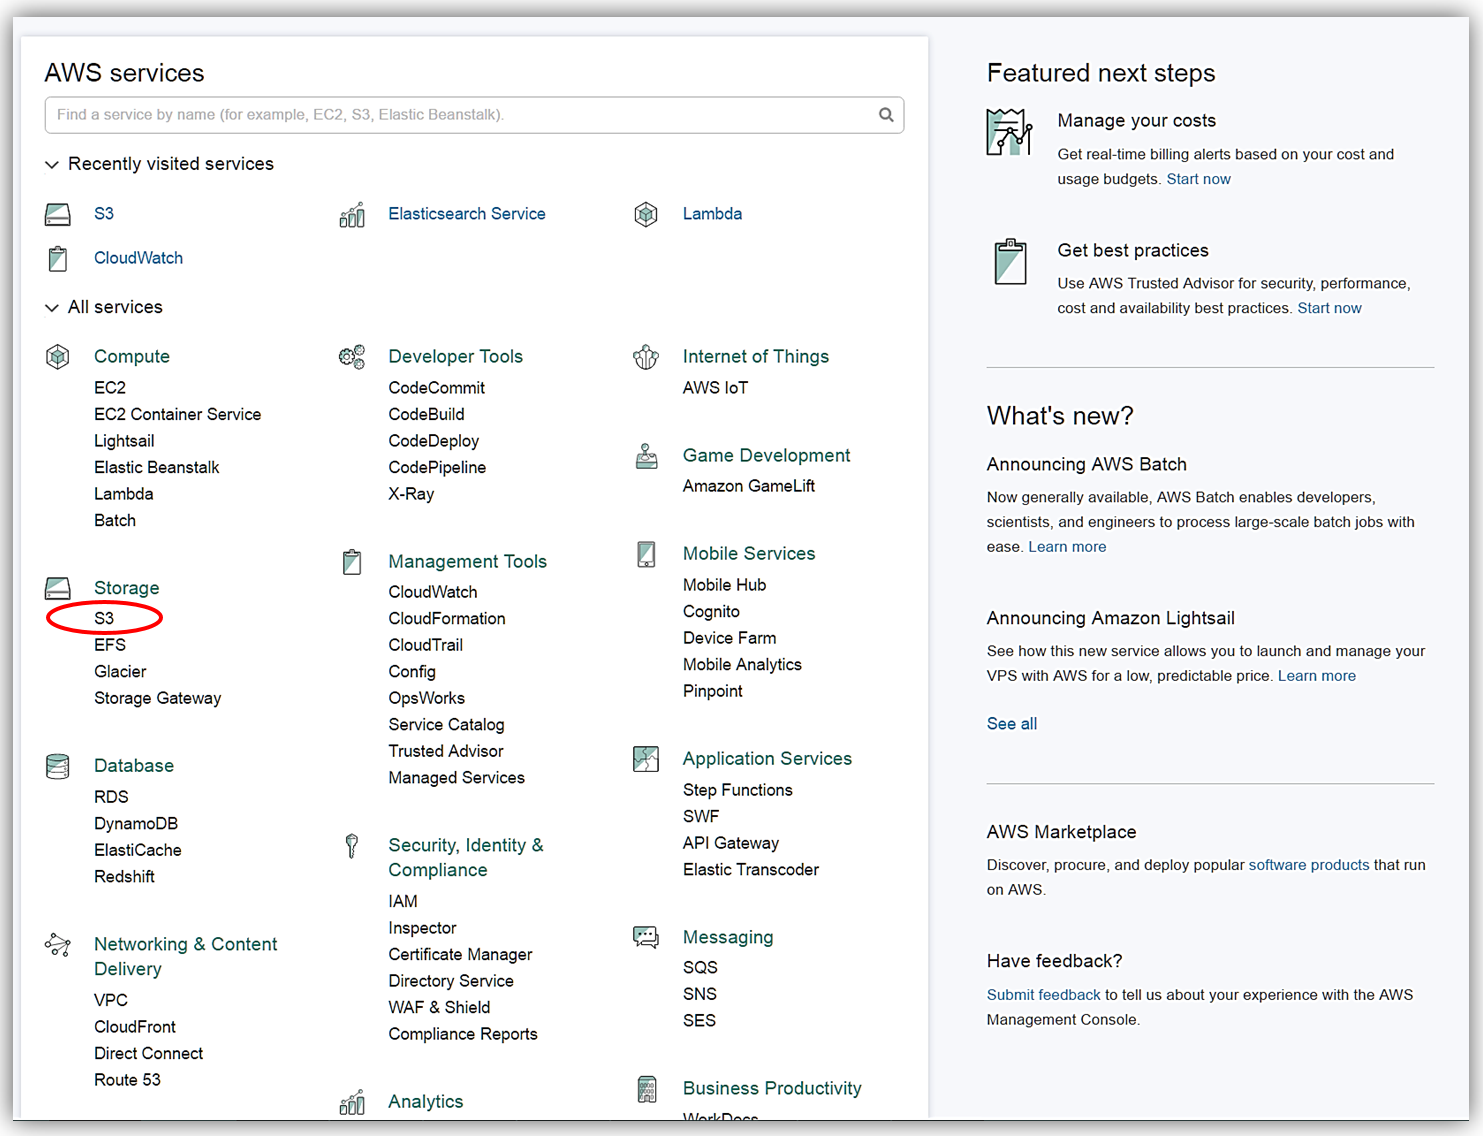
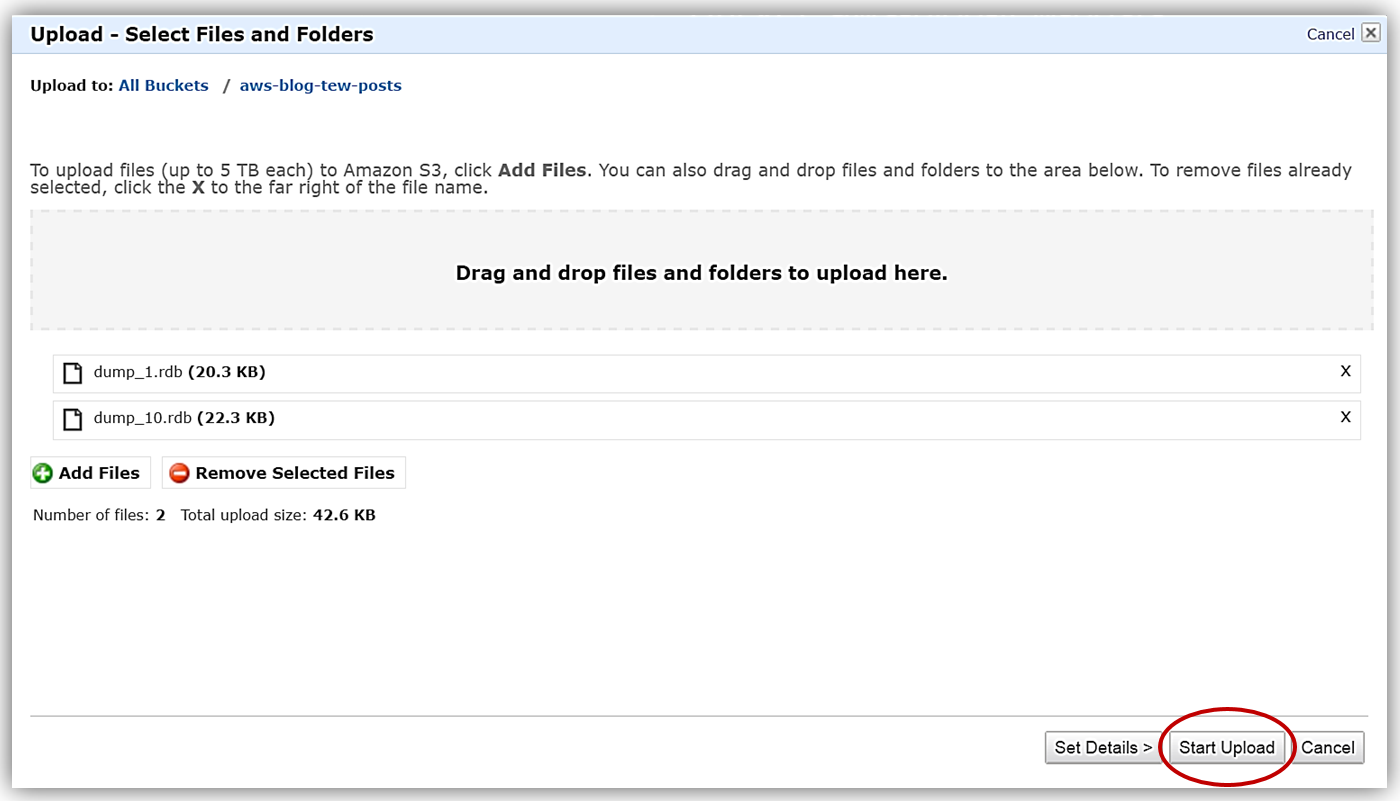
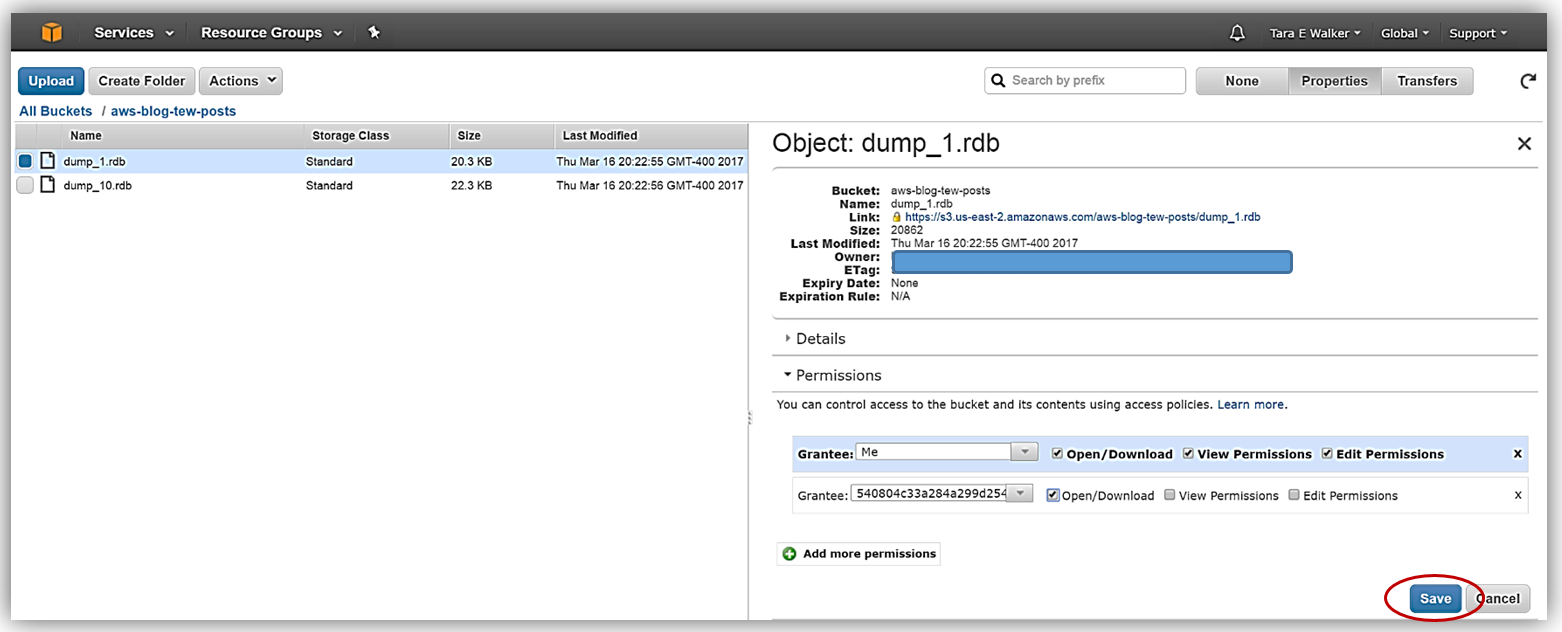
In the S3 console, I will go to my S3 bucket, aws-blog-tew-posts, that I created for testing and development purposes. I’ll upload the .rdb snapshot files that were provided to me into this S3 bucket.

It is important to note that the name of your S3 bucket must conform to DNS standards. To be DNS-compliant, the name must be at least three characters, must contain only lowercase letters, numbers, and/or dashes, and it must start and end with a lowercase letter or number. While this may be obvious, I will also note that the bucket name cannot be in an IP address format. You can learn more about the S3 Bucket Restrictions at the link provided here.
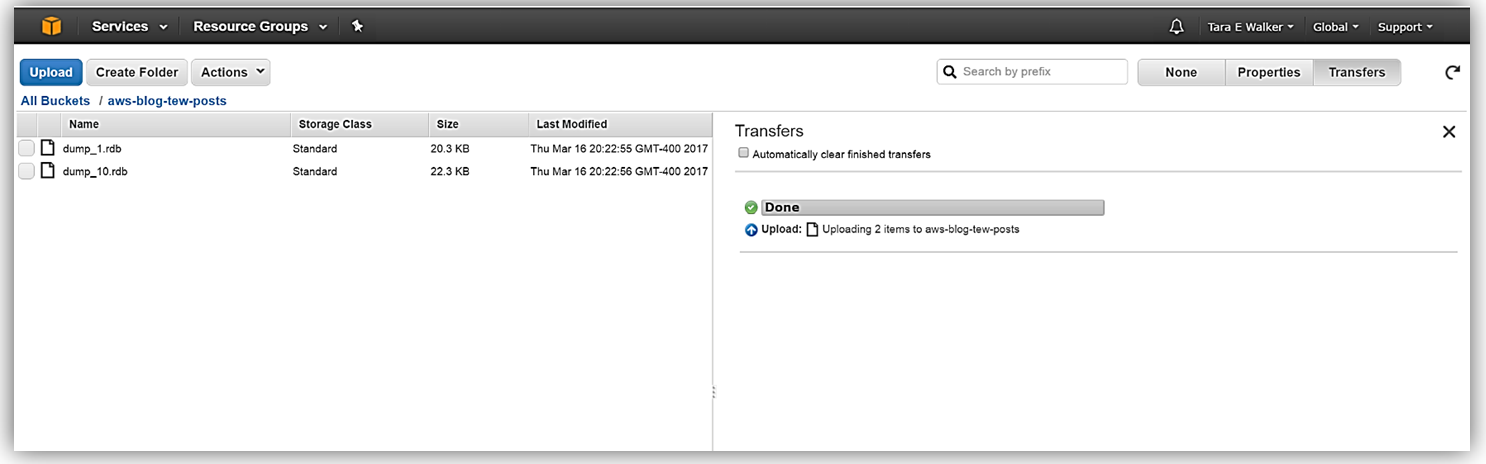
With my .rdb files successfully uploaded into my aws-blog-tew-posts bucket, I need to take note of the S3 path to these backup files. For these files, the path would be aws-blog-tew-posts/dump_1.rdb or aws-blog-tew-posts/dump_10.rdb. If you have placed your files into a folder, the folder name would need to be included in this path, i.e. thebucketname/thefoldername/thefilename.
For ElastiCache to access these files, I need to ensure that the service has read permissions for each of the files. To provide access, I will update the permissions for each of .rdb files by assigning the Grantee as the canonical id for my region and grant the user Open/Download permissions. The canonical id for all regions, outside of China (Beijing) and AWS GovCloud (US), is as follows:
540804c33a284a299d2547575ce1010f2312ef3da9b3a053c8bc45bf233e4353
After I click the Save button, I am all set to use these files as input for an ElastiCache Redis cluster.
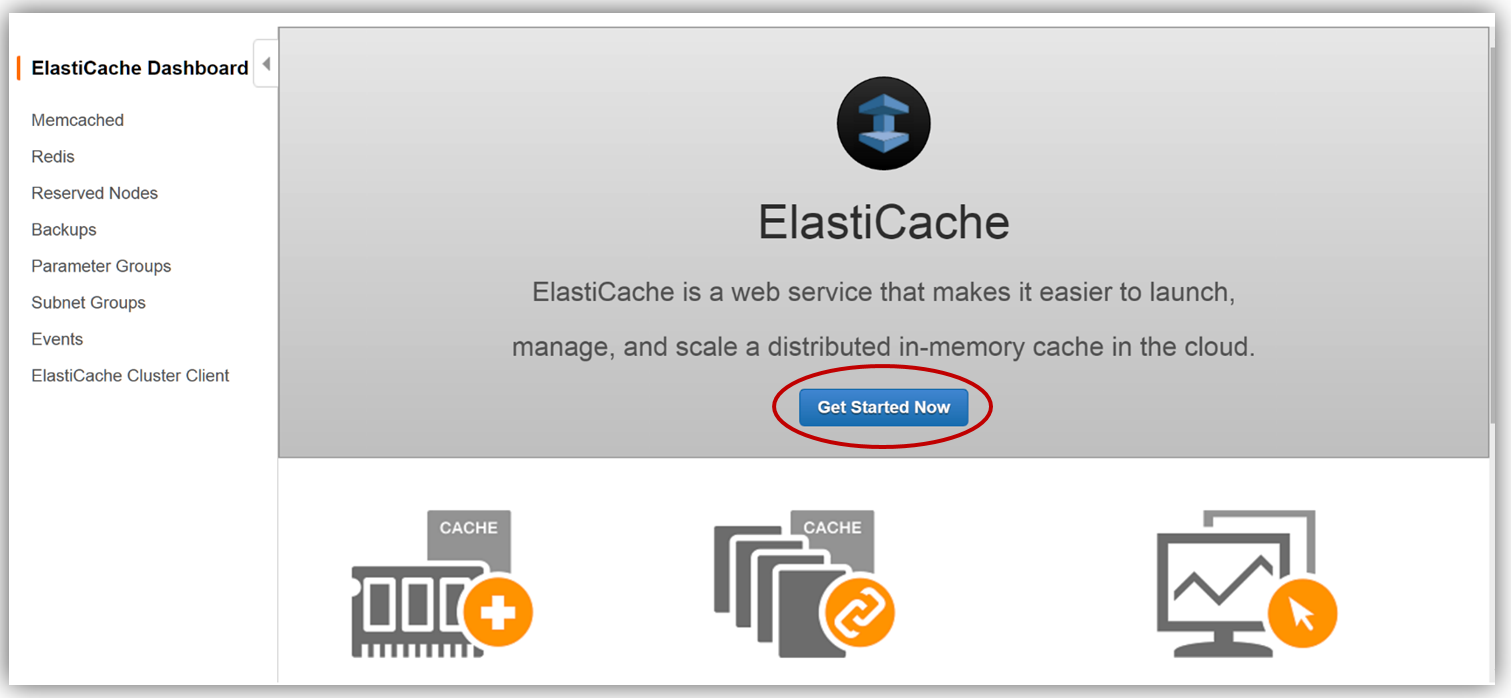
The next step is to go to the ElastiCache console. Here I will create a new ElastiCache Redis cluster and seed this new cluster with data from one of the RDB snapshots located in the files in my S3 bucket. I’ll choose the dump_1.rdb snapshot file to use as my data input to seed this new cluster. Since I want to explore the ElastiCache Redis capabilities added on this past October with 3.2.4 support of Redis Cluster, as well as, discuss the new Backup and Restore with Cluster Resizing enhancements, I’ll create a new Redis Cluster and ensure I have cluster mode enabled. At this point, I should note that you cannot restore from a backup created using a Redis (cluster mode enabled) cluster to a Redis (cluster mode disabled) cluster.
First, I will click the Get Started Now button from the ElastiCache console dashboard or the Create button based upon your console view.

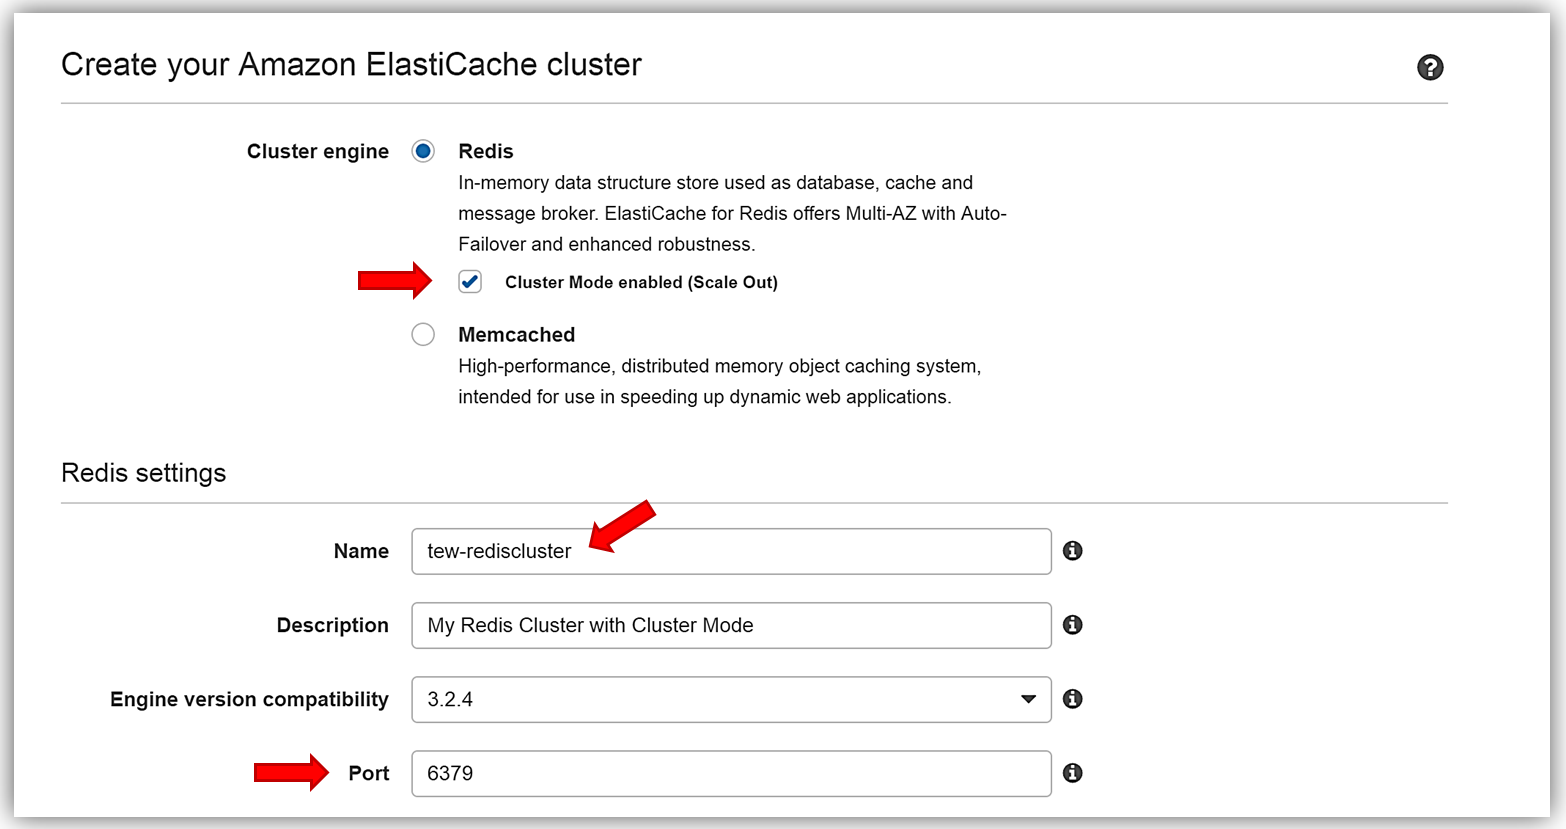
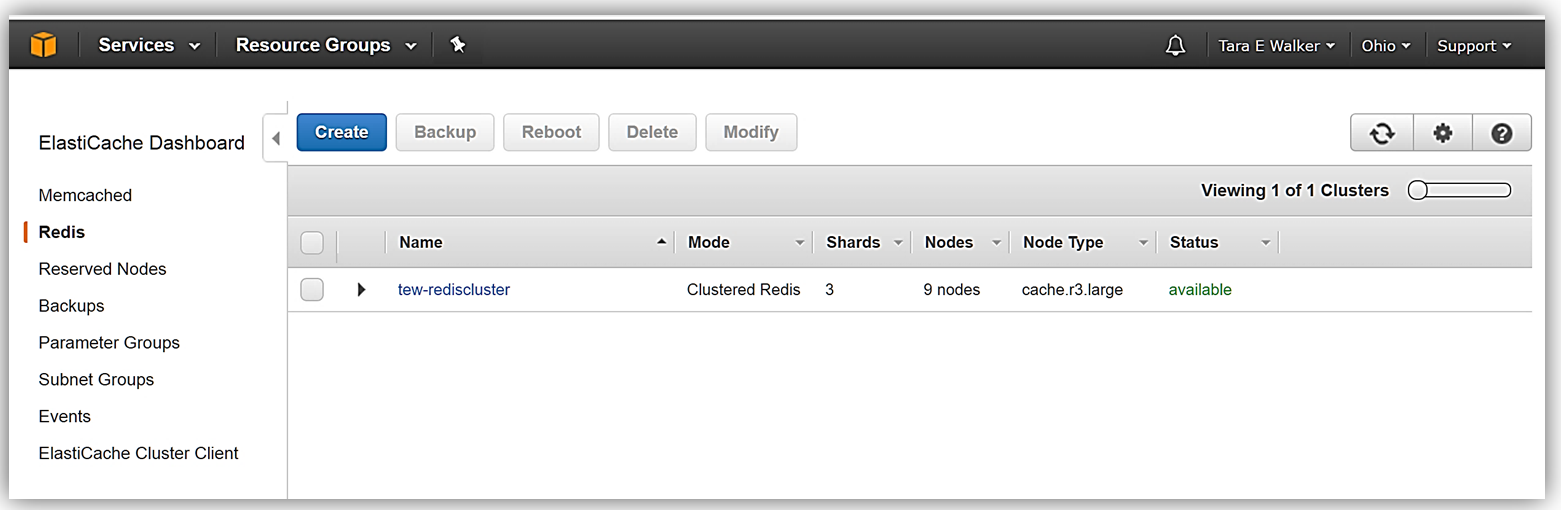
In the Create your Amazon ElastiCache cluster dialog window, I’ll select Redis for my caching and make sure I click the checkbox for Cluster Mode enabled (Scale Out). The name of my new cluster will be, tew-rediscluster and I since I am enabling a Cluster mode, my ElastiCache Redis Engine version is 3.2.4. For this cluster, I will keep the default Redis port of 6379.
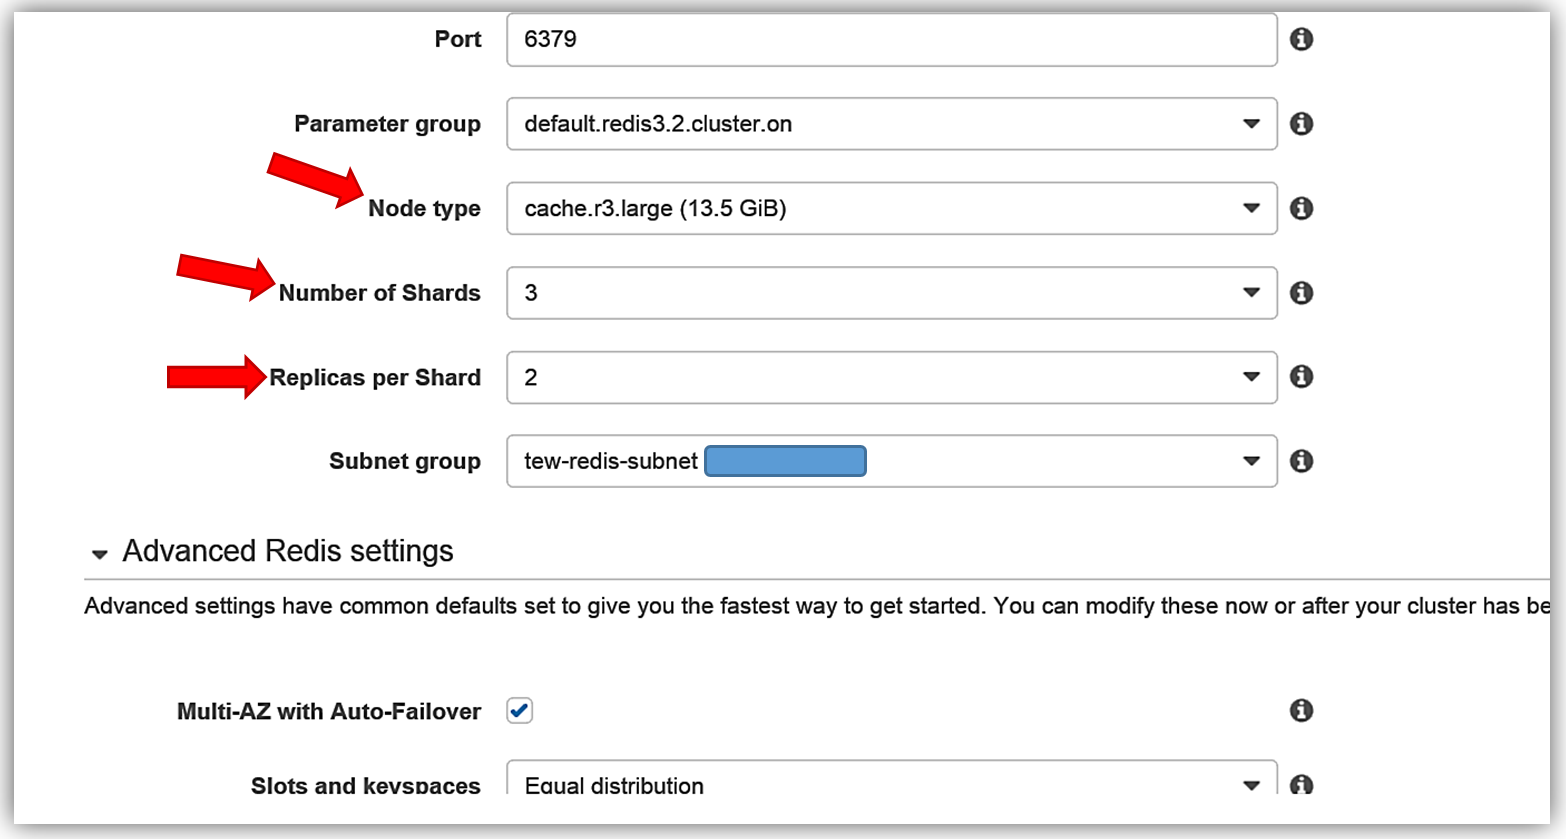
The key benefit of the ElastiCache enhanced Redis Backup and Restore feature is the cluster resizing capability that allows me to build a new cluster with a different number of shards than was originally used for the backup file. To build the new Redis Cluster, I am using only one RDB snapshot file, dump_1.rdb which is a small Redis instance backup with only one shard. However, in the creation of my new tew-rediscluster, I have opted for 3 shards with 2 replicas per shard.
In addition, I have the ability to specify a node type for my new cluster that is a different size than my original instance from the RDB snapshot. As I mentioned, the dump_1.rdb is a backup of a Redis instance that is significantly smaller than the size of the chosen node type for my tew-rediscluster shown below.
There are other options and data input needed in order to complete the creation of my ElastiCache Redis cluster that I will not show in this blog post. However, if you want to go through each of the steps necessary for creating an ElastiCache Redis cluster you can find more information in the AWS ElastiCache Getting Started documentation for Launch a Cluster.
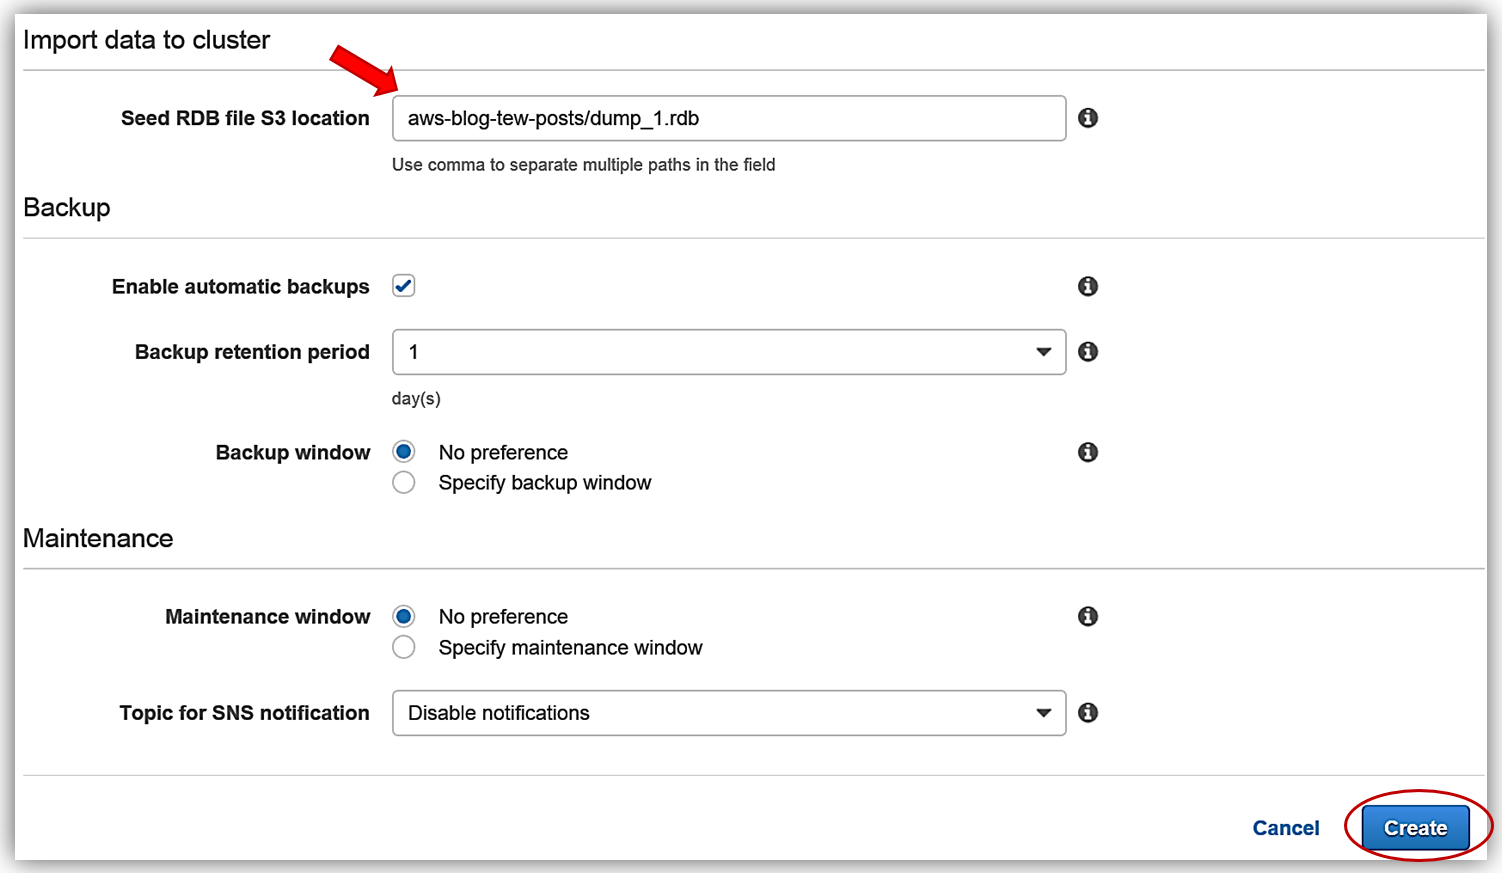
Once I have provided all the information needed to create my ElastiCache Redis cluster, I will need to tell ElastiCache how to seed the cluster with the .rdb file by providing the file location from my S3 bucket. In the Import Data to Cluster section of the create dialog, I will enter the S3 path to my dump_1.rdb in the Seed RDB file S3 location textbox. Remember, the nomenclature for the S3 file path is Bucket/Folder/ObjectName so I will enter aws-blog-tew-posts/dump_1.rdb as the path to the RDB file in S3. All that is left now is to click the Create button.
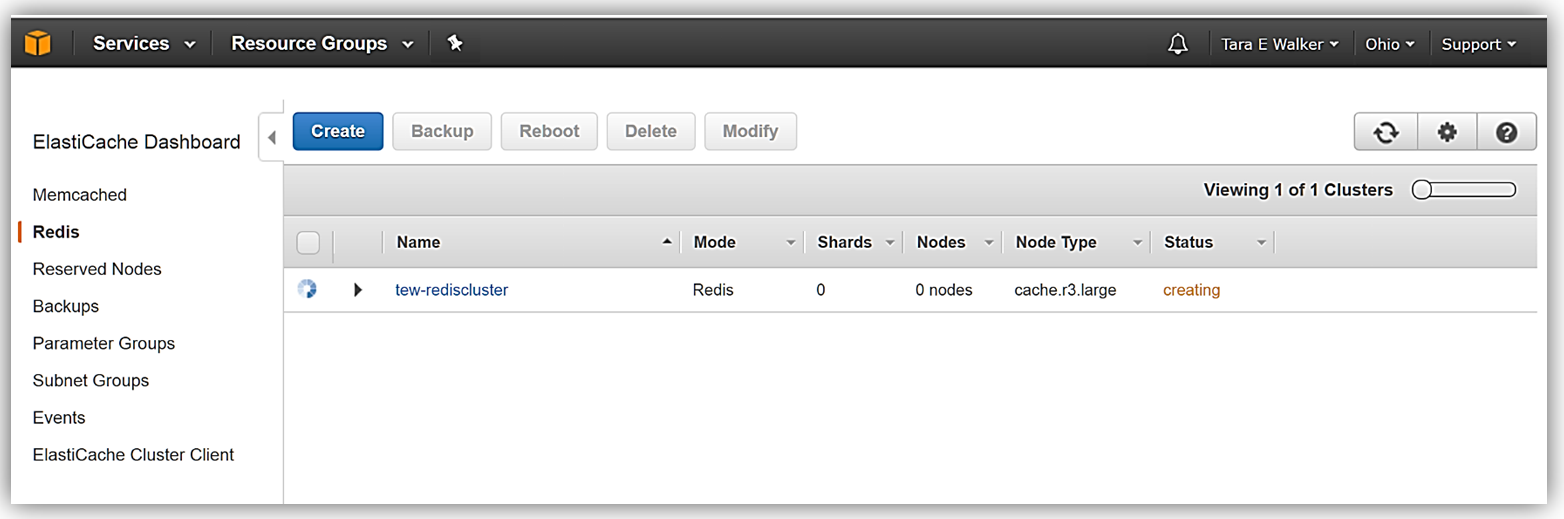
That’s it! ElastiCache goes to work to creating the new Redis cluster. After a short time period, the ElastiCache console shows my new Amazon ElastiCache Redis cluster as available and I have successfully created this cluster with data restored from an external RDB snapshot file.
I just demonstrated how you have the capability to create an ElastiCache Redis cluster using an external RDB snapshot, but of course, you can create backups and restore from backups from your existing ElastiCache Redis clusters as well. To dig deeper into information about this newly launched feature, visit Restoring From a Backup with Cluster Resizing in the Amazon ElastiCache User Guide.
To learn more about making your applications more performant with Amazon ElastiCache, visit the AWS Amazon ElastiCache page for product details, resources, and customer testimonials.
– Tara