AWS News Blog
Route 53 Update – Domain Name Registration, Geo Routing, and a Price Reduction
Amazon Route 53 is a highly available and scalable Domain Name Service (DNS), including a powerful Health Checking Service. Today we are extending Route 53 with support for domain name registration and management and Geo DNS. We are also reducing the price for Route 53 queries! Let’s take a closer look at each one of these items.
Domain Name Registration and Management
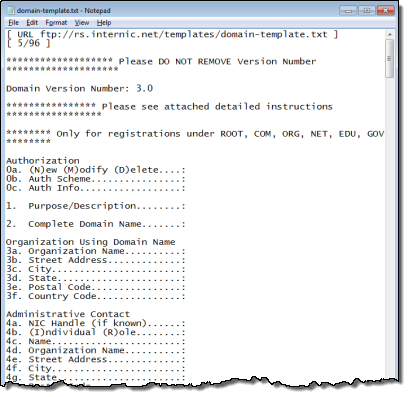 I registered my first domain name in 1995! Back then, just about every aspect of domain management and registration was difficult, expensive, and manual. After you found a good name, you had to convince one or two of your tech-savvy friends to host your DNS records, register the name using an email-based form, and then bring your site online. With the advent of web-based registration and multiple registrars the process became a lot smoother and more economical.
Up until now, you had to register your domain at an external registrar, create the Hosted Zone in Route 53, and then configure your domain’s entry at the registrar to point to the Route 53 name servers. With today’s launch of Route 53 Domain Name Registration, you can now take care of the entire process from within the AWS Management Console (API access is also available, of course). You can buy, manage, and transfer (both in and out) domains from a wide selection of generic and country-specific top-level domains (TLDs). As part of the registration process, we’ll automatically create and configure a Route 53 Hosted Zone for you. You can think up a good name, register it, and be online with static (Amazon Simple Storage Service (Amazon S3)) or dynamic content (Amazon Elastic Compute Cloud (Amazon EC2), AWS Elastic Beanstalk, or AWS OpsWorks) in minutes.
 If you, like many other AWS customers, own hundreds or thousands of domain names, you know first-hand how much effort goes in to watching for pending expirations and renewing your domain names. By transferring your domain to Route 53, you can take advantage of our configurable expiration notification and our optional auto-renewal. You can avoid embarrassing (and potentially expensive) mistakes and you can focus on your application instead of on your domain names. You can even reclaim the brain cells that once stored all of those user names and passwords.
Let’s walk through the process of finding and registering a domain name using the AWS Management Console and the Route 53 API.
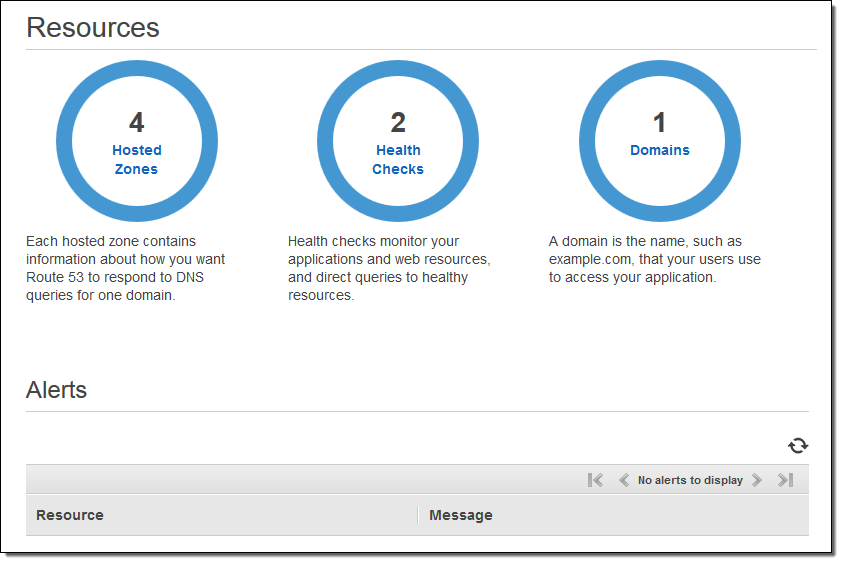
The Route 53 Dashboard gives me a big-picture view of my Hosted Zones, Health Checks, and Domains:
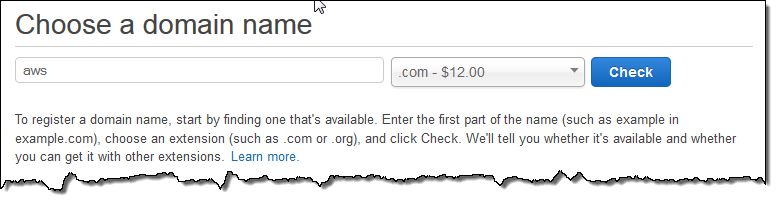
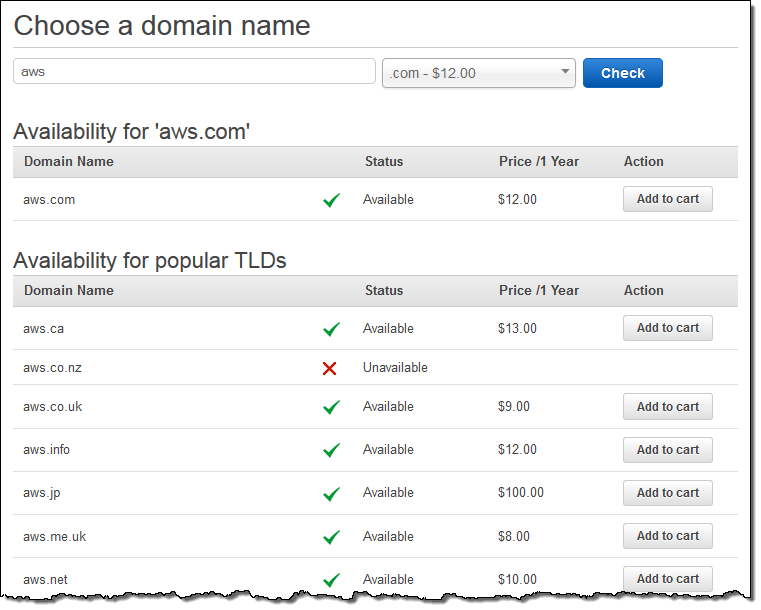
I begin the registration process by entering the desired name and selecting a TLD from the menu:
The console checks on availability within the selected domain and in some other popular domains. I can add the names I want to the cart (.com and .info in this case):

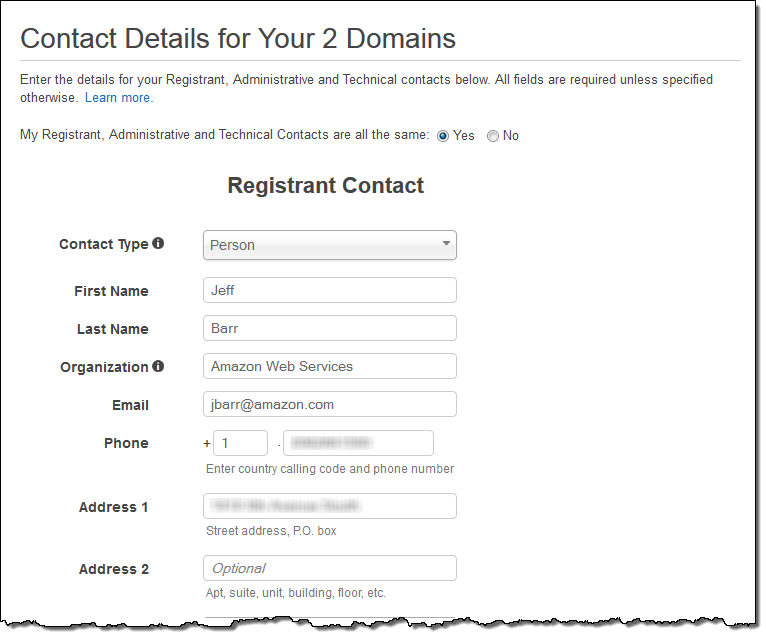
Then I enter my contact details:
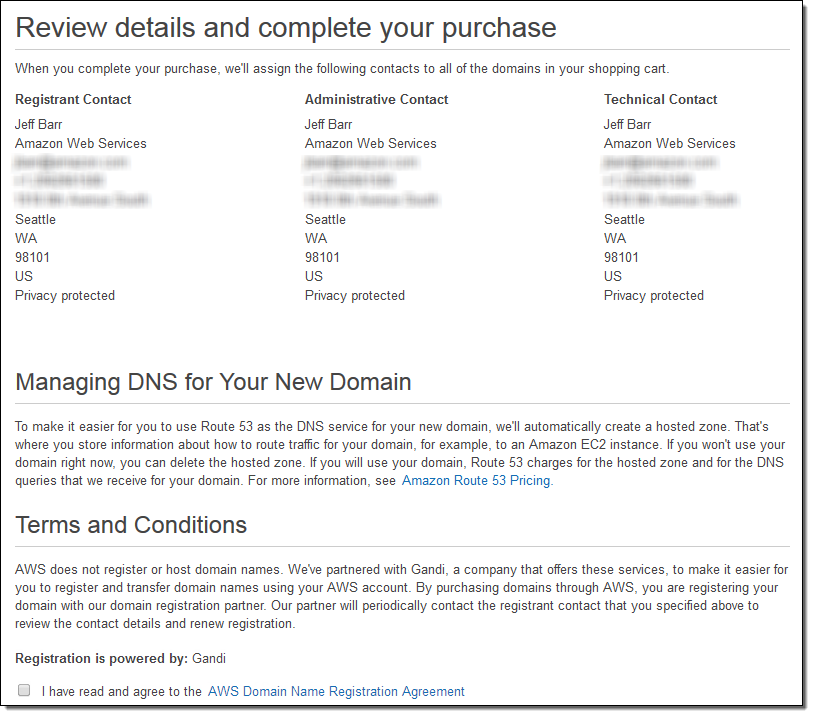
I can choose to enable privacy protection for my domain. This option will hide most of my personal information from the public Whois database in order to thwart scraping and spamming.

When everything is ready to go, I simply agree to the terms and my domain(s) will be registered:
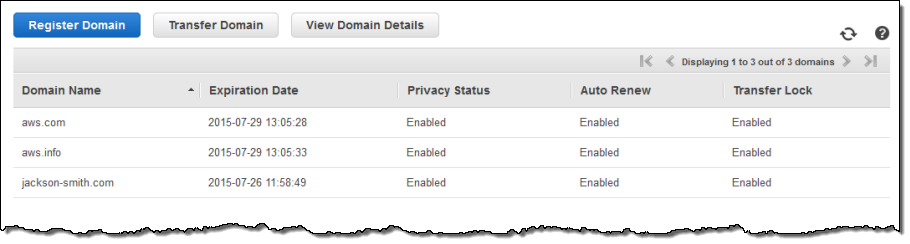
I can see all of my domains in the console:
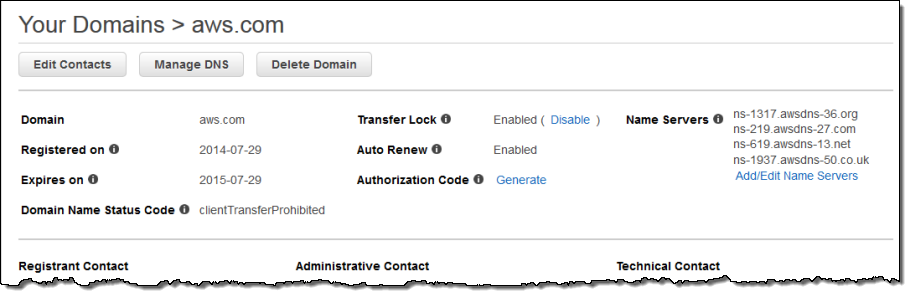
I can also see detailed information on a single domain:
I can also transfer domains into or out of Route 53:
As I mentioned earlier, I can also investigate, purchase, and manage domains through the Route 53 API. Let’s say that you are picking a name for a new arrival to your family and you want to make sure that you can acquire a suitable domain name (in most cases, consultation with your significant other is also advisable). Here’s some code to automate the entire process! I used the AWS SDK for PHP.
The first step is to set the desired last name and gender, and the list of acceptable TLDs:
$LastName = 'Barr';
$Gender   = 'F';
$TLDs     = array('.com', '.org');
Then I include the AWS SDK and the PHP Simple HTML DOM and create the Route 53 client object:
require 'aws.phar';
require 'simple_html_dom.php';

// Connect to Route 53
$Client = \Aws\Route53Domains\Route53DomainsClient::factory(array('region' => 'us-east-1'));
Now I need an array of the most popular baby names. I took this list and parsed the HTML to create a PHP array:
$HTML       = file_get_html("http://www.babycenter.com/top-baby-names-2013");
$FirstNames = array();

$Lists = $HTML->find('table tr ol');
$Items = $Lists[($Gender == 'F') ? 0 : 1];

foreach ($Items->find('li') as $Item)
{
  $FirstNames[] = $Item->find('a', 0)->innertext;
}
With the desired last name and the list of popular first names in hand (or in memory to be precise), I can generate interesting combinations and call the Route 53 checkDomainAvailability function to see if they are available:
foreach ($FirstNames as $FirstName)
{
  foreach ($TLDs as $TLD)
  {
    $DomainName = $FirstName . '-' . $LastName . $TLD;

    $Result = $Client->checkDomainAvailability(array(
      'DomainName'  => $DomainName,
      'IdnLangCode' => 'eng'));
  }
  echo "{$DomainName}: {$Result['Availability']}\n";
}
I could also choose to register the first available name (again, consultation with your significant other is recommended here). I’ll package up the contact information since I’ll need it a couple of times:
$ContactInfo = array(
  'ContactType'      => 'PERSON',
  'FirstName'        => 'Jeff',
  'LastName'         => 'Barr',
  'OrganizationName' => 'Amazon Web Services',
  'AddressLine1'     => 'XXXX  Xth Avenue',
  'City'             => 'Seattle',
  'State'            => 'WA',
  'CountryCode'      => 'US',
  'ZipCode'          => '98101',
  'PhoneNumber'      => '+1.206XXXXXXX',
  'Email'            => 'jbarr@amazon.com');
And then I use the registerDomain function to register the domain:
if ($Result['Availability'] === 'AVAILABLE')
{
  echo "Registering {$DomainName}\n");

  $Result = $Client->registerDomain(array(
    'DomainName'              => $DomainName,
    'IdnLangCode'             => 'eng',
    'AutoRenew'               => true,
    'DurationInYears'         => 1,
    'BillingContact'          => $ContactInfo,
    'RegistrantContact'       => $ContactInfo,
    'TechContact'             => $ContactInfo,
    'AdminContact'            => $ContactInfo,
    'OwnerPrivacyProtected'   => true,
    'AdminPrivacyProtected'   => true,
    'TechPrivacyProtected'    => true,
    'BillingPrivacyProtected' => true));
}
Geo Routing
Route 53’s new Geo Routing feature lets you choose the most appropriate AWS resource for content delivery based on the location where the DNS queries originate. You can now build applications that respond more efficiently to user requests, with responses that are wholly appropriate for the location. Each location (a continent, a country, or a US state) can be independently mapped to static or dynamic AWS resources. Some locations can receive static resources served from S3 while others receive dynamic resources from an application running on EC2 or Elastic Beanstalk.
 You can use this feature in many different ways. Here are a few ideas to get you started:
- Global Applications – Route requests to Amazon Elastic Compute Cloud (Amazon EC2) instances hosted in an AWS Region that is in the same continent as the request. You could do this to maximize performance or to meet legal or regulatory requirements.
- Content Management – Provide users access with access to content that has been optimized, customized, licensed, or approved for their geographic location. For example, you could choose to use distinct content and resources for red and blue portions of the United States. Or, you could run a contest or promotion that is only valid in certain parts of world and use this feature to provide an initial level of filtering.
- Consistent Endpoints – Set up a mapping of locations to endpoints to ensure that a particular location always maps to the same endpoint. If you are running a MMOG, routing based on location can increase performance, reduce latency, give you better control over time-based scaling, and increase the likelihood that users with similar backgrounds and cultures will participate in the same shard of the game.
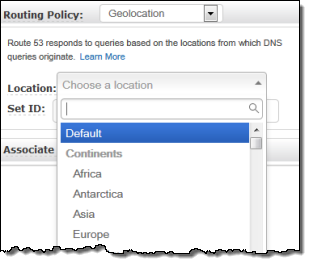
To make use of this feature, you simply create some Route 53 Record Sets that have the Routing Policy set to Geolocation. Think of each Record Set as a mapping from a DNS entry (e.g. www.jeff-barr.com) to a particular AWS resource an S3 bucket, an EC2 instance, or an Elastic Load Balancer. With today’s launch, each Record Set with a Geolocation policy becomes effective only when the incoming request for the DNS entry originates within the bounds (as determined by an IP to geo lookup) of a particular continent, country, or US state. The Record Sets form a hierarchy in the obvious way and the most specific one is always used. You can also choose to create a default entry that will be used if no other entries match.
You can set up this feature from the AWS Management Console, the Route 53 API, or the AWS Command Line Interface (AWS CLI). Depending on your application, you might want to think about an implementation that generates Record Sets based on information coming from a database of some sort.
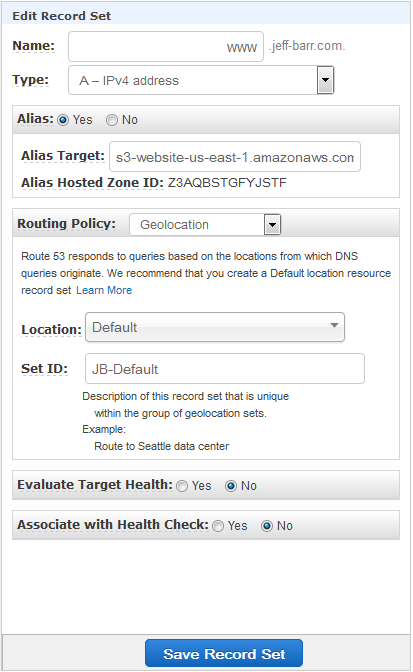
Let’s say that I want to provide static content to most visitors to www.jeff-barr.com, and dynamic content to visitors from Asia. Here’s what I need to do. First I create a default Record Set for “www” that points to my S3 bucket:
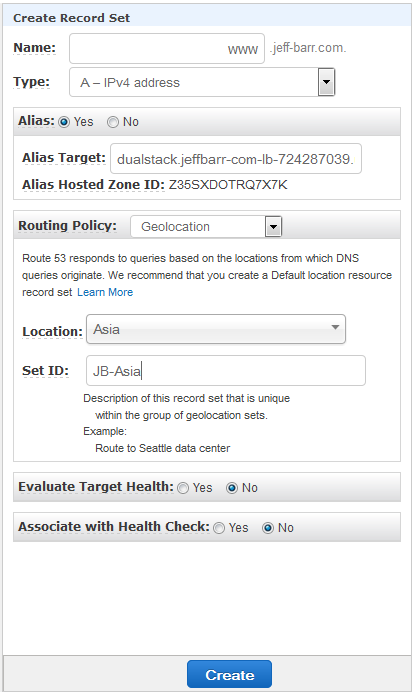
Then I create another one “www”, this one Geolocated for Asia. This one points to an Elastic Load Balancer:
Price Reduction
Last, but certainly not least, I am happy to tell you that we have reduced the prices for Standard and LBR (Latency-Based Routing) queries by 20%. The following prices go in to effect as of August 1, 2014:
- Standard Queries – $0.40 per million queries for the first billion queries per month; $0.20 per million queries after that.
- LBR Queries – $0.60 per million queries for the first billion queries per month; $0.30 per million queries after that.
- Geo DNS Queries – $0.70 per million queries for the first billion queries per month; $0.35 per million queries after that.
Available Now
These new features are available now and the price reduction goes in to effect tomorrow.
— Jeff;
PS – Thanks to Steve Nelson of AP42 for digging up the Internic Domain Registration Template!