AWS for SAP
Extracting data from SAP HANA using AWS Glue and JDBC
Have you ever found yourself endlessly clicking through the SAP GUI searching for the data you need? Then finally resort to exporting tables to spreadsheets, just to run a simple query to get the answer you need?
I know I have—and wanted an easy way to access SAP data and put it in a place where I can use it the way I want.
In this post, you walk through setting up a connection to SAP HANA using AWS Glue and extracting data to Amazon S3. This solution enables a seamless mechanism to expose SAP to a variety of analytics and visualization services, allowing you to find the answer you need.
Overview
There are several tools available to extract data from SAP. However, almost all of them take months to implement, deploy, and license. Also, they are a “one-way door” approach—after you make a decision, it’s hard to go back to your original state.
AWS has a “two-way door” philosophy. AWS Glue, Amazon Athena, and Amazon QuickSight are AWS pay-as-you-go, native cloud services:
- AWS Glue – This fully managed extract, transform, and load (ETL) service makes it easy for you to prepare and load data for analytics. There is no infrastructure to create or manage. AWS Glue handles provisioning, configuration, and scaling of the resources required to run your ETL jobs on a fully managed, scale-out, Apache Spark environment.
- Athena – This interactive query service makes it easy to analyze data in S3 using standard SQL. Because Athena is serverless, there is no infrastructure to manage, and you pay only for the queries that you run. Just point to your data in S3, define the schema, and start querying using standard SQL.
- Amazon QuickSight – This fully managed, fast, cloud-powered business intelligence service makes it easy to deliver insights to everyone in your organization. Amazon QuickSight lets you easily create and publish interactive dashboards that include ML Insights.
Walkthrough
In this post, you use the previous AWS resources plus AWS Secrets Manager to set up a connection to SAP HANA and extract data.
Prerequisites
Before you set up connectivity, you must store your credentials, connection details, and JDBC driver in a secure place. First, create an S3 bucket for this exercise.
Create an S3 bucket and folder
- In the S3 console, create an S3 bucket called
sap-kna1. To prevent any of your objects from being public, use the default bucket settings around public access. - After the
sap-kna1bucket is created, choose Create folder. - On the Create folder page, for output, enter the folder name or prefix name.
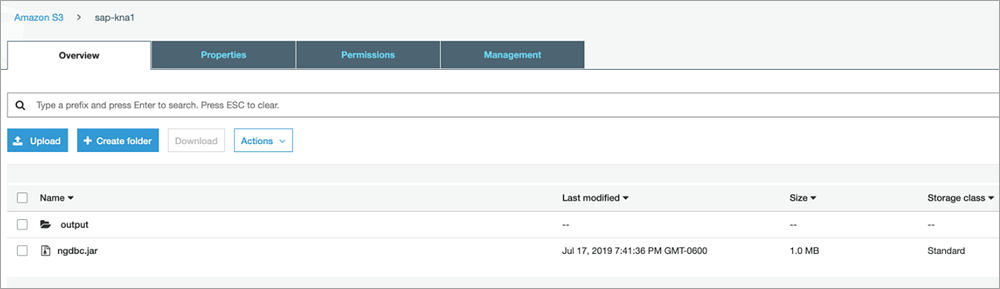
You should now have a brand new bucket and structure ready to use.
Next, use Secrets Manager to store your credentials and connection details securely.
Create a new secret
- In the Secrets Manager console, choose Store a new secret, Other type of secrets.
- On the Secret key/value tab, create a row for each of the following parameters by using the Add row button and then entering the following values:
- For db_username, enter SAPABAP1. This is the HANA database user that has read access to the primary SAP schema and has read permissions to the tables from which you plan to read. For more details, work with your DBA or SAP Basis teams.
- For db_password, enter NotMyPassword123. This is the HANA database user password that you encrypt using Secrets Manager.
- For db_url, enter jdbc:sap://10.0.52.188:30013/?instanceNumber=00&databaseName=S4A. You’re connecting to the tenant DB in an MDC system. For more details, work with your DBA or SAP Basis teams.
- For db_table, enter KNA1. Here you use the KNA1 data from the customer master in the SAP.
- For driver_name, enter com.sap.db.jdbc.Driver. This entry indicates that you are using the SAP HANA JDBC driver for this AWS Glue job.
- For output_bucket, enter s3://sap-kna1/output/. This is the bucket you created earlier that you use to organize your JDBC drivers and output files.
After you enter all these values, your screen should look like the following screenshot.

- At the bottom of the page, select your encryption key. For this exercise, use the default key provided. Feel free to use any key you want, but make sure you have access to that key.
- Choose Next.
- For Secret name, enter SAP-Connection-Info.
- (Optional) Provide a description.
- Choose Next.
- Although you can rotate secrets, for this exercise, leave the default Disable automatic rotation, and choose Next.
- On the next page, review your secret’s configuration and then choose Store.
The following screenshot shows your secret successfully saved.

Next, create an IAM role for your AWS Glue job. The IAM role can either be created before creating the extraction job or created during the run. For this exercise, create it in advance.
Create the IAM role
- In the IAM console, in the left navigation pane, choose Roles, Create role. The role type of trusted entity must be an AWS service, so for this post, choose AWS Glue.
- Choose Next, Permissions.
- Under Policy name, search for and select the check box for the following policies:
- AWSGlueServiceRole.
- SecretsManagerReadWrite. This policy allows the AWS Glue job to access database credentials stored in Secrets Manager. This policy is open and is used for testing purposes only. Create a custom policy to narrow the access to just the secrets to use in the ETL job.
- AmazonS3FullAccess. This policy allows the AWS Glue job to access database jars stored in S3 and upload the AWS Glue job Python scripts.
- AmazonAthenaFullAccess. This policy allows Athena to read your extract file from S3 to support Amazon QuickSight.
- Choose Next, Review.
- For Role name, enter a name for your role, for example, GluePermissions.
- (Optional) Enter a description in the Role description box.
- Under Policies, confirm the four policies that you selected earlier.
- Choose Create role.
After creating the IAM role, upload the JDBC driver to the location in your S3 bucket, as shown in the following screenshot. For this example, use the SAP HANA driver, which is available on the SAP support site.
Setting up the solution
Now that you set up the prerequisites, author your AWS Glue job for SAP HANA.
Author the AWS Glue job
- In the AWS Glue console, in the left navigation pane under Databases, choose Connections, Add connection.
- For Connection name, enter KNA1, and for Connection type, select JDBC.
- (Optional) Enter a description.
- Choose Next.
- Enter values for JDBC URL, Username, Password, VPC, and Subnet.
- For Security groups, select the default.
- Choose Next.
- Review the connection properties and connection access parameters, and then choose Finish.
Now, create the actual AWS Glue job.
Create the AWS Glue job
- In the left navigation pane, under ETL, choose Jobs.
- Choose Add job.
- Fill in the job properties:
- For Name, give the job a name (for this exercise, KNA1).
- For IAM role, choose the IAM role that you created previously (GluePermissions).
- For This job runs, select A new script to be authored by you.
- For ETL language, choose Python.
- For Script file name, enter KNA1.
- For the S3 path where the script is stored and Temporary directory, enter the name of the S3 bucket that you created earlier.
- Under Security configuration, script libraries, and job parameters, for Dependent jars path, enter the location of your JDBC driver. For example, s3://sap-kna1/ngdbc.jar.
- All other fields can be left as the default.
- Choose Next.
- On the Connections summary page, for Required connections, add the KNA1 connection, then choose Save job and edit script. The script editor opens.
- In the blank editor, add the following script and then choose Save:
Running the ETL job
Now that you created the AWS Glue job, the next step is to run it.
- In the script editor, double-check that you saved your new job, and choose Run job.
- Confirm your parameters and choose Run job.
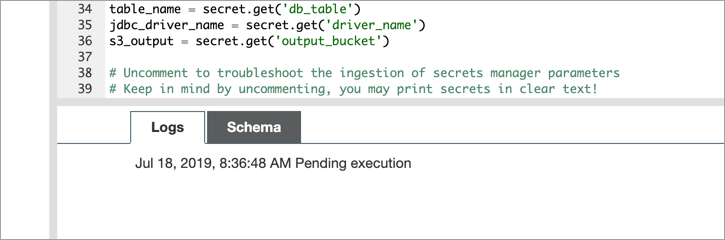
As this is the first run, you may see the Pending execution message to the right of the date and time for 5-10 minutes, as shown in the following screenshot. Behind the scenes, AWS is spinning up a Spark cluster to run your job.
The job log for a successful run looks like the following screenshot.
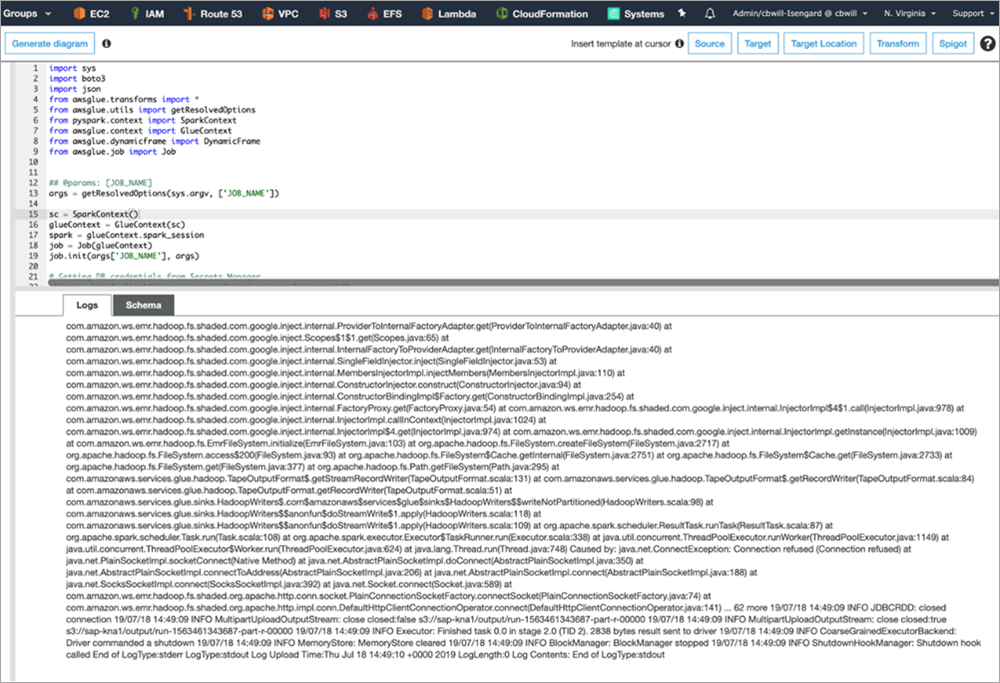
If you encounter any errors, they are in Amazon CloudWatch under /aws-glue/jobs/.
- To view the extracted file, navigate to your S3 output bucket that you defined earlier, and download the file to confirm the contents.

Visualizing the data
You got the data out of SAP into S3. Now you need a way to contextualize it, so that end users can apply their logic and automate what they usually do in spreadsheets. To do this, set up integration with your data in S3 to Athena and Amazon QuickSight.
Create a database in AWS Glue
- On the AWS Glue screen, choose Database, Add database.
- For Database name, provide KNA1 and leave other fields empty. Choose Create.
- Choose Classifiers, Add Classifier. For Classifier, enter KNA1, and choose Create.
- Choose Tables, Add tables using a crawler.
- Name your crawler KNA1 and add KNA1 as a Selected classifier.
- Select Data stores, and specify the Include path as the extract file.
- Choose Next (to not add another data store).
- Select Choose an existing IAM role and select the GluePermissions role.
- For this exercise, choose Run on demand.
- For Database, select your kna1 database.
- Choose Finish.
- On the next page, choose Run it now?
- After the crawler completes, view the logs in CloudWatch by choosing Logs to the right of your crawler.
Create a query with Athena
- In the Athena console, select the table created by the AWS Glue crawler.
- To preview the table, choose Run query. This gives users the capability to run queries on multiple sets of data and preview it with minimal lift.
Next, extend these queries to visualizations to further enrich the data.
Enable S3 bucket access in Amazon QuickSight
- Open the Amazon QuickSight console.
- If this is the first time that you’ve used Amazon QuickSight, the Create your QuickSight account page appears. For QuickSight account name, enter KNA1, and for Notification email address, enter your email.
- Choose Finish, Go to Amazon QuickSight.
- On the top right, choose Manage QuickSight, Security & permissions.
- Under QuickSight access to AWS services, choose Add or remove.
- On the next screen, under QuickSight access to AWS services, select Amazon S3, sap-kna1, and then choose Select buckets.
- Choose Update, and then choose the Amazon QuickSight icon.
Create a visualization in Amazon QuickSight
- In the Amazon QuickSight console, choose New Analysis, New data set.
- Select Athena.
- On the New Athena data source page, for Data source name, enter KNA1, and then choose Create data source.
- On the Choose your table page, for Database: contain sets of tables, select kna1. For Tables: contain the data you can visualize, select output. Choose Select.
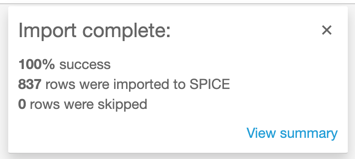
- Choose Import to SPICE for quicker analytics, Visualize. You should see a message that the import is complete.
With Amazon QuickSight’s drag-and-drop capability, you can now build visualizations from the fields brought over using S3 and Athena.

Conclusion
In this post, you walked through setting up a connection to SAP HANA using AWS Glue and extracting data to S3. This enables a seamless mechanism to expose SAP to a variety of analytics and visualization services allowing you to find the answer you need. No longer do you have to use SAP’s transaction code, SE16, to export data to a spreadsheet, only to have to upload it to another tool for manipulation.
Make sure that you review your HANA license model with SAP to make sure you are using supportable features within HANA when extracting data.