AWS DevOps & Developer Productivity Blog
Setting up a secure CI/CD pipeline in a private Amazon Virtual Private Cloud with no public internet access
With the rise of the cloud and increased security awareness, the use of private Amazon VPCs with no public internet access also expanded rapidly. This setup is recommended to make sure of proper security through isolation. The isolation requirement also applies to code pipelines, in which developers deploy their application modules, software packages, and other dependencies and bundles throughout the development lifecycle. This is done without having to push larger bundles from the developer space to the staging space or the target environment. Furthermore, AWS CodeArtifact is used as an artifact management service that will help organizations of any size to securely store, publish, and share software packages used in their software development process.
We’ll walk through the steps required to build a secure, private continuous integration/continuous development (CI/CD) pipeline with no public internet access while maintaining log retention in Amazon CloudWatch. We’ll utilize AWS CodeCommit for source, CodeArtifact for the Modules and software packages, and Amazon Simple Storage Service (Amazon S3) as artifact storage.
Prerequisites
The prerequisites for following along with this post include:
- An AWS Account
- A Virtual Private Cloud (Amazon VPC)
- A CI/CD pipeline – This can be CodePipeline, Jenkins or any CI/CD tool you want to integrate CodeArtifact with, we will use CodePipeline in our walkthrough here.
Solution walkthrough
The main service we’ll focus on is CodeArtifact, a fully managed artifact repository service that makes it easy for organizations of any size to securely store, publish, and share software packages used in their software development process. CodeArtifact works with commonly used package managers and build tools, such as Maven and Gradle (Java), npm and yarn (JavaScript), pip and twine (Python), or NuGet (.NET).
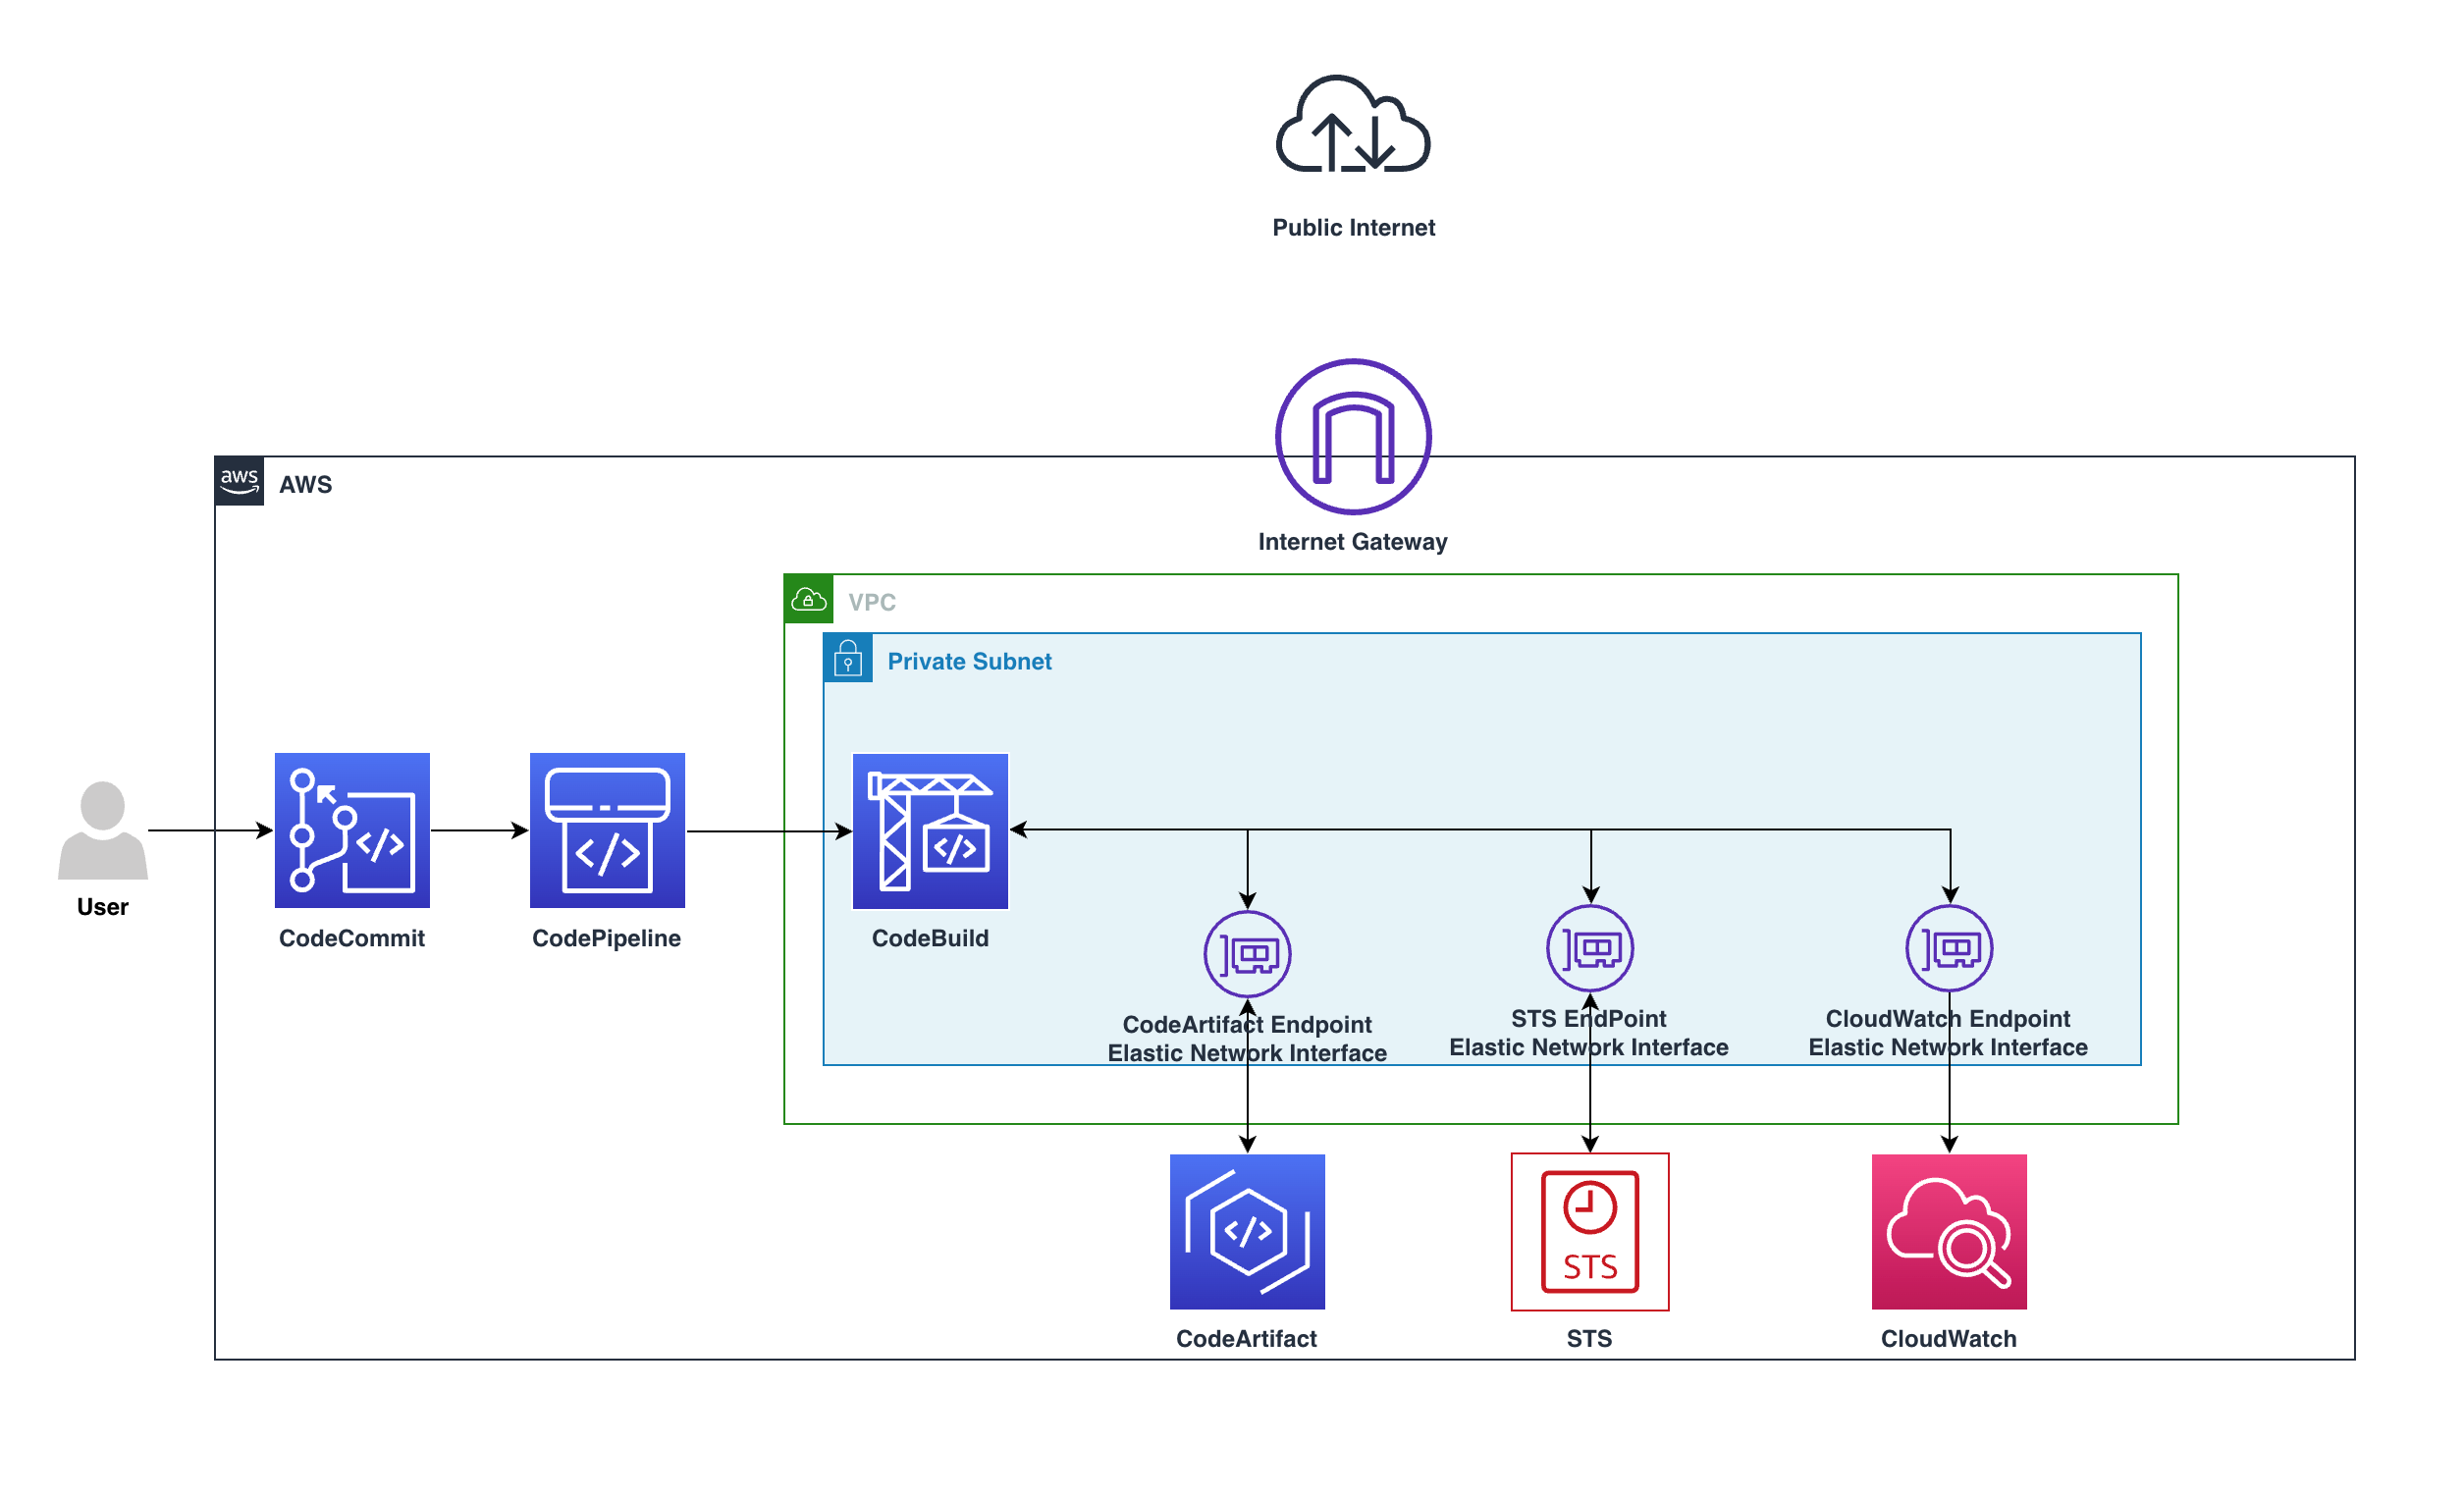
Users push code to CodeCommit, CodePipeline will detect the change and start the pipeline, in CodeBuild the build stage will utilize the private endpoints and download the software packages needed without the need to go over the internet.
The preceding diagram shows how the requests remain private within the VPC and won’t go through the Internet gateway, by going from CodeBuild over the private endpoint to CodeArtifact service, all within the private subnet.
The requests will use the following VPC endpoints to connect to these AWS services:
- CloudWatch Logs endpoint (for CodeBuild to put logs in CloudWatch)
- CodeArtifact endpoints
- AWS Security Token Service (AWS STS) endpoint
- Amazon Simple Storage Service (Amazon S3) endpoint
Walkthrough
- Create a CodeCommit Repository:
- Navigate to your CodeCommit Console then click on Create repository
Figure 2. Screenshot: Create repository button.
-
- Type in name for the repository then click Create
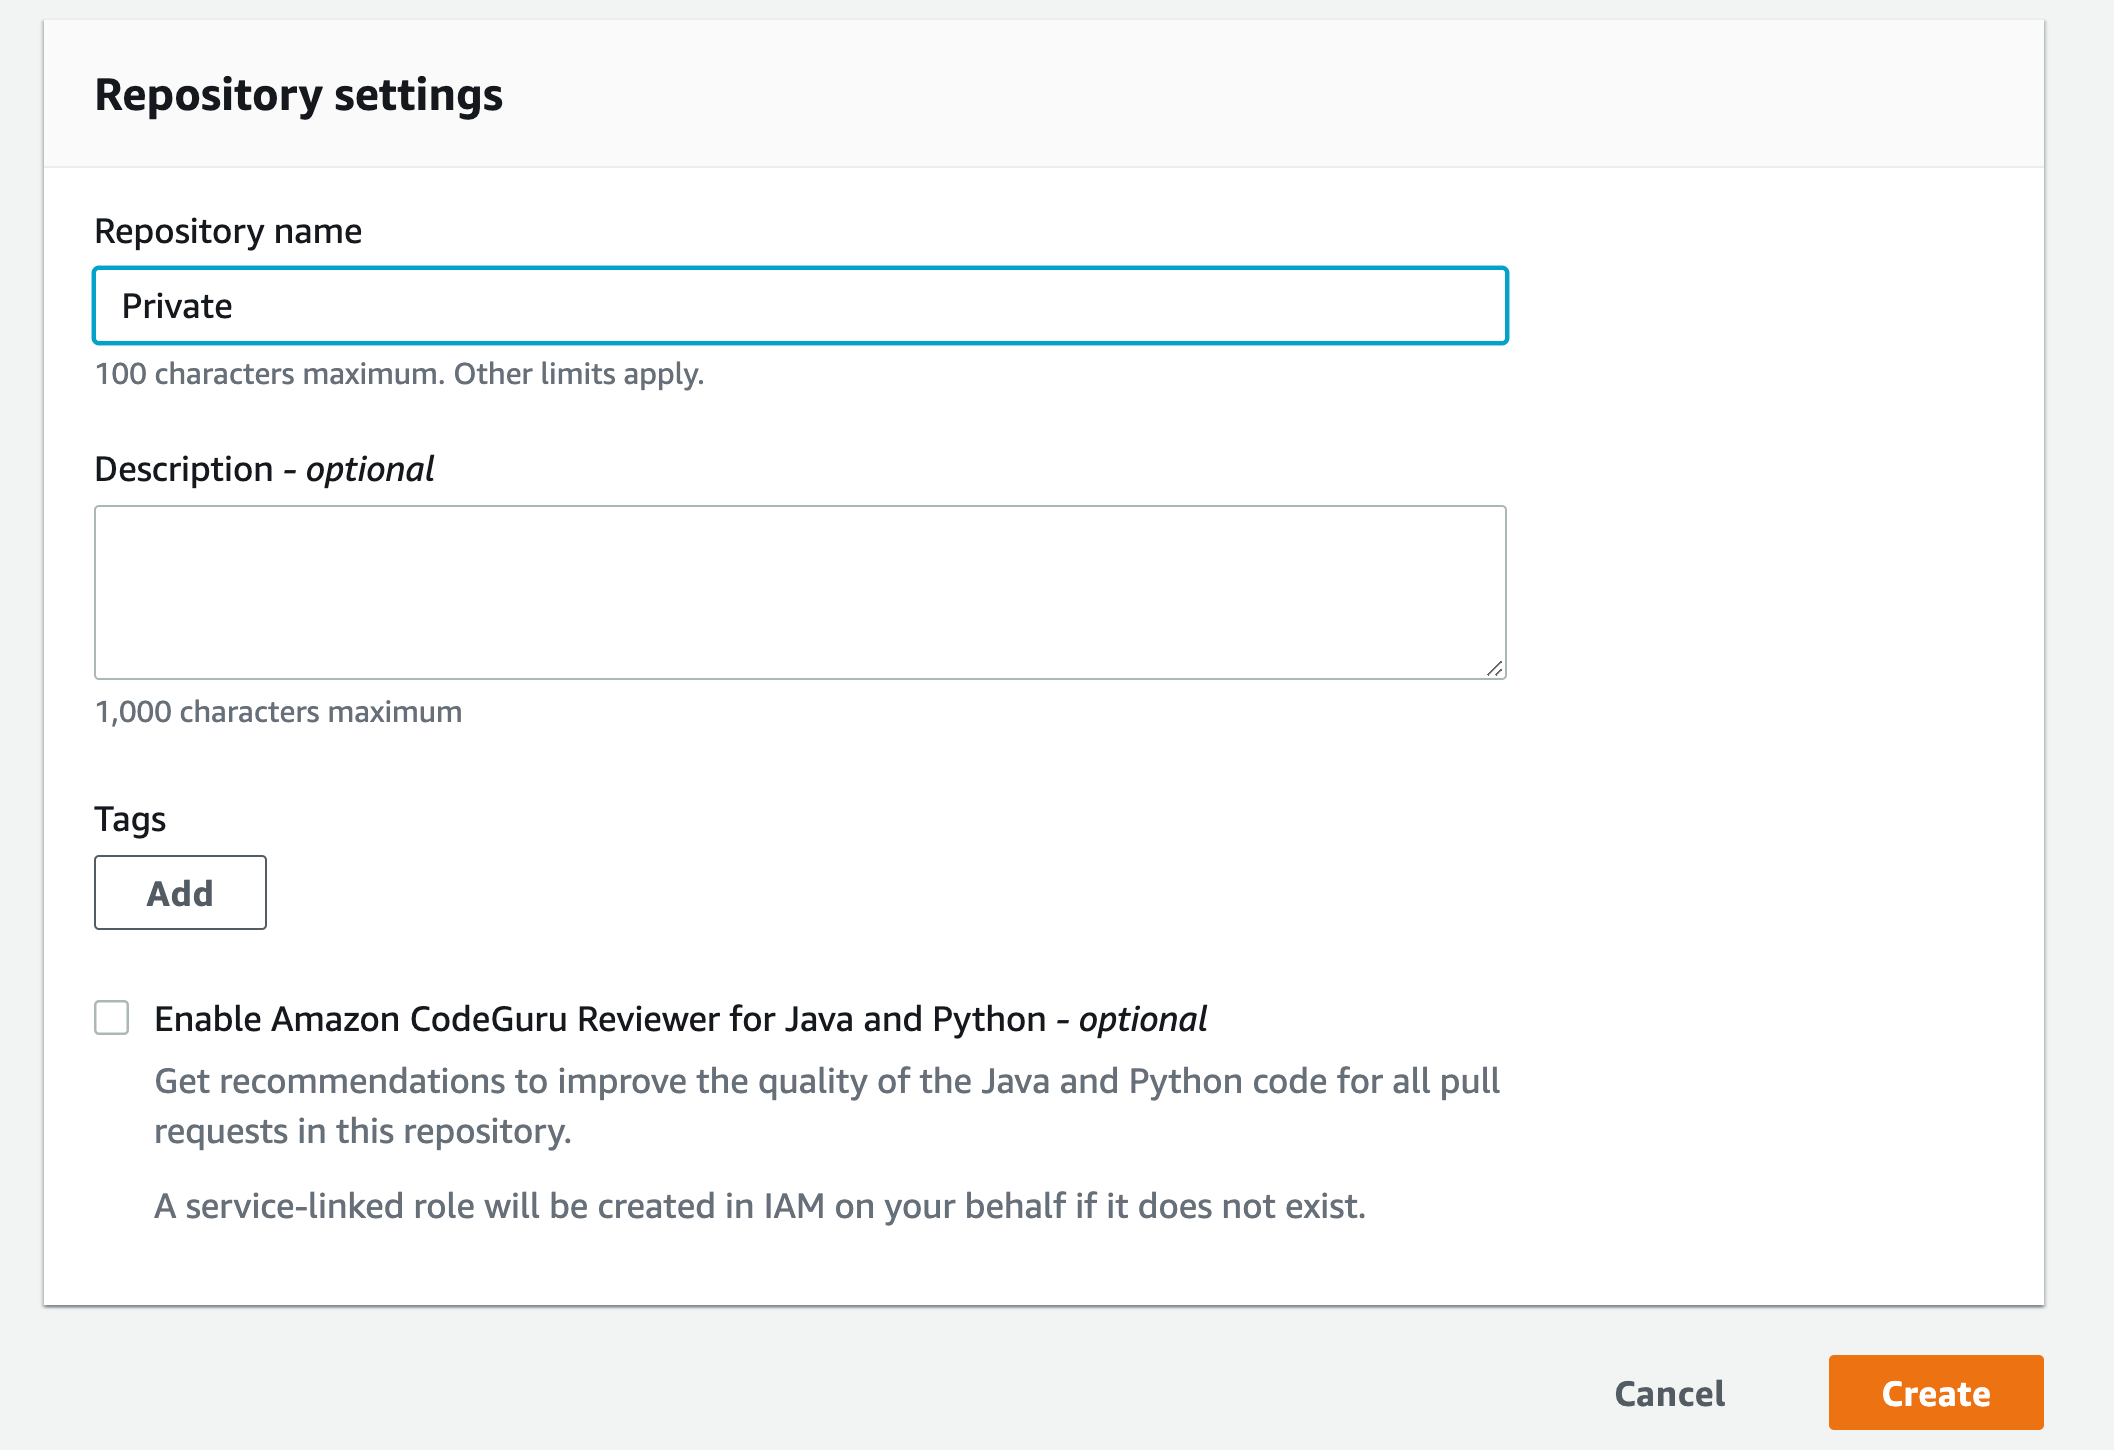
Figure 3. Screenshot: Repository setting with name shown as “Private” and empty Description.
-
- Scroll down and click Create file
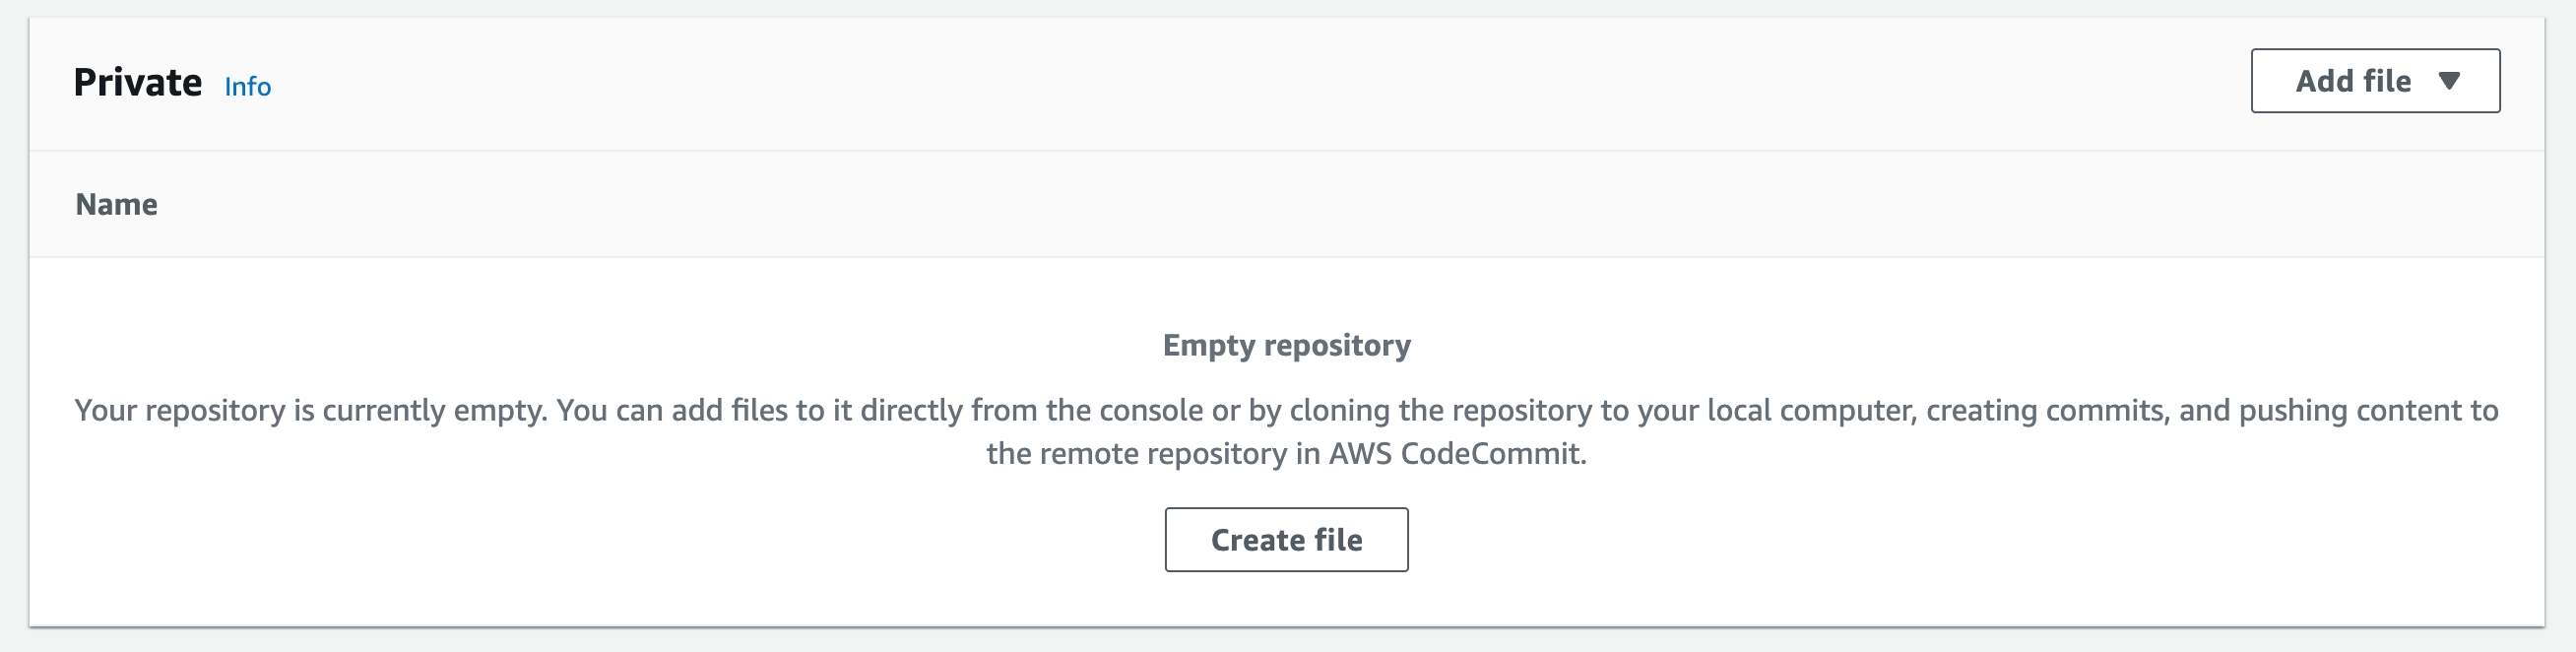
Figure 4. Create file button.
-
- Copy the example buildspec.yml file and paste it to the editor
Example buildspec.yml file:
-
- Name the file buildspec.yml, type in your name and your email address then Commit changes
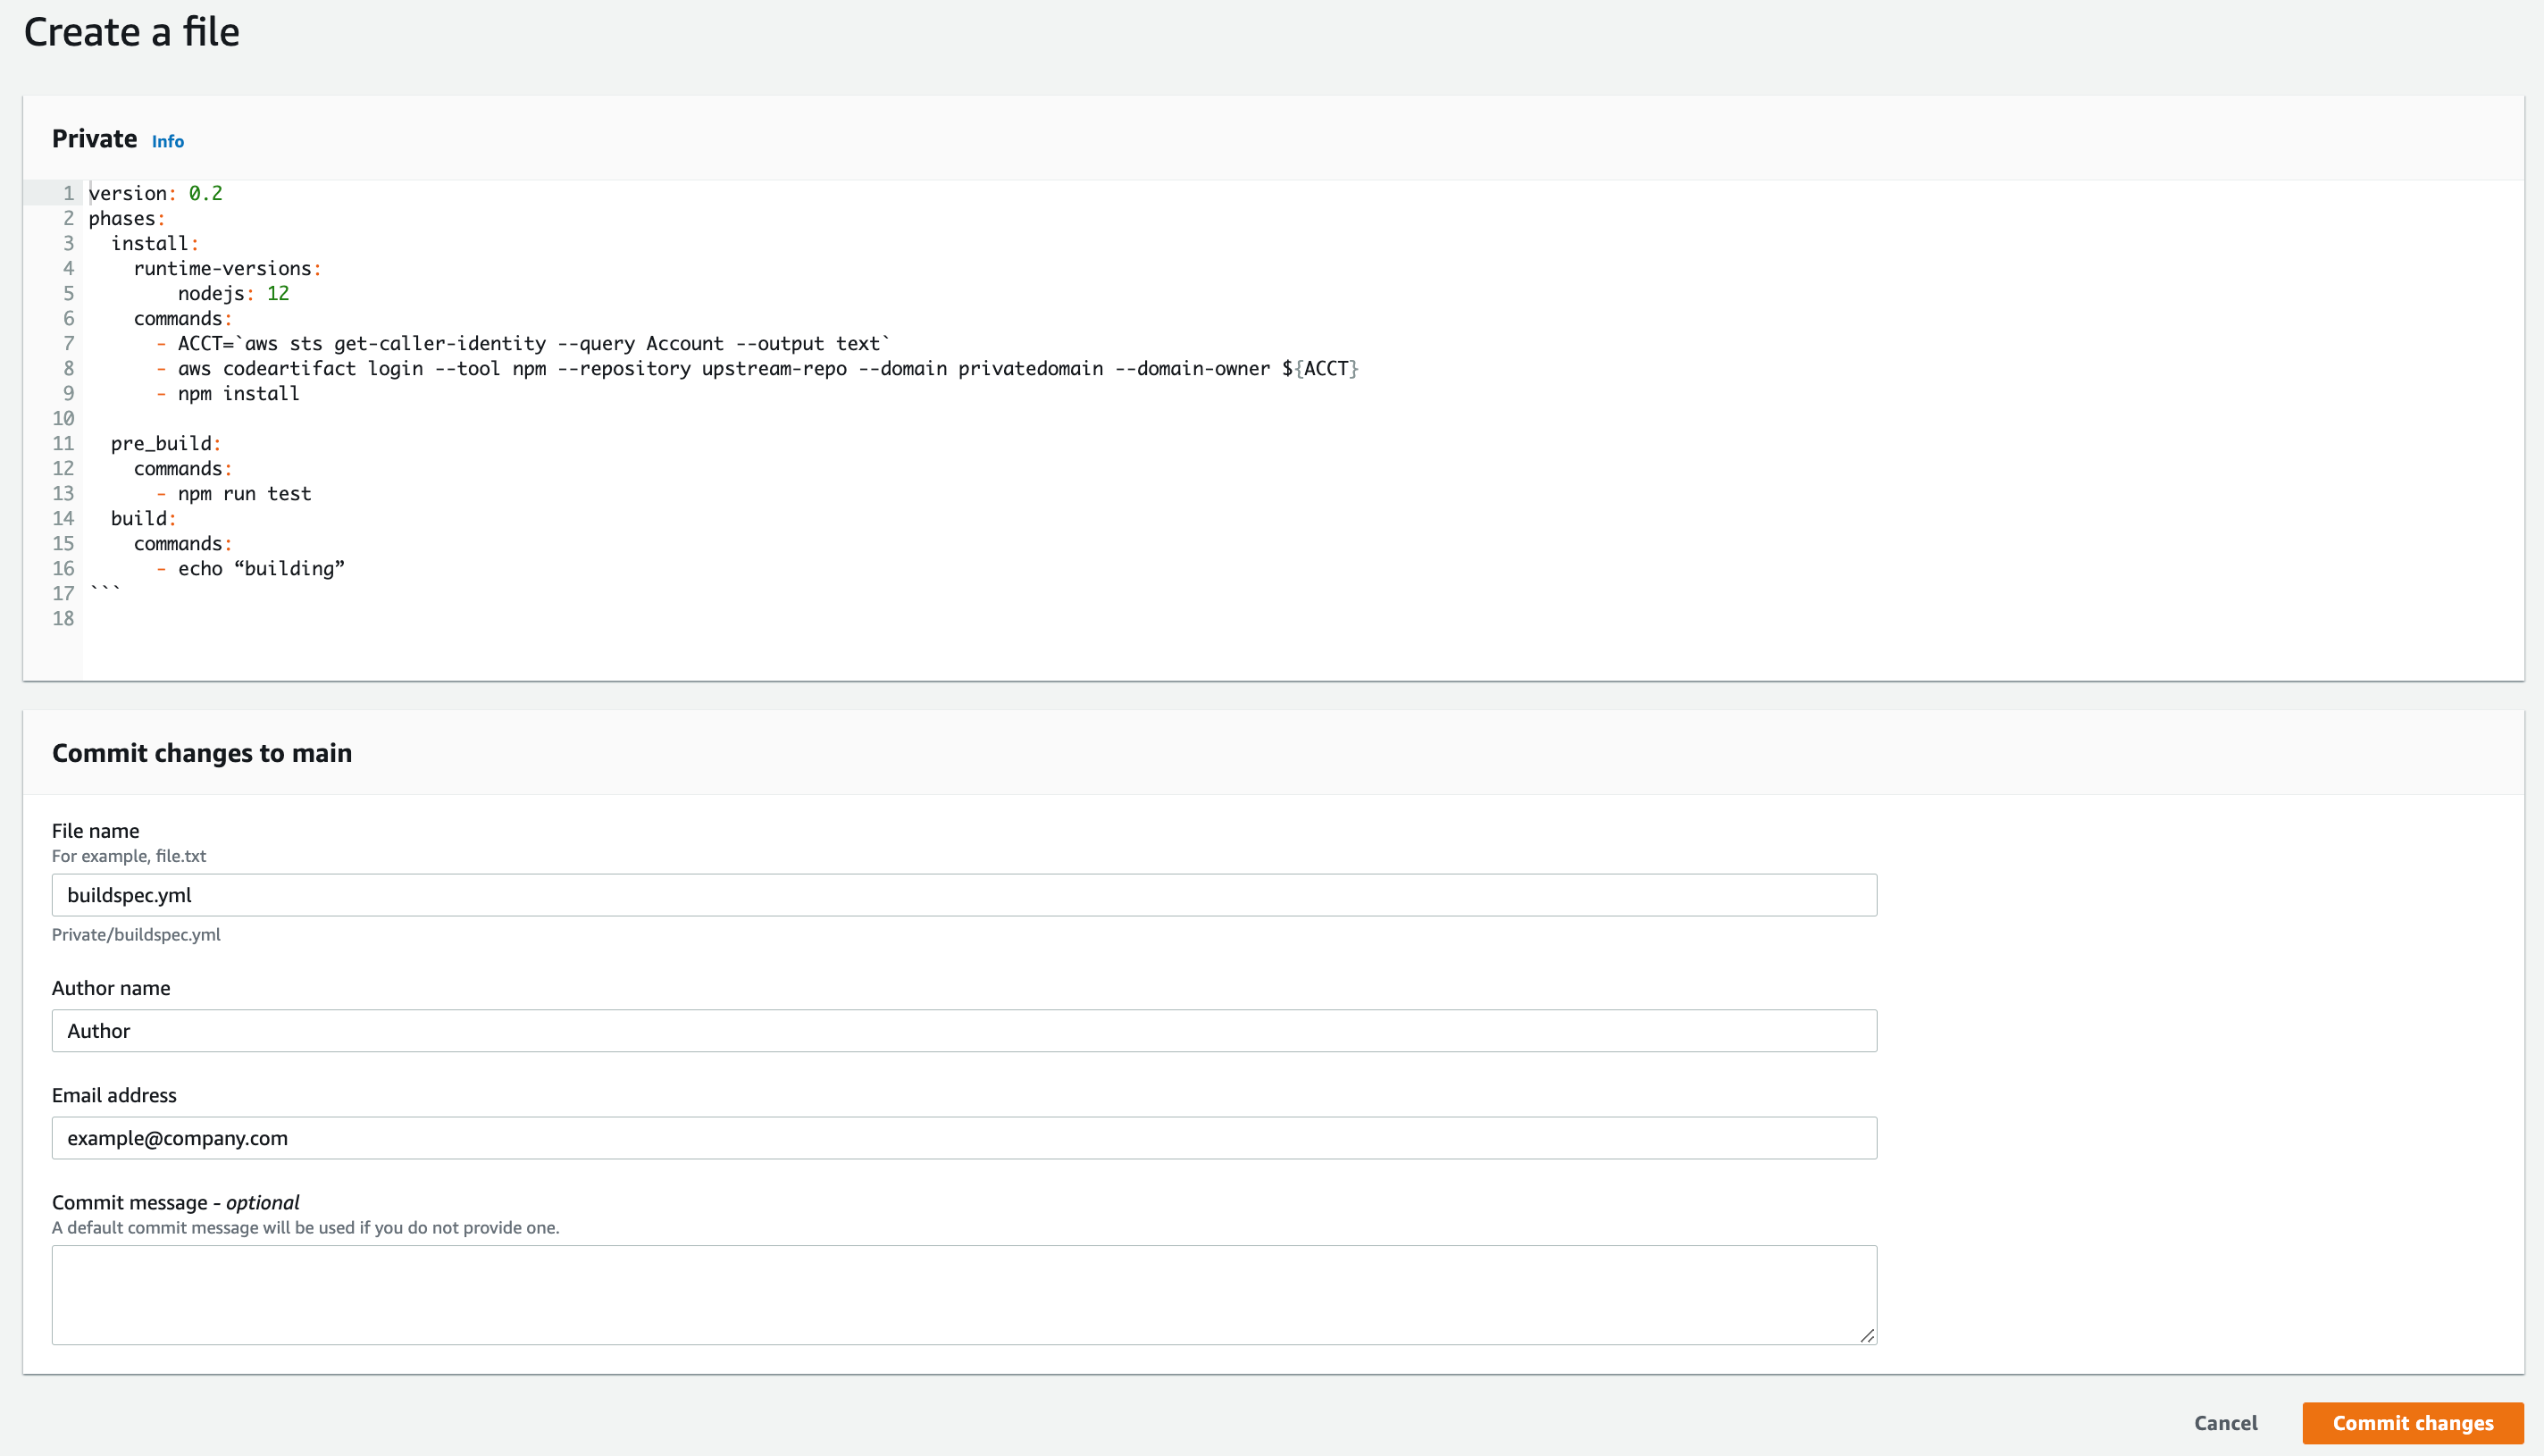
Figure 5. Screenshot: Create file page.
- Create CodeArtifact
- Navigate to your CodeArtifact Console then click on Create repository
- Give it a name and select npm-store as public upsteam repository
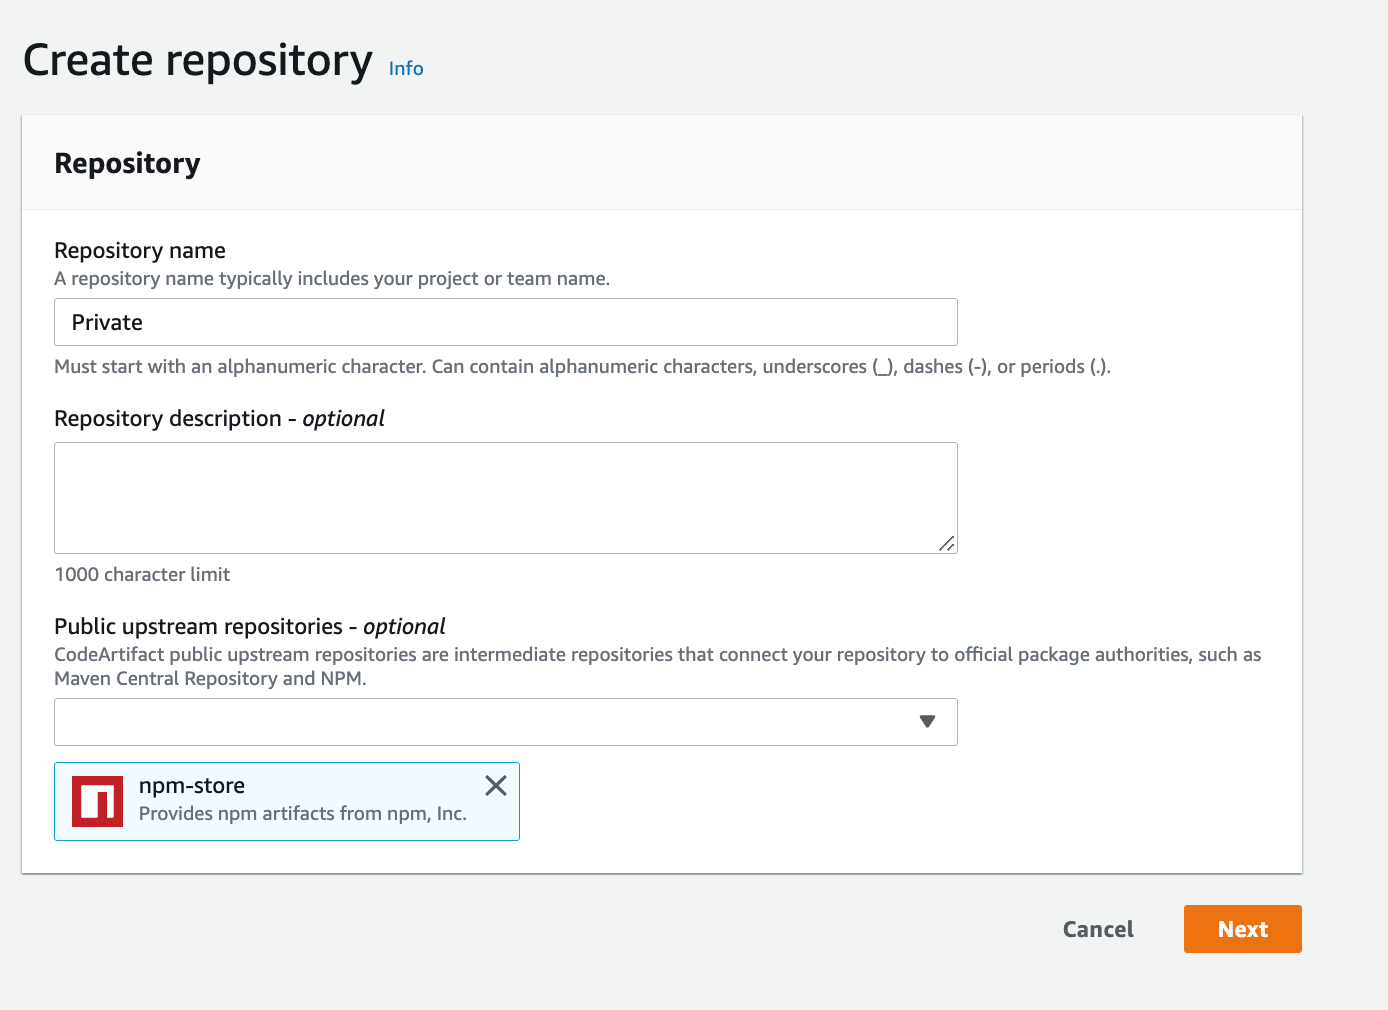
Figure 6. Screenshot: Create repository page with Repository name “Private”.
-
- For the Domain Select this AWS account and enter a domain name
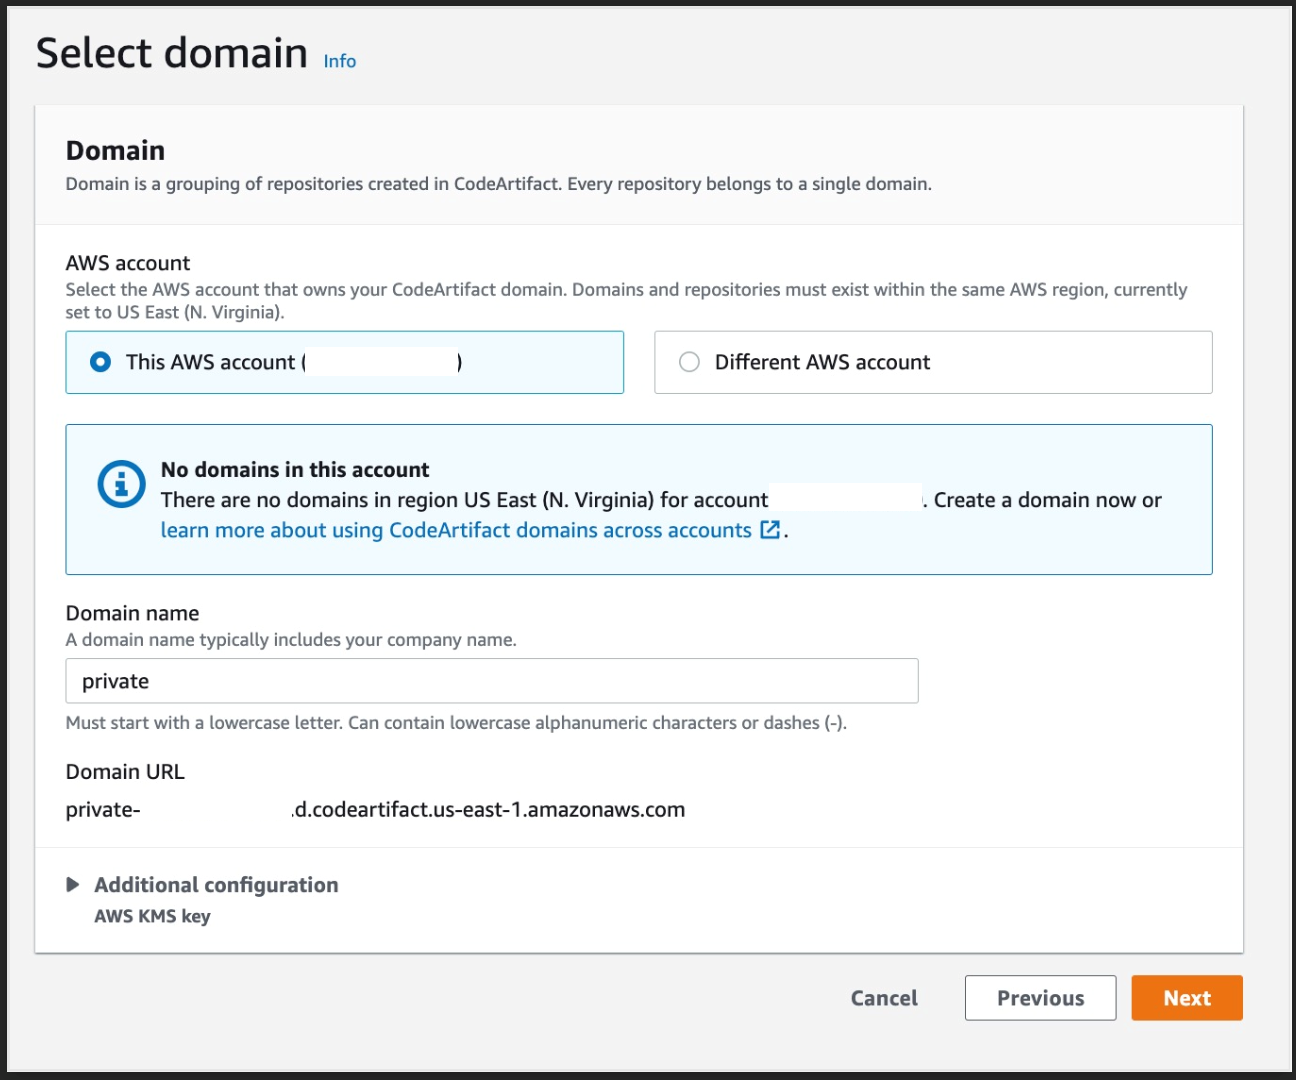
Figure 7. Screenshot: Select domain page.
-
- Click Next then Create repository

Figure 8. Screenshot: Create repository review page.
- Create a CI/CD using CodePipeline
- Navigate to your CodePipeline Console then click on Create pipeline
Figure 9. Screenshot: Create pipeline button.
-
- Type a name, leave the Service role as “New service role” and click next
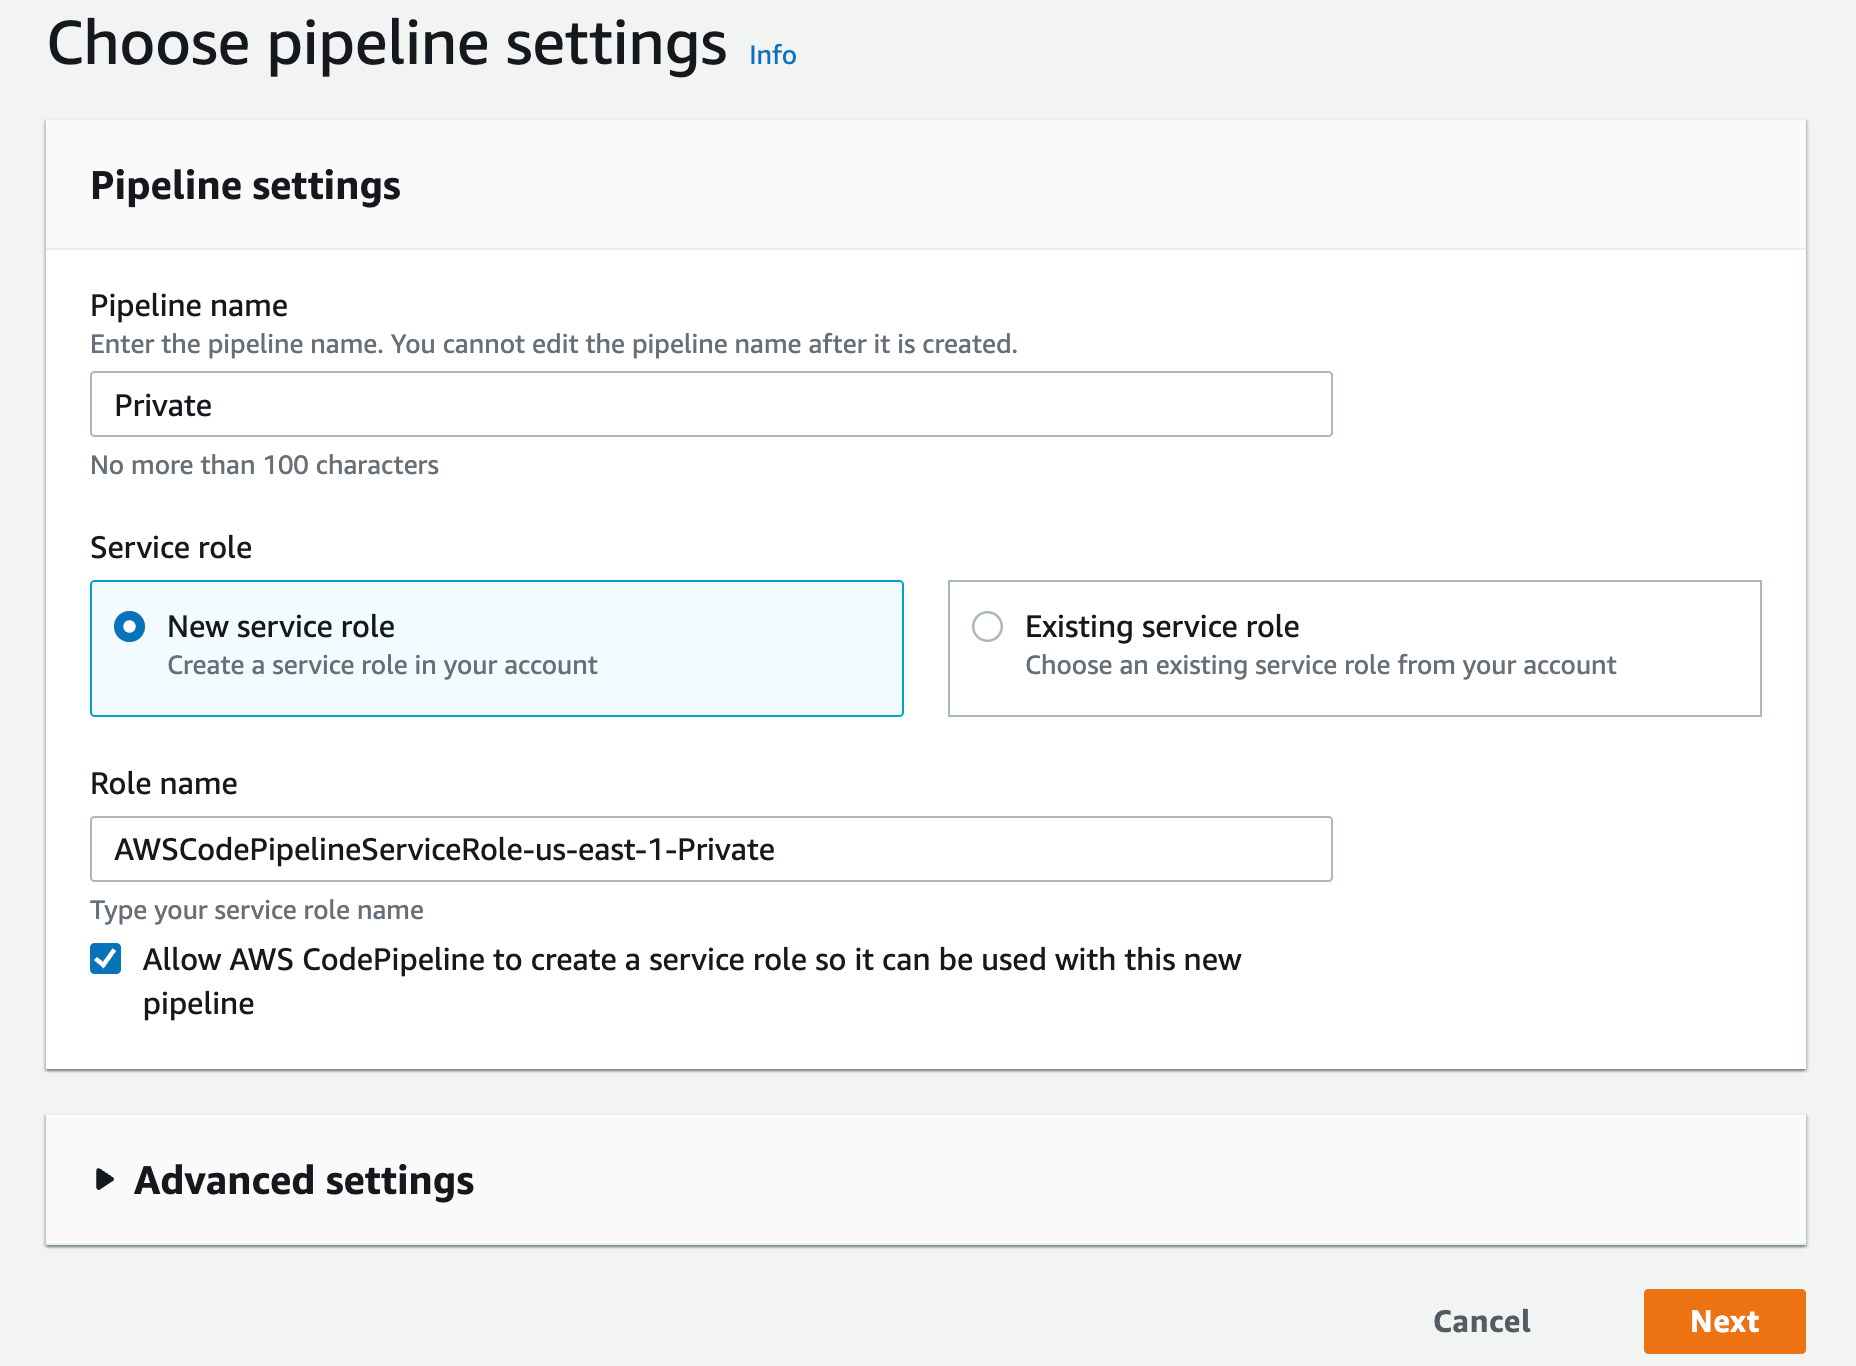
Figure 10. Screenshot: Choose pipeline setting page with pipeline name “Private”.
-
- Select AWS CodeCommit as your Source provider
- Then choose the CodeCommit repository you created earlier and for branch select main then click Next
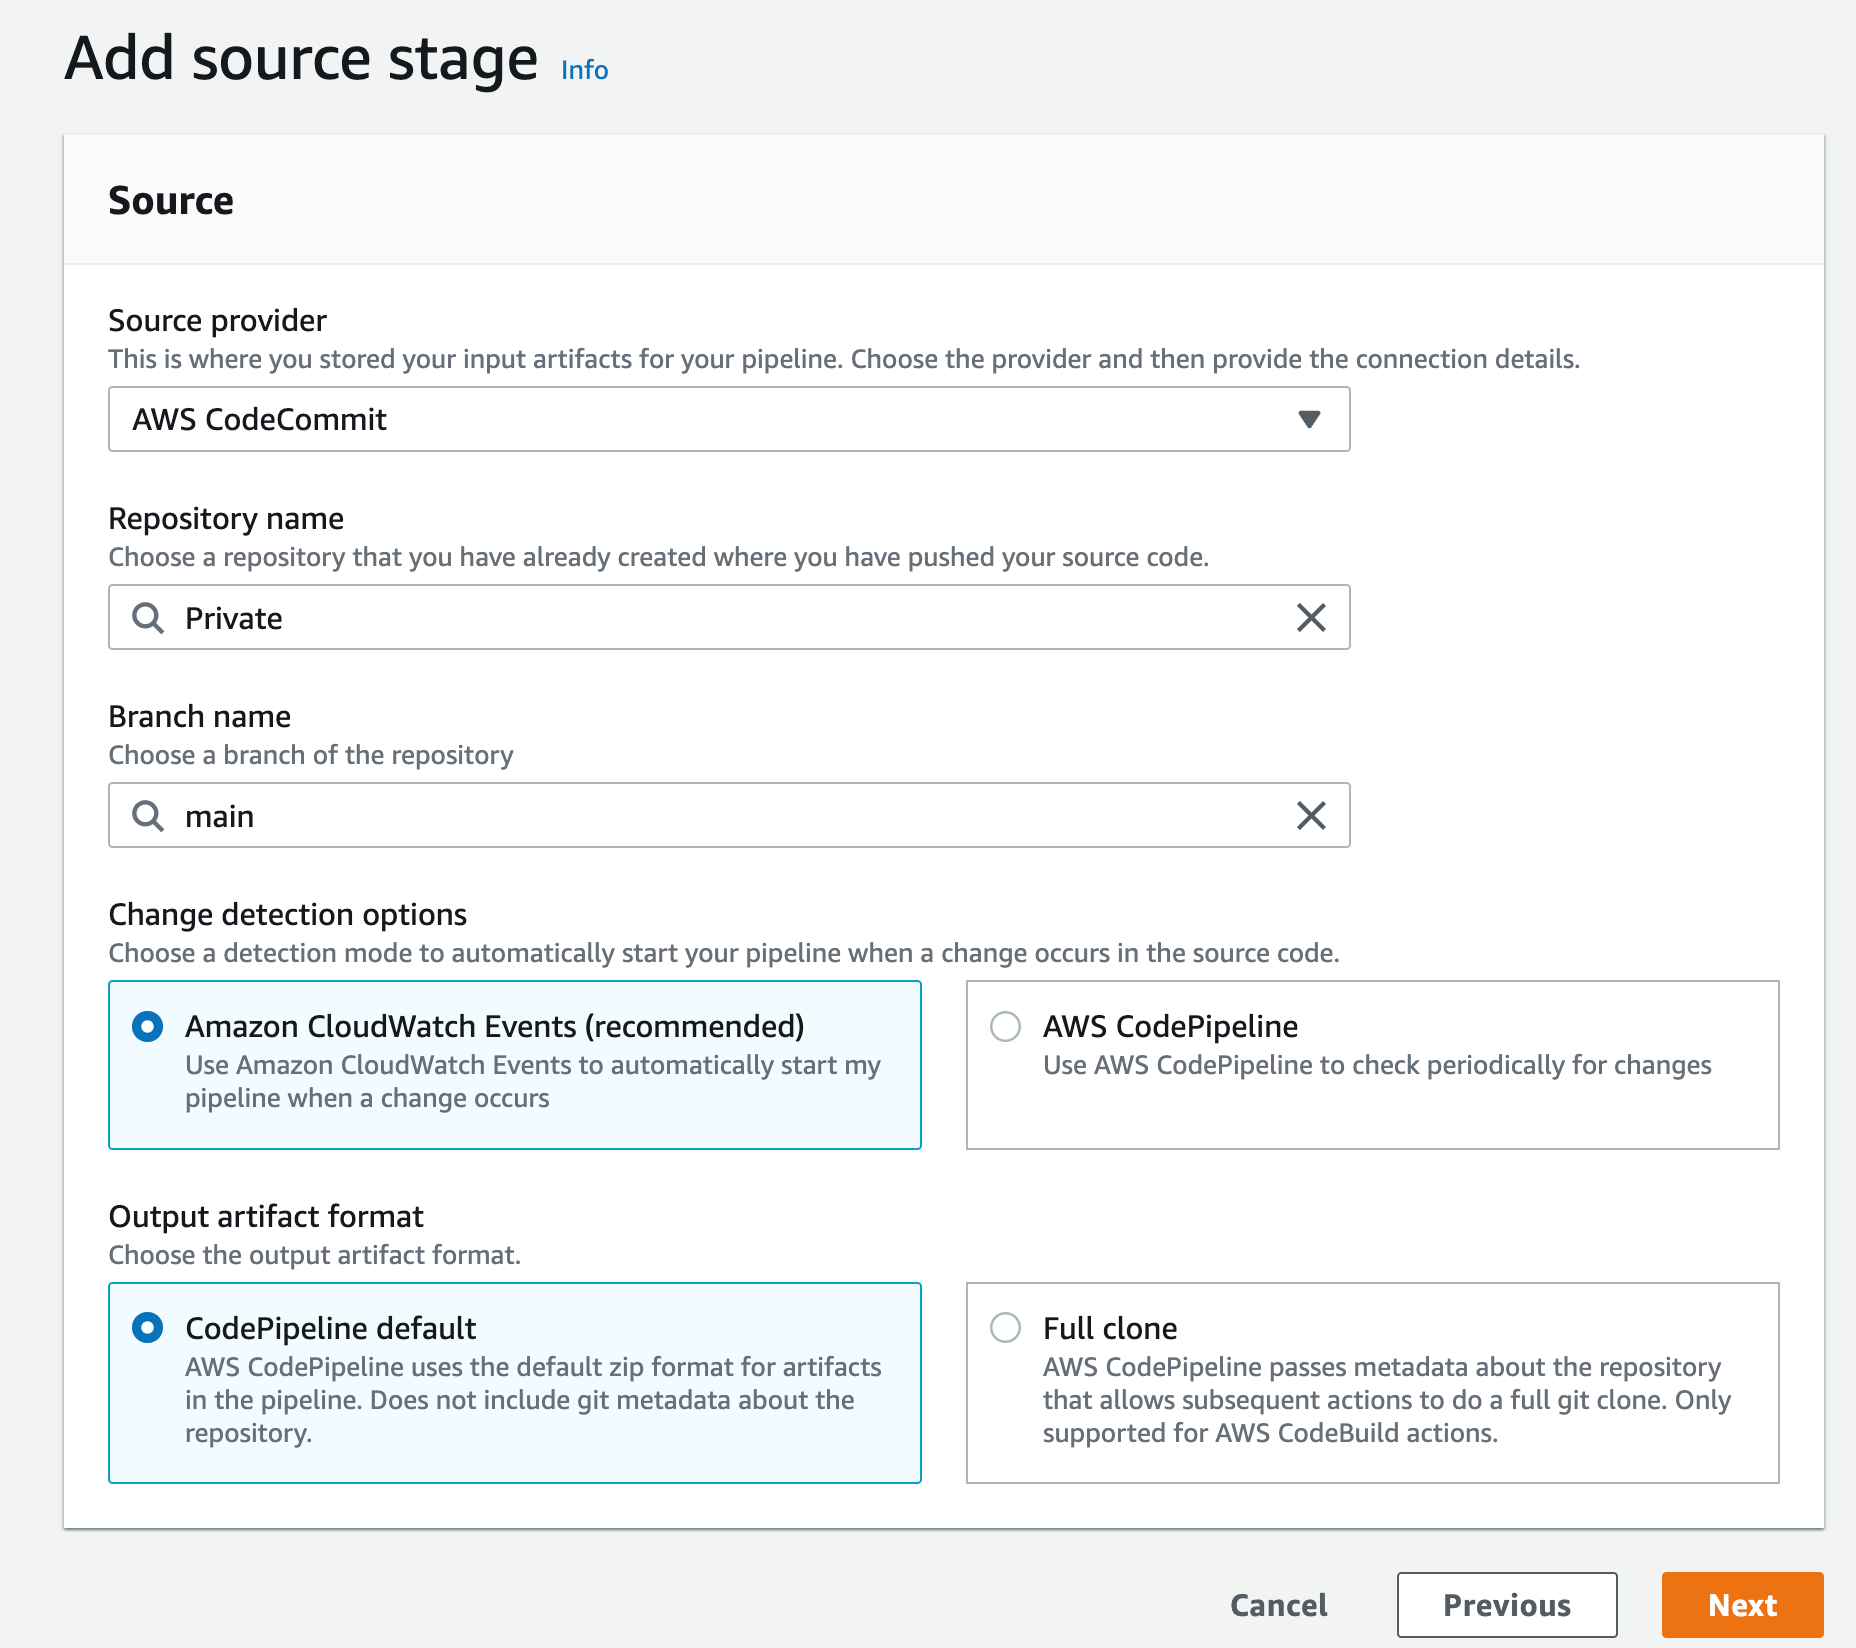
Figure 11. Screenshot: Create pipeline add source stage.
-
- For the Build Stage, Choose AWS CodeBuild as the build provider, then click Create Project
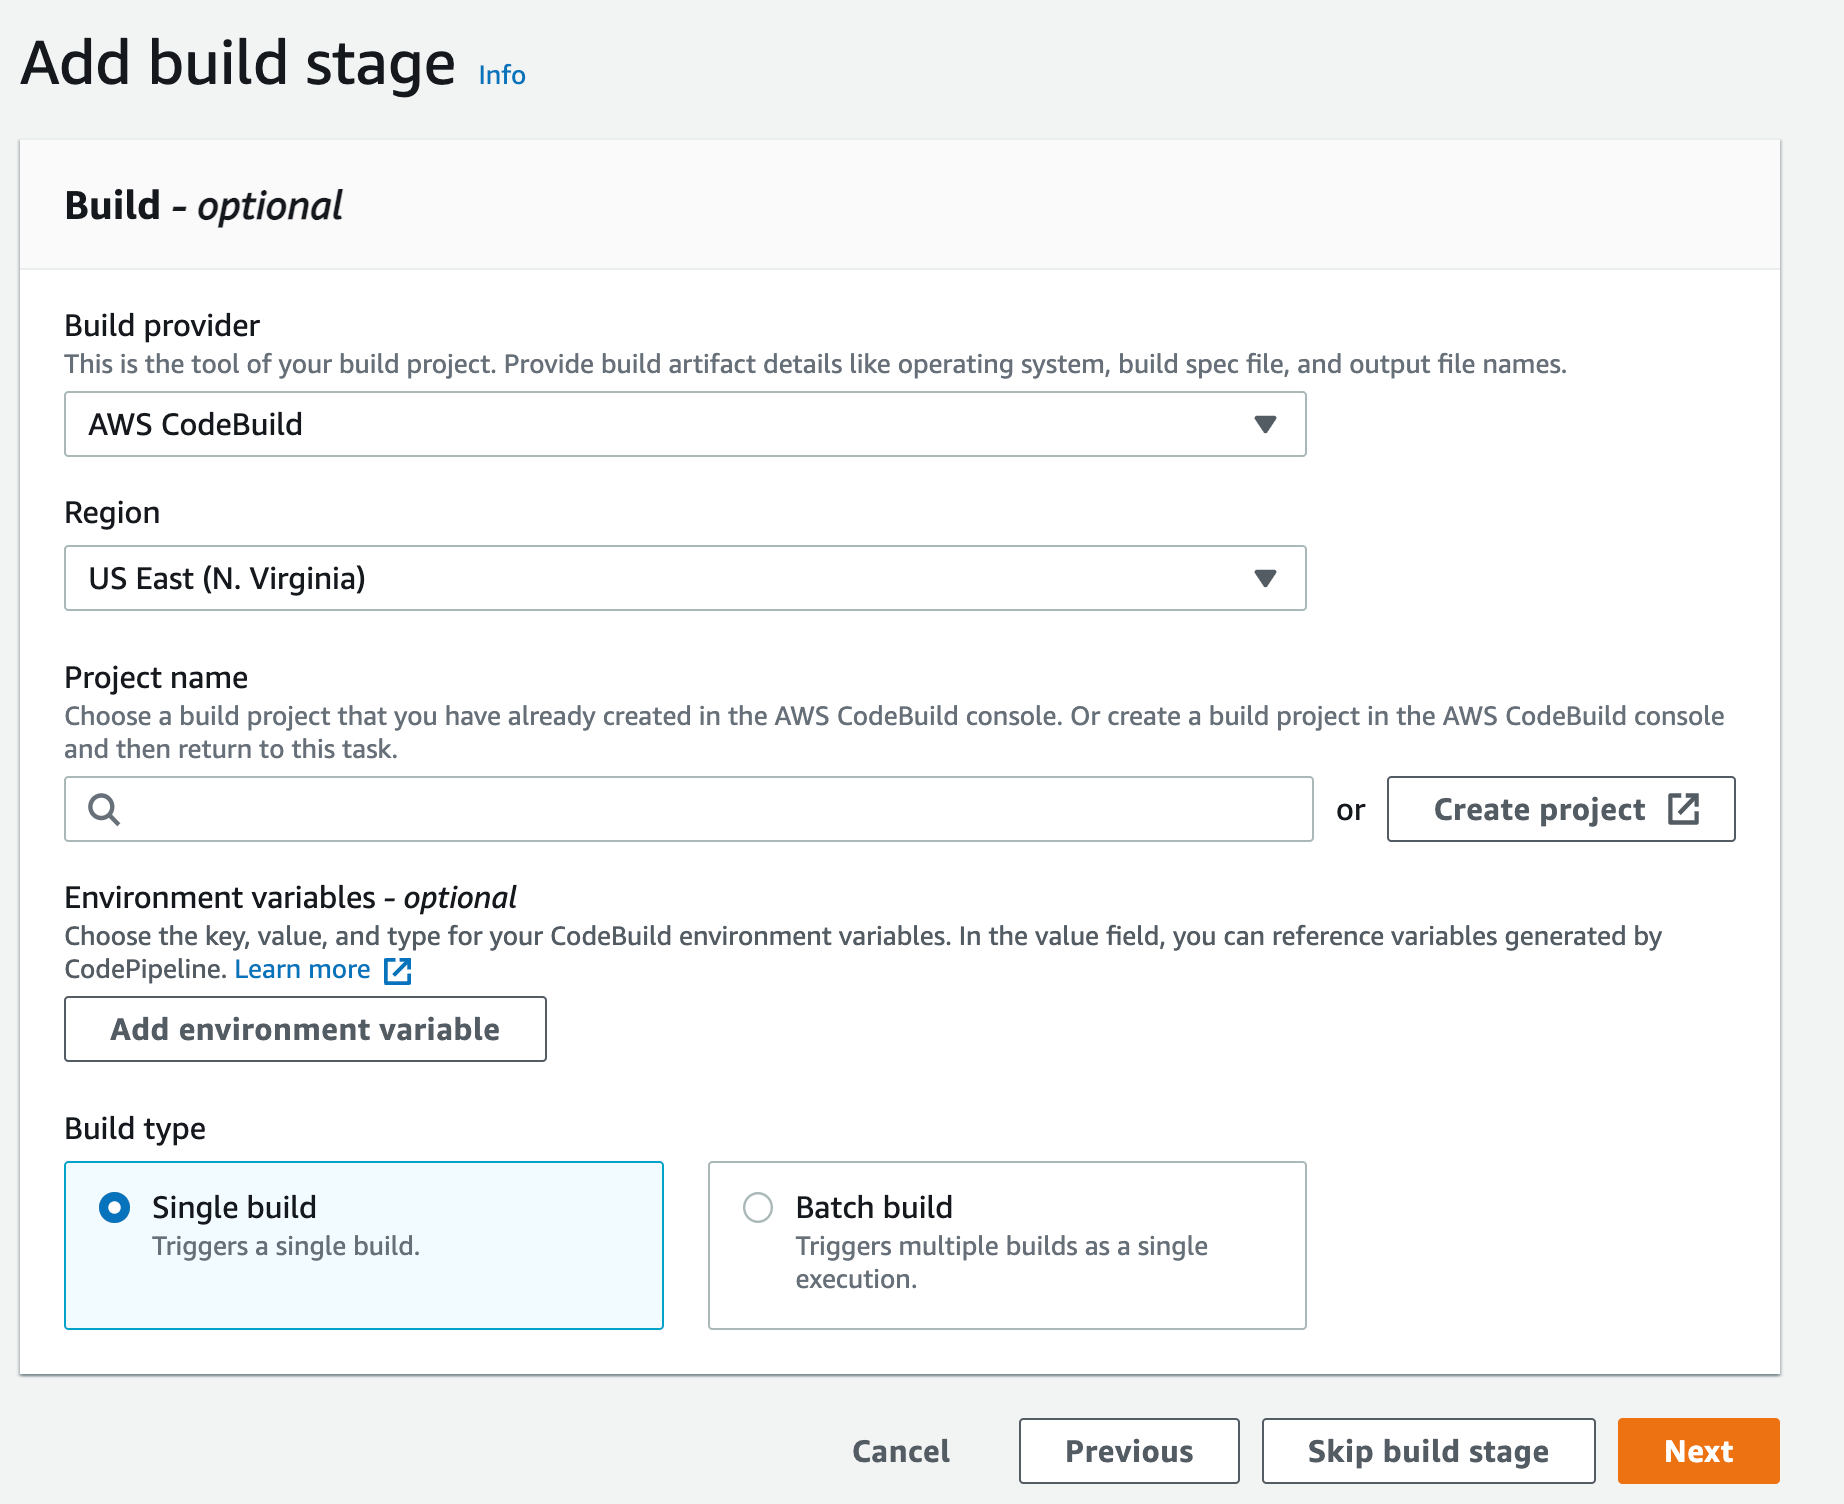
Figure 12. Screenshot: Create pipeline add build stage.
-
- This will open new window to create the new Project, Give this project a name
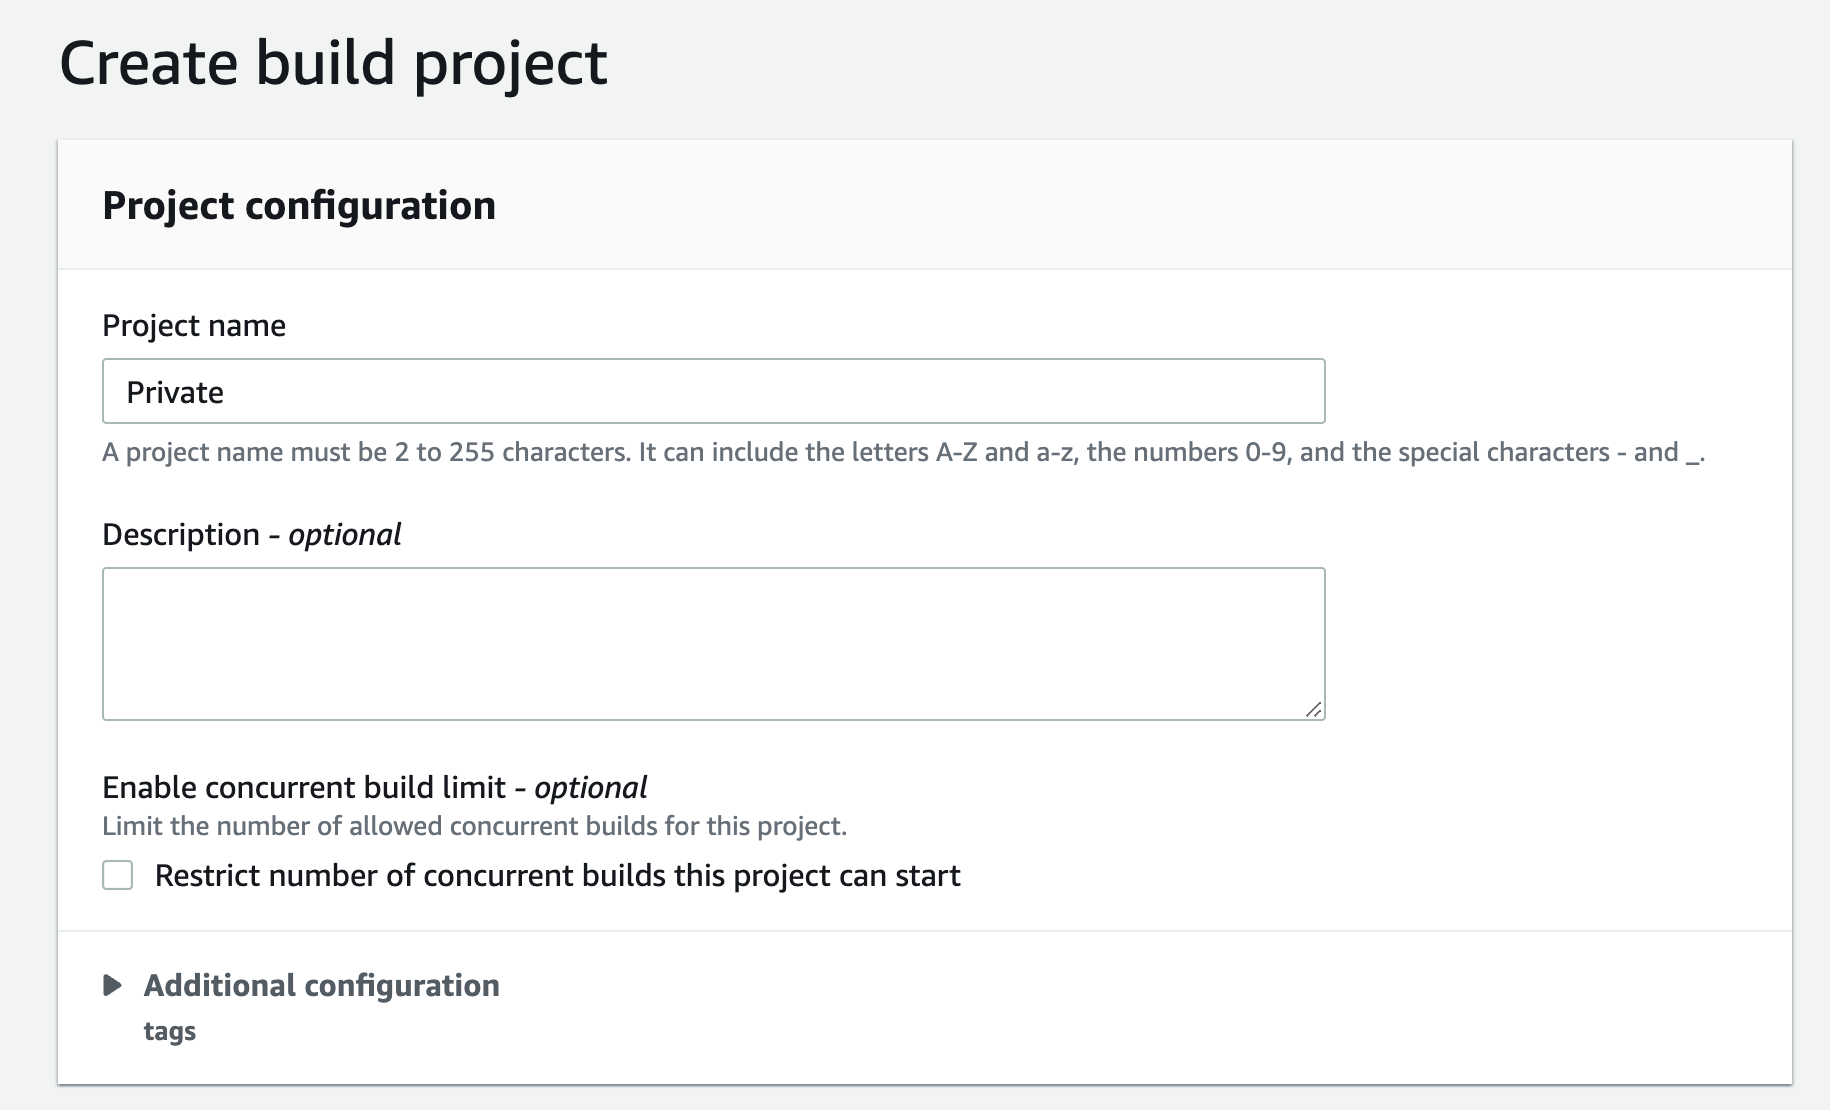
Figure 13. Screenshot: Create pipeline create build project window.
-
- Scroll down to the Environment section: select pick Managed image,
- For Operating system select “Amazon Linux 2”,
- Runtime “Standard” and
- For Image select the aws/codebuild/amazonlinux2-x86+64-standard:4.0
For the Image version: Always use the latest image for this runtime version - Select Linux for the Environment type
- Leave the Privileged option unchecked and set Service Role to “New service role”

Figure 14. Screenshot: Create pipeline create build project, setting up environment window.
-
- Expand Additional configurations and scroll down to the VPC section, select the desired VPC, your Subnets (we recommend selecting multiple AZs, to ensure high availability), and Security Group (the security group rules must allow resources that will use the VPC endpoint to communicate with the AWS service to communicate with the endpoint network interface, default VPC security group will be used here as an example)
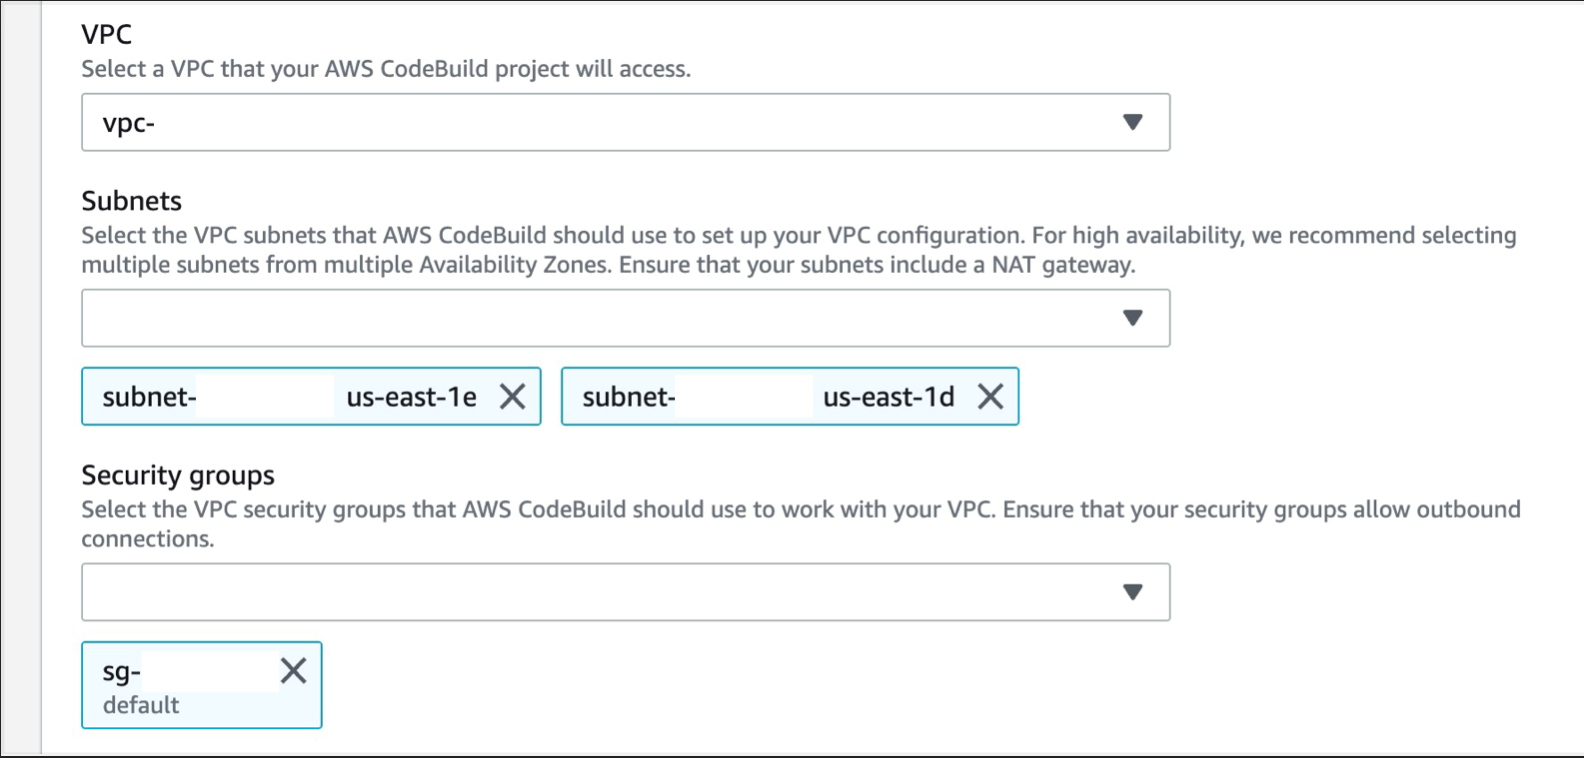
Figure 15. Screenshot: Create pipeline create build project networking window.
-
- Scroll down to the Buildspec and select “Use a buildspec file” and type “buildspec.yml” for the Buildspec name
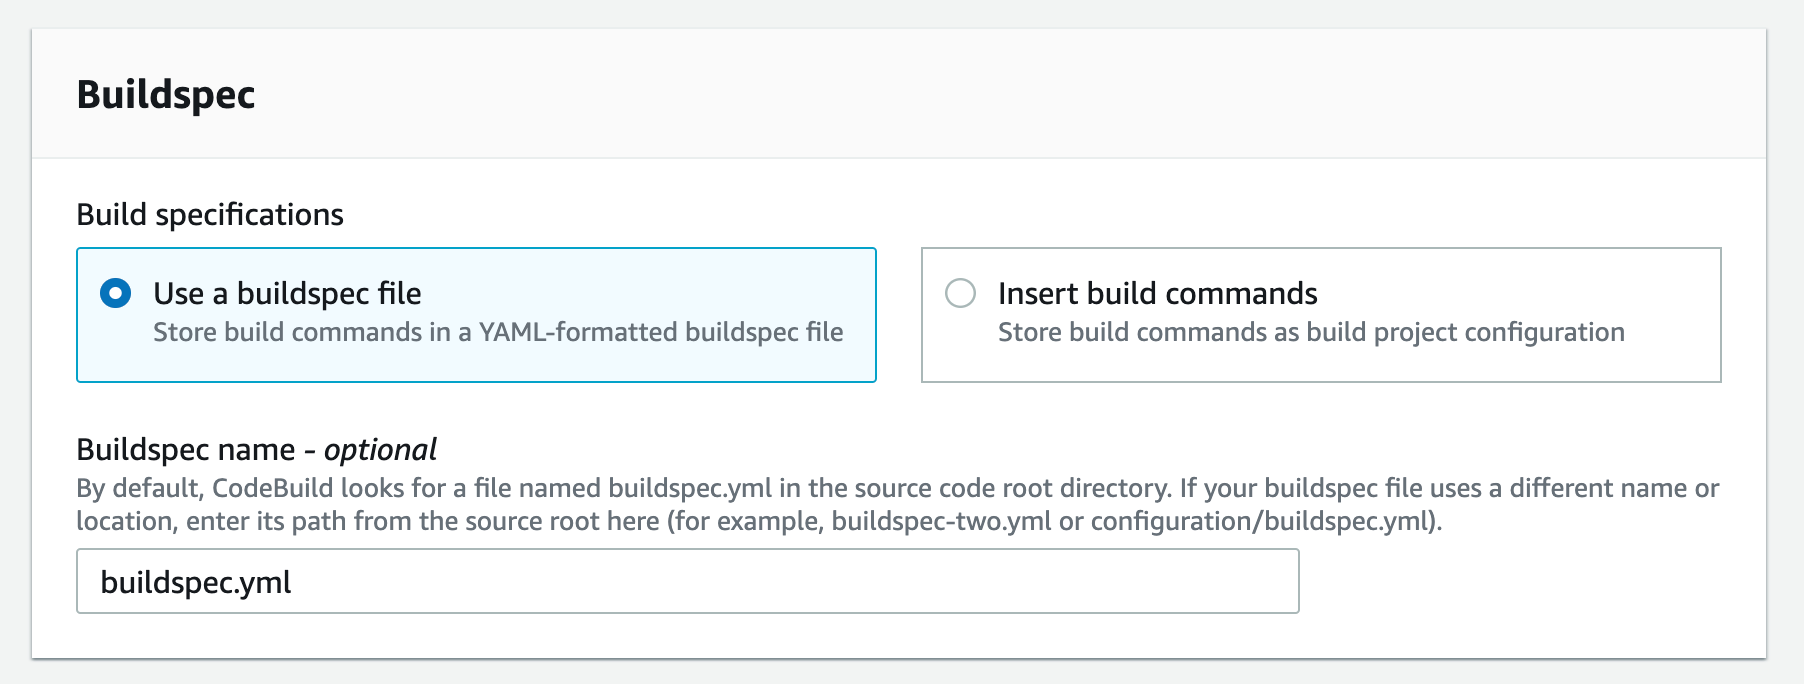
Figure 16. Screenshot: Create pipeline create build project buildspec window.
-
- Select the CloudWatch logs option you can leave the group name and stream empty this will let the service use the default values and click Continue to CodePipeline
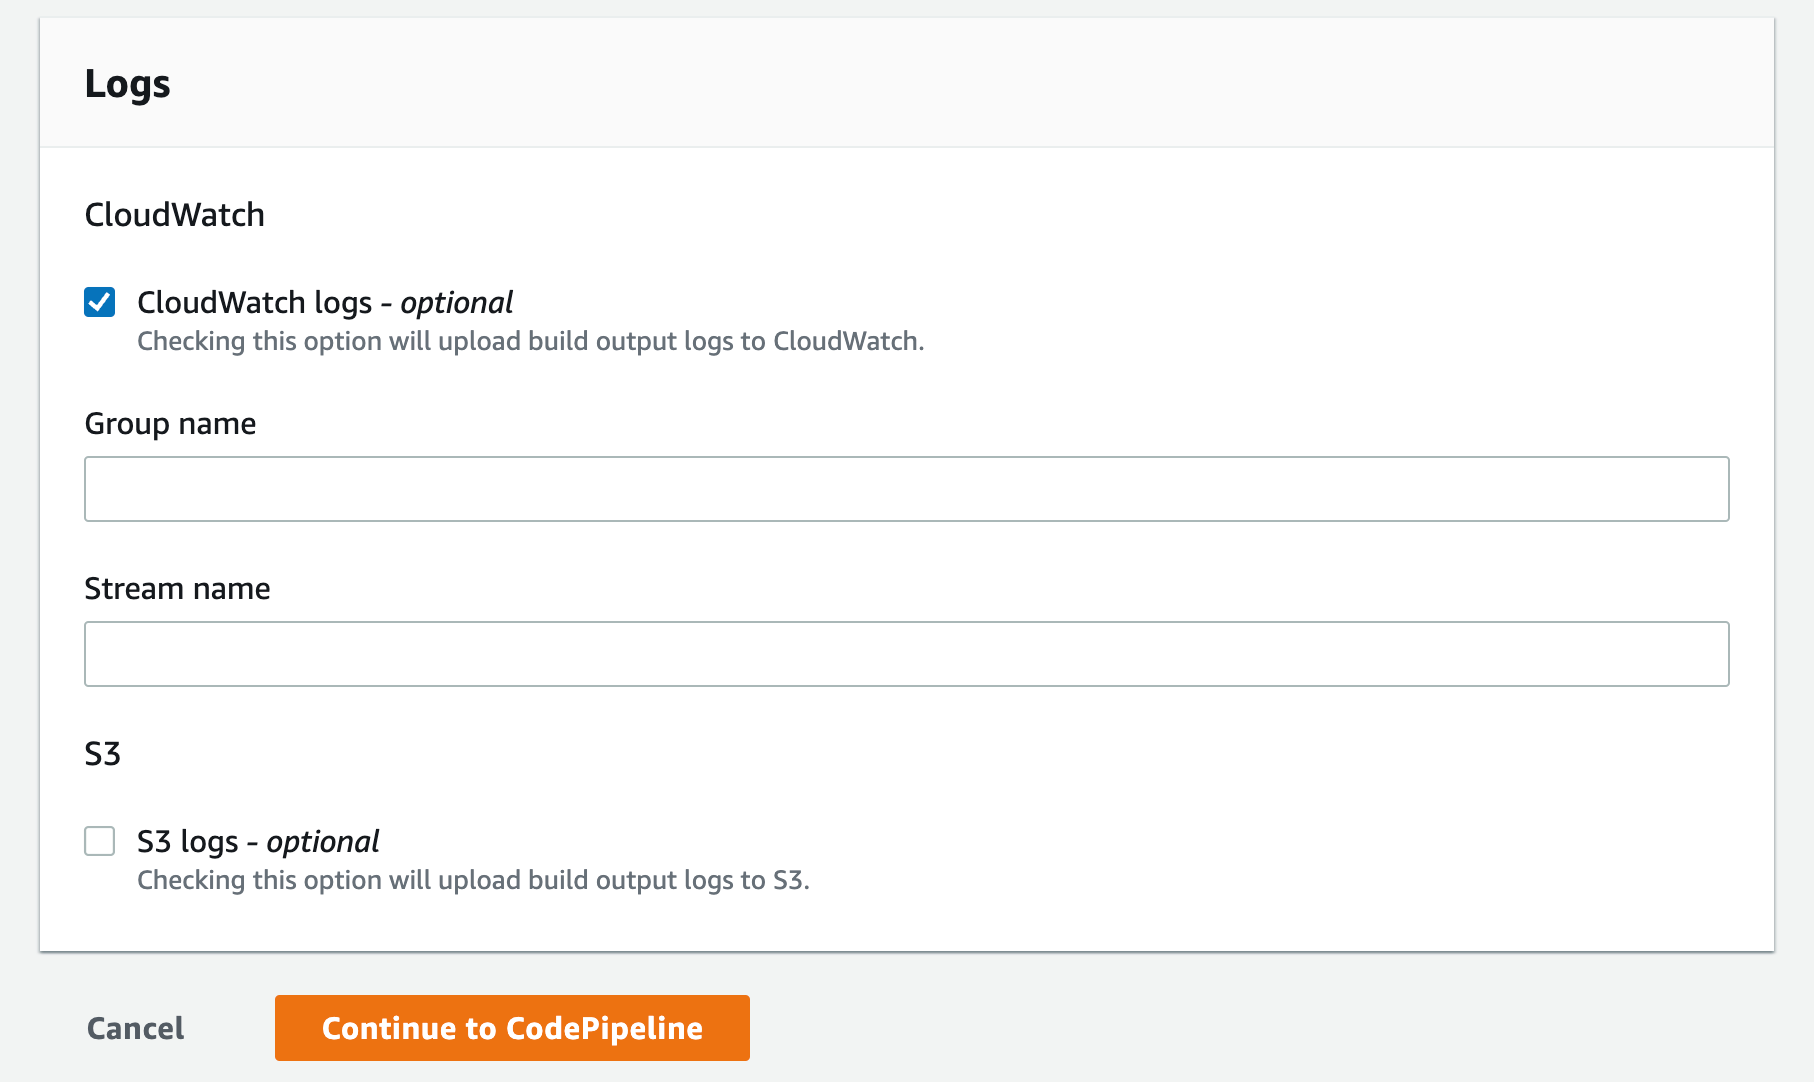
Figure 17. Screenshot: Create pipeline create build project logs window.
-
- This will create the new CodeBuild Project, update the CodePipeline page, now you can click Next
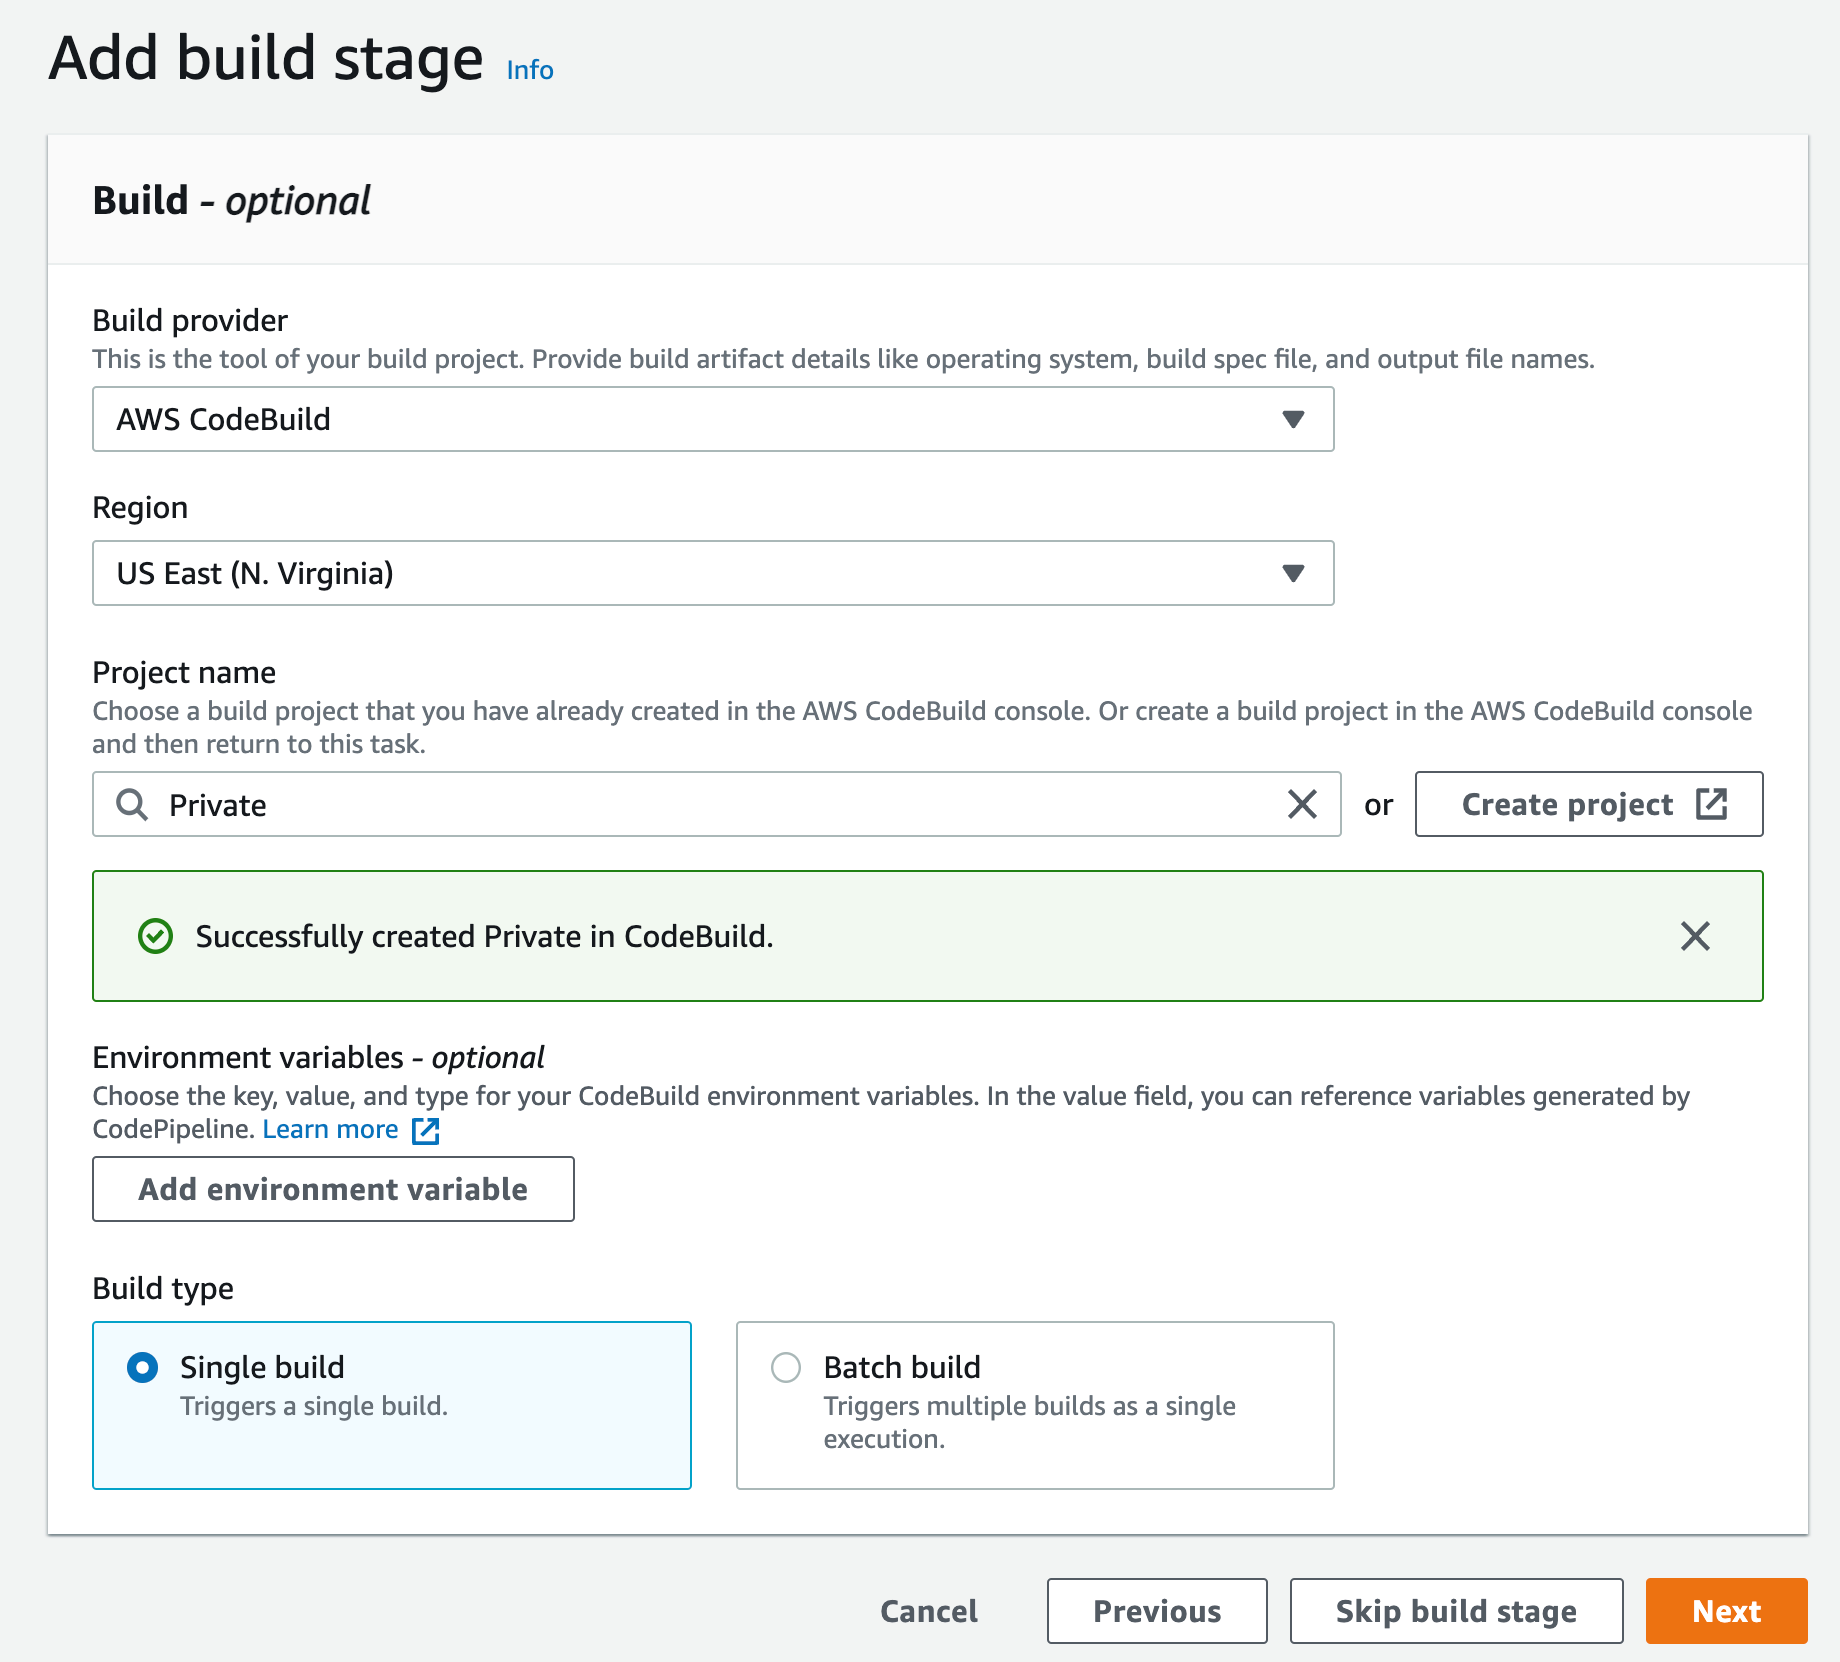
Figure 18. Screenshot: Create pipeline add build stage window.
-
- Since we are not deploying this to any environment, you can skip the deploy stage and click “Skip deploy stage”
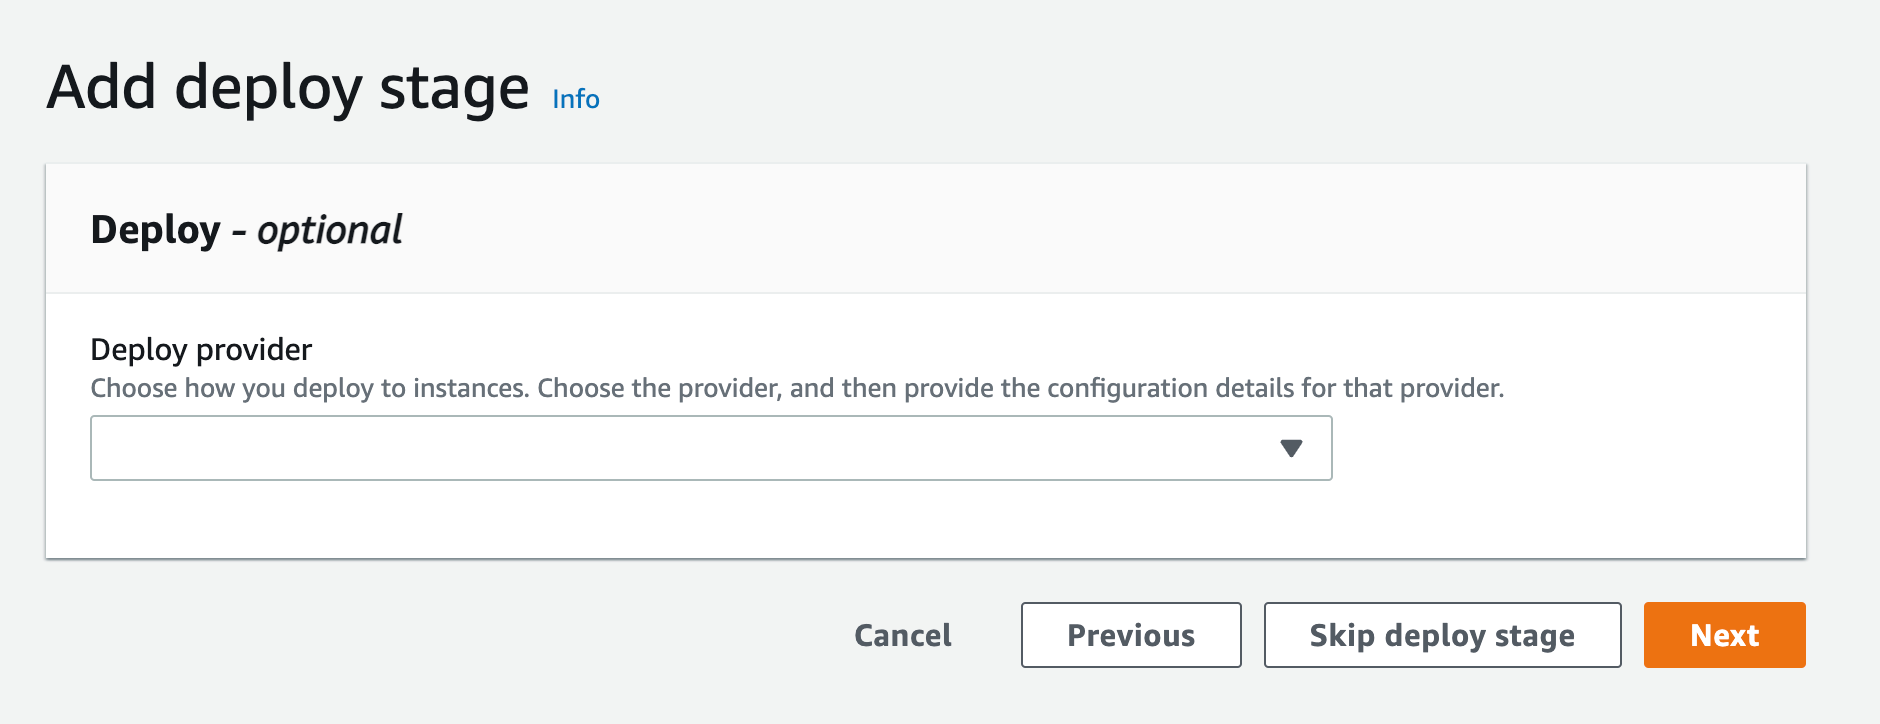
Figure 19. Screenshot: Create pipeline add deploy stage.
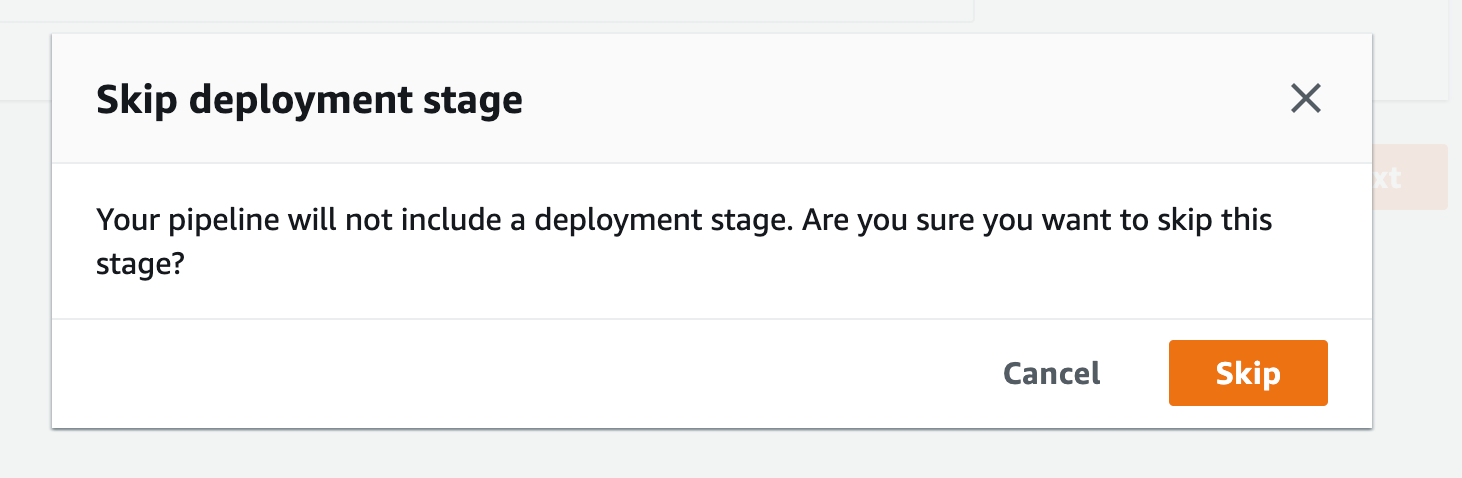
Figure 20. Screenshot: Create pipeline skip deployment stage confirmation.
-
- After you get the popup click skip again you’ll see the review page, scroll all the way down and click Create Pipeline
- Create a VPC endpoint for Amazon CloudWatch Logs. This will enable CodeBuild to send execution logs to CloudWatch:
- Navigate to your VPC console, and from the navigation menu on the left select “Endpoints”.
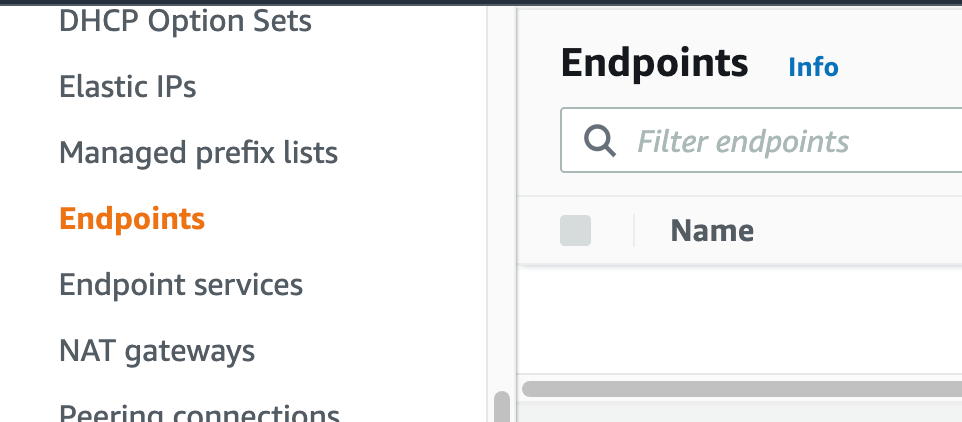
Figure 21. Screenshot: VPC endpoint.
-
- click Create endpoint Button.
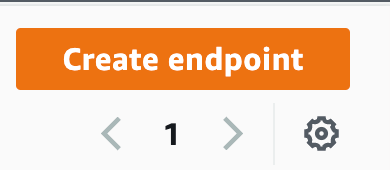
Figure 22. Screenshot: Create endpoint.
-
- For service Category, select “AWS Services”. You can set a name for the new endpoint, and make sure to use something descriptive.
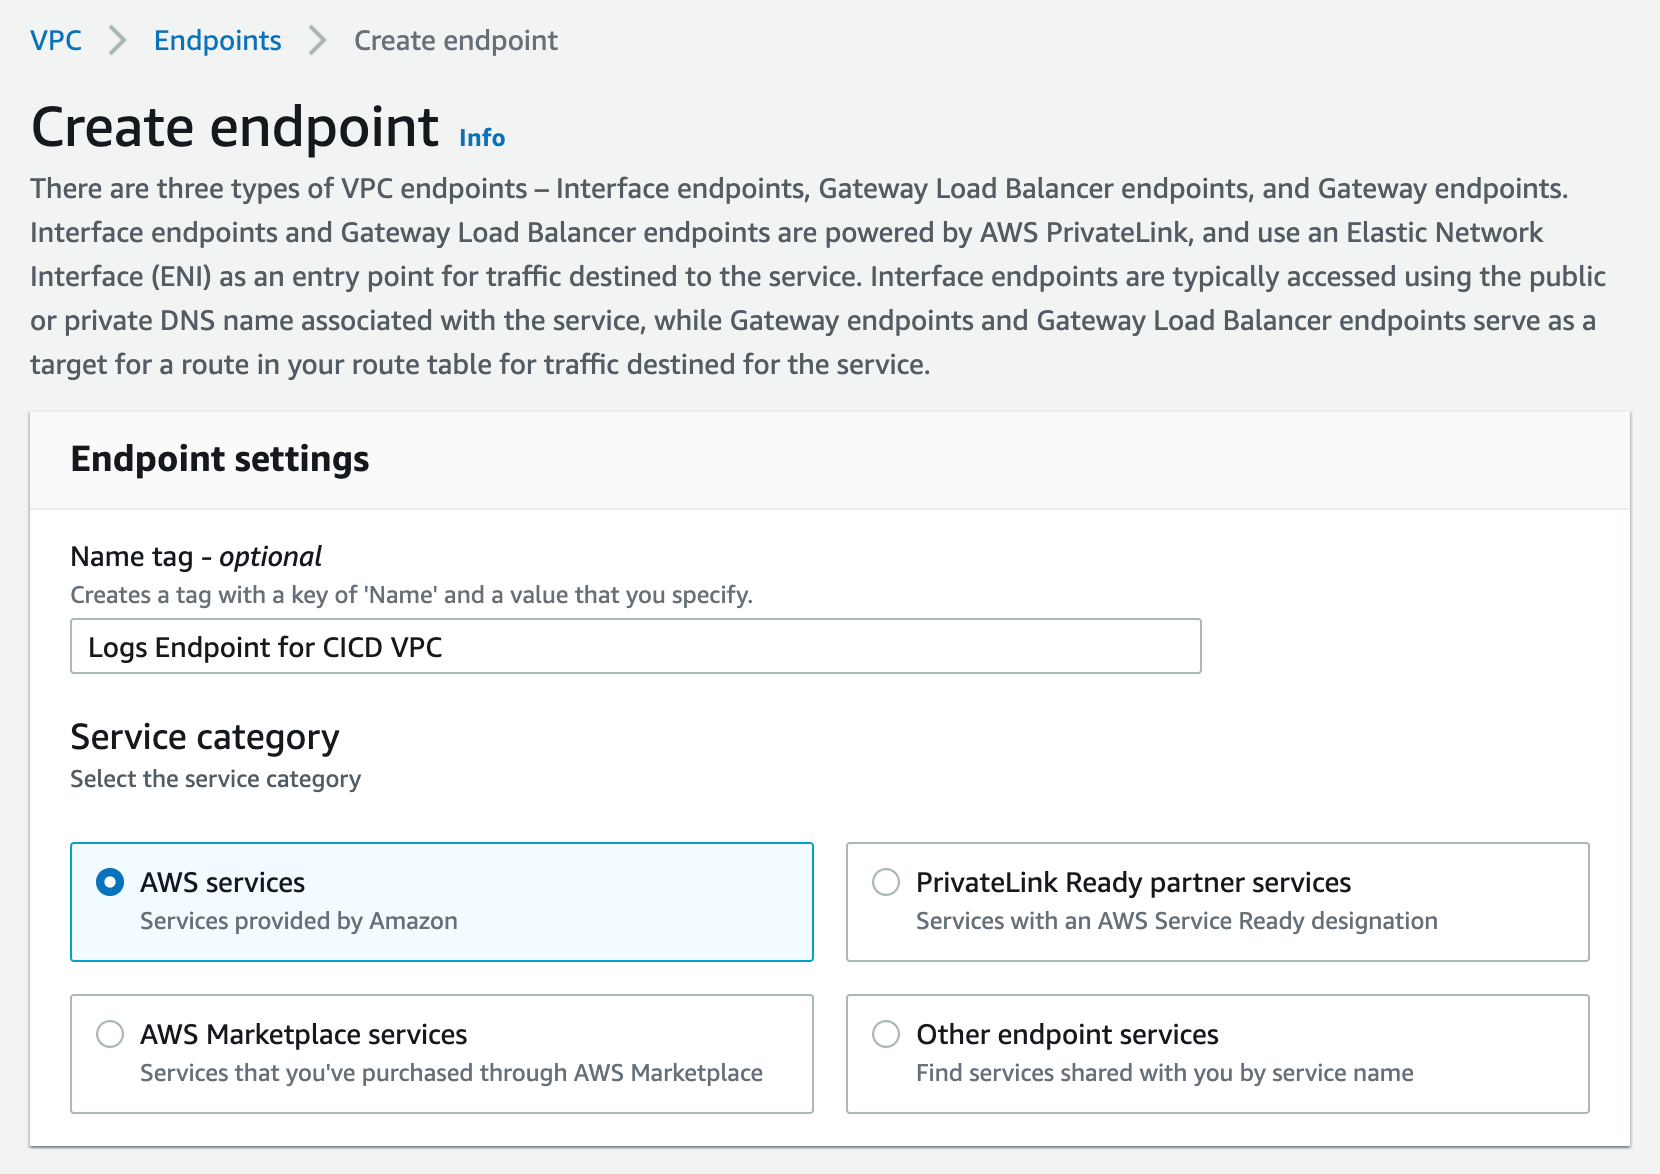
Figure 23. Screenshot: Create endpoint page.
-
- From the list of services, search for the endpoint by typing logs in the search bar and selecting the one with com.amazonaws.us-west-2.logs.
This walkthrough can be done in any region that supports the services. I am going to be using us-west-2, please select the appropriate region for your workload.
- From the list of services, search for the endpoint by typing logs in the search bar and selecting the one with com.amazonaws.us-west-2.logs.
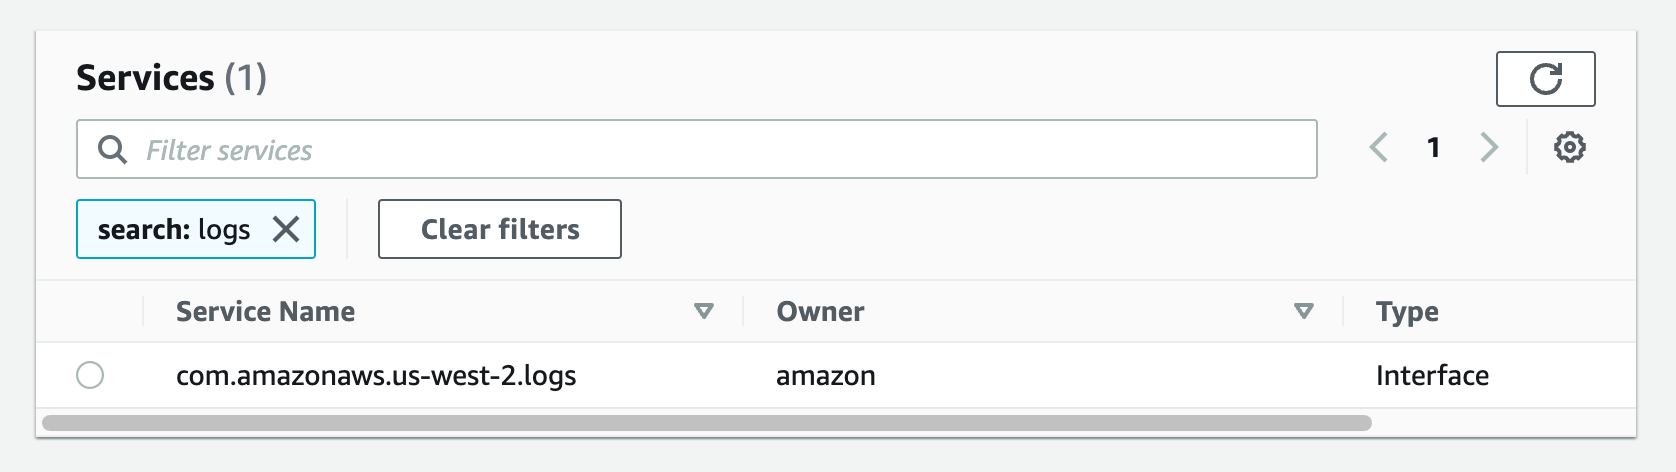
Figure 24. Screenshot: create endpoint select services with com.amazonaws.us-west-2.logs selected.
-
- Select the VPC that you want the endpoint to be associated with, and make sure that the Enable DNS name option is checked under additional settings.
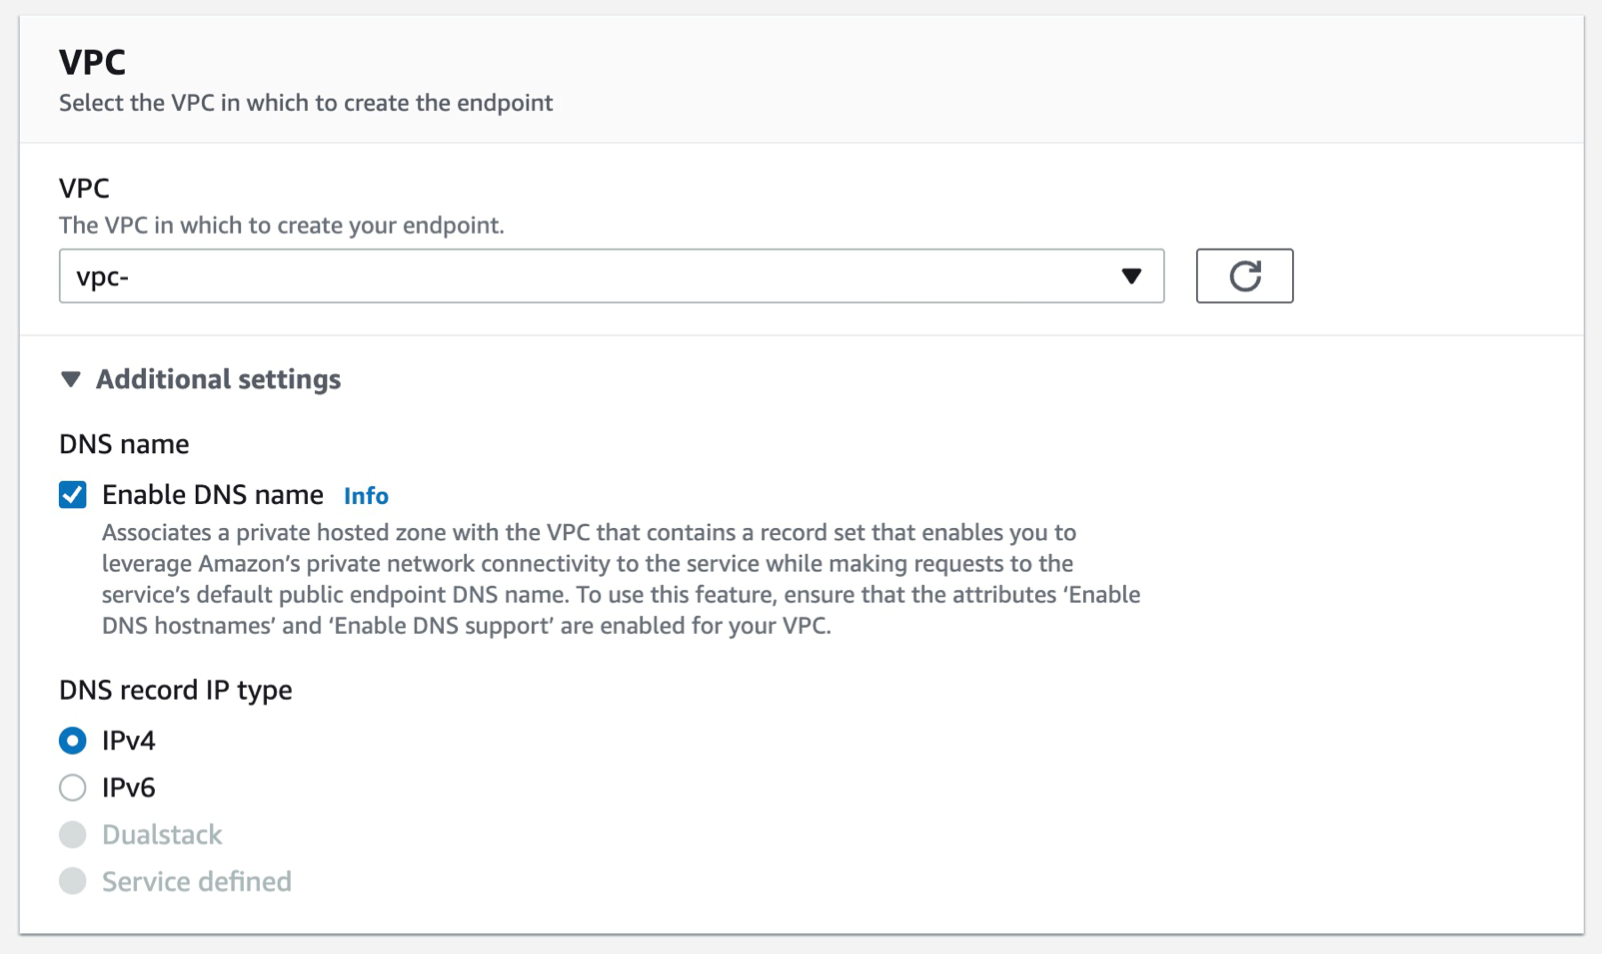
Figure 25. Screenshot: create endpoint VPC setting shows VPC selected.
-
- Select the Subnets where you want the endpoint to be associated, and you can leave the security group as default and the policy as empty.
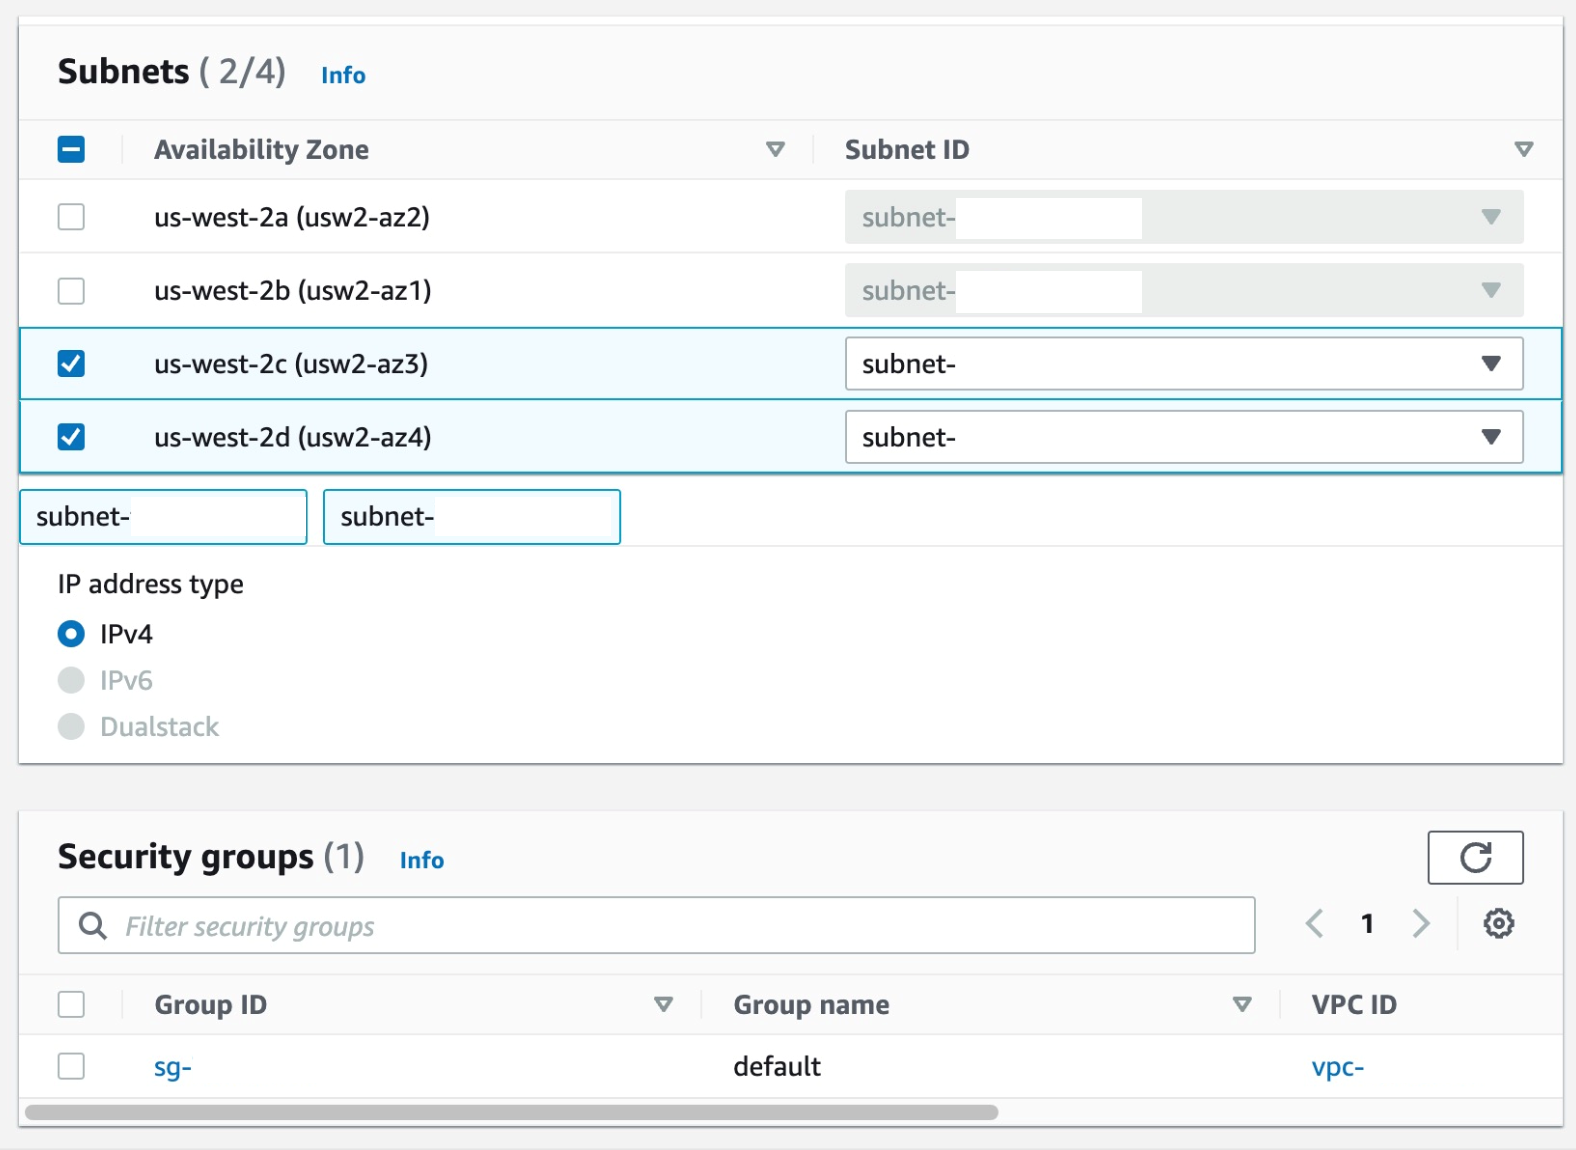
Figure 26. Screenshot: create endpoint subnet setting shows 2 subnet selected and default security group selected.
-
- Select Create Endpoint.
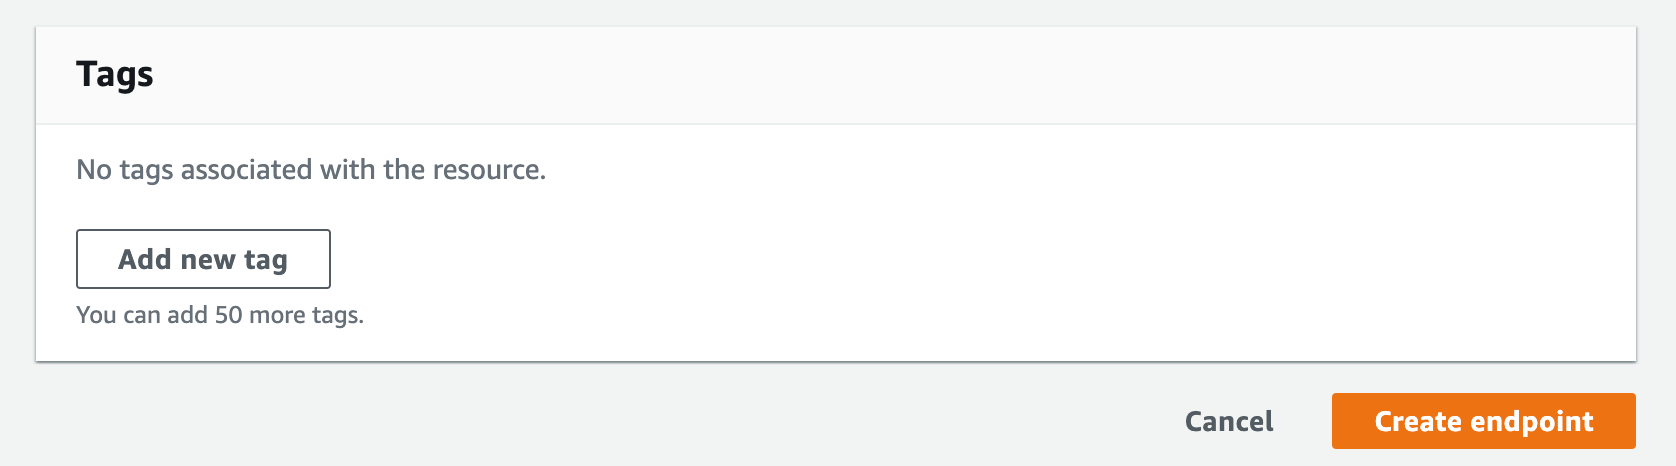
Figure 27. Screenshot: create endpoint button.
- Create a VPC endpoint for CodeArtifact. At the time of writing this article, CodeArifact has two endpoints: one is for API operations like service level operations and authentication, and the other is for using the service such as getting modules for our code. We’ll need both endpoints to automate working with CodeArtifact. Therefore, we’ll create both endpoints with DNS enabled.
In addition, we’ll need AWS Security Token Service (AWS STS) endpoint for get-caller-identity API call:
Follow steps a-c from the steps that were used from the creating the Logs endpoint above.
a. From the list of services, you can search for the endpoint by typing codeartifact in the search bar and selecting the one with com.amazonaws.us-west-2.codeartifact.api.
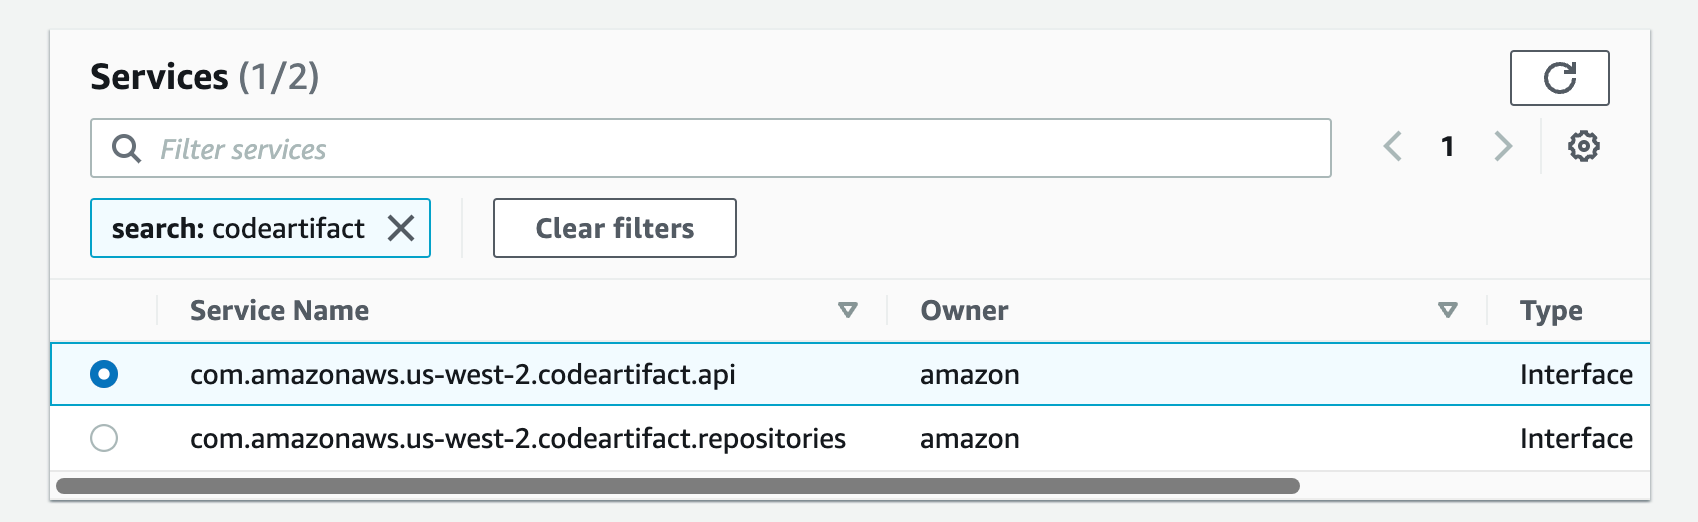
Figure 28. Screenshot: create endpoint select services with com.amazonaws.us-west-2.codeartifact.api selected.
Follow steps e-g from Part 4.
Then, repeat the same for com.amazon.aws.us-west-2.codeartifact.repositories service.
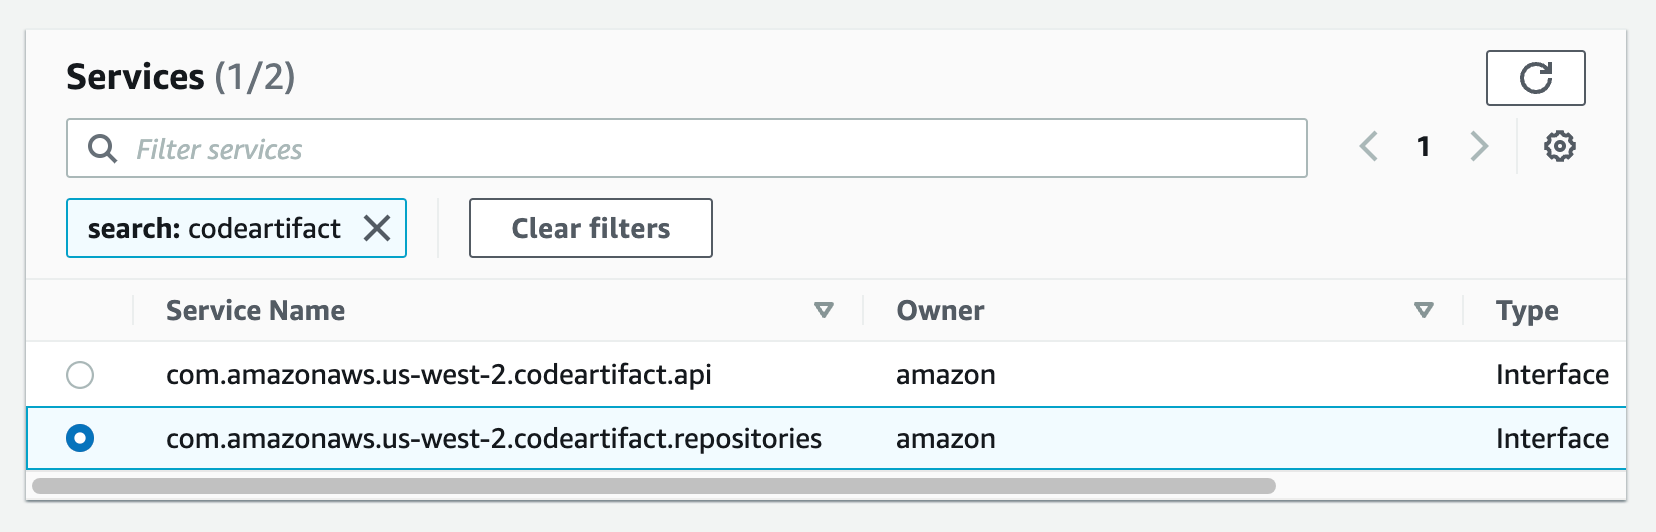
Figure 29. Screenshot: create endpoint select services with com.amazonaws.us-west-2.codeartifact.api selected.
- Enable a VPC endpoint for AWS STS:
Follow steps a-c from Part 4
a. From the list of services you can search for the endpoint by typing sts in the search bar and selecting the one with com.amazonaws.us-west-2.sts.
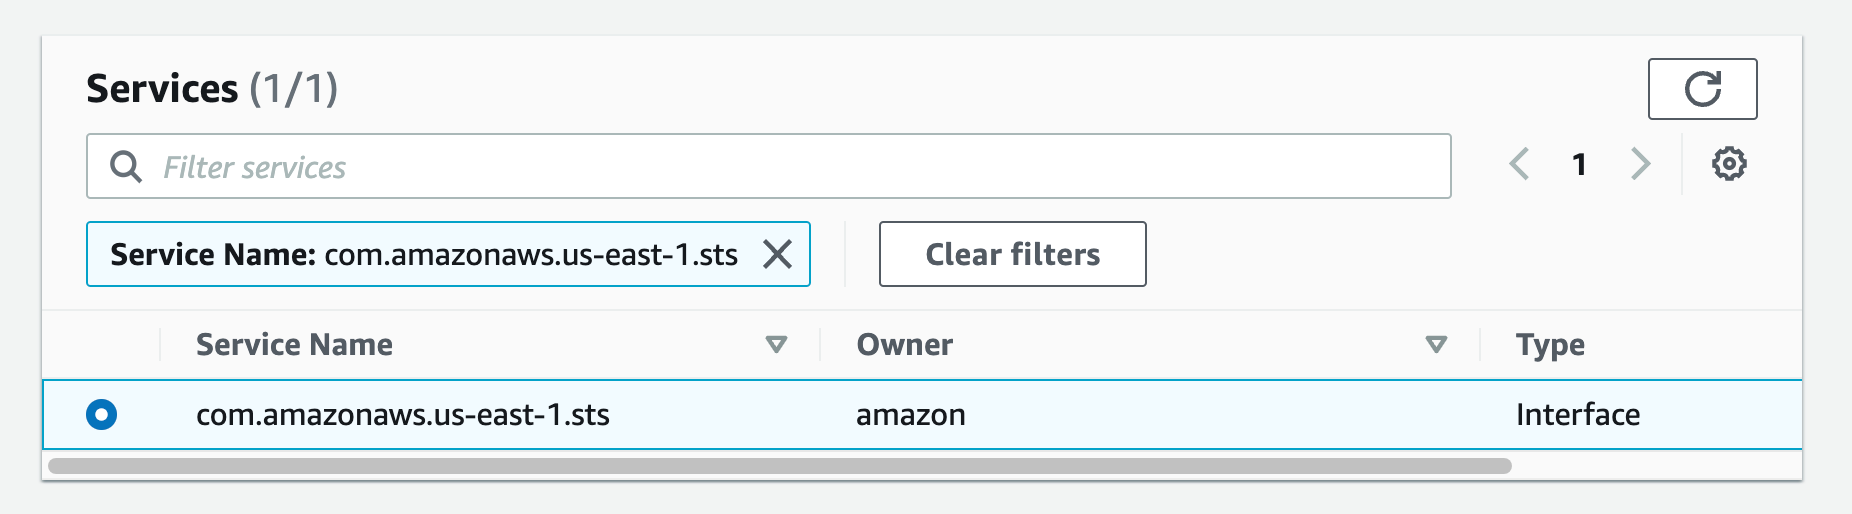
Figure 30.Screenshot: create endpoint select services with com.amazon.aws.us-west-2.codeartifact.repositories selected.
Then follow steps e-g from Part 4.
- Create a VPC endpoint for S3:
Follow steps a-c from Part 4
a. From the list of services you can search for the endpoint by typing sts in the search bar and selecting the one with com.amazonaws.us-west-2.s3, select the one with type of Gateway
Then select your VPC, and select the route tables for your subnets, this will auto update the route table with the new S3 endpoint.
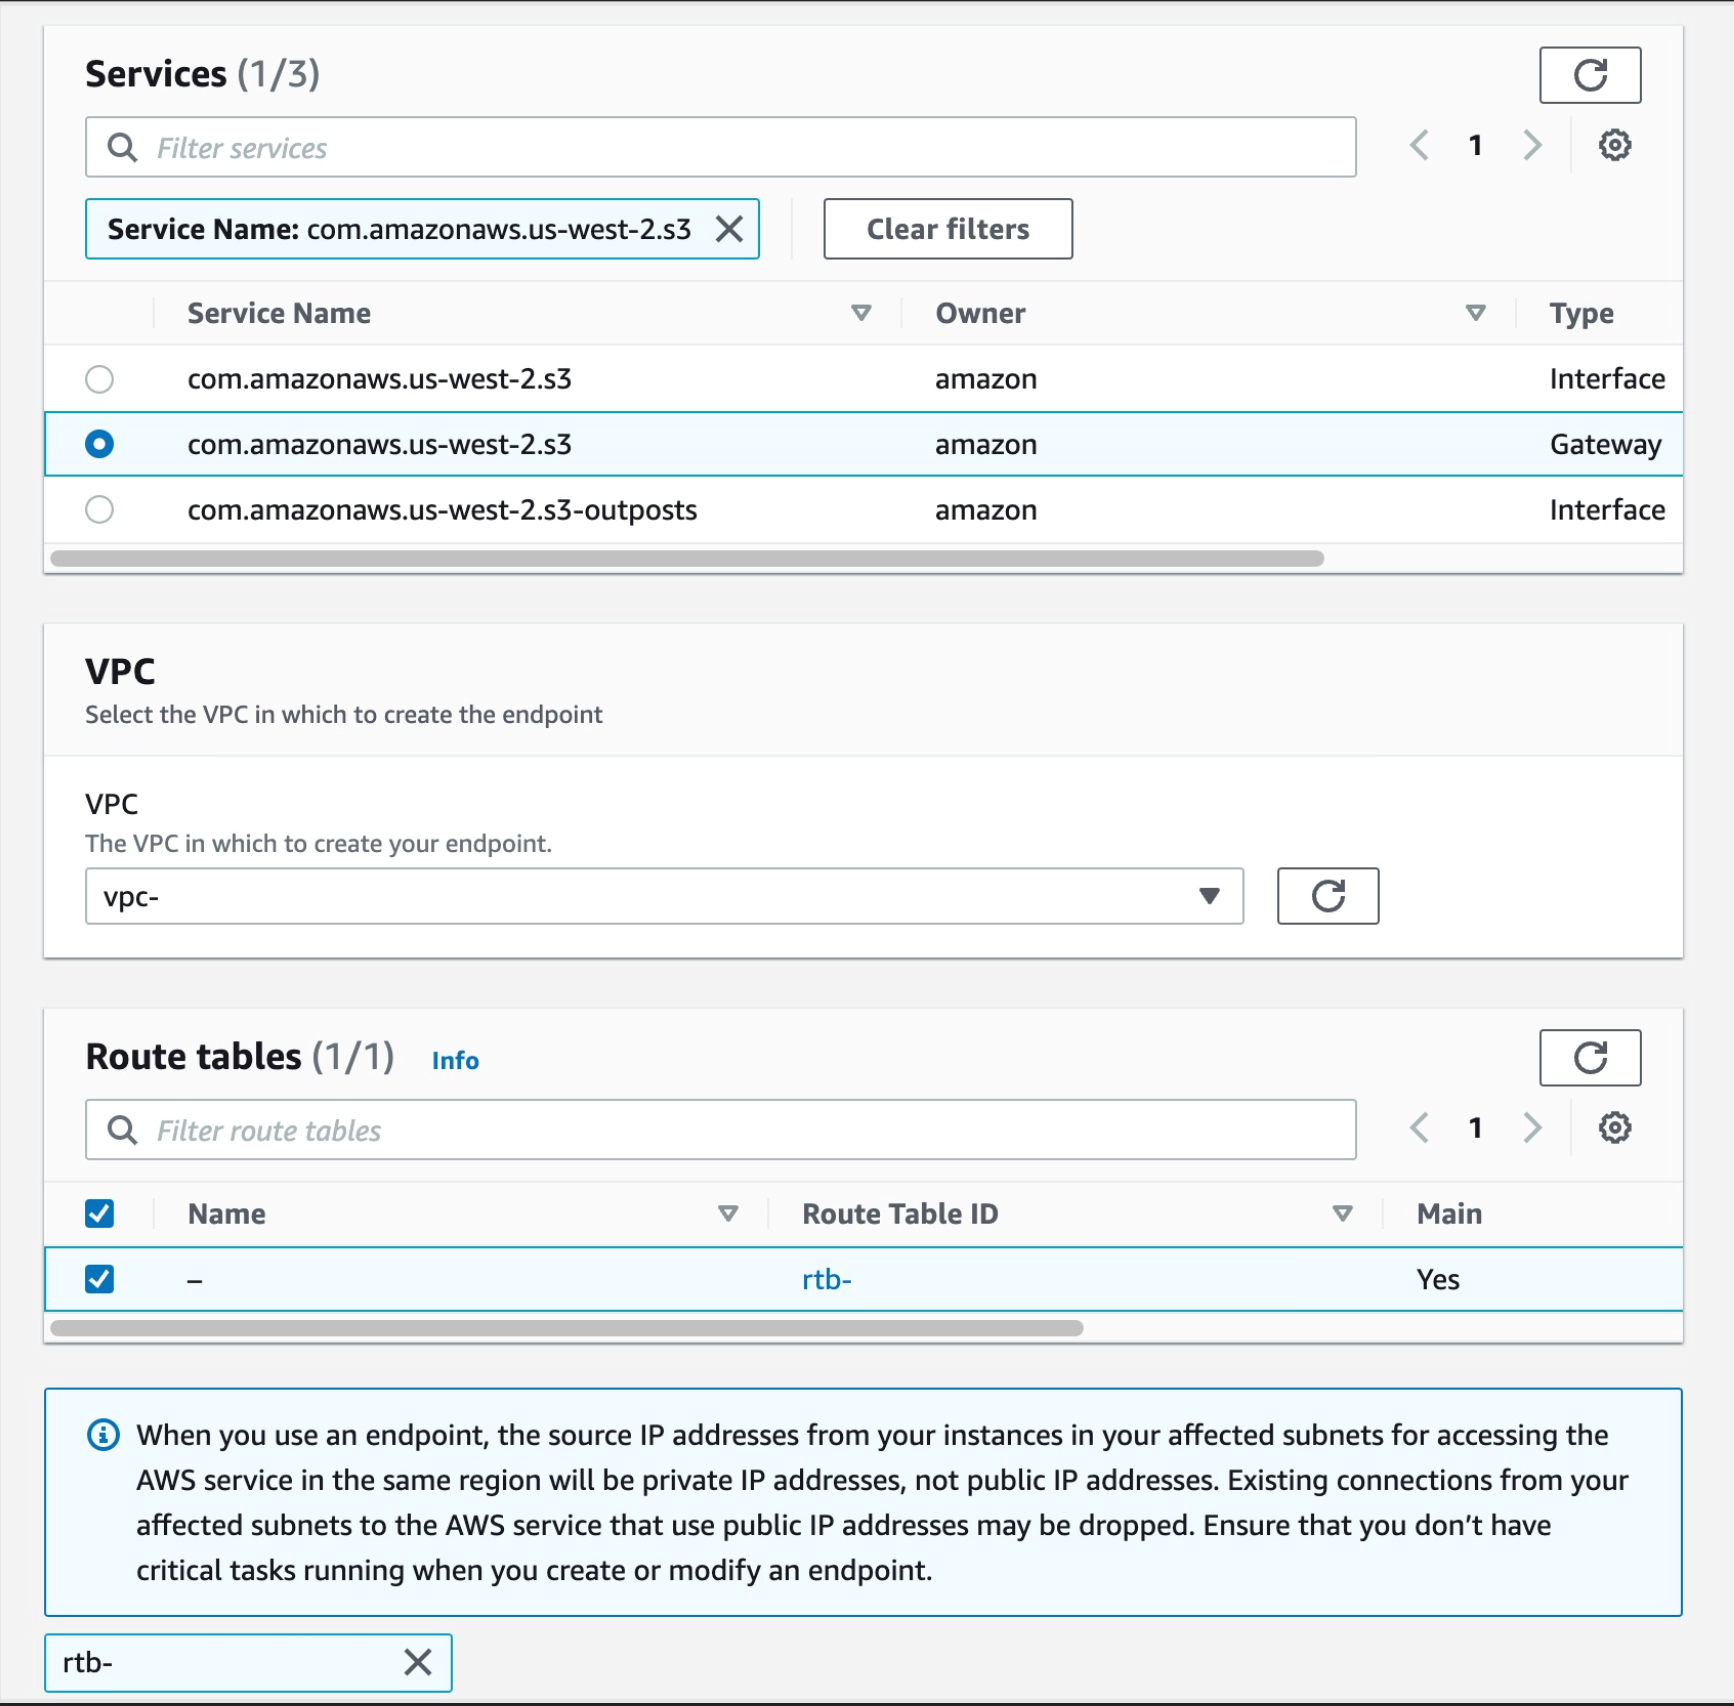
Figure 31. Screenshot: create endpoint select services with com.amazonaws.us-west-2.s3 selected.
- Now we have all of the endpoints set. The last step is to update your pipeline to point at the CodeArtifact repository when pulling your code dependencies. I’ll use CodeBuild buildspec.yml as an example here.
Make sure that your CodeBuild AWS Identity and Access Management (IAM) role has the permissions to perform STS and CodeArtifact actions.
Navigate to IAM console and click Roles from the left navigation menu, then search for your IAM role name, in our case since we selected “New service role” option in step 2.k was created with the name “codebuild-Private-service-role” (codebuild-<BUILD PROJECT NAME>-service-role)
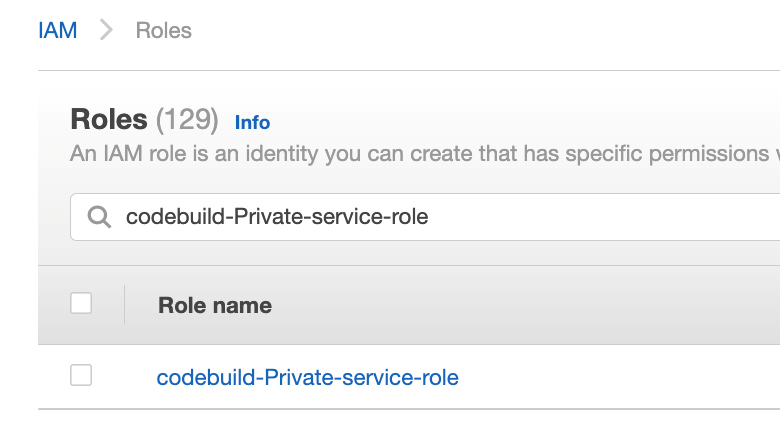
Figure 32. Screenshot: IAM roles with codebuild-Private-service-role role shown in search.
From the Add permissions menu, click on Create inline policy

Search for STS in the services then select STS
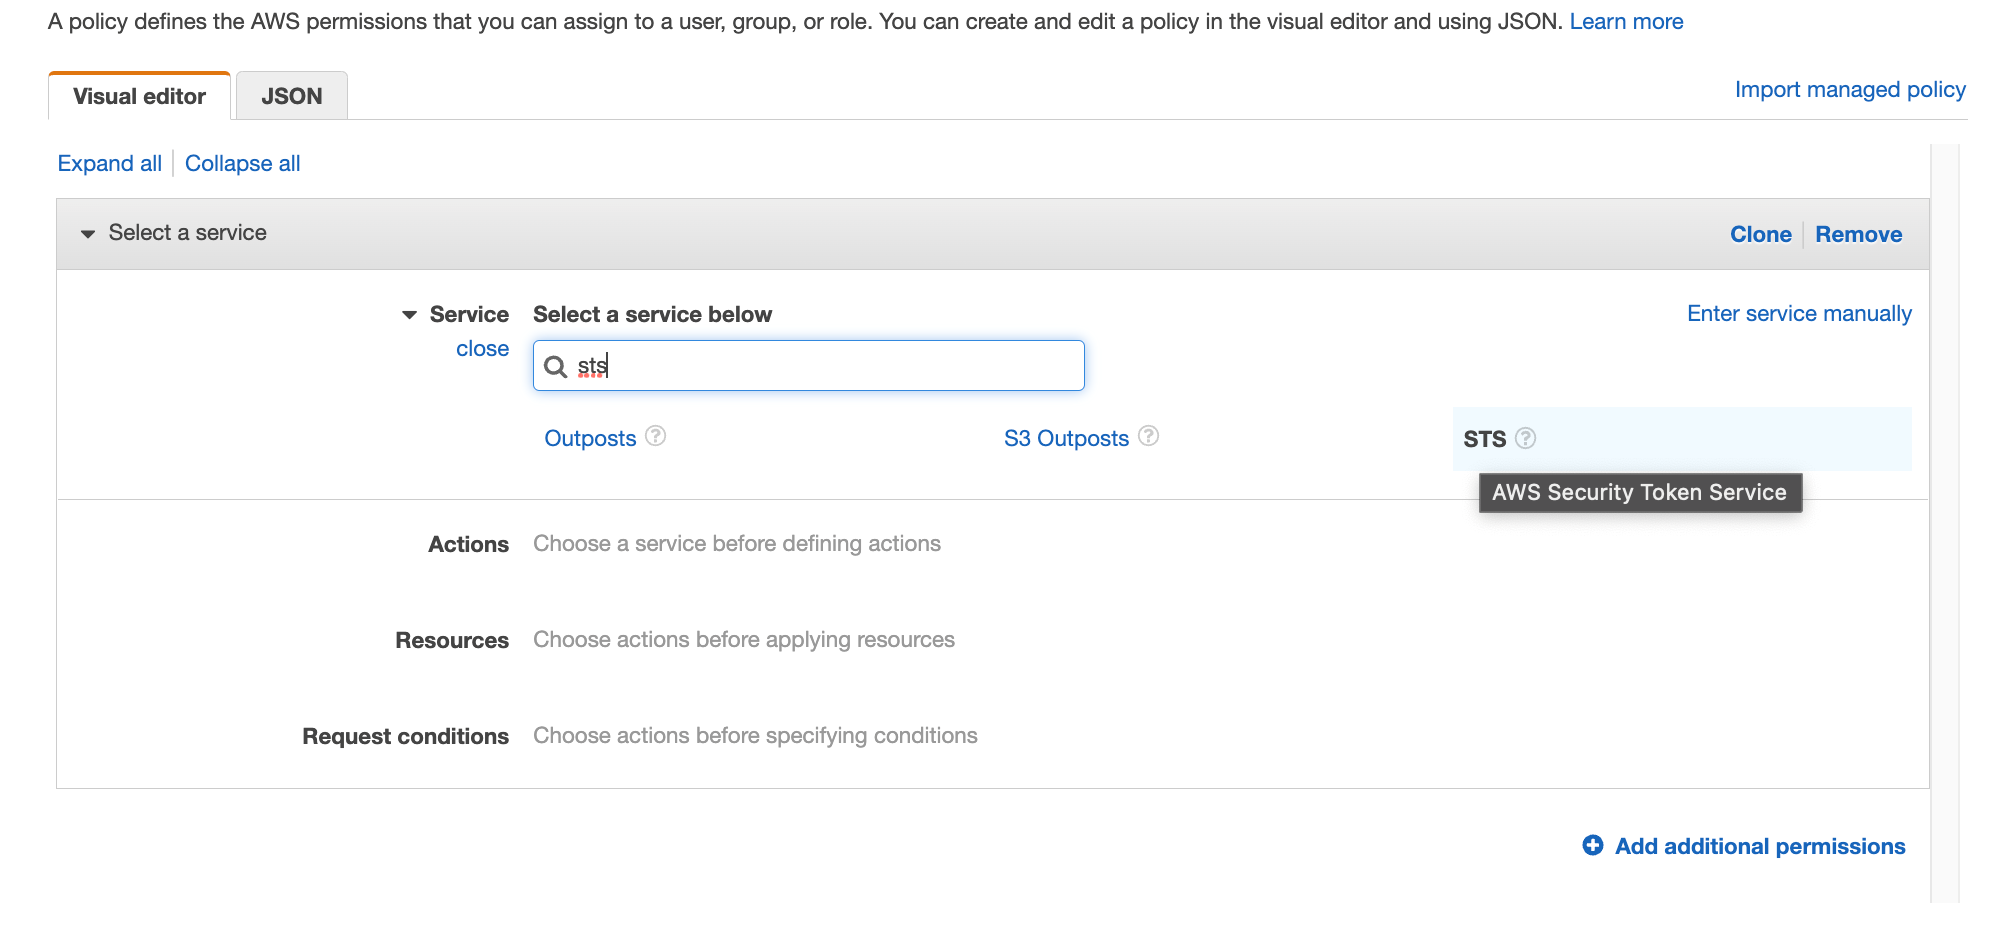
Figure 34. Screenshot: IAM visual editor with sts shown in search.
Search for “GetCallerIdentity” and select the action
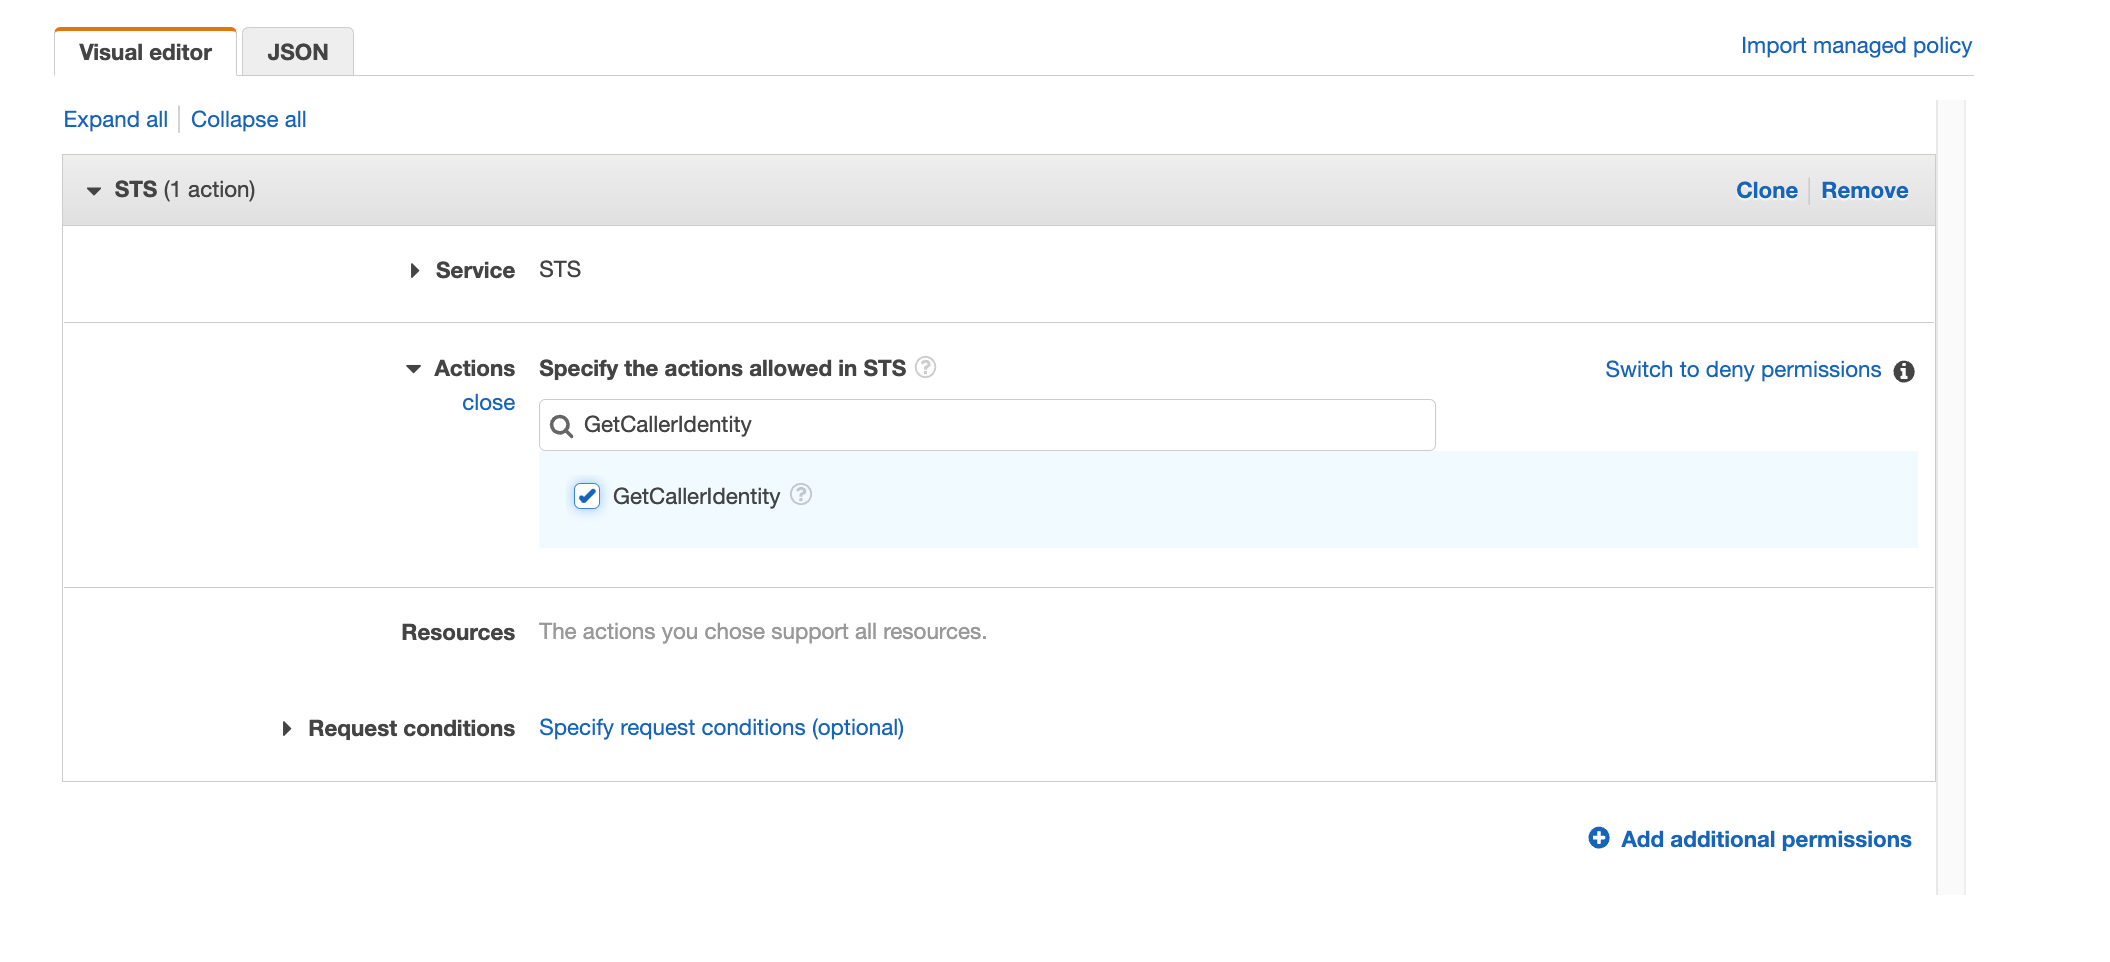
Figure 35. Screenshot: IAM visual editor with GetCallerIdentity in search and action selected.
Repeat the same with “GetServiceBearerToken”
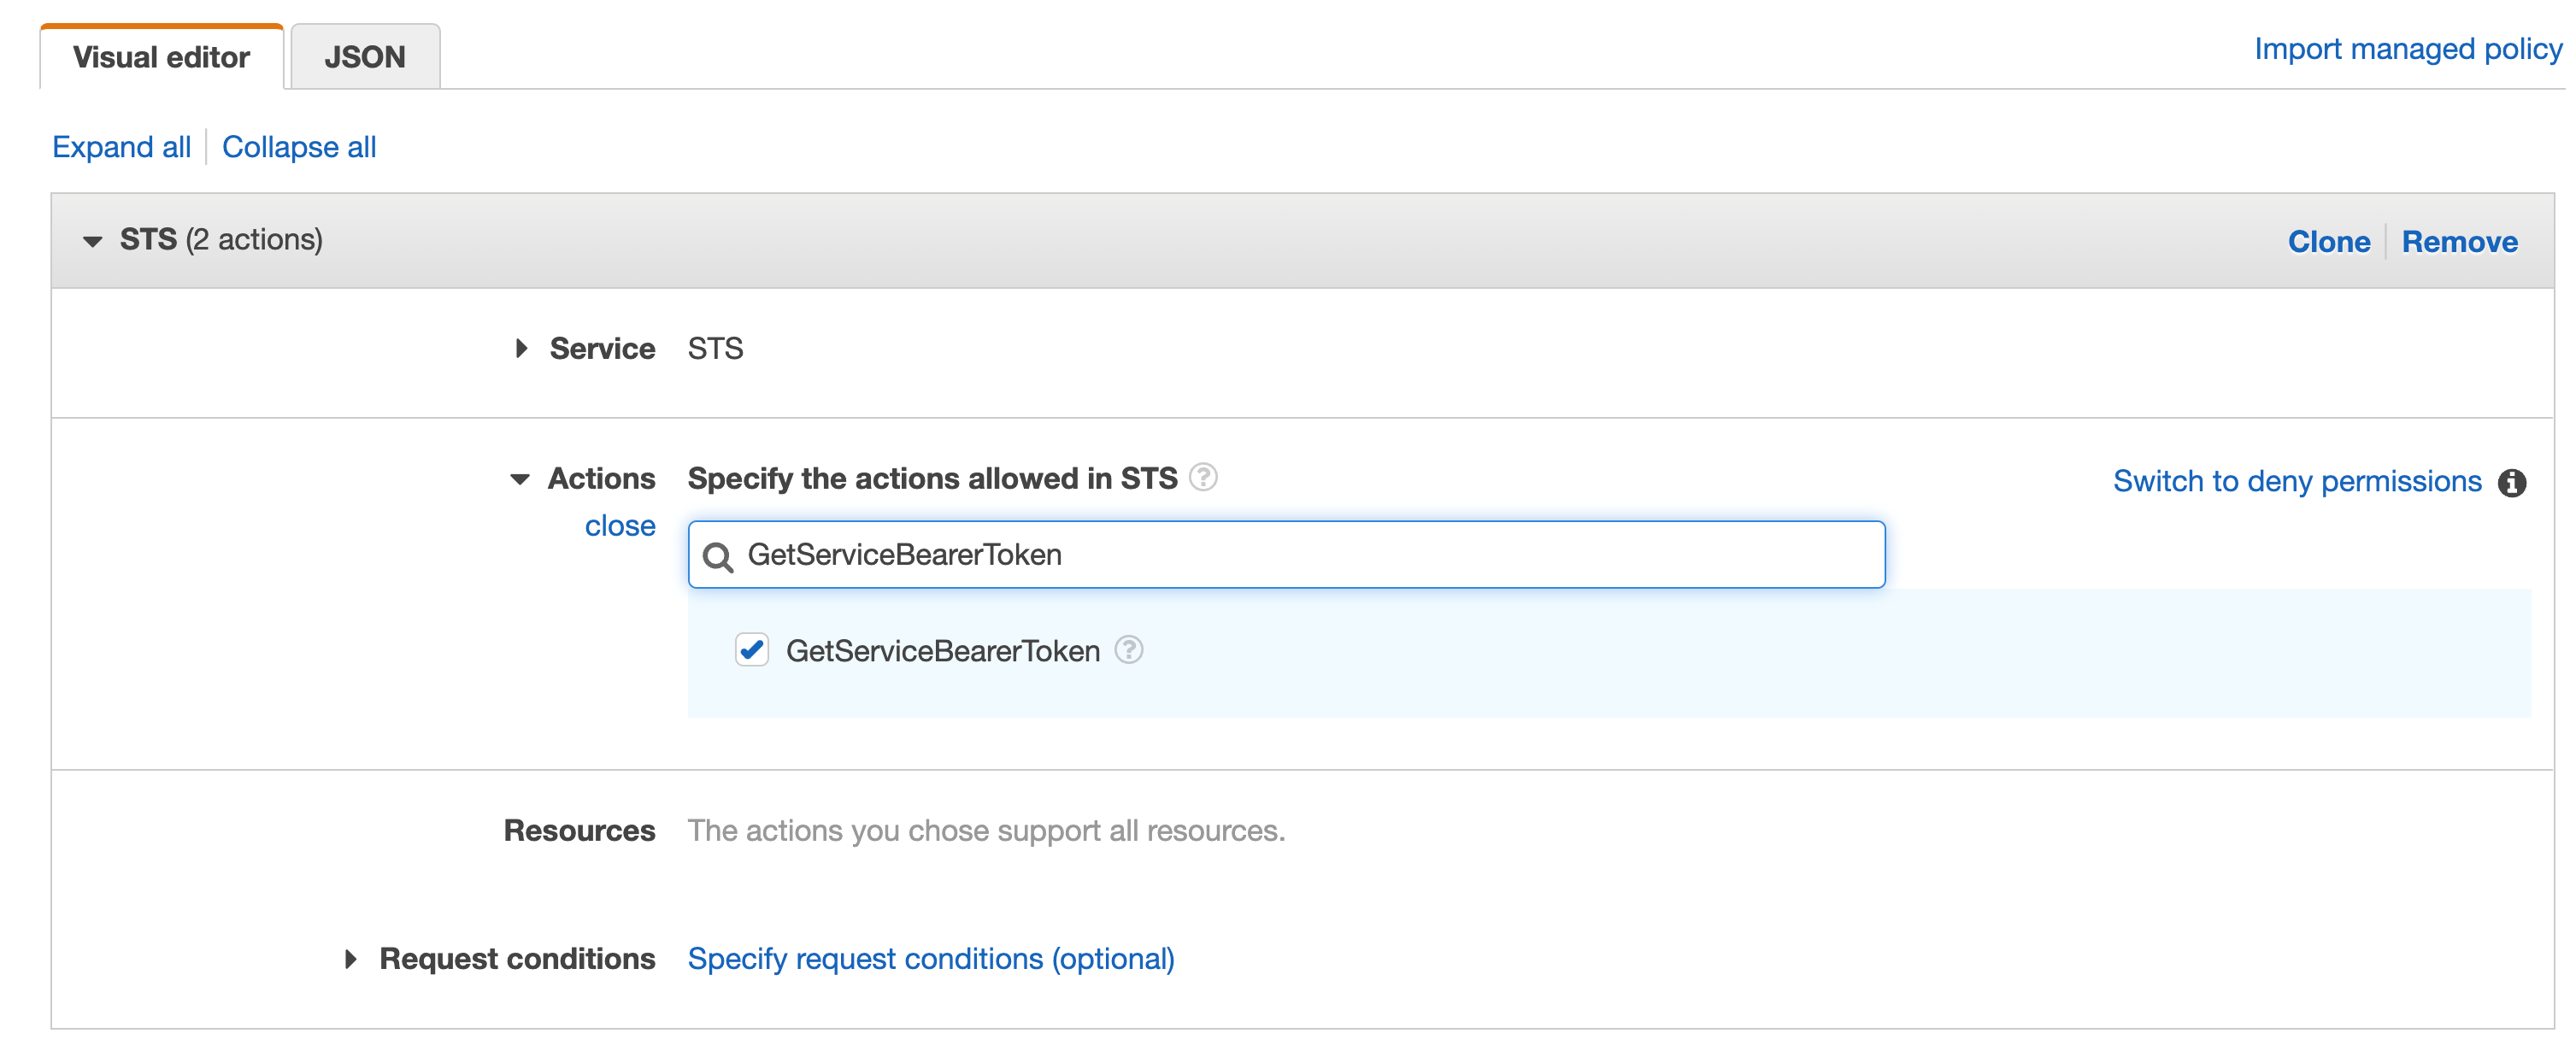
Figure 36. Screenshot: IAM visual editor with GetServiceBearerToken in search and action selected.
Click on Review, add a name then click on Create policy
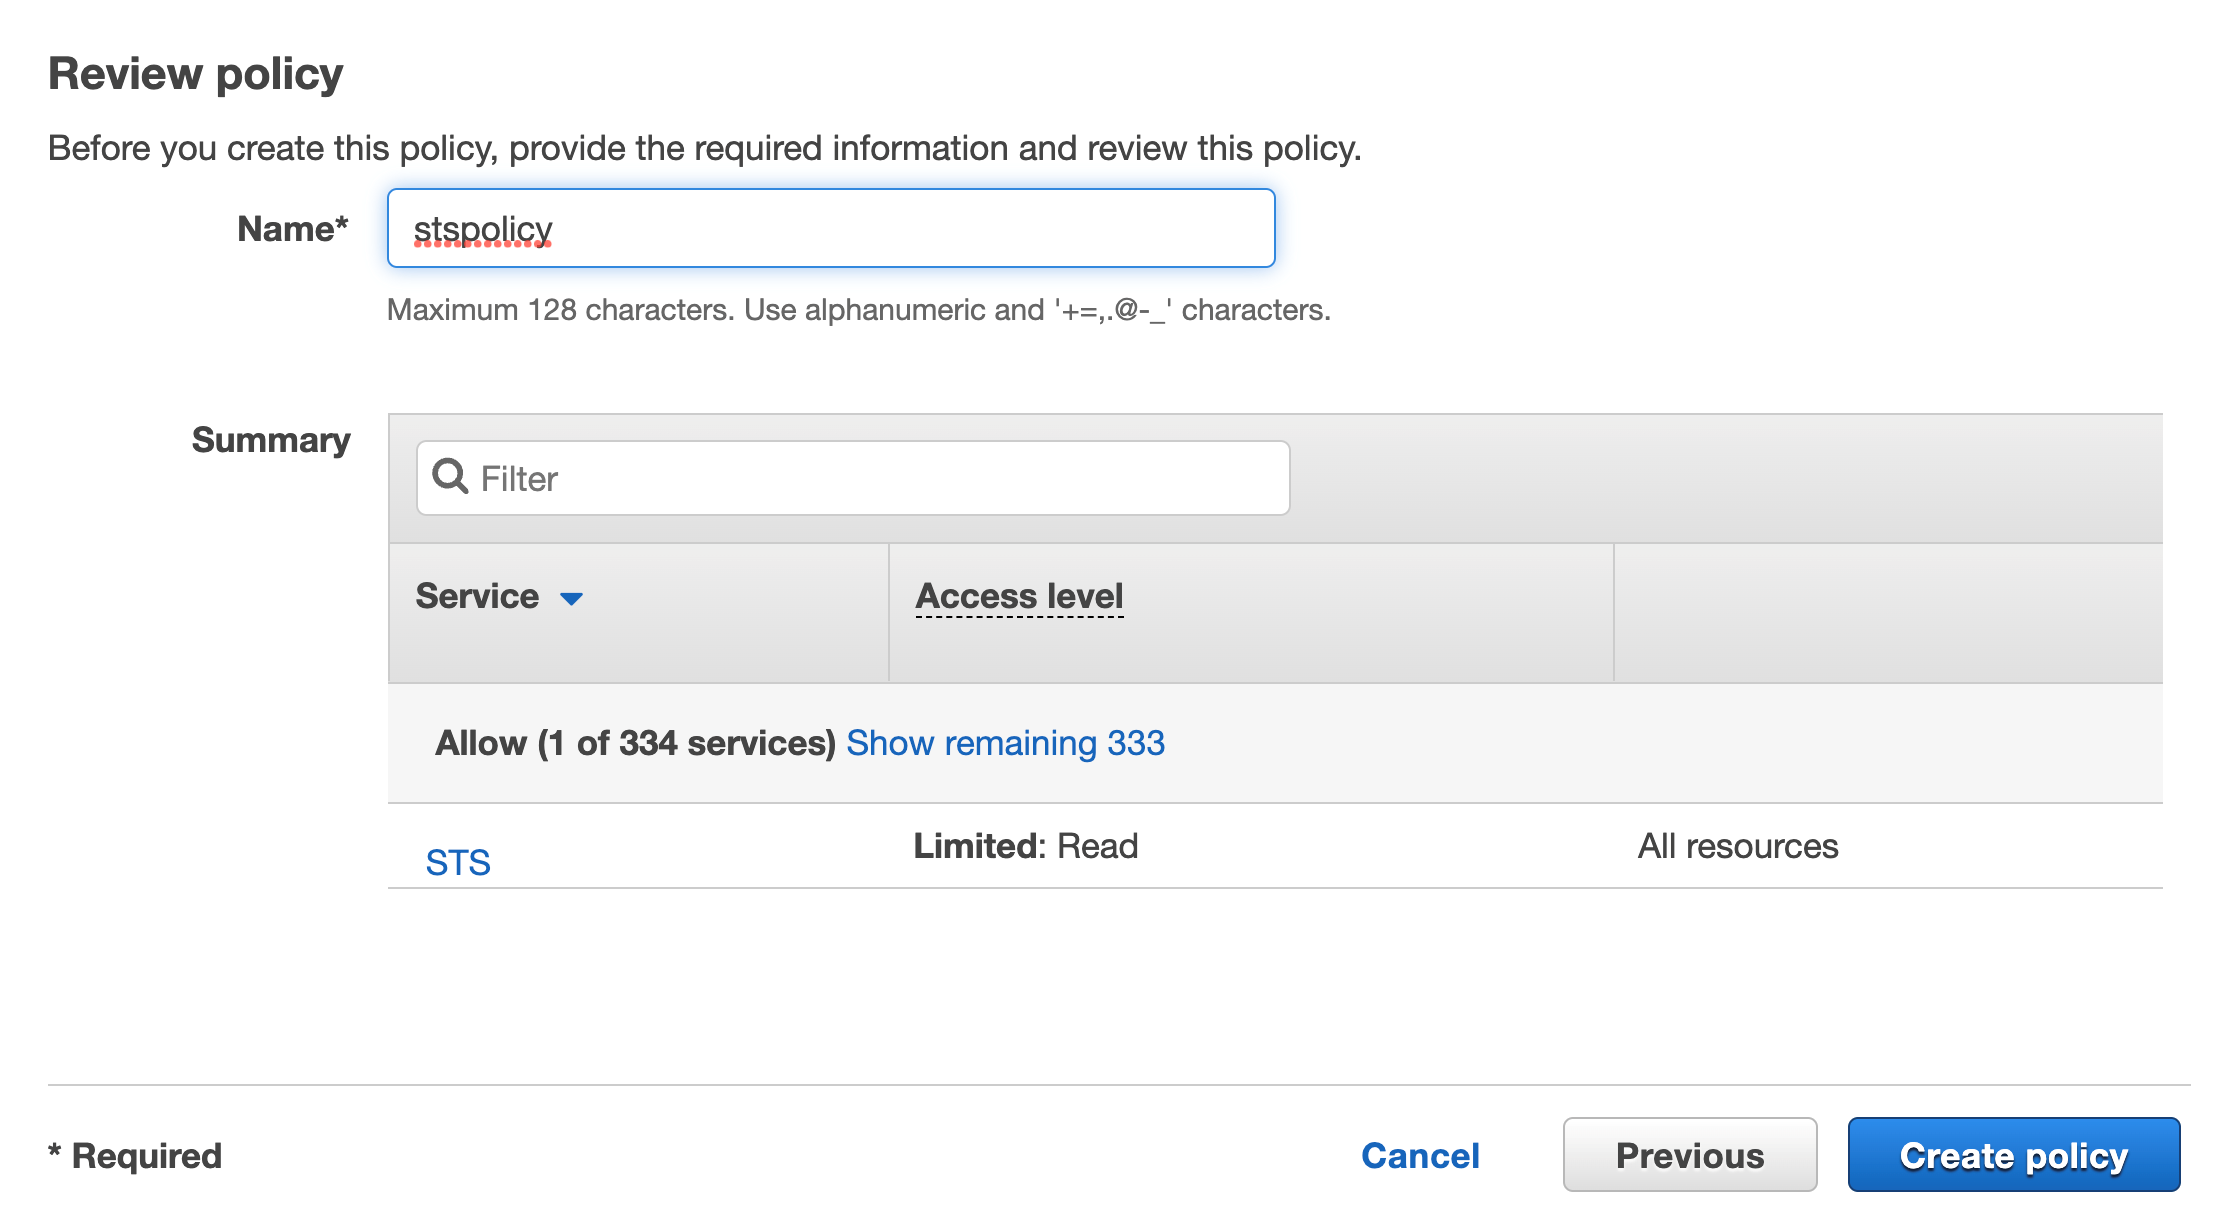
Figure 37. Screenshot: Review page and Create policy button.
You should see the new inline policy added to the list
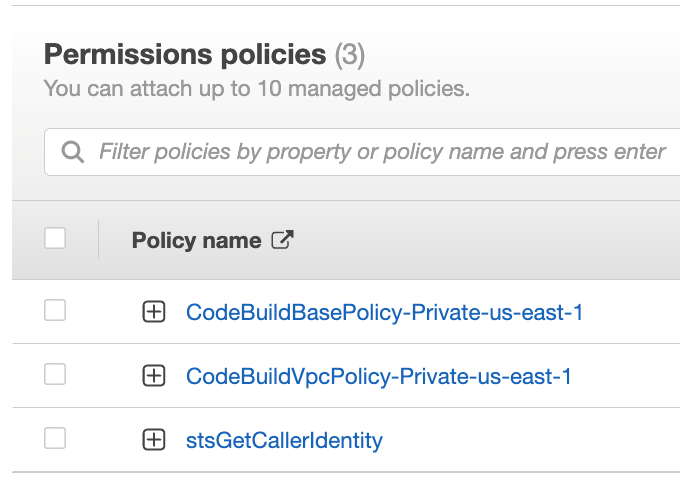
Figure 38. Screenshot: shows the new in-line policy in the list.
For CodeArtifact actions we will do the same on that role, click on Create inline policy
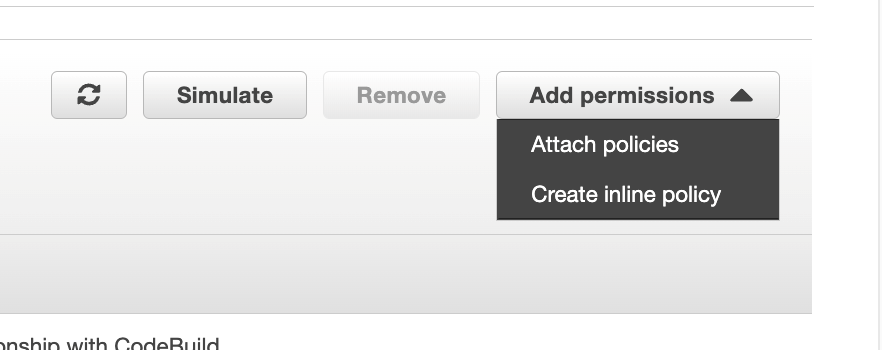
Figure 39. Screenshot: attach policies.
Search for CodeArtifact in the services then select CodeArtifact
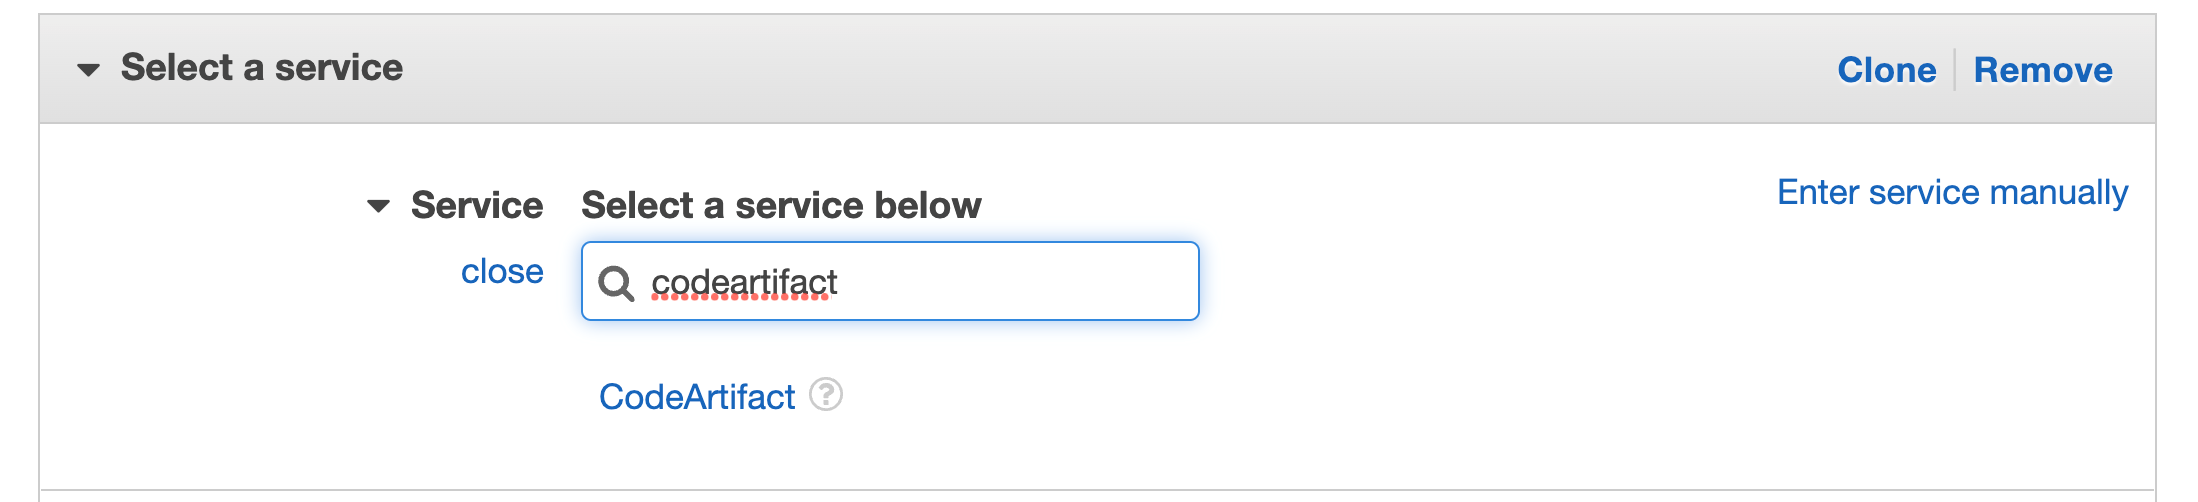
Figure 40. Screenshot: select service with CodeArtifact in search.
Search for “GetAuthorizationToken” in actions and select that action in the check box
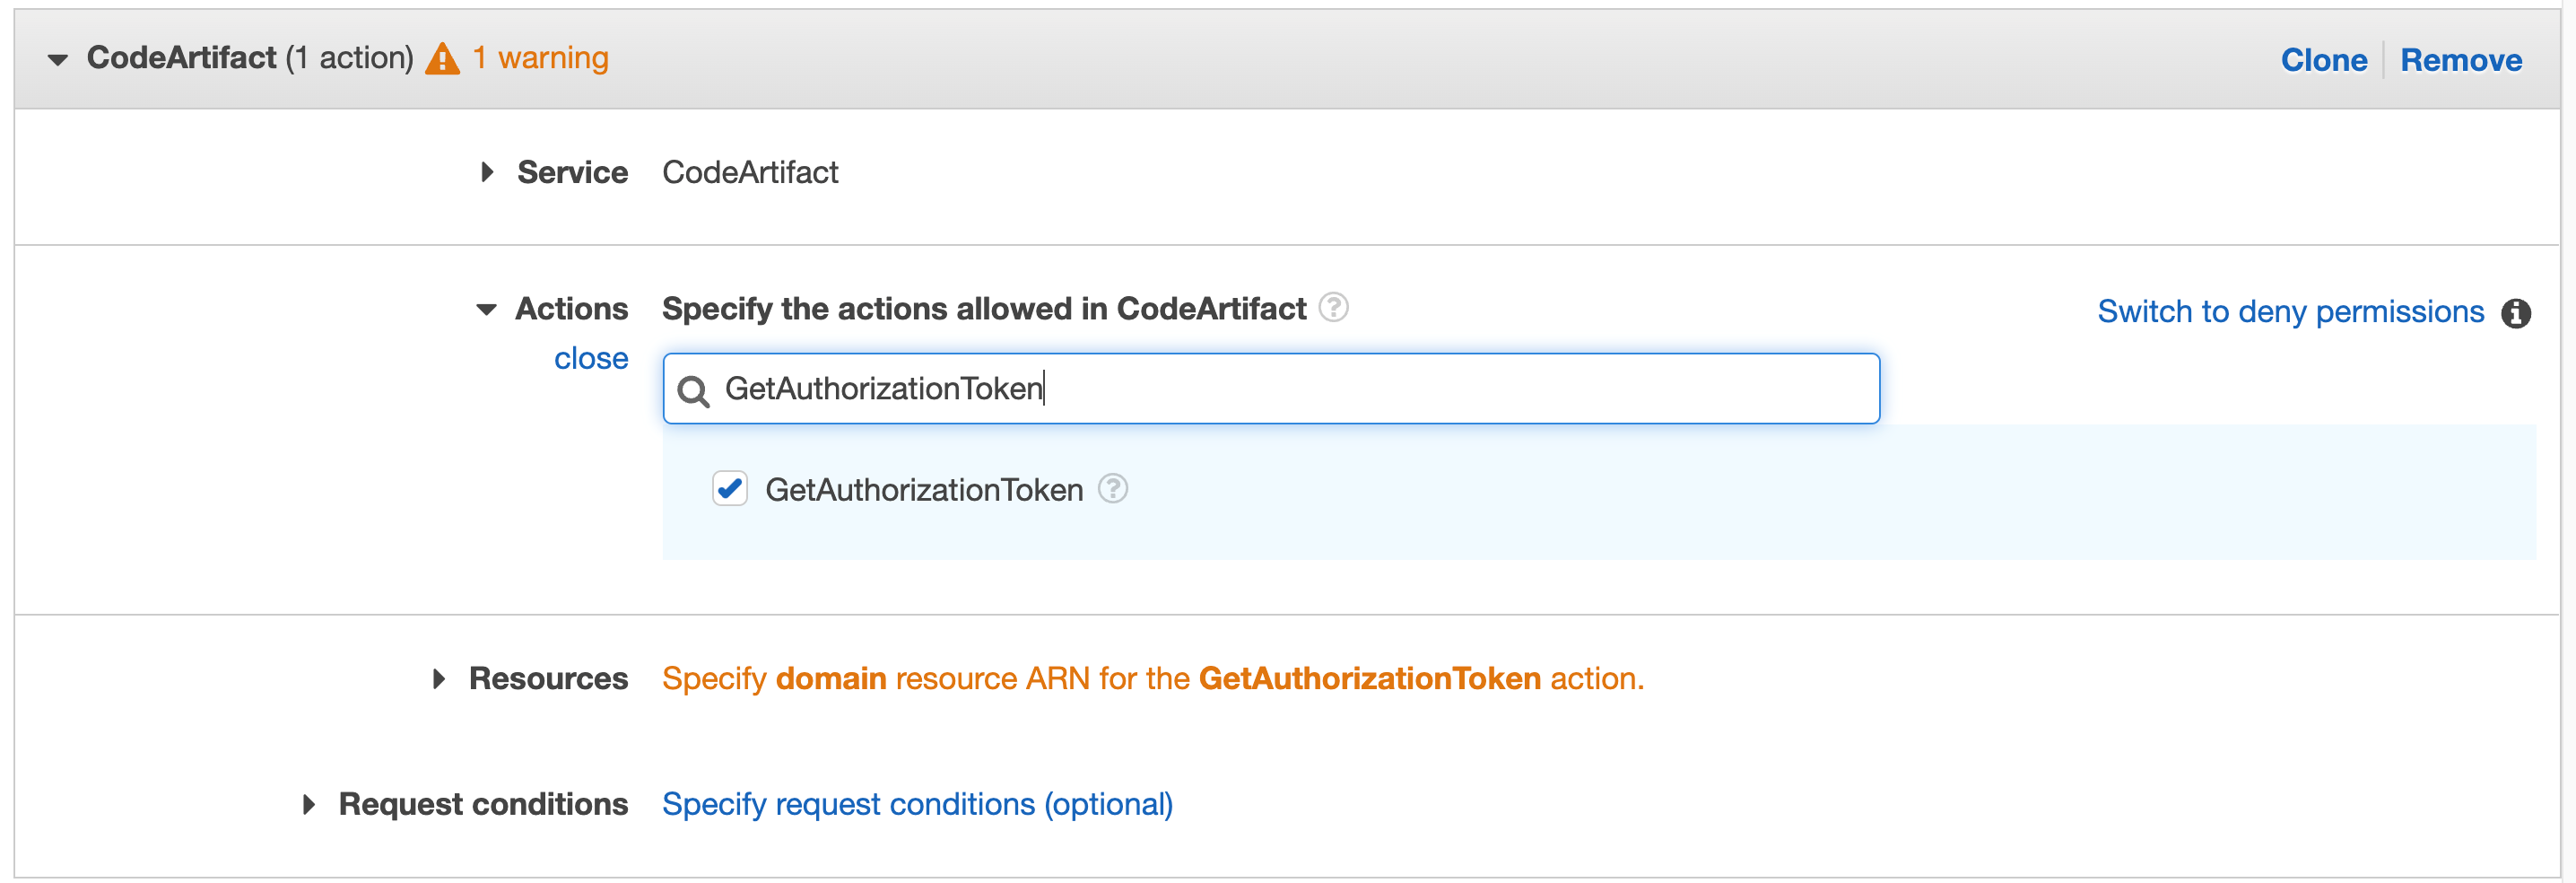
Figure 41. CodeArtifact: with GetAuthorizationToken in search.
Repeat for “GetRepositoryEndpoint” and “ReadFromRepository”
Click on Resources to fix the 2 warnings, then click on Add ARN on the first one “Specify domain resource ARN for the GetAuthorizationToken action.”
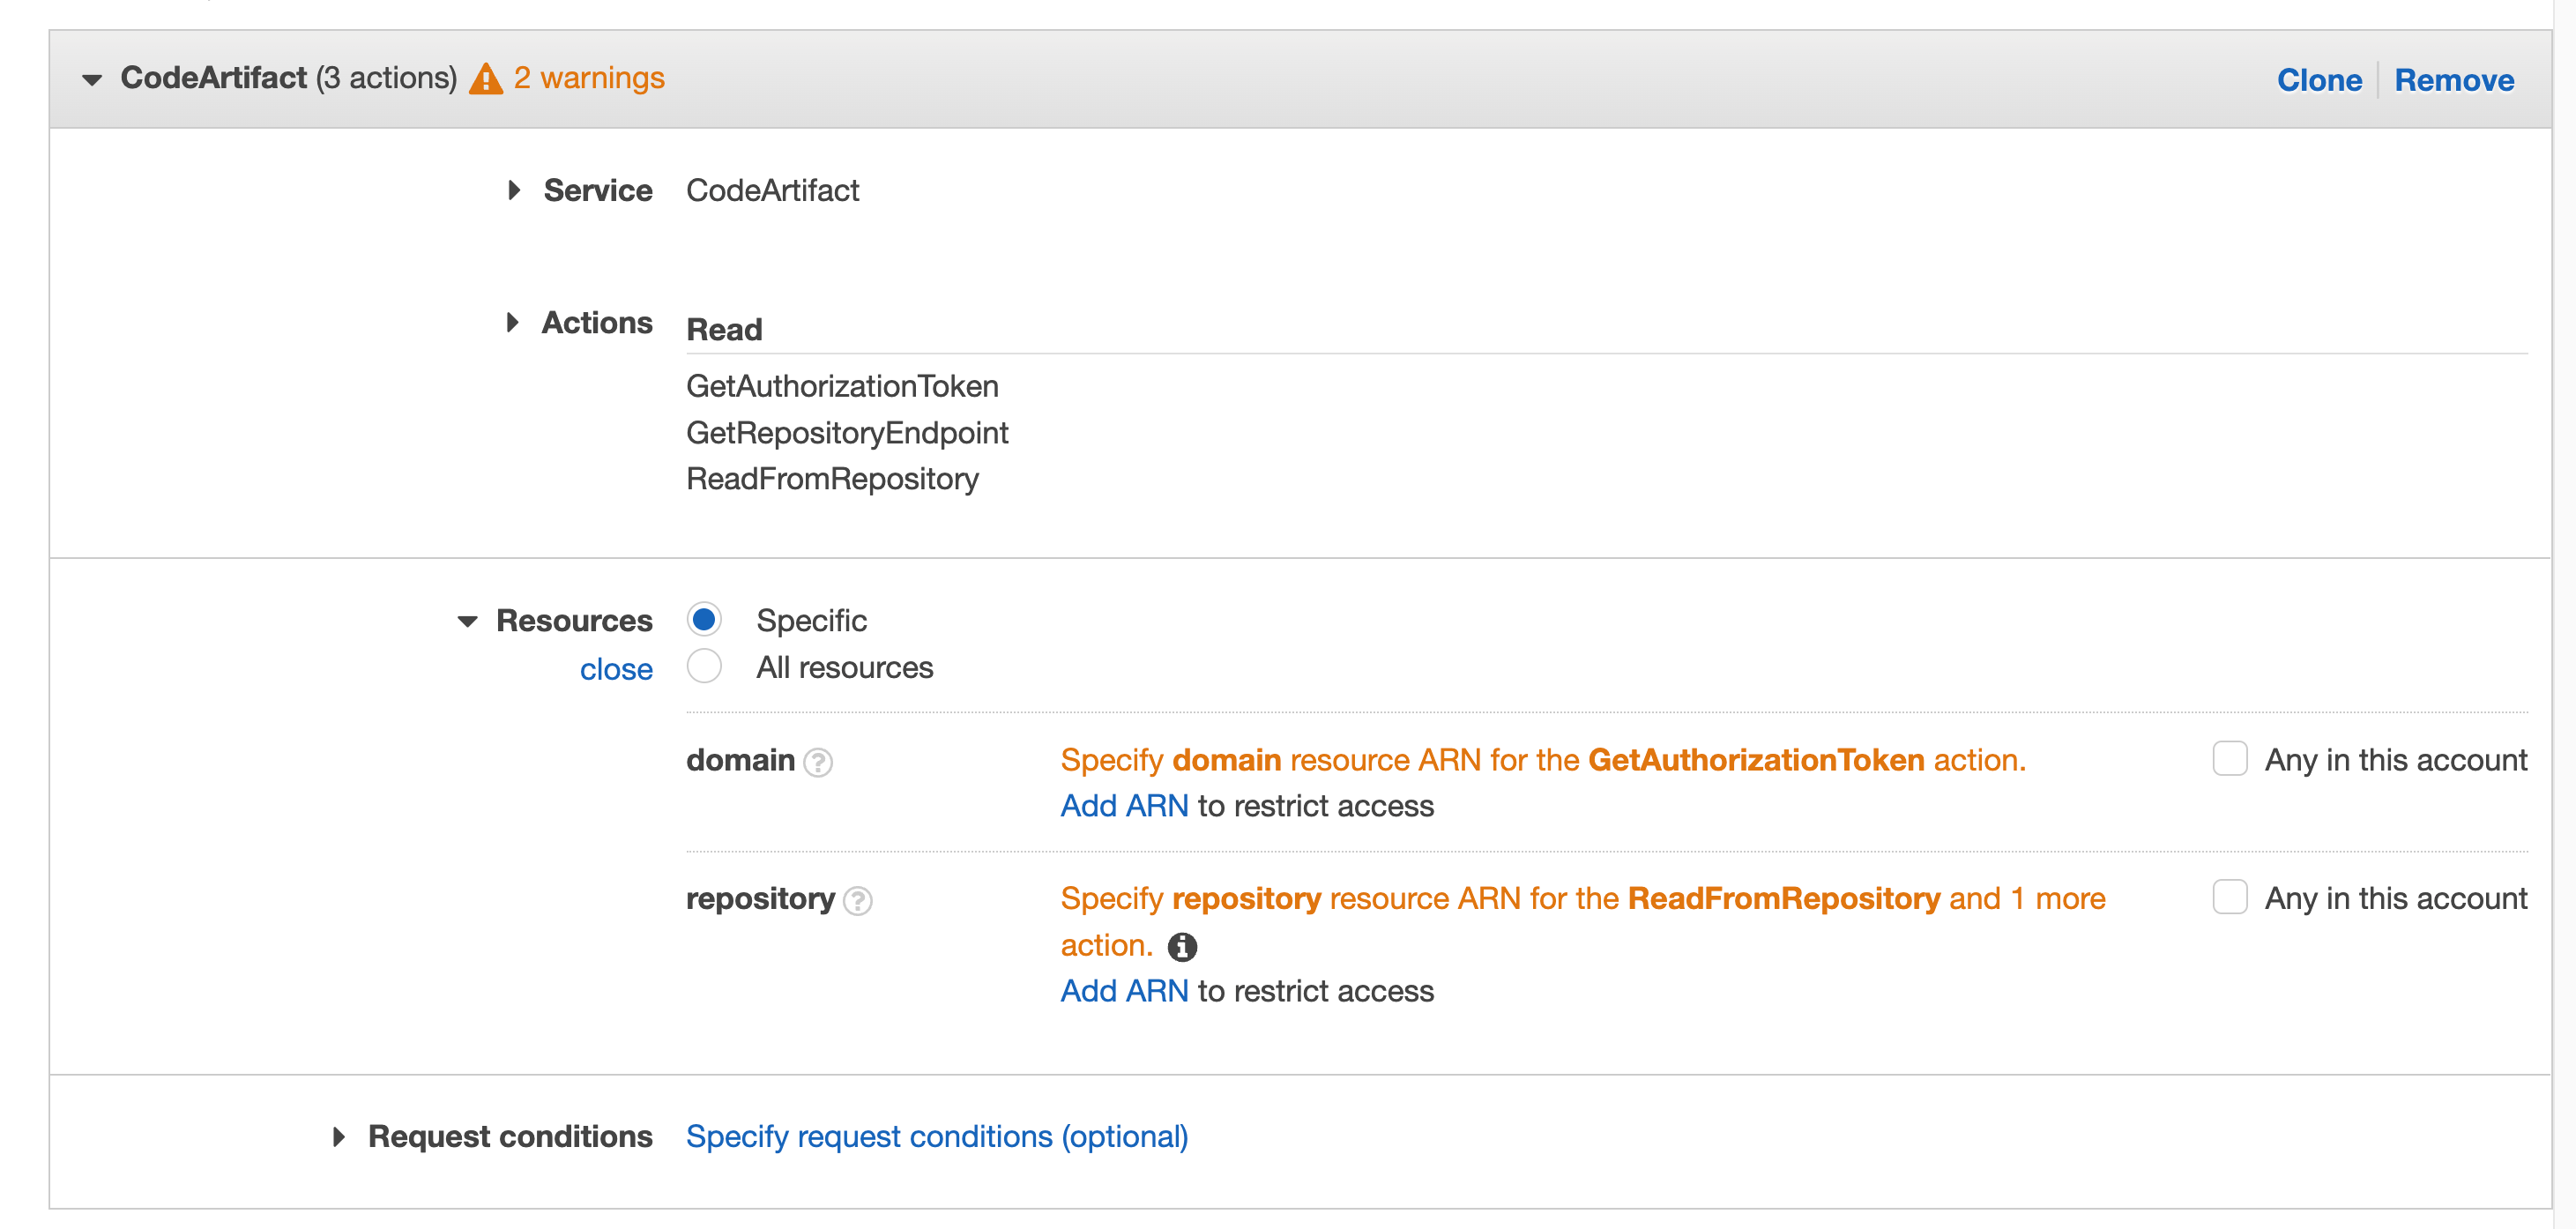
Figure 42. Screenshot: with all selected filed and 2 warnings.
You’ll get a pop up with fields for Region, Account and Domain name, enter your region, your account number, and the domain name, we used “private” when we created our domain earlier.
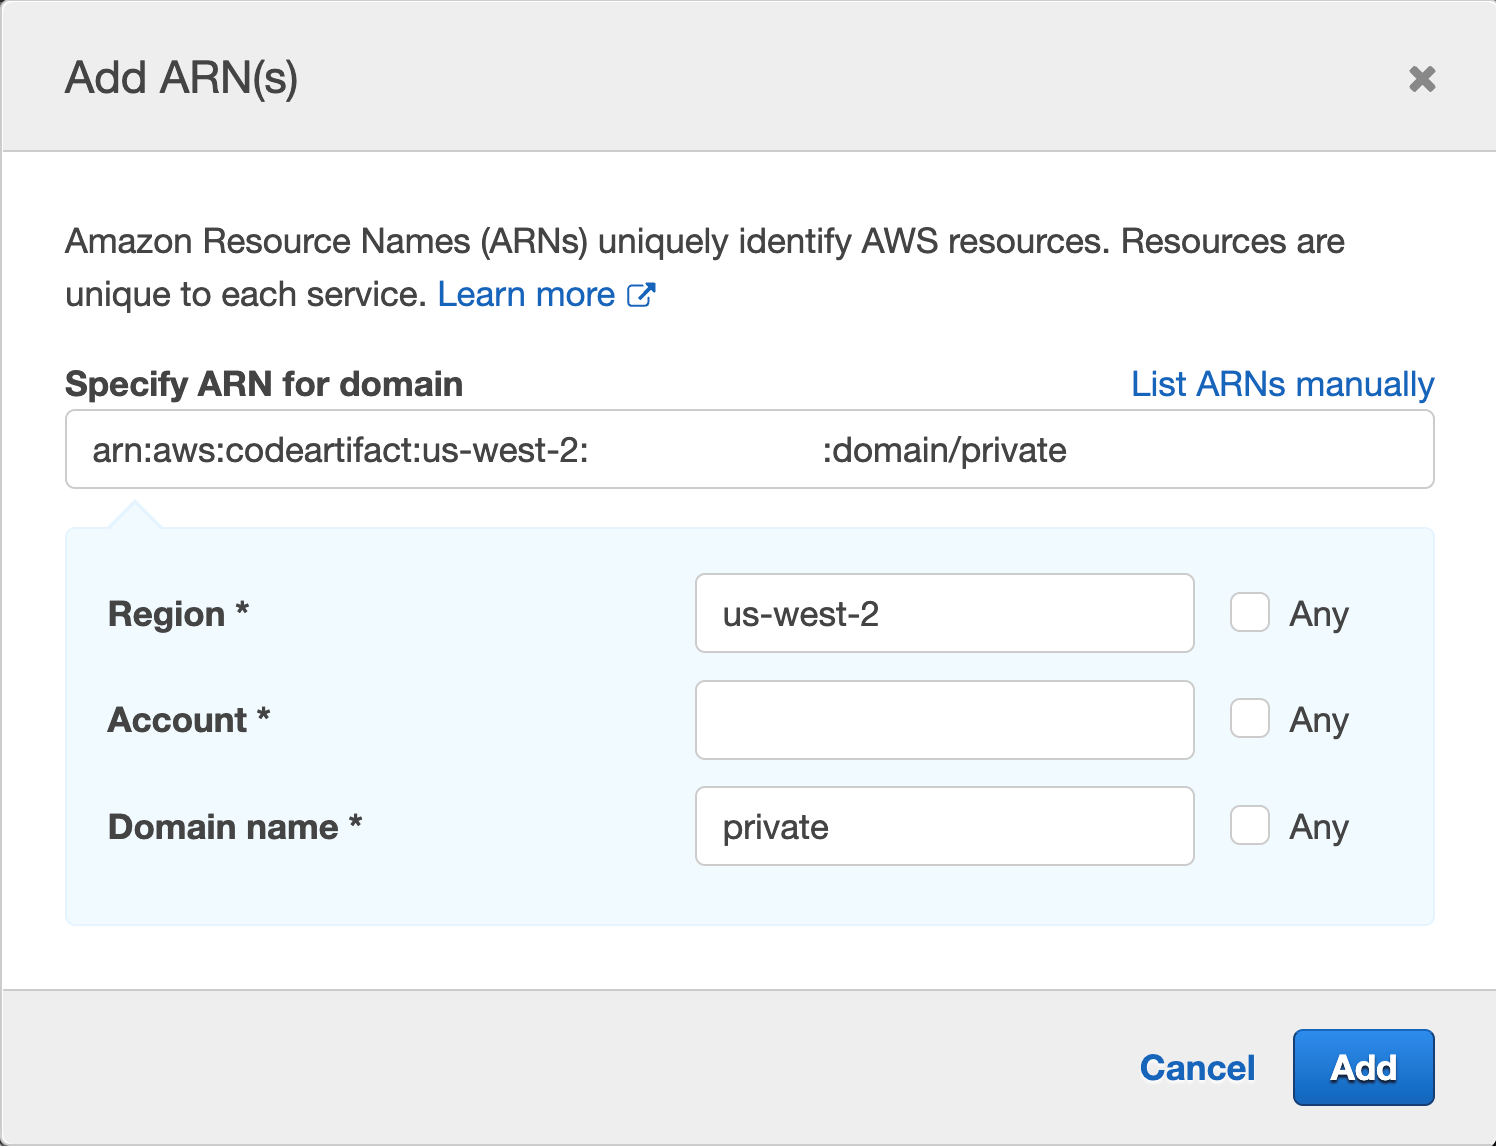
Figure 43. Screenshot: Add ARN page.
Then click Add
Repeat the same process for “Specify repository resource ARN for the ReadFromRepository and 1 more”, and this time we will provide Region, Account ID, Domain name and Repository name, we used “Private” for the repository we created earlier and “private” for domain
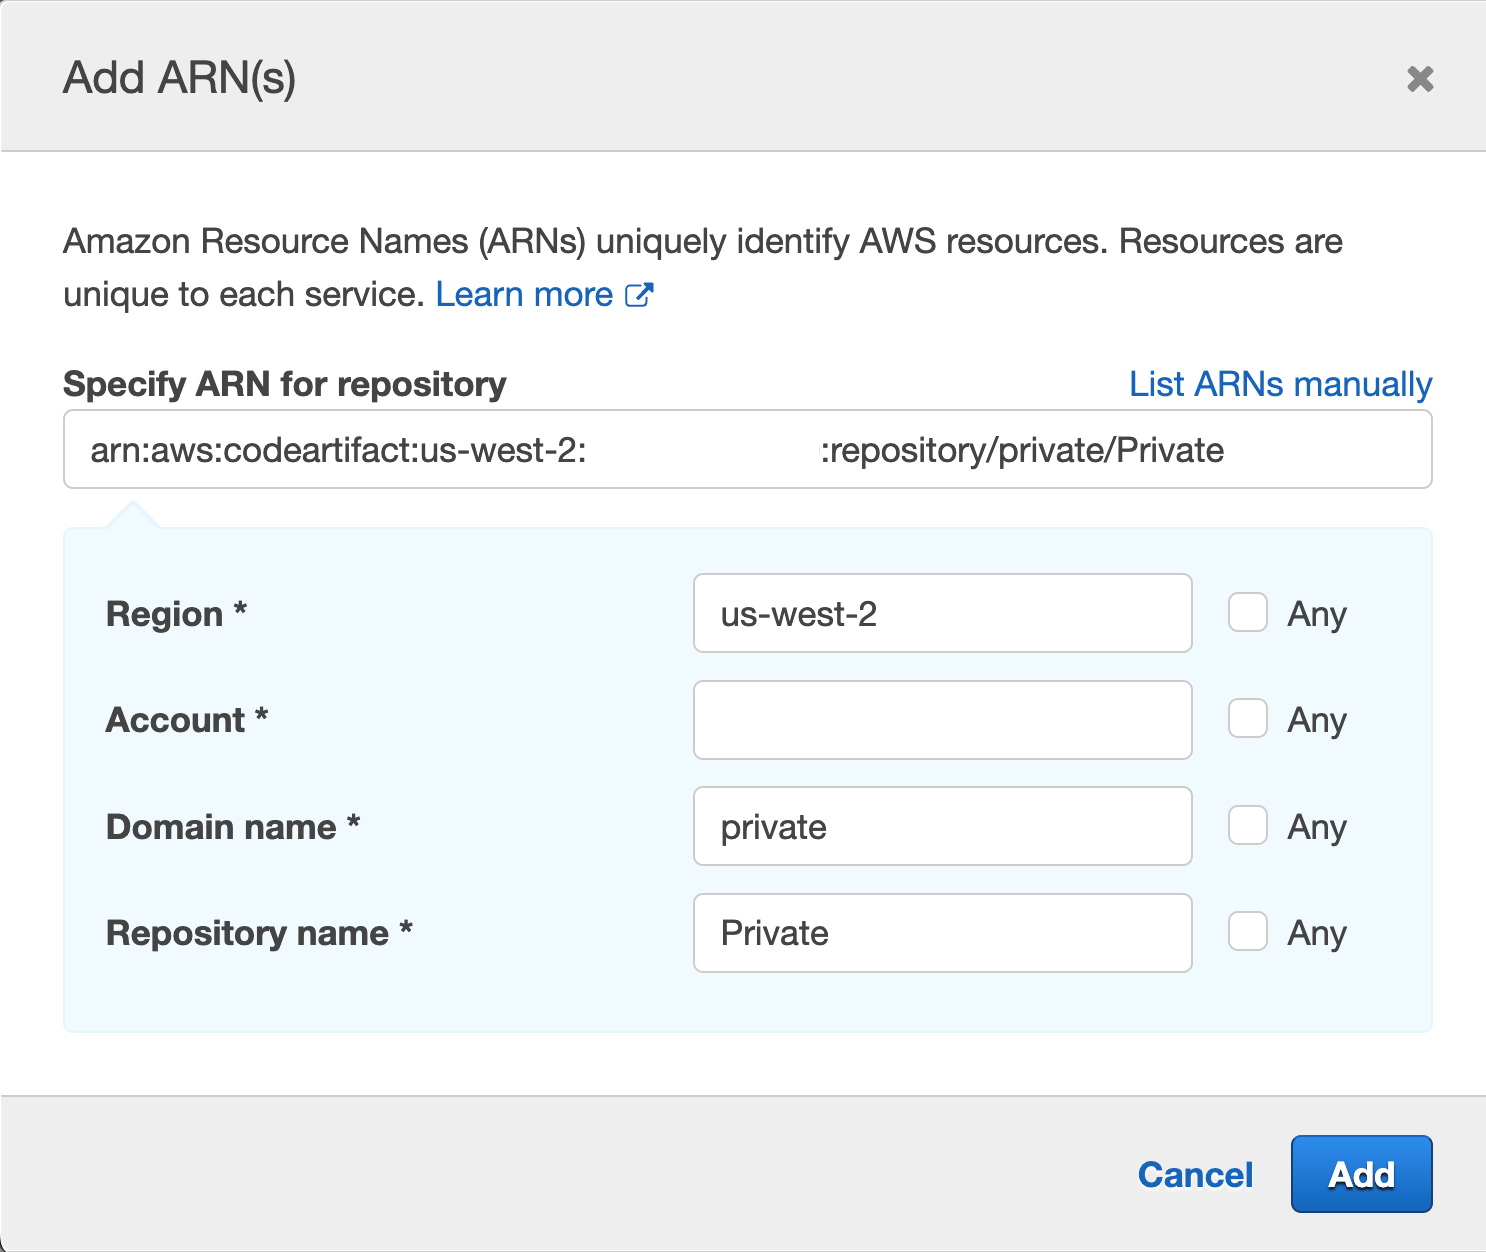
Figure 44. Screenshot: add ARN page.
Note it is best practice to specify the resource we are targeting, we can use the checkbox for “Any” but we want to narrow the scope of our IAM role best we can.
- Navigate to CodeCommit then click on the repo you created earlier in step1

Figure 45. Screenshot: CodeCommit repo.
Click on Add file dropdown, then Create file button
Paste the following in the editor space:
Add your name and email, and optional commit message
Repeat this process for “index.js” and paste the following in the editor space:
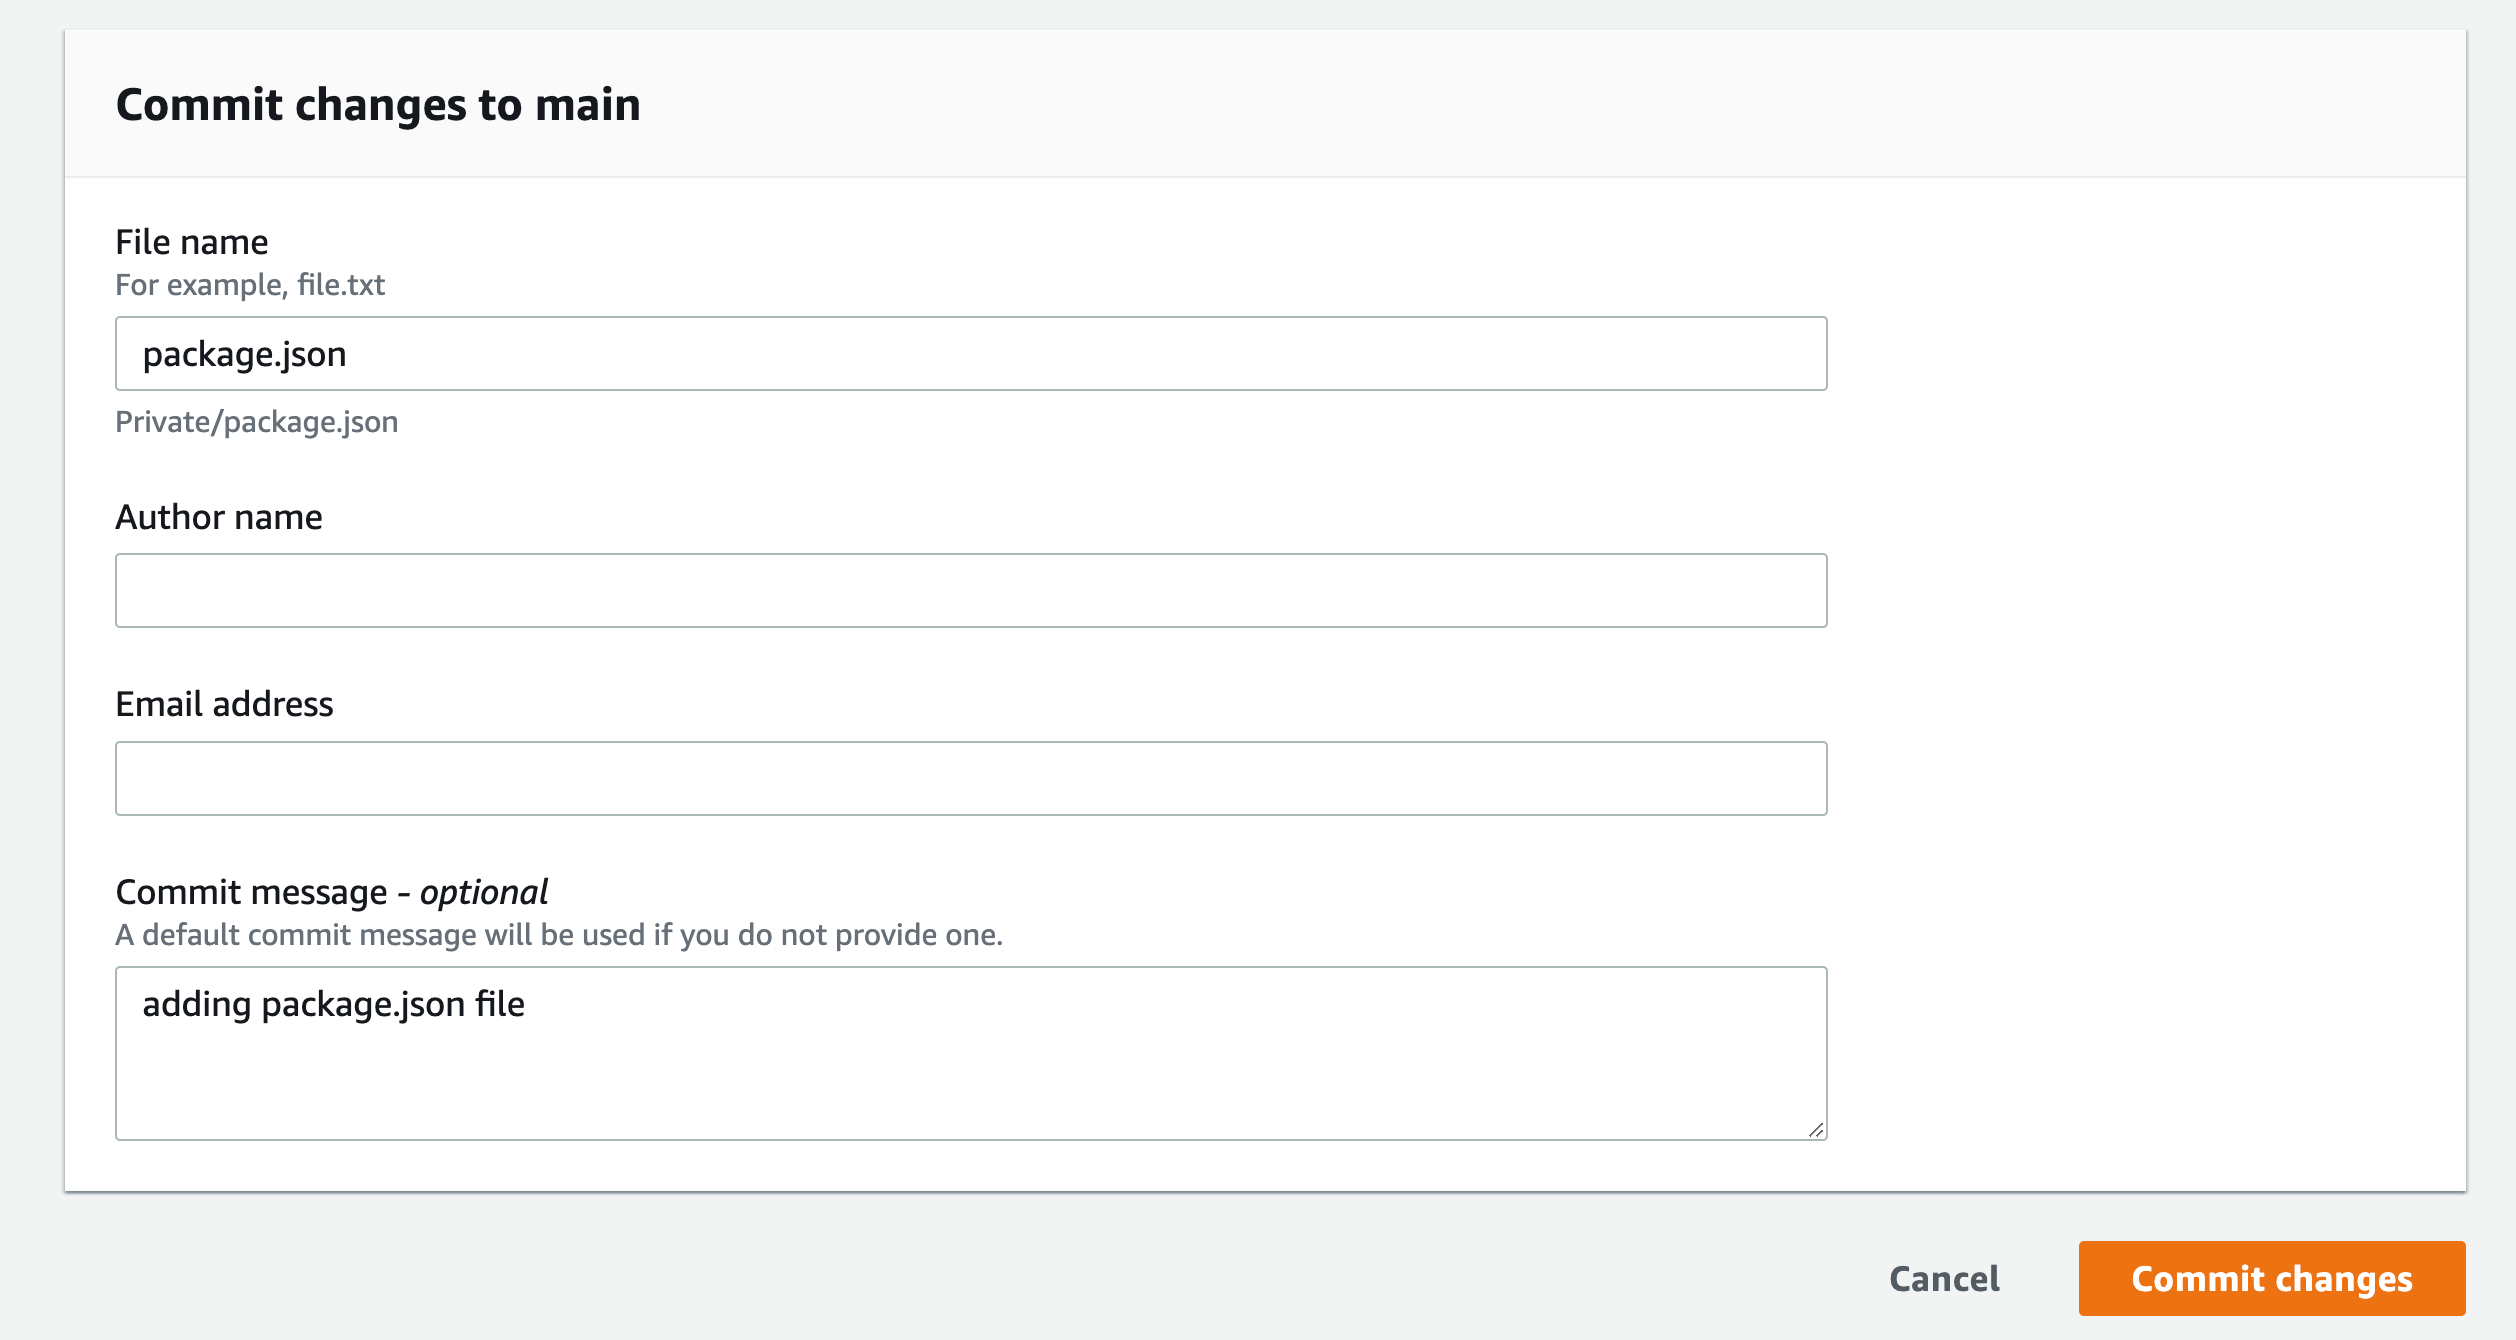
Figure 46. Screenshot: CodeCommit Commit changes button.
This will force the pipeline to kick off and start building the application
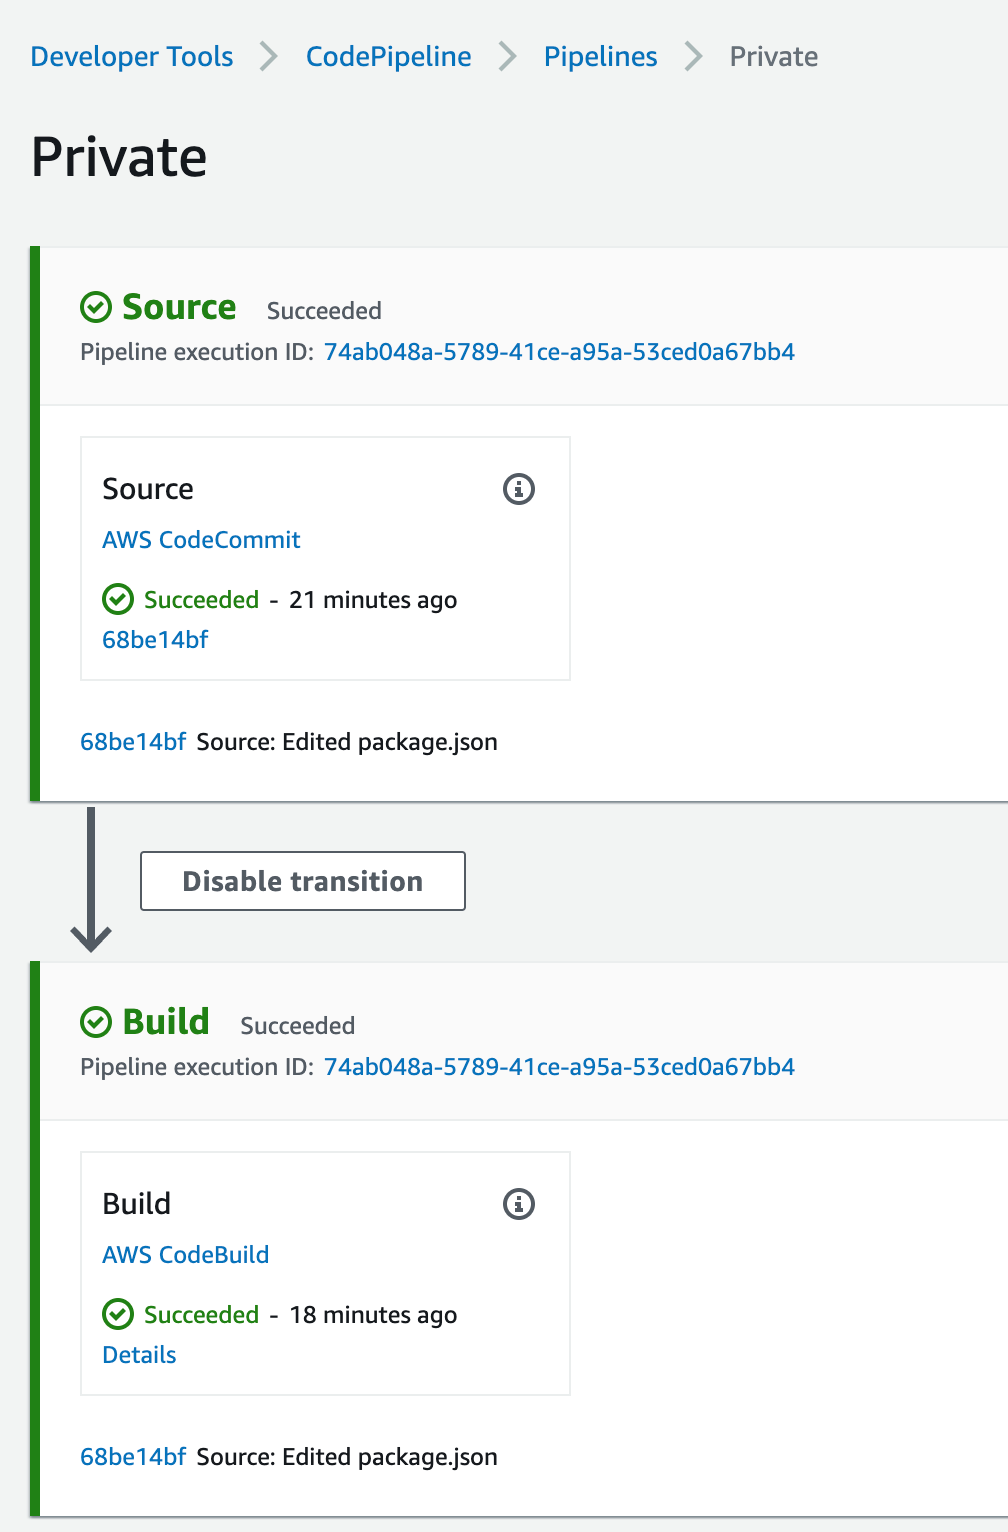
Figure 47. Screenshot: CodePipeline.
This is a very simple application that gets the square root of 49 and log it to the screen, if you click on the Details link from the pipeline build stage, you’ll see the output of running the NodeJS application, the logs are stored in CloudWatch and you can navigate there by clicking on the link the View entire log “Showing the last xx lines of the build log. View entire log”

Figure 48. Screenshot: Showing the last 54 lines of the build log. View entire log.
We used npm example in the buildspec.yml above, Similar setup will be used for pip and twine,
For Maven, Gradle, and NuGet, you must set Environment variables and change your settings.xml and build.gradle, as well as install the plugin for your IDE. For more information, see here.
Cleanup
Navigate to VPC endpoint from the AWS console and delete the endpoints that you created.
Navigate to CodePipeline and delete the Pipeline you created.
Navigate to CodeBuild and delete the Build Project created.
Navigate to CodeCommit and delete the Repository you created.
Navigate to CodeArtifact and delete the Repository and the domain you created.
Navigate to IAM and delete the Roles created:
For CodeBuild: codebuild-<Build Project Name>-service-role
For CodePipeline: AWSCodePipelineServiceRole-<Region>-<Project Name>
Conclusion
In this post, we deployed a full CI/CD pipeline with CodePipeline orchestrating CodeBuild to build and test a small NodeJS application, using CodeArtifact to download the application code dependencies. All without going to the public internet and maintaining the logs in CloudWatch.
About the author: