The Internet of Things on AWS – Official Blog
Machine Learning at the Edge: Using and Retraining Image Classification Models with AWS IoT Greengrass (Part 2)
In part 1 of this blog post, we created an image classification model for a recycling facility’s sorter to identify four beverage containers. We deployed it to our AWS IoT Greengrass Core device using the new AWS IoT Greengrass Image Classification connector. AWS IoT Greengrass connectors, announced at this year’s re:Invent, make it possible for IoT Greengrass Core devices to connect to third-party applications, on-premises software, and AWS services without writing code.
At the end of part 1, we noticed that our beverage container predictions weren’t always correct or consistently of high confidence. In part 2, we will extend our application to upload images breaching a threshold for prediction confidence, label those images, and retrain and deploy our model back to our IoT Greengrass Core device.
Note: The information in this blog post is heavily dependent on part 1. If you haven’t already done so, complete the steps in part 1 before you proceed.
Overview
In this post, we will extend the beverage classifier Lambda function we created in part 1 by adding an additional step in the code to check the prediction confidence of captured images. Images whose prediction confidence falls below a minimum or above a maximum threshold will be uploaded to Amazon S3 where they can be labeled manually for use in future Amazon SageMaker model training jobs. That is, our Amazon SageMaker notebook will download these newly labeled images, combine them with the original Caltech 256 data set, and create a new model with the combination of new and original data. Finally, we will update the model in our IoT Greengrass group connector and redeploy to our Core device.
At the end of part 2, we will have an architecture like the one shown here. You’ll see that numbers are used to show the sequence of the flow for retraining the model.

Prerequisites
To access Amazon S3 from our Lambda function we will use the AWS SDK for Python (Boto3). Run the following command to install it on your Raspberry Pi:
Extending and testing the application
To upload our images to S3, we need to give our Core device permission to access our S3 bucket.
Configure S3 permissions
On the group’s setting page in the AWS IoT console, make a note of the value in Group Role. If a role isn’t already configured for your group, see Configure IAM Roles in the AWS IoT Greengrass Developer Guide.
To grant the group access to S3, we need to use the IAM console to add the AmazonS3FullAccess policy to its role. In the IAM console, choose Roles. Find and choose the role you identified for your IoT Greengrass group. On the summary page, choose Attach policies.
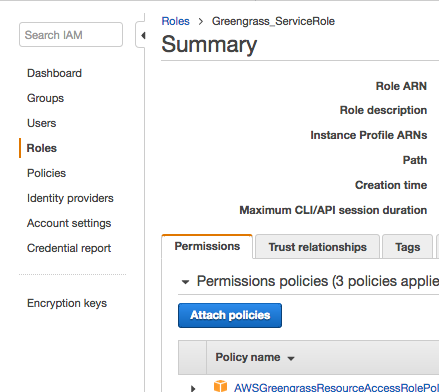
Search for AmazonS3FullAccess, select the check box, and then choose Attach policy.

Perform a deployment to your group. Your group will now have permission to read and write to S3.
For information about interacting with other AWS services, see Module 6: Accessing AWS Cloud Services in the AWS IoT Greengrass Developer Guide.
Extend the beverage classifier Lambda function
In this step, we will extend the beverage container classifier Lambda function. The new code integrates with S3. It provides logic for when to upload images to be labeled and used as new training data. We want to upload images that fall:
- Above a high threshold, to be used as data to validate our less confident predictions.
- Below a low threshold, to be tagged and incorporated into our dataset.
Update your beverage classifier Lambda function with the code found on GitHub.
Create a new deployment.
Collect data in the field
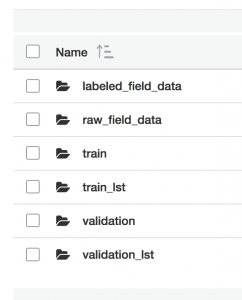
The beverage classifier can now collect data in the field and upload it to S3 for manual labeling. You should now see the following in the image-classification folder in your S3 bucket:
Take some time to use the updated application. Try to collect images for each of the five categories. During our testing, we collected 50 additional images per category. We took pictures of a variety of objects in each class and at different angles to capture a broad set of test data. Remember, you can classify images and view results on the Test page of the AWS IoT console by publishing to the /request/classify/beverage_container topic and subscribing to the /response/prediction/beverage_container topic as we did in part 1.
Here are some of the images we captured:


Label field data
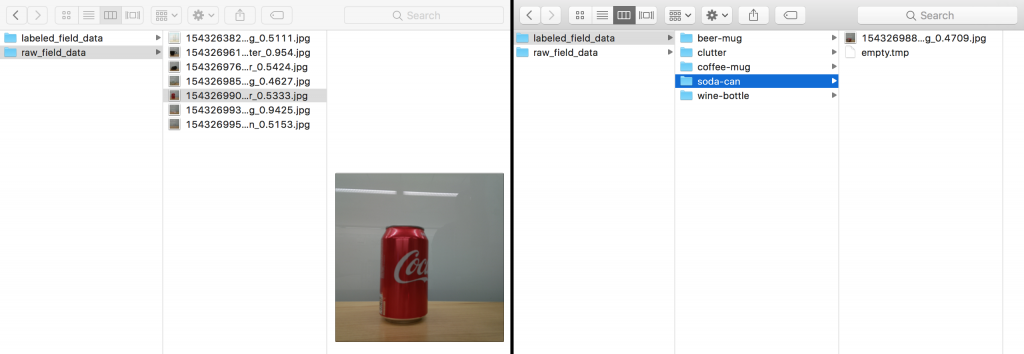
To label the data, we need to review the images in the raw_field_data folder in your S3 bucket and move them to their respective category folders in the labeled_field_data folder. We recommend that you use the AWS CLI to do this.
Sync your S3 bucket to a folder on your desktop:
Go through the images in your local raw_field_data folder. Review each image and move them to their respective folders in your local labeled_field_data folder:
After labeling, run the following commands to update S3. This will move the unlabeled images to their correctly labeled folders.
Retrain your model
We now have new labeled data that can be used to retrain our model. Return to the Amazon SageMaker notebook we used in part 1 (copied from our notebook here). Follow the steps in the notebook, and return here when you have reached the end.
Note: You can rerun part 2 of the notebook any time you add training data. Doing so will create a new model that you can deploy to your Core device.
Redeploy your model
We now have a retrained model that we can deploy. Return to your IoT Greengrass group and edit the machine learning resource you created in part 1. In the drop-down menu for Amazon SageMaker training jobs, choose your new training job. Choose Save, and then create a deployment. When the deployment is complete, your new model will be used by the Lambda function.
Test your new model
Now that our new model has been deployed, we can test to see how it performs. In our testing, we saw an improvement in our model’s ability to consistently identify our test objects. Give it a try and see how your model performs.
For more information about measuring a model’s performance, see the Amazon SageMaker image classification sample notebooks.
Recap
In parts 1 and 2 of this post, we created an AWS IoT Greengrass application that used the new AWS IoT Greengrass Image Classification connector to identify several categories of beverage containers. We extended this application in part 2 to allow us to collect data in the field and retrain the model we created in part 1.
We look forward to seeing what you build! Keep an eye out for what’s in store next from AWS IoT Greengrass.
Things to try next
If you would like to continue playing around with the example in this post, here are some ideas that you can try next. For information about how to retrain and improve your model, see the Amazon SageMaker Image Classification documentation.
You might also want to try:
- Using Amazon SageMaker Ground Truth.
- Adding a new class to your model.
- Experimenting with training parameters in the Amazon SageMaker notebook to improve your model’s accuracy.
- Updating the training configuration in the AmazonSageMaker notebook to use iterative training. See Image Classification Algorithm in the Amazon SageMaker Developer Guide.
- Adding a buffering mechanism to store captured images when the Core device is offline and upload to S3 when connectivity to the cloud is restored.
To learn more, visit https://aws.amazon.com/greengrass/.