AWS Messaging Blog
How to send your first email on SES
Introduction
Sending your first email on any service can be complicated. In this blog we will walk you through how to send your first email on Amazon Simple Email Service (SES) through the SES Console and to direct you to examples of how you can send email through the AWS SDK. Our public documentation includes additional information on how you can configure SES. We encourage you to read through these documents to learn about these other mechanisms in the future.
Getting Started
Getting started with sending an email on SES requires three actions which are: 1) verifying a domain or email address 2) requesting production access to SES and 3) sending your first email. Let’s walk through each of these steps and send our first email.
Verifying an Identity
To start, you will configure what email address or domain your customers will receive emails from. As part of this verification, you will need to be able to either receive a confirmation email at the email address you are trying to setup, or to publish CNAME records for your intended domain. Generally, we recommend using a domain for your email sending as this gives you the ability to set up SPF, DKIM, and DMARC alignment which will increase recipient trust in your emails. Email addresses can be used for account-specific email sending where a customer may not own a domain, but this type of use-case is prone to receiving entities having low trust in the sender and a lower probability of inbox placement. For more in-depth instructions please review our public documentation as I will briefly touch on the most important pieces to verifying a domain or email address.
To verify an identity, you can go to the SES Console and click the ‘Verified identities’ link on the left-hand side of the screen. It will then present you with a list of verified domains or email addresses currently in your account if they were previously verified. There is a yellow button that states ‘Create identity’, when you click this you will be presented with a screen to choose whether to verify an email address or domain.
Email Address Verification
To verify an email address, you will be prompted with the following dialog:

To verify an email address to use as your sending identity, you will include the address in the ‘Email address’ field and then click the ‘Create identity’ button. This will trigger an automated email to the address with a verification link that will need to be clicked to verify ownership of the email address. Once verified, you can begin sending emails from your new email address identity.
Domain Verification
To start verifying a domain you will click the ‘Verified identities’ option from the ‘Configuration’ dropdown which can be found on the left side of the screen. When choosing to verify a domain, you will be presented with a series of dialogs which include:
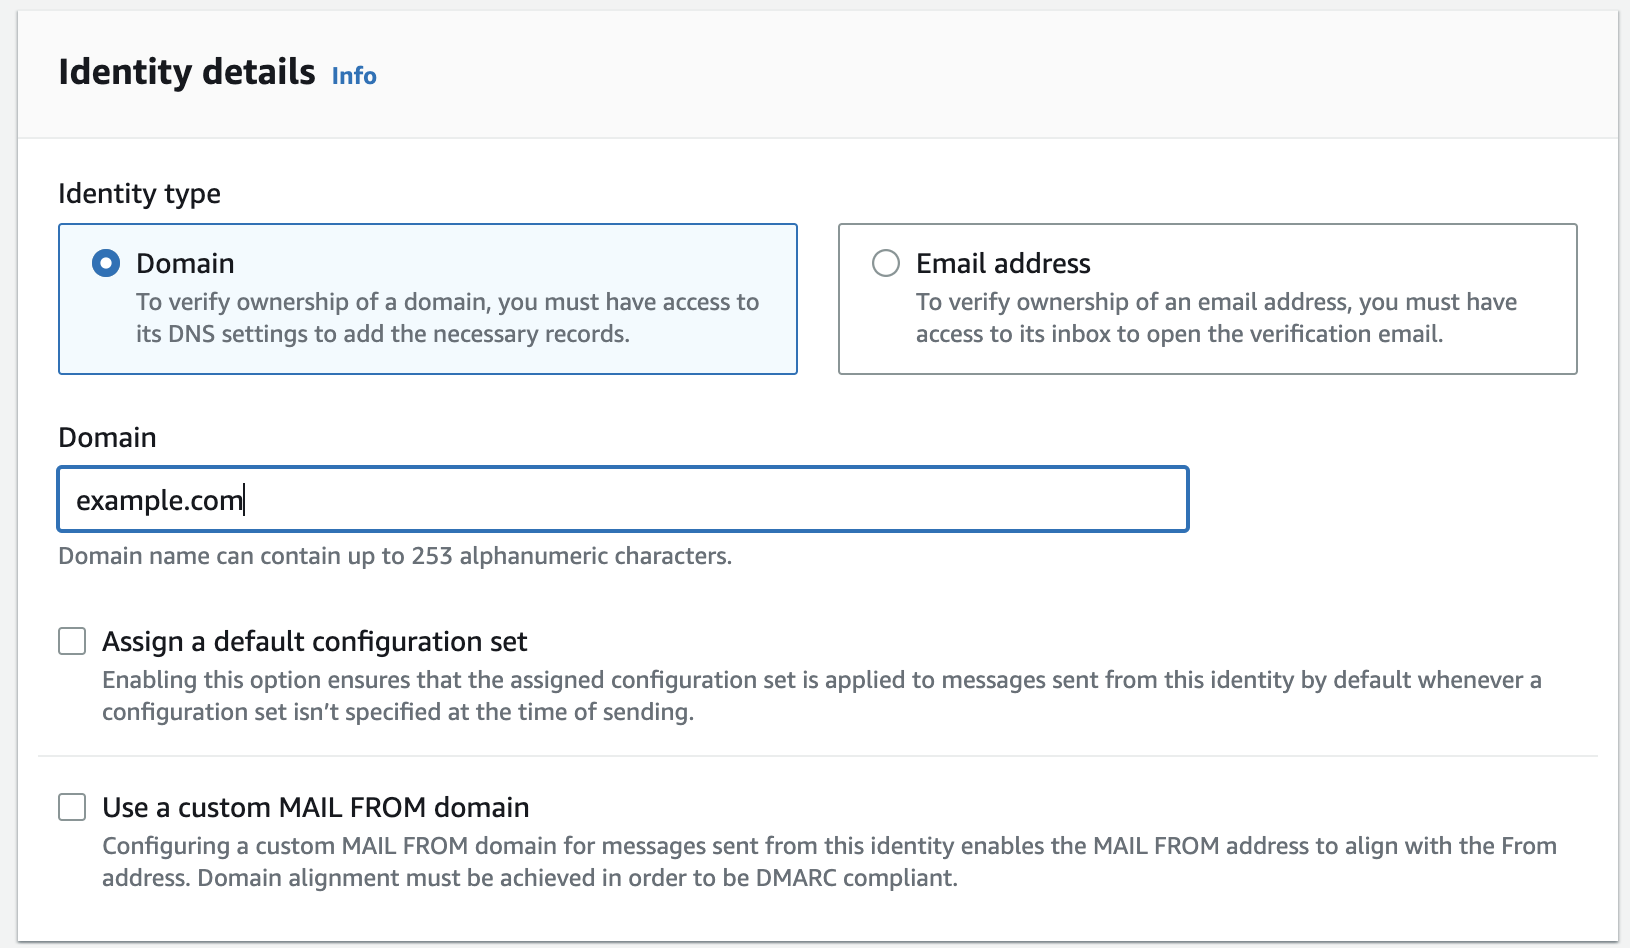
Here you will need to include the domain you intend to use for email sending. If you are keeping to a basic configuration on SES this will be the only data you need to add to this dialog. However, it is recommended to also use a custom mail-from. A custom mail-from is a way for you to remove the amazonses.com domain from your mail-from header to ensure domain alignment throughout your headers. You can find more information about the custom mail-from addresses in our documentation.
After finishing your changes in the first dialog you will then be presented with a second dialog that looks like the following:
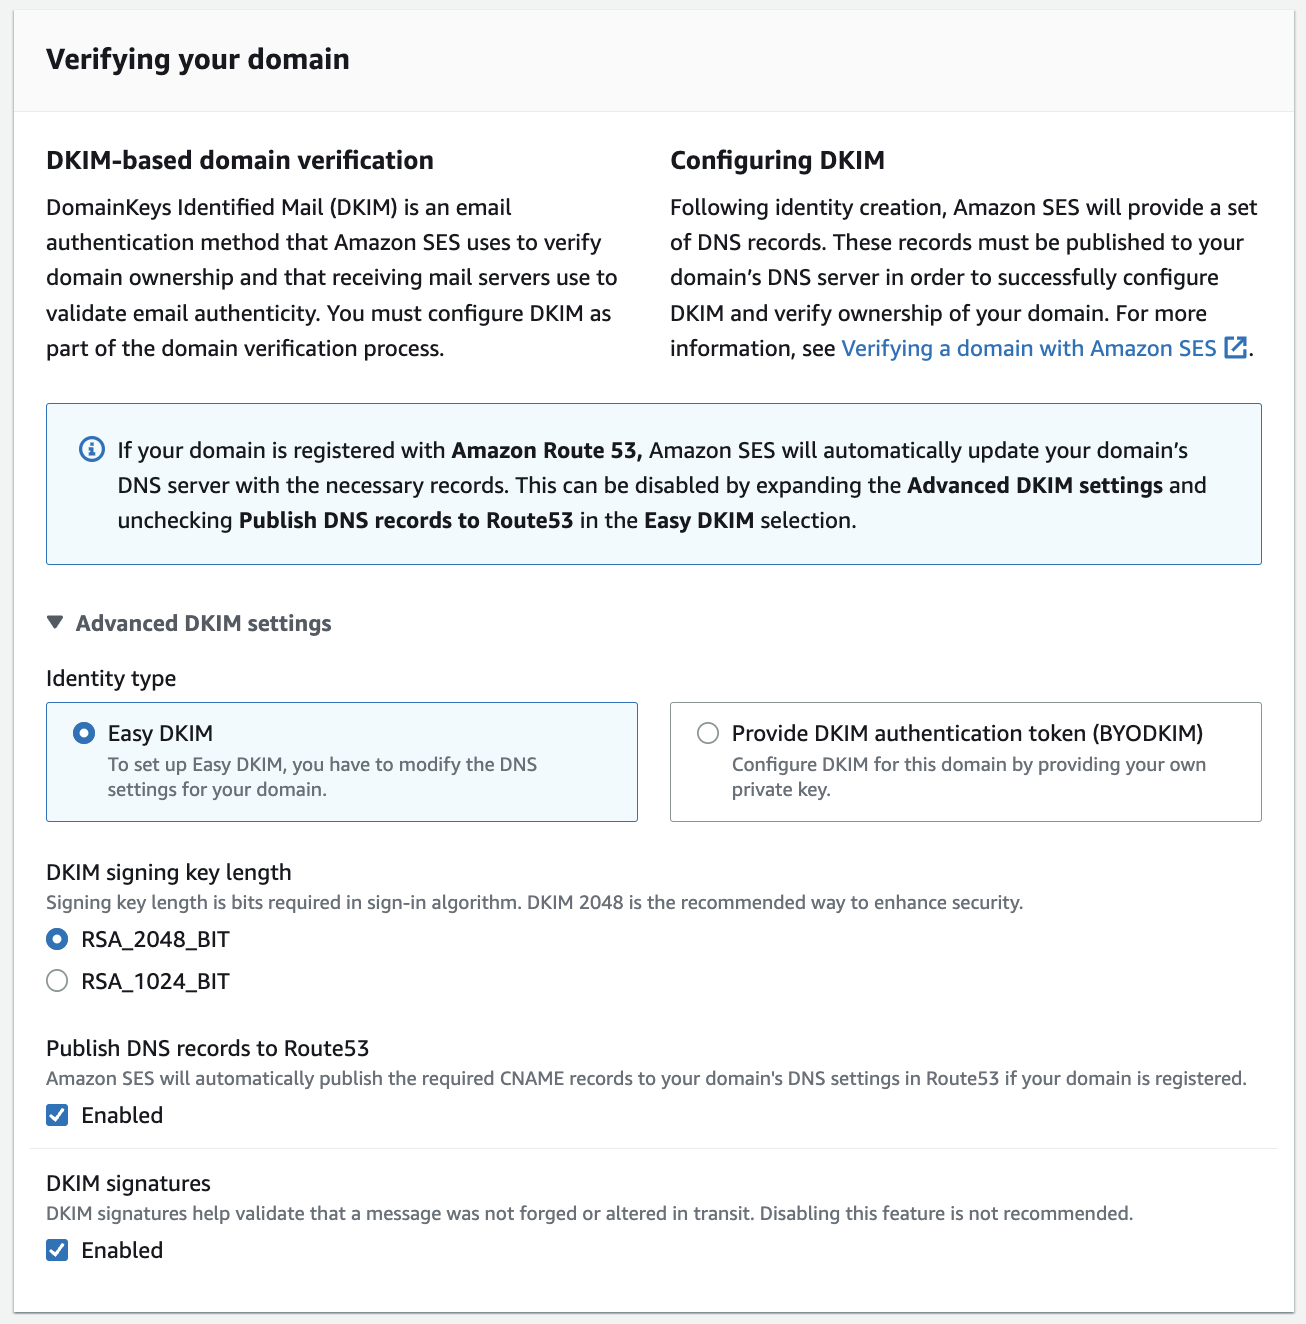
To verify the domain, you will need to utilize either the Easy DKIM feature, or to provide a DKIM authentication token if you plan to DKIM sign your own messages. In selecting the ‘Easy DKIM’ option, you will be presented with the option to use either 1024 bit or 2048 bit signing key length. We would recommend utilizing the 2048 bit signing key length for most customers as this is the more secure key.
If you use Amazon Route53 as your DNS provider, SES can automatically publish DNS records for your domain. If not, this step will require you to edit your DNS records to include three CNAME records which are used for the DKIM signature process and as a mechanism to prove domain ownership. An example of the CNAME records is as follows:

Once you have placed these DNS records SES will periodically attempt to look-up the records to change the status of your domain verification. If SES doesn’t automatically update the status, you are presented with the option to force another check to verify the records are present.
After your domain verification is successful, you are now ready to send emails from any email address for your domain.
Requesting Production Access
Now that you’ve verified an identity, the next step is to be able to send an email to an unverified identity you will need to request production access. If you only want to test to your own domain or email address you can skip this step until you are ready to send to unverified recipients.
Note: This is region-based, a request for production access is limited to the region in which you are requesting.
To begin this process, you will navigate to the SES Console and the ‘Account dashboard’ section. Once you are on this page you will be presented with the following dialog at the top of your screen.
Clicking the ‘Request production access’ button will then navigate to the ‘Request details’ page which you can reference below.

Fill out each section with the details of your mail-type, website URL, use case description, and then acknowledging that you have read and agree to the AWS Service Terms and Acceptable Use Policy (AUP). When filling out the use case description, provide as much detail as you can for your request as our teams will review to determine if we need more information before approving or denying your request. An example of a good use case description would look like the following:
“Example.com is the domain my company intends to use to send our transactional emails. Our recipients are all customers who have either signed up for an account, requested a new password, or have made purchases through our website. We require confirmation of opt-in for all our new accounts and if no confirmation is received, we do not attempt to send an email to that address.”
Note: SES will review your production access request and will provide feedback on your use case and whether it could pose a risk to the sending reputation of SES, our customers, or your own sending domain.
Finally, click the ‘Submit request’ button to submit your request for production access. This will create an AWS Support case and will be reviewed by our team. These requests are reviewed with a 24-hour Service Level Agreement (SLA). While you are waiting for production access you can send test emails to any of the Mailbox Simulator endpoints or to your own verified domain(s) or email address(es).
Sending Your First Email
From the Console
To send your first email from the SES Console you will need to start by clicking the ‘Verified identities’ option from the ‘Configuration’ dropdown which can be found on the left side of the screen. From here you will select the domain and/or email address you want to send your email from and then click the ‘Send test email’ button, which will open the following screen:

From here you will fill out the ‘From-address’ box with the local name (anything before the @ sign) that you want to use to send the email. If you want to test SES functionality you can choose any of the dropdown events present, or you can choose the ‘Custom’ option which will allow you to set a ‘Custom recipient’ address of your choosing. Then you will fill out the ‘Subject’ and ‘Body’ fields with the content you will use for this first test email and then click the ‘Send test email’ button.
Congratulations, you’ve sent your first email from the SES Console! Now, utilizing SES to send single emails from the console isn’t the most scalable way to send email. In the next section, I will provide you links to our documentation for the 5 programming languages supported with the AWS SDK so that you can begin building your integration with SES.
From Code
The AWS Documentation includes some code snippets on how to send an email with SES via the AWS SDK. You can find examples of how to send an email from languages such as: .NET, Java, PHP, Ruby, and Python. We highly recommend reviewing our documentation to see these introductory code snippets to get you started.
Conclusion
Hopefully this blog post has aided you in your journey to send your first email through SES. From verifying a domain, requesting production access, and finally sending an email through the console. Take this knowledge and build upon it for future success in sending email through SES. Happy sending!