Front-End Web & Mobile
Considerations when choosing Amazon Location Services Map Styles
Amazon Location Service offers nine different map styles to fit multiple use cases. How do you pick the right base map style for your application? And how does the base map you pick influence the rest of your application? In this post, we review the different map styles available with Amazon Location maps, as well as how to decide which is best for your application.
Displaying Amazon Location Maps
Amazon Location supports popular open-source map rendering libraries, such as MapLibre GL JS, Tangram, and AWS Amplify JS. Providing multiple ways to display base map tiles lets you easily migrate from existing base map providers and sources. Our developer guide includes simple getting-started guides for the libraries listed that let you get up and running in just a few minutes.
Amazon Location offers both Vector and Raster tiles from our data providers. Using vector tiles, you can further modify the style of the map to fit your application. We have resources in our sample Github repository to help get you started with editing map styles outside of the basemap design.
Installing our application
Now that we’ve discussed some different ways to display Amazon Location maps, let’s look at our sample application. First, we must install it. For this post, I’ll use an AWS Cloud9 instance to run the installation commands.
Prerequisites
Make sure that you have the following prerequisites before continuing:
- An AWS Account
- An AWS Identity and Access Management (IAM) User or Amazon Elastic Compute Cloud (Amazon EC2) Instance Profile with permissions to Access AWS Amplify, Amazon Location, AWS Lambda, and AWS Cognito
- node v16.x installed
- npm 8.x installed
- AWS Amplify CLI installed
Configuring the application
First, we must clone our amazon-location-samples github repository, which contains our sample application. This repo also contains other great examples of getting started with Amazon Location.
Now we’ll navigate into our application repo.
Now we’ll install our dependencies.
Once this is complete, we’ll initialize Amplify.
Choose the following options when creating the Amplify project:
For more information about the authentication method, see Install the Amplify CLI.
Once we’ve initialized our Amplify environment, we can create our cloud resources. This may take a few minutes to fully deploy all of the resources.
Select “Y” when prompted if you would like to continue.
Wait for the deployment to finish.
Once the resources are created in the AWS Cloud, we can either host the app locally, or publish our frontend to AWS Amplify.
For local hosting, we run the following command:
The following is an example of our application running in AWS Cloud9 locally:
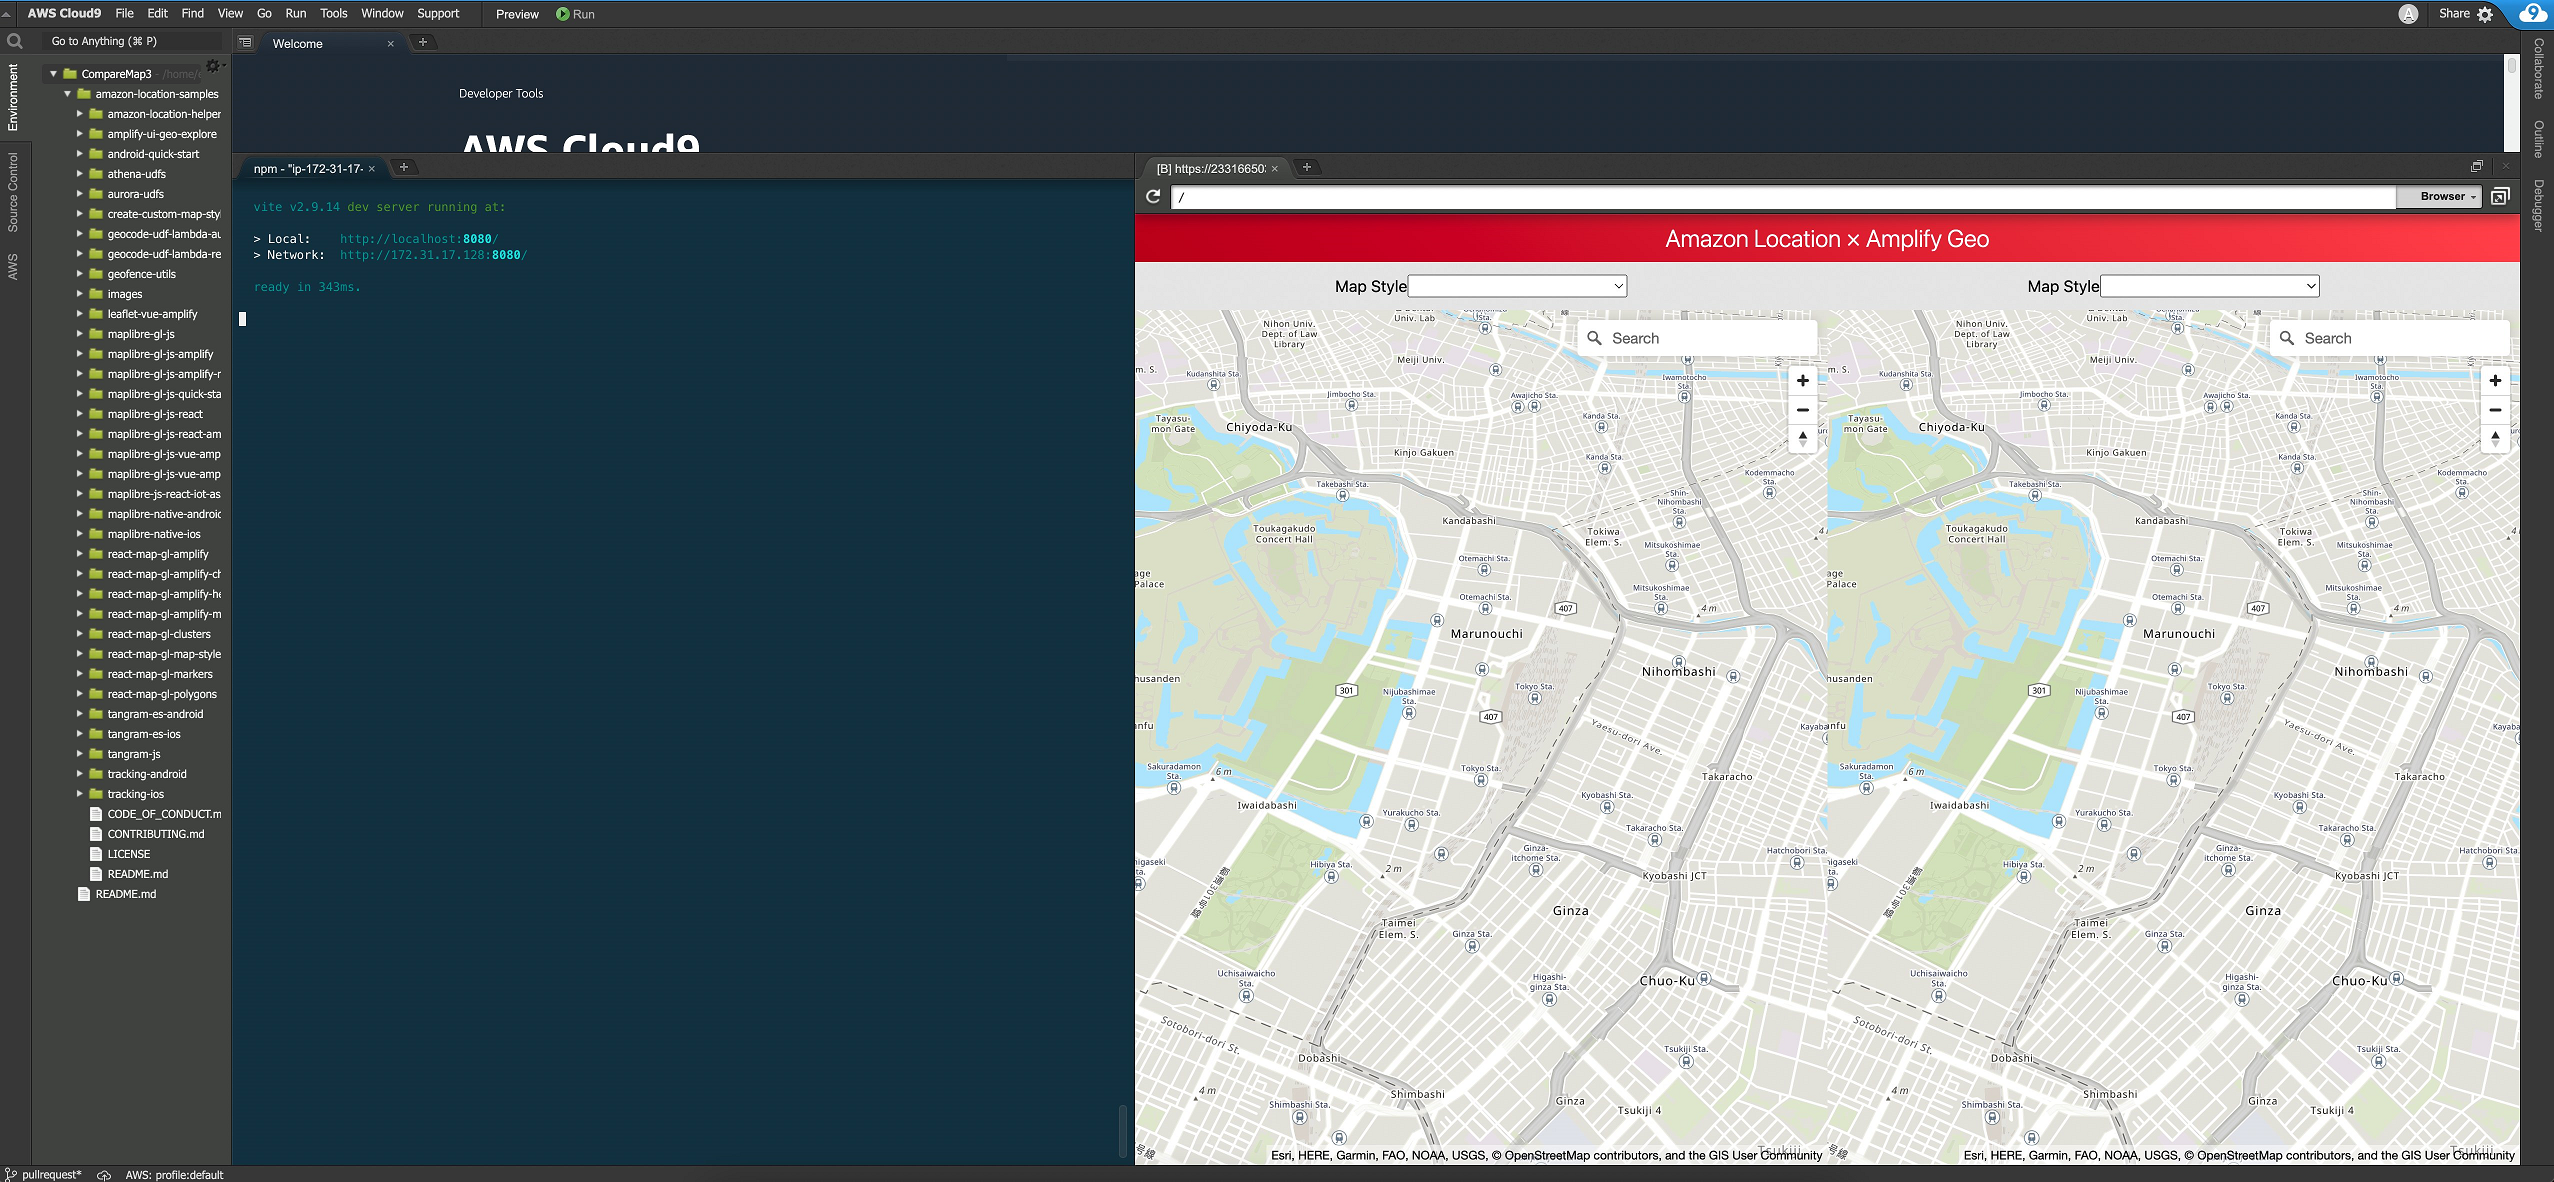
Figure 1. Cloud9 displaying the application running locally
For Amplify hosting, we just need the publish command. For more information about Amplify frontend hosting, see Hosting Overview.
Select “Y” when prompted.
When this is complete, a URL will be provided which will lead you to the application now running in Amplify.

Figre 2. Amplify deployment complete
Select the URL and open it in a web browser. Now you’re ready to use the application to compare map styles. This URL can also be shared within your organization for others to use the app.
Using the application
Now that our application is running in Amplify, we can try loading up some map styles. The application lets you change the pitch of the map, thereby allowing you to utilize 3D styles, as well as a search bar to help find points of interest that you’d like to compare. Next, let’s look at a few examples, and why you might choose one style over the other.
Light vs Dark Map
Starting with two Esri styles – VectorEsriDarkGreyCanvas, and VectorEsriLightGreyCanvas – in this example we can see that using both maps may be preferable, with a switch within the application to swap between light and dark mode. The information presented on the maps is the same, but the colors are different. We have a sample application that switches between map styles on our amazon-location-samples Github repository.
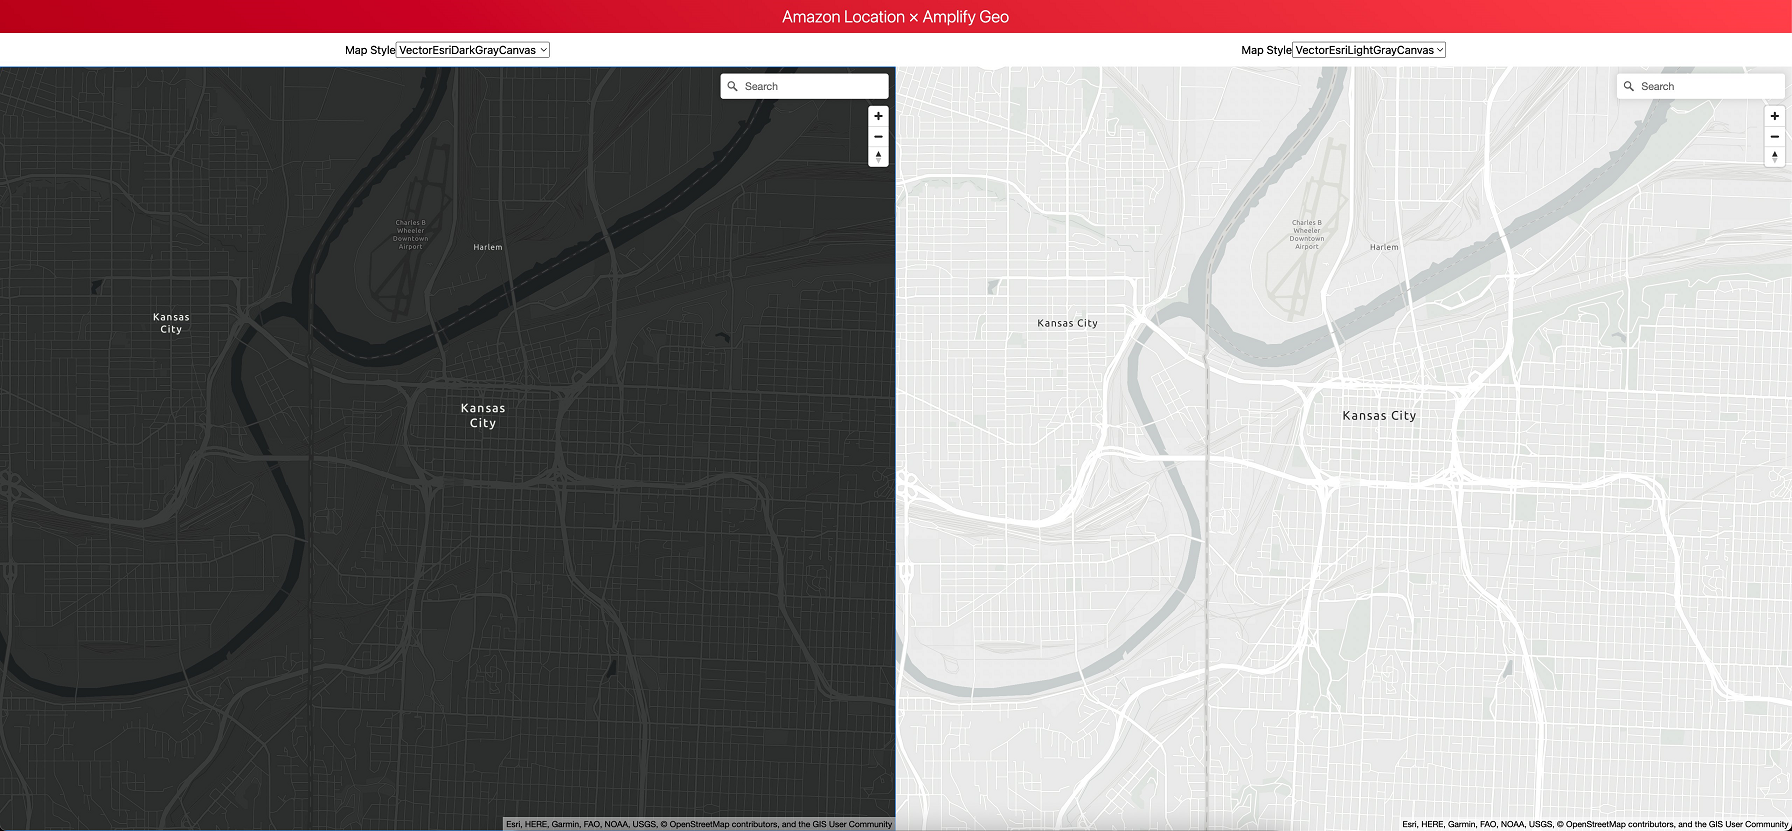
Figure 3. Image showing app comparing Esri Light and Dark styles
Map accuracy
Another use case is which maps are more up-to-date. Because Amazon Location uses two data providers, there may be subtle differences between features. In this case, we’re comparing an Esri Navigation style with a Here Explore style. The highway interchange shown was completed in June 2022, and while Here shows the updated configuration, Esri has not updated yet. For applications with very accurate data requirements, you may find that one provider or style provides a more up-to-date or accurate representation in certain areas.
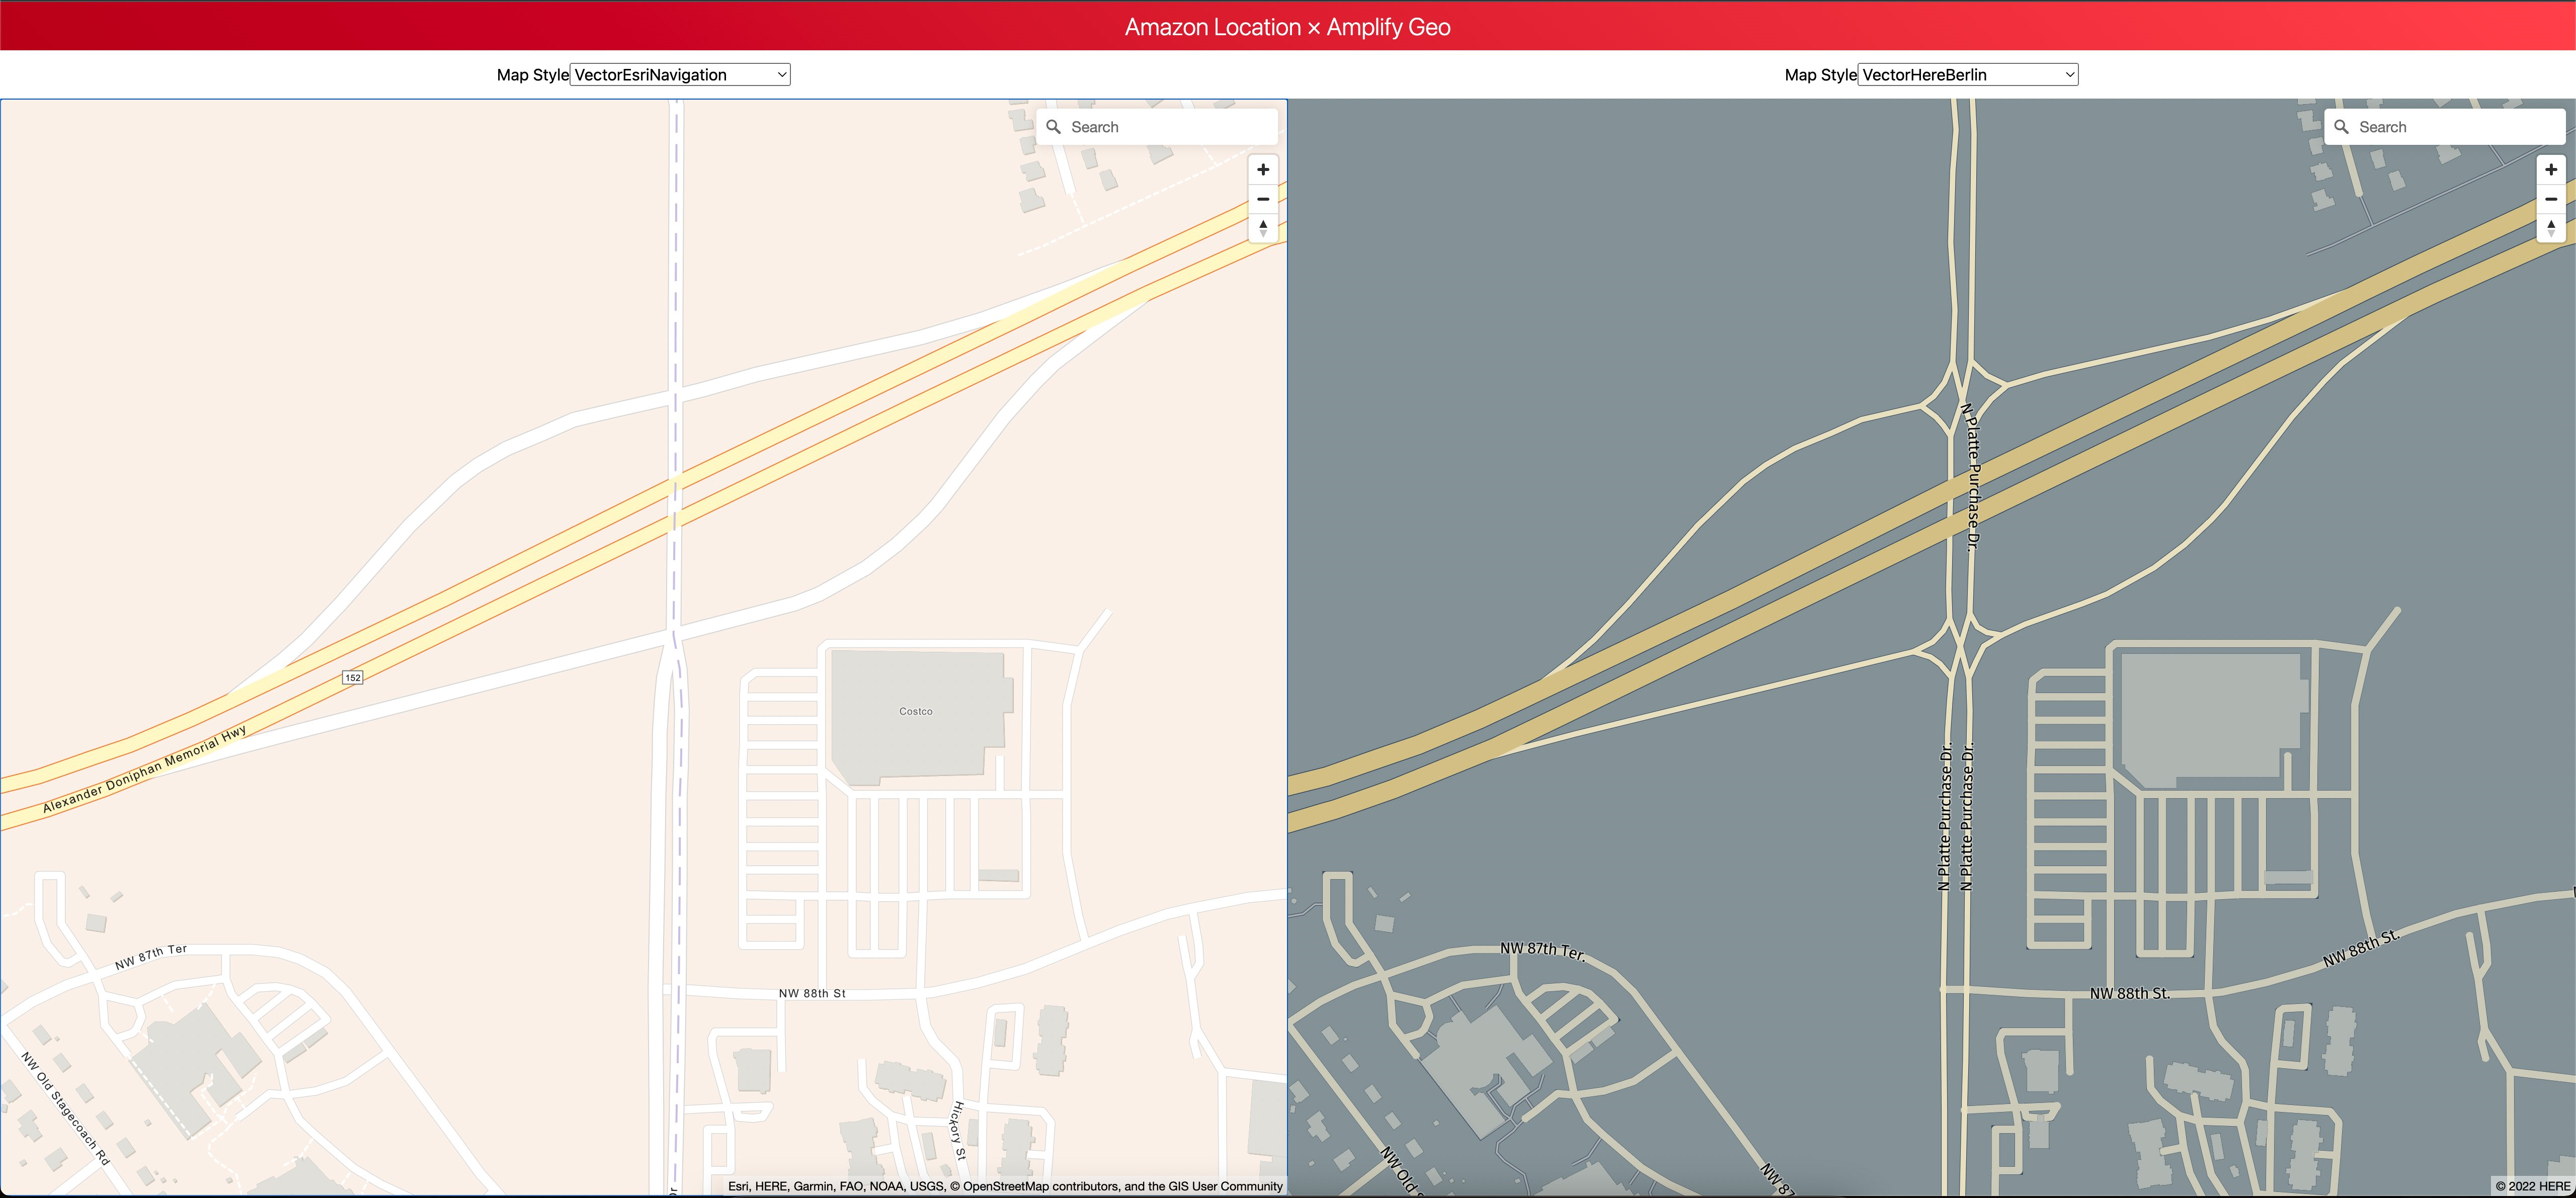
Figure 4. Image showing app displaying Esri Navigation and Here Explore
Natural features
Map styles will differ regarding what type of natural features they provide. One style that Amazon Location offers – Esri Vector Topographic – is particularly suited for this use-case. In the following example, looking at Yellowstone National Park, we can see feature names for mountains, as well as elevations. The Esri Navigation maps don’t contain this information. For an application designed around outdoor recreation, the Esri topographic vector map may be the better option.
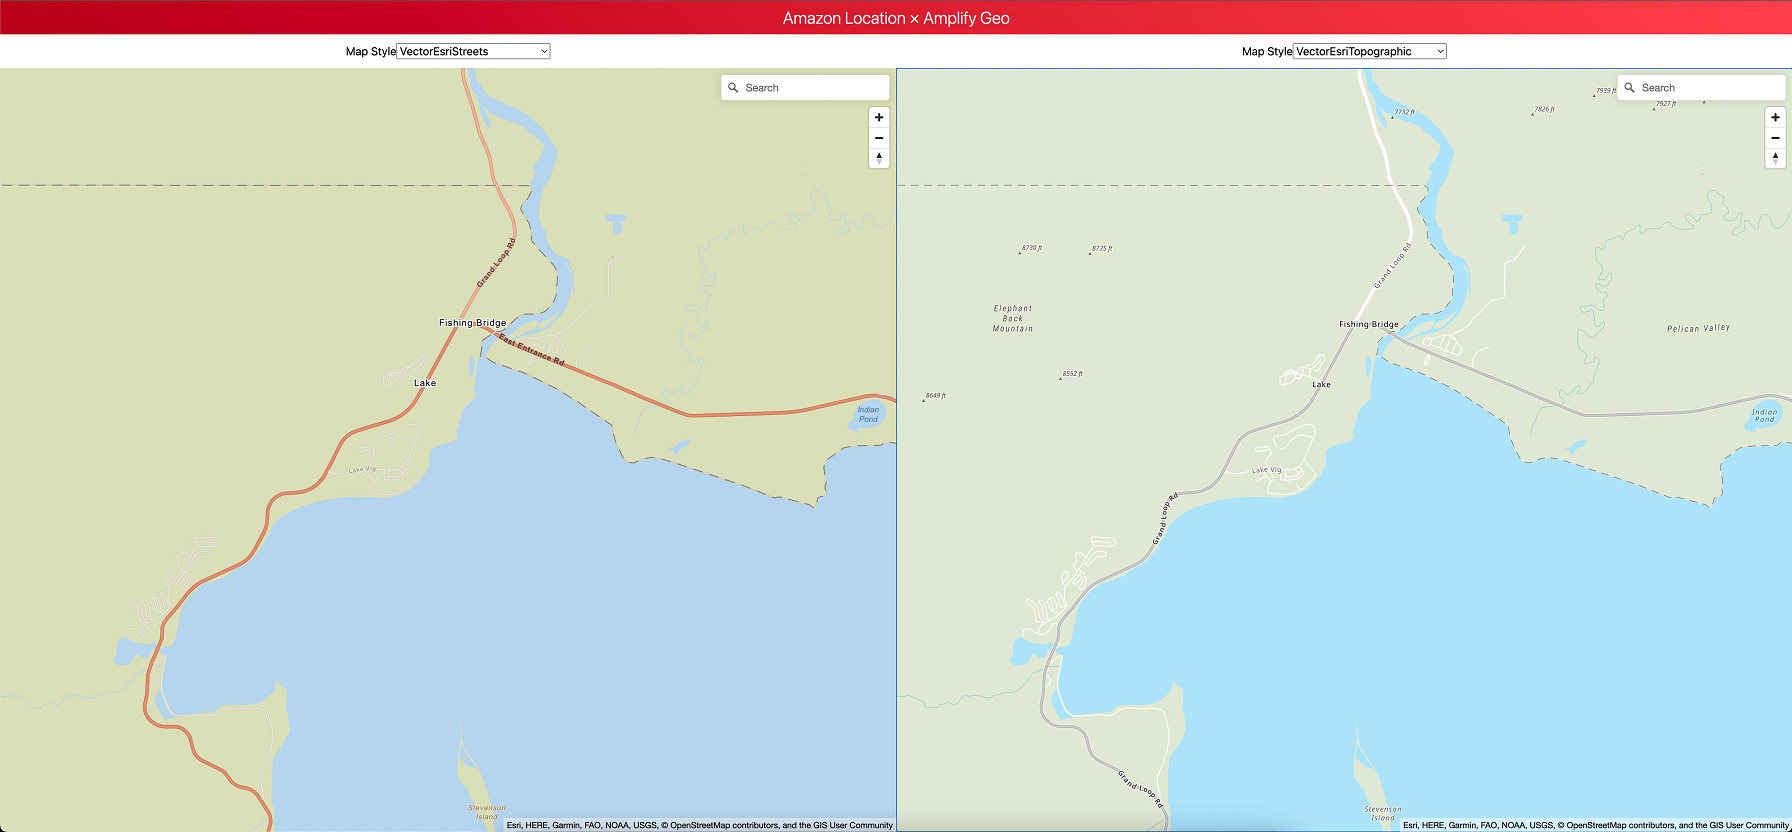
Figure 5. Image showing app displaying Esri Streets and Esri Topographic
Public transit
For a use-case that may focus on public transit or other navigational aids, certain styles may prove to be a better fit. In this example, we’re looking at Downtown Tokyo, and comparing an Esri Navigation style with the Here Explore style. In this case, Here has more public transit information, including more obvious train lines and train stations.
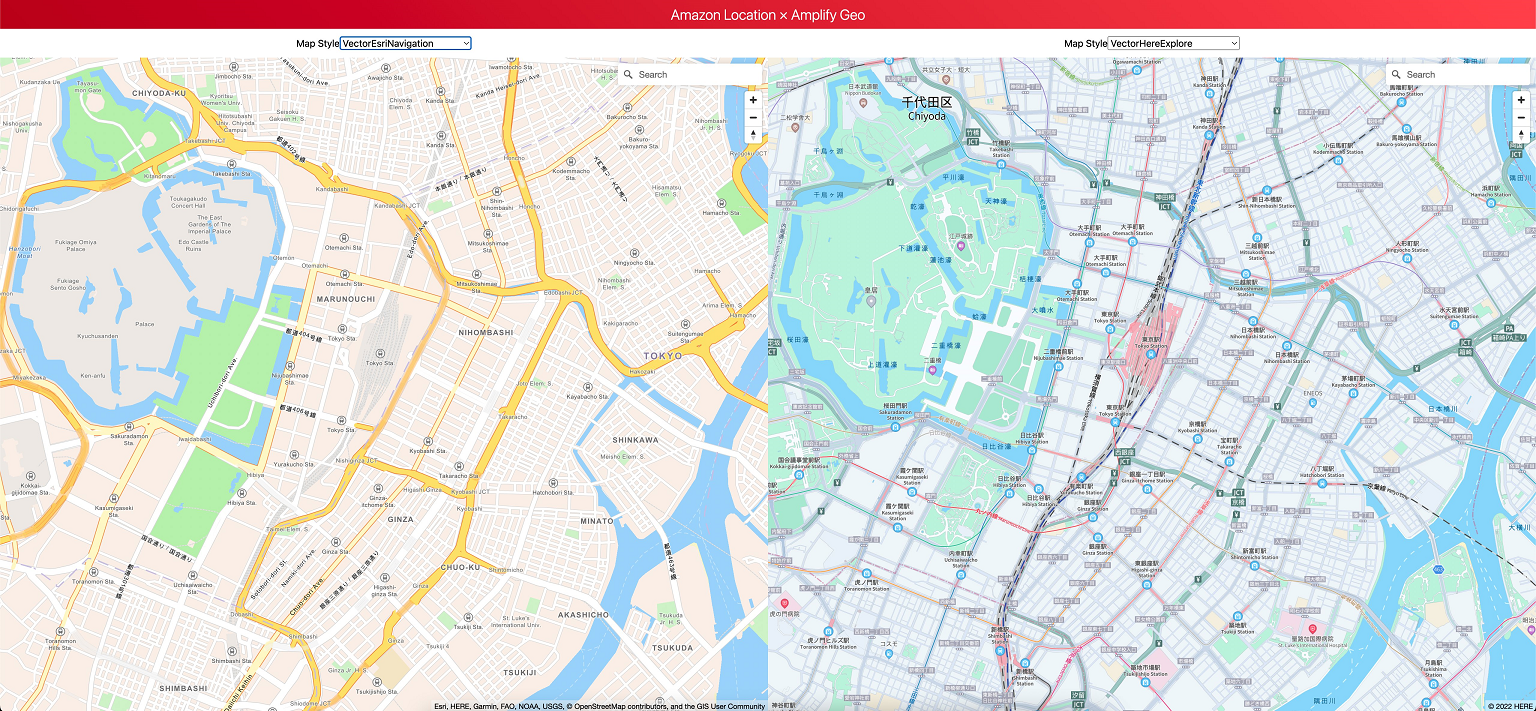
Figure 6. Image showing app displaying Esri Navigation compared to Here Explore
Trucking and hazardous material
When driving a large vehicle, bridge heights and travel restrictions are incredibly important. When building an application for these use-cases, the Here Explore Truck map is designed specifically for this task. Displaying bridge heights as well as haz-mat restricted roads, the Here Explore Truck maps make sure that you have all of the information that you need for safe travels in a larger vehicle.
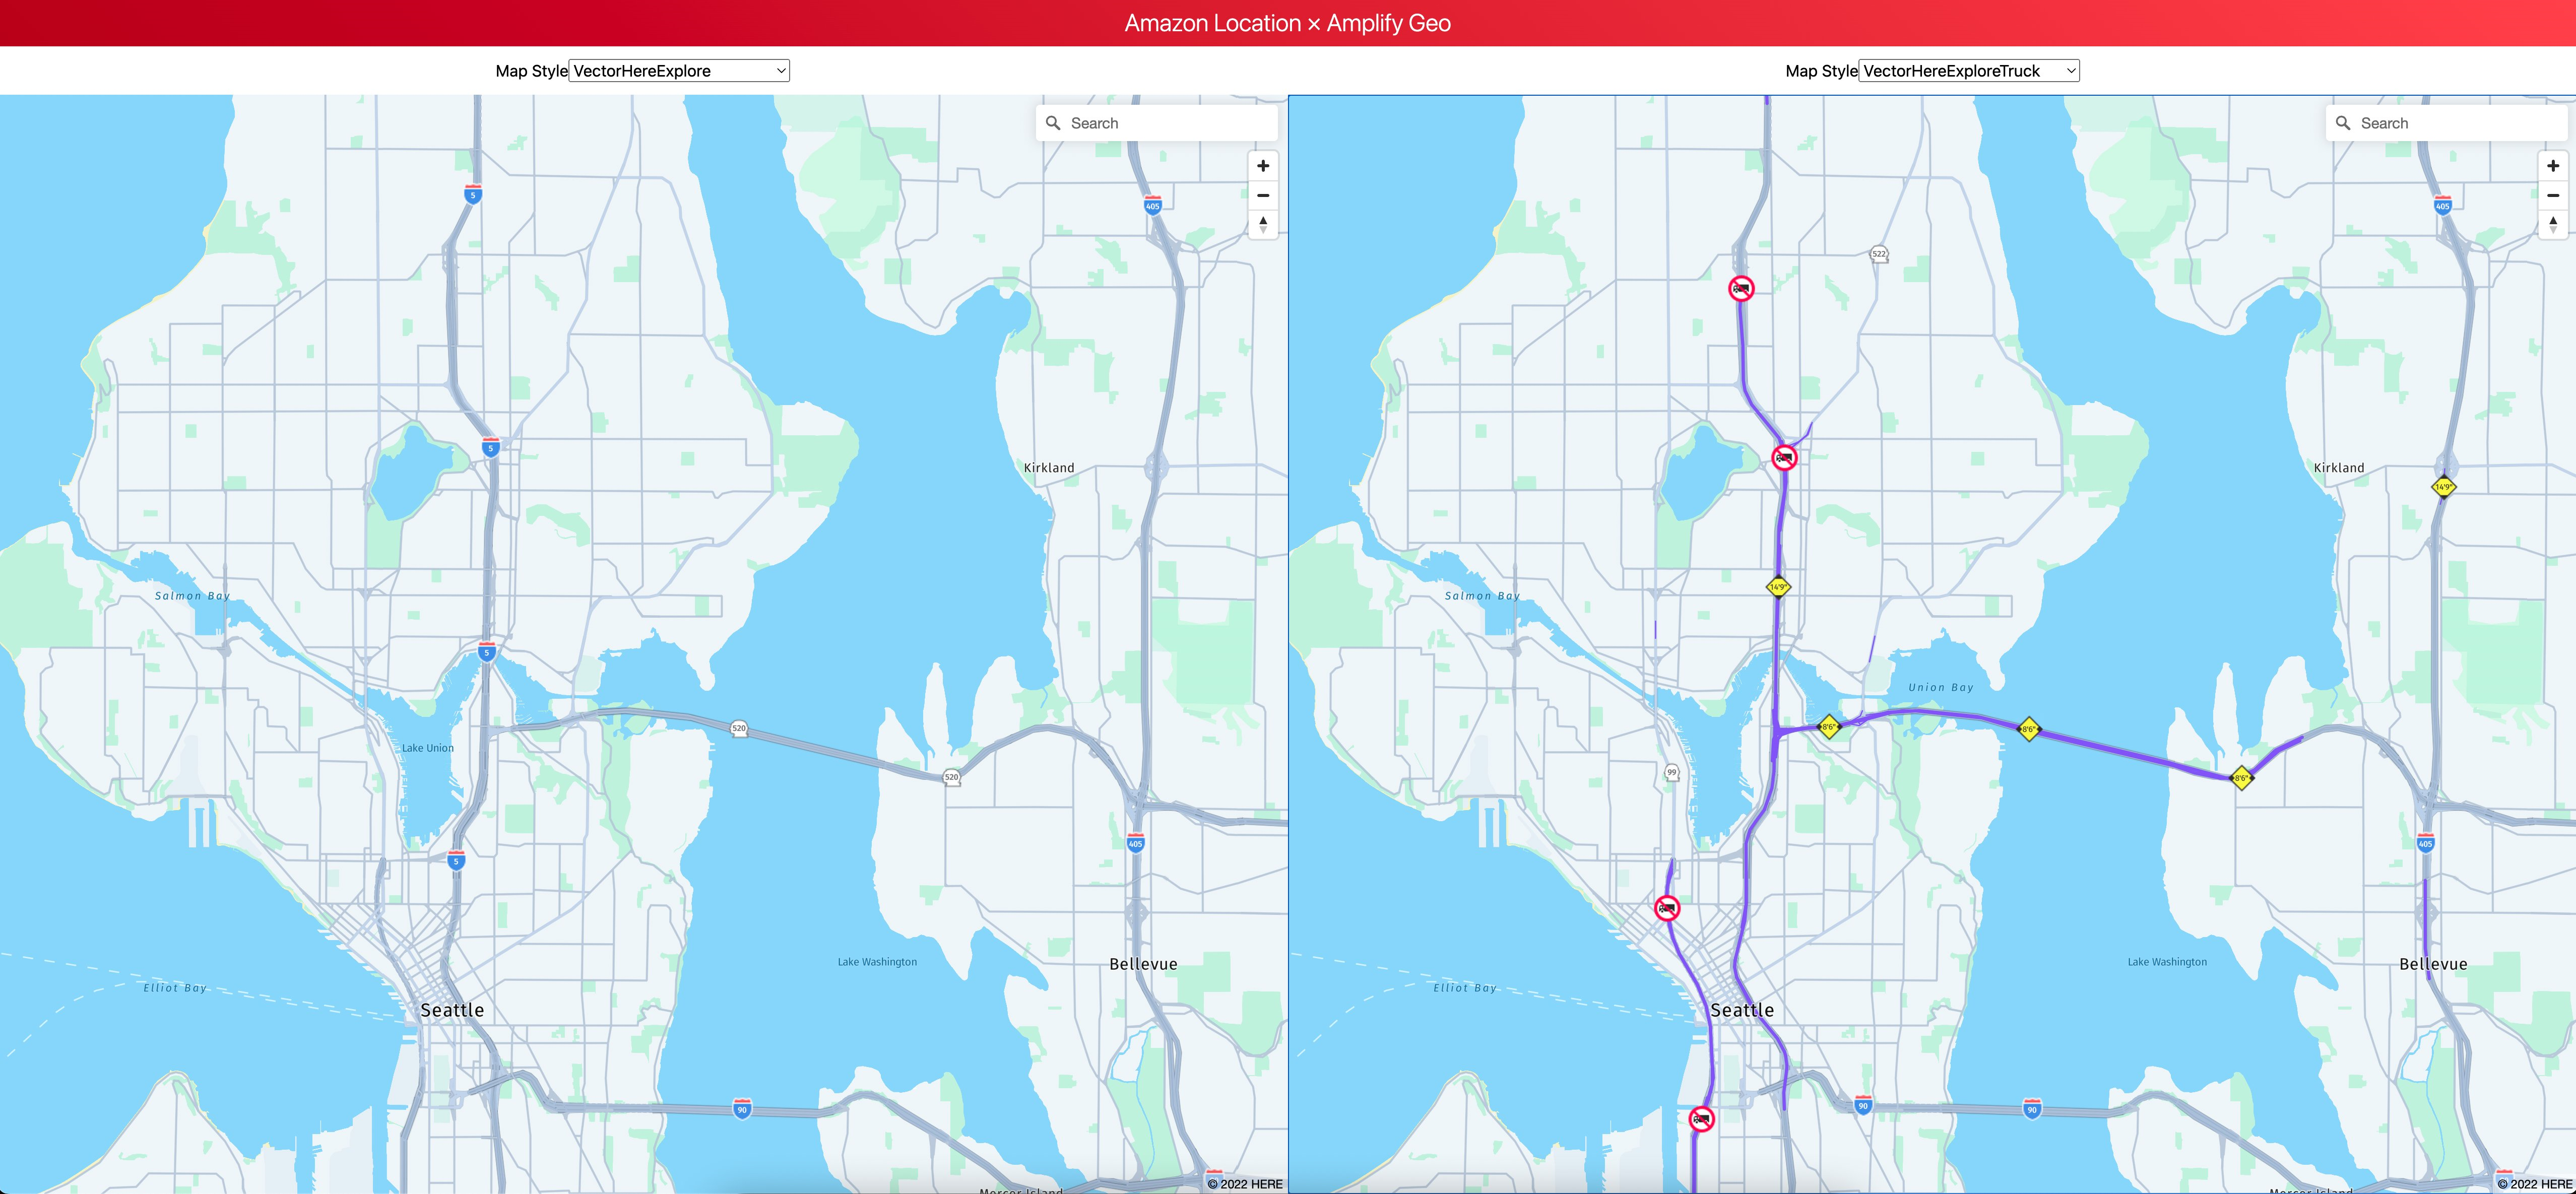
Figure. 7 Image showing app displaying Here Explore vs Here Explore Truck
Satellite vs Street maps
The final use-case is satellite (or aerial) views compared to a street map. By using the Raster Esri Imagery tiles, we can see aerial views of our locations. This can be useful in precision locating apps, where it must be very obvious where something may be located. One example may be locating a rental scooter that is in a parking lot that isn’t clear on a street map, but is obvious on aerial views.
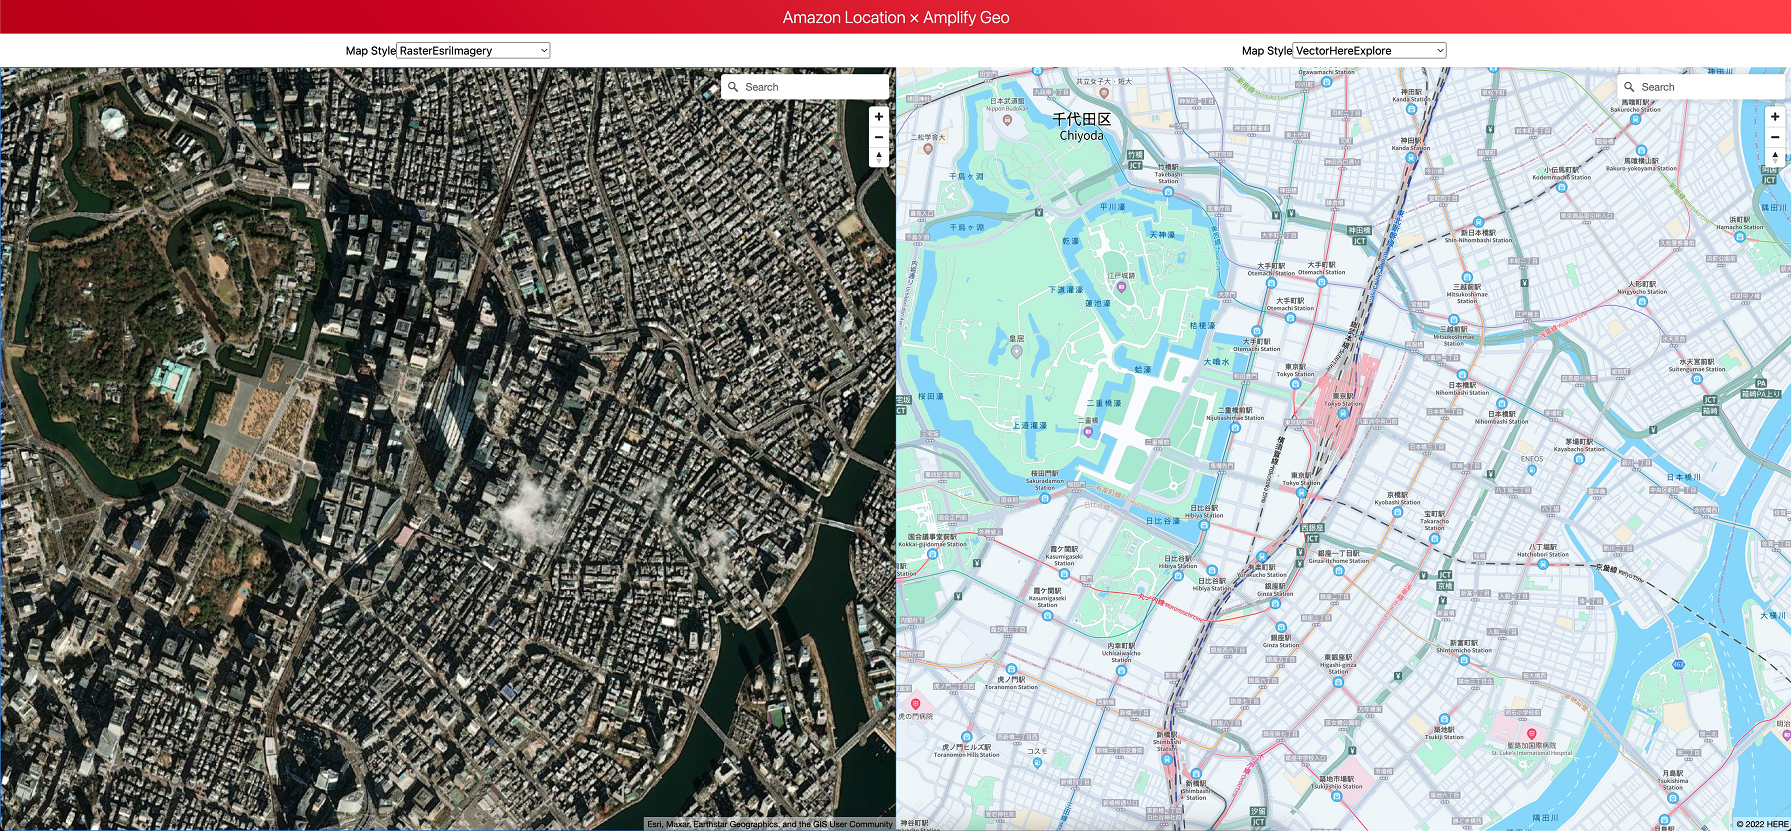
Figure 8. Image showing app displaying Esri Raster imagery next to Here Explore
Cleanup
To delete the application, navigate to the application directory:
then run
Select “y” when prompted:
Summary and next steps
In this post, we discussed how you can use an open-source application to compare Amazon Location map styles side-by-side in AWS Amplify. Using this tool, you can decide which map is the best for your use case, and look at specific points of interest in different styles. Because this is an open-source tool, you can modify the code and add markers, polygons, and other features to compare even farther exactly how your application might look using different map styles.
About the Authors: