Microsoft Workloads on AWS
Simplify migrating your Windows Server images with AWS Migration Hub Orchestrator
Amazon Web Services (AWS) recently introduced a new workflow template that improves the experience of importing your on-premises virtual machine (VM) images using the AWS Migration Hub Orchestrator console.
Previously, when importing Windows Server or Linux VM images using the VM Import/Export service, customers could only use the AWS Command Line Interface (AWS CLI) or AWS API calls to manage the import task lifecycle. This required understanding many of the important API parameters for importing these workloads correctly, including the manual validation of VM images for import compatibility and ensuring that the appropriate software licensing options were applied to avoid unnecessary cost. For customers already using AWS Migration Hub, they could not centrally track these import tasks, which added further overhead when managing their diverse migration projects.
The new import workflow in Migration Hub Orchestrator improves on the existing functionality of VM Import by providing a brand new, console-based experience that helps manage and automate the VM Import/Export import tasks. The workflow allows you to create and track import tasks centrally from the Migration Hub console, detect import issues through automated validation of your running source servers, and reduce configuration effort by combining multiple image imports within common workflows.
In this blog post, I will explore these new advantages provided by the Migration Hub Orchestrator import workflows and how they can help you accelerate the migration of your Windows Server images into Amazon Elastic Compute Cloud (Amazon EC2) while meeting your software license requirements.
Prerequisites
Before getting started with creating an import workflow, you will first need to stage your VM images in Amazon Simple Storage Service (Amazon S3) and add AWS Identity and Access Management (IAM) permissions for both the VM Import/Export and Migration Hub Orchestrator services.
Your VM images can either be OVA or VMDK files that contain a supported Windows or Linux operating system. You can find the list of supported VM images and operating systems within the VM Import/Export Requirements documentation.
Store your VM images inside an Amazon S3 bucket within a Region that is both supported by Migration Hub Orchestrator and where you will access the Migration Hub Orchestrator console.
Inside the Amazon S3 bucket, use folders prefixed with migrationhub-orchestrator-vmie-<folder-name> to store your VM images. If you are importing both OVA and VMDK images, they will need to be stored in separate folders.
Note: As part of this blog post, I intend to import a web application that consists of two Windows Server VM images (OVA and VMDK) and store them in an Amazon S3 bucket using the following object paths:
migrationhub-orchestrator-vmie-ova-images/my-first-vm.ova
migrationhub-orchestrator-vmie-vmdk-images/my-second-vm.vmdk
The VM Import/Export service will need access to import your images from this Amazon S3 bucket through the vmimport IAM service role. If you have previously used the VM Import/Export service, you may already have the IAM service role. Ensure that its IAM policy has been updated for the correct Amazon S3 bucket. For more information on the IAM service role and its policy, refer to the Required permissions for VM Import/Export.
Provide your IAM user with access permissions to the Migration Hub Orchestrator console by attaching managed policies AWSMigrationHubFullAccess and AWSMigrationHubOrchestratorConsoleFullAccess.
This last prerequisite is optional, but recommended: Deploy the Migration Hub Orchestrator plugin within your environment to enable validation of the running source servers that you intend to import as VM images.
With the prerequisites now covered, let’s move onto creating the import workflow.
Creating a workflow to import your VM images
To create an import workflow, navigate to the Migration Hub console (Figure 1).
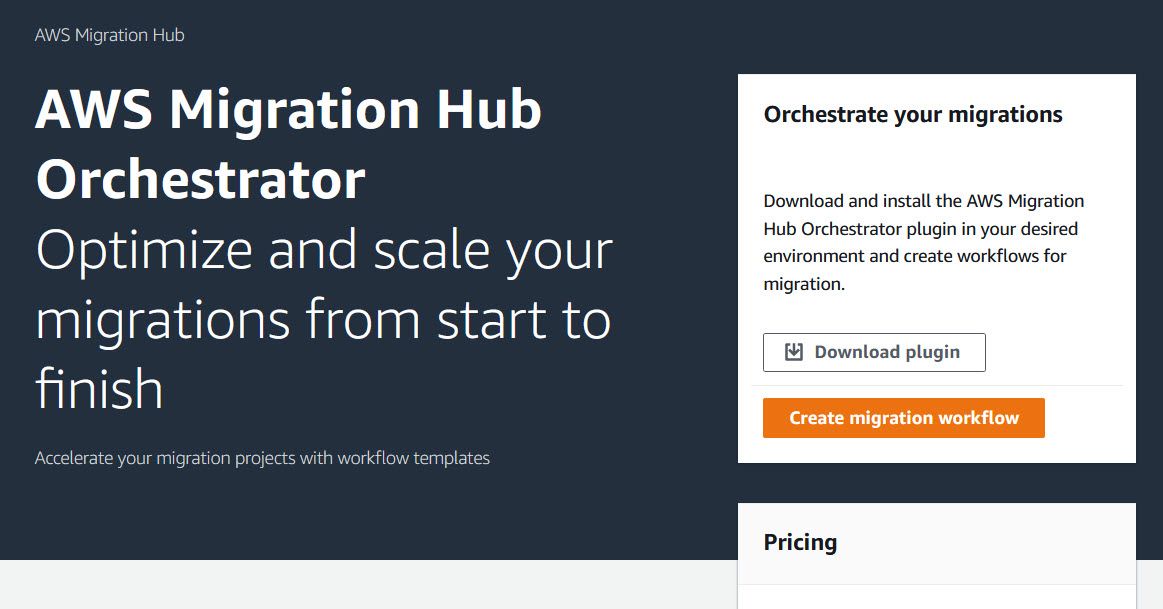
Figure 1. AWS Migration Hub Orchestrator Console
Browse to Orchestrate in the left navigation pane and then choose Create migration workflow to see the list of available workflow templates (Figure 2).
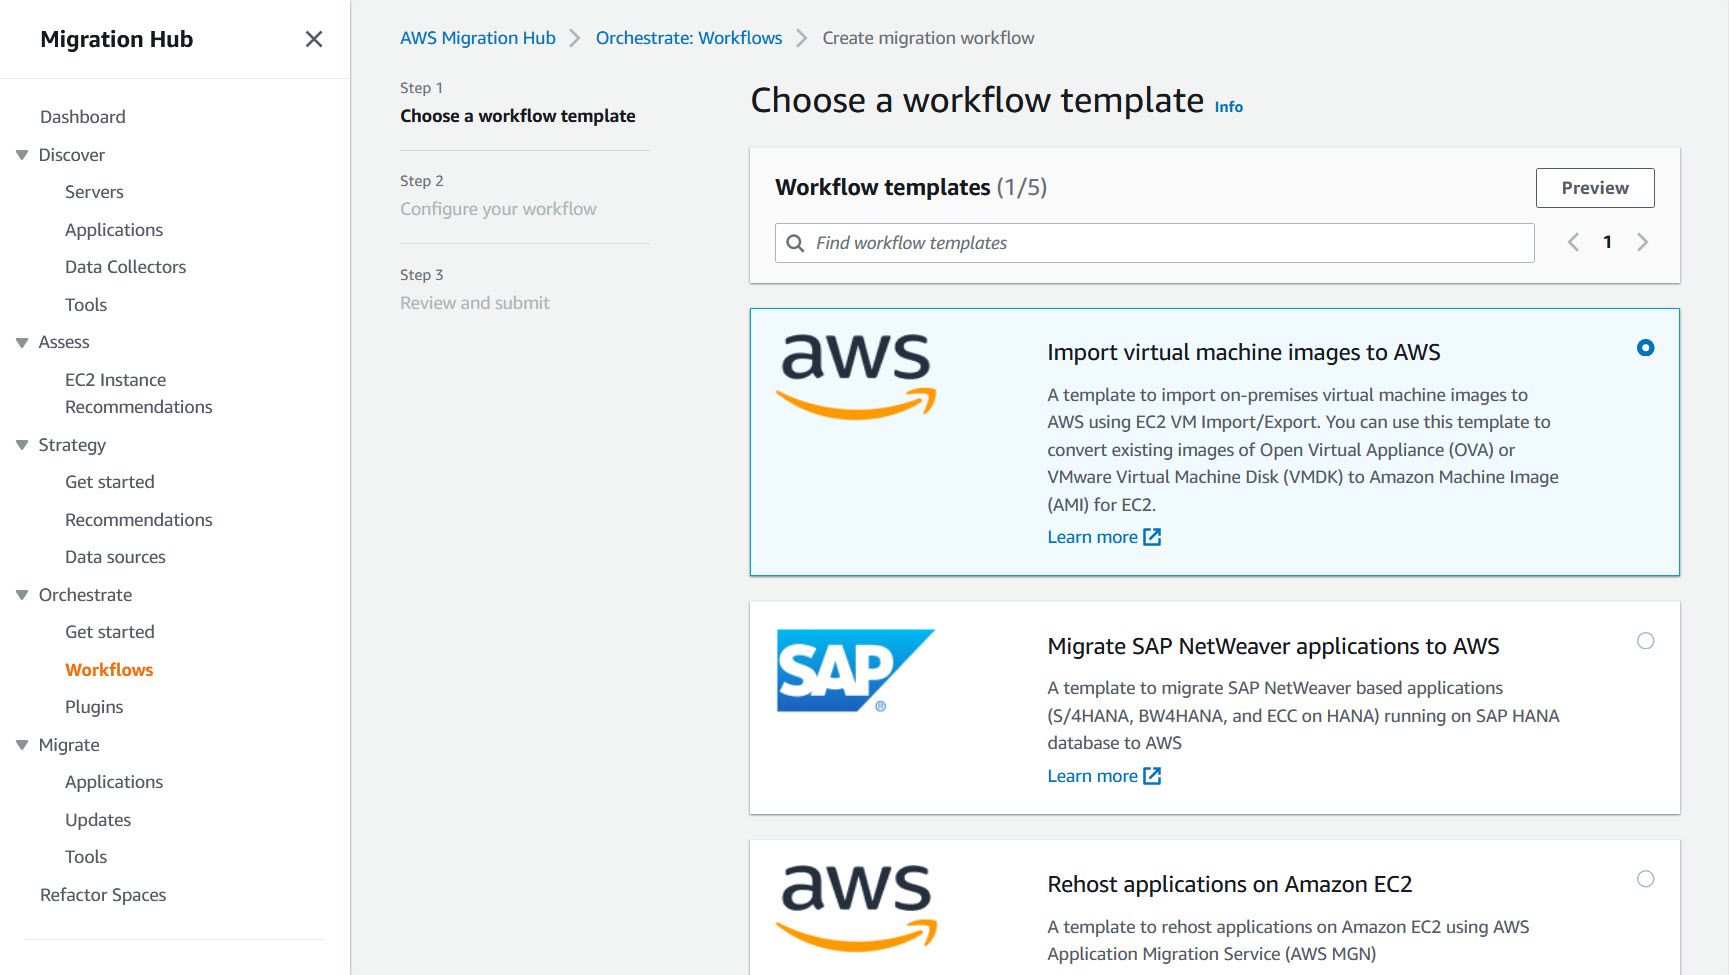
Figure 2. Choose a workflow template
Select the Import virtual machine images to AWS template, and then choose Next to open the workflow configuration page (Figure 3).
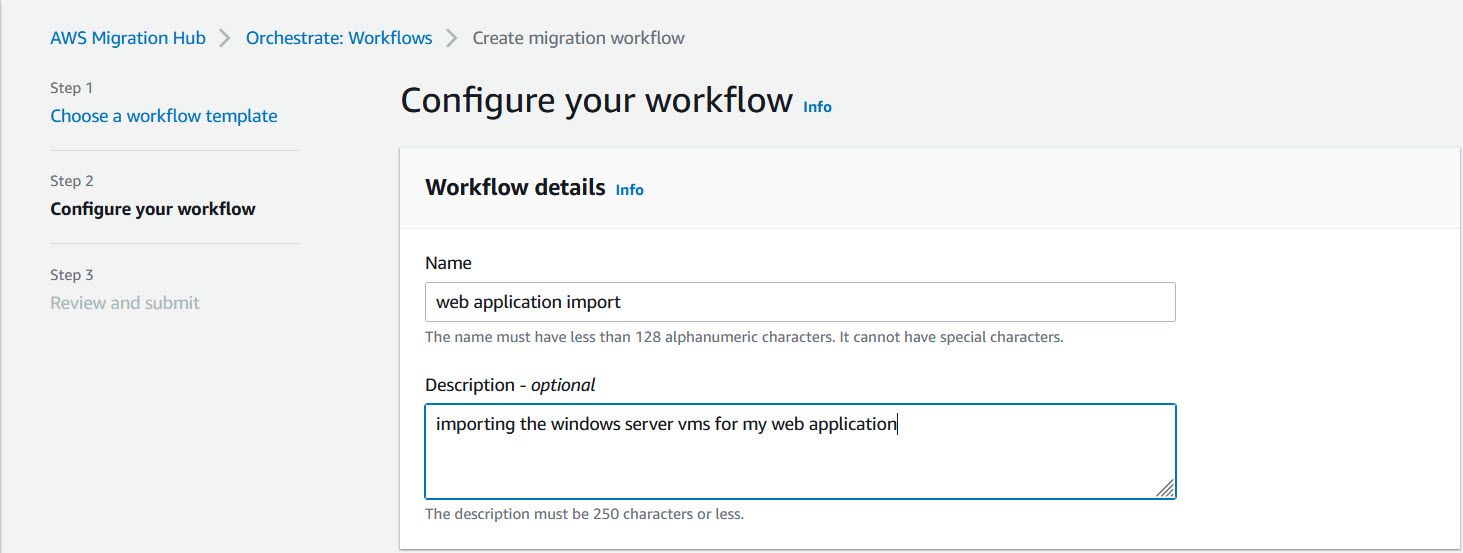
Figure 3. Configure your workflow
Enter in a Name and Description for your workflow, and then move to the Source environment configuration (Figure 4).
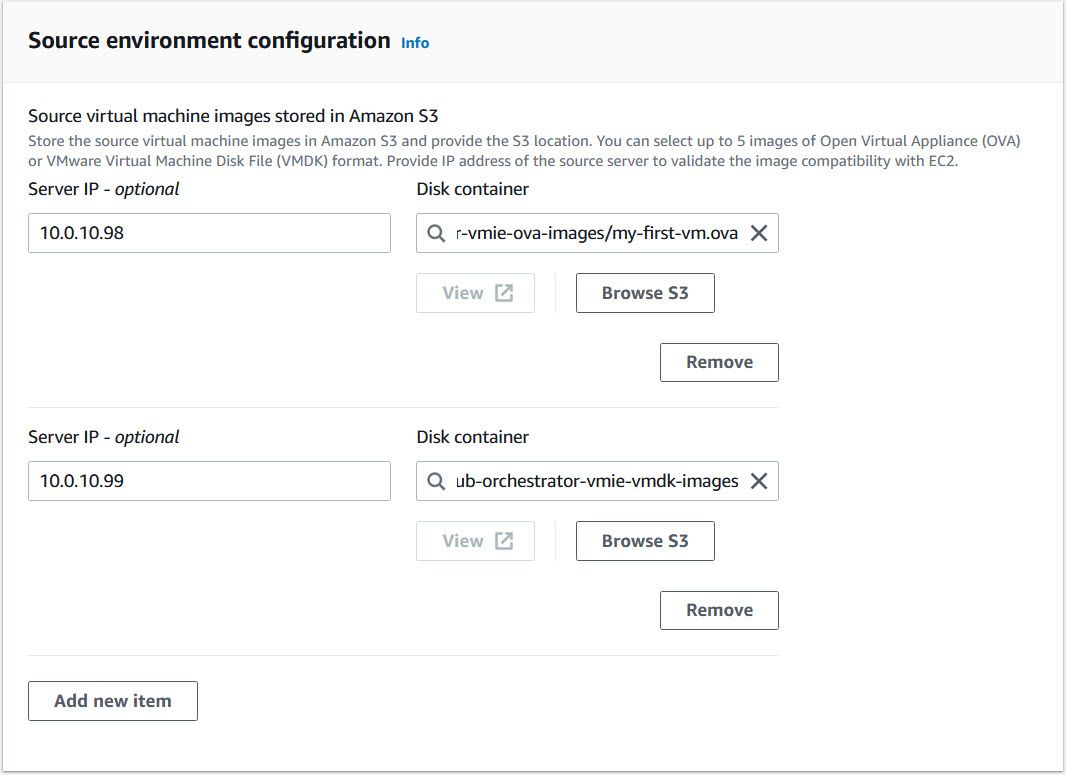
Figure 4. Source environment configuration
The parameter, Server IP, is optional. You can validate the image compatibility with Amazon EC2 by providing the IP address of the source server. The Migration Hub Orchestrator plugin will need to be installed to do the validation. Validating can help save time troubleshooting import failures by detecting potential issues early. If you do not have a running source server or have not deployed the Migration Hub Orchestrator plugin, you can skip the Server IP parameter.
The Disk container parameter is mandatory and is where you will specify the Amazon S3 bucket location for the VM image stored earlier.
Note: When importing VMDK images, choose the Amazon S3 bucket folder as the Disk container and not the VMDK object itself. For OVA images, choose only the OVA object as the Disk container.
You can also import additional VM images within the same workflow by choosing Add new item. This allows you to combine multiple image imports, apply common configuration to those imports, and reduce the number of steps necessary when importing more than one VM image.
Once you have finished defining the Source environment configuration, move to the Target environment configuration (Figure 5).
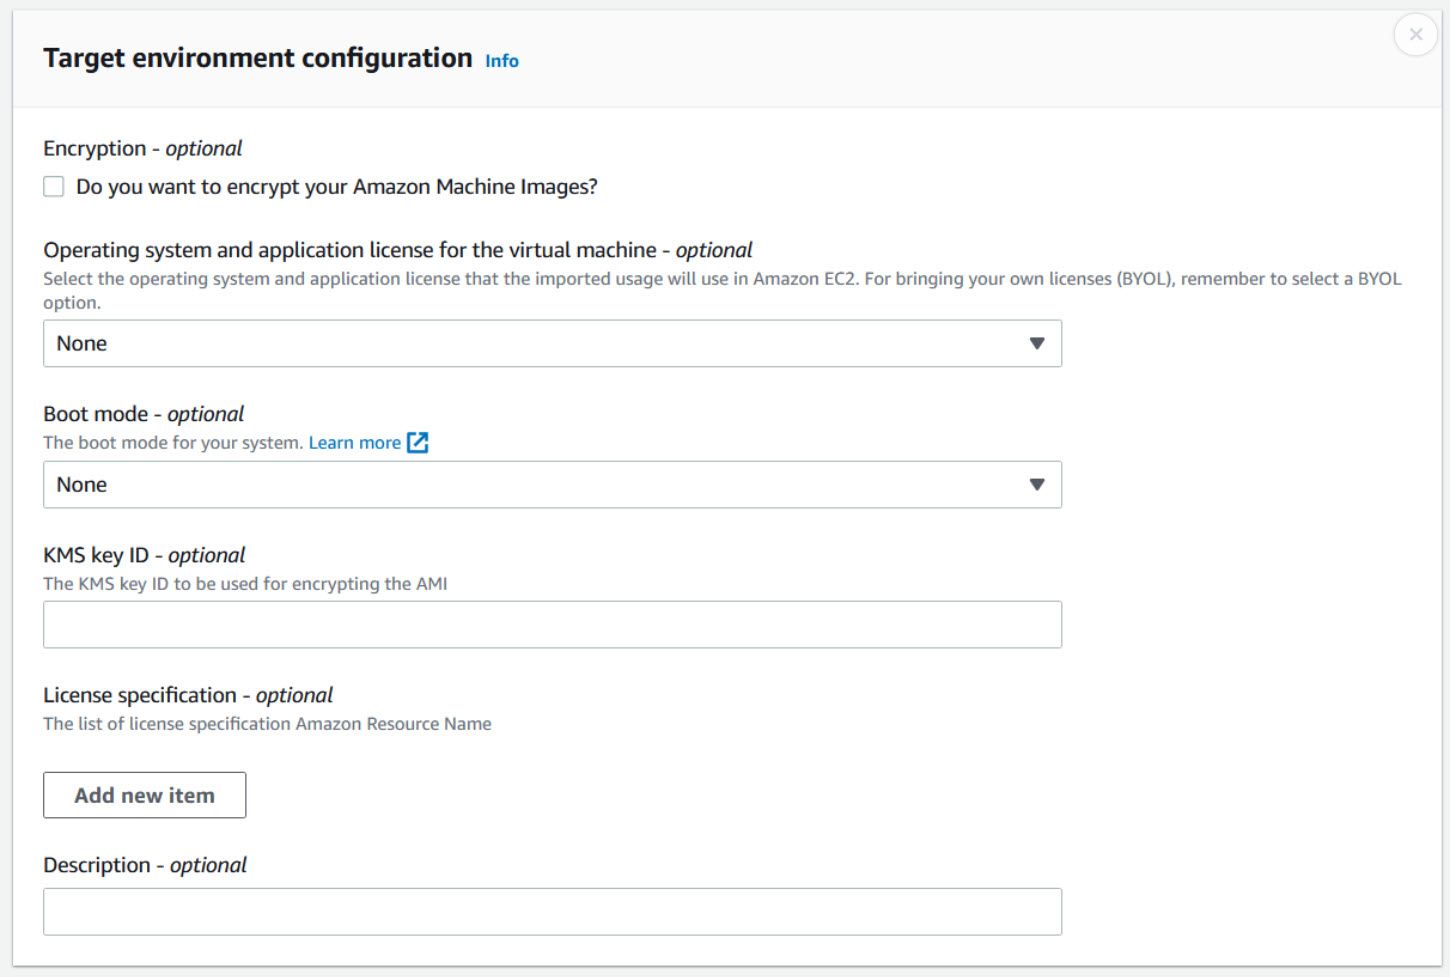
Figure 5. Target environment configuration
The Target environment configuration allows you to define how your VM image will be imported as an Amazon Machine Image (AMI) in Amazon EC2.
Check the box for Encryption. This will encrypt your AMIs using the default AWS Key Management Service (AWS KMS) key. You can also specify an alternate AWS KMS key under KMS key ID.
Review the available licensing options by opening the drop-down menu for Operating system and application license for the virtual machine (Figure 6).
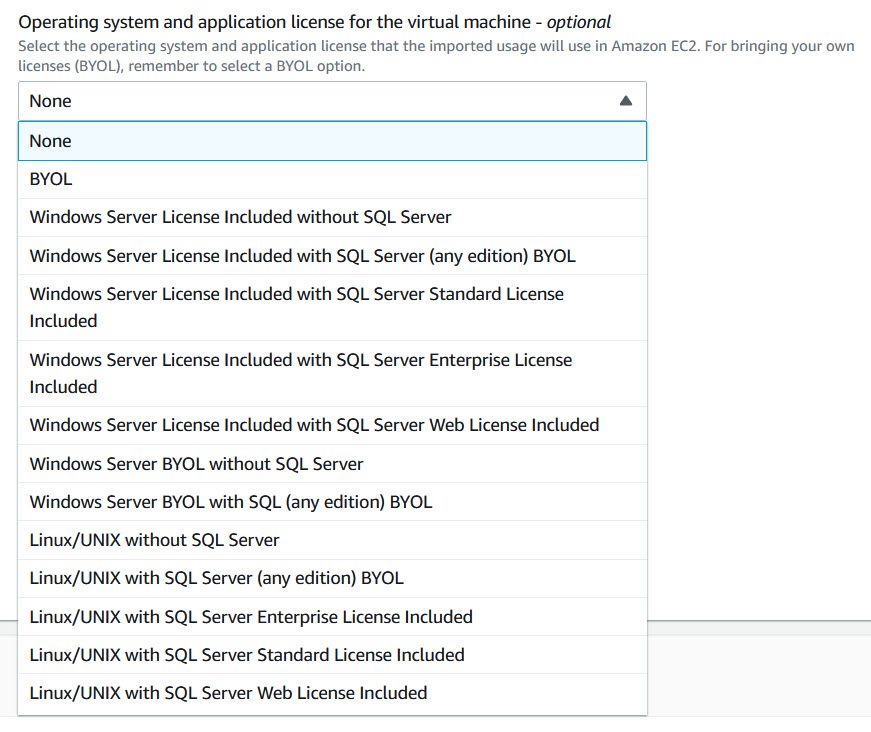
Figure 6. Operating system and application licensing options for the virtual machine
The options presented here determine how licensing will be set for your VM once it has been imported as an AMI.
Choose BYOL if you intend to bring your own license for Windows Server and run your VM in Amazon EC2 on a Dedicated Host.
You can also choose a license-included option where appropriate for your use case. Refer to both the Licensing options in the VM Import/Export documentation and Microsoft Licensing on AWS guide for more information on the available licensing options for running Microsoft workloads in Amazon EC2.
Note: When importing multiple VM images within a single workflow, the same license option will be applied to each server.
Choose Next to see an overview of the configuration, and then choose Create to complete the workflow configuration. You will see your workflow listed under Migration workflows with the status Not Started (Figure 7).
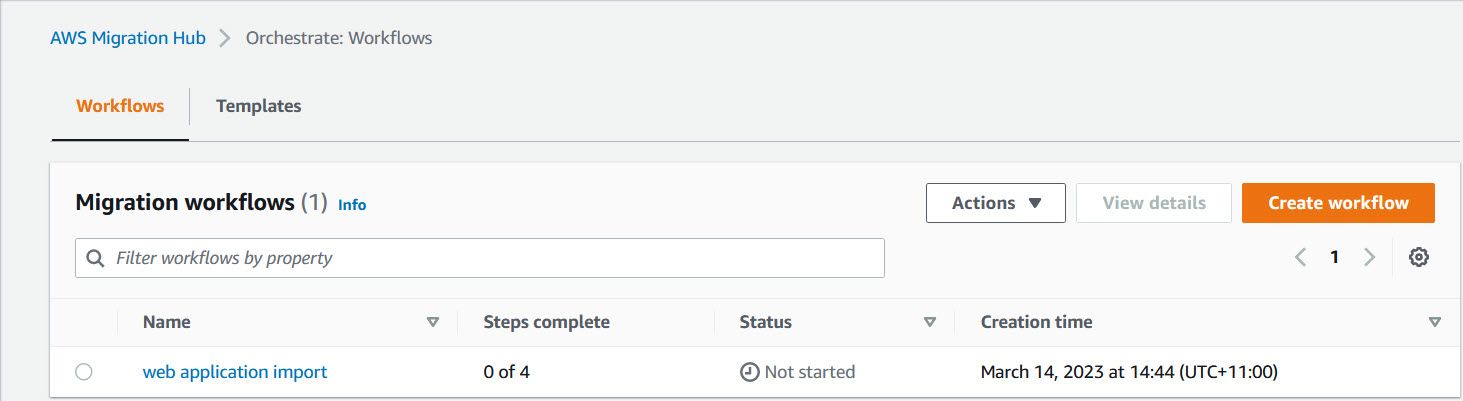
Figure 7. Existing migration workflows
View the details page of your workflow by choosing its Name in the list (Figure 8).
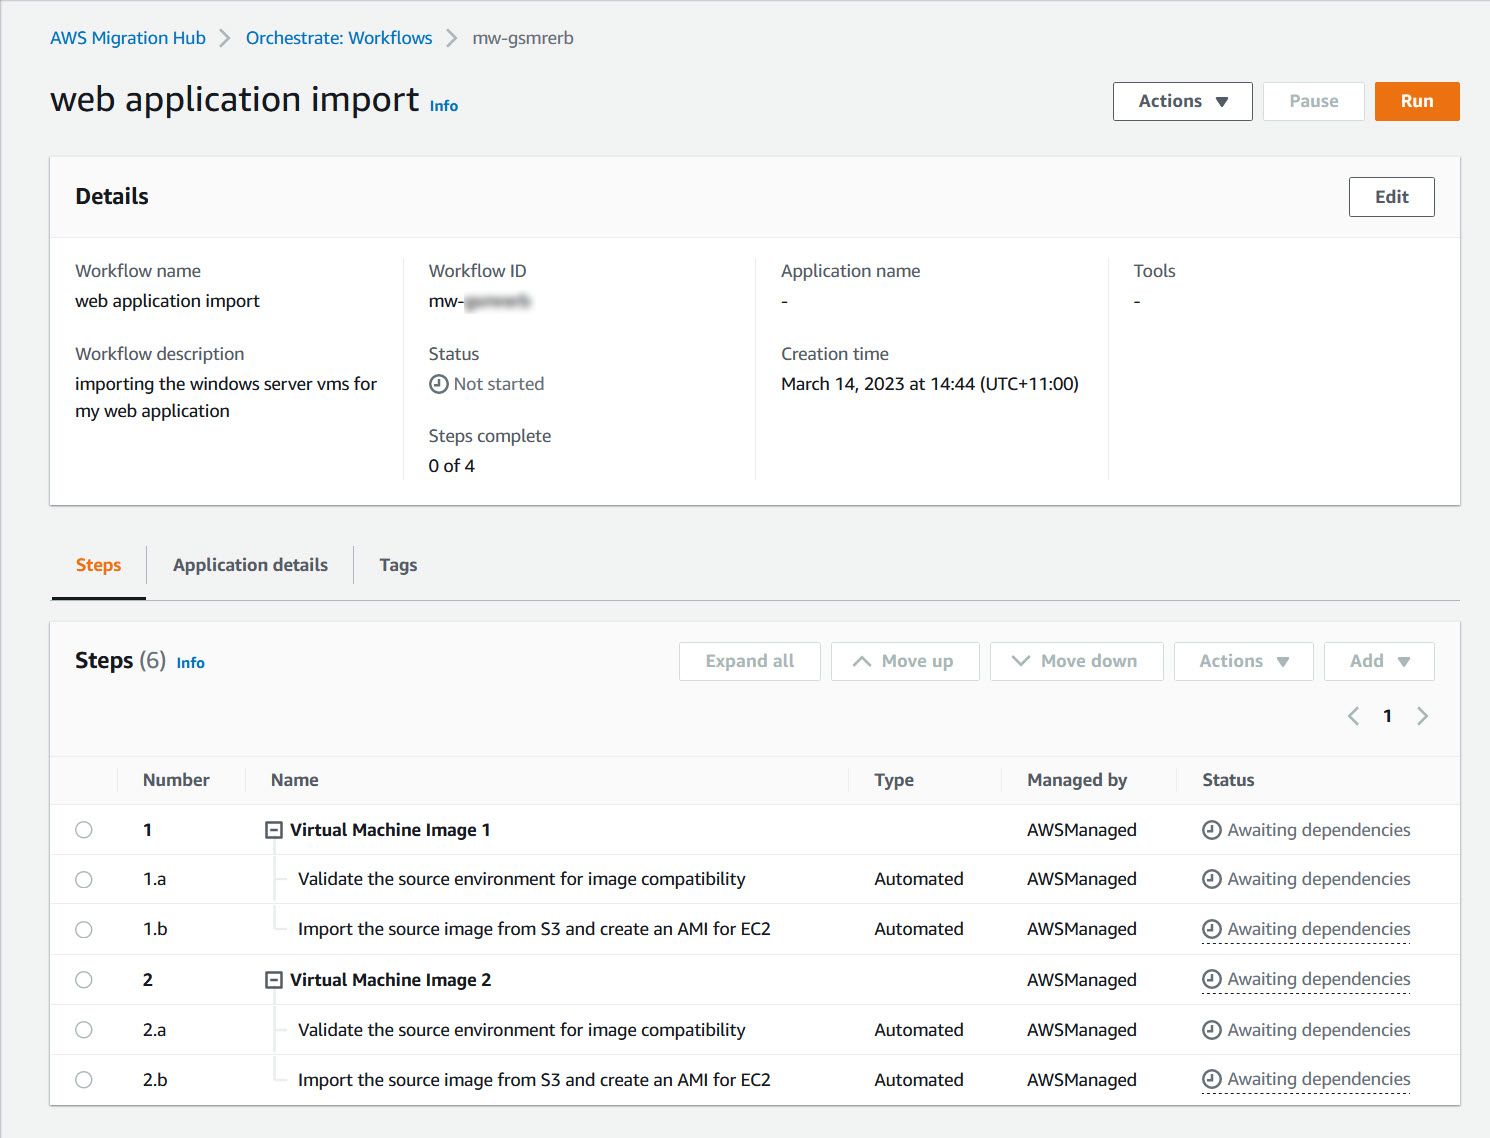
Figure 8. Details page for a workflow
Within the workflow details page, you can see its Workflow ID, which can be used to trace logs in AWS CloudTrail and Amazon S3.
To view more information on the process that will be completed for each VM image, choose Expand All under Steps. The steps will be processed in the order they are listed.
When you are ready to start your workflow, choose Run. Monitor the workflow status until it is completed (Figure 9).

Figure 9. Workflow has completed
After completion, you can review each step for further details. This includes an output log for the validation step—useful if it had failed—and the AMI ID that was generated from your VM image (Figure 10).
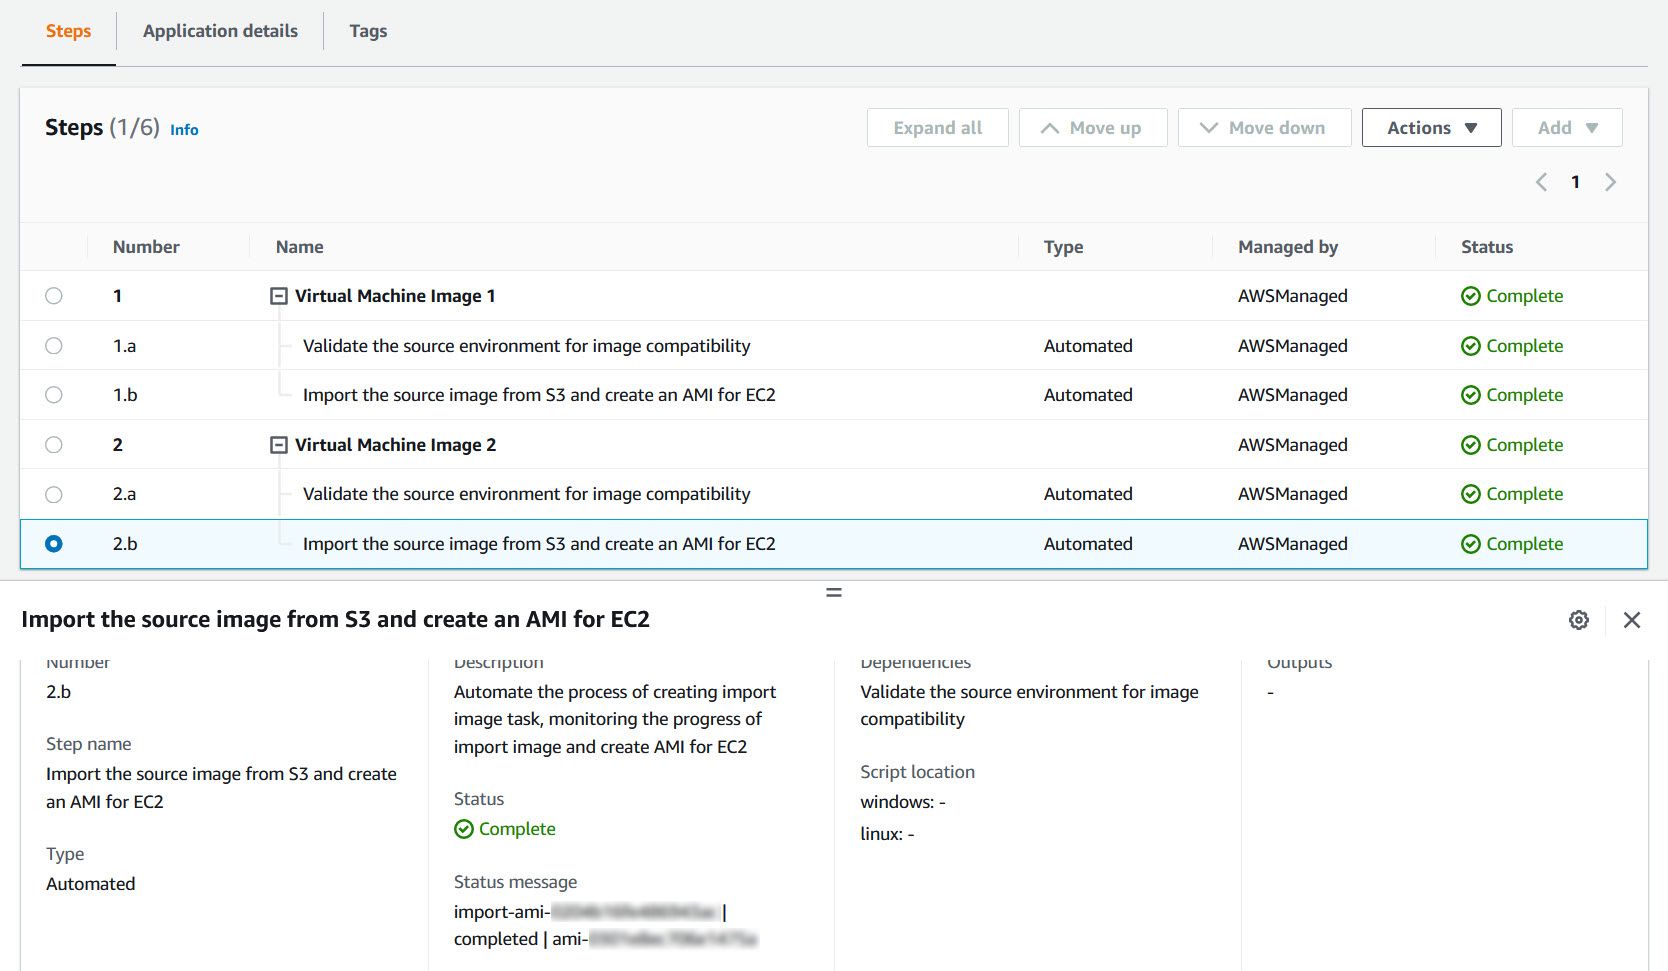
Figure 10. Details of the completed workflow
With the workflow completed and your VM images imported as AMIs, this portion of your migration journey is complete, and you can now launch those workloads in Amazon EC2. Enjoy!
Cleanup
If you followed the steps in this blog post, you created additional resources that will need to be cleaned up to avoid incurring further costs.
Any source VM images and validation logs generated by Migration Hub Orchestrator can be deleted from Amazon S3. Any AMIs created from importing VM images can be cleaned up by deregistering the AMI ID and deleting the backup Amazon EBS snapshot.
Any workflows created in Migration Hub Orchestrator do not incur additional costs. But if you want to delete these workflows, navigate to Workflows in the Migration Hub Orchestrator console, select your workflow, and then choose Delete from the Actions drop-down menu.
Conclusion
In this blog post, I covered how you can use the import workflow template provided by Migration Hub Orchestrator to import your VM images and accelerate migrating Windows Server workloads to AWS. For more information about Migration Hub Orchestrator, visit the user guide.
AWS can help you assess how your company can get the most out of cloud. Join the millions of AWS customers that trust us to migrate and modernize their most important applications in the cloud. To learn more on modernizing Windows Server or SQL Server, visit Windows on AWS. Contact us to start your modernization journey today.