AWS Cloud Operations Blog
Manage your AWS CloudFormation templates and stacks using AWS Systems Manager
With AWS CloudFormation, you get a powerful way to automate and manage infrastructure as code. Until now, customers relied on Amazon Simple Storage Service (Amazon S3) or a version-control system to store, share, and manage CloudFormation templates as code artifacts. In addition, many customers use AWS Service Catalog for advanced use cases related to governance of a catalog for easily deployable products based on CloudFormation templates. Today, we announce the release of the Template Library in Application Manager, a capability of AWS Systems Manager. The Template Library provides an easy way to author, store, version, validate, share, and provision CloudFormation templates through the console. You can use this feature to manage the templates for your applications or application components in the Systems Manager console. It’s available to all AWS customers without any additional setup or onboarding requirement.
An application represents a logical group of AWS resources that you want to view or manage as a single unit. Each of these groups of resources generally represents an application or component of an application. In this blog post, we will share a functional example of an Application Manager application that uses CloudFormation: the deployment of the popular Jenkins build server. Many development teams use Jenkins as their primary build and deployment team of choice, and, often, many entities in a single company have their own Jenkins deployments. A company can streamline and unify their process by authoring a single CloudFormation template that configures Jenkins in accordance with best practices. This template can easily be stored in the Template Library and used to provision and update Jenkins deployments across the organization.
Template Library primer
The focus of this post is creating and managing CloudFormation templates using the console. we will start by using the Template Library to author a CloudFormation template that creates the resources required for a Jenkins deployment. Each template in the Template Library is a Systems Manager document. You can use the console, AWS CLI, or SDK to manage the template.
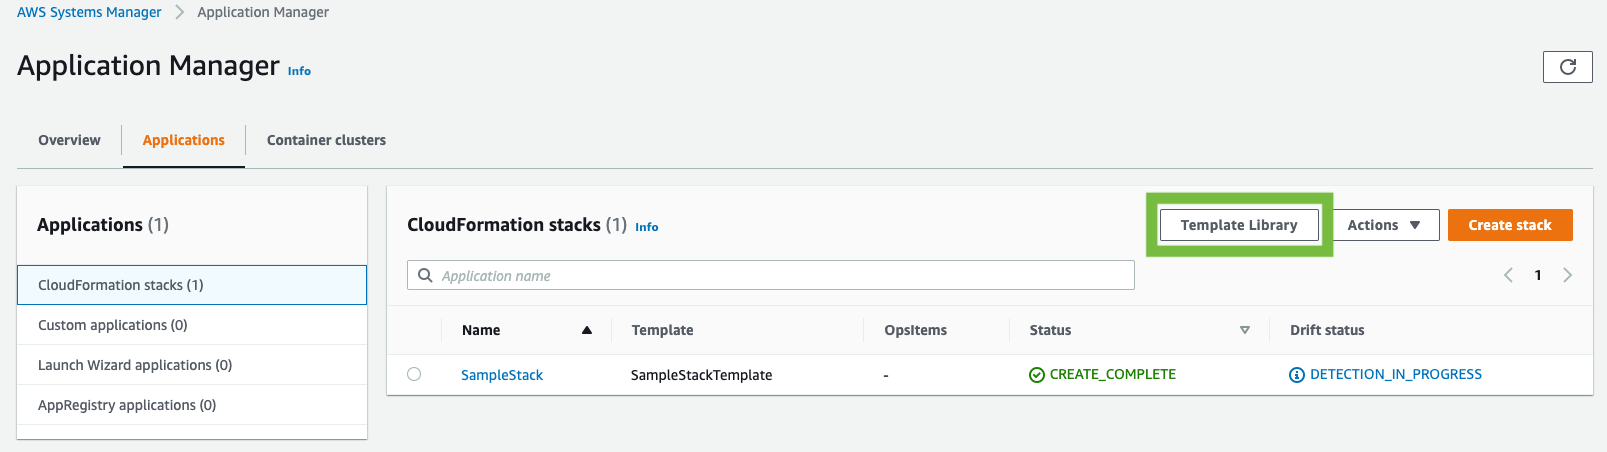
Figure 1: Template Library
The Template library page displays Owned by Amazon, Owned by me, Shared with me, and All documents tabs. If you choose Owned by Amazon, you see templates that have published by AWS as AWS Quick Starts and AWS Solutions.
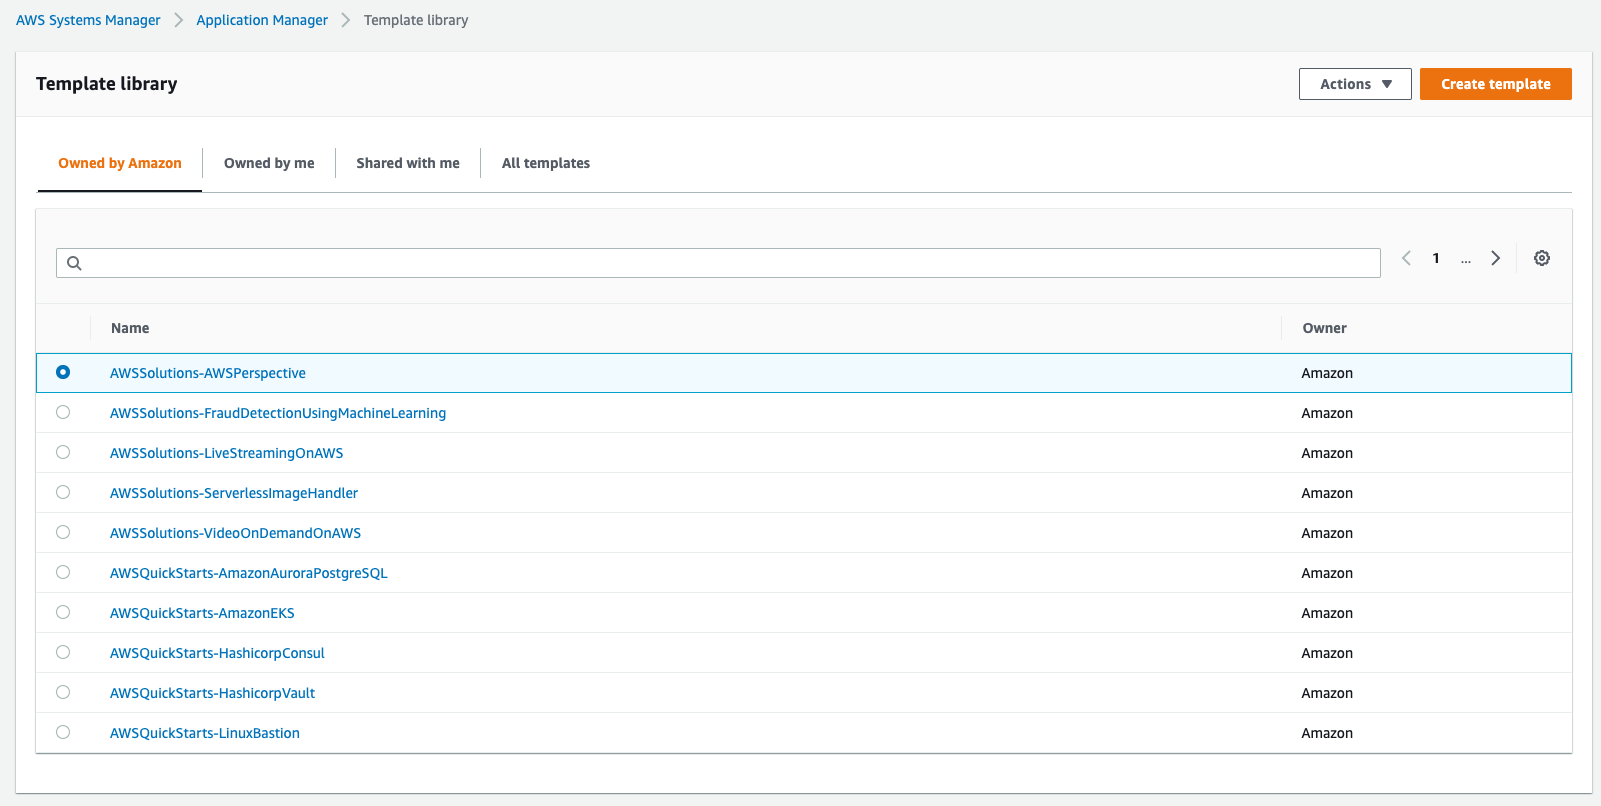
Figure 2: Owned by Amazon tab
Create your first template
Choose the Owned by me tab, and then choose Create template.
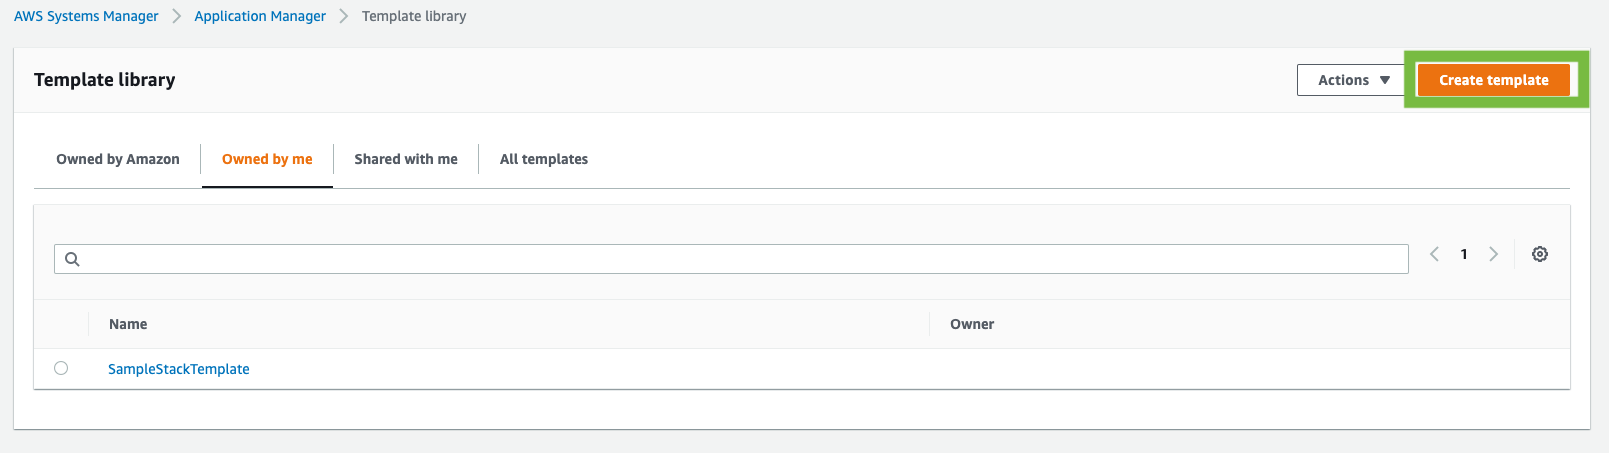
Figure 3: Create template
On Create template, enter a name (for example, JenkinsTemplate) and optional version name (for example, Testversion) for the template. In Code editor, choose YAML or JSON, and then enter the template content.
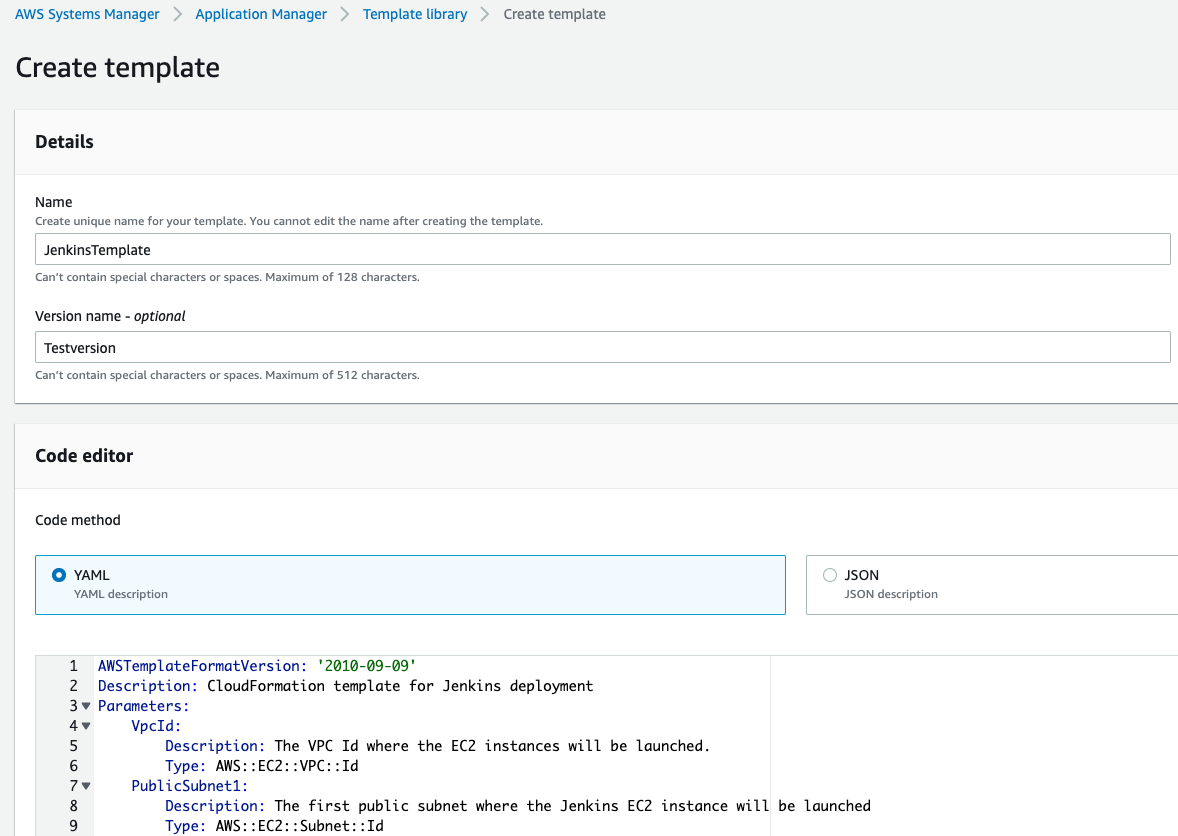
Figure 4: Template details
Provision a CloudFormation stack from your template
After you’ve created the CloudFormation template for Jenkins deployment, from Actions, choose Provision stack to provision a Jenkins installation.
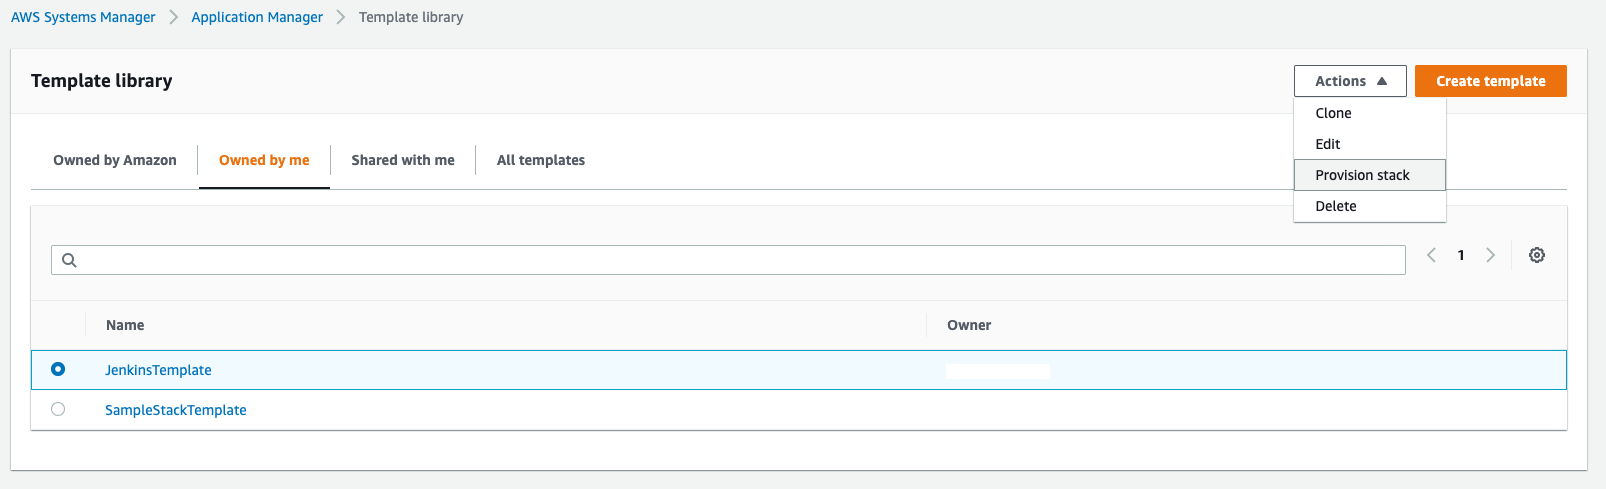
Figure 5: Provision stack
On Edit stack details, choose Create new stack for Stack name, enter JenkinsStack-DevTeam-A. In Parameters, complete the fields as shown, and then choose Next.
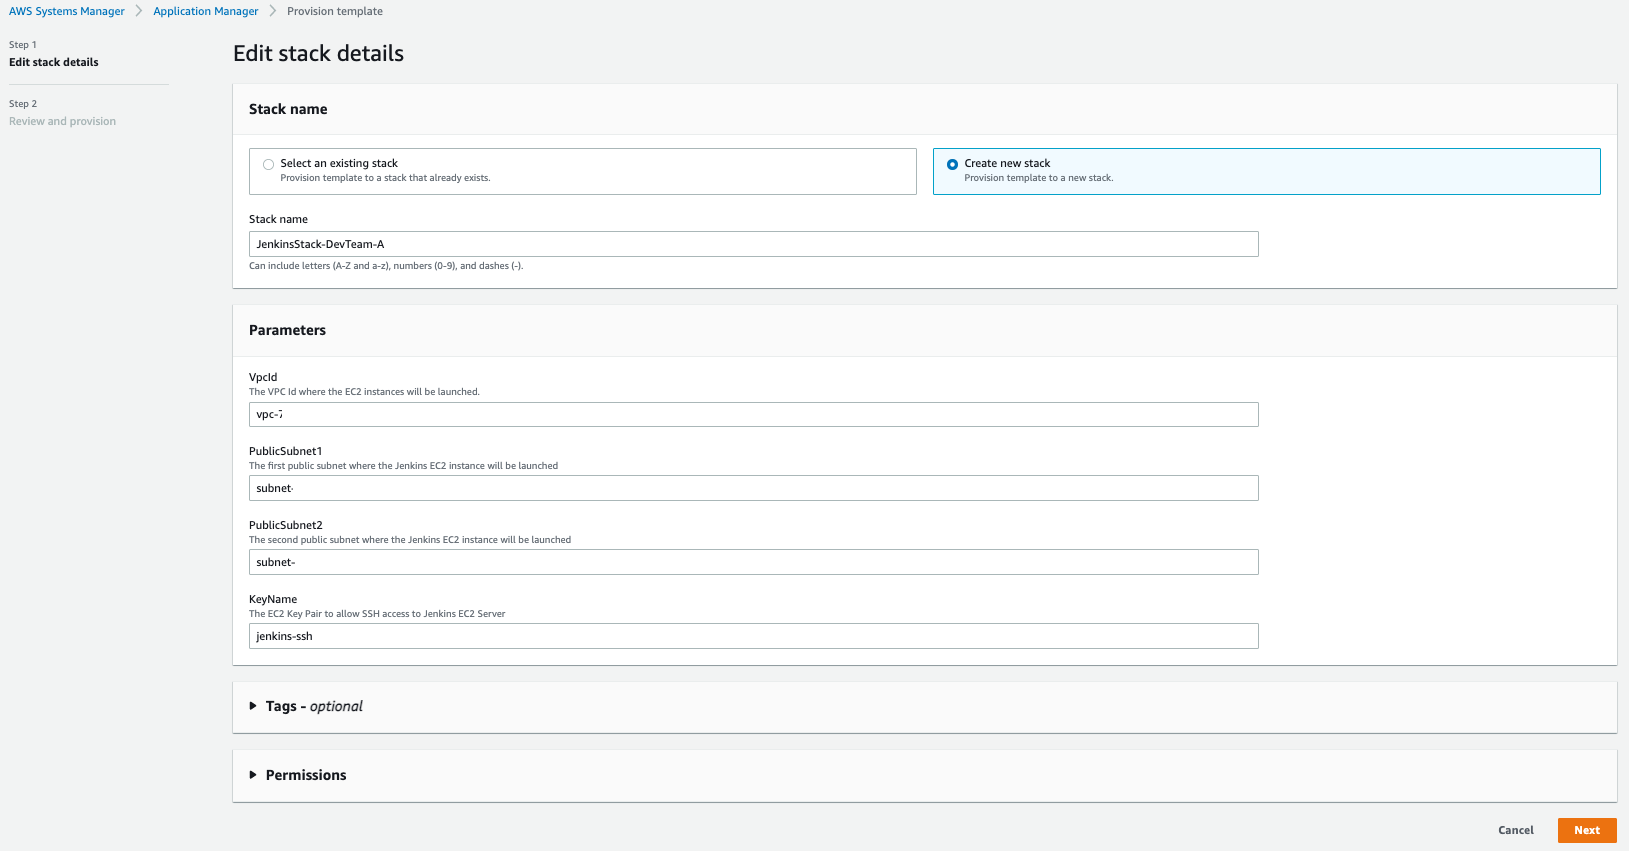
Figure 6: Edit stack details
On Review and provision, choose Provision stack.
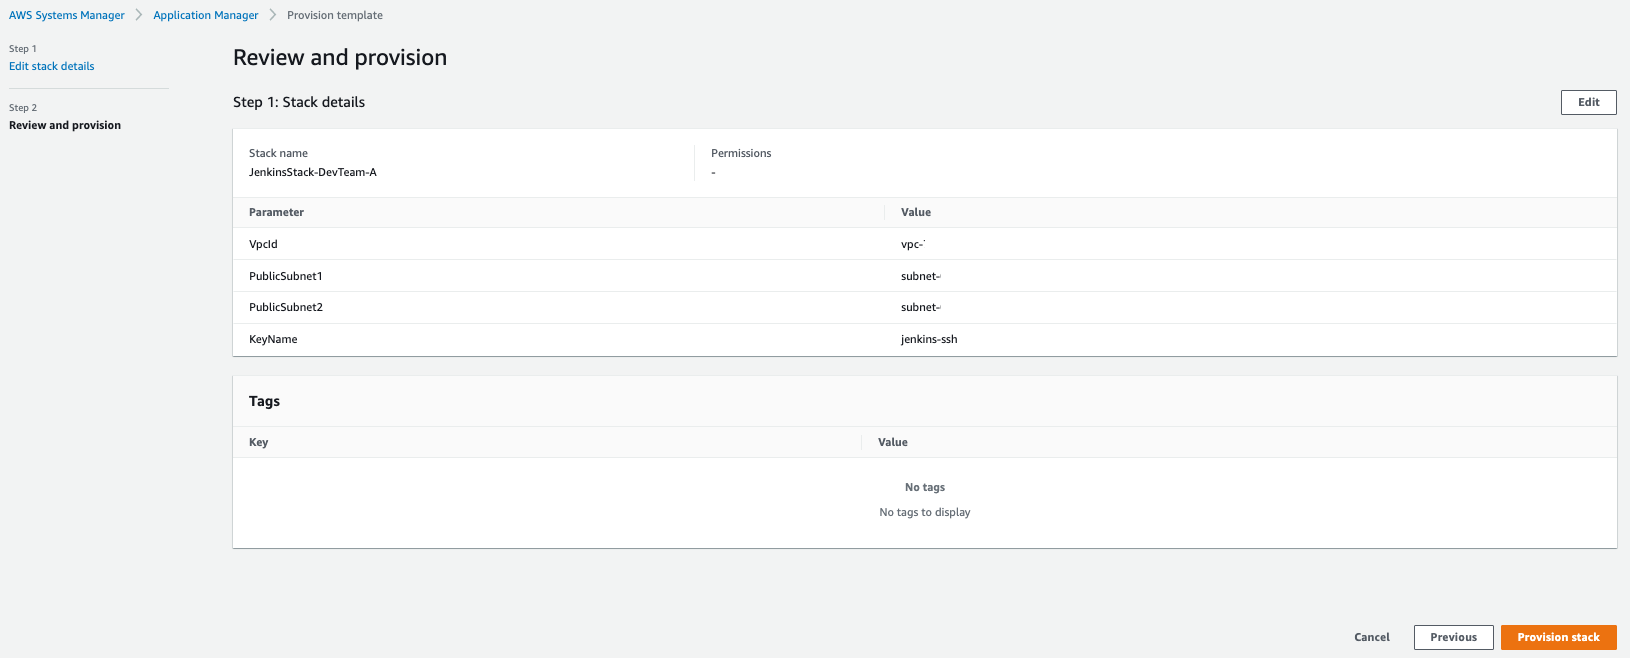
Figure 7: Review and provision
On the details page for the template, choose the Provisioning tab. Under Provision events, you’ll see status and other details.
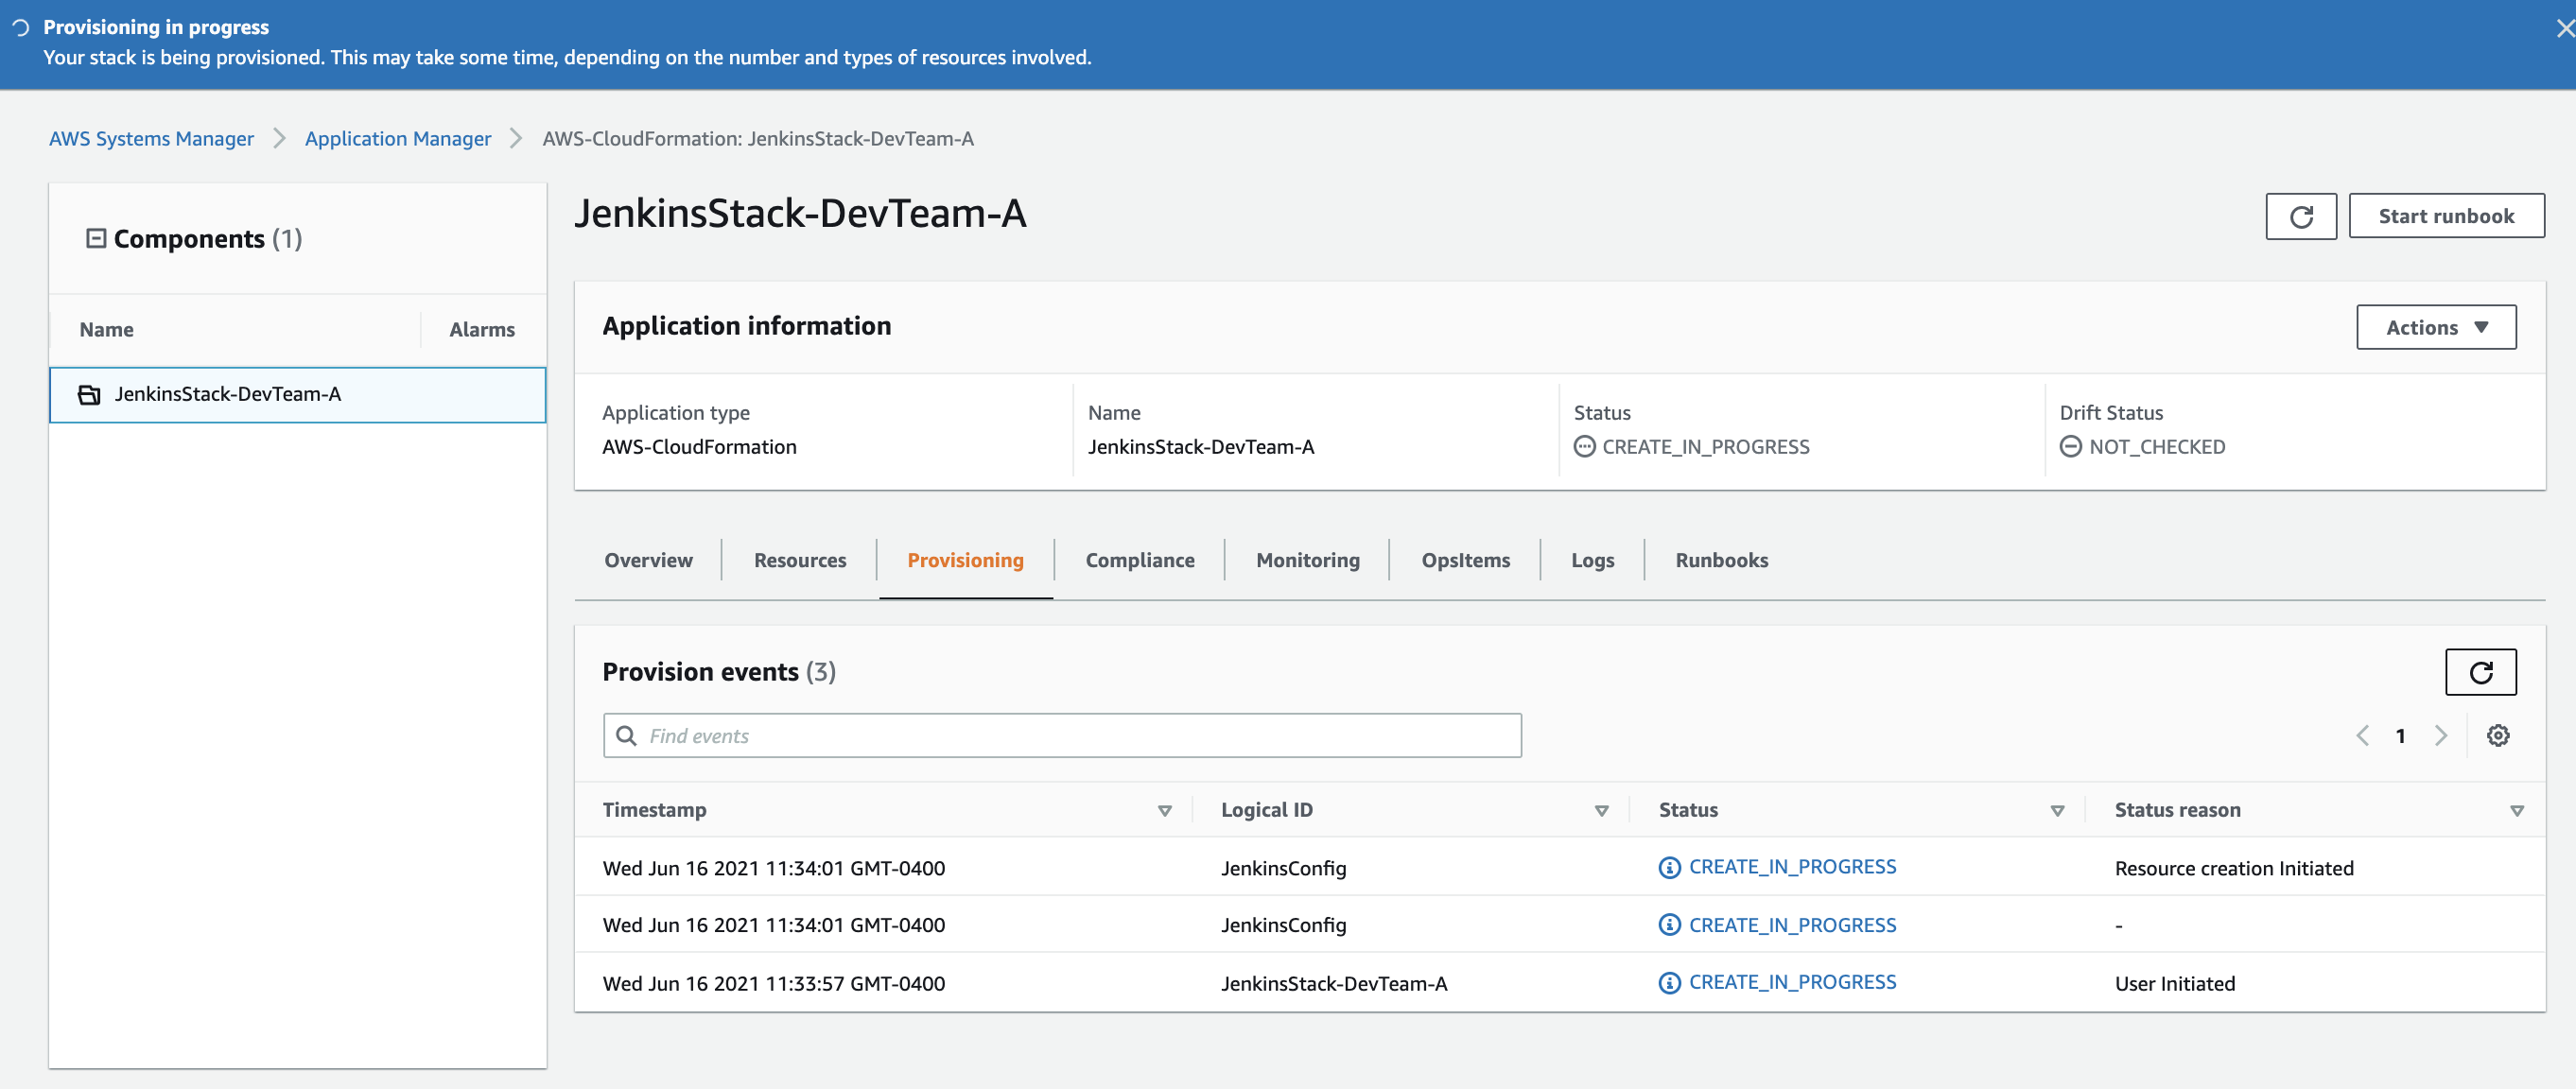
Figure 8: JenkinsStack-DevTeam-A
Now that your Jenkins deployment is completed, you can use the Application Manager dashboard to view operations data about your deployment (for example, deployment status, Amazon CloudWatch alarms, resource configurations, and operational issues) in the context of your Jenkins application and perform remedial actions, if required.
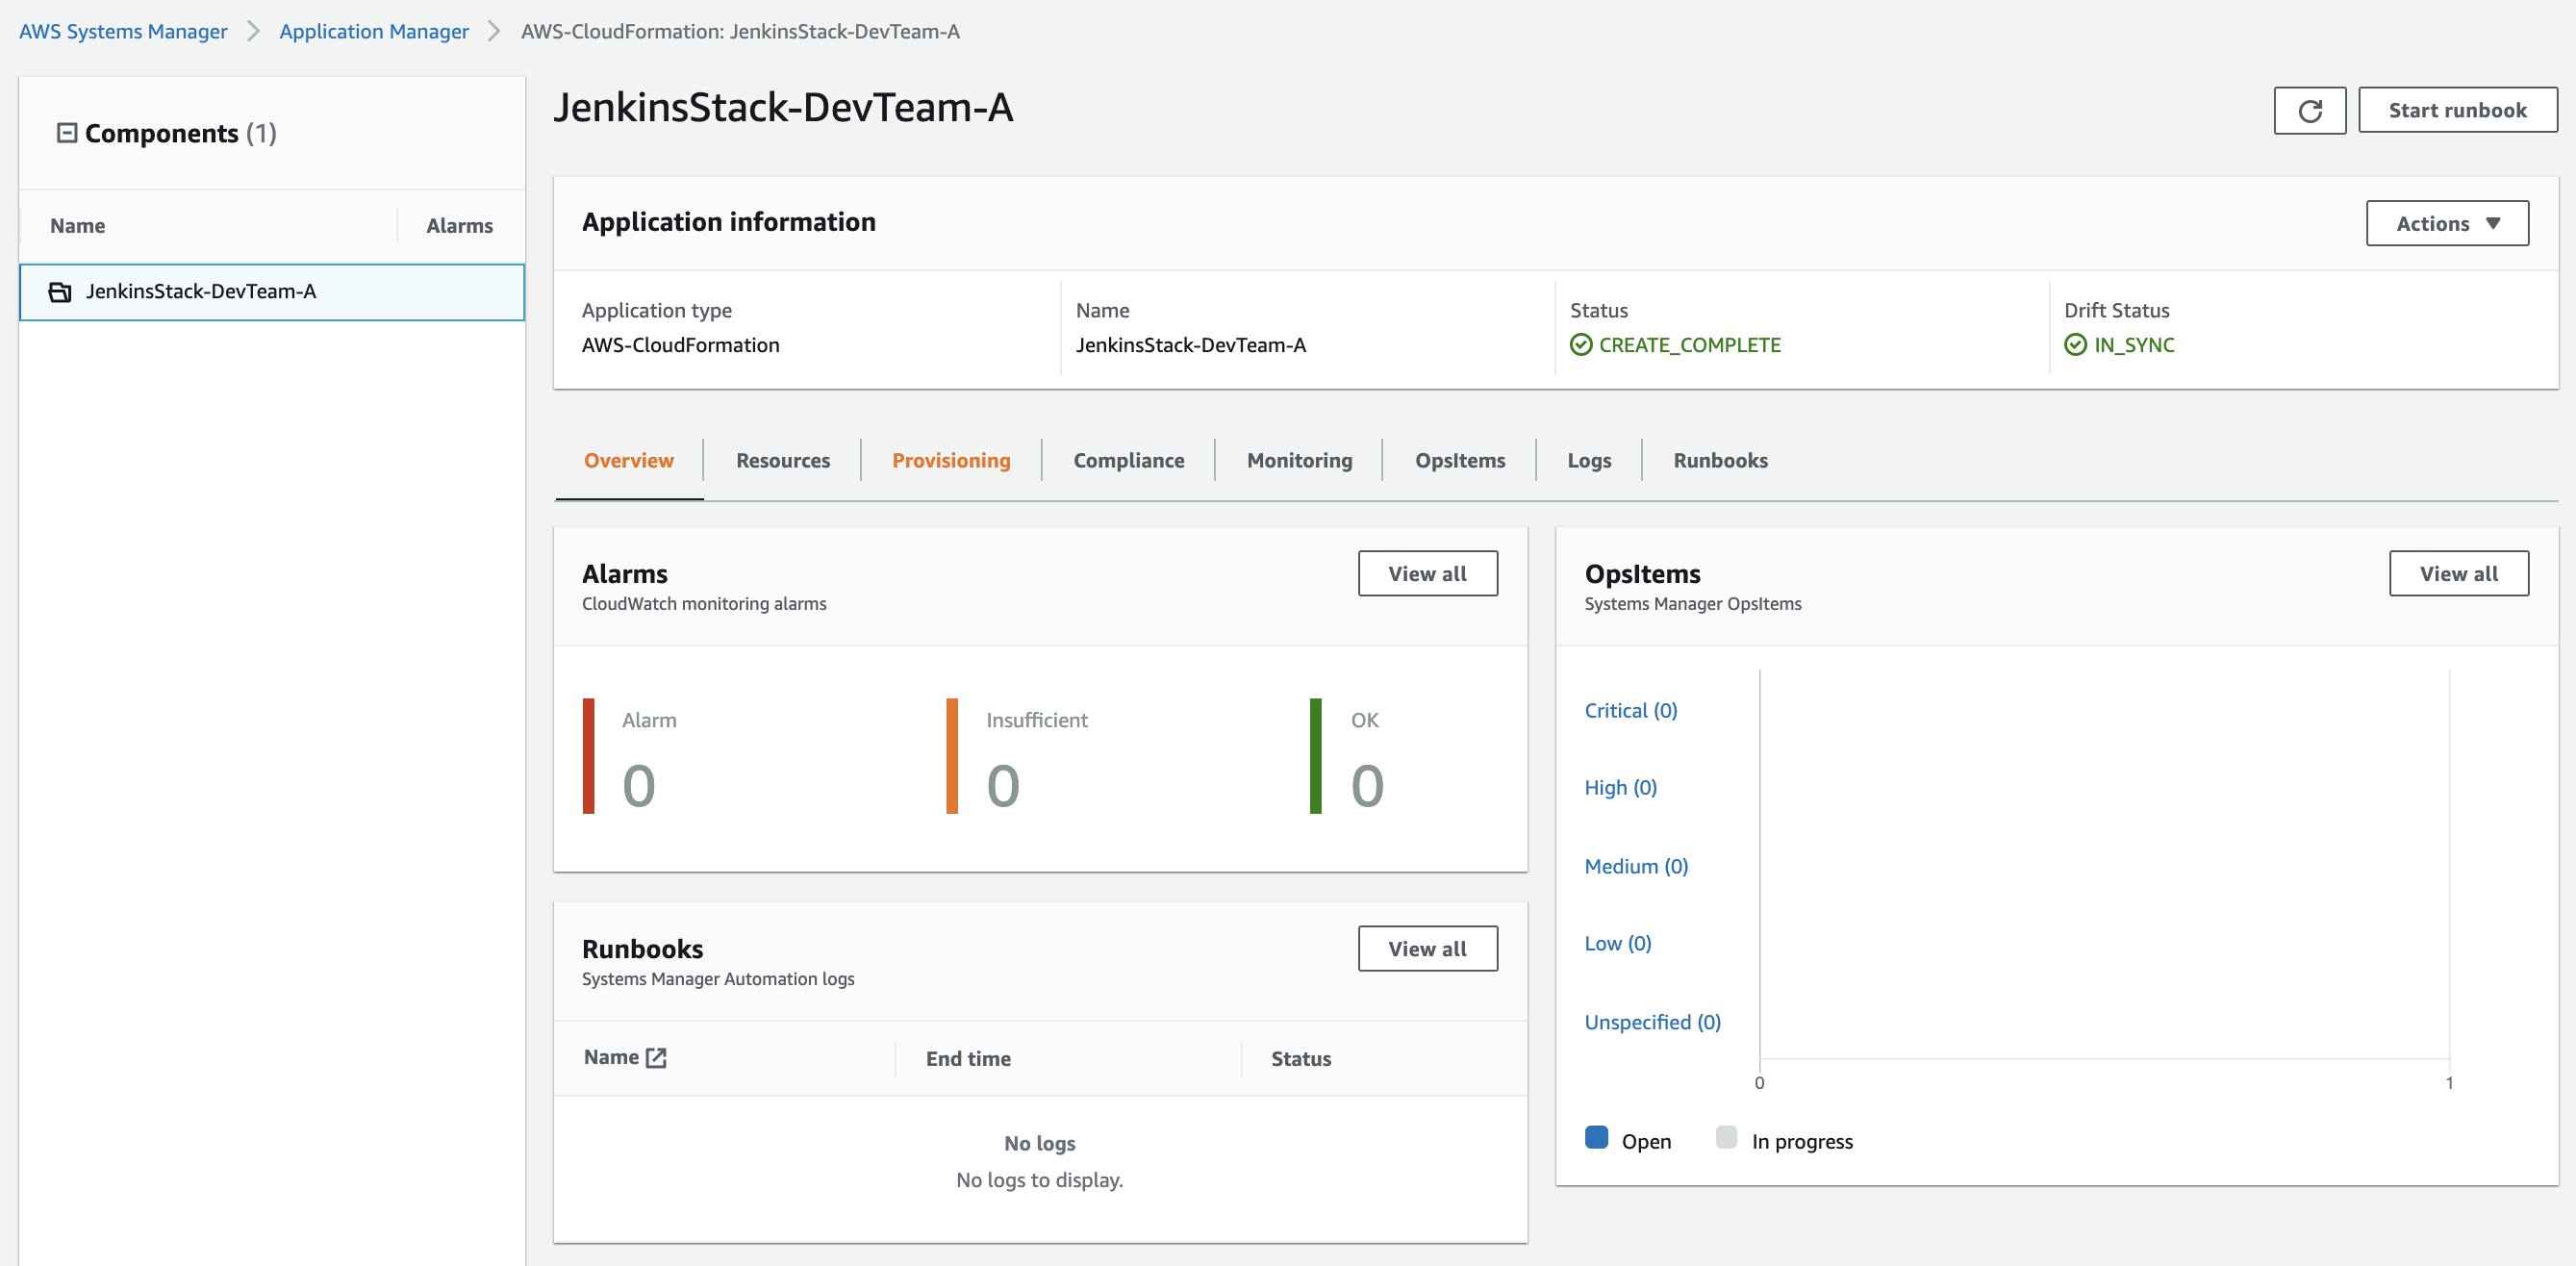
Figure 9: Application Manager dashboard
Manage versions and additional deployments for your template
At this point, you have one version of Jenkins template (the default version) and one deployed stack that uses that template. If you want to deploy the same template into multiple CloudFormation stacks, you can go through these steps again and choose the same template. If you need to add more resources to the Jenkins deployment, extend the template and create a new version with the required resources.
On the Template library page, choose Owned by me, and then choose the Jenkins template. From Actions, choose Edit.

Figure 10: Owned by me tab
Add any required resources to the template, and then choose Save. Clear the Set as default checkbox. You should test the updated stack before you make it the default for creating subsequent stacks.
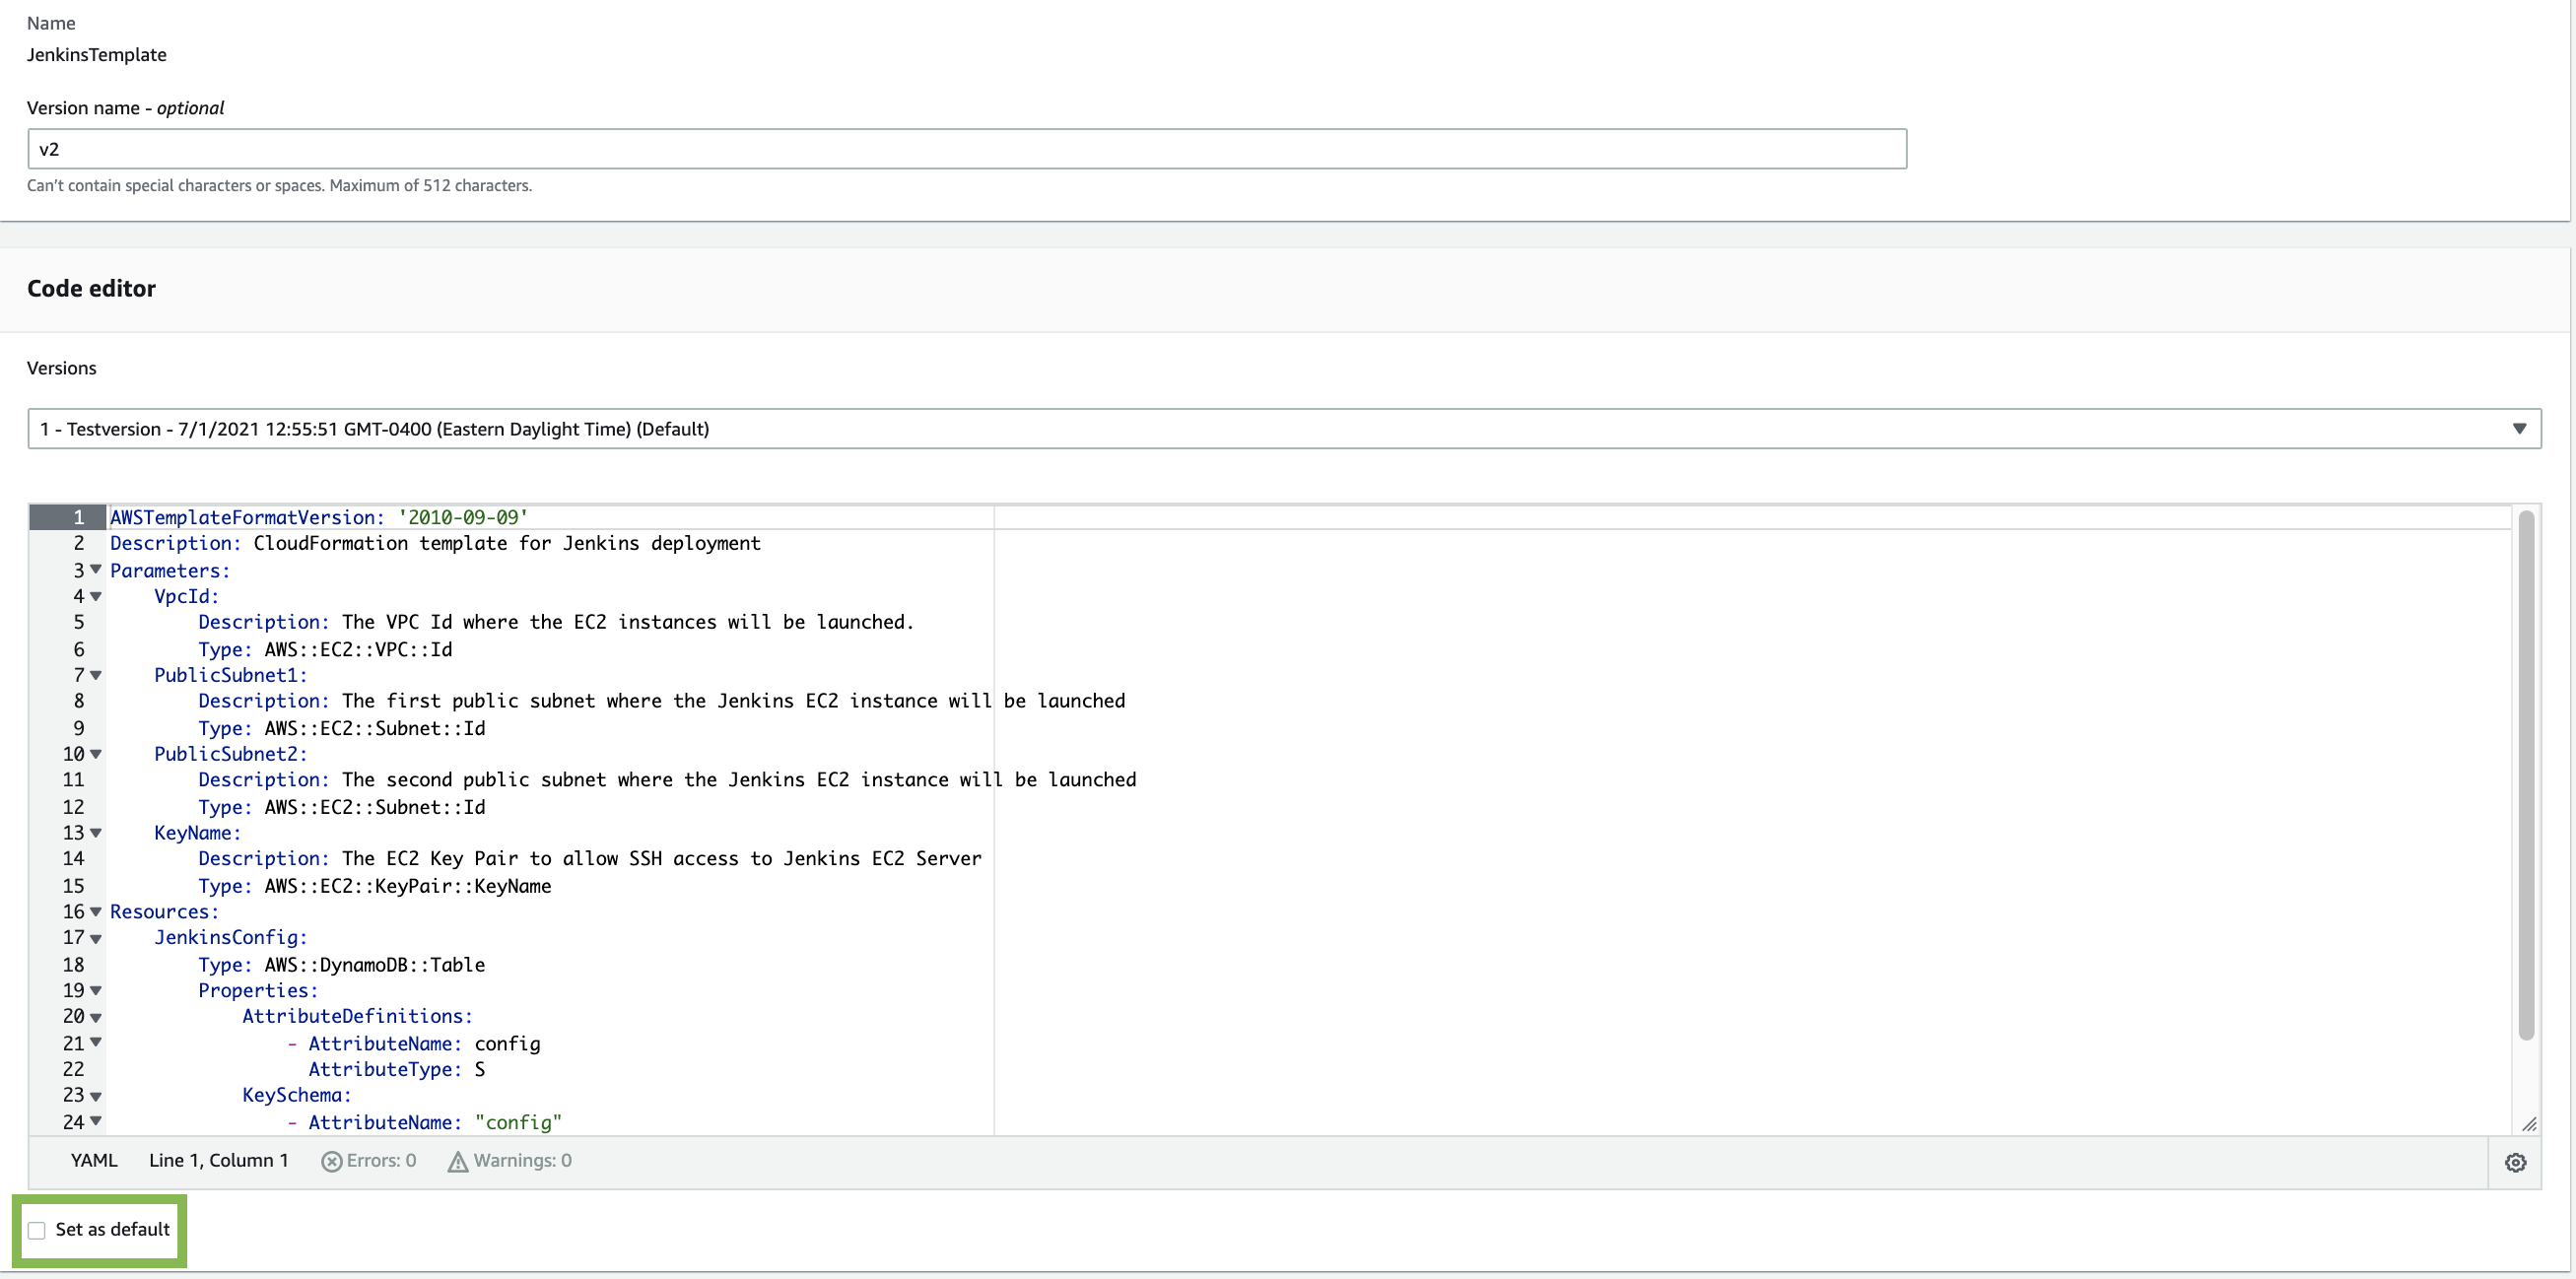
Figure 11: Version 2 of JenkinsTemplate
To compare template versions side by side, choose Compare versions.
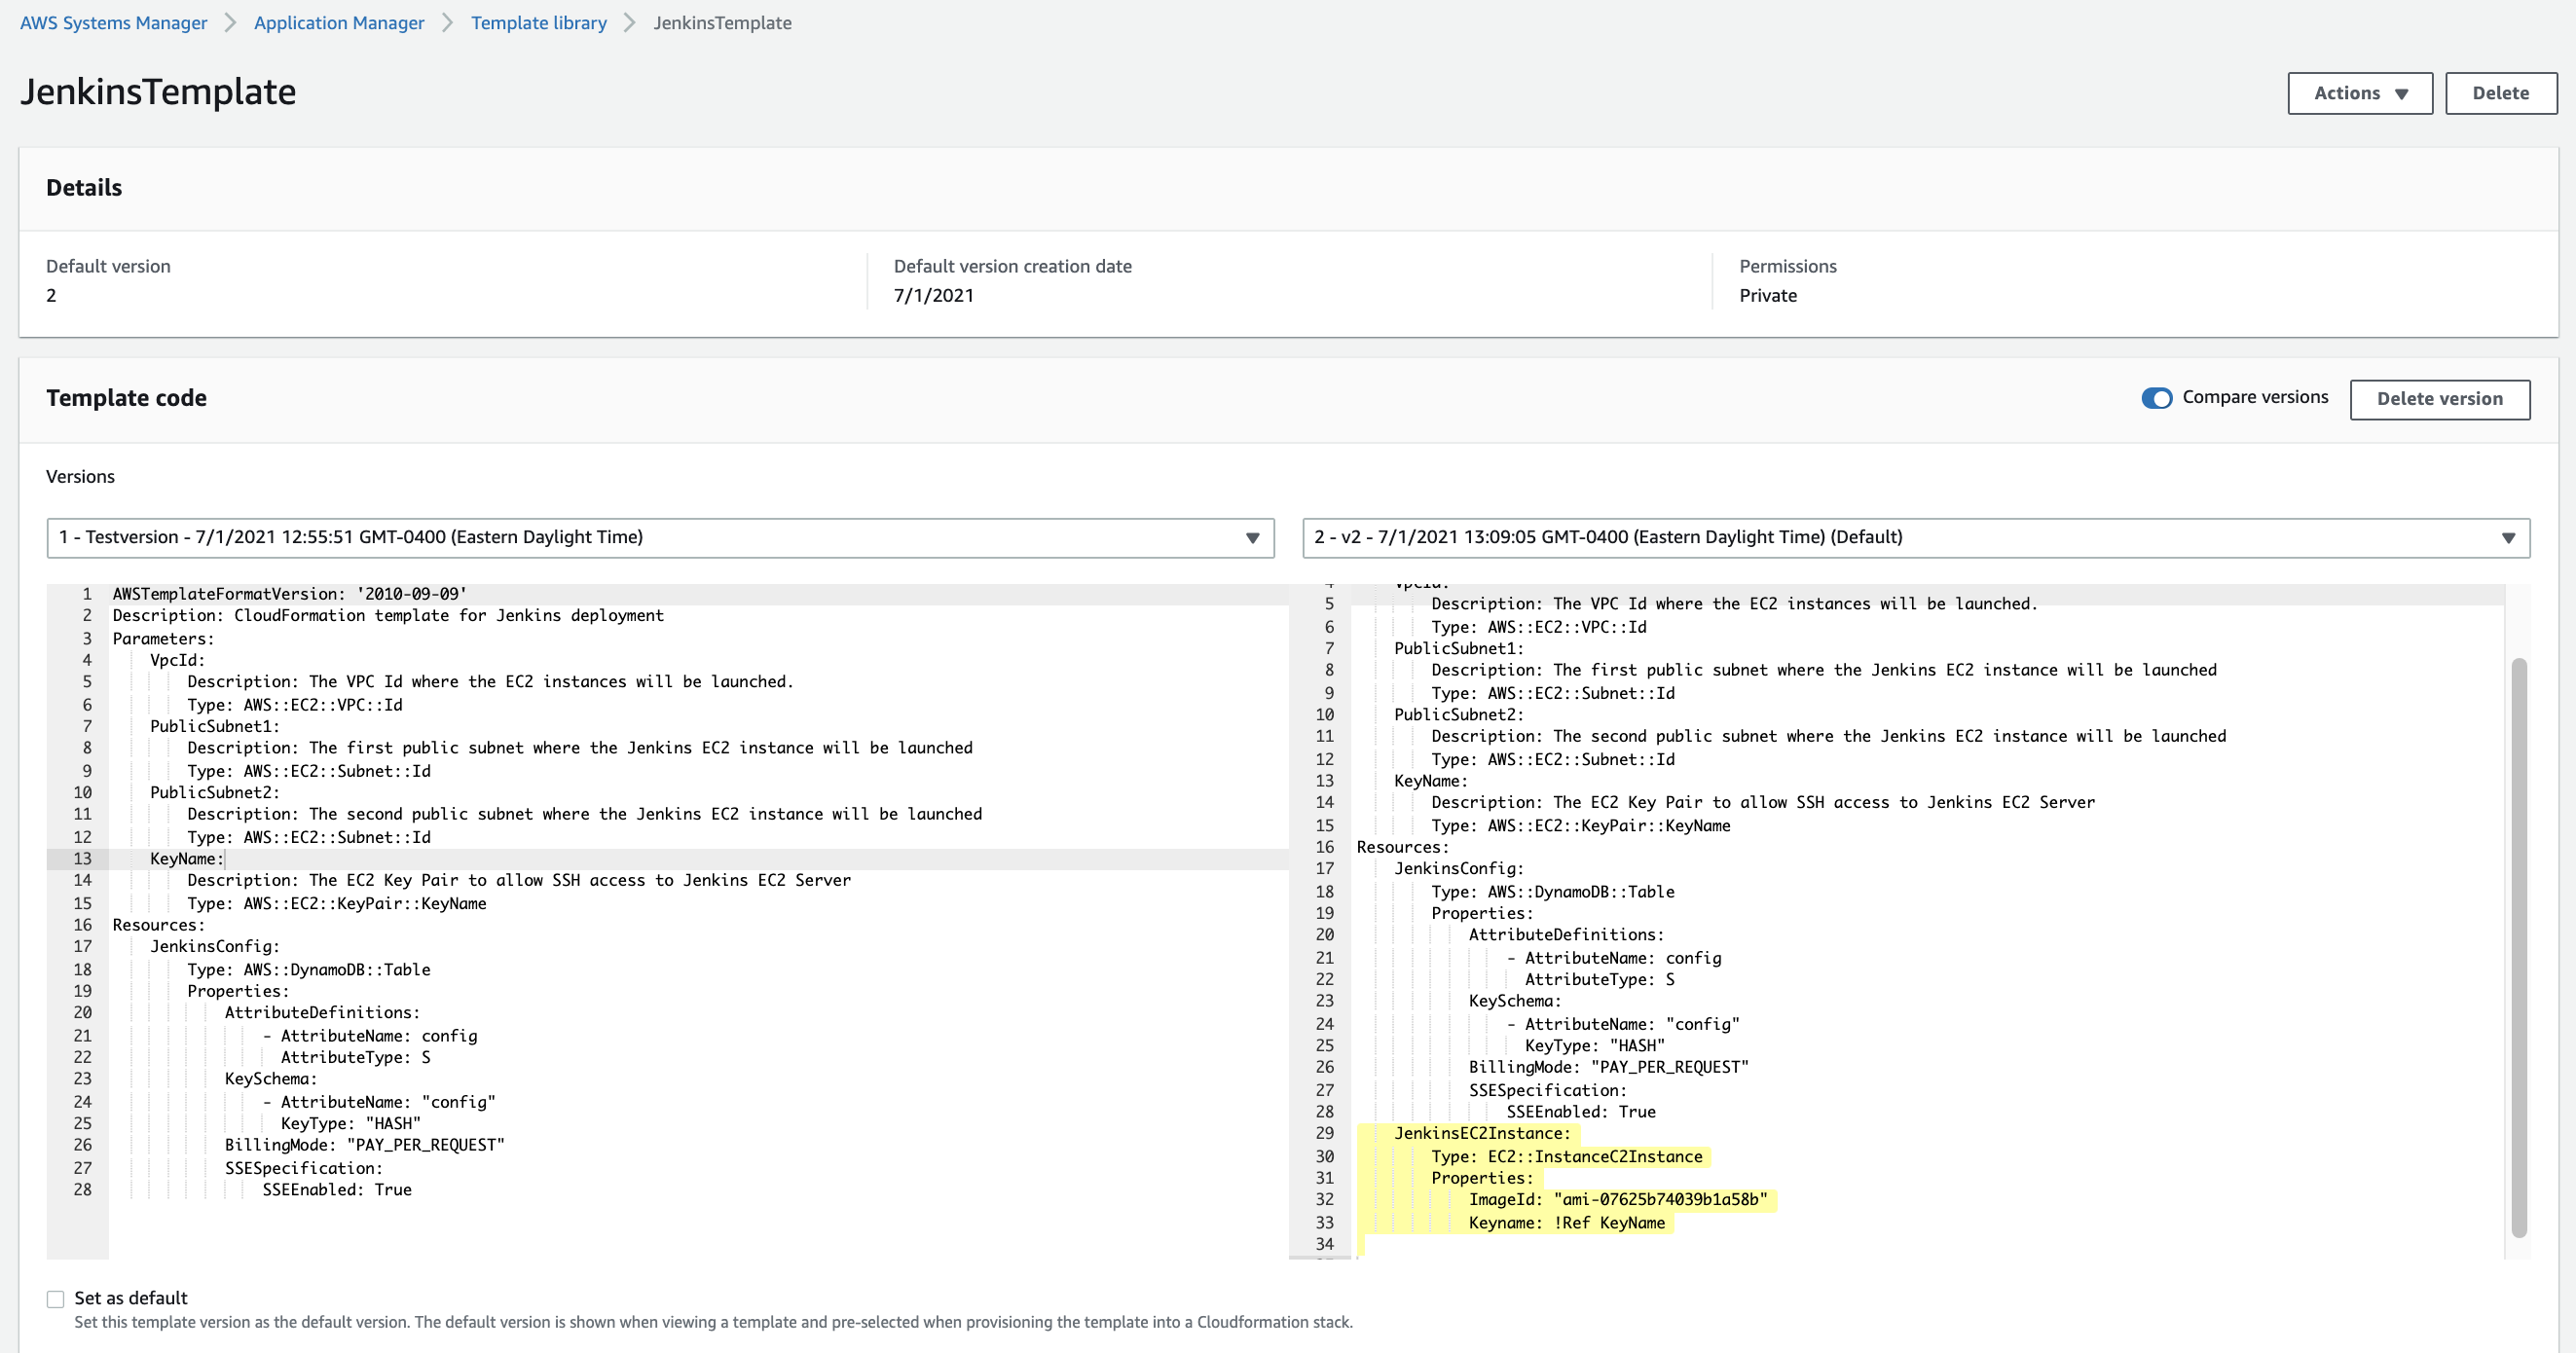
Figure 12: Compare versions
At this point, you can use the updated template to provision another stack. After you confirm that the updated template is working as expected, you can set the current version as the default. When you view the template, you can also see stacks that are deployed using different versions of the template.
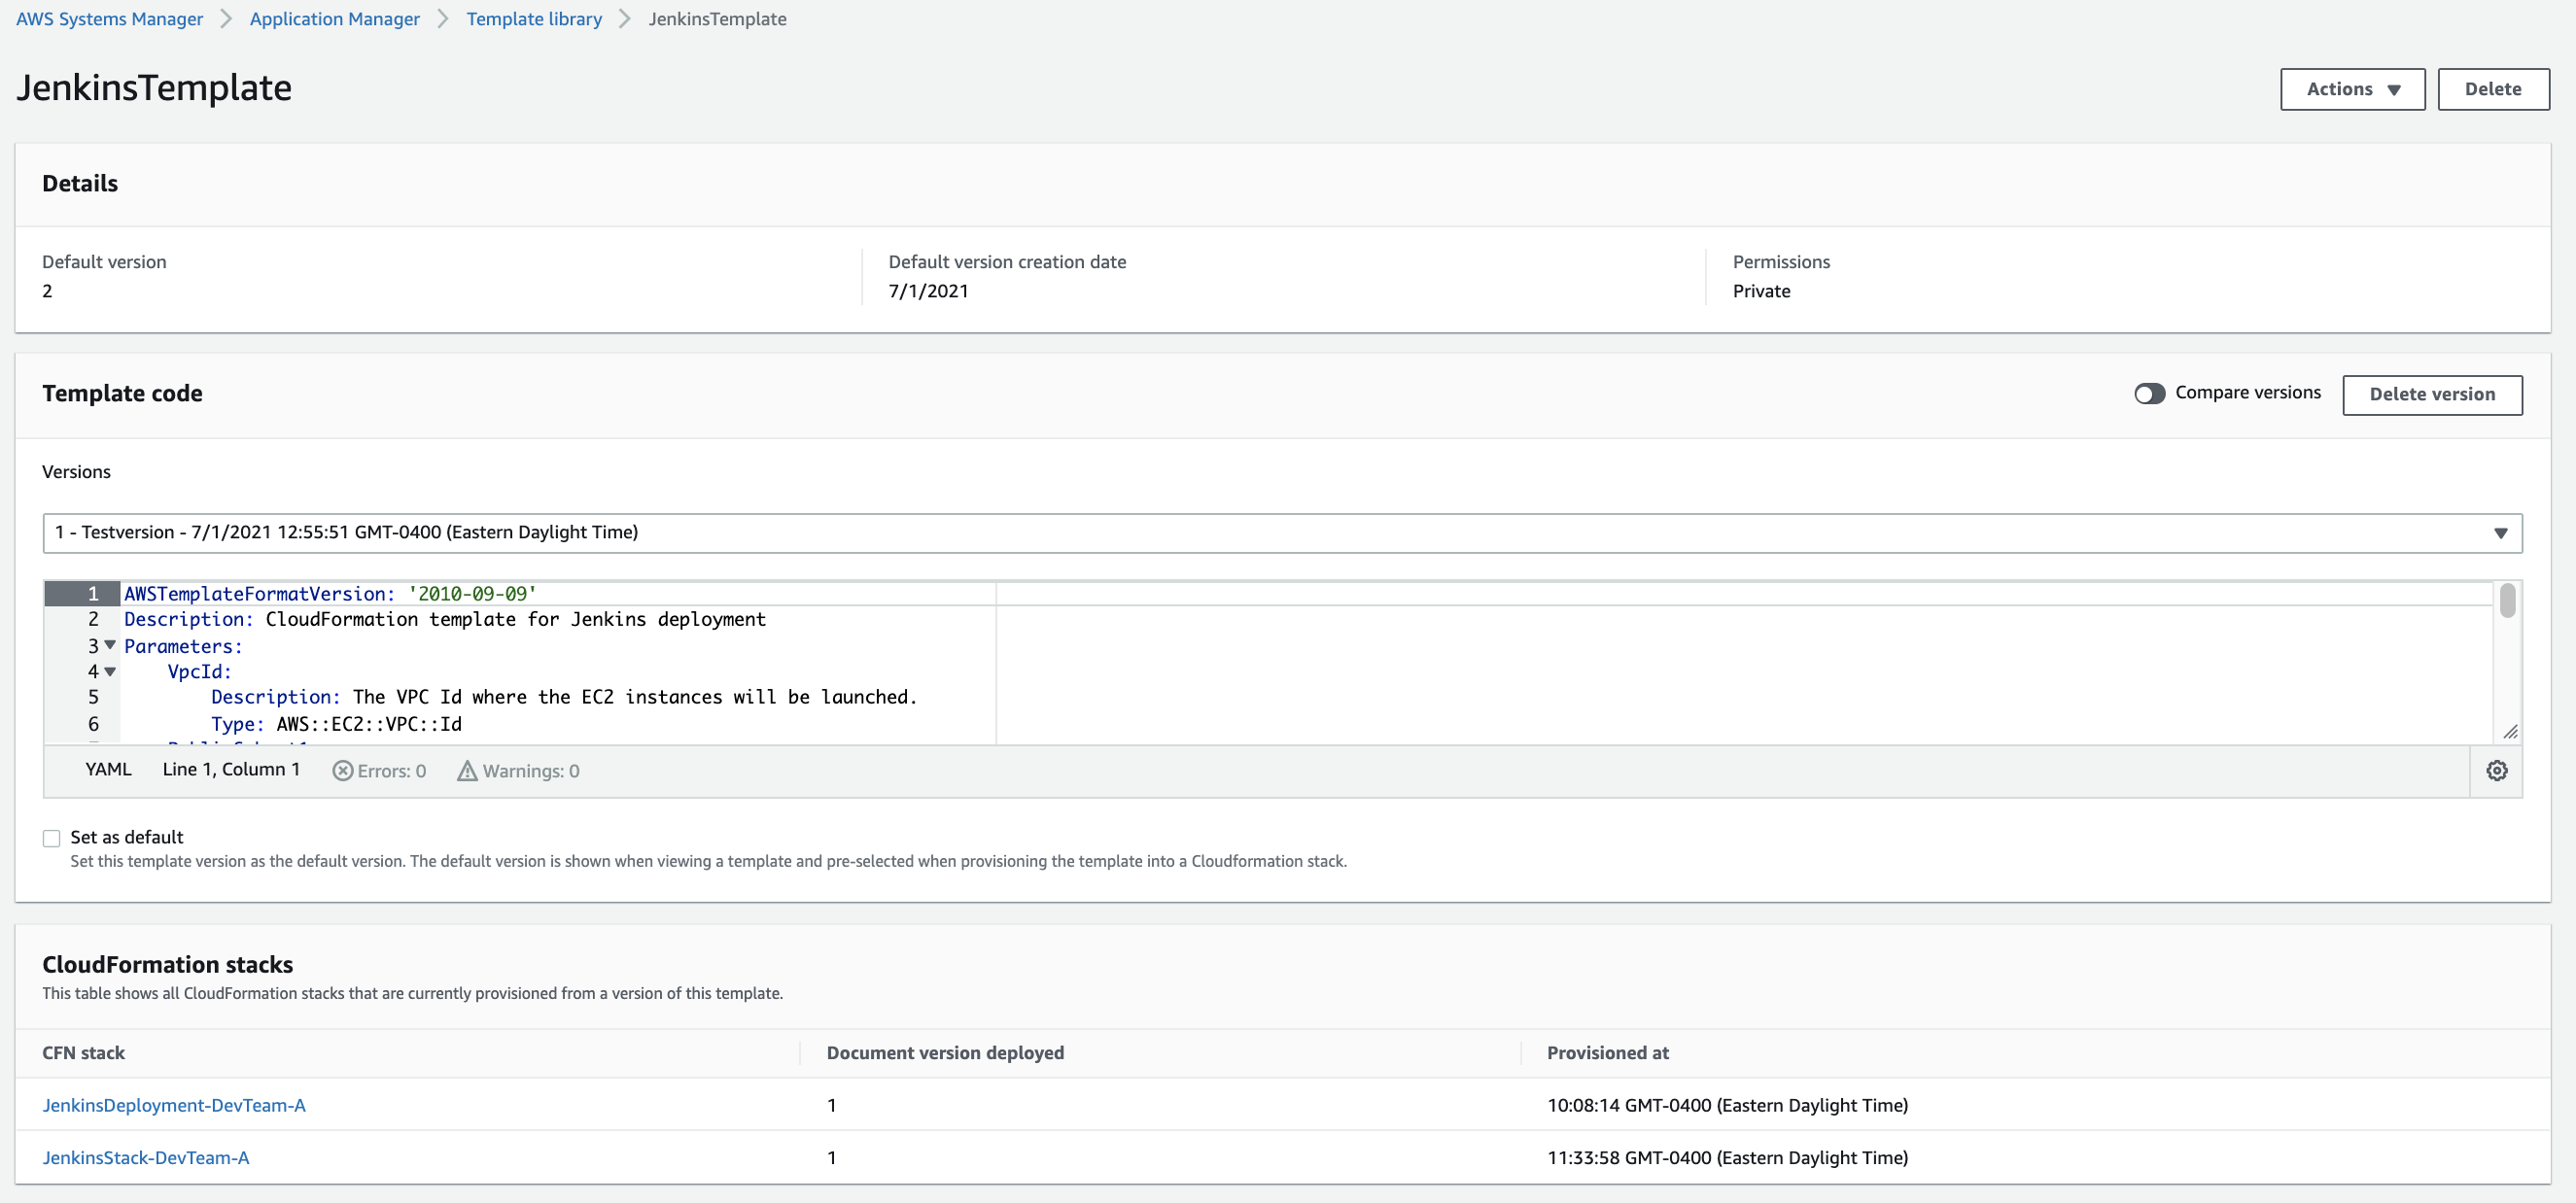
Figure 13: JenkinsTemplate
Conclusion
With today’s launch of the Template Library, you can now manage CloudFormation stack-based applications from Application Manager without onboarding or navigating through different consoles. This simplifies the application management process and makes it easier for IT teams to focus on their core competency.
About the authors