Networking & Content Delivery
Securely Connect your Mobile Device to your AWS environment with AWS Client VPN
AWS Client VPN is a fully-managed, client-based Virtual Private Network (VPN) service used by your remote workforce to securely access resources within AWS and your on-premises network. It’s an elastic service that automatically scales up or down based on demand.
In addition to the free, AWS-provided VPN client, you can also use a common Open VPN client application to connect computers and Android/iOS-based mobile devices to a Client VPN endpoint. Note that the VPN client lets you access your AWS environment. This is different than the AWS Console Mobile Application (which you can use to view and manage resources in your AWS account).
In this post, you’ll follow a walkthrough with detailed steps to deploy an infrastructure stack in your AWS account, and then securely connect your mobile device to it by leveraging Client VPN. You will generate server and client certificates and keys, deploy the infrastructure stack using AWS CloudFormation, download the Client VPN endpoint configuration file, and distribute it to your mobile device. Then, you’ll connect with an OpenVPN mobile app and perform a connectivity test to an Amazon Elastic Compute Cloud (Amazon EC2)-based web server in a VPC.
Solution components
The following components are included in this post’s solution.
AWS Client VPN endpoint: The Client VPN endpoint is the resource that you create and configure to enable and manage client VPN sessions. It’s the resource where all of the client VPN sessions are terminated.
Target networks: A target network is the network that you associate with a Client VPN endpoint. A subnet from a VPC is a target network. Associating a subnet with a Client VPN endpoint lets you establish VPN sessions. You can associate multiple subnets with a Client VPN endpoint for high availability. This is what you’ll be doing by following this post’s walkthrough. All of the subnets must be from the same VPC, and each subnet must belong to a different Availability Zone.
Client VPN network interfaces: When you associate a subnet with your Client VPN endpoint, we create Client VPN network interfaces in that subnet. Traffic that’s sent to the VPC from the Client VPN endpoint is sent through a Client VPN network interface. Then, source network address translation (SNAT) is applied, where the source IP address from the client CIDR range is translated to the Client VPN network interface IP address.
AWS Certificate Manager (ACM): ACM is a service that lets you easily provision, manage, and deploy public and private SSL/TLS certificates for use with AWS services and your internal connected resources. To properly authenticate your mobile device, you’ll generate and upload an SSL/TLS certificate to ACM and rely on it to perform mutual authentication between your mobile device and your Client VPN endpoint.
NAT gateways: A NAT gateway is a Network Address Translation (NAT) service. You can use a NAT gateway so that instances in a private subnet can connect to services outside of your VPC, but external services can’t initiate a connection with those instances. In this solution, NAT gateways are deployed in a highly available configuration, and within two public subnets, so that the Amazon EC2-based web server can download and install Apache after it’s been provisioned.
Amazon EC2-based web server: This Amazon EC2 instance, running Amazon Linux and Apache, is included in this solution for testing. Once you’ve connected your mobile device to your Client VPN endpoint, you can access the instance to test end-to-end connectivity.

Figure 1: Solution overview
Walkthrough
Follow these steps to deploy an infrastructure stack in AWS, and then connect remotely and securely using your mobile device.
Prerequisites
- An AWS account with the required permissions. If you don’t have an AWS account, create and activate one.
- Access to Git.
- A mobile device running an Android or iOS operating system.
- A basic understanding of Secure Sockets Layer/Transport Layer Security (SSL/TLS) certificates.
Generate server and client certificates and keys
Since this walkthrough uses mutual authentication, Client VPN uses certificates to perform authentication between your mobile device and the server.
If you’re using Linux or macOS:
The following procedure uses OpenVPN easy-rsa to generate the server and client certificates and keys. Then it uploads the server certificate and key to ACM.
Step 1: At your command line, clone the OpenVPN easy-rsa repo to your local computer and navigate to the easy-rsa/easyrsa3 folder. easy-rsa is an AWS CLI utility to build and manage a public key infrastructure (PKI) certificate authority (CA):
git clone https://github.com/OpenVPN/easy-rsa.git

 cd easy-rsa/easyrsa3
Step 2: Initialize a new PKI environment:
./easyrsa init-pki
Step 3: To build a new CA, run this command and follow the prompts. The nopass option is used so that you don’t have to enter a CA key passphrase:
./easyrsa build-ca nopass
Step 4: Generate the server certificate and key. The nopass option is used so that the private key is not encrypted:
./easyrsa --san=DNS:server build-server-full server nopass
Step 5: Generate the client certificate and key:
./easyrsa build-client-full client1.domain.tld nopass
Note that if multiple mobile devices will be connecting to the Client VPN, you should repeat this step for each client (end user) to make sure that each one has a unique client certificate and key.
Step 6: Copy the server certificate and key to a new folder, and then navigate into the new folder.
Before you copy the certificates and keys, create the new folder by using the mkdir command. The following example creates a Client VPN walkthrough folder in your home directory:
mkdir ~/client_vpn_walkthrough_folder/

 cp pki/ca.crt ~/client_vpn_walkthrough_folder/

 cp pki/issued/server.crt ~/client_vpn_walkthrough_folder/

 cp pki/private/server.key ~/client_vpn_walkthrough_folder/

 cp pki/issued/client1.domain.tld.crt ~/client_vpn_walkthrough_folder

 cp pki/private/client1.domain.tld.key ~/client_vpn_walkthrough_folder/

 cd ~/client_vpn_walkthrough_folder/
Step 7: Make sure that your default Region is set to the same Region in which you intend to create the Client VPN endpoint (use aws configure to check). Upload the server certificate and key and the client certificate and key to ACM:
aws acm import-certificate --certificate fileb://server.crt --private-key fileb://server.key --certificate-chain fileb://ca.crt
Note the outputted ACM certificate ARN. It’ll be in this format: arn:aws:acm:[region]:[accountId]:certificate/########-####-####-####-############
If you’re using Windows:
The following procedure installs OpenVPN software, uses it to generate the server and client certificates and keys, and then uploads the server certificate and key to ACM.
Step 1: Open the OpenVPN Community Downloads page, download the Windows installer for your version of Windows, and run the installer.
Step 2: Open the EasyRSA releases page and download the ZIP file for your version of Windows. Extract the ZIP file and copy the EasyRSA folder to the \Program Files\OpenVPN folder.
Step 3: Open your command prompt as an Administrator, navigate to the \Program Files\OpenVPN\EasyRSA directory, and run the following command to open the EasyRSA 3 shell:
EasyRSA-Start
Step 4: Initialize a new PKI environment:
./easyrsa init-pki
Step 5: To build a new CA, run this command and follow the prompts. The nopass option is used so that you don’t have to enter a CA key passphrase:
./easyrsa build-ca nopass
Step 6: Generate the server certificate and key. The nopass option is used so that the private key isn’t encrypted:
./easyrsa --san=DNS:server build-server-full server nopass
Step 7: Generate the client certificate and key:
./easyrsa build-client-full client1.domain.tld nopass
Note that if multiple mobile devices will be connecting to the Client VPN, then you should repeat this step for each client (end user) to make sure that each one has a unique client certificate and key.
Step 8: Exit the EasyRSA 3 shell.
exit
Step 9:
Copy the server certificate and key and the client certificate and key to a new folder, and then navigate into the new folder.
Before you copy the certificates and keys, create the new folder by using the mkdir command. The following example creates a Client VPN walkthrough folder in your home directory:
mkdir C:\client_vpn_walkthrough_folder

 copy pki\ C:\client_vpn_walkthrough_folder

 copy pki\issued\server.crt C:\client_vpn_walkthrough_folder

 copy pki\private\server.key C:\client_vpn_walkthrough_folder

 copy pki\issued\client1.domain.tld.crt C:\client_vpn_walkthrough_folder

 copy pki\private\client1.domain.tld.key C:\client_vpn_walkthrough_folder

 cd C:\client_vpn_walkthrough_folder
Step 10: Make sure that your default Region is set to the same Region in which you intend to create the Client VPN endpoint (use aws configure to check). Upload the server certificate and key and the client certificate and key to ACM:
aws acm import-certificate --certificate fileb://server.crt --private-key fileb://server.key --certificate-chain fileb://ca.crt
Note the outputted ACM certificate ARN. It’ll be in this format: arn:aws:acm:[region]:[accountId]:certificate/########-####-####-####-############
Deploy the infrastructure stack
To deploy the infrastructure stack for this walkthrough, you’ll use CloudFormation. CloudFormation speeds up cloud provisioning with infrastructure as code (IaC). This stack includes a VPC, subnets, a private Amazon EC2-based web server, and a Client VPN endpoint.
Step 1: Clone the AWS Git repository to a local directory on your device:
git clone https://github.com/aws-samples/awsclientvpn-mobilewalkthrough
Step 2: Log in to the AWS Management Console and select the AWS Region where you’d like to deploy this stack. In the example, I selected Canada (Central).
Step 3: Open the CloudFormation console.
Step 4: Choose Create Stack, choose Template is ready, and choose Upload a template file. Then, choose File to select client-vpn-cfn.yaml that you saved locally.
Step 5: Choose Next. Enter a stack name, such as MyClientVPNStack. For the Certificate parameter, enter the full ACM certificate ARN that you noted earlier. Choose Next.
Step 6: On the subsequent screens, leave the defaults, and continue to select Next until you arrive at the Review step, and then Choose Create stack.
Step 7: The stack status is initially CREATE_IN_PROGRESS. Click the Refresh button periodically to refresh the status. Upon completion, the status changes to CREATE_COMPLETE.
Step 8: Select the stack’s Outputs tab, and note the WebServerURL value. It’ll be in this format: http://ip-x-x-x-x.[region].compute.internal. You’ll use this later on to test connectivity from your mobile device to the private web server.
Download the Client VPN endpoint configuration file
Next, you’ll download and prepare the Client VPN endpoint configuration file. The configuration file includes the Client VPN endpoint and certificate information required to establish a VPN connection. You must provide this file to the mobile devices that need to connect to the Client VPN endpoint to establish a VPN connection.
Step 1: Open the Amazon VPC console.
Step 2: In the navigation pane, choose Client VPN Endpoints.
Step 3: Select the Client VPN endpoint, and choose Download Client Configuration. Choose Download.
Step 4: Locate the client certificate and key that were copied into the new folder when following the steps in the “Generate server and client certificates and keys” section above:
- Client certificate – client_vpn_walkthrough_folder/client1.domain.tld.crt
- Client key – client_vpn_walkthrough_folder/client1.domain.tld.key
Open the Client VPN endpoint configuration file (that you just downloaded) using your preferred text editor, and add the contents of the client certificate between <cert></cert> tags and the contents of the private key between <key></key> tags.
<cert>


         Contents of client certificate (.crt) file

 </cert>

 <key>


         Contents of private key (.key) file

 </key>
Step 5: Prepend a random string to the Client VPN endpoint DNS name. Locate the line that specifies the Client VPN endpoint DNS name, and prepend a random string to it so that the format is random_string.displayed_DNS_name. For example:
- Original DNS name:
cvpn-endpoint-0102bc4c2eEXAMPLE.prod.clientvpn.ca-central-1.amazonaws.com - Modified DNS name:
asdfa.cvpn-endpoint-0102bc4c2eEXAMPLE.prod.clientvpn.ca-central-1.amazonaws.com
See this sample finalized Client VPN configuration file for reference.
Step 6: Save and close the Client VPN endpoint configuration file.
Distribute the Client VPN endpoint configuration file to your mobile device and connect with an OpenVPN mobile app
There are a few different methods to securely distribute your Client VPN endpoint configuration file to your clients. For this post, you’ll send yourself an email which includes the file as well as your private web server’s URL that can be accessed by your mobile device after it’s successfully connected.
Important: Distributing the Client VPN endpoint configuration file via email is only intended for a development environment. In a production environment, you should utilize a more secure channel to distribute the configuration file to your clients.
Step 1: On your device, write an email to yourself that you can retrieve and read on your mobile device. Attach your Client VPN endpoint configuration file to the email. After doing that, include your private web server’s URL in the body of the email which you noted at the end of the “Deploy the required infrastructure stack” section above.
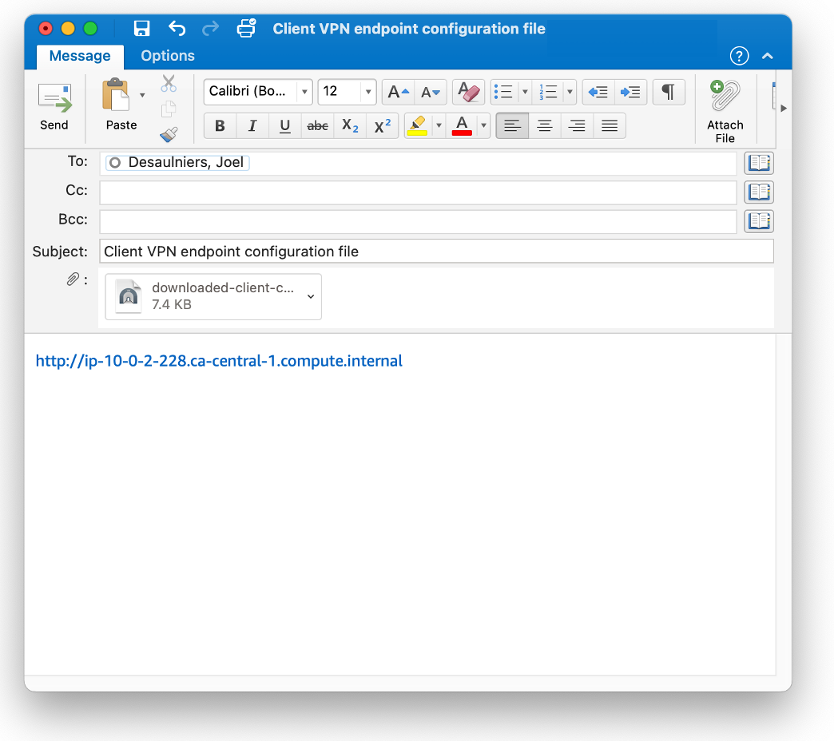
Figure 2: Send an email to yourself
Step 2: On your mobile device, download an OpenVPN mobile app. If you’re using an iOS device, then you can find one in the App Store. If you’re using an Android device, search in Google Play. For this walkthrough, search for and download the OpenVPN Connect app and wait until it’s finished downloading.
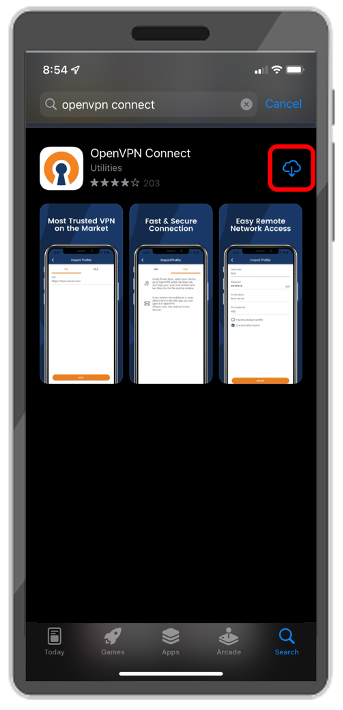
Figure 3: Download an OpenVPN app onto your mobile device
Step 3: Open your mobile device’s email client and retrieve the email that you just received from your device. Select the Client VPN endpoint configuration file and choose to open it with OpenVPN Connect:
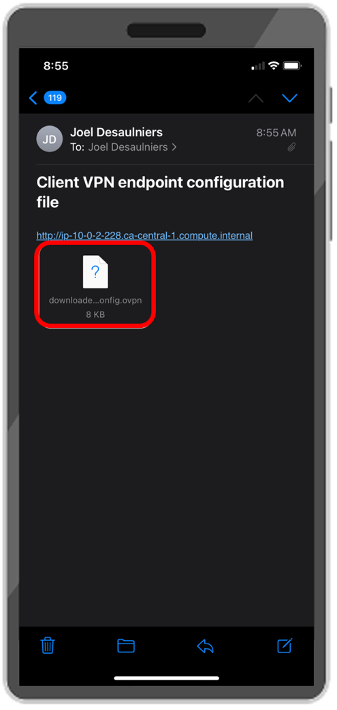
Figure 4: Open the email containing the Client VPN endpoint configuration file
Step 4: In the OpenVPN Connect mobile app, select Add to import the VPN profile:

Figure 5: Add the VPN profile
Step 5: Choose the toggle switch to securely connect to your Client VPN endpoint:
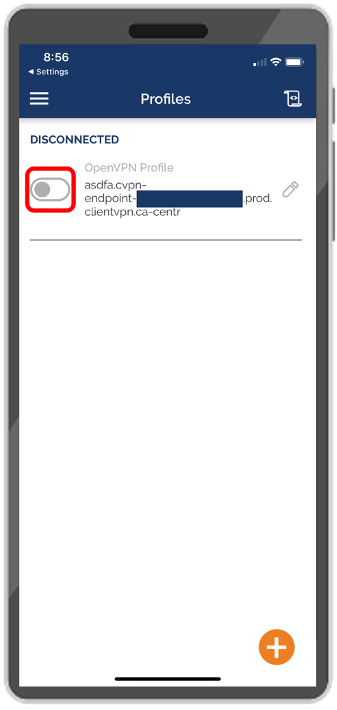
Figure 6: Choose the toggle switch
If it doesn’t connect, try closing and re-opening the app. Once the connection is successful, the toggle switch will turn green:

Figure 7: Successful Client VPN connection
Step 5: Return to your mobile device’s email client, and retrieve the email that you previously received from your device. Choose the URL in the body of the email:
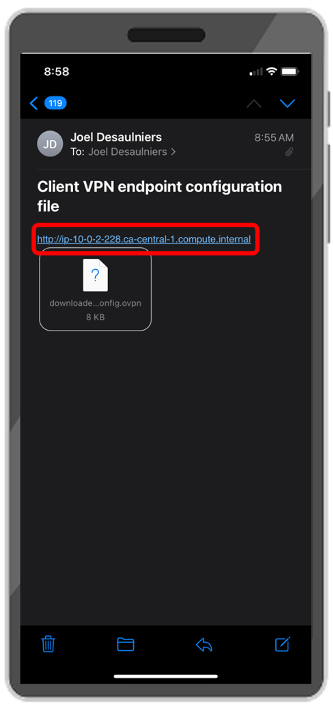
Figure 8: Choose the URL in the body of the email
This will open a web browser on your mobile device and validate that you can load the web content on your private web server running on Amazon EC2:
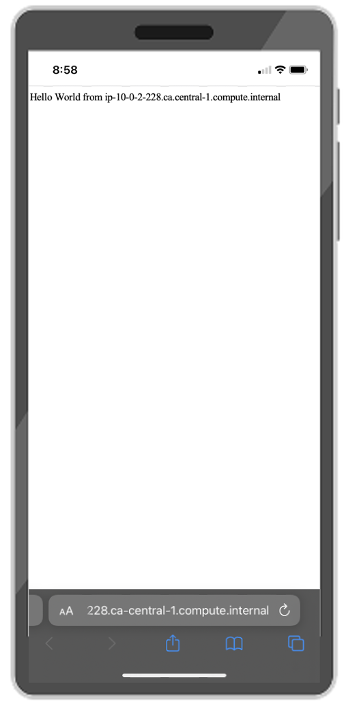
Figure 9: Validate that you can load the web content with your mobile device’s browser
Congratulations, you’ve successfully connected your mobile device to AWS by using Client VPN!
Cleanup
Terminate the resources that were deployed for this walkthrough to avoid unnecessary costs.
Step 1: On your mobile device, go to your OpenVPN Connect mobile app and choose on the green switch. This will disconnect you from the Client VPN endpoint.
Step 2: Remove the app from your mobile device.
Step 3: On your device, open the CloudFormation console.
Step 4: Select the stack that you created earlier, such as MyClientVPNStack.
Step 5: Choose Delete, then choose Delete Stack.
Step 6: The stack status is initially DELETE_IN_PROGRESS. Click the Refresh button periodically to refresh its status. The status changes to DELETE_COMPLETE after it’s finished, and the stack name no longer appears in your list of active stacks.
Step 7: At your CLI, delete the imported certificate in ACM. Make sure that you correctly enter the full ACM certificate ARN that you noted earlier:
aws acm delete-certificate --certificate-arn arn:aws:acm:[region]:[accountId]:certificate/########-####-####-####-############
Conclusion
By reading this post and following my walkthrough, you deployed an infrastructure stack in your AWS account, securely connected your mobile device to it using Client VPN, and then accessed a private, Amazon EC2-based web server to test end-to-end connectivity.
Although Client VPN can be used to allow remote access to VPC-based resources, such as Amazon EC2 instances, it also enables access to other AWS services, such as Amazon Simple Storage Service (Amazon S3), access to networks via AWS PrivateLink, or other resources via an internet gateway. Furthermore, you can provide access to your on-premises network through a hybrid network connection.
An update was made on June 27, 2024: An earlier version of this post used command line options to generate the server certificate and key that have become obsolete after EasyRSA removed the default SAN for server cert on March 3, 2024. The post has been updated to include improved EasyRSA command line options for explicitly specifying the SAN.