AWS Public Sector Blog
How to manage Amazon SageMaker code with AWS CodeCommit
Managing the influx of data, and designing strategies to draw effective insights from the deluge of information, is key for public sector organizations looking to innovate. For example, as the 2020 National Data Strategy states, the UK government is taking new action to improve data use in order to experiment and drive a new era of growth to benefit citizens.
But to accomplish these goals, government agencies need talent. And according to a Deloitte study, data science jobs typically take 45 days to fill—five days longer than the US market average. A poll from KDnuggets, a popular data scientist community, found that half of the voters stayed at the previous job two years or less, with government as the third least popular industry to work among data scientists. Longer hiring times, data scientist rotation, and a gap of data scientists working for government organizations can cause project delays and higher costs, holding governments back from pursuing machine learning (ML) efforts.
To help protect investments on ML, government organizations can securely store ML source code. Storing Amazon SageMaker Studio code in an AWS CodeCommit repository enables you to keep them as standalone documents to reuse in the future.
SageMaker Studio provides a single, web-based visual interface where you can perform all ML development steps required to prepare data and build, train, and deploy models.
Read on to learn the steps to configure a git-based repository on CodeCommit to manage ML code developed with SageMaker.
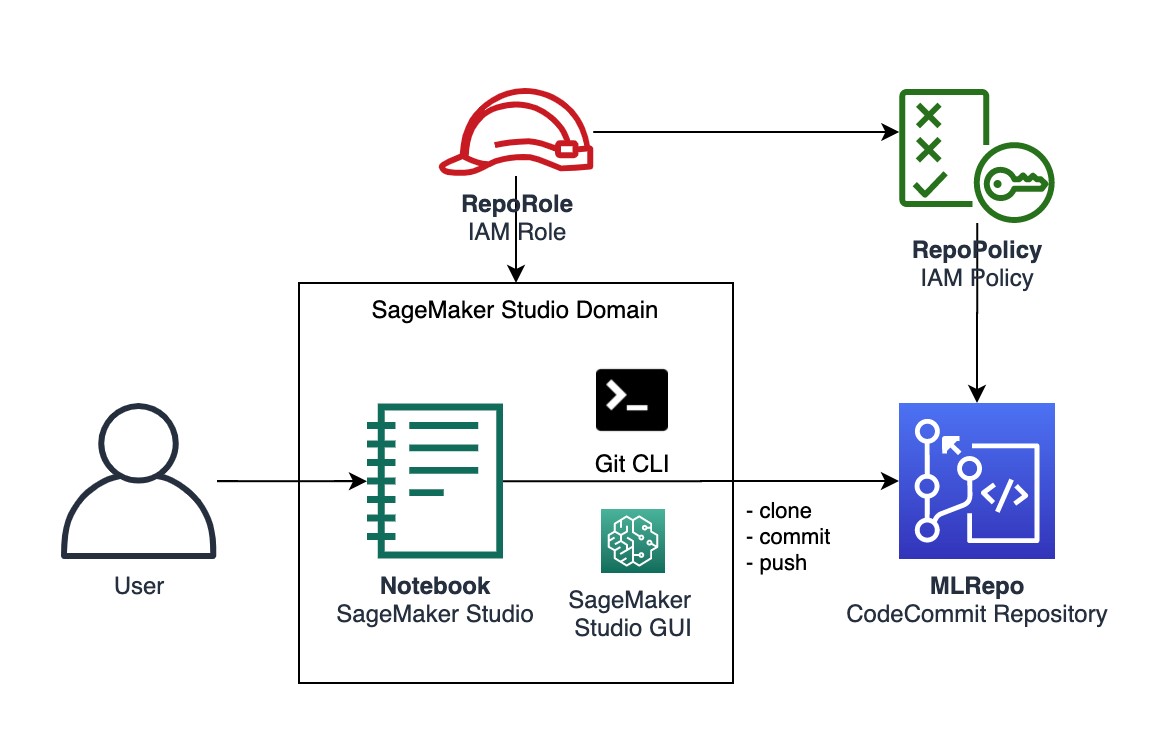
Figure 1: Manage Amazon SageMaker code with AWS CodeCommit architecture
Create a code repository in CodeCommit
1. Sign in to the AWS Management Console and open the CodeCommit console.
2. Choose Repositories on the left menu.
3. To create a CodeCommit repository, choose Create repository.
- For Repository name, enter
MLRepo.

Figure 2: Create repository
4. On the repository panel, choose Clone URL, then choose Clone HTTPS and temporarily save the URL.
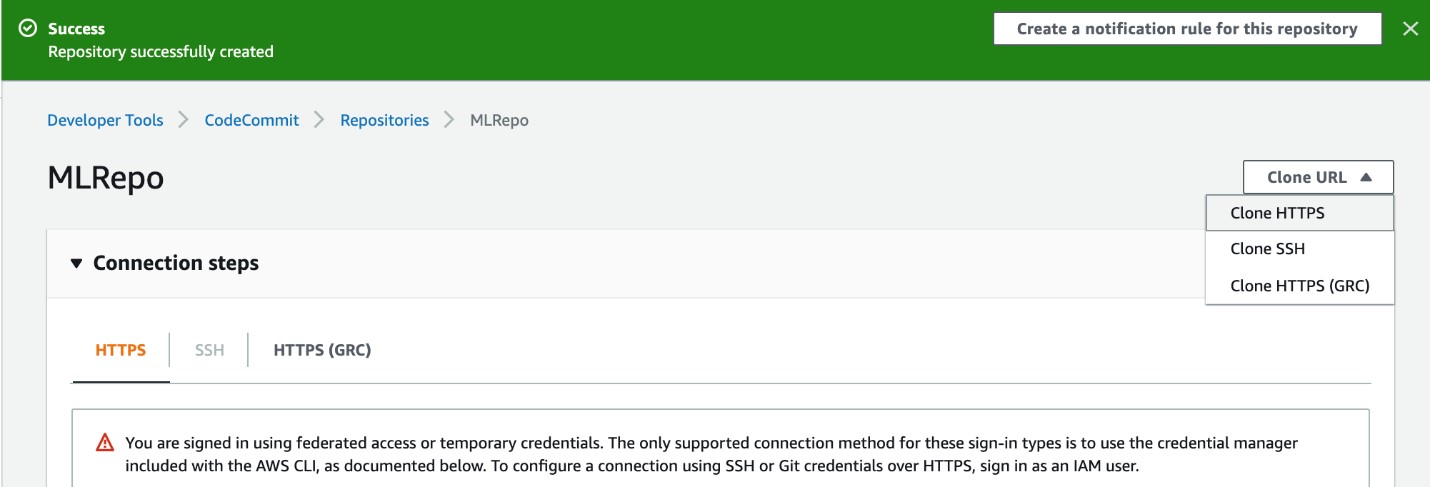
Figure 3: Clone HTTPS
Create an AWS Identity and Access Management (IAM) role for SageMaker
To create the IAM policy:
1. Open the IAM console.
2. Choose Policies on the left menu and then choose Create policy.
3. Choose the JSON tab and copy paste the JSON bellow, replacing <<Region>> and <<AccountId>> with your own.
4. (Optional) To find your account number, choose your username at the top right corner of the screen.

Figure 4
{
    "Version": "2012-10-17",
    "Statement": [
        {
            "Sid": "VisualEditor1",
            "Effect": "Allow",
            "Action": "codecommit:*",
            "Resource": "arn:aws:codecommit:<<Region>>:<<AccountId>>:MLRepo"
        }
    ]
}
5. Choose Next:Tags and then choose Next:Review.
6. For Name, enter MLRepoPolicy and choose Create policy.
To create the IAM role:
1. Choose Roles on the left menu and then choose Create role.
2. Under the AWS service trusted entity type, choose SageMaker and then choose Next:Permissions.
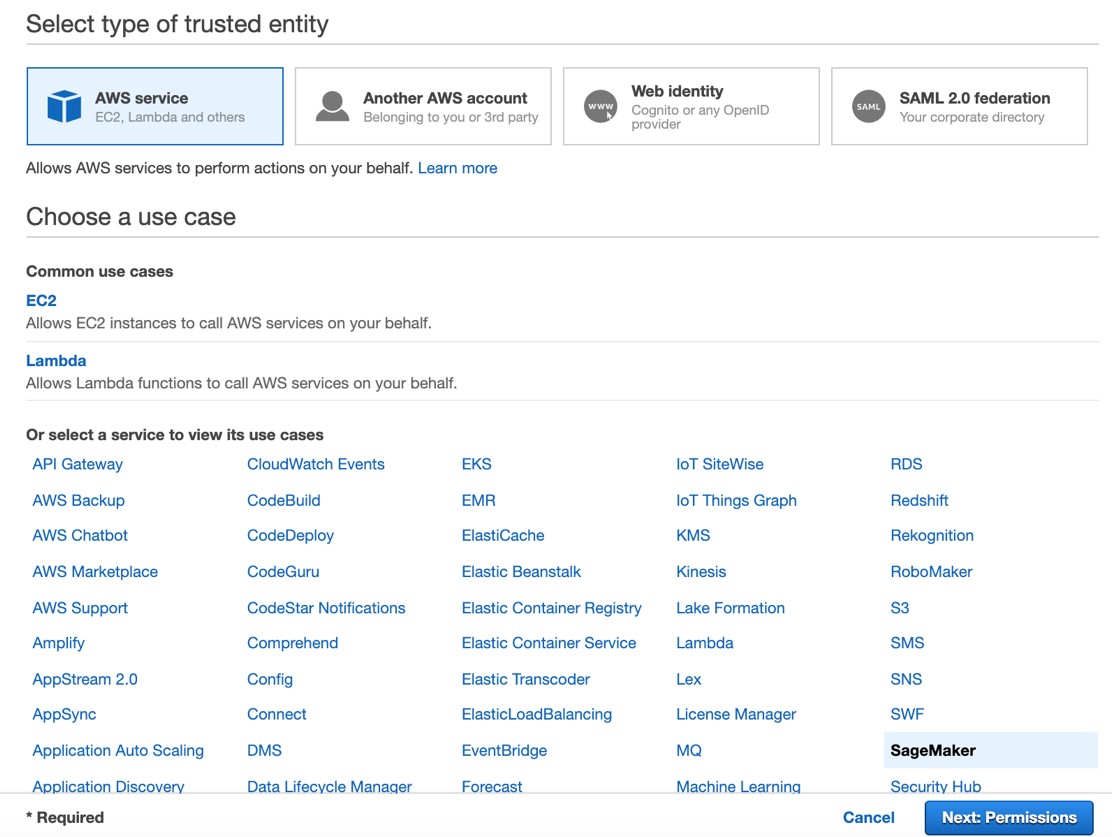
Figure 5: Under the AWS service trusted entity type, select SageMaker and then choose Next:Permissions.
3. Choose Next two times to accept the default permissions and tags. Enter SageMakerRepoRole into the Role name and choose Create role. You’ve created the role.
4. Now, choose SageMakerRepoRole on the green confirmation message.

Figure 6: Chose SageMakerRepoRole.
5. Choose Attach policy and enter MLRepoPolicy into the search bar. Choose the checkbox next to the MLRepoPolicy and then choose Attach Policy.
6. Under the Permissions tab, make sure that the MLRepoPolicy inline policy is attached to the role.

Figure 7: Under Permissions, make sure the MLRepoPolicy inline policy is attached to the role.
Set up SageMaker Studio
1. Onboard to SageMaker Studio using the quick start.
- For User name, enter a user name of your choosing.
- For Execution role, choose the SageMakerRepoRole created before.

Figure 8
When SageMaker completes the setup, the status under Studio Summary will be Ready, and you’ll find the user name you created.
2. On the Studio Control Panel, choose Open Studio next to the user name.

Figure 9: On the Studio Control Panel, choose Open Studio next to the user name.
3. Wait for Studio to load.
4. In Studio, in the left sidebar, choose the Git icon (identified by a diamond with two branches), then choose Clone a Repository.

Figure 10: Clone a repository.
5. For the URI, enter the HTTPS URL of the CodeCommit repository you created earlier, then choose Clone.
6. In the left sidebar, choose the file browser icon. You will find a folder with your repository MLRepo cloned.

Figure 11: Check out your cloned repo.
Working with the CodeCommit repository on SageMaker Studio (using the Git UI)
1. In the file browser, open the MLRepo folder (or double click).
2. From the menu, choose File, New, Notebook.
- For Select Kernel, choose Python 3 (Data Science).
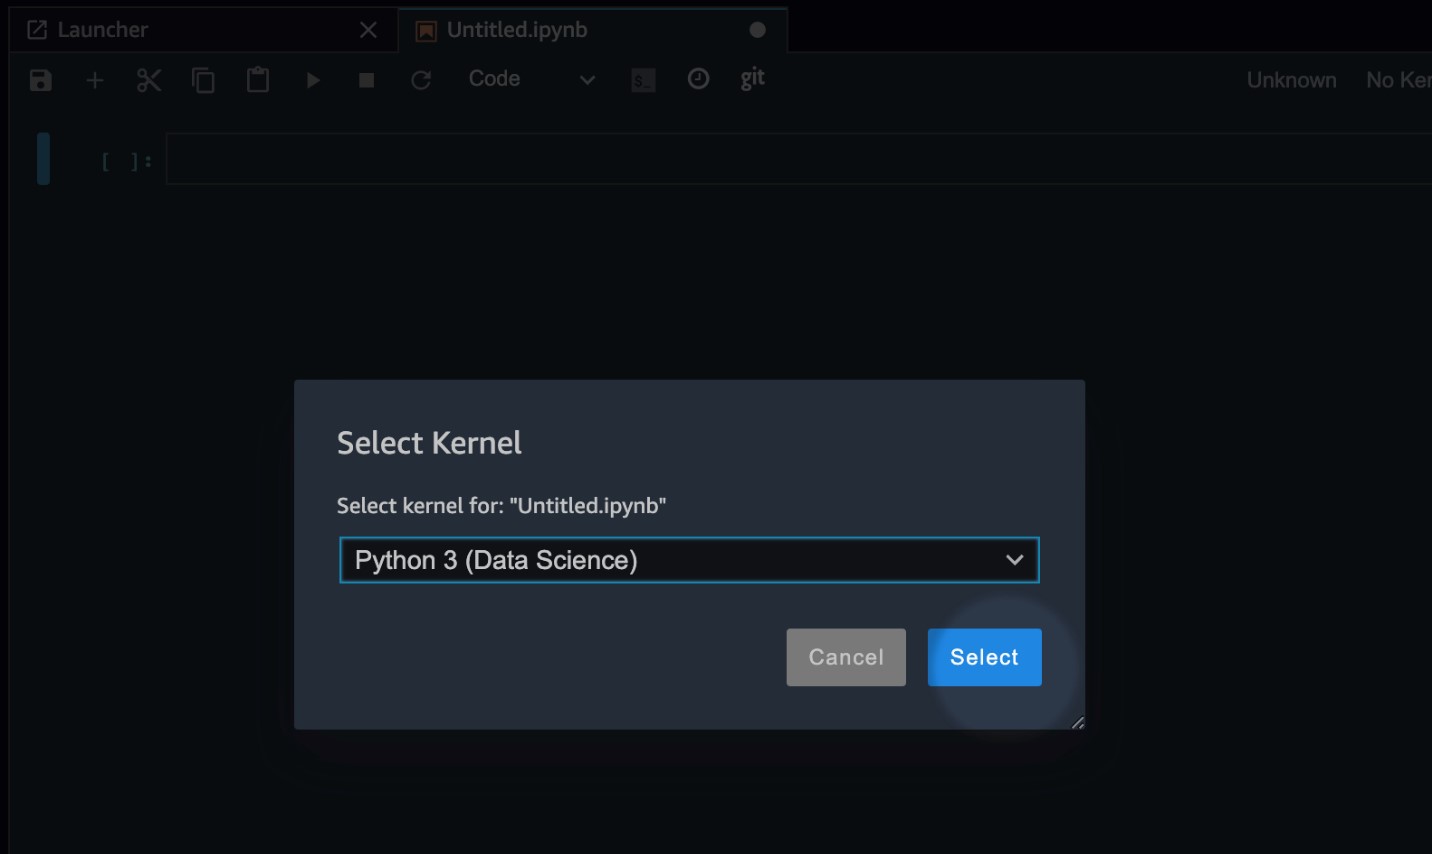
Figure 12: For Select Kernel, choose Python 3 (Data Science).
3. Enter some Python code on the first cell of the notebook.
print('This is the beginning of an incredible ML project')4. In the notebook menu, choose the Save notebook and create checkpoint icon, identified by a floppy disk.

Figure 13: Save notebook and create checkpoint icon (floppy disk).
5. In the left sidebar, choose the Git icon.
To track and commit all the files:
1. In the Git panel, next to Untracked, choose +.
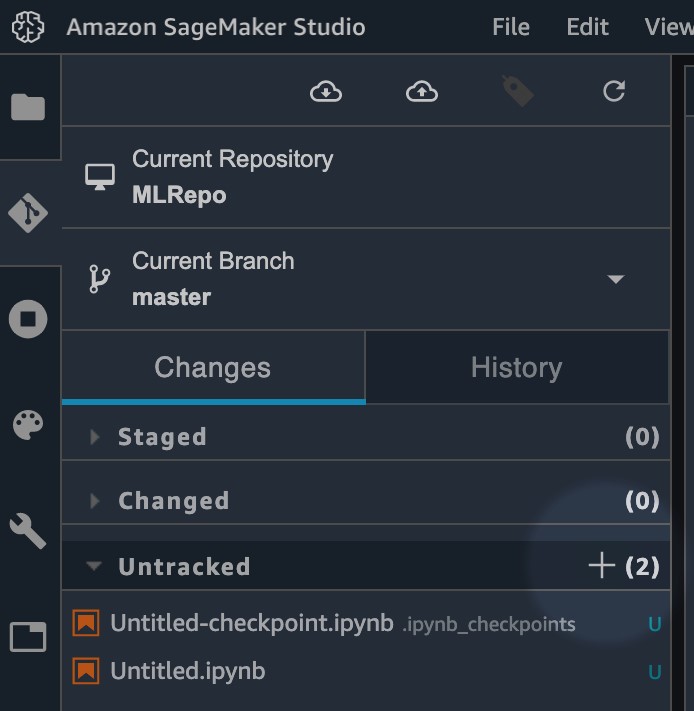
Figure 14: In the Git panel, next to Untracked, choose +.
The untracked files are now moved into the Staged panel.
2. Enter a Summary and Description, then choose Commit to commit your changes.
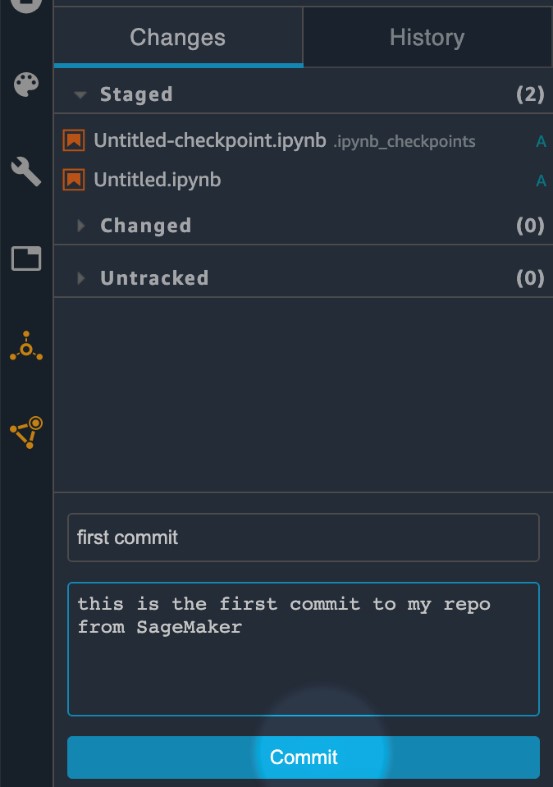
Figure 15: Choose Commit to commit to your changes.
To push your changes to the repository:
1. In the Git panel, choose the Push icon, identified by a cloud with an upwards arrow inside.
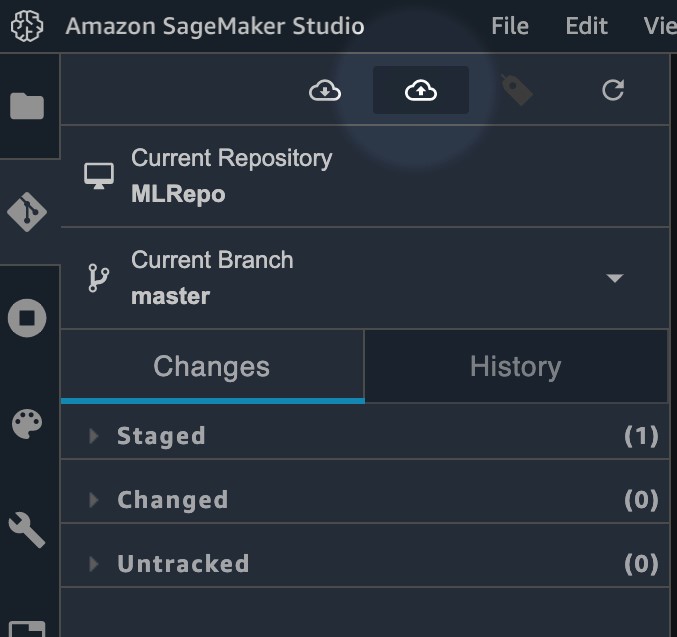
Figure 16: In the Git panel, choose the Push icon.
2. When prompted, enter a Name and Email, then choose OK.

Figure 17: Confirmation message “Git Push completed successfully.”
You will get a confirmation message indicating that the push completed successfully.
Working with the CodeCommit repository on SageMaker Studio (using the Git CLI)
You can also work with the Git command line interface (CLI) on Studio. The following example demonstrates the use of the Git CLI:
1. In the notebook menu, choose the + icon to add a new cell.
2. In the notebook cell, enter the following code:
import numpy as np
import pandas as pd
Figure 18
3. In the notebook menu, choose the Save notebook and create checkpoint icon.
4. In Studio, on the Git menu, choose Open Git Repository in Terminal.

Figure 19: Open Git Repository in Terminal.
5. In the Terminal, execute the following Git commands to stage the changes, create a new commit, and push your changes:
git add .
git commit -m "import packages"
git push origin master
As you run the commands, notice how the Git panel shows files transitioning from Changed to Staged and finally removes them from the window when you push your changes.
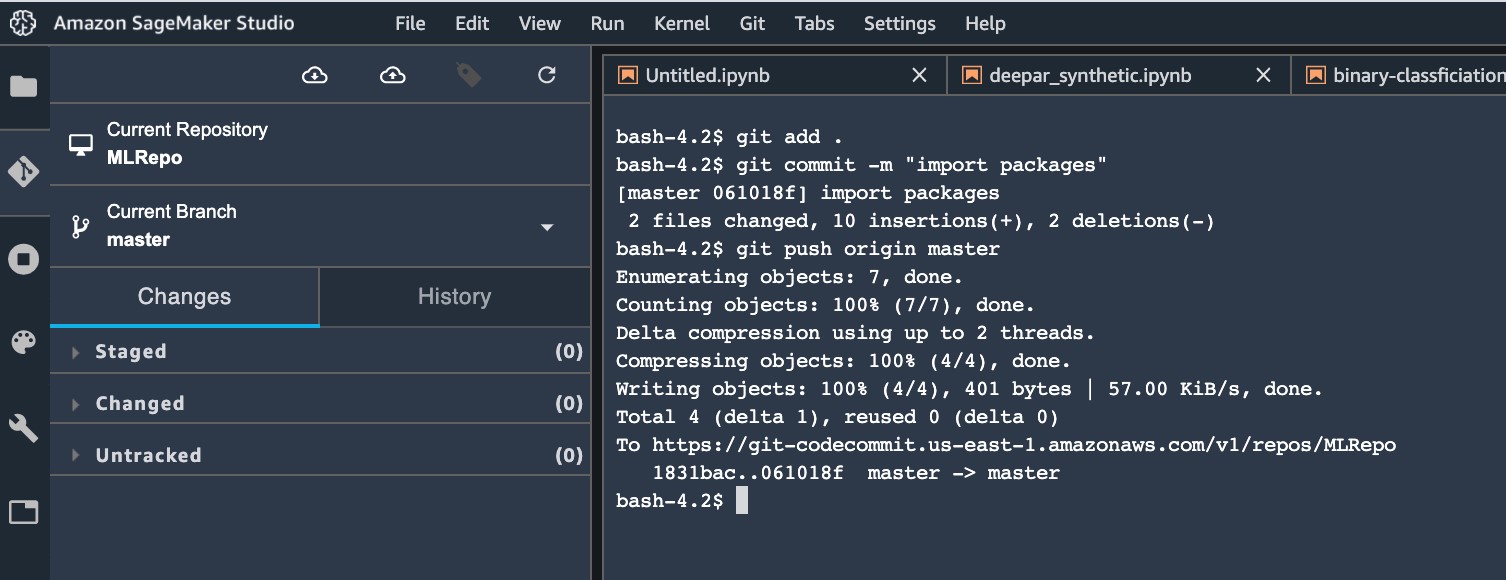
Figure 20: Notice how the Git panel shows files transitioning from Changed to Staged.
To verify the changes in the CodeCommit repository:
1. Open the CodeCommit management console.
2. Choose the repository MLRepo.
In the Code panel for MLRepo, you find the notebook Untitled.ipynb created in the previous step.
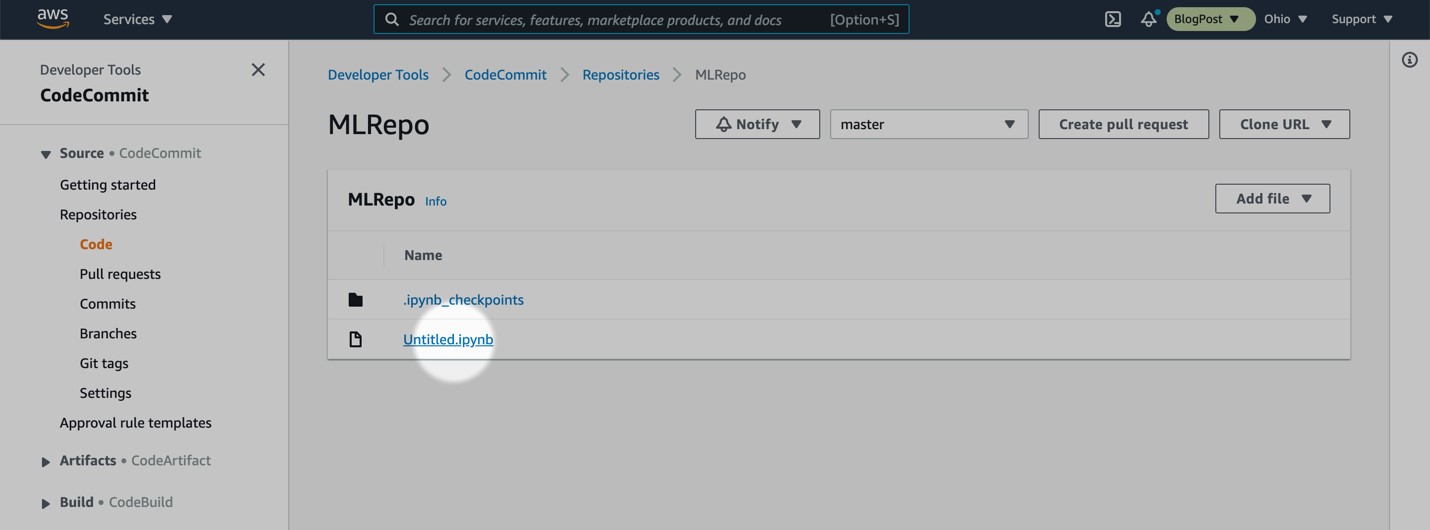
Figure 21: Find your notebook in the MLRepo.
Cleanup
Delete your CodeCommit repository, your SageMaker Studio user, and the SageMaker Studio domain to prevent from generating any unnecessary costs. For detailed instructions, please refer to the CodeCommit docs and the Studio docs.
What’s next
Artificial intelligence (AI) and ML are fueling digital transformation in the government. Now that you have SageMaker set up to manage your code on CodeCommit, you are ready to develop ML solutions that allow you to deliver better, more cost-effective, and citizen-friendly services. Check out on this blog post to learn how Banco Estado in Chile built ML models on SageMaker using Python programming language to detect and reduce fraud. You can also review this blog post that describes how companies like Iteris and Parsons are using cloud analytics along with machine learning to create scalable and secure solutions to help cities improve mobility.