AWS Public Sector Blog
How to set up Galaxy for research on AWS using Amazon Lightsail

Galaxy is a scientific workflow, data integration, and digital preservation platform that aims to make computational biology accessible to research scientists that do not have computer programming or systems administration experience. Although it was initially developed for genomics research, it is largely domain agnostic and is now used as a general bioinformatics workflow management system, running on everything from academic mainframes to personal computers. But researchers and organizations may worry about capacity and the accessibility of compute power for those with limited or restrictive budgets. In this blog post, discover how to implement Galaxy in the cloud at a predictable cost within your research or grant budget.
Amazon Lightsail is a compute service available from Amazon Web Services (AWS) that allows customers to deploy applications at a predictable monthly cost. This cost fully encapsulates compute, storage, and bandwidth, allowing grant-funded researchers and those with constrained budgets to more simply project the cost of their resources on a recurring basis without exceeding budgets. The open-source Galaxy Project is a well-known toolkit for researchers to complete tasks and common tooling on public and private datasets. This can be deployed wherever the researcher chooses and then accessed through a web-based interface.
Galaxy can be deployed on Lightsail using instances starting at 2vCPUs and 4GB of RAM and growing from there. Each Lightsail instance also includes local SSD storage, providing fast access with options to grow by adding additional storage for data.
Setting up Lightsail
Find Lightsail via the AWS Management Console or click here.
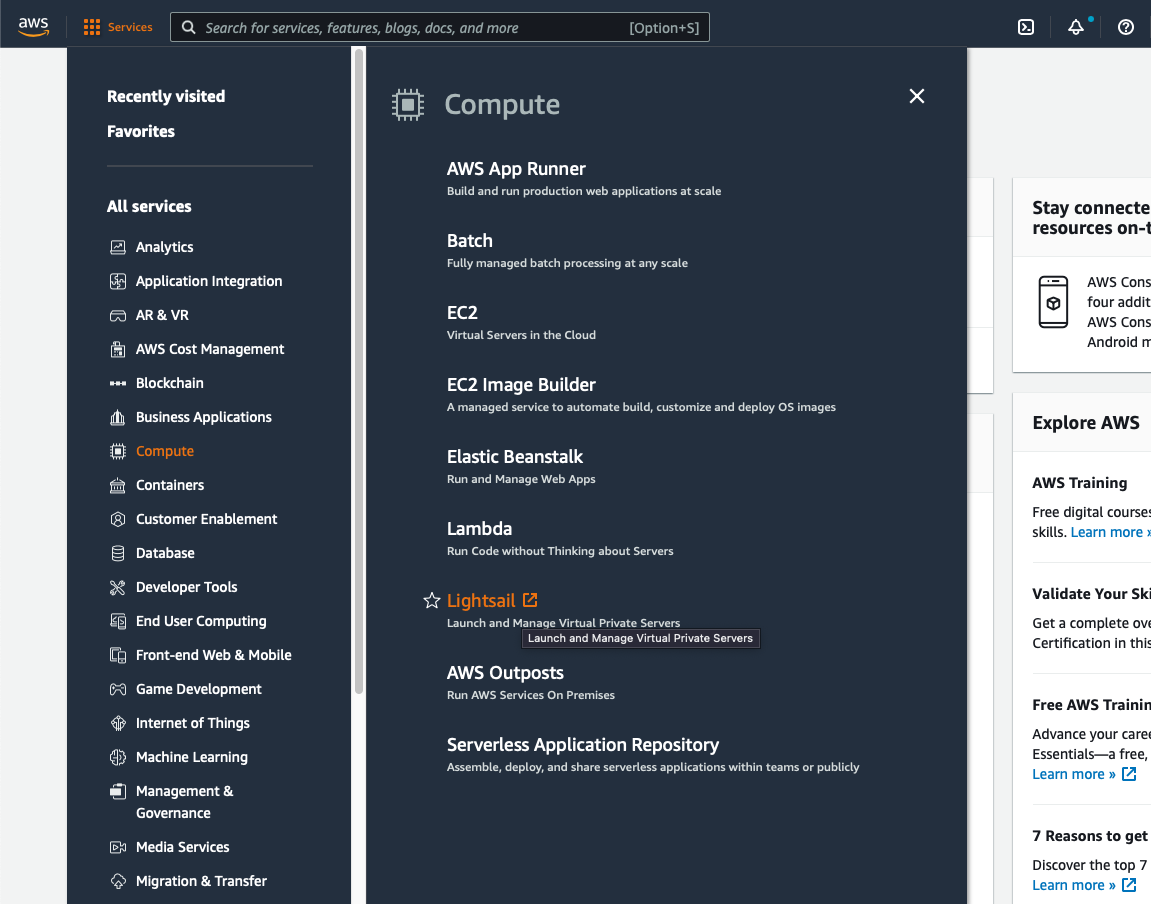
Figure 1. Find Amazon Lightsail under Compute in the AWS Console Menu, or through the search bar.
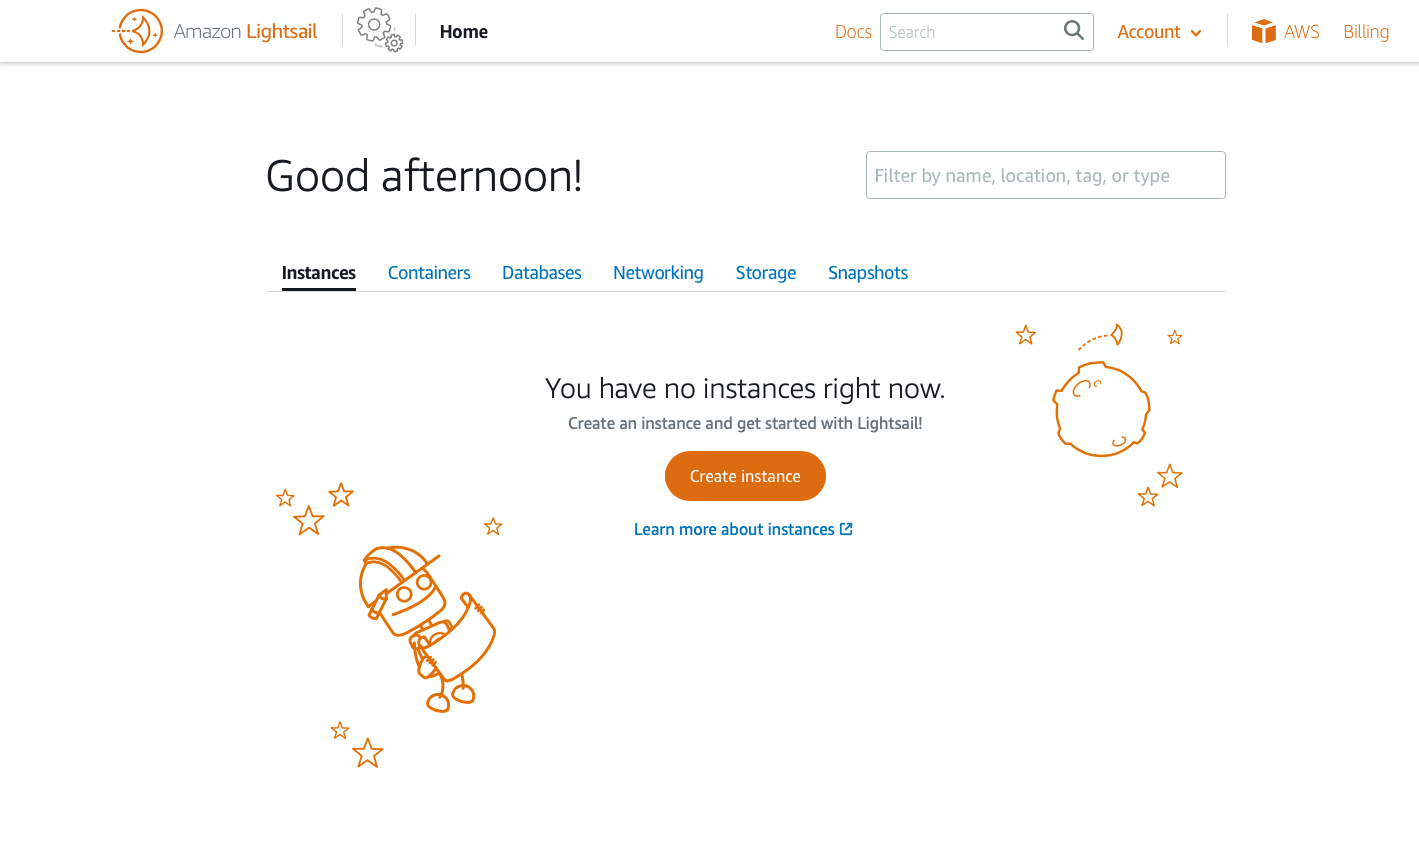
Figure 2. The Amazon Lightsail console.
Once in the Lightsail console, you can see any resources that have been provisioned. To provision Galaxy to a Lightsail instance, select the button marked Create Instance. This brings you a configuration screen allowing you to select options for your instance.
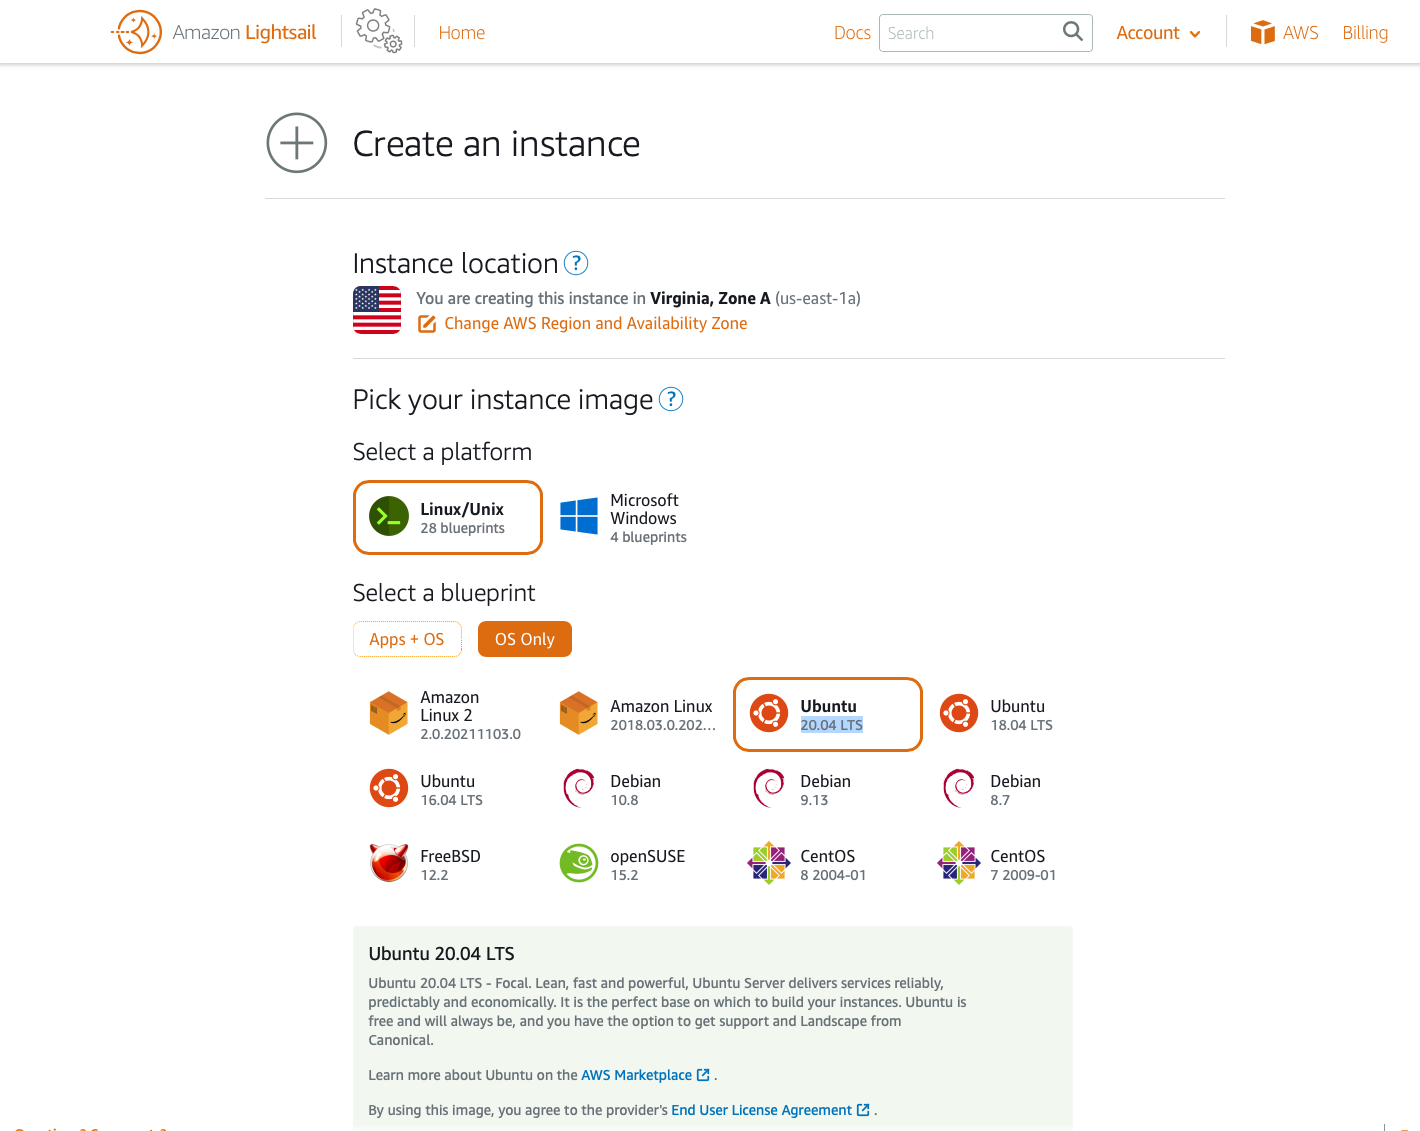
Figure 3. Create an instance from Amazon Lightsail. This demo uses the Linux/Unix platform with the Ubuntu 20.04 LTS blueprint.
For simplicity, the instance provisioned should use the OS-only option. This provisions a base operating system with only common required packages. Note: The following steps presume you are using a Ubuntu 20.04 blueprint. Steps for other distributions and versions may vary from the ones outlined here.
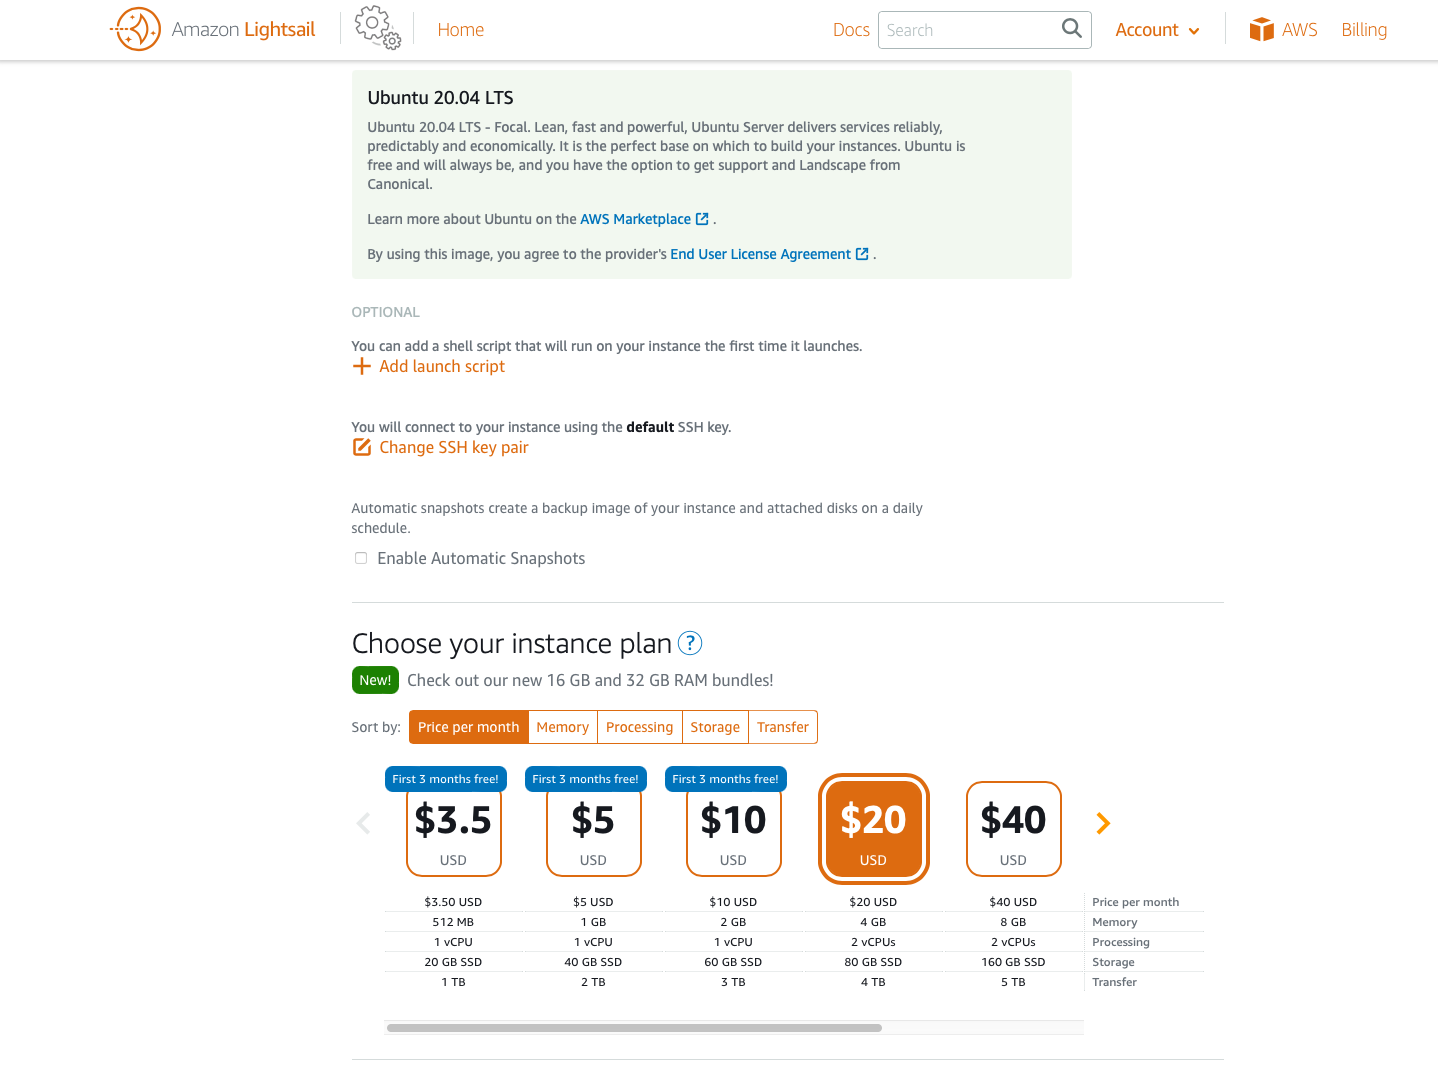
Figure 4. Choose instance size from Amazon Lightsail.
When provisioning an instance with Lightsail, you have the option to choose a launch script and an SSH keypair. Launching scripts in Lightsail allows you to create a set of scripted actions for the instance on first-boot. The SSH key pair allows you to log in to the console of the provisioned Lightsail instance. Choose the key pair you would like to use and select the instance plan of your choosing.
For performance reasons, this demo uses the instance with 2vCPUs and 8GB of memory. Additional options are available as needed per your requirements.
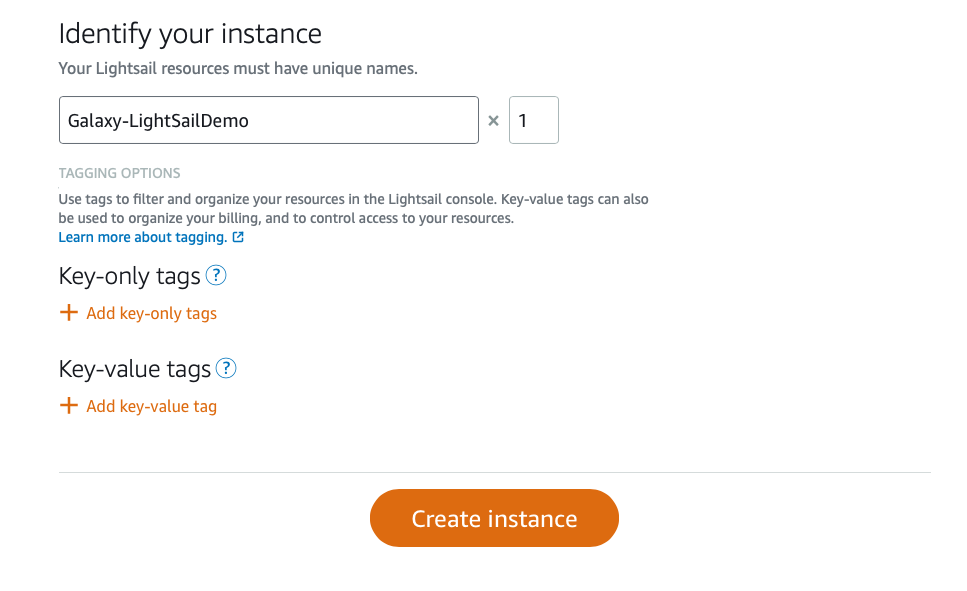
Figure 5. Identify your instance with a unique name and tag your Lightsail instance.
Lastly, configure the identity of your instance—this is a simple but required name. Add any tags you choose to associate with the instance. Tags may be changed at any time; however, the name of the instance is persistent. Once identified, select Create instance to be brought back to the Lightsail console. From here, you can see your new Lightsail instance as it becomes available and reaches a running state.
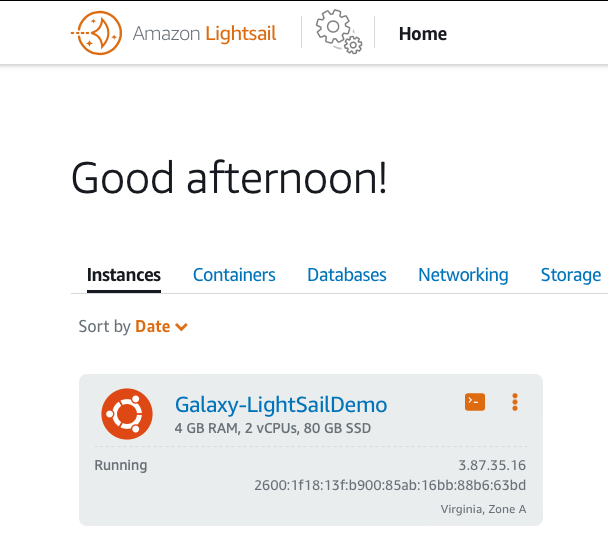
Figure 6. View your instance in the Amazon Lightsail dashboard in the Instances tab. The name of our instance for this demo is Galaxy-LightSailDemo.
Once in a running state, the console presents both an IPv4 and IPv6 address which can be used to SSH to the instance for configuration and management.
Login via SSH is available both via your local machine and via the web-based console using the SSH icon on the right. For the purposes of this demo, we use the web-based console. Select the instance name—in our case Galaxy-LightSailDemo—under the Connect heading, where there are options to connect remotely to your instance. Under the Use your browser section, select the button marked Connect using SSH. As a shortcut, you can click in the orange icon near the instance name on the previous screen as well.
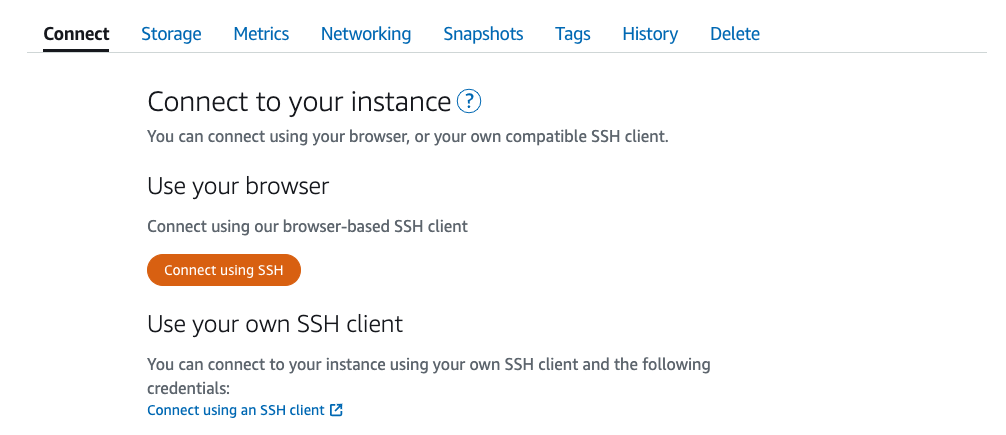
Figure 7. Connect to your instance from the Amazon Lightsail dashboard.
Then, a browser-based SSH command line interface appears.
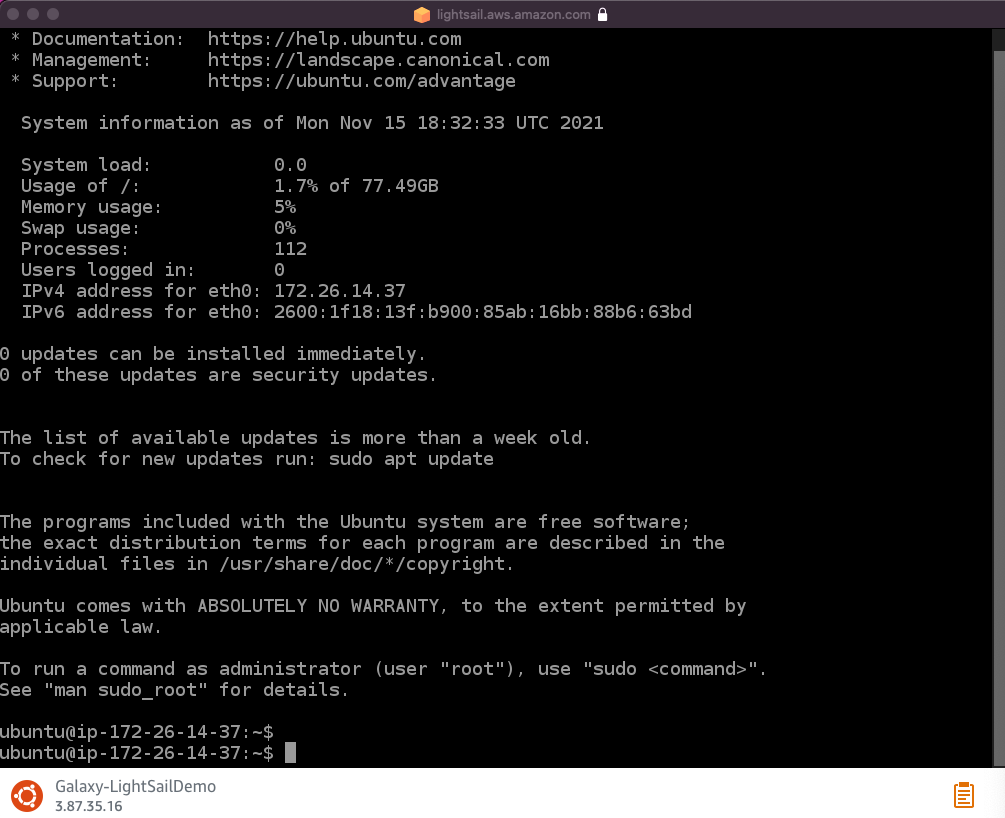
Figure 8. Connect to your instance via SSH over the web or SSH client of your choice.
Now, the first step is to make sure that the provisioned instance is up to date with all known necessary package and security updates. The following command implements a reboot to cover anything that needs be applied at boot time:
sudo apt update && sudo apt upgrade -y && sudo reboot
Setting up Galaxy Project
Log in to the instance again, and run the following command:
sudo apt install -y npm python3-virtualenv yarn
Once these modules have been installed, create a user for Galaxy to run as a service. Doing so decouples Galaxy from any existing service and/or user accounts, allowing it to effectively run as a background service and permit better control of permissions in the future.
Use the command below to create a galaxy user:
sudo adduser galaxy --disabled-password

Figure 9. Create the Galaxy service account.
Switch to the Galaxy user and download the Galaxy Project software by using Git to clone the repository from the Galaxy Project’s Github with the following command (or you can also check the latest release in the Galaxy Project Release page):
sudo su galaxy

 cd ~

 git clone -b release_21.09 https://github.com/galaxyproject/galaxy.git galaxy
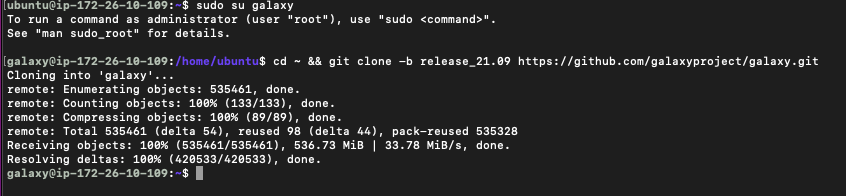
Figure 10. Switch to the Galaxy service account and clone the repository for the Galaxy project.
Now that Galaxy has been downloaded, you need to update the default configuration file to match your particular needs. To get the application running on Lightsail, the configuration needs to be updated to allow access from a web browser. You can do this by copying the sample configuration file to a new one and updating the section on http access. Run the following commands to copy the file and edit using vi (though you may use any text editor you are familiar with to perform this step).
cp galaxy/config/galaxy.yml.sample galaxy/config/galaxy.yml

 vi galaxy/config/galaxy.yml
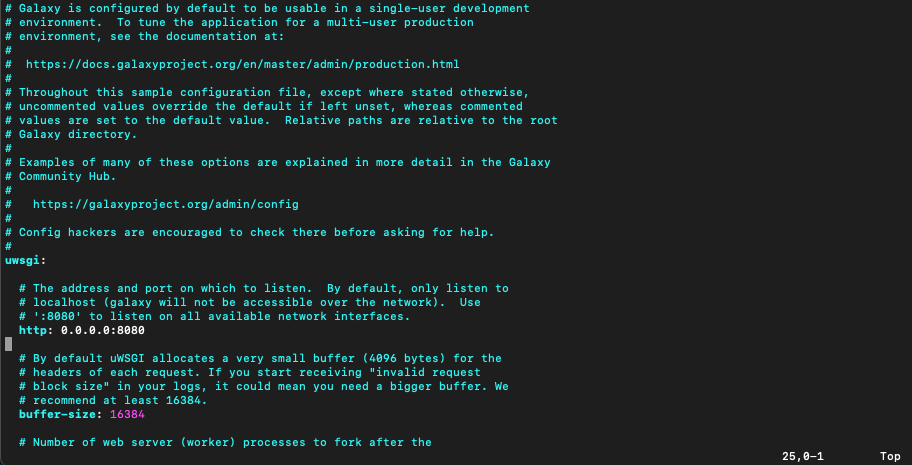
Figure 11. Update the config file to allow internet access.
The line marked as http: 127.0.0.1:8080 should be updated to http: 0.0.0.0:8080 (see Figure 11).
Galaxy can be administered using a web-based interface. This allows you to install tools, manage users, create groups, and perform various other functions. To access the administrative portions of the web interface, a user email needs to be added to the configuration file. Once Galaxy is up and running, you need to register as a user with this same email address.
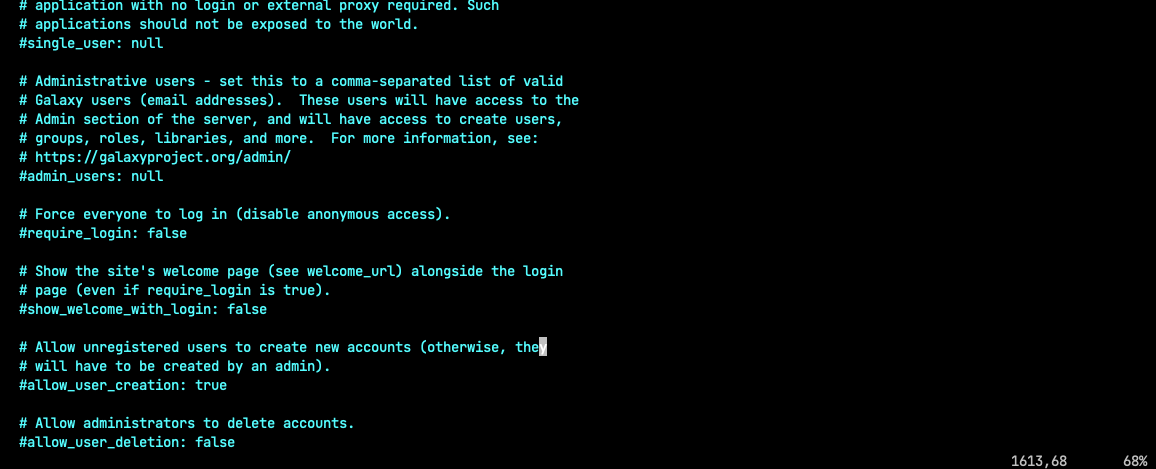
Figure 12. The admin section of the configuration file.
Open the configuration file using the text editor of your choice and look for the admin_users line (as seen in Figure 12). On the admin_users line, remove the pound sign (#) to uncomment the parameter and replace the word “null” with your email address. You may add additional email addresses in a list, separated by commas.
Note: To install the Galaxy tool shed, copy the sample tool sheds configuration file to a new file with the following command:
cp galaxy/config/tool_sheds_conf.xml.sample galaxy/config/tool_sheds_conf.xml
Running Galaxy
Galaxy installs its dependencies during the first run. This may be completed using the following run.sh script:
sh galaxy/run.sh
On its first run, Galaxy downloads a number of packages before starting the application. This process requires about 15 minutes. As packages are being downloaded and configured, you need to allow access to the instance using port 80. Return to the Lightsail console, select your instance, and go to the Networking tab.
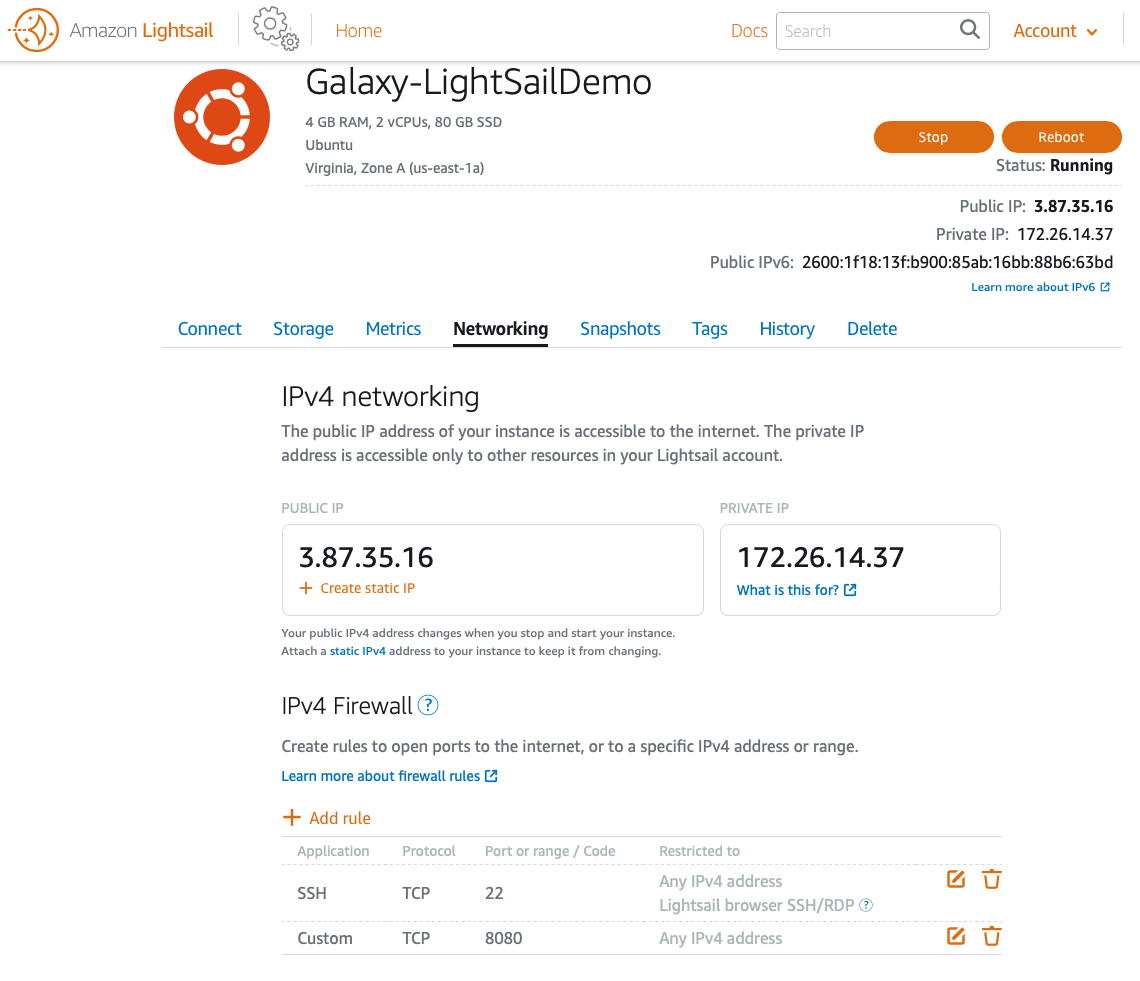
Figure 13. Update IPv4 Firewall in the Amazon Lightsail console in the Networking tab.
From this tab, update the IPv4 Firewall to allow traffic on TCP port 8080. If you have a static public IP address, you may also restrict access to only your IP or IP ranges.
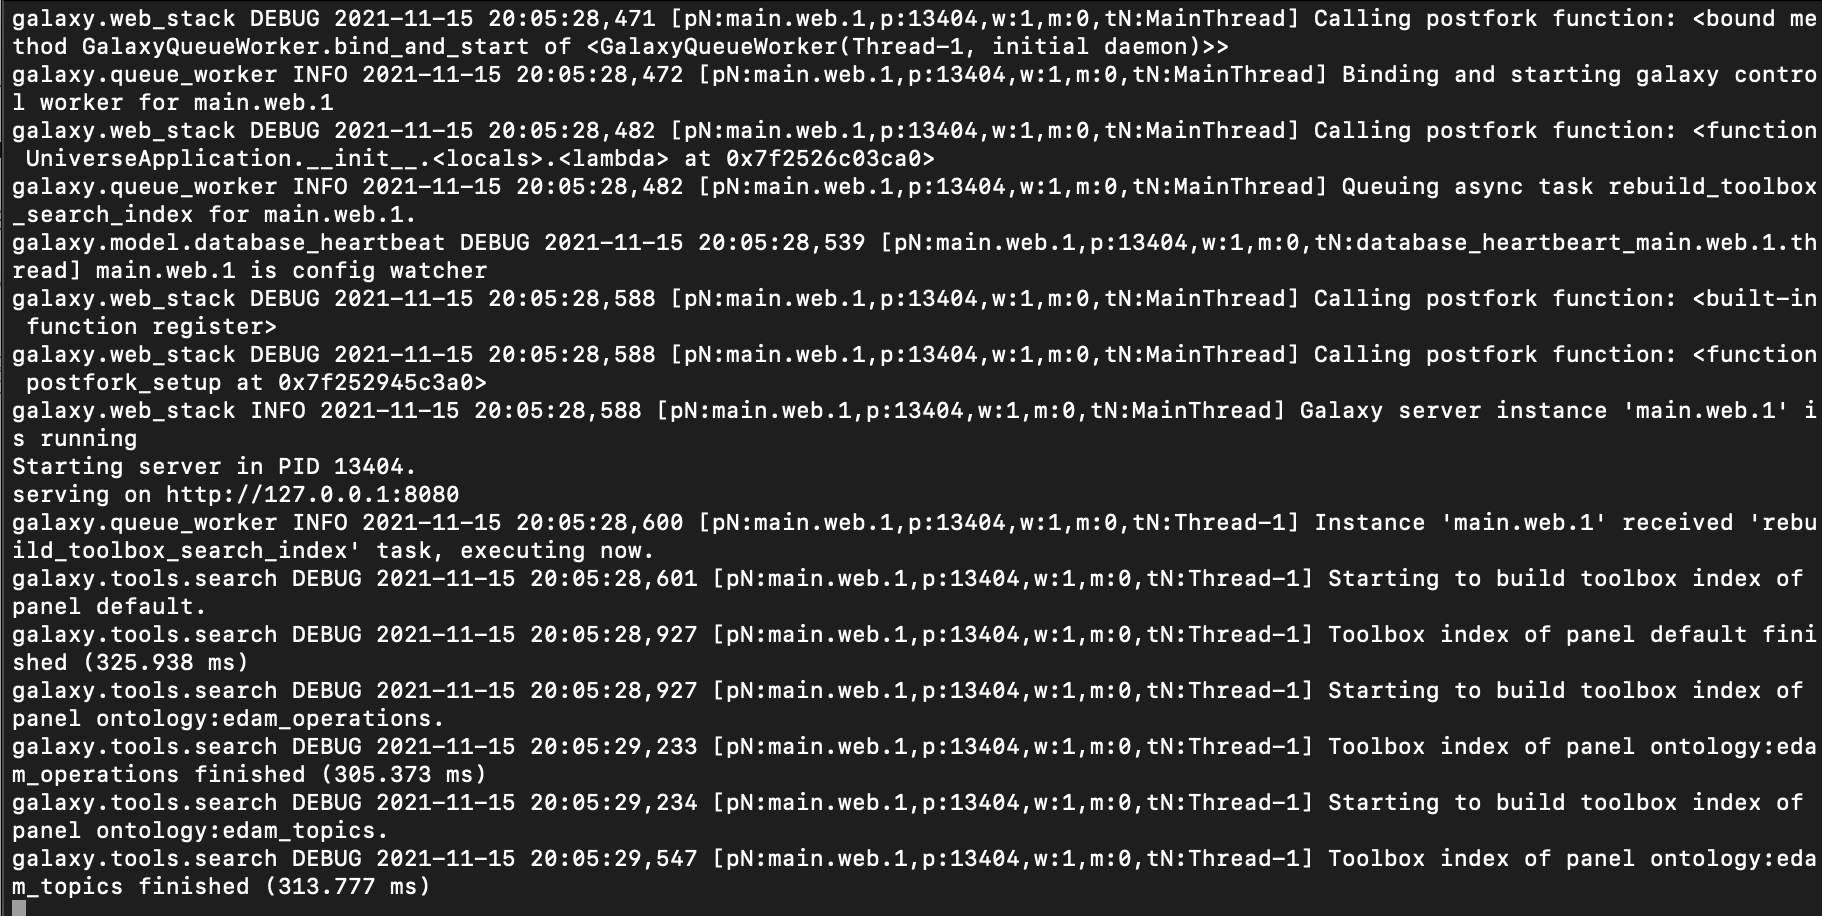
Figure 14. Sample log file after Galaxy has started.
Once completed, confirm the launch was successful by visiting http://<your.instance.ip.address:8080/.
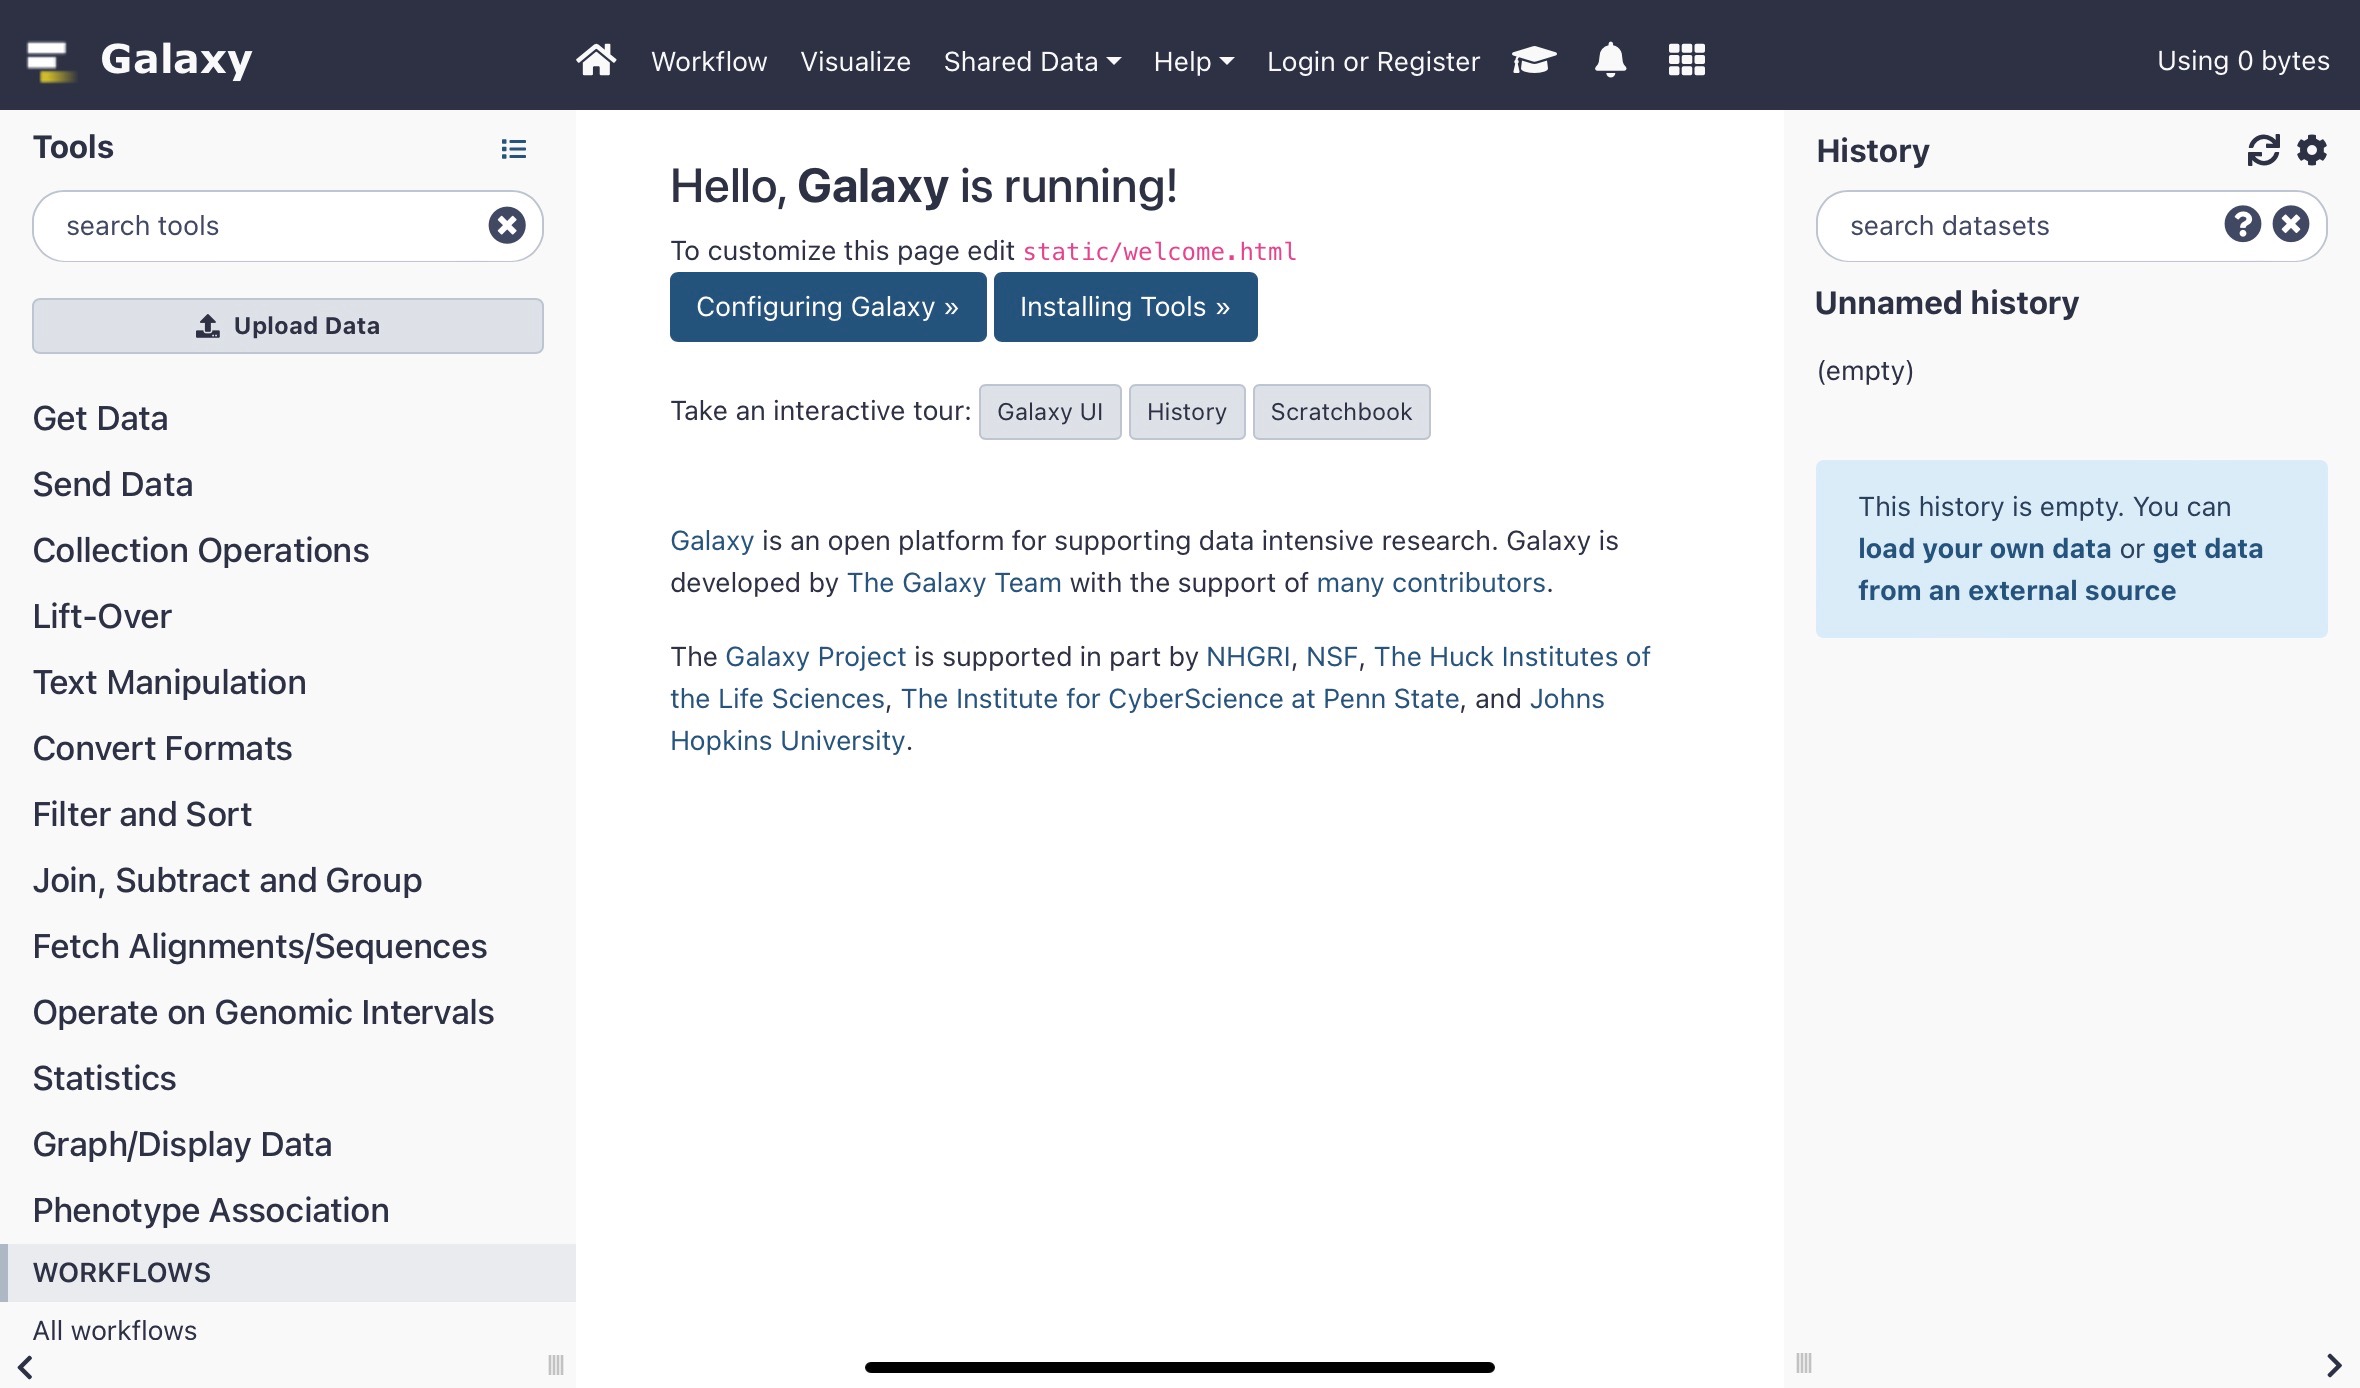
Figure 15. The Galaxy dashboard.
Setting up Galaxy as a service
Configuring Galaxy as a service allows Galaxy to start automatically every time the instance reboots without having to use the run.sh command. After confirming that Galaxy is up and running, stop Galaxy by pressing CTRL+C. The following steps start Galaxy as a service with the instance. These may be modified if Galaxy is installed to another location and can be referenced with the Controlling Galaxy with systemd or Supervisor documentation from the Galaxy Training Network. Run the following command to exit from the Galaxy user and create the service file using vi:
exit # goes back to the ubuntu user shell

 sudo vi /etc/systemd/system/galaxy.service
Copy and paste the following to the newly created file above:
Note the folder path in the ExecStart and Environment settings above calling the virtual environment. This may be created as venv instead of .venv in some Linux distributions, depending on how VirtualEnv is installed if divergent from the above instructions. The path in the service configuration file should reflect your deployed filesystem. Once created, you may reload daemons for systemctl with the following command:
sudo systemctl enable galaxy.service

 sudo systemctl start galaxy
Galaxy should again respond and now become available on every boot of the instance.
Securing Galaxy for a single user
By default, Galaxy allows for anonymous login. Multiple options are available to secure Galaxy for one or multiple users, including federated identity and external authentication. To immediately secure the deployment, you may use Galaxy’s default authentication by creating a user and then updating the galaxy.yml file.
Select Login or Register from the main menu within Galaxy. This presents you with the login screen. From here, select the Register here link to create your account.
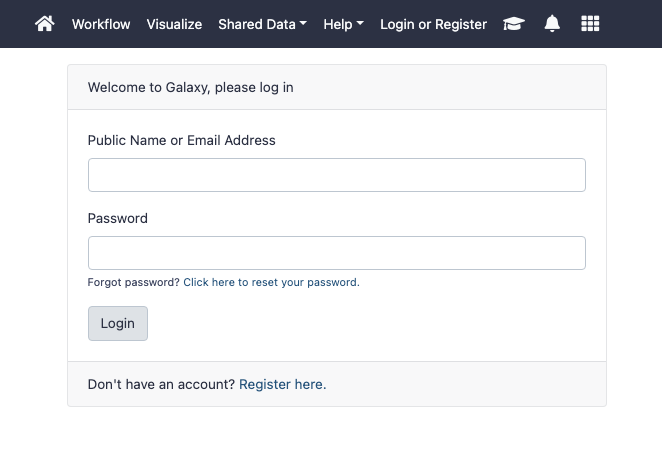
Figure 16. The Galaxy login prompt.
Once created, you can access additional features in Galaxy as a user; however, you will not yet be able to fully administer the platform.
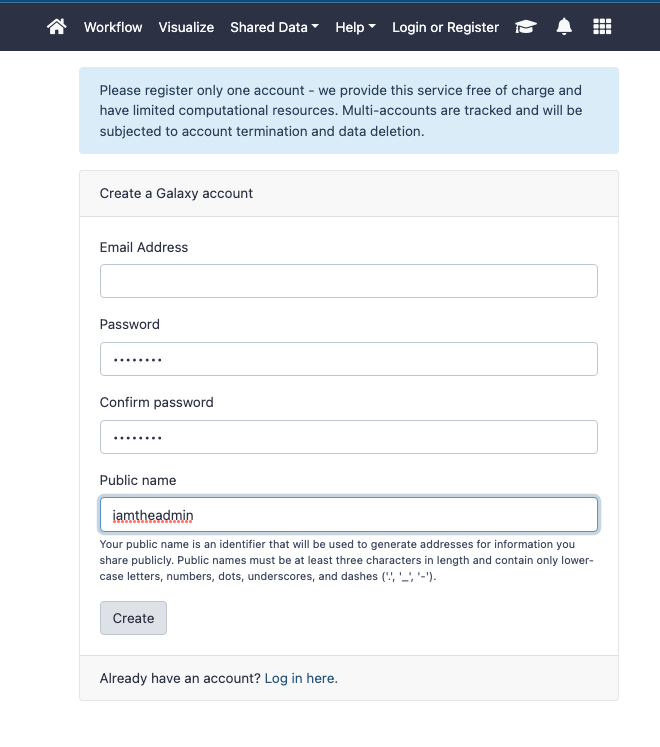
Figure 17. Create a Galaxy user account.
To fully enable the account as an administrator and disable anonymous access, you need to update the galaxy.yml file with four changes:
1. Uncomment the item for admin_users.
2. Add the email address with which you have registered to this list.
3. Uncomment the item for require_login.
4. Change the default value for require_login from false to true.
Run the following command:
sudo vi /home/galaxy/galaxy/config/galaxy.yml
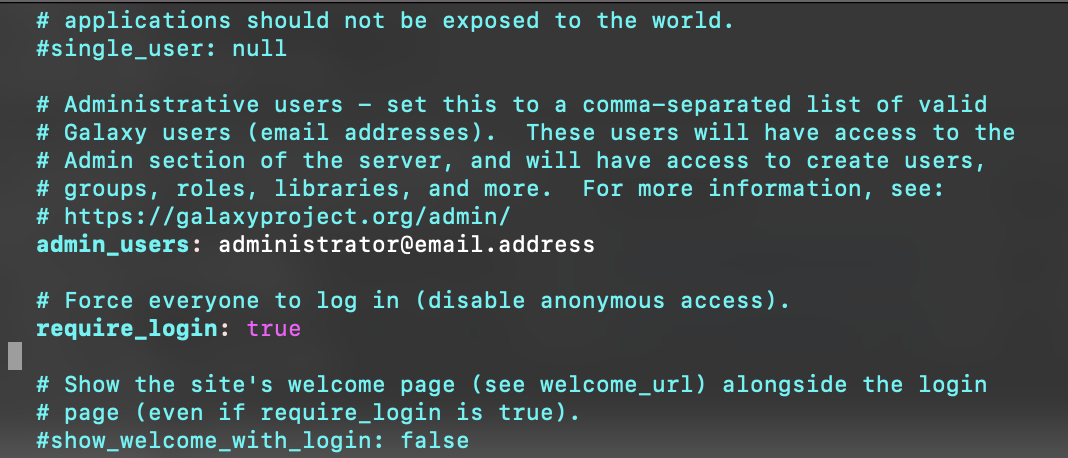
Figure 18. Update the list of admin users.
Once complete, restart Galaxy with the following command:
sudo systemctl restart galaxy
For additional administration options, please review the Federated Identity and Access Management documentation for the Galaxy project on the Galaxy Community Hub.
Conclusion and learn more
With Lightsail, you can deploy any web-based or other persistent application to meet the requirements of your grant or research budget. LightSail also integrates with other AWS services to allow you to expand your deployment as needed. Read more about these integrations with the following resources:
- Get started with Linux/Unix-based instances in Lightsail
- Creating a snapshot of your Linux or Unix instance in Lightsail
If you require additional compute capacity beyond LightSail for short term computing requirements, you can easily migrate your Lightsail deployment to Amazon Elastic Compute Cloud (Amazon EC2) for larger compute instances. Learn more with the following resources:
- Migrating web services from Lightsail to Amazon Elastic Compute Cloud (Amazon EC2)
- AWS Pricing Calculator
- Estimated running cost for Galaxy on Amazon EC2
Subscribe to the AWS Public Sector Blog newsletter to get the latest in AWS tools, solutions, and innovations from the public sector delivered to your inbox, or contact us.
Please take a few minutes to share insights regarding your experience with the AWS Public Sector Blog in this survey, and we’ll use feedback from the survey to create more content aligned with the preferences of our readers.