AWS Storage Blog
Adding and removing object tags with Amazon S3 Batch Operations
For many organizations, securely and cost-effectively organizing massive amounts of stored data can be a daunting task. Without an easy way to organize data, companies may find themselves exerting a lot of time and energy trying to meet their data storage requirements, potentially slowing down projects and operations. For instance, certain data may need to be securely stored with fine-grained access controls, limiting the number of users with access to certain datasets, while other data may have various retention period requirements. If unable to differentiate data within massive storage arrangements, whether that be data that requires specific access controls or data that must be retained for specific lengths of time, organizations will find themselves embarking on an uphill battle. Companies may find that their data storage violates the principle of least privilege, opening themselves up to security liabilities or inadvertent mistakes. Companies may also find that they are inefficiently retaining unneeded data (or mistakenly ridding themselves of needed data) and incurring unintended costs.
Amazon S3 customers use prefixes as a way to organize data, and this works well, but customers often find that data needed for a project may span several prefixes, or that some data that may be within a prefix is not associated with the project at hand. To help with this, S3 object tagging can be used to define a logical grouping of data, which customers can then use to apply AWS Identity and Access Management (IAM) access policies or data management tasks. Of course, adding object tags to each object at scale is not manageable, so customers can use Amazon S3 Batch Operations, which lets them manage billions of objects at scale with just a few clicks in the Amazon S3 console or via a single API request.
In this blog, I demonstrate how to apply object tags to a set of data using S3 Batch Operations. I then describe how to create IAM policies to provide fine-grained access based on object tags. Next, I share how to transition objects to the Amazon S3 Glacier or Amazon S3 Glacier Deep Archive storage class using tag based lifecycle policies. I conclude with showing how to use S3 Batch Operations to delete object tags to save on costs. To demonstrate these operations, I reference a fictional business that wants to organize sets of data by projects. This business needs to provide fine-grained access control to users within their organization while there is an ongoing project. Once the project is complete, the customer requires that project datasets are retained for five years. After the data is archived, fine-grained access to groups of end users is no longer required. Using S3 Batch Operations and object tagging, this example customer can organize their data efficiently and securely, saving money and facilitating projects that are important to its bottom line rather than managing an unorganized and daunting storage arrangement.
Getting started
Let’s start by logging into the AWS Management Console and selecting S3 from the services menu. I will be working with a bucket I have previously created, which I populated with some test objects. My test objects follow a naming convention that starts with “PID_007_xxx”, which is how I will easily identify objects associated with a specific project.
For this demonstration, I will be working with objects associated with project ID 007. To get started, I identify all of the objects in our bucket associated with this project so we can tag these objects appropriately.
At scale, a best practice is to use S3 Inventory Report to generate a list of objects for the bucket. Inventory reports can be configured to run daily or weekly, and provide insight into the bucket contents. Once you have an inventory report, you can use Amazon Athena to run standard SQL based queries against the report. You can also output a filtered list of objects for each specific project. Learn more about using Athena with S3 Inventory Reports.
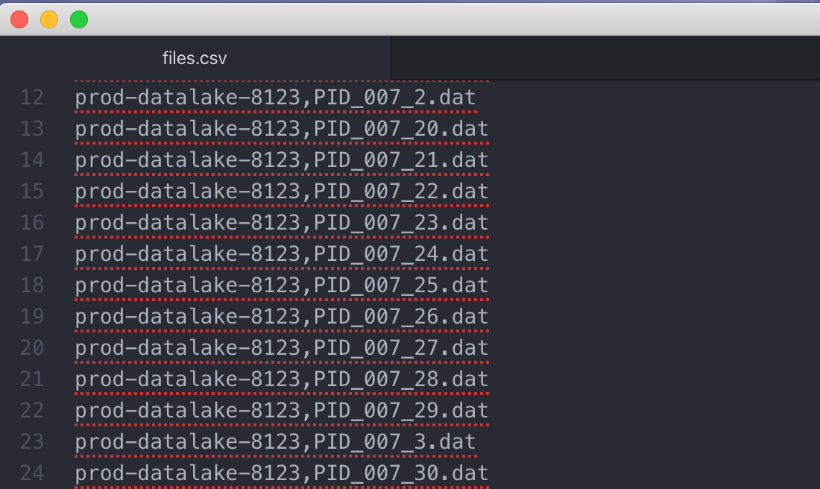
To simplify this exercise, I will use a CSV file I created manually. The CSV file includes the bucket name and key value for each object associated with project ID 007.
Configure S3 Batch Operations tagging job
Now I am ready to configure the first S3 Batch Operations job to add project ID tags to the appropriate objects. From the left rail navigation menu in the S3 console, I select Batch Operations. On the Batch Operations page, l select the Create Job button.

Next, I select the us-east-1 Region for my Batch Operations job as that is the same Region where my objects are stored. The Batch Operations jobs should be created in the same Region as the bucket containing the objects that are undergoing changes. For object tagging, the activity will always be performed in the Region that the objects exist. However, actions such as object copy may have a different source and destination Region.
Next, I provide a manifest for the Batch Operations job as a CSV file. This file is stored in the inventory prefix of my bucket. I keep the optional manifest object version ID blank, and select the Next button.

From the operations section, I choose the Replace all object tags option and add “project_ID” for my tag key, and “007” for the tag value. Note that when you write new tags to an object, this action will overwrite any existing tags the objects may currently have. If you have existing tags you’d like to retain, re-add them here. I then select the Next button to continue.

Next, I create a descriptive name for my Batch Operations job, and keep the priority at its default. I ask Batch Operations to generate a Completion report including all tasks into the completion_reports prefix in my bucket.

Next, I configure the appropriate IAM policies to allow S3 Batch Operations to perform the defined operations on my behalf. I don’t have an existing IAM role configured for this purpose, so I will create one. First, I expand the view IAM role policy template and IAM trust policy section. I then review the recommended IAM role policy template Batch Operations has defined based on the job I am creating. Notice that the S3 actions of PutObjectTagging and PutObjectVersionTagging are allowed for the objects in my defined bucket. We also see an allow entry for GetObject associated with our defined CSV inventory file. I select the Copy policy template button to copy the contents to my clipboard.

Next, I right-click on the AWS logo in the top left corner of the S3 console. I then choose my browsers option to open the link in a new tab. On this new tab, I select IAM from the AWS services section. Within the IAM console, I choose Policies from the left navigation menu and choose Create policy.

Next, I select the JSON tab and overwrite the contents with the template I previously copied to my clipboard. This policy provides the necessary rights for Batch Operations to initiate the tagging actions that were previously defined during the Batch Operations creation process. Before continuing, I modify a few fields in this policy template. First, I replace the “TargetResource” placeholder with the actual ARN of the bucket where my objects are stored. Next, I know that after this project is complete, Batch Operations will be required to delete all existing tags. I am going to add the “s3:DeleteObjectTagging” and “s3:DeleteObjectVersionTagging” action to my allow statement now; this way I do not need to modify it later. I then select the Next: Tags button to continue.

I skip adding tags to my policy and then add a descriptive name for my policy. l select Next and then select the Create policy button.
Now that I have created my IAM policy, I create an IAM role for my Batch Operations job. From the IAM console, I select the Role option from the left navigation menu and then select the Create role button.

I select AWS service from the Select type of trusted entity section. Then I select S3 from the services list and S3 Batch Operations from the Select your use case section. I then select the Next: Permissions button.

Next, I enter the name of the policy I previously created in the Filter policies dialog box. I select the policy I previously created, and select Next: Tags to continue.

I skip adding tags and enter a descriptive name for my new role. I verify that I have attached the proper policy to my new role and select the Create role button.
Now I jump back to my previous browser tab to finish the Batch Operations job creation. I click the refresh button next to the IAM role dropdown box. I select my newly created role, skip adding tags to the job, and select the Next button.

On the next screen, I review my job details for accuracy and select the Create job button.
Add tags with S3 Batch Operations
Once the job is created, I’m redirected to the Batch Operations page on the AWS Management Console. At this point, Batch Operations attempts to read the contents of my CSV file. If my file is formatted correctly, and no IAM-related mistakes have been made, I will soon see a number listed under the Total objects column. The job Status will change from Preparing to Awaiting your confirmation to run. I take this opportunity to verify that the total objects value is what I expected based on my CSV file. If it does not match, I likely selected the wrong CSV file. In this case, the results match my expectations. I now select my new job, and select the Run job button. Batch Operations will present me with a job overview page allowing me to verify my settings. Satisfied that my job is configured correctly, I will select Run job.

Job progress will update periodically and the job status will update to indicate it has completed. I also take note if any errors have occurred. In this case, the job has competed with no errors. I navigate back over to the S3 console and check to see if my object tags have been updated.

From the services menu, I choose S3, then I select my bucket and view an object that I previously processed using Batch Operations. On the Properties tab, I navigate to the Tags section and verify that my project_ID tag has been added.

Access policies and lifecycle management
Now that my project data has been properly tagged, I can configure IAM group or user access policies. These groups or policies grant conditional access to my S3 bucket via the s3:ExistingObjectTag condition. Configuring IAM access policies is out of scope for this document, but for more information view the documentation on tagging and policy creation.
Now the project has run its course and I am ready to archive my dataset. Remember that my business requirements dictate I retain this project data for five years. The requirements also dictate that fine-grained access control for end users does not need to be maintained after five years. To save on costs, I transition these objects to Amazon S3 Glacier using lifecycle rules. Then, I remove the corresponding object tags as they are no longer needed. For more information about lifecycle rules and object tagging, read this blog: “Simplify your data lifecycle by using object tags with Amazon S3 Lifecycle.”
First, to transition objects to Amazon S3 Glacier, I navigate to the S3 console and select my data bucket. On the Management tab, I locate the Lifecycle rules section and select the Create lifecycle rule button.

Here, I provide a descriptive name for my lifecycle rule. I set my rule scope to Limit the scope of this rule using one or more filters, and then select Add tag. In the Key dialog box I enter “project_ID” and in the Value dialog box I enter “007”.

In the Lifecycle rule actions section, I select Transition current versions of objects between storage classes. I choose Glacier from the Storage class transitions dropdown box, and enter “0” in the Days after object creation dialog box. Setting this value to zero means that the next time this lifecycle policy runs (daily at midnight UTC), all of my objects with the tag project_ID:007 will be transitioned to Amazon S3 Glacier. Next, I acknowledge the small object transition warning and select Create rule.

Now that the rule has been created, I wait for the lifecycle policy to run. I then wait 24-48 hours to ensure that the lifecycle policy has run. Next, I log into my S3 console and double check a few objects to verify they have been archived to Amazon S3 Glacier. I select my data bucket from my S3 buckets list and navigate down to one of the project 007 objects. I select the object name and on its Properties tab I navigate to the Storage class section. Here I can verify that this object has been archived to Amazon S3 Glacier. At scale, I would typically use S3 Inventory Reports to verify all of my project data has been archived to Amazon S3 Glacier. For this demonstration, a quick check in the console will suffice.

Removing tags with S3 Batch Operations
Now I have successfully archived my project data to Amazon S3 Glacier. For additional cost savings, I can now remove all object tags from my archived objects. In the S3 console, I choose Batch Operations from the left menu and select the Create job button.
Again, I create my Batch Operations job in the same Region as my S3 bucket. I select CSV for my manifest format and enter the path to my list of project objects I created at the onset. I then select the Next button.

In the Choose operation section, I choose the Delete all object tags option. I acknowledge the warning message and select the Next button.

Next, I navigate to the Configure additional options section. I then give my job a descriptive name and enable the completion report for all tasks. Next, I enter the path to my completion report bucket and prefix I created earlier. In the Permissions section, I choose from the existing IAM roles and select the role I previously created, then I select the Next button.

I review my job settings and select the Create job button.
Now on the Batch Operations jobs page, I wait for the status to indicate Awaiting your confirmation to run. Next, I select the job and then I select the Run Job button. I review the job details, acknowledge the delete object tag warning, and select the Run job button.

Once the job has completed, the job Status will update to indicate it has completed. I also take note if any errors occurred. In this case, the job has competed with no errors. I navigate back over to the S3 console and check to see if my object tags have been removed.

From the services menu I choose S3, and then I open the bucket containing my objects. I navigate down until I find one of my objects associated with project ID 007 and then I select the object name. On the Properties tab, I navigate down and verify that the object tags have been removed.

Cleaning Up
If you have been following the guidance in this blog in your own AWS account, be sure to delete any non-production test data that you have uploaded. This will ensure you do not incur unintended storage charges. It is also a best practice to remove any IAM policies or roles that you have created specifically for this activity if you do not plan on leveraging the policies in the future.
Conclusion
In this blog, I reviewed the process of setting up S3 Batch Operations for applying object tags to subsets of business data. I discussed creating fine-grained access to these objects based on the object tags applied. I also covered using object tags to lifecycle project files to an archive storage class. Finally, I used S3 Batch Operations to remove all object tags from an archived dataset. With data organized using tags and operated on in bulk with S3 Batch Operations, you can save time and money managing data storage, retention, and access requirements, amongst other things as defined by your specific business requirements.
I hope you found this quick overview informative, and that it gets you thinking about ways you can use S3 Batch Operations in your environment. Thanks for reading this blog post! If you have any questions or suggestions, please leave your feedback in the comments section.