Artificial Intelligence
Mount an EFS file system to an Amazon SageMaker notebook (with lifecycle configurations)
In this blog post, we’ll show you how you can mount an Amazon Elastic File System (EFS) to your Amazon SageMaker notebook instance. This is an easy way to store and access large datasets, and to share machine learning scripts from your SageMaker notebook instance. Amazon SageMaker notebooks provide fast access to your own instance running a Jupyter Notebook server. From there, you can access the Amazon SageMaker distributed, managed training environment and set up a real-time, production-grade hosted endpoint. You can use the Amazon SageMaker fast, scalable algorithms or pre-built deep learning framework containers. Amazon EFS provides simple, scalable file storage that can be shared across multiple AWS resources at one time. The combination of the two provides easy access to your large machine learning datasets or shared code, right from your notebook environment.
Currently Amazon SageMaker notebook instances start with 5 GB of Amazon Elastic Block Store (EBS) storage, and about 20 GB of non-persistent storage. Larger files can be accessed from Amazon S3, but this doesn’t offer the same flexibility as a file system. Use cases that require this flexibility and large datasets are met by mounting EFS to a notebook instance. Some customers are also likely to have existing EFS mounts where files are stored and shared across existing EC2 instances. This is another area where EFS and Amazon SageMaker work together well.
Mounting an existing EFS files system to an existing Amazon SageMaker notebook instance
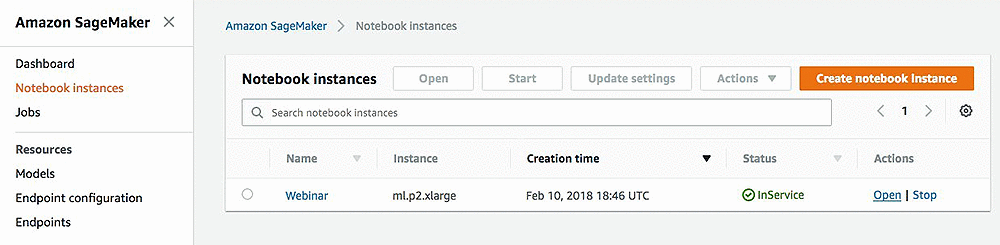
If you already have an EFS file system that you want to mount to your Amazon SageMaker notebook instance, you can start by opening the SageMaker console and logging into your Notebook Instance.
Then, open a new conda_python3 notebook. These steps could also be done from the Jupyter Terminal.

Now, create a directory from your Jupyter Notebook by running a cell that contains the following:
Now, we’ll need to get the IP address of our EFS file system. If your notebook instance was setup with Amazon SageMaker-provided internet access, this can be done from the notebook using boto3 calls to describe_file_systems() and describe_mount_targets(FileSystemId='<file_system_id>'). Otherwise, we can look it up in the EFS console.

Now, we can mount the EFS file system to our Amazon SageMaker notebook instance by executing a cell with the following command. Remember to replace <efs_ip_address_from_above> with your EFS IP address.
Now you can access any datasets and shared files you have on your Elastic File System from your SageMaker notebook instance. This enables you to train locally on datasets larger than 5 GB and share files across multiple Amazon SageMaker notebooks.
Using Amazon SageMaker notebooks lifecycle configurations
When you stop and restart your Amazon SageMaker notebook instance, the EFS mount will no longer be there. An empty directory will be there, and your files will still be stored on the EFS file system, but the connection between EFS and your notebook will no longer exist.
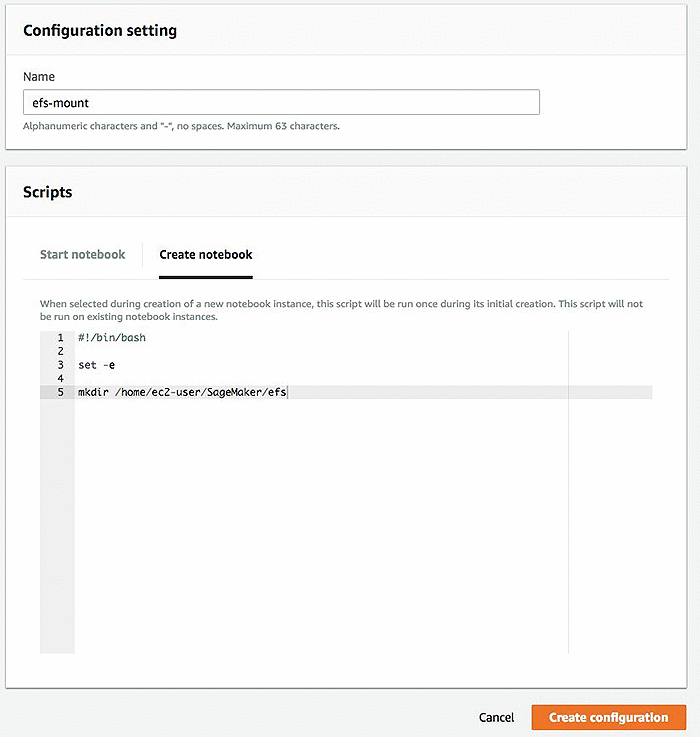
You could remount the EFS resource by rerunning the sudo mount -t nfs ... command above every time you start your notebook. But, rather than doing that manually, you can automate this process using a SageMaker Notebook Lifecycle configuration. To do this go the Lifecycle configuration page of the SageMaker console and choose Create configuration.

The lifecycle configuration gives you an option to write scripts that can be executed when you first create the notebook instance, or every time you start your notebook instance (including the first time). For the Start notebook script, you can copy and paste the snippet sudo mount -t nfs ... we gave you earlier if you want this to be run every time you start your Amazon SageMaker notebook instance.

However, when we first start our notebook instance, there won’t be an efs directory on it to mount to. So, let’s write our Create notebook script to set this up. Then choose Create configuration.
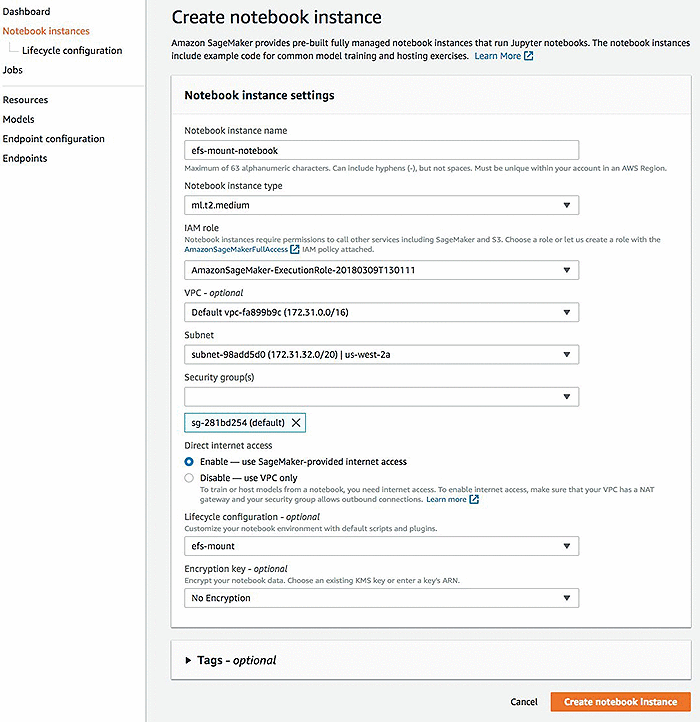
Now, let’s create a new SageMaker notebook instance that we can apply our efs-mount lifecycle configuration to.
After choosing Create notebook instance and waiting a few minutes for our instance to be ready, we can open it, and confirm from the Jupyter Terminal that our efs directory was created and mounted successfully.
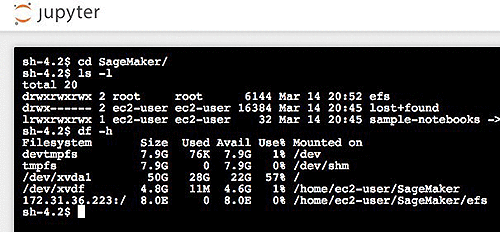
Now, even when we restart our notebook instance, our EFS file system will be remounted and available immediately.
Conclusion
Lifecycle configurations in Amazon SageMaker notebooks are extremely versatile tools. This blog post shows you one way to use them to enable you to expand the file system storage of your SageMaker notebook instances. You can find more information about lifecycle configurations here.
About the Author
 David Arpin is AWS’s AI Platforms Selection Leader and has a background in managing Data Science teams and Product Management.