AWS Partner Network (APN) Blog
Modernize Your CI/CD Pipeline Using Jenkins X with Amazon EKS
By Oscar Medina, Developer Advocate for Jenkins X at CloudBees
 |
At a time when software delivery speed matters more than ever, teams need a toolchain that allows them to build and deploy rapidly while realizing the cost savings of open source technologies.
Amazon Elastic Kubernetes Service (Amazon EKS) is a fully managed Kubernetes service that takes us part of the way toward that goal. Jenkins takes us the rest of the way. It’s a self-contained, open source server designed to automate all sorts of tasks related to building, testing, and delivering or deploying software.
CloudBees is a provider of Jenkins-based continuous integration/continuous delivery (CI/CD) solutions (Jenkins X) that meet the security, scalability, and manageability needs of on-premises and cloud environments. We are also an AWS Partner Network (APN) Advanced Technology Partner with the AWS DevOps Competency.
In this post, I’ll show you how to combine Amazon EKS with Jenkins X to establish a Kubernetes-native CI/CD process. Doing that requires two tasks:
- Task 1: Install Jenkins X on a newly-created Amazon EKS cluster.
- Task 2: Import an existing application from GitHub so you can run it through your new Kubernetes-native CI/CD process.
When done, you will know how to get Amazon EKS and Jenkins X up and running, run your application through CI/CD in Jenkins X, and publish it to a staging environment.
About Jenkins X
Jenkins X is a modern Kubernetes-native CI/CD platform that allows you to focus more on developing features for your applications instead of having to learn the intricacies of Kubernetes and related technologies.
The platform includes a Google open source software (OSS) project named Tekton, which as of version 2.0 has been used as the pipeline execution engine for Jenkins X.
Jenkins X was conceived taking into consideration all of the principles outlined in the book Accelerate: Building and Scaling High Performing Technology Organizations by Nicole Forsgren, Ph.D., and Jez Humble.
The Jenkins X open-source project team wanted to ensure anyone could have a high-performing organization if they were willing to follow the principles outlined in the Accelerate book. In fact, the entire Jenkins X platform is based on this intent, so it safeguards you from making mistakes.
Think of it as guardrails to keep you aligned with best practices—including GitOps, which Jenkins X uses to manage its own configuration—that leave you with a sustainable CI/CD pipeline in place.
Jenkins X Boot
Prior to Jenkins X Boot, you would install Jenkins X using the command line interface (CLI). This was a great way to get started fast. However, it did not take into account the need to follow core principles like GitOps and infrastructure as code (IaC).
Also, running CLI commands to provision clusters was not idempotent, meaning if you ran the CLI command multiple times you could not expect the same result. Therefore, the Jenkins X team decided to decouple the provisioning of clusters from the installation of Jenkins X itself. So, they developed Jenkins X Boot.
With Jenkins X Boot, you can install and maintain the configuration of the platform and leave the provisioning of clusters to standard tools such as eksctl for Amazon EKS or even Terraform, if your company has adopted it. Jenkins X Boot also lets you run the jx boot CLI command whenever you need to make a configuration change.
Requirements YAML File
Jenkins X Boot uses a YAML (jx-requirements-eks.yml) file to allow you to specify the configuration needed for the Jenkins X instance. You can configure things like Transport Layer Security (TLS), custom domains, HashiCorp Vault, and more.
Boot Config Repository
Jenkins X Boot uses a GitHub repository that is cloned when you run the jx boot command for the first time. That repository becomes the heart of your configuration, and you’ll use it for subsequent changes.
During the initial boot process, the repository is cloned locally to your desktop. Then it’s created in your GitHub organization. Making changes to your Jenkins X cluster entails making changes to this repository through the typical pull request (PR) process.
Task 1: Install Jenkins X on Amazon EKS Cluster
You can create your Amazon EKS cluster using any method you’d like, such as using the eksctl CLI tool or Terraform. From the Jenkins X perspective, how you create your cluster does not matter. For this task, I used eksctl to create this cluster:

Figure 1 – The Amazon EKS cluster running Jenkins X that I used for this task.
For this task, I will use a stable distribution of the open-source Jenkins X project, otherwise known as CloudBees Jenkins X Distribution (CJXD). The advantage of using this edition over the straight open source server is it has been tested and certified for Amazon EKS. It also allows for a controlled platform upgrade within your enterprise environment.
I have a clean cluster named drymartini that is using Kubernetes 1.14:

Figure 2 – Amazon EKS cluster named drymartini I used for this procedure.
My goal for this task is to end up with a basic configuration that includes a custom domain and TLS, both of which are configured in the first Jenkins X Boot CLI command run.
This task has two main steps, each with several sub-steps:
- Download and install Jenkins X CLI.
- Install Jenkins X on Amazon EKS Cluster.
Prerequisites
The prerequisites for this process are a bit involved, so I’ll take some time to explain how to address them:
- GitHub organization and Bot account.
- Bot account permissions.
- Custom domain Amazon Route 53 settings.
GitHub Organization and Bot Account
Most companies have a GitHub organization where their repositories reside. Be sure the associated Bot account has permissions to the GitHub organization.
To illustrate this process, I created a sample GitHub organization.

Figure 3 – Sample GitHub organization shows bot account as member.
Bot Account Permissions
Make sure the Bot account does not have multi-factor authentication (MFA) enabled, but be sure it’s assigned a member role.
Custom Domain Amazon Route 53 Settings
This task configures Jenkins X with a custom domain. To enable that, first configure an Amazon Route 53 hosted zone, and then delegate your subdomain to Amazon Route 53:
- Create a hosted zone for your subdomain.
- Delegate your subdomain to Amazon Route 53 from the vendor hosting your domain.
- Test it using
digor some other method.
In my case, my domain is managed by Google Domains, so I created a Google Name Service (NS) record pointing to the NS servers given to me by Amazon Route 53 after I created my hosted zone.
You can test the hosted zone from the AWS Console. Look for a NOERROR output.

Figure 4 – Testing Amazon Route 53 hosted zone in AWS Console.
Step 1: Download and Install Jenkins X CLI
The first thing you must do is install the CLI so you can use Jenkins X. The CLI allows you to interact with the platform in different ways, including viewing pipelines, logs, creating pull requests, and more.
There are binaries of the CLI for several platforms, including Linux and OS X. I used OS X. However, the installation is typical of any binary. At the time I wrote this, CJXD 8 was the latest binary version for OS X.
1a: Download the latest version of the jx binary archive
Use your web browser or curl on the command line and pipe (|) the compressed archive to the tar command:
1b: Use the mv command to install the jx binary by moving it to a location in your executable path
1c: Ensure you are using the correct binary and executable path by running the which command
1d: Check the binary version with the jx version command
jx version
| NAME | VERSION |
| jx | 2.0.1245+cjxd.8 |
| Kubernetes cluster | v1.14.10-gke.27 |
| kubectl | v1.16.0 |
| helm client | 2.14.3 |
| git | 2.21.0 |
| Operating System | Mac OS X 10.14.6 build 18G3020 |
When you downloaded the archive in Step 1a above, a file called jx-requirements-eks.yml was also un-archived and placed in the directory where you ran the download command. You will use that file in the next section.
Step 2: Install Jenkins X on Amazon EKS Cluster Using Jenkins X Boot
Assuming you have an Amazon EKS cluster provisioned, and you’re able to connect to it from your desktop with proper credentials, you can now focus on installing Jenkins X on top of that cluster.
2a: Modify the jx-requirements-eks.yml file with basic settings
The basic settings to execute an initial jx boot installation look similar to these. Modify yours as needed:
The environmentGitOwner is the GitHub organization name. Because I am using the free tier of GitHub, my repositories must be publicly accessible. Therefore, I set the environmentGitPublic field to true. The rest of the fields are self-explanatory.
The domain is specified within the ingress field and child elements:
For the jx boot command to run successfully the first time, specify an AWS Identity and Access Management (IAM) username in the specific jx-requirements-eks.yml file section, like this:
More information about IAM permissions for Jenkins on Amazon EKS is available on the CloudBees site.
2b: Run the JX Boot CLI Command
Having modified the appropriate fields in the jx-requirements-eks.yml, run jx boot in the same location where the requirements file is located:
It asks if you would like to boot the cluster:
Creating boot config with defaults, as not in an existing
boot directory with a git repository.

No Jenkins X pipeline file jenkins-x.yml or no jx boot
requirements file jx-requirements.yml found. You are not
running this command from inside a Jenkins X Boot git clone

To continue we will clone
https://github.com/cloudbees/cloudbees-jenkins-x-boot-
config.git @ 2.0.1245+cjxd.8 to cloudbees-jenkins-x-boot-
config

? Do you want to clone the Jenkins X Boot Git repository? [? for help] (Y/n)
Since it defaults to (Y), press Enter.
The cluster configuration repository is cloned immediately. This repository is added to your GitHub Organization, and any future changes will require a pull request, as is the GitOps way.
IMPORTANT: If you run jx boot again, you must run it from the root of the cluster configuration repository that was cloned during the first run. This means you will not use the original jx-requirements-eks.yml file in subsequent runs.
The next prompt asks you to enter a comma-separated list of GitHub usernames that can be approvers for PRs issued against the configuration repository, otherwise known as the Dev Repository.
WARNING: Vault is enabled and TLS is not enabled. This means your secrets will be sent
to and from your cluster in the clear.
See https://go.cloudbees.com/docs/cloudbees- jenkins-x-distribution/tls/
for more information

WARNING: TLS is not enabled so your webhooks will be called using HTTP. This means
your webhook secret will be sent to your cluster in the clear.
See https://go.cloudbees.com/docs/cloudbees-jenkins-x- distribution/tls/
for more information

? Do you wish to continue? [? for help] (y/N)
Enter Y, to ignore this message for now.
Next, press Enter to accept the creation of the long term storage Amazon Simple Storage Service (Amazon S3) buckets. These are used for logs, reports, and charts.
The next question asks you to enter a comma delimited list of the GitHub usernames that can approve changes to the development or configuration repo.
The next question asks you to enter a password for the Jenkins X Admin account.
? Jenkins X Admin Username admin

? Jenkins X Admin Password [? for help] *********

? Pipeline bot Git username jenkinsx-bot-sposcar

? Pipeline bot Git email address jenkinsxio@gmail.com

? Pipeline bot Git token [? for help]
****************************************

Generated token
c1d06666666650b8b18453336830788de8366609dc24a32,
to use it press enter.
This is the only time the generated token is shown, so be sure to save it.
? HMAC token, used to validate incoming webhooks. Press
enter to use the generated token [? for help]

? Do you want to configure an external Docker Registry? No
Press Enter to use the generated token. Then enter No to the question about configuring an external Docker registry.
Jenkins X goes through a verification of configuration on the newly created environment. The last output from the install looks similar to this:
POD                                            STATUS

crier-6c4944b868-wccgk                         Running

deck-7f5c64b45d-cdhpv                          Running

deck-7f5c64b45d-xsqgs                          Running

exdns-external-dns-545998d78d-spcvf            Running

hook-647f968ffb-95n99                          Running

hook-647f968ffb-b4ppb                          Running

horologium-9fdcd6b57-cbgwq                     Running

jenkins-x-chartmuseum-d87cbb789-qj878          Running

jenkins-x-controllerbuild-5b87d6f59c-4nb6v     Running

jenkins-x-controllerrole-55fbf89ccc-t2b5b      Running

jenkins-x-heapster-75558b6cfb-8vszj            Running

jenkins-x-nexus-8b8dfd746-cjzrk                Running

jx-vault-drymartini-0                          Running

jx-vault-drymartini-configurer-769ffcd54-5hq8x Running

pipeline-7dff794486-qkmvt                      Running

pipelinerunner-7c747569d4-d8n9l                Running

tekton-pipelines-controller-666488cbd5-gbw29   Running

tide-6bcf8f9f7f-klz2n                          Running

vault-operator-75d5446bb7-8f6w9                Running

Verifying the git config

Verifying username jenkinsx-bot-sposcar at git server github at https://github.com

Found 1 organisations in git server https://github.com: jenkins-oscar

Validated pipeline user jenkinsx-bot-sposcar on git server https://github.com

Git tokens seem to be setup correctly

Installation is currently looking: GOOD
Now that the installation is working, run jx get urls to see the endpoints:
NAME                URL

deck                https://deck-jx.jx.eks.sharepointoscar.com

hook                https://hook-jx.jx.eks.sharepointoscar.com

jx-vault-drymartini https://vault-jx.jx.eks.sharepointoscar.com

nexus               https://nexus-jx.jx.eks.sharepointoscar.com

tide                https://tide-jx.jx.eks.sharepointoscar.com
Now, you are ready to use the Amazon EKS cluster.
Task Two: Import an Application from GitHub
You will most likely have applications you’ve developed, so let’s go over how to import an application into Jenkins X and run it through CI/CD. You’ll ultimately deploy it to the staging environment. This task has three steps:
- Import the application.
- Verify the deployed application is in staging.
- Promote the application to production.
No prerequisites in addition to those for Task 1 are required.
Step 1: Import the Application
Run this CLI command and use the GitHub URL for your application. For example:
jx import --url https://github.com/jenkins-oscar/carsweb.git
The command asks what Git username you would like to use to import the app. I selected my personal account:
? Git user name: sharepointoscar
Next, the jx import command leads to these actions:
- Jenkins X detects the language you app is written in, and selects the appropriate build pack.
- Jenkins X adds additional files to your repository, including a helm chart,
skaffold.yaml, and others. - Adds a new webhook to your app repository.
- Automatically triggers a pipeline to deploy your application to the staging environment, which also means a PR was created in the staging GitHub repository.
- Displays a list of commands you can use to see the activity of the pipeline being triggered for this application.
Here’s what that looks like in the CLI:
performing pack detection in folder /Users/omedina/git-repos/carsweb

--> Draft detected EJS (57.572451%)

--> Could not find a pack for EJS. Trying to find the next likely language match...

--> Draft detected JavaScript (26.858251%)

selected pack: /Users/omedina/.jx/draft/packs/github.com/jenkins-x-buildpacks/jenkins-x-kubernetes/packs/javascript

replacing placeholders in directory /Users/omedina/git-repos/carsweb

app name: carsweb, git server: github.com, org: jenkins-oscar, Docker registry org: jenkins-oscar

skipping directory "/Users/omedina/git-repos/carsweb/.git"

Let's ensure that we have an ECR repository for the Docker image jenkins-oscar/carsweb

Creating GitHub webhook for jenkins-oscar/carsweb for url https://hook-jx.jx.eks.sharepointoscar.com/hook

…….

Watch pipeline activity via:    jx get activity -f carsweb -w

Browse the pipeline log via:    jx get build logs jenkins-oscar/carsweb/master

You can list the pipelines via: jx get pipelines

When the pipeline is complete:  jx get applications

For more help on available commands see: https://jenkins-x.io/developing/browsing/
Note that your first pipeline may take a few minutes to start while the necessary images get downloaded.
I used ChatOps, so my bot account took care of merging the PR for the staging environment, and the app was published.

Figure 5 – Using ChatOps, Jenkins X Bot merges a pull request (PR) to deploy the application in staging.
Step 2: Verify the Deployed Application is in Staging
To list the deployed applications, use this command:
jx get applications
Its output, using my application as an example, looks like this:
APPLICATION STAGING PODS URL

carsweb     0.0.1   1/1  http://carsweb-jx-staging.jx.eks.sharepointoscar.com
The command confirms the application you just imported is now deployed in the staging environment. If you go to that URL, you should find your application. This is how it looks for my application. Notice the staging URL and the message in the yellow band:

Figure 6 – My sample Carsweb application deployed to staging.
Step 3: Promote the Application to Production
Run this command:
jx promote --app carsweb --version 0.0.1 --env production
It publishes the staged application to the production environment by creating a pull request in the production Github repository.
This is how it looks for my application. Notice the yellow band is gone.
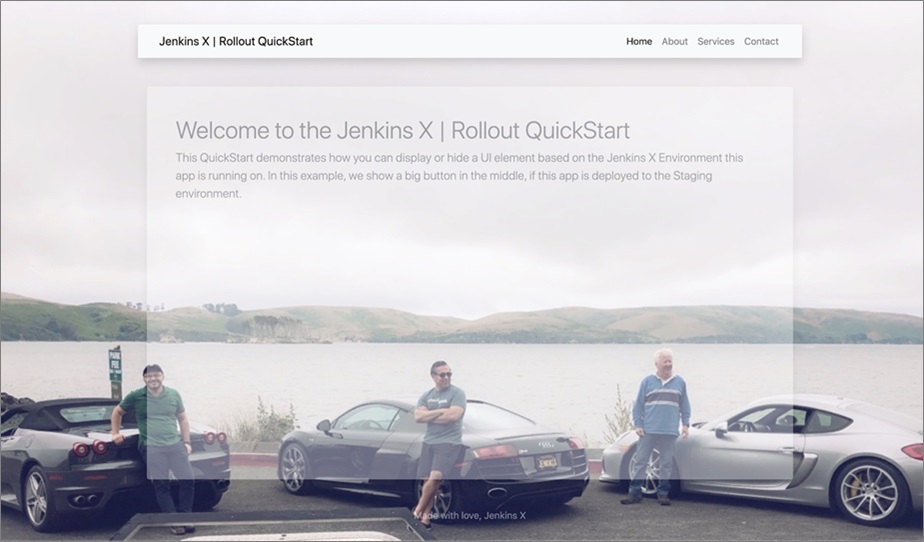
Figure 7 – My sample Carsweb application deployed to production.
As you can see from the URL, your production environment now has the same version of your application running in production as well.
Summary
In this post, we walked through creating an Amazon EKS cluster, and then installing Jenkins X through the Jenkins X Boot CLI. We imported an existing application from GitHub, which immediately triggered a pipeline to deploy it to your staging environment.
Along the way, we used ChatOps and the bot account to intercept and act according to the pull request comments, ultimately merging pull requests and triggering deployment pipelines.
We also used a GitOps pull request that was being tracked to deploy your application to its respective environment. We promoted your application to production. Git was the source of truth all along.
The content and opinions in this blog are those of the third party author and AWS is not responsible for the content or accuracy of this post.
.

.
CloudBees – APN Partner Spotlight
CloudBees is an AWS Competency Partner and provider of Jenkins-based CI/CD solutions (Jenkins X) that meet the security, scalability, and manageability needs of on-premises and cloud environments.
Contact CloudBees | Solution Overview | AWS Marketplace
*Already worked with CloudBees? Rate the Partner
*To review an APN Partner, you must be an AWS customer that has worked with them directly on a project.