AWS Compute Blog
Best practices for handling EC2 Spot Instance interruptions
This post is contributed by Scott Horsfield – Sr. Specialist Solutions Architect, EC2 Spot
Amazon EC2 Spot Instances are spare compute capacity in the AWS Cloud available to you at steep discounts compared to On-Demand Instance prices. The only difference between an On-Demand Instance and a Spot Instance is that a Spot Instance can be interrupted by Amazon EC2 with two minutes of notification when EC2 needs the capacity back. Fortunately, there is a lot of spare capacity available, and handling interruptions in order to build resilient workloads with EC2 Spot is simple and straightforward. In this post, I introduce and walk through several best practices that help you design your applications to be fault tolerant and resilient to interruptions.
By using EC2 Spot Instances, customers can access additional compute capacity between 70%-90% off of On-Demand Instance pricing. This allows customers to run highly optimized and massively scalable workloads that would not otherwise be possible. These benefits make interruptions an acceptable trade-off for many workloads.
When you follow the best practices, the impact of interruptions is insignificant because interruptions are infrequent and don’t affect the availability of your application. At the time of writing this blog post, less than 5% of Spot Instances are interrupted by EC2 before being terminated intentionally by a customer, because they are automatically handled through integrations with AWS services.
Many applications can run on EC2 Spot Instances with no modifications, especially applications that already adhere to modern software development best practices such as microservice architecture. With microservice architectures, individual components are stateless, scalable, and fault tolerant by design. Other applications may require some additional automation to properly handle being interrupted. Examples of these applications include those that must gracefully remove themselves from a cluster before termination to avoid impact to availability or performance of the workload.
In this post, I cover best practices around handing interruptions so that you too can access the massive scale and steep discounts that Spot Instances can provide.
Architect for fault tolerance and reliability
Ensuring your applications are architected to follow modern software development best practices is the first step in successfully adopting Spot Instances. Software development best practices, such as graceful degradation, externalizing state, and microservice architecture already enforce the same best practices that can allow your workloads to be resilient to Spot interruptions.
A great place to start when designing new workloads, or evaluating existing workloads for fault tolerance and reliability, is the Well-Architected Framework. The Well-Architected Framework is designed to help cloud architects build secure, high-performing, resilient, and efficient infrastructure for their applications. Based on five pillars — Operational Excellence, Security, Reliability, Performance Efficiency, and Cost Optimization — the Framework provides a consistent approach for customers to evaluate architectures, and implement designs that will scale over time.
The Well-Architected Tool is a free tool available in the AWS Management Console. Using this tool, you can create self-assessments to identify and correct gaps in your current architecture that might affect your toleration to Spot interruptions.
Use Spot integrated services
Some AWS services that you might already use, such as Amazon ECS, Amazon EKS, AWS Batch, and AWS Elastic Beanstalk have built-in support for managing the lifecycle of EC2 Spot Instances. These services do so through integration with EC2 Auto Scaling. This service allows you to build fleets of compute using On-Demand Instance and Spot Instances with a mixture of instance types and launch strategies. Through these services, tasks such as replacing interrupted instances are handled automatically for you. For many fault-tolerant workloads, simply replacing the instance upon interruption is enough to ensure the reliability of your service. For advanced use cases, EC2 Auto Scaling groups provide notifications, auto-replacement of interrupted instances, lifecycle hooks, and weights. These more advanced features allow for more control by the user over the composition and lifecycle of your compute infrastructure.
Spot-integrated services automate processes for handling interruptions. This allows you to stay focused on building new features and capabilities, and avoid the additional cost that custom automation may accrue over time.
Most examples in this post use EC2 Auto Scaling groups to demonstrate best practices because of the built-in integration with other AWS services. Also, Auto Scaling brings flexibility when building scalable fault-tolerant applications with EC2 Spot Instances. However, these same best practices can also be applied to other services such as Amazon EMR, EC2 fleet, and your own custom automation and frameworks.
Choose the right Spot Allocation Strategy
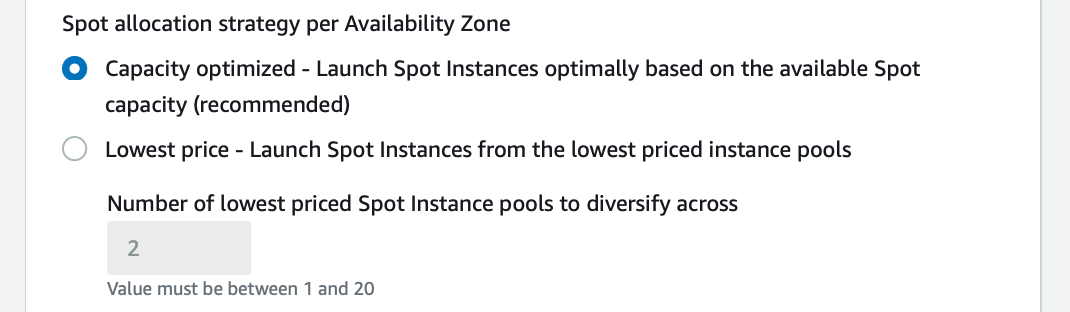
It is a best practice to use the capacity-optimized Spot Allocation Strategy when configuring your EC2 Auto Scaling group. This allows Auto Scaling groups to launch instances from Spot Instance pools with the most available capacity. Since Spot Instances can be interrupted when EC2 needs the capacity back, launching instances optimized for available capacity is a key best practice for reducing the possibility of interruptions.
You can simply select the Spot allocation strategy when creating new Auto Scaling groups, or modifying an existing Auto Scaling group from the console.
Choose instance types across multiple instance sizes, families, and Availability Zones
It is important that the Auto Scaling group has a diverse set of options to choose from so that services launch instances optimally based on capacity. You do this by configuring the Auto Scaling group to launch instances of multiple sizes, and families, across multiple Availability Zones. Each instance type of a particular size, family, and Availability Zone in each Region is a separate Spot capacity pool. When you provide the Auto Scaling group and the capacity-optimized Spot Allocation Strategy a diverse set of Spot capacity pools, your instances are launched from the deepest pools available.
When you create a new Auto Scaling group, or modify an existing Auto Scaling group, you can specify a primary instance type and secondary instance types. The Auto Scaling group also provides recommended options. The following image shows what this configuration looks like in the console.

When using the recommended options, the Auto Scaling group is automatically configured with a diverse list of instance types across multiple instance families, generations, or sizes. We recommend leaving a many of these instance types in place as possible.
Handle interruption notices
For many workloads, the replacement of interrupted instances from a diverse set of instance choices is enough to maintain the reliability of your application. In other cases, you can gracefully decommission an application on an instance that is being interrupted. You can do this by knowing that an instance is going to be interrupted and responding through automation to react to the interruption. The good news is, there are several ways you can capture an interruption warning, which is published two minutes before EC2 reclaims the instance.
Inside an instance
The Instance Metadata Service is a secure endpoint that you can query for information about an instance directly from the instance. When a Spot Instance interruption occurs, you can retrieve data about the interruption through this service. This can be useful if you must perform an action on the instance before the instance is terminated, such as gracefully stopping a process, and blocking further processing from a queue. Keep in mind that any actions you automate must be completed within two minutes.
To query this service, first retrieve an access token, and then pass this token to the Instance Metadata Service to authenticate your request. Information about interruptions can be accessed through http://169.254.169.254/latest/meta-data/spot/instance-action. This URI returns a 404 response code when the instance is not marked for interruption. The following code demonstrates how you could query the Instance Metadata Service to detect an interruption.
If the instance is marked for interruption, you receive a 200 response code. You also receive a JSON formatted response that includes the action that is taken upon interruption (terminate, stop or hibernate) and a time when that action will be taken (ie: the expiration of your 2-minute warning period).
The following sample script demonstrates this pattern.
Developing automation with the Amazon EC2 Metadata Mock
When developing automation for handling Spot Interruptions within an EC2 Instance, it’s useful to mock Spot Interruptions to test your automation. The Amazon EC2 Metadata Mock (AEMM) project allows for running a mock endpoint of the EC2 Instance Metadata Service, and simulating Spot interruptions. You can use AEMM to serve a mock endpoint locally as you develop your automation, or within your test environment to support automated testing.
1. Download the latest Amazon EC2 Metadata Mock binary from the project repository.
2. Run the Amazon EC2 Metadata Mock configured to mock Spot Interruptions.
3. Test the mock endpoint with curl.
With default configuration, you receive a response for a simulated Spot Interruption with a time set to two minutes after the request was received.
Outside an instance
When a Spot Interruption occurs, a Spot instance interruption notice event is generated. You can create rules using Amazon CloudWatch Events or Amazon EventBridge to capture these events, and trigger a response such as invoking a Lambda Function. This can be useful if you need to take action outside of the instance to respond to an interruption, such as graceful removal of an interrupted instance from a load balancer to allow in-flight requests to complete, or draining containers running on the instance.
The generated event contains useful information such as the instance that is interrupted, in addition to the action (terminate, stop, hibernate) that is taken when that instance is interrupted. The following example event demonstrates a typical EC2 Spot Instance Interruption Warning.
Capturing this event is as simple as creating a new event rule that matches the pattern of the event, where the source is aws.ec2 and the detail-type is EC2 Spot Interruption Warning.
For example, if multiple EC2 Spot Instances were interrupted, you could aggregate the instance-ids by temporarily storing them in DynamoDB and then combine the instance-ids into a single DescribeInstances API call. This allows you to retrieve details about multiple instances rather than implementing individual DescribeInstances API calls that may exceed API limits and result in throttling.
The following script demonstrates describing multiple EC2 Instances with a reusable paginator that can accept API-specific arguments. Additional examples can be found here.
When running containerized workloads, it’s common to want to let the container orchestrator know when a node is going to be interrupted. This allows for the node to be marked so that the orchestrator knows to stop placing new containers on an interrupted node, and drain running containers off of the interrupted node. Amazon EKS and Amazon ECS are two popular services that manage containers on AWS, and each have simple integrations that allow for handling interruptions.
Amazon EKS/Kubernetes
With Kubernetes workloads, including self-managed clusters and those running on Amazon EKS, use the AWS maintained AWS Node Termination Handler to monitor for Spot Interruptions and make requests to the Kubernetes API to mark the node as non-schedulable. This project runs as a Daemonset on your Kubernetes nodes. In addition to handling Spot Interruptions, it can also be configured to handle Scheduled Maintenance Events.
You can use kubectl to apply the termination handler with default options to your cluster with the following command.
Amazon ECS
With Amazon ECS workloads you can enable Spot Instance draining by passing a configuration parameter to the ECS container agent. Once enabled, when a container instance is marked for interruption, ECS receives the Spot Instance interruption notice and places the instance in DRAINING status. This prevents new tasks from being scheduled for placement on the container instance. If there are container instances in the cluster that are available, replacement service tasks are started on those container instances to maintain your desired number of running tasks.
You can enable this setting by configuring the user data on your container instances to apply this the setting at boot time.
Inside a Container Running on Amazon ECS
When an ECS Container Instance is interrupted, and the instance is marked as DRAINING, running tasks are stopped on the instance. When these tasks are stopped, a SIGTERM signal is sent to the running task, and ECS waits up to 2 minutes before forcefully stopping the task, resulting in a SIGKILL signal sent to the running container. This 2 minute window is configurable through a stopTimeout container timeout option, or through ECS Agent Configuration, as shown in the prior code, giving you flexibility within your container to handle the interruption. If you set this value to be greater than 120 seconds, it will not prevent your instance from being interrupted after the 2 minute warning. So, I recommend setting to be less than or equal to 120 seconds.
You can capture the SIGTERM signal within your containerized applications. This allows you to perform actions such as preventing the processing of new work, checkpointing the progress of a batch job, or gracefully exiting the application to complete tasks such as ensuring database connections are properly closed.
The following example Golang application shows how you can capture a SIGTERM signal, perform cleanup actions, and gracefully exit an application running within a container.
Implement checkpointing
For some workloads, interruptions can be very costly. An example of this type of workload is if the application needs to restart work on a replacement instance, especially if your applications needs to restart work from the beginning. This is common in batch workloads, sustained load testing scenarios, and machine learning training.
To lower the cost of interruption, investigate patterns for implementing checkpointing within your application. Checkpointing means that as work is completed within your application, progress is persisted externally. So, if work is interrupted, it can be restarted from where it left off rather than from the beginning. This is similar to saving your progress in a video game and restarting from the last save point vs. the start of the level. When working with an interruptible service such as EC2 Spot, resuming progress from the latest checkpoint can significantly reduce the cost of being interrupted, and reduce any delays that interruptions could otherwise incur.
For some workloads, enabling checkpointing may be as simple as setting a configuration option to save progress externally (Amazon S3 is often a great place to store checkpointing data). For example, when running an object detection model training job on Amazon SageMaker with Managed Spot Training, enabling checkpointing is as simple as passing the right configuration to the training job.
The following example demonstrates how to configure a SageMaker Estimator to train an object detection model with checkpointing enabled. You can access the complete example notebook here.
For other workloads, enabling checkpointing may require extending your custom framework, or a public frameworks to persist data externally, and then reload that data when an instance is replaced and work is resumed.
For example, MXNet, a popular open source library for deep-learning, has a mechanism for executing Custom Callbacks during the execution of deep learning jobs. Custom Callbacks can be invoked during the completion of each training epoch, and can perform custom actions such as saving checkpointing data to S3. Your deep-learning training container could then be configured to look for any saved checkpointing data once restarted. Then load that training data locally so that training can be continued from the latest checkpoint.
By enabling checkpointing, you ensure that your workload is resilient to any interruptions that occur. Checkpointing can help to minimize data loss and the impact of an interruption on your workload by saving state and recovering from a saved state. When using existing frameworks, or developing your own framework, look for ways to integrate checkpointing so that your workloads have the flexibility to run on EC2 Spot Instances.
Track the right metrics
The best practices discussed in this blog can help you build reliable and scalable architectures that are resilient to Spot Interruptions. Architecting for fault tolerance is the best way you can ensure that your applications are resilient to interruptions, and is where you should focus most of your energy. Monitoring your services is important because it helps ensure that best practices are being effectively implemented. It’s critical to pick metrics that reflect availability and reliability, and not get caught up tracking metrics that do not directly correlate to service availability and reliability.
Some customers choose to track Spot Interruptions, which can be useful when done for the right reasons, such as evaluating tolerance to interruptions or conducing testing. However, frequency of interruption, or number of interruptions of a particular instance type, are examples of metrics that do not directly reflect the availability or reliability of your applications. Since Spot interruptions can fluctuate dynamically based on overall Spot Instance availability and demand for On-Demand Instances, tracking interruptions often results in misleading conclusions.
Rather than tracking interruptions, look to track metrics that reflect the true reliability and availability of your service including:
- Load Balancer Connection Metrics
- RejectedConnectionCount
- TargetConnectionErrorCount
- SurgeQueueLength
- TargetResponseTime
- Auto Scaling Group Metrics
- GroupInServiceInstances
- GroupDesiredCapacity
- ECS Metrics
- Service Running Task Count
- Service CPUUtilization
- Service MemoryUtilization
- Customer Experience Monitoring
- CloudWatch Synthetic Monitoring
Conclusion
The best practices we’ve discussed, when followed, can help you run your stateless, scalable, and fault tolerant workloads at significant savings with EC2 Spot Instances. Architect your applications to be fault tolerant and resilient to failure by using the Well-Architected Framework. Lean on Spot Integrated Services such as EC2 Auto Scaling, AWS Batch, Amazon ECS, and Amazon EKS to handle the provisioning and replacement of interrupted instances. Be flexible with your instance selections by choosing instance types across multiple families, sizes, and Availability Zones. Use the capacity-optimized allocation strategy to launch instances from the Spot Instance pools with the most available capacity. Lastly, track the right metrics that represent the true availability of your application. These best practices help you safely optimize and scale your workloads with EC2 Spot Instances.