AWS Database Blog
Stream time series data into Amazon Timestream using Apache NiFi
Time series data is one of the fastest growing categories of source data used by organizations to provide better services, analysis, and insights to their end-users. High on the list of requirements is the speed at which streaming data can be ingested and accessed by existing and new applications. One of the enabling technologies being adopted by organizations to automate data flows has been Apache NiFi, an open-source site-to-site data transfer tool that aims to abstract writing code by providing a simple drag-and-drop interface of predefined processor modules, which you can use to connect a variety of data sources and targets and perform lightweight data transformations. Another requirement we hear consistently is to simplify the process and improve operational excellence. One example is to remove the overhead of a self-managed database (patching, scaling, monitoring, and so on) to a fully managed, serverless database engine such as Amazon Timestream.
In this post, we discuss how Apache NiFi users can ingest time series data into Timestream without explicitly writing code. Our team has developed an Apache NiFi processor, called PutTimestreamJSON, which provides a no-code capability to enable data flow ingestion from an existing Apache NiFi processor to Timestream.
We provide a use case to demonstrate how to upload and use the PutTimestreamJSON processor. The walkthrough provides the steps required to configure and run the example in your own AWS account.
Alternative methods to ingest data into Timestream include either using the AWS SDK or integrating Amazon Kinesis using the Flink Connector, which requires coding.
Solution overview
To demonstrate the ingest capability, we have developed a simple use case to monitor data center metrics such as CPU, memory, and disk usage in real time.
We use Apache NiFi’s data generation capability to simulate this feed, but in a real-world scenario, you can stream the data into your data flow using the appropriate source processors. In our use case, the simulated feed consists of metrics such as host name, data center name, zone, CPU usage, memory usage, and disk usage percentages. The following diagram illustrates the high-level architecture for our use case. Data generated from the data center nodes is acquired by source processors on the Apache NiFi cluster and delivered to a Timestream table using the PutTimestreamJSON processor.

The high-level steps to configure this solution are:
- Use AWS CloudFormation to configure the environment with the following resources:
- An Amazon Virtual Private Cloud (Amazon VPC).
- An Amazon Elastic Compute Cloud (Amazon EC2) instance to run an Apache NiFi single-node instance.
- A target Timestream database and table.
- Configure the Apache NiFi data flow process.
- Run the data flow process.
- Check the results by querying the data.
- Visualize the data with Amazon QuickSight.
Prerequisites
For this walkthrough, you must have the following prerequisites:
- An AWS account with privileges to access Timestream. You also need an access key ID and secret access key. Make sure that the key has the least privilege principle, which means that the key should be granted only the least permissions it requires to complete a task, which in our case is to perform write operations into the Timestream table. The processor also supports alternate authentication mechanisms using Apache NiFi’s
AWSCredentialsProviderControllerService. - An Amazon EC2 key pair required to run the CloudFormation template and for SSH purposes. You can use an existing key pair or create a new one if necessary.
- Your client machine’s public IPv4 address or a CIDR range that requires access to Apache NiFi instance.
- Decide if you are using an existing Apache NiFi cluster or the provided CloudFormation template file referenced in this post.
- If you have an existing Apache NiFi cluster, you can use it by deploying the NAR file (which you can download) for the
PutTimestreamJSONCopy the NAR file into the /lib directory on all Apache NiFi nodes and restart the Apache NiFi service. ThePutTimestreamJSONprocessor should be available for use after the service is up. - If you don’t have an existing Apache NiFi cluster, use the CloudFormation template provided in this post to deploy a single node Apache NiFi instance on Amazon EC2 that includes the
PutTimestreamJSON - Optionally, a QuickSight account for visualization.
- If you have an existing Apache NiFi cluster, you can use it by deploying the NAR file (which you can download) for the
Deploy resources via AWS CloudFormation
Deploy the CloudFormation template with the following steps:

- Choose Next.
- For Stack name, enter
NiFi. - For ClientIPCIDR, enter your IPv4/32 address, obtained as follows:
- On Windows, run
ipconfigat a command prompt and copy the ipv4 address and append/32. - On Mac, run
curl ipecho.net/plain ; echo /32and copy what’s returned.
- On Windows, run
- For KeyName, enter the name of your key pair.
- Choose Next.
- Choose Next
- Choose Create stack.
The CloudFormation stack creates the following resources:
- an Amazon VPC
- a single node Apache NiFi instance in Amazon EC2 (v 1.13.2) with the AWS
PutTimestreamJSONprocessor deployed - a Timestream database (
nifi-test_db) and table (nifi-test-table)
On the AWS CloudFormation console, monitor the stack Outputs tab and wait for the NiFiURL field to be populated with a hyperlink. This indicates that the deployment is fully up and running (approximately 15 minutes).
When the environment is ready, follow the next steps to configure the Apache NiFi data flow and ingest data into the Timestream database.
Configure the Apache NiFi data flow
To configure the data flow, complete the following steps:
- Download the Apache NiFi template we created called amazon-timestream-dataflow.xml.
- On the CloudFormation stack’s Outputs tab, copy the link in the
NiFiURL - Open a browser window and enter the copied
NifiURL
The Apache NiFi service canvas opens. If the page doesn’t load, make sure you’re not on a VPN.
- Upload the
amazon-timestream-dataflow.xmltemplate
For details on how to work with Apache NiFi templates, see Templates.
- Add the
amazon-timestream-dataflow.xmltemplate to the Apache NiFi canvas. - After the template is imported, choose the Timestream process group.
- Choose (right-click) and configure the
PutTimestreamJSONprocessor to input your AWS access key ID and secret access key details. - Choose Apply.

Before you run the data flow, you can explore the configurations on the GenerateFlowFile processor that simulates the timestream data. It uses a JSON structure as shown in the following code. The data is generated and streamed into the timestream table, which can be later queried.
Run the data flow process
To run the data flow, choose (right-click) the Timestream process group created by the data flow and choose Start.

After a few seconds, you can see data being generated by the GenerateFlowFile processor and passed to the PutTimestreamJSON processor. Success records are tallied in the success LogAttribute processor.
To stop the flow, choose the process group and choose Stop.
Let’s now look at the generated data using the Timestream console.
Query the data
To query your generated data, complete the following steps:
- On the Timestream console, choose Tables in the navigation pane
- Choose the table
nifi-test-table - Choose Query table

- Run the following query:

The following screenshot shows our results.

Deep dive into the processor payload
The PutTimestreamJSON processor accepts JSON messages. For the processor to ingest your streaming data, the data needs to be transformed into the payload structure that the PutTimestreamJSON processor can recognize. You can use other Apache NiFi processors within your data flow to perform this data conversion. The following code is a detailed description of the accepted payload structure:
A dimension in Timestream is an attribute that describes the metadata of a time series. An input record should have at least one dimension and takes the following structure:
A measure in Timestream is the actual value being measured by the record. It takes the following structure:
The PutTimestreamJSON processor is designed to insert records into the Timestream tables. However, by passing a measure version number greater than the current version, you can perform update and upsert operations using the same processor.
Additionally, you can batch multiple inserts into one payload by creating an array of insert records. The input in that case looks like the following:
Visualize your data with QuickSight
Now that you have confirmed the table has been populated with data, let’s use QuickSight to produce a couple visualizations of the dataset. This step is optional; also note that using QuickSight may incur charges to your account.
To enable or disable the AWS services that QuickSight can access, complete the following steps:
- Sign in to QuickSight.
- If you don’t have an account, create one with the same credentials you used earlier.
- Choose your user name and on the drop-down menu, choose Manage QuickSight.
- Choose Security & permissions.
- Under QuickSight access to AWS services, choose Add or remove.
A screen appears where you can enable all available AWS services.
- Select the check box for Timestream.
- Clear the check boxes for all other services.
- Choose Update to confirm.
Now we can configure QuickSight with Timestream.
- Choose Datasets in the navigation pane.
- Choose New dataset.

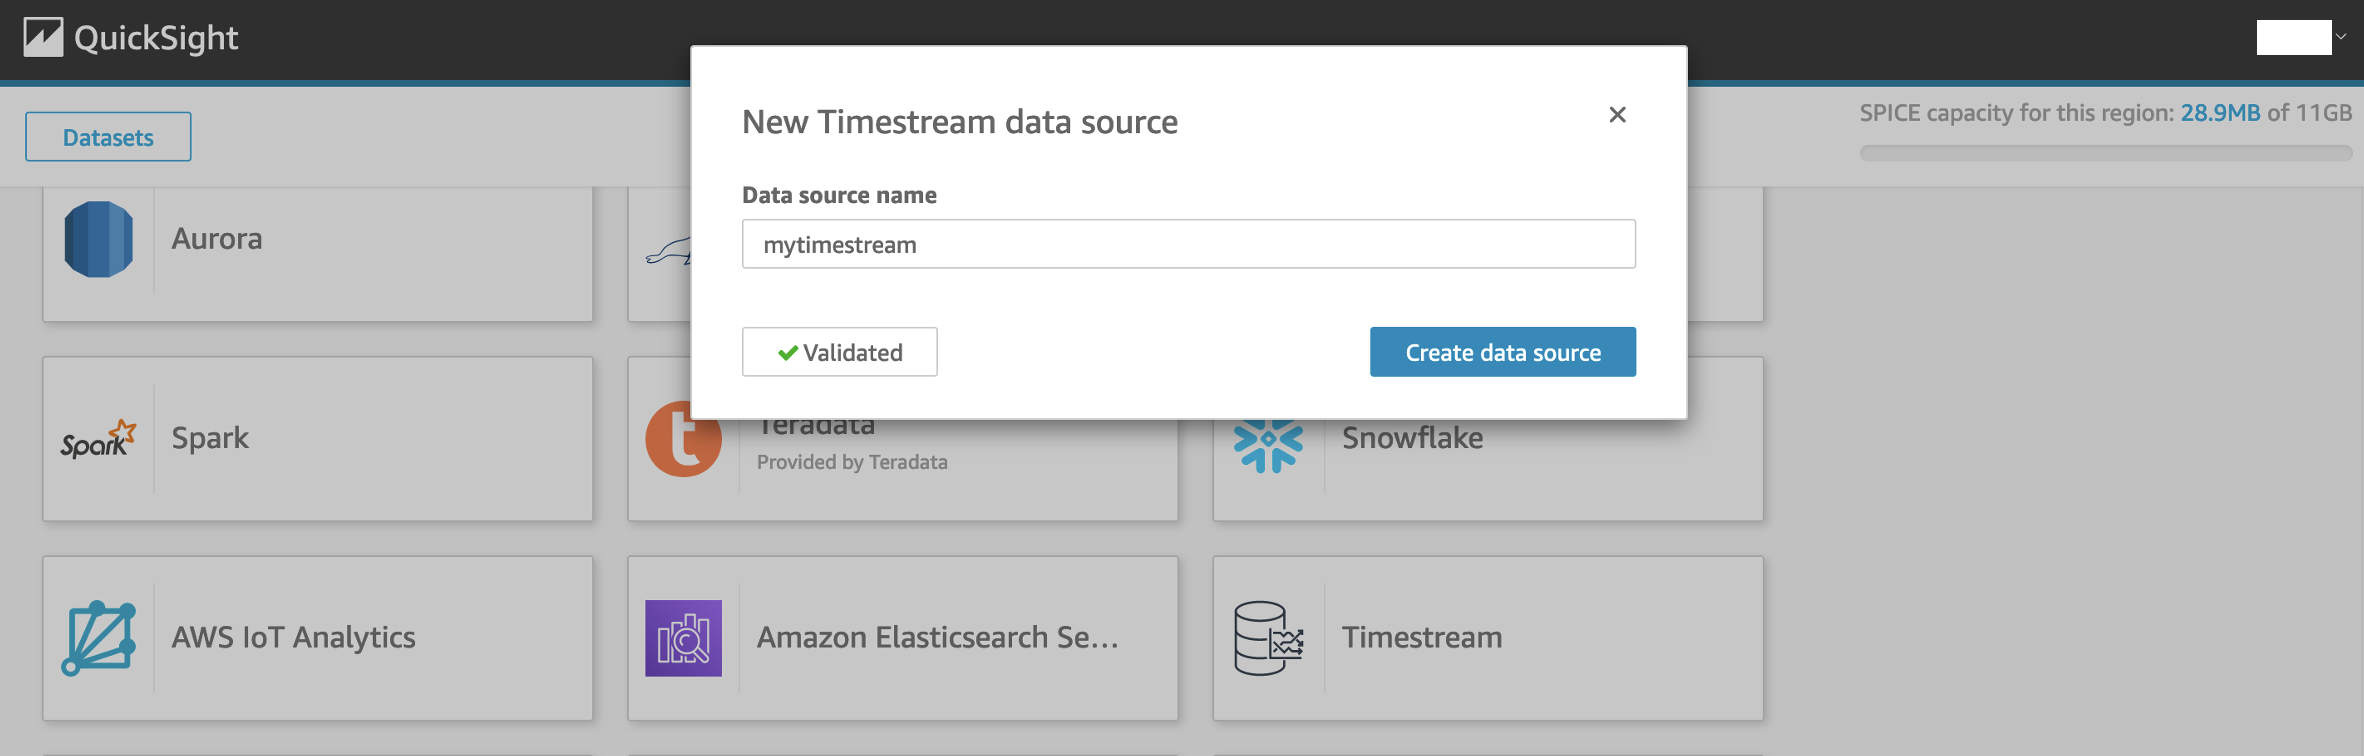
- Choose Timestream.
- For Data source name, enter
mytimestream. - Choose Validate connection.
- After the connection is validated, choose Create data source.
- Choose the database
nifi-test-dband tablenifi-test-tableand choose Select. - Select Direct query your data and choose Visualize.

- Choose the visual type Line Chart and plot measure metrics across time on the X-axis.
The following screenshots show your resulting visualizations.


Clean up
To avoid incurring future charges, delete the CloudFormation stack.
- On the AWS CloudFormation console, choose Stacks.
- Select the NiFi stack.
- Choose Delete.
If you don’t want to keep your QuickSight account, you can delete it as well.
- On the QuickSight console, choose your user name and on the drop-down, choose Manage QuickSight.
- Choose Account Settings.
- Choose Delete account.
- Enter
confirmand choose Delete account.
Conclusion
In this post, we demonstrated how to use Apache NiFi and the PutTimestreamJSON processor to ingest data into Timestream. The benefits include faster access to time series data without writing code or developing complex data flow pipelines. As seen in the walkthrough, you can achieve a fully functional data flow in under 30 minutes.
We encourage you to use the prescribed use case, CloudFormation stack, NAR file, and XML file to jump-start your individual use cases to adopt Timestream.
Additional Resources
Amazon Timestream Developer Guide
About the Authors
 Arun A K is an Analytics Solutions Architect with AWS. He works with customers to provide architectural guidance for running analytics solutions on the cloud. In his free time, Arun loves to enjoy quality time with his family.
 Hari Rongali is a Solutions Architect at AWS. Hari works with AWS customers in the ISV space and helps them in solution architecture. Prior to AWS, Hari worked as a Big Data Solutions architect. In his free time, Hari likes to spend time with his family and socialize with friends.
 Wayne R. Vincent is a Sr. Solutions Architect with AWS. Wayne is based in NYC and works with independent software vendor (ISV) customers to design solutions to extend capabilities and services by using data assets in the cloud.