AWS Database Blog
Using AWS Database Migration Service and Amazon Athena to Replicate and Run Ad Hoc Queries on a SQL Server Database
Prahlad Rao is a solutions architect at Amazon Web Services.
When you replicate a relational database to the cloud, one of the common use cases is to enable additional insights on the replicated data. You can apply the analytics and query-processing capabilities that are available in the AWS Cloud on the replicated data. To replicate the database, you need to set up and configure a target database on Amazon EC2 or Amazon Relational Database Service (Amazon RDS). This can take additional time and configuration, especially if you’re looking to query the data interactively and aggregate data from multiple database sources to a common data store like Amazon S3 for ad hoc queries. This capability is especially useful if you’re building a data lake architecture using Amazon S3 as a central data store, and you want to extract specific datasets from multiple database sources and use them for downstream applications and analytics.
This post demonstrates an easy way to replicate a SQL Server database that’s hosted on an Amazon EC2 instance to an Amazon S3 storage target. You can use AWS Database Migration Service (AWS DMS) and then interactively query data stored on Amazon S3 using Amazon Athena without having to set up a target database instance. You can apply the same procedure when you are replicating a database from an on-premises instance.
Amazon Athena is an interactive query service that makes it easy to analyze data in Amazon S3 using standard SQL. Athena is serverless, so there is no infrastructure to manage, and you pay only for the queries that you run. Although you can use Athena for many different use cases, it’s important to understand that Athena is not a relational database engine and is not meant as a replacement for relational databases. You can use Athena to process logs and unstructured, semi-structured, and structured datasets. You can also use it to perform ad hoc analysis and run interactive queries for data that’s stored on Amazon S3.
This post breaks down the process into two high-level steps:
- Replicate data from a SQL Server database that is stored on an Amazon EC2 instance to an Amazon S3 target using AWS DMS.
- Use Amazon Athena to run interactive queries for data that is stored on Amazon S3.

Step 1: Replicate data from a SQL Server database to Amazon S3
When you replicate data to Amazon S3 using AWS DMS from supported database sources, both full load and change data capture (CDC) data is written as comma-separated values (CSV) format in the target Amazon S3 bucket. First, you create an Amazon S3 bucket named dms-replication-mrp in the same AWS Region as your database instance. The AWS account that you use for migration should have write and delete access to the Amazon S3 bucket that is used as a target.
Assign the following permission to the role that is used to create the migration task:
The role should also have a trust relationship defined with AWS DMS as the principal entity, as in the following:
Because the AWS Management Console does not have an explicit service role for AWS DMS yet, you create an Amazon EC2 service role and rename ec2.amazonaws.com to dms.amazonaws.com, as shown in the previous example.
Creating a replication instance
To replicate databases using AWS DMS, you need to provision a replication instance to perform the tasks and replicate data from source to target. The required size of the instance varies depending on the amount of data needed to replicate or migrate. For more information about choosing a replication instance, see Replication Instances for AWS Database Migration Service. In this example, you can use a dms.t2.medium instance for the replication.
On the AWS DMS console, choose Replication instances, and then Create replication instance, which takes you to the screen shown in the following image. The replication instance should be able to connect to both the source database and the target Amazon S3 bucket. When creating the replication instance, ensure that you select the Publicly accessible check box because the instance needs to access the Amazon S3 bucket outside your virtual private cloud (VPC). However, you can also set up a private VPC endpoint for Amazon S3 that lets you connect the replication instance to Amazon S3 without making it publicly accessible.

Creating the source and target endpoints
After creating the replication instance, create the source and target endpoints. The source is SQL Server on an Amazon EC2 instance.

Similarly, the target endpoint is your Amazon S3 bucket.

Be sure to test the connection for both the endpoints. For the replication to be successful, the replication instance should be able to connect to both source and target endpoints.
Creating a replication task
Finally, create a replication task to replicate data from source to target.

Specify the migration type as Migrate existing data and replicate ongoing changes, which is essentially a change data capture mode. With Amazon S3 as a target, data manipulation language (DML) inserts, updates, and deletes are supported with a new file that is created under the same folder for each INSERT statement.
In the Table Mappings section, choose the HumanResources schema. To replicate the data and all tables under that schema, type % for Table name is like, as shown in the following screenshot:

Table mapping specifies tables from a particular source schema that you want to replicate to the target endpoint. Table mapping gives you flexibility to migrate specific tables and datasets to a target database and can also be rule-based for datasets that you want to filter when replicating data. It provides powerful capabilities for granularly replicating datasets to the desired target. For more information, see Using Table Mapping with a Task to Select and Filter Data.
Now that the task is created, verify it on the console. After the task runs, the initial load is completed followed by any changes as they happen on the source database. On the task tab, choose Table statistics to verify the tables and rows that were replicated to the target database with additional details—in this case, HumanResources data:

Next, verify your target Amazon S3 bucket:

You can see the HumanResources folder that was created under the dms-replication-mrp bucket. And in the folder, each of the tables being replicated has its own folder created. For each source table, AWS DMS creates a folder under the specified target folder. AWS DMS writes full load and CDC files to the specified Amazon S3 bucket.

The actual CSV file that contains data for each table is in respective folders. For example, if you inspect the Employees folder, you see the CSV file as shown in the following image:

With Amazon S3 as a target, DML inserts, updates, and deletes are supported with a new file created under the same folder for each statement. AWS DMS names CDC files using time stamps.
Let’s look at two of the scenarios—inserts and deletes. For every insert to the source table, AWS DMS replicates the insert and creates a new file with a time stamp under the same target folder.

When you perform a delete on the source table, AWS DMS replicates the delete and creates a new file for the delete row with similar time stamp details. Note that AWS DMS does not edit or delete existing data from the CSV files on the Amazon S3 bucket but instead creates new files under the Amazon S3 folder. You can see the DML delete statement captured on the AWS DMS dashboard:

When you query data using Amazon Athena (later in this post), due to the way AWS DMS adds a column indicating inserts, deletes and updates to the new file created as part of CDC replication, we will not be able to run the Athena query by combining data from both files (initial load and CDC files). In this situation, you can move CDC files to a new S3 folder location allowing you to run Athena queries individually on initial load files, and change data by specifying different S3 folder paths for Athena. With respect to how to combine data from both files to run Athena queries to reflect existing and new data inserts is beyond the scope of this blog post. There are two potential options I can think of: 1) Use Amazon Glue to process initial files and CDC files on S3 and consolidate onto a single table on glue. Then use Athena with Glue catalog to query the table. 2) Second option is again using Glue catalog to discovery metadata information for initial and CDC files and Glue will create 2 metadata tables. You then use Athena with Glue catalog, have a SQL join syntax to query across the 2 tables.
Now that source and target databases are being replicated, you can proceed to the second step, which is to configure Amazon Athena to interactively query data on this Amazon S3 bucket.
Step 2: Use Amazon Athena to run interactive queries for data stored on Amazon S3
There are currently two ways to access Athena: using the AWS Management Console or through a JDBC connection. A detailed walkthrough of using Athena is beyond the scope of this post, but you can find more information in the Amazon Athena documentation.
It’s important to understand databases and tables when it comes to Athena. Tables are definitions of how your data is stored. They are essentially metadata that describes your data in a way similar to a relation, and they don’t represent a true relational database. Databases are simply logical groupings of tables on the lines of catalog and namespace. Athena applies schemas on-read, which means that your table definitions are applied to your data in Amazon S3 when queries are being executed. No data loading or transformation is required, and you can delete table definitions and schema without impacting underlying data in Amazon S3.
Before you can create tables and databases, you need to set up the appropriate IAM permissions for Athena actions and access to Amazon S3 locations where data is stored. The following managed policy provides access to Athena and the appropriate Amazon S3 bucket permissions:
The resource aws-athena-query-results in the preceding example is the bucket for Athena to store query results.
In addition, you also need access to the Amazon S3 bucket where the data is stored—in this case, the target Amazon S3 bucket that AWS DMS replicates into. You can simply create an IAM user policy or bucket policy to provide access to the Amazon S3 bucket so that users can create tables and work with underlying data.
Creating a database and tables in Amazon Athena
First, you create a database in Athena. On the Athena console, using the Query Editor, type CREATE DATABASE sqlserver, with sqlserver being the name of the database.

After the database is created, you can create a table based on SQL Server replicated data. You need to define columns that map to source SQL Server data, specify how the data is delimited, and specify the location in Amazon S3 for the source data.
Using sqlserver as the database, create a table using a CREATE TABLE statement, and then choose Run Query:

You will create three tables from the HumanResources schema that was replicated by AWS DMS: Employee, Department, and Employee Dept History. Because the data on the underlying Amazon S3 bucket is encrypted using Amazon S3 server-side encryption (SSE), you need to specify has_encrypted_data = ‘true’ for TBLPROPERTIES. The data that is replicated by AWS DMS is stored in CSV format, so the fields terminated are set to “,” and lines are terminated by “\n”. Also notice the Amazon S3 file location for Employee data. This is the location AWS DMS used to replicate SQL Server data in step 1.
Create tables for Department and Employee Dept History, and specify the appropriate Amazon S3 bucket locations.
In Athena Catalog Manager, verify the table properties under the sqlserver database:

Make sure that all three tables are created and visible under the sqlserver database:

Running queries on the data
Tables were created with the same fields as the source SQL Server database replicated with AWS DMS, so you can now run queries on the data and see the results in Athena.
Run a simple SELECT statement of employees using the sqldata_employee10 table:

Because you’re using standard SQL to query data, you can use JOIN and other SQL syntax to combine data from multiple tables as in the following example:

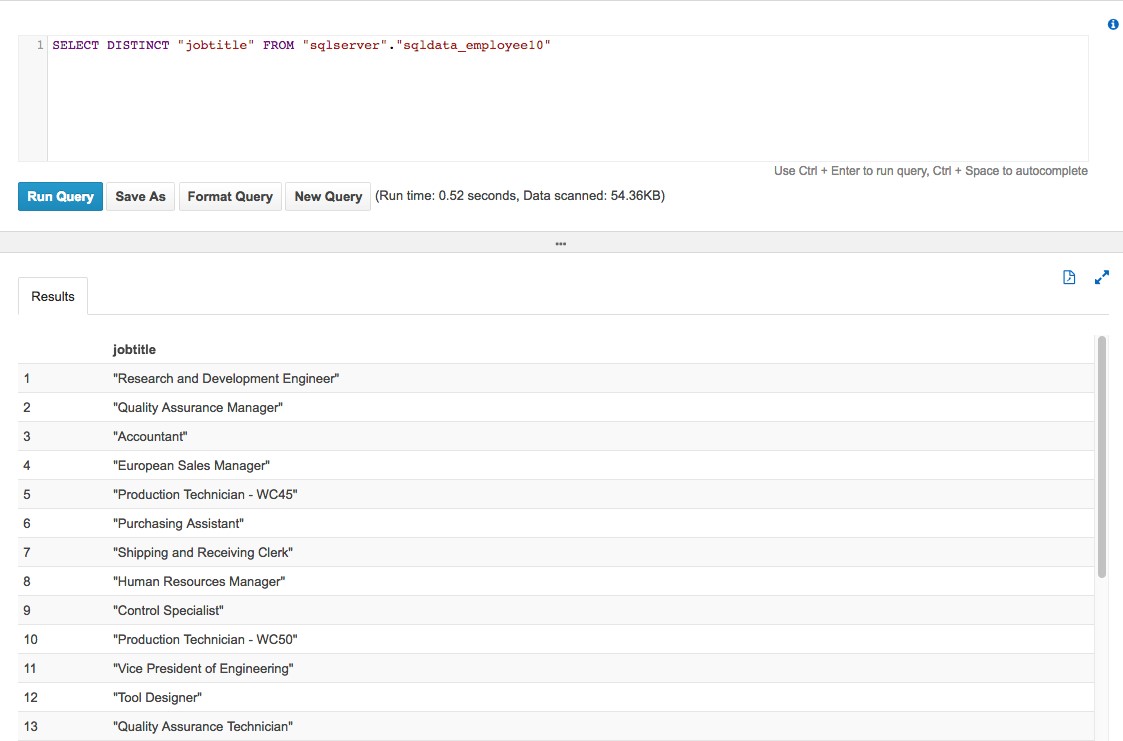
The following is another example that queries unique job titles from the Employee database:
As you can see, the query time from Amazon Athena is pretty fast. To read about some best practices and tuning tips for Amazon Athena, see this post on the AWS Big Data blog. You can also download query results and save queries for later execution from the Athena console.
Summary
Using AWS DMS and Amazon Athena provides a powerful combination. Not only can you easily replicate databases to a common data store such as Amazon S3, but you can also query data interactively and run ad hoc queries quickly using ANSI SQL—without needing to set up a target database, aggregate data, or load data into Athena. This is especially useful if you have multiple database sources and you need to quickly aggregate and query data from a common data store without having to set up and manage underlying infrastructure.
An additional bonus for you to explore is to expand this architecture to use Amazon QuickSight for easy visualization with its built-in integration with Amazon Athena.