Microsoft Workloads on AWS
Bringing your Windows 11 image to AWS with VM Import/Export
Do you maintain a Windows 11 VM image on-premises? Windows 11 sets new hardware requirements for Unified Extensible Firmware Interface (UEFI), Trusted Platform Module (TPM) 2.0, and Secure Boot support. Using the UEFI boot mode and NitroTPM, launching Windows 11 is now supported on Amazon Elastic Compute Cloud (Amazon EC2). You can reduce your time spent preparing an Amazon Machine Image (AMI) for Windows 11 by using VM Import/Export to convert your existing VM image to an AMI ready for use with the Secure Boot feature.
In this blog post, I will discuss new functionality in the VM Import/Export import process used with Windows 11 images. I will then start an import of a Windows 11 image, resulting in an AMI that can be used to launch Secure Boot-enabled instances. Using this AMI, I will then launch a new instance and demonstrate how to confirm the operation of the TPM, the UEFI boot mode, and Secure Boot state.
Differences in importing Windows 11 images
When VM Import/Export detects a Windows 11 image, it configures the import task with:
- The BootMode set to
uefiby default – This behavior is a change to the import process for Windows images as Windows 11 supports only UEFI. For previous versions of Windows, VM Import/Export defaults to the Legacy BIOS boot mode. - The LicenseType set to
BYOL– Microsoft requires customers to Bring Your Own License (BYOL) for Windows 11 and to run it on hardware dedicated to a single customer. Customers with Virtual Desktop Access (VDA) E3 or E5 licenses may bring those licenses to Amazon EC2 Dedicated Hosts and Dedicated Instances.
Unique to Windows 11 imports, VM Import/Export automatically enables UEFI Secure Boot using Microsoft keys and NitroTPM. This is done when registering the image by:
- Setting the necessary UEFI variables in UefiData – VM Import/Export enables Secure Boot by populating a binary blob of UEFI variables, including the Platform Key (PK) database, Key Exchange Key (KEK) database, Signature database (db), and Signature denylist database (dbx). Read more about this process at How the AWS binary blob is created.
- Setting TpmSupport to
v2.0– This enables NitroTPM, a virtual TPM 2.0-compliant TPM module for your Amazon EC2 instances. By enabling the feature, NitroTPM can then be used for secured key storage and access as well as platform attestation. Refer to the list of supported instance types in Prerequisites for launching Windows instances.
Importing a Windows 11 image
Prerequisites
- A Windows 11 Virtual Desktop Access E3 or E5 license.
- A new or existing Amazon Simple Storage Service (Amazon S3) bucket where you will store the VM image (OVA, VHD/X or VMDK file) exported from your on-premises hypervisor.
- Upload the VM image file to Amazon S3. Navigate to Amazon S3 in the AWS Console, choose the bucket name, choose Upload, add your file to the list, and select Upload.
- Create the required AWS Identity and Access Management (IAM) service role for VM Import/Export, and apply permissions to the service role and the user executing the import-image command. Ensure the IAM policy above grants permissions to the bucket so that the service role can read the file. Specific instructions can be found here: VM Import/Export Requirements – Required service role
Import the image
Use the import-image command of the AWS Command Line Interface (CLI), specifying the image file in Amazon S3 and the --boot-mode parameter uefi. In the following example, replace bucketname with the name of the S3 bucket and filename with the name of your image file in the S3 bucket (e.g. Windows11.vhd).
Note: It is recommended to specify the boot mode as uefi to avoid confusion, though VM Import/Export will choose uefi based on the Windows 11 OS.
The import Task Id is displayed and the import process runs asynchronously.
Check the status of the import task using the command aws ec2 describe-import-image-tasks.
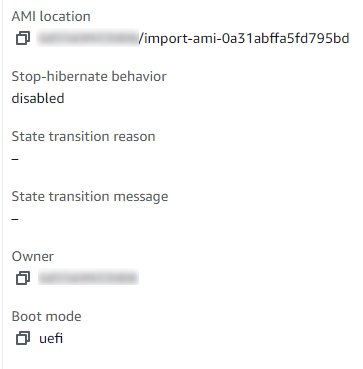
When the process is complete, confirm that the LicenseType is BYOL and the BootMode is uefi for the new AMI. Note the ImageId, which you will use when launching an Amazon EC2 instance in the following example output:
Launch a Windows 11 instance from your AMI
Now let’s launch an Amazon EC2 instance using the UEFI and the NitroTPM-enabled AMI you imported. To do so, navigate to the EC2 Console and choose Launch Instance. Within the Launch Instance Wizard, select My AMIs, select Owned by me, select the AMI matching your ImageId from the Amazon Machine Image (AMI) dropdown.
Select an instance type which supports Secure Boot. In this case, I have selected a c5.large instance:

In the Advanced details section, select Dedicated – run a dedicated instance for Tenancy to launch a dedicated instance to meet the Microsoft licensing requirement.

After confirming the settings, choose Launch Instance.
Verify UEFI boot mode
Once launched, you can find the instance details In the EC2 console. In the EC2 console, select Instances in the sidebar, then choose the Instance ID of your new instance. In the Details tab, the boot mode will be listed as “uefi”.
Confirming the TPM, Boot Mode, and Secure Boot State in Windows 11
When you logon to the new Windows 11 instance, you can use PowerShell to check the state of these components.
Select the Start button, enter PowerShell in the search box, under Windows PowerShell. Select Run as Administrator. Run the commands Get-Tpm and Confirm-SecureBootUEFI. Confirm TPMActivated and Confirm-SecureBootUEFI are True.
Note: PowerShell must be Run as Administrator to confirm Secure Boot.
Example (TPM):
PS C:\Windows\system32> Get-Tpm

TpmPresent                : True
TpmReady                  : True
TpmEnabled                : True
TpmActivated              : True
TpmOwned                  : True
RestartPending            : False
ManufacturerId            : 1095588430
ManufacturerIdTxt         : AMZN
ManufacturerVersion       : 8217.4131.22.13878
ManufacturerVersionFull20 : 8217.4131.22.13878
...
Example (Secure Boot State):
PS C:\Windows\system32> Confirm-SecureBootUEFI
True
Cleanup
To clean up the resources created, navigate to Amazon S3 in the AWS Console, open the bucket you used, check the box next to your source image file and select Delete. Next, navigate to Amazon EC2 in the AWS Console, select AMIs from the sidebar, check the box next to your AMI, and then choose Deregister AMI under the Actions dropdown to remove the imported AMI. In the EC2 console, select Instances in the sidebar, check the box next to your Windows 11 instance, and select the Instance state dropdown and select Terminate instance.
Conclusion
In this blog post, I examined new VM Import/Export functionality that enables Secure Boot for Windows 11 and the parameters set on the registered AMI. I then demonstrated the import process using VM Import/Export to produce a Windows 11 AMI from a UEFI source image. Using this AMI, I launched a new Windows 11 instance on Amazon EC2 dedicated tenancy with Secure Boot enabled. Last, I demonstrated the commands used to confirm the TPM, boot mode, and Secure Boot state.
Now you can begin launching your Windows 11 instances with Secure Boot enabled and take advantage of additional defense-in-depth of your end user clients.
To learn more about VM Import/Export, EC2 Boot modes, and Secure Boot, visit
What is VM Import/Export?
User Guide for Windows Instances – Boot modes
and NitroTPM – Prerequisites for launching Windows instances.
AWS can help you assess how your company can get the most out of cloud. Join the millions of AWS customers that trust us to migrate and modernize their most important applications in the cloud. To learn more on modernizing Windows Server or SQL Server, visit Windows on AWS. Contact us to start your modernization journey today.