AWS Partner Network (APN) Blog
Integrating Zendesk with AWS and Other SaaS Services Using Amazon AppFlow
By Joe Norman, Partner Solutions Architect – AWS
By Sarthak Handa, Product Manager – Amazon AppFlow
 |
Organizations are rapidly adopting software-as-a-service (SaaS) solutions to better serve their end customers using specialized software, but using SaaS services can lock key business data in different “data islands” that are hard to integrate.
Not having 360-degree visibility of all your business data in one place is a competitive disadvantage.
Amazon AppFlow is a fully managed application integration service enabling secure transfer of data between SaaS applications and AWS services, in minutes, without coding.
Amazon AppFlow helps organizations get 360-degree visibility of their business data by doing the heavy lifting of building point-to-point data integrations for different services. This allows you to focus on innovating with data rather than spending months of valuable time to build, scale, and maintain data pipelines.
Amazon Web Services (AWS) recently announced the extension of support for Zendesk as both source and destination in Amazon AppFlow. This expanded integration enables customers to transfer data bi-directionally between Zendesk and other AWS and SaaS services—like Amazon S3, Amazon Redshift, and Salesforce—in just a few clicks.
Zendesk is an AWS Partner and leader in the 2020 Gartner Magic Quadrant for the CRM Customer Engagement Center. Zendesk’s service-first CRM software is designed to foster better customer relationships.
The enhanced Amazon AppFlow support for Zendesk as both source and destination of data flows opens many interesting use cases for Zendesk users. Customers can use Amazon AppFlow to synchronize data between Salesforce to Zendesk, transfer CSV files from S3 to Zendesk, hydrate Zendesk data into Amazon Redshift for business intelligence, and more.
In this post, we’ll walk through the steps to set up a data flow to synchronize “Contact” data of Salesforce with “Users” data in Zendesk using Amazon AppFlow. You’ll see the simplicity in which customers can configure a data flow using Amazon AppFlow in three simple steps without the need of coding or knowledge of the underlying APIs of Salesforce and Zendesk.
Solution Overview
Amazon AppFlow abstracts the heavy lifting involved with pulling data from the Salesforce API, transforming it, and loading it into Zendesk via the Zendesk API.
The figure below shows just how simple Amazon AppFlow makes the architecture.

Figure 1 – High-level architecture of syncing Salesforce contacts to Zendesk via Amazon AppFlow.
To get started, you’ll need to have the following prerequisites:
- Salesforce account with API access.
- Zendesk account with admin access to create OAuth tokens.
- AWS account with enough rights to create flows in Amazon AppFlow.
In this use case, we’re assuming Salesforce is one source of truth for customer contacts your company may need to support.
Proactively loading those contact names, email addresses, phone numbers, and other details from that source to Zendesk allows support agents to have valuable information about someone who opens a ticket, whether by email or phone, without needing to collect it from the customer the first time a ticket is opened.
For example, the CEO of your customer may call into the support system, and your support agents would immediately know they’re talking to a VIP because of the information you preloaded into Zendesk using Amazon AppFlow.
Connecting Amazon AppFlow to Salesforce
You can access Amazon AppFlow from the AWS Management Console. Setting up a data flow requires connections to the source and destination SaaS applications, a flow trigger, and field mapping.
To get started, go into the console, head to Amazon AppFlow, and press the orange Create flow button in the top right.
Step 1 of the flow setup is just giving your flow a name, description, and optionally choosing to use a custom AWS Key Management Service (KMS) customer master key for encryption or sticking to the default of letting Amazon AppFlow handle encryption.
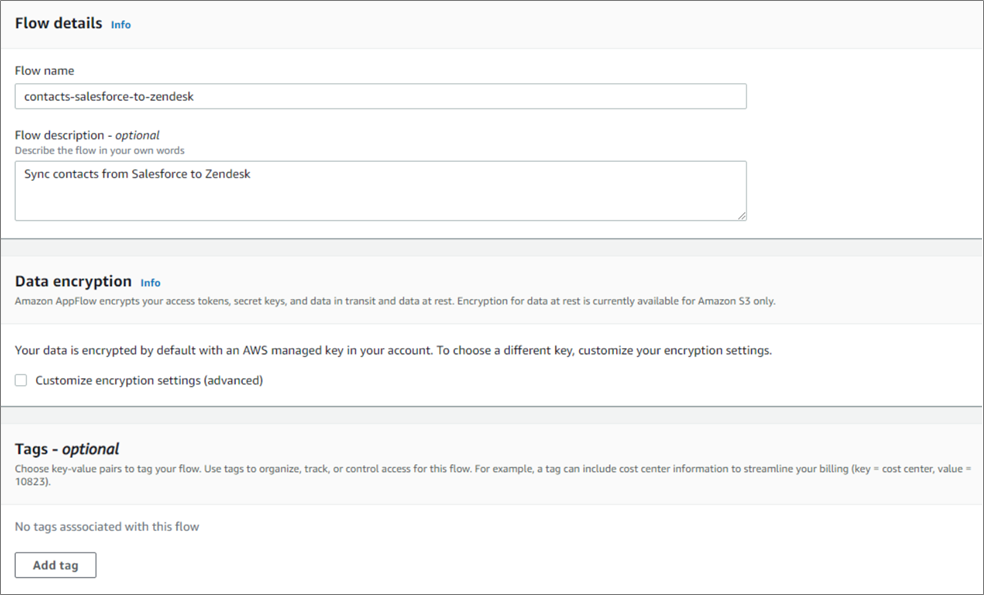
Figure 2 – Set your title, encryption settings, and tags.
On the next page of the setup, things start to get a bit more involved. You’ll need to choose your data source and destination and create OAuth connections to each.
Click the Choose data source drop-down to see all of the different sources Amazon AppFlow currently supports, as shown below. For this example, we’ll choose Salesforce.

Figure 3 – Choose Salesforce as your data source for the flow.
In the Choose Salesforce connection box, create a new connection. This is where you’ll need to set up an OAuth connection between Amazon AppFlow and Salesforce. Once you create a connection, it will be saved for future use.
In the Connect to Salesforce modal, we are using a Production Salesforce environment. The connection name you provide determines how it will be listed by the service for you to use it in the future, and it can be anything you want.
After you click Continue, you’ll be prompted to sign into your Salesforce account and accept the OAuth scope Amazon AppFlow needs to run data flows.
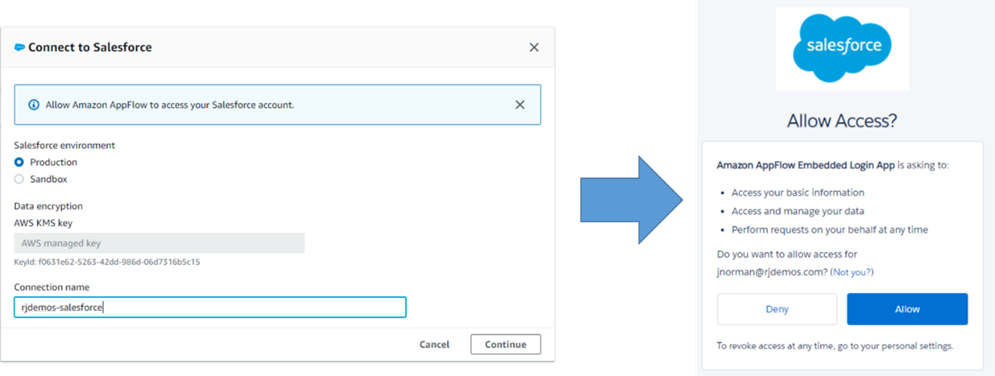
Figure 4 – Set up the OAuth connection between Amazon AppFlow and Salesforce.
Finally, in the source section, you need to choose the actual data construct that you want to pull in this flow. In this case, we’ll be pulling the Contact object from Salesforce.
Select the Salesforce objects radio button, and then choose Contact in the Choose Salesforce object drop-down. When you’re done with the source section, it should look like what you see below.
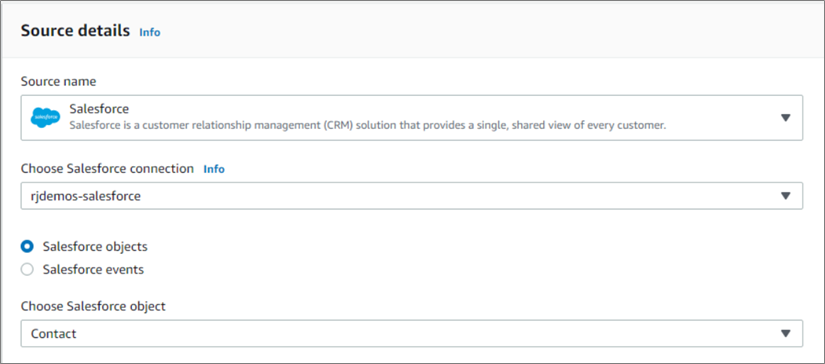
Figure 5 – Completed Source details.
Connecting Amazon AppFlow to Zendesk
Moving on to destination details, you’re going to repeat a nearly identical process. For Destination name, choose Zendesk, and then create a new connection if you don’t already have one configured.
Setting up OAuth between Amazon AppFlow and Zendesk requires a bit more configuration than what we saw earlier with Salesforce. You’ll want two windows open to do the setup: (1) the new connection modal in the Amazon AppFlow console; and (2) your Zendesk account’s admin settings page.
In the Zendesk admin settings, go to the API section. Click the OAuth Clients tab, and click the Add OAuth client button to set up a new OAuth client for Amazon AppFlow.
Figure 6 below shows the two sides of the setup and fields you’ll need to fill in. On the left is the Zendesk admin settings page for creating an OAuth client. On the right is the new connection to Zendesk modal in the Amazon AppFlow console.
Fill in the Zendesk side first. Then, copy the relevant data over to the AWS side. The arrows in Figure 6 show the sources for each field, and we’ll describe it in more detail in the next paragraph.

Figure 6 – Configure the OAuth connection between Zendesk and Amazon AppFlow.
The fields should be filled out as follows:
- Client name, Description, Company, and Logo: These can be anything you want and do not feed any other fields.
. - Unique identifier: Create a single string with no spaces that uniquely identifies this particular OAuth client. It can be anything you want but should be unique, similar to how you would name an Amazon S3 bucket. Copy this value to Client ID in the Amazon AppFlow modal.
. - Redirect URL: To fill in this field, take the URL from the AWS console, up to and including “appflow” and add “/oauth” to the end of it. Note this URL will be different for each AWS region. In our example, using us-east-1, the full redirect URL is https://console.aws.amazon.com/appflow/oauth
.
Secret: The secret fills in automatically on the Zendesk side. Copy it to the “Client secret” field on the Amazon AppFlow side. You will not be able to see the secret again after you save, but you can just generate a new secret if you need it again. Treat this like a password.
. - Account (in the Amazon AppFlow modal): Enter your Zendesk subdomain into the account field in the Amazon AppFlow connection modal. This is just your Zendesk URL between and not including the “https://” and “.zendesk.com.”
Once you complete those, you’ll be prompted to log into Zendesk, if your browser isn’t already, and accept the OAuth scopes presented to you.
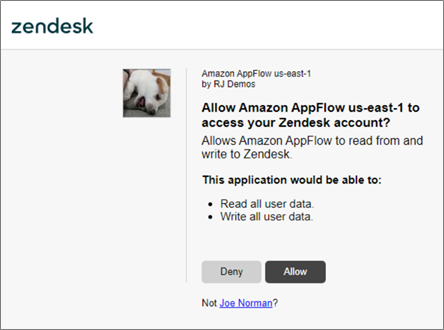
Figure 7 – Give Amazon AppFlow access to read from and write to your Zendesk account.
After you have configured the connection, the last step for destination details is to choose the Zendesk data object where you’d like to send Salesforces “Contact” data.
Let’s select Zendesk’s “User” object. Once you’ve chosen “User,” the destination details should look like what you see below.

Figure 8 – Completed destination details section.
Create the Flow Schedule
Next, we’ll configure the trigger for our data flow. You can choose to run the data flow on-demand, which means the data transfer will happen every time you manually trigger it, or you can set up a schedule.
Because we want to keep Zendesk users continuously updated with new and modified Salesforce contacts for our company’s customers, it makes sense to set up a schedule. Here, you can see how we have configured our schedule.
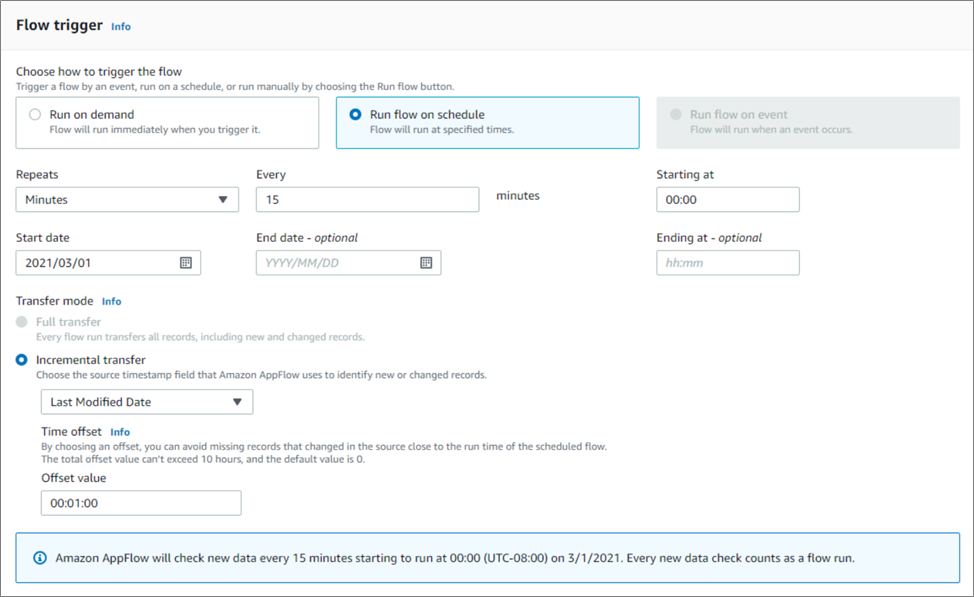
Figure 9 – Configure the schedule that will trigger your data flow.
Most of the settings in the schedule are self-explanatory, but there are a few things worth pointing out. You can set up the flow to run as often as once per minute, with the start and end times entered in a 24-hour format in the time zone of your browser.
When entering the time, notice the blue dialog box at the bottom that confirms the hour and time zone the flow will run for the first time.
Running an incremental transfer cuts down on excess data transfer and unnecessary overwrites. Amazon AppFlow will only transfer records that have been created or changed after the time of the last successful run.
Here, we can choose to check “Last Modified Date” or “Create Date” in the Salesforce contact. Choosing “Last Modified Date” means we’ll capture any changes to fields of contacts that already existed in the last run. For example, if the phone number is updated for a contact in Salesforce, that will be pushed to Zendesk.
An important consideration, though, is that any changes to fields made in Zendesk may be overwritten with changes to the same field of the Salesforce side. If that’s an issue for your use case, you may wish to take mitigating action, such as setting up a loop, where you have a flow from Zendesk to Salesforce as well, so each is kept in sync with changes in the other.
In this use case, we are treating Salesforce as the authoritative source of truth for the fields mapped in the next section.
Map the Source and Destination Fields
The last major step to set up this flow is to map corresponding fields together in the source and destination objects.
First, you need to decide whether you want to create new records in Zendesk for every record from Salesforce that comes through the flow, update existing Zendesk records without adding new records, or do a mix of the two (updating existing records when they exist and create new records when they don’t already exist). For this example, “Upsert records” makes the most sense.
To upsert or update, you need to choose a field on each side of the flow to compare to each other. When the two sides match, Amazon AppFlow treats that as an existing record to be updated.
For our customer, Email address is a value unlikely to change that is unique to each contact, so that’s what we’ll use to join the two on the upsert. Figure 10 shows what the destination record preference section looks like when it’s configured as described.

Figure 10 – Set up records to upsert, joining on Email.
Now, we need to map the rest of the fields that we want to allow Salesforce to create or update on the Zendesk side. You don’t need to match every single field available for either of the two sides. You just include the fields that make sense for your use case.
Figure 11 shows how we have chosen to map the Salesforce fields on the left with Zendesk fields on the right. For your use case, there could be some variation. To learn more about each of the fields in the object models, you can refer to the Salesforce and Zendesk documentation.

Figure 11 – Map Salesforce fields on the left with corresponding Zendesk fields on the right.
Now that we’ve mapped the fields, we’re done with our flow setup. You can optionally add validations to check for bad data during the transfer. You can also add filters to choose which records you want to transfer during the data flow.
For our example, we’ll just save our flow and activate it. Once the flow is set to active, it will run based on the schedule we set up.
Check the Results
After the flow runs for the first time, based on the schedule we configured, it’s time to see if contacts in Salesforce were transferred to users in Zendesk.
Figure 12 shows our users list in Zendesk before and after running the data flow. You can see the count of users went from 6 to 50. Amazon AppFlow successfully loaded in all of the Salesforce contacts and mapped them to the appropriate fields in Zendesk.
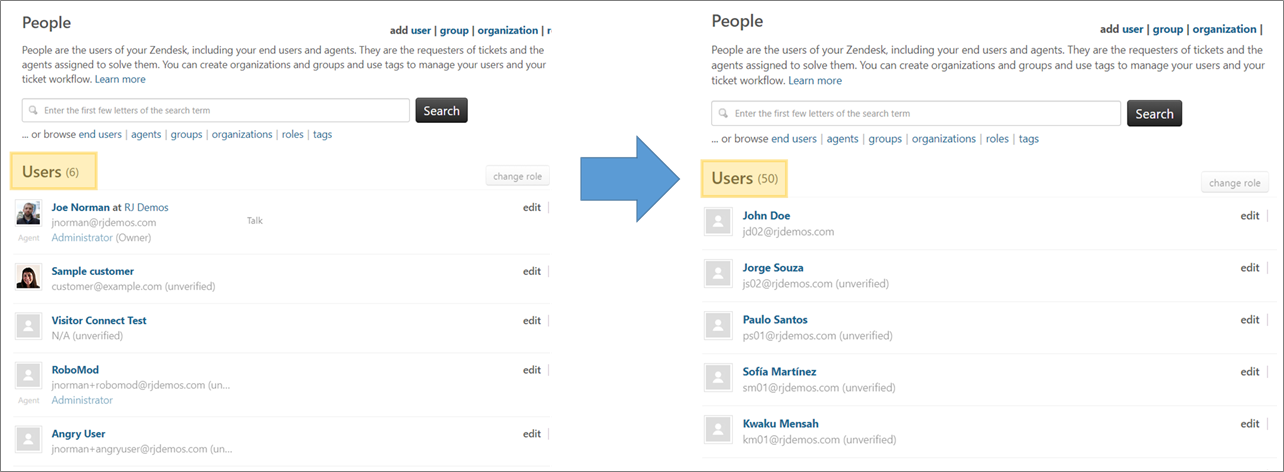
Figure 12 – After the flow runs, new users copied from Salesforce show up in Zendesk.
Conclusion
Organizations increasingly want to aggregate and unlock insights from their siloed SaaS enterprise data at a rapid pace, and get a 360-degree visibility on their customer journey and business metrics.
By using Amazon AppFlow to quickly build secure and reconfigurable data flows between SaaS applications and AWS services in a few clicks, organizations are opening opportunities for business optimizations and serving their customers better.
With the deeper integration of Amazon AppFlow with Zendesk, customers can explore various use cases to make the most of their customer data.
.

.
Zendesk – AWS Partner Spotlight
Zendesk is an AWS Partner and service-first CRM company that builds software designed to improve customer relationships.
Contact Zendesk| Partner Overview
*Already worked with Zendesk? Rate the Partner
*To review an AWS Partner, you must be a customer that has worked with them directly on a project.