AWS for M&E Blog
Add live chat to your video streams with Amazon Interactive Video Service
Today, Amazon Interactive Video Service (Amazon IVS) introduced Amazon IVS Chat, a new feature that enables developers to build interactive experiences designed to scale alongside Amazon IVS live streams.
The team at Amazon IVS understands the importance of live chat as a core part of social video. Alongside Timed Metadata, Amazon IVS Chat is a foundational technology with tools developers need to create new and exciting interactive experiences. With minimal development, you can set up a chat room designed to support hundreds of thousands of users chatting together.
Amazon IVS Chat comes with built-in “active” moderation features that allow moderators to delete messages and disconnect users. Amazon IVS Chat also supports automated or “passive” moderation, which empowers developers to leverage advanced technologies like machine learning (ML) or natural language processing (NLP) to proactively review and remove harmful content. Check out the Getting Started with Amazon IVS Chat guide to learn more about moderation.
The sample app in this blog post is a simple live streaming app with video and chat. Following are the steps required to get up and running:
- Deploy a simple serverless backend to handle authentication and send events to the chat room
- Configure and run the React client app
Although this post covers the React client app, code samples for iOS and Android are also available as open-source repositories:
Prerequisites
Before you set up the demo app, you need the following:
- AWS CLI Version 2
- AWS SAM CLI
- Access to an AWS Account with at least the following permissions:
- Create IAM roles
- Create Lambda Functions
- Authenticate and send Events in Amazon IVS Chat
- Create Amazon S3 Buckets
- Npm and NodeJS
Deploying the serverless backend
The backend application in this demo is used to handle encrypted chat tokens, which authorize users to perform actions in your chat room. In a production setting, this backend would retrieve data from an existing identity or user service, and then call Amazon IVS Chat to create a chat token with the appropriate permissions for a user. For example, a client that is marked as a default user in your user database can view and send messages, but a client marked as a moderator can also delete messages and disconnect users.
In this demo, the backend simply accepts whatever information the client provides. When you launch the client app, you’ll be able to pick a username, profile picture, and whether or not you want moderator permissions.

Step 1 – Clone the repository and install the AWS SDK
First, clone the Amazon IVS Chat Web Demo source code from GitHub using your method of choice. The following steps describe how to do this using the Terminal app on macOS.
- Open the Terminal
- Navigate to a directory where you want to store the app code. For example:
cd ~/git. - Clone the demo code repository:
git clone git@github.com:aws-samples/amazon-ivs-chat-web-demo.git
Navigate to serverless/dependencies/nodejs and run npm install to install the AWS SDK. Then, navigate back to the serverless directory:
cd ../../
Step 2 – Configure the AWS CLI tools
Before you start, run the following command to make sure you’re in the correct AWS account (or configure as needed):
aws configure
For configuration specifics, refer to the AWS CLI User Guide.
Step 3 – Create an Amazon S3 bucket
- Replace
<S3_BUCKET>with a name for your S3 Bucket. - Replace
<AWS_REGION>with your AWS region. The following regions are supported:- us-east-1
- us-west-2
- eu-east-1
aws s3api create-bucket --bucket <S3_BUCKET> --region <AWS_REGION> \
--create-bucket-configuration LocationConstraint=<AWS_REGION>
Step 4- Pack template with the AWS SAM CLI
sam package --template-file template.yaml \
--s3-bucket <S3_BUCKET> \
--output-template-file output.yaml
DO NOT run the output from above command, proceed to the next step.
Step 5 – Deploy the packaged template
- Replace
<STACK_NAME>with a name of your choice. The stack name is used to reference the application. - Replace
<AWS_REGION>with the AWS region you entered in Step 3.
sam deploy --template-file ./output.yaml \
--stack-name <STACK_NAME> \
--capabilities CAPABILITY_IAM \
--region <AWS_REGION>
Step 6 – Get the ApiURL output

When the deployment successfully completes, copy the ApiURL from the stack output. You will need this ApiURL when configuring the demo client application. If you lose track of the outputs, you can find them again in the Amazon CloudFormation console, or run the following CLI command:
- Replace
<STACK_NAME>with the name of your stack from Step 5
aws cloudformation describe-stacks --stack-name <STACK_NAME> \
--query 'Stacks[].Outputs'
Running the client application locally
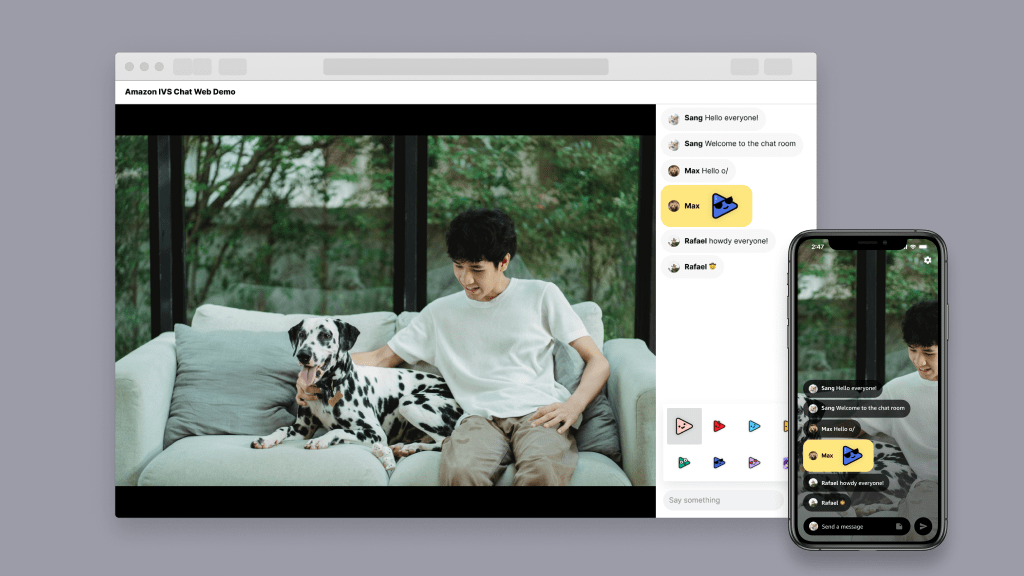
The client application is a web app that gives users a way to interact with their chat room. Although the steps in this section refer to the react web app, there are also demo clients for iOS and Android that work with the same backend you deployed in the previous steps.

Step 1 – Create an IVS chat room
Visit the Amazon IVS web console at https://console.aws.amazon.com/ivs and navigate to the chat overview page. Click the Create chat room button in the Get started section.
On the following page, create a room with the default configuration options. The room name is optional, but providing a descriptive name can help keep your rooms organized. For this demo, name the room: demo-room.

arn:aws:ivschat:us-west-2:012345678901:room/ABCdefghIjK
Step 2 – Configure the client app
Going back to the local repository, navigate to the web-ui directory. If you navigate from the serverless folder in the previous steps, the web-ui folder will be in the parent directory:
cd ../web-ui
Open the file src/config.js and set the value of CHAT_ROOM_ID to the ARN from Step 1 of this section. Then, set the value of the API_URL to the stack output from the final step of the serverless backend section.
Finally, set the value of CHAT_WEBSOCKET to the websocket endpoint for the region where your chat room is located. For example, if your chat room is located in us-west-2, the endpoint would be the following:
wss://edge.ivschat.us-west-2.amazonaws.com

Step 3 – Run the client app
Run the following commands from the web-ui folder to run the demo.
npm install
npm start
The script should automatically open the app in your web browser once setup is complete. You can also open your web browser and navigate to http://localhost:3000.

Final steps and wrap-up
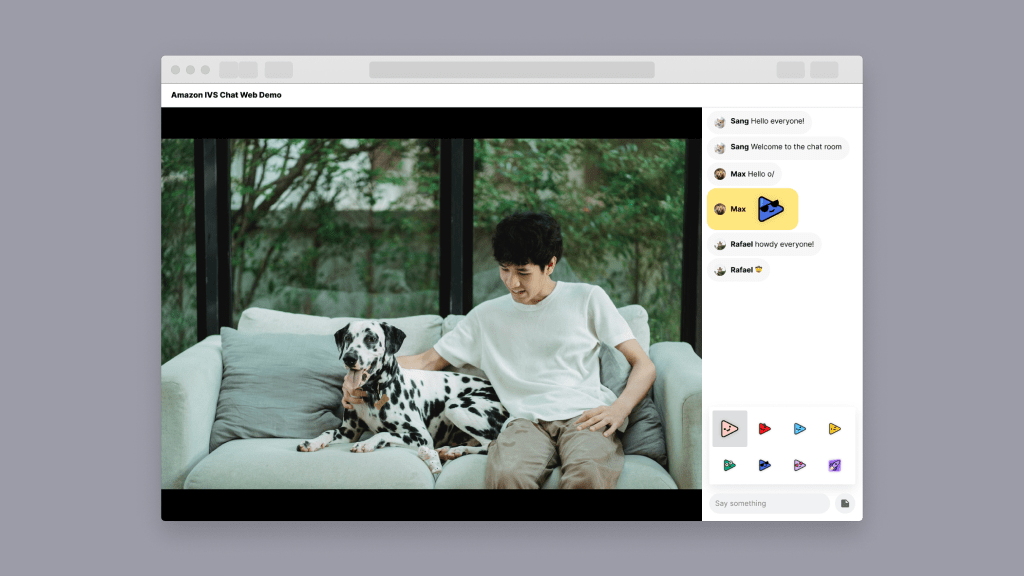
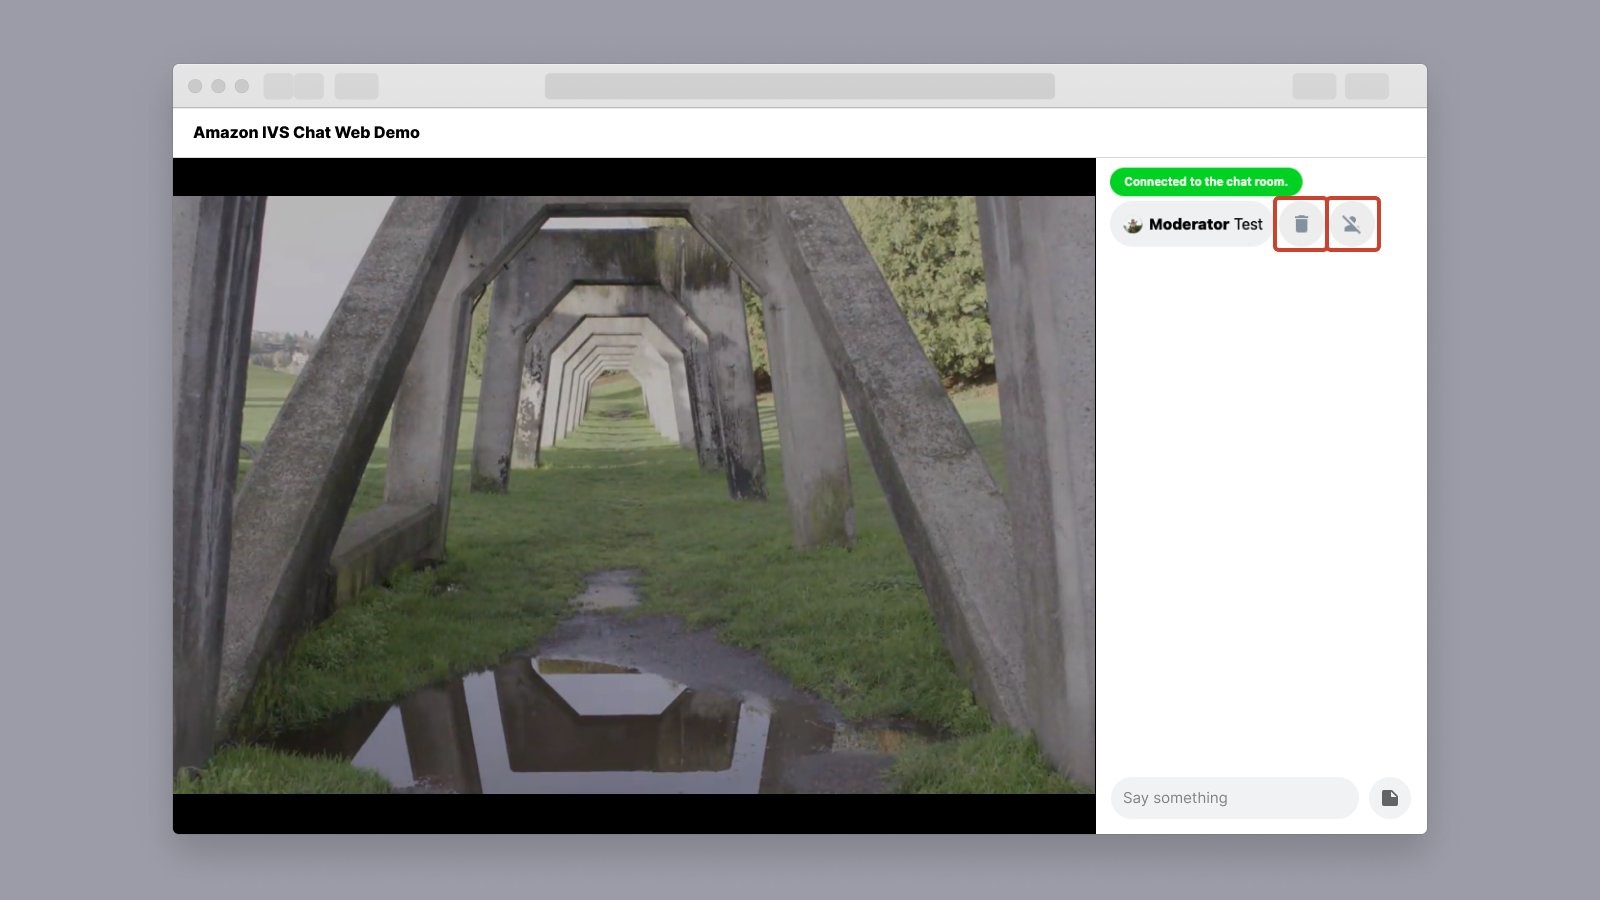
Fill out the fields and sign in to the app to start chatting. Things are working correctly if you see a green bubble containing the phrase Connected to the chat room, and you can type in the chat input. Press “enter” to send a message, or click on the button next to the message input box to select a sticker.

If you sign in to the demo with moderator permissions, you can also choose to delete a message or disconnect the user who sent a message. In this demo, disconnecting a user will also delete all of their messages in the view.
Next steps
You can sign into the chat room as a different user by opening another browser window and joining the chat room. The previously mentioned iOS and Android demo apps are also designed to work with this client app. You can use the same configuration values from this demo in those apps.
Now that you have the demo app deployed, there are several things you can do to add additional features or extend this demo for use in a production environment.
One thing to consider is automated moderation. Start by adding a message review handler to your chat room. A message review handler is an AWS Lambda function that lets you add custom business logic to review the contents of a message before it’s delivered to users in a chat room. When used with advanced NLP solutions like Amazon Comprehend, you can build automated systems that check for harmful content like personally identifiable information (PII) and block those messages from being sent to your users.
You can also make this demo more fully featured by connecting a user database. This allows users to create and sign-in to an account in order to chat. If you don’t already have a user identity system, Amazon Cognito lets you quickly add user sign-up, sign-in, and access control to your apps. As an AWS service, it works well with the serverless backend included in this demo.
To host this application in a publicly available website, navigate to the web-ui directory and run the command npm run build. Once the build finishes successfully, upload the contents of web-ui/build to an Amazon S3 bucket and use Amazon Cloudfront to serve your content globally. Read the documentation to learn more about hosting files on Amazon S3.
To wrap things up, if you were able to complete all the steps successfully, you should have a web application running locally that can send and receive chat messages from users who are connected to your chat room. You should also be able to sign in as a moderator and delete messages or disconnect other users from the chat room.
For more ideas and inspiration, take a look at other open-source code samples from the Amazon IVS team at https://ivs.rocks/examples. To learn more about Amazon IVS, visit https://aws.amazon.com/ivs/.