AWS Cloud Operations Blog
Save costs and deploy highly available Microsoft Exchange on AWS using Dedicated Hosts and License Manager
In a previous blog, “How to run Microsoft Exchange on AWS using Amazon EC2”, you learn how you can run Microsoft Exchange on AWS. However, did you also know that you could save costs by bringing both your Windows Server and Exchange licensing to Dedicated Hosts?
In this post, I will show you how Amazon EC2 Dedicated Hosts and AWS License Manager can be used to design a highly available Microsoft Exchange architecture while saving costs by bringing your own licenses. You will understand how License Manager integrates with Dedicated Hosts and EC2 Image Builder to reduce management overhead. You will also understand how host resource groups simplify management of Dedicated Hosts while allowing you to meet the design requirements for the Microsoft Exchange Preferred Architecture.
Solution overview
All resources are created in one region in the below solution, across two availability zones, with Exchange 2019 installed on Windows Server 2019.
AWS License Manager is used to create a license configuration that will track Windows and Exchange Server licensing consumption. EC2 Image Builder is used to build the AMI, and as part of the deployment, associates the AMI to the license configuration. Within License Manager, two host resource groups are then configured and associated with the license configuration, which will handle automatically provisioning, releasing, and recovering the underlying Dedicated Hosts.

Figure 1: Microsoft Exchange Architecture on AWS using Dedicated Host
Two host resource groups allow you automatically allocate a minimum of four Dedicated Hosts, in two separate availability zones. This follows Microsoft’s best practice of Exchange Native Data Protection where databases are protected through a minimum of four copies, with one lagged copy, deployed across separate physical hardware to protect data integrity in case of failure.
Walkthrough
This walkthrough will cover the following:
- Create a customer managed license configuration.
- Associate a license configuration with an AMI through EC2 Image Builder.
- Create a host resource group and associate the license configuration.
- Launch your Exchange Servers using host resources groups.
Prerequisites
To deploy this solution, the following is required:
- IAM permissions to deploy EC2 instances and access to create license configurations and host resource groups in License Manager.
- Exchange Server media is required, and it may be used with or without Software Assurance on Dedicated Hosts. You can either use your Windows Server licensing if purchased prior to 10/1/2019, or use a license included AMI. Please refer to the FAQ for the latest on Windows licensing.
- A private AMI is required to associate the license configuration. If you intend to bring your own Windows Server license, you will need to import that image to EC2.
- An existing deployment of Active Directory with networking access to support the Exchange Servers. Active Directory can deployed on EC2 with AWS Launch Wizard for Active Directory or through our Quick Start for Active Directory.
- This blog assumes advanced knowledge of Microsoft Exchange and does not cover configuration or deployment. For information on how to do so, refer to the blog “How to run Microsoft Exchange Server on AWS using Amazon EC2”.
1.1 Create Windows Server License Configuration
- Under Customer managed licenses select Create license configuration.
- Fill out a name and optional description.
- You will need to choose from one of the four license types to track your licensing. Windows Server licenses are bound to physical cores, so make sure to choose “Cores” in this instance.
- There are number of optional parameters available that allow you to restrict tenancy, enforce compliance, and apply license affinity to a host. These can be left undefined for this example.
- Click submit to create the configuration.

Figure 2: License Configuration in AWS License Manager
1.2 Create Exchange Server License Configuration
- Repeat steps 1 and 2 but for Exchange Server.
- For Exchange Server the license model is based on instances, so choose instances for the license type.
- As before, you can enter a limit if you want to be notified or restrict the number of licenses that are consumed.
- Click submit to create the configuration.
You should now have two configurations created that look like the screenshot in figure 3.

Figure 3: License Configuration for Windows server & Exchange
Step 2: Associate AMI to License Configurations
Now that the license configurations are set up, we need to associate the AMI. This can either be done directly through the license configuration or as part of EC2 Image Builder , which simplifies the process for building and maintaining secure images.
If you already build your AMIs with EC2 Image Builder and have an existing pipeline, follow step 2.1, otherwise step 2.2 will show you how an associate any private AMI you already have.
2.1 Associate the AMI using EC2 Image Builder
- Open the EC2 Image Builder console.
- Under Distribution Settings Open the setting of the target AMI pipeline (the one you want to associate with EC2 Image builder) and click edit.
- Under “Associate License Configurations,” add the two license configurations that you created earlier (Refer Figure 3).

Figure 4: Associated resources for the license configuration
- Save changes, and run the pipeline to build a new AMI and associate it to the license configuration.
2.2 Associate the AMI in License Manager
- In the License Manager console, open your license configuration for Windows Server.
- Select “Associate AMI” under the “Associated AMI” tab.

Figure 5: License configuration tab with the “Associate AMI” button that will be clicked to add a private AMI.
- From the list of Private AMIs in your account, select the one you will use to deploy Exchange Server and select “Associate”.
- Repeat this process for your Exchange Server license configuration.
After either method, you will now have an AMI associated with each license configuration.
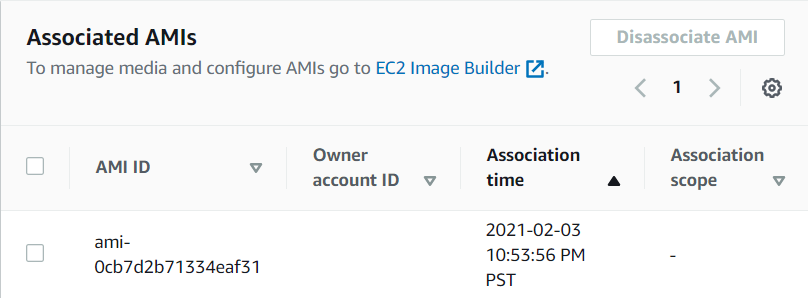
Figure 6: An example of the license configuration after associating the private AMI
Step 3: Create host resource groups
Now that you have license configurations to track and enforce your licensing, and have associated the AMIs, you will create host resource groups. Host resource groups are a collection of Dedicated Hosts that you can manage together as a single entity. When you launch instances into the resource group, the License Manager will handle the management of the hosts based on settings you have configured. In step 4, you will learn more about how these host resource groups will be used as part of the Microsoft Exchange architecture.
3.1 Create host resource group
- In the License Manager Console, go to Host Resource Groups and click Create host resource group.
- You will need to enter a name for the host resource group. Use a unique name like “HRG-Exchange-1,” as you will create multiple host resource groups.
- Under the EC2 Dedicated Host management settings you may leave the defaults, which will allow the host resource group to manage the Dedicated Host.

Figure 7: Host resource group setup options for allocating, releasing, and recovering that are all check boxed.
- Under “Associated license configuration”, you may leave it as is, which will allow any instance matching any licensing configuration to be launched.
- Select “Create” and repeat the process for your second host resource group. Choose a name that follows the name convention you picked earlier like “HRG-Exchange-2”.
You should now have two host resource groups created as shown in figure 9.
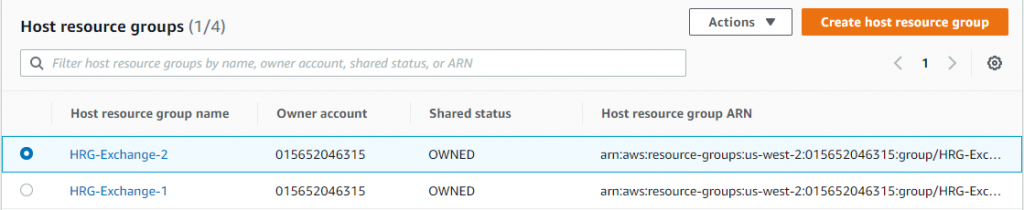
Figure 8: The host resource group page that shows two created host resource groups named HRG-Exchange-1, and HRG-Exchange-2.
Before you start the final step, it is important to understand why you should use two resource groups and how this is important for the architecture. Each resource group will place instances based on available capacity of the Dedicated Hosts and the target availability zone.
For example, when you allocate an R5 Dedicated Host, it has 2 sockets and 48 physical cores on which you can run different instance sizes, such as r5.4xlarge and r5.8xlarge, up to the core capacity associated with the host. However, for each instance family, there is a limit on the number of instances that can be run for each instance size. For example, an R5 Dedicated Host supports up to two r5.8xlarge instances, which uses 32 of the physical cores. Additional R5 instances of another size can then be used to fill the host to core capacity.
To follow the Microsoft Exchange Preferred Architecture, a minimum of four instances are required across four distinct physical hosts to ensure data integrity in the event of any individual failure. With two host resource groups and two availability zones, you ensure that a minimum of four hosts are always allocated. The pattern for launching will be to launch equally across each host resource group, allowing for distribution between the allocated hosts.

Figure 9: Highly available Microsoft Exchange deployment using two host groups &, AZ’s.
Now that we understand the value of using two host resource groups for this architecture, let’s launch our EC2 instances.
Step 4: Launch your Exchange Servers using Host Resource Groups
4.1 Launch Exchange into host resource group
- Open the EC2 console.
- Under instances, click “Launch Instance”.
- Under “My AMIs”, choose the AMI you associated with the License Configurations earlier.
Select your instance type, VPC, a private subnet, and directory join information.
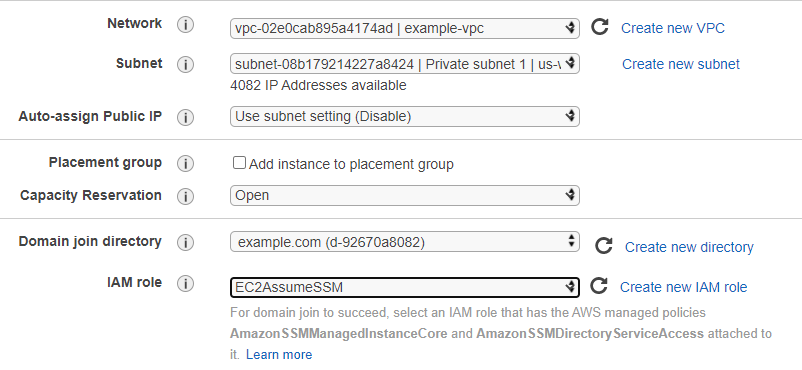
Figure 10: EC2 Launch Wizard settings with VPC, subnet, and domain join information completed.
- Under tenancy, choose “Dedicated Host”, check “Launch instance into a host resource group”, and then choose the first host resource group “HRG-Exchange-1”

Figure 11: EC2 Launch Wizard settings with tenancy set to Dedicated Hosts, the Host resource group option checked, and host resource group name specified to HRG-Exchange-1.
- Finish choosing your security group and launch the instance.
- Repeat the above steps but for another subnet in a second availability zone. Use the same host resource group “HRG-Exchange-1”.

Figure 12: The EC2 Launch Wizard page for deploying a second instance into the same host resource group, with a private subnet in another availability zone.
4.2 Launch Exchange into the second host resource group
You will now repeat the process above, except now you will choose “HRG-Exchange-2” under “Host resource group name”.
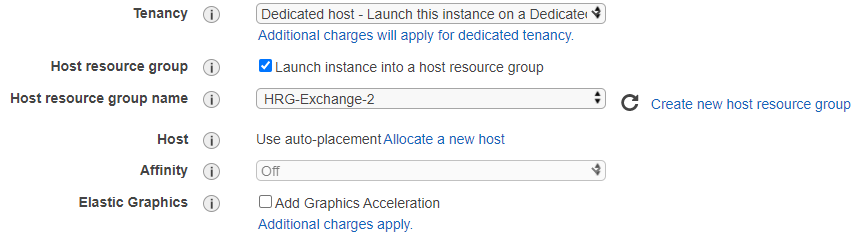
Figure 13: Launch Wizard settings with tenancy set to Dedicated Hosts, the Host resource group option checked, and host resource group name specified to HRG-Exchange-2.
This will allocate an additional two Dedicated Hosts in each availability zone for a total of four. Additional instances you launch using these two host resource groups will use the remaining capacity of the Dedicated Hosts. To verify this, go to the EC2 Console, and select “Dedicated Hosts” in the left panel to see the four hosts.
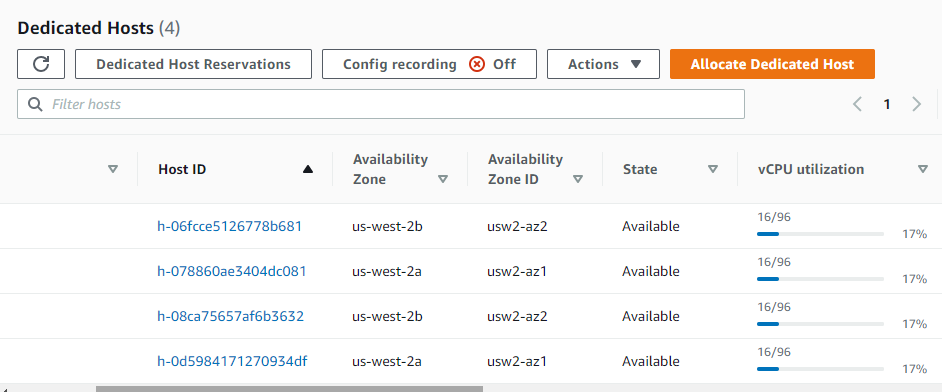
Figure 14: List of allocated Dedicated Hosts in the EC2 console that are being managed by the host resource groups you created earlier.
You can also view the Dedicated Hosts from within License Manager by selecting “Host resource groups” from the left panel and then the “Dedicated Hosts” tab.

Figure 15: The list of Dedicated Hosts allocated in the host resource groups configuration
You now have the base environment to configure your Exchange Servers, and setup your Database Availability Group for Exchange Native Data Protection. For more information on best practices of configuring Microsoft Exchange on AWS, please refer to the blog “How to run Microsoft Exchange on AWS using Amazon EC2”.
Cleanup
When you are finished, you can terminate the EC2 instances you launched earlier which will automatically release the Dedicated Hosts. There is no additional charge for using License Manager; you pay only for the resources you create to run your applications such as EC2 instances.
Conclusion
In this post, you have learned how Dedicated Hosts can be used with License Manager to save costs by utilizing your existing licensing and deploy a highly available Microsoft Exchange environment. I described how you could use license configurations, host resource groups, and EC2 image builder to ensure that as you move to the cloud, reduce management by automatically associating your AMI with your license configuration. It simplifies bring your own licensing by bringing the elasticity of EC2 shared tenancy to Dedicated Hosts through automatic host allocation and instance placement. License Manager not only allows you to track licensing but also alerts you and even enforces limits based on your inputs to ensure license compliance.
To learn more on migrating Windows Server or SQL Server, visit Windows on AWS. For more information on how AWS can help you modernize your legacy Windows applications, check our Modernization page. Contact us to start your modernization journey today.