AWS Cloud Operations Blog
Update your Amazon CloudWatch dashboards automatically using Amazon EventBridge and AWS Lambda
Amazon CloudWatch lets customers collect monitoring and operational data in the form of logs, metrics, and alarms. This allows for easy visualization and notifications regarding their workload health.
Amazon CloudWatch dashboards are customizable home pages in the CloudWatch console that you can use to monitor your resources in a single view, even those resources that are spread across different AWS regions or on-premises. You can use CloudWatch dashboards to create customized views of the metrics and alarms for your resources. Users can add various widgets, such as line, stacked area, number, bar, pie, or text to their dashboard to fit their visualization needs.
A widget can contain information from multiple sources and metrics, such as CPU utilization from multiple Amazon Elastic Compute Cloud (EC2) instances or network traffic statistics from the same EC2 instances. Although creating dashboards and widgets is straight forward, it can require a maintenance effort to update the resource sources if the content is based on the dynamic information, such as EC2 instances that are created or removed during scale-out and scale-in events in the Auto Scaling group. This post will show how to create and update an event-based, automatically-updated CloudWatch dashboard.
For this example, we will provide an overview of how to create and update a CloudWatch dashboard based on the scale-out and scale-in events of an Auto Scaling group. However, this example only scratches the surface of what is possible with the CloudWatch.
Solutions Overview
This solution will use Amazon EC2 Auto Scaling instance lifecycle events and Amazon EventBridge to trigger an AWS Lambda function that will automatically create or update a CloudWatch dashboard, as seen in figure one.
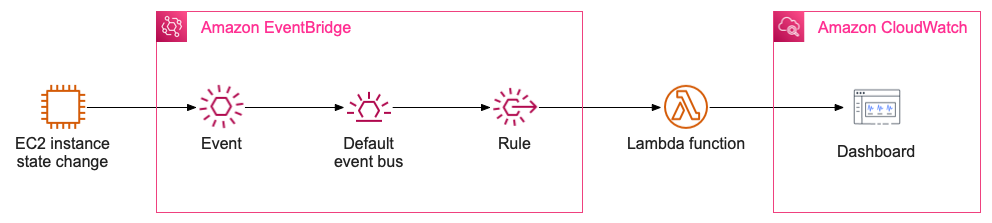
Figure 1: Solution overview, showing the event flow between AutoScaling Group, Amazon EventBridge, AWS Lambda and Amazon CloudWatch
Services used in this solution
Amazon CloudWatch collects monitoring and operational data in the form of logs, metrics, and events, and then visualizes it using automated dashboards so that you can get a unified view of your AWS resources, applications, and services that run in AWS and on-premises.
Amazon EventBridge is a serverless event bus that makes it easier to build event-driven applications at scale using events generated from your applications, integrated Software-as-a-Service (SaaS) applications, and AWS services.
AWS Lambda is a serverless, event-driven compute service that lets you run code for virtually any type of application or backend service without provisioning or managing servers. You can trigger Lambda from over 200 AWS services and SaaS applications, and only pay for what you use.
Getting started
In this post, we will first prepare an environment for our sample, which includes:
- One VPC
- Two subnets
- An Auto Scaling group
- An empty Lambda function (which we will manually edit later)
- An AWS Identity and Access Management role
Then, we will create an EventBridge rule, modify the Lambda function and roles for our sample, and, once the components are in place, we will scale our Auto Scaling group to trigger the dashboard creation and update.
We must highlight that this VPC and other resources are not intended for production use, but merely as an example that you can optionally deploy if you wish to recreate this approach for demonstration purposes. We have a curated set of best practices available in the AWS Well-Architected Framework, and we encourage our customers to incorporate these into their release lifecycle. However, to expedite things, we are providing an AWS CloudFormation template that creates this infrastructure for us.
Cost
If operated for an entire month, this sample CloudFormation stack would cost approximately $0.50 per day, though this may vary based on slight differences in regional prices. Without the CloudFormation components, operating only the automatic dashboard updating resources (including the Lambda function, EventBridge rule, and dashboard) will typically cost between a few cents if the free tier is leveraged, or up to $3 per month if more than three dashboards are created per account.
Execute CloudFormation
The following is the CloudFormation stack that we will be using in this example. Note that this sample is only meant to demonstrate using an Auto Scaling group to trigger dynamic dashboard updates, and it is not intended for production use. We use this as a way of rapidly creating an environment that demonstrates the solution. If you are unfamiliar with AWS CloudFormation and stacks, then please see our documentation here, or this video introduction.
With this deployed, your environment will now have the following components in it:
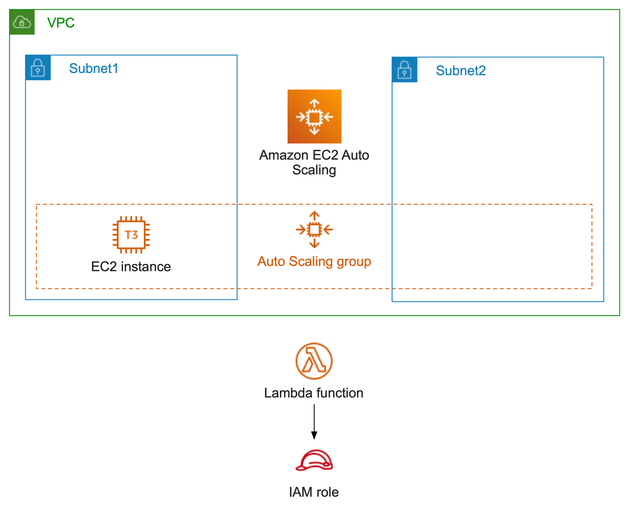
Figure 2: Architecture diagram of resources deployed by the CloudFormation stack
Create EventBridge Rule
With the working environment created, we will now walk you through the process of automating CloudWatch dashboard updates.
First, select here to launch the Amazon EventBridge console. And then, select Create rule and provide a name for the rule.
Now, select the following fields, in this order:
- Event pattern
- Pre-defined pattern by service
- Service provider: AWS
- Service Name: Auto Scaling
- Event Type: Instance Launch and Terminate
- Any instance event
- Specific group name(s)
In the drop-down for Specific group names, select the Auto Scaling group created by CloudFormation. Your page should now look similar to the following:
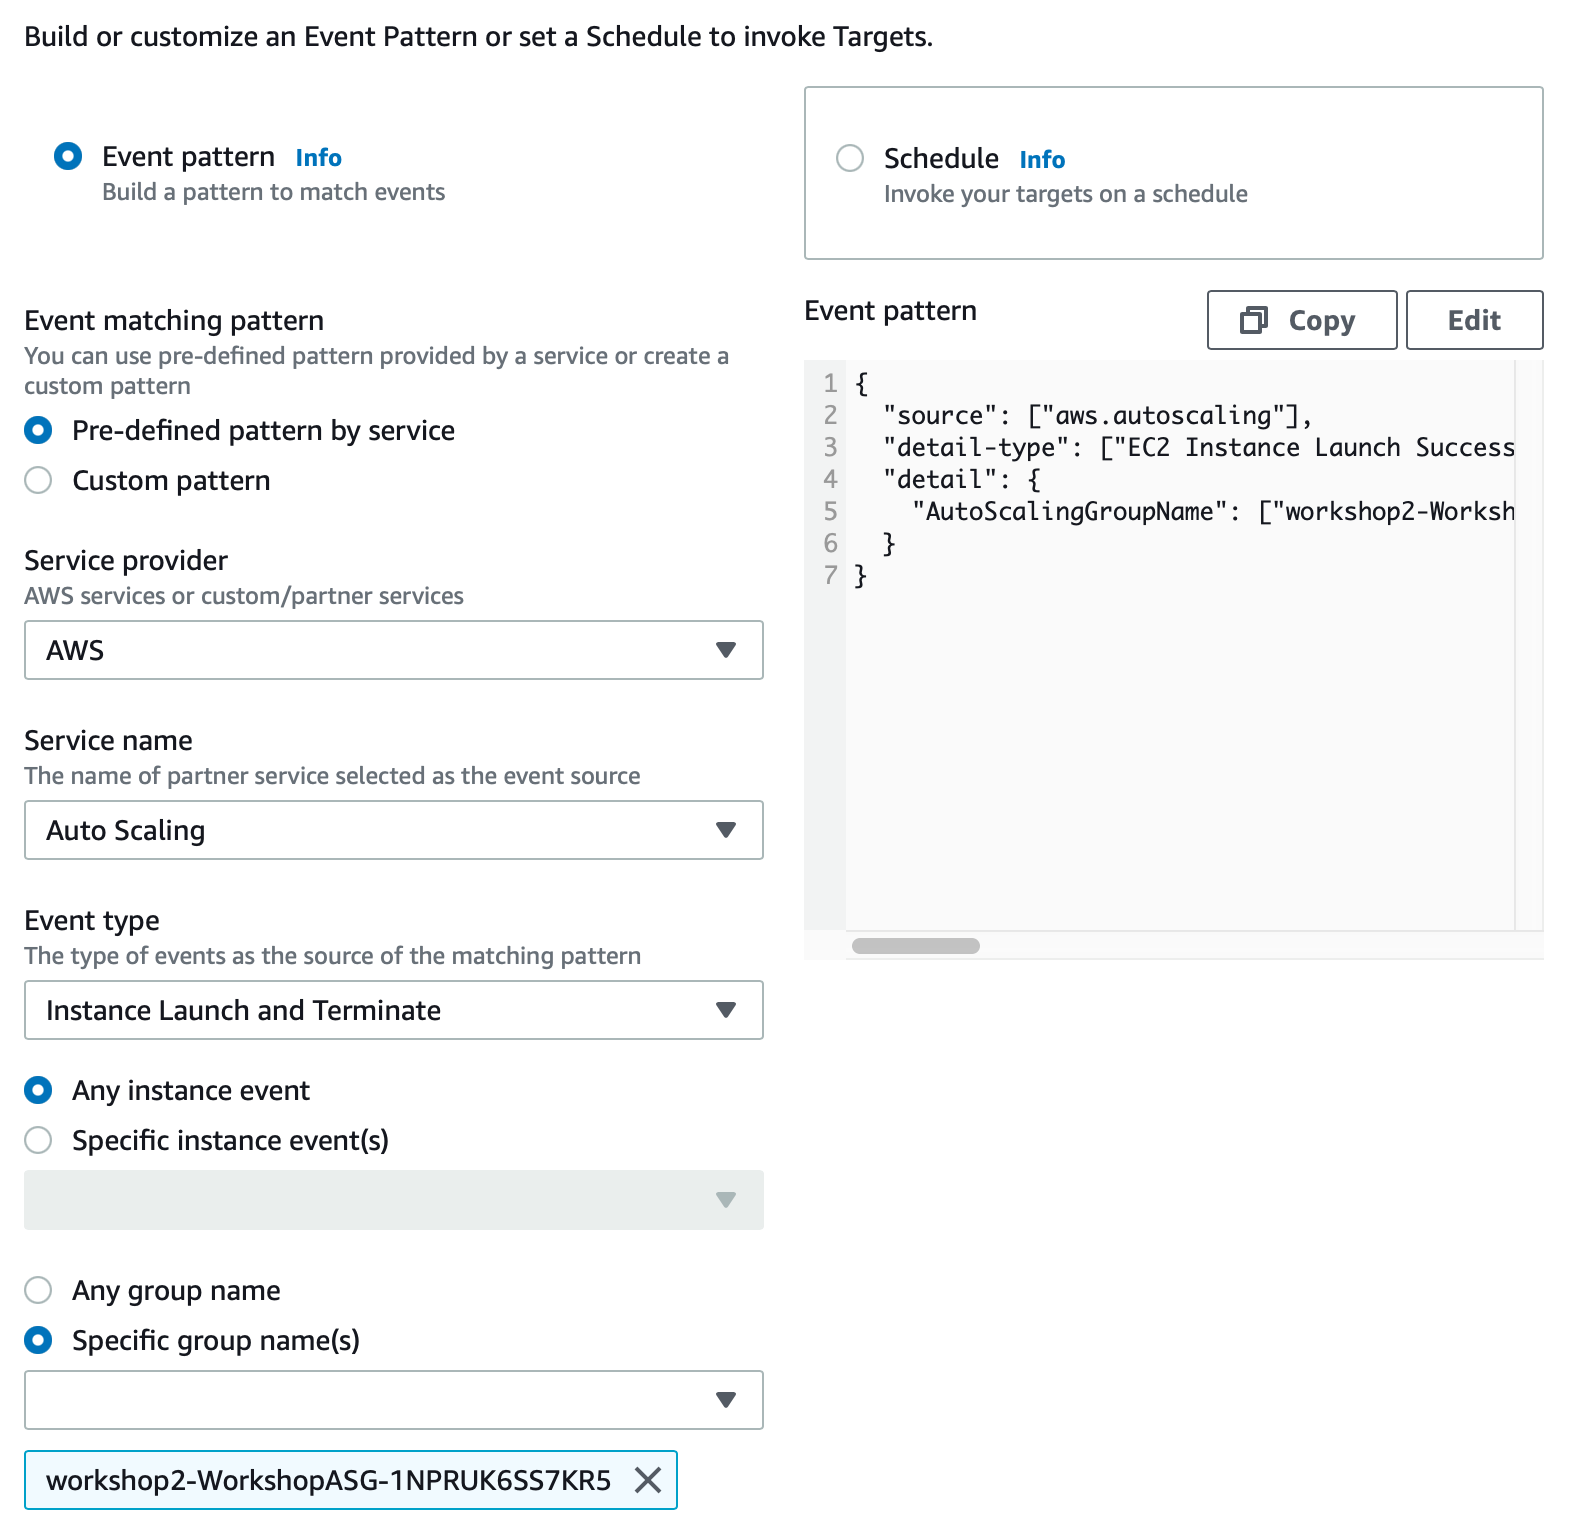
Figure 3: Amazon EventBridge configuration
Leave the Select event bus section untouched, and move on to the Select targets section. Now, select Lambda function, and then WorkshopLambdaFunction.
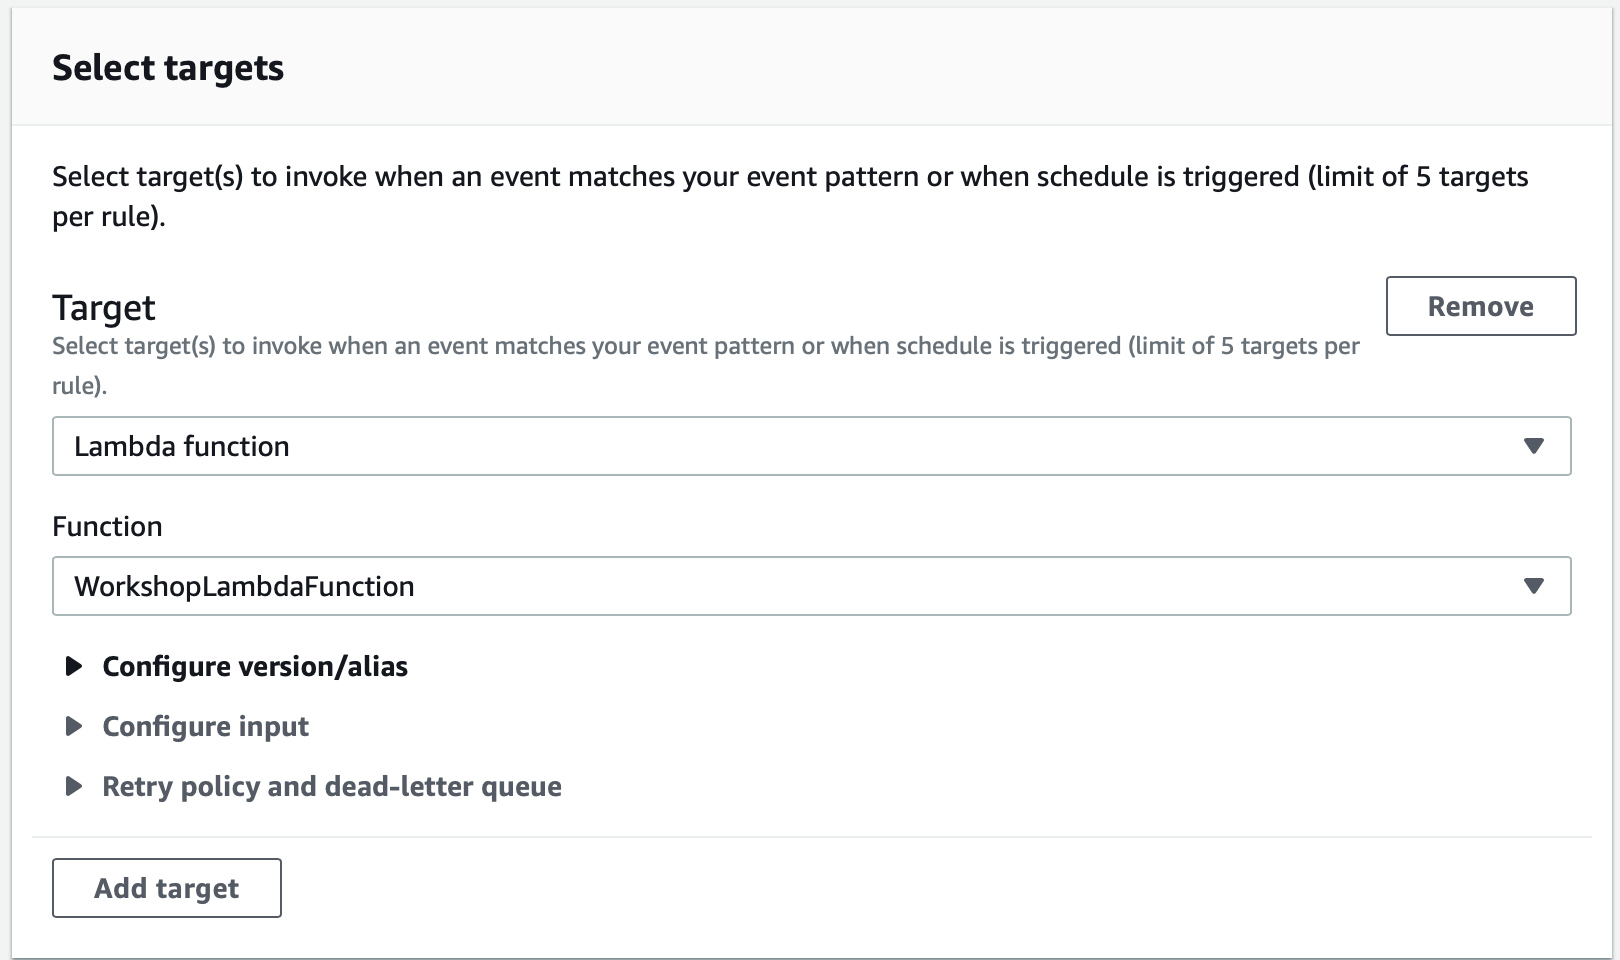
Figure 4: EventBridge Configuration – select target
Finally, select Create.
Modify Lambda function
Now that we have a Lambda function that will execute every time our Auto Scaling group changes its size, we can add the code to it that actually creates (or recreates) a dashboard. This will be a simple example that creates a single widget with CPU metrics from all instances in our sample Auto Scaling group.
First, go to the Lambda console and select the region where you launched the CloudFormation template. Go into the function created by CloudFormation and select the Configuration tab, where you should see an EventBridge under the Triggers, as seen in the following:
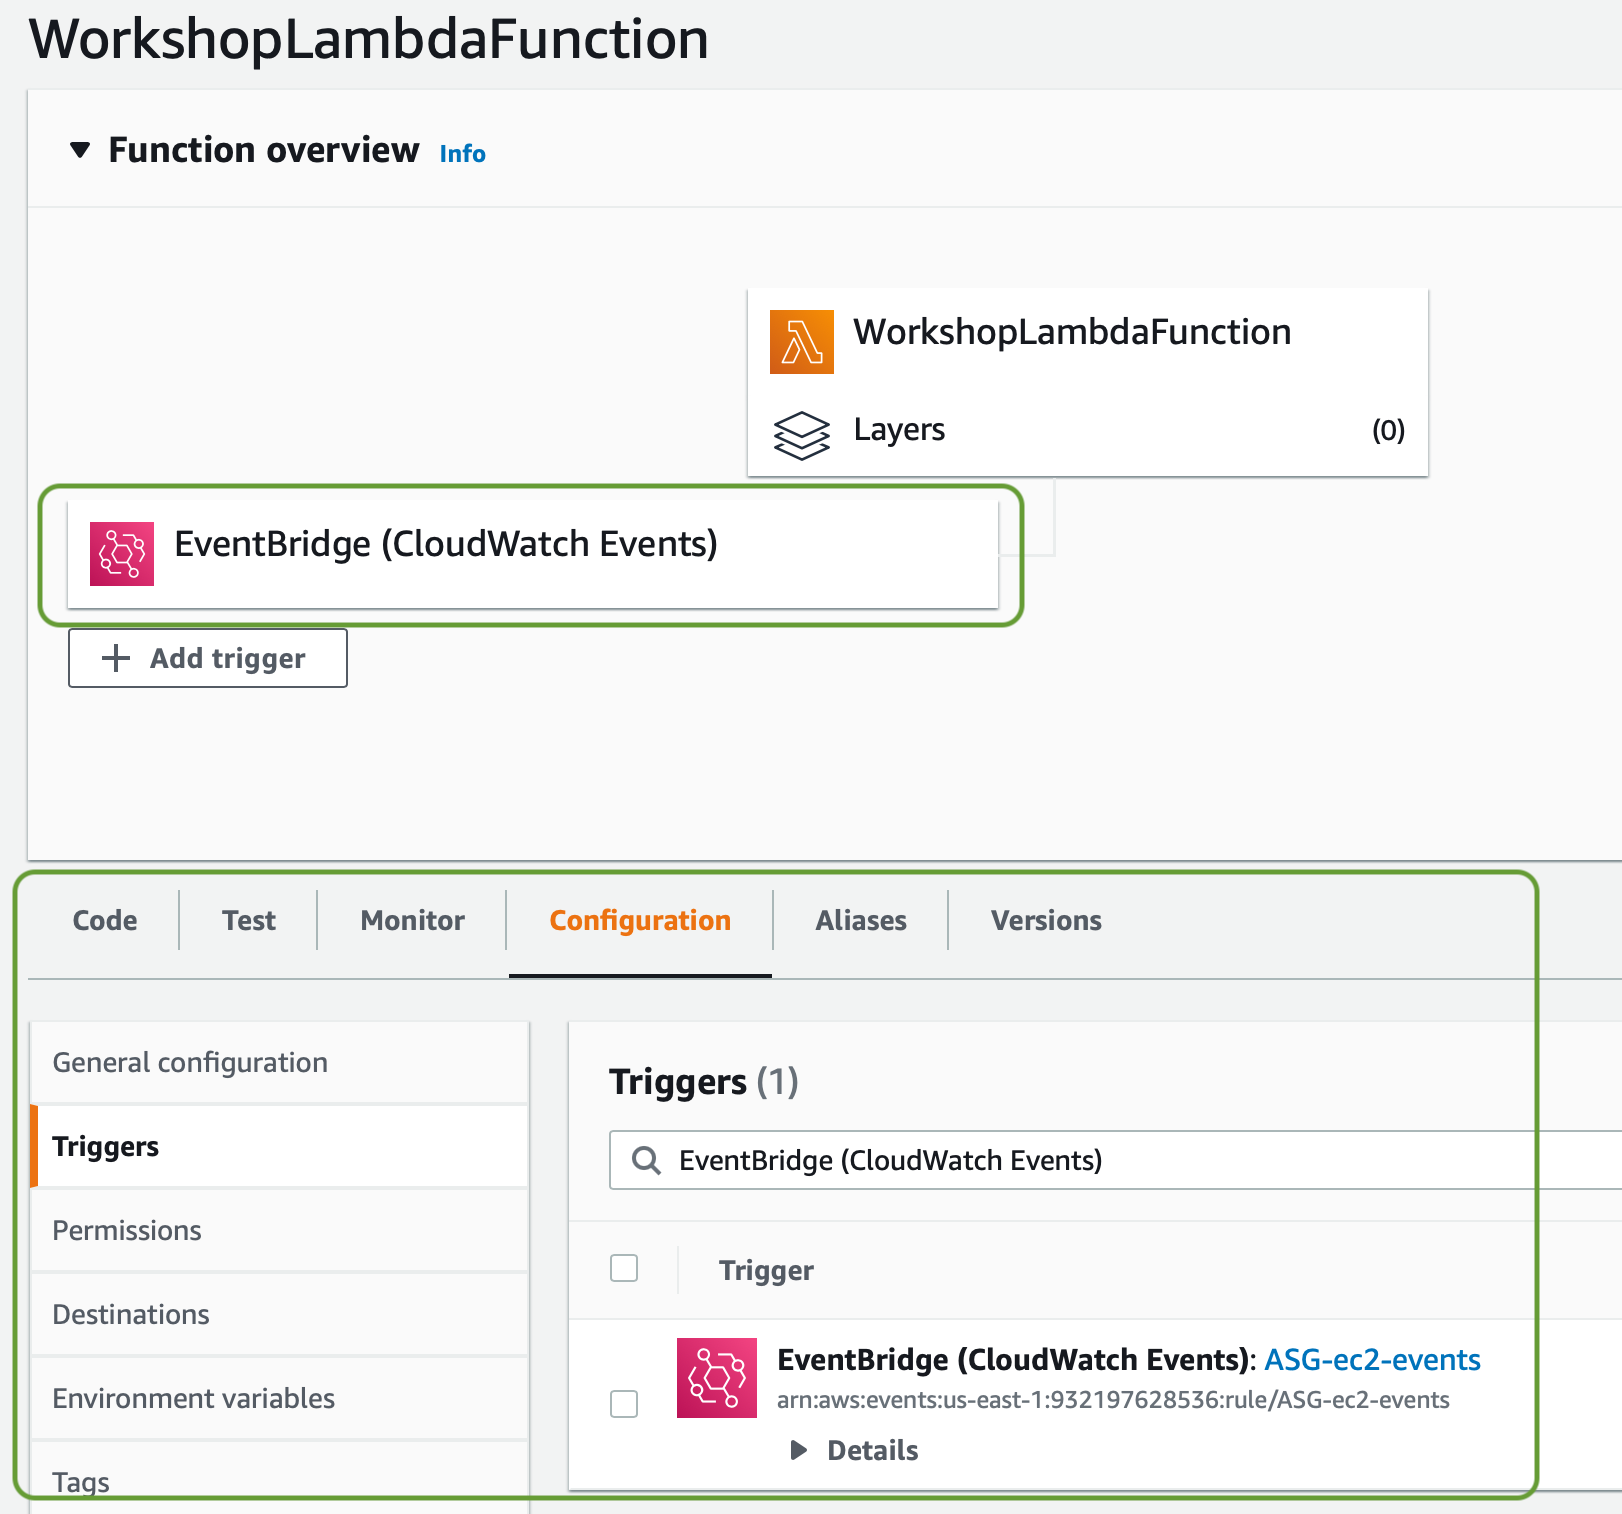
Figure 5: AWS Lambda configuration
Copy and paste the following code into to the editor under the Code tab, in the index.py file.
Then, select Deploy to push your changes to become live.
One final change to our Lambda function is required. You must enter an environment variable that will determine the name of the new dashboard.
Note that this script will overwrite any existing dashboard of the same name. Make sure that you don’t use the name of an existing dashboard, as you will then lose it inadvertently.
Select Configuration, and then Environment variables. Now, select Edit to create a new variable. The name must be DASHBOARD_NAME, and the value is the name that you choose.
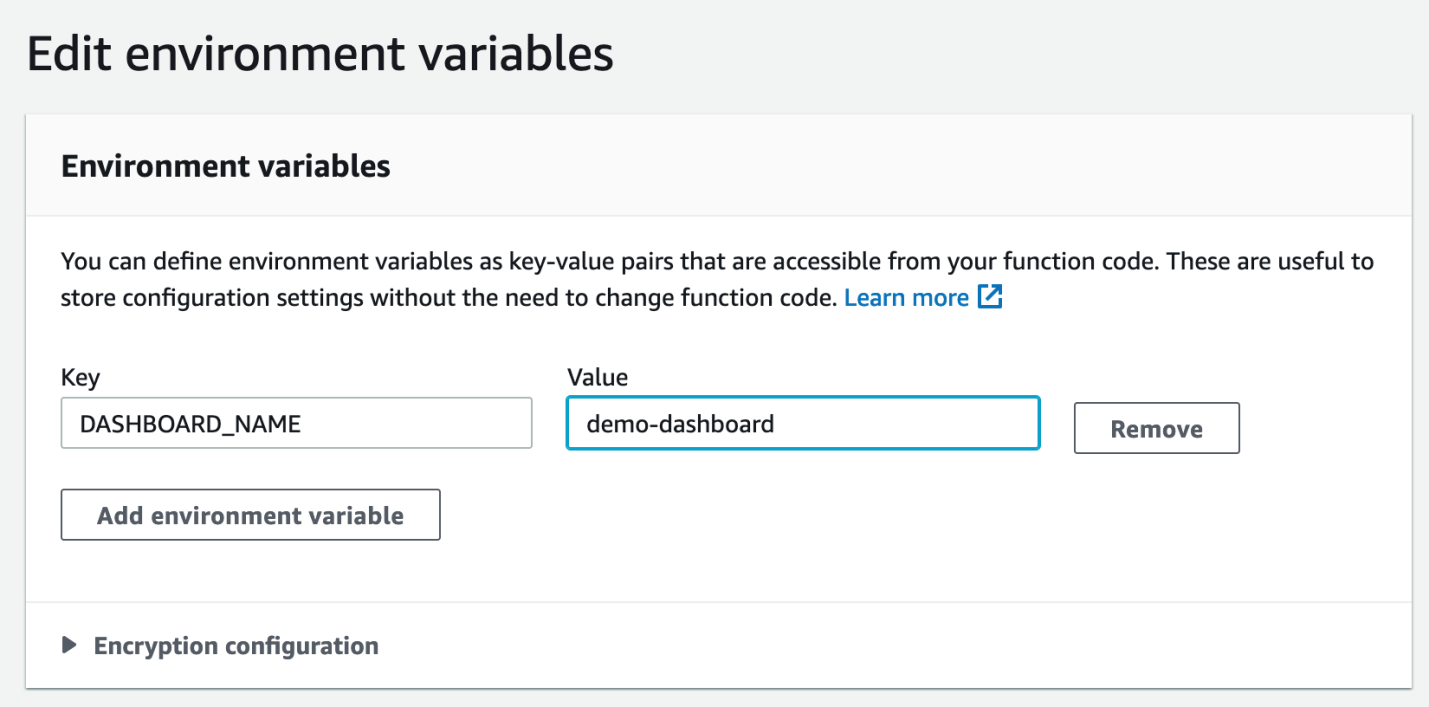
Figure 6: AWS Lambda function environment variables
A note about proper IAM permissions
When we created our Lambda function with our CloudFormation template, we also created an execution role that gives the Lambda function the basic permission to write logs to CloudWatch Logs and associated it with the function. In order for our code to work properly, it requires the following permissions:
- Describe the Auto Scaling group and retrieve the instance details that will be added to the dashboard.
- Execute the CloudWatch
PutDashboardAPIendpoint that creates the dashboard (for demo purpose, this IAM policy was created with the CloudFormation template).
We have added these permissions for you already, but if you are not familiar with the process, then you can view these privileges from the Lambda function’s Permissions view under the Configuration tab. Your view will appear similar to the following:
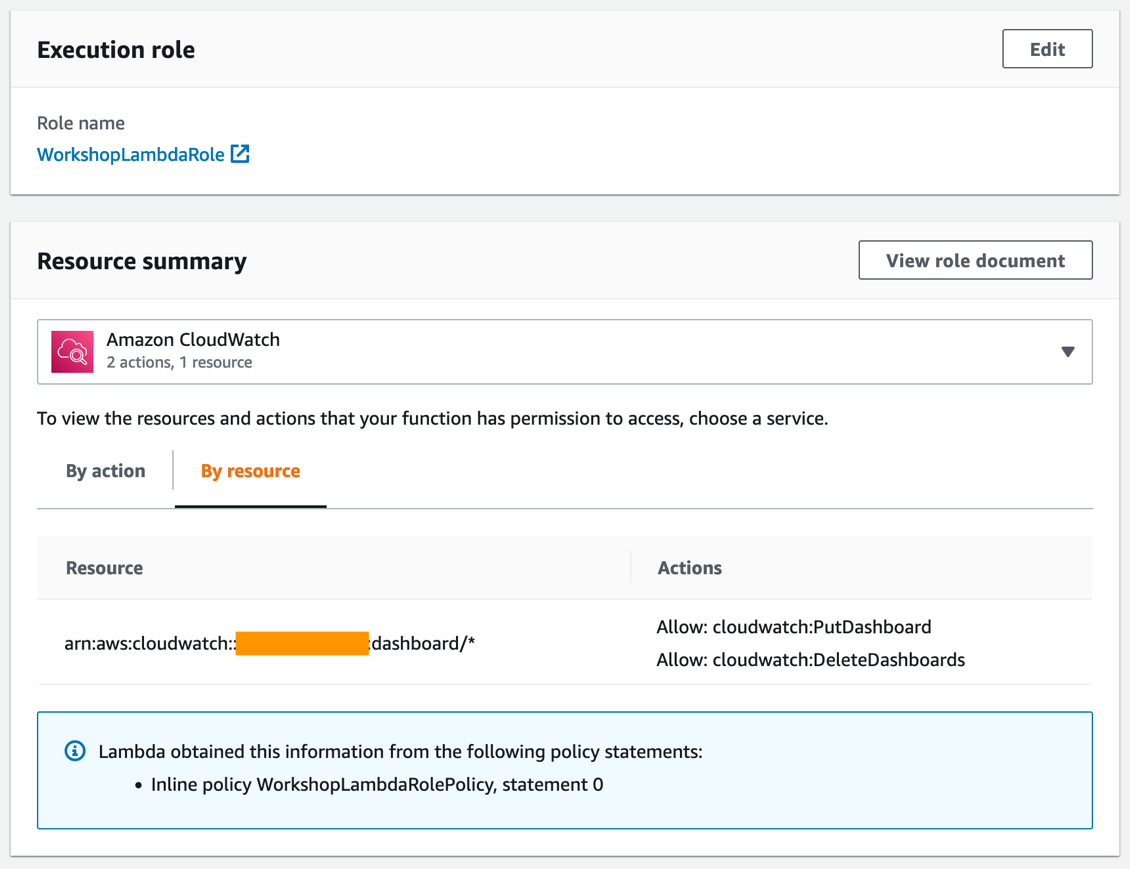
Figure 7: Execution role for our Lambda function
Verification
Now you have all of the pieces needed to create the dashboard based on the events from the Auto Scaling group. Let’s go ahead and trigger it by adjusting our deployment.
The Auto Scaling group created by the CloudFormation template has a desired capacity of one, so we should see exactly one instance has been created under the Auto Scaling group. Open your Auto Scaling group console here, and go to the work shop Auto Scaling Group. Select Edit in the Group details section, and change the desired capacity to two.
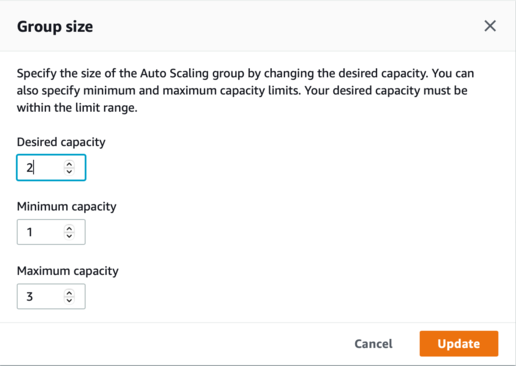
Figure 8: Auto Scaling Group size
You can monitor the Lambda Execution through the Monitor tab in the Lambda function, or you can check the logs from the CloudWatch logs.
Check your dashboard
Now, go to the CloudWatch Dashboards (or reload your CloudWatch dashboard page). Your newly updated dashboard will be ready for you!
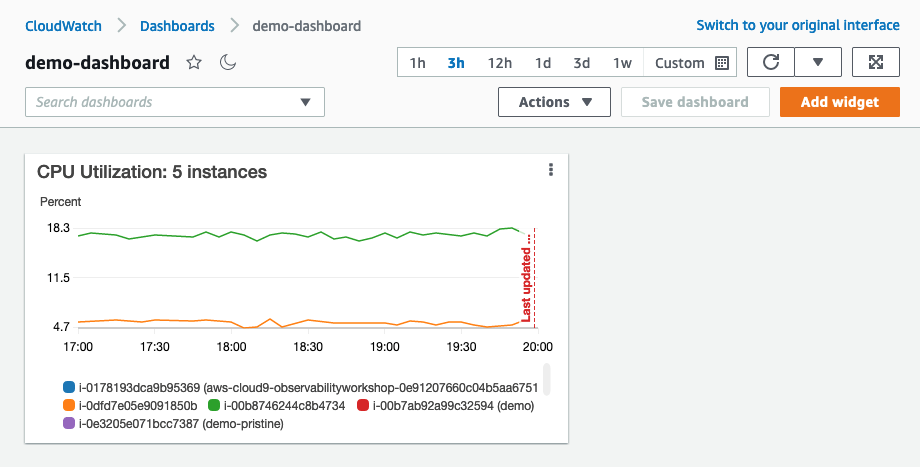
Figure 9: Auto Scaling Group dashboard sample
Summary
The example in this post shows how you can automatically create or modify the Cloud Watch Dashboard based on the lifecycle events from EventBridge. This solution will be handy when you must manage much more complicated situations with multiple Auto Scaling groups and many instances with the least effort.
Cleanup
To cleanup resources used in this post, follow these steps:
- Delete the CloudFormation stack created earlier
- Delete the CloudWatch log group created by your CloudFormation stack’s Lambda function (it will have a name that includes the stack’s name)
- Delete the EventBridge rule that triggers your updates
- Delete the generated dashboard from CloudWatch
Next steps
This post only scratches the surface of what is possible with CloudWatch dashboards and you can extend this solution to include more EC2 metrics, data from Amazon Elastic Block Store, Amazon Kinesis, Amazon API Gateway, or any of our services that emit metric data into CloudWatch. You can even perform more advanced automation including custom widgets, CloudWatch logs, and more.