AWS Marketplace
Five-minute data connection and transformation from AWS to anywhere using Nexla
As data becomes ubiquitous and data environments grow more complex, my customers ask for scalable solutions for managing their data flows. Accessing data from different vendors and data sources can be complicated, and transformations and checkpoints require the expertise of data engineers. Custom in-house solutions present a cost in both development and management time. Businesses need a cost-effective, agile way to make decisions based on rich, up-to-date data. Modern data operations demand not just data connection, but standardization, transformation, and monitoring along the way.
Nexla, available in AWS Marketplace, offers an enterprise solution for data operations. It allows you to build and set up the data flows you need, adding a layer of accessibility for you to use data on AWS without a technical background. You can use Nexla to easily apply transformations and criteria to your data flows. Nexla works with the following data formats and sources, among others.
- Files: Amazon S3, FTP, SFTP, FTPS
- Databases and data warehouses: Amazon Redshift, Snowflake, Amazon Aurora, MySQL, Amazon RDS
- Streams: Amazon Kinesis
- Analytics: Amazon EMR, Amazon Athena
- APIs: AWS AppSync, Amazon API Gateway, SaaS services
In this blog post, I provide a step-by-step guide for procuring Nexla in AWS Marketplace, setting it up, and creating your first data flow. For this example, I will use a common flow, from Amazon S3 to Salesforce. Nexla can be used with any of the sources mentioned earlier and to most destinations.
Solution walkthrough: Five-minute data connection and transformation from AWS to anywhere using Nexla
1. Set up Nexla and a data flow
a. Request a demo and a free trial
On Nexla’s AWS Marketplace product detail page, request a demo and a free 15-day trial. Enter your information and choose Schedule Meeting, Demo & Trial Access. After submitting your information, an account will be created for you, and you’ll receive your login credentials via email.
b. Log in to Nexla
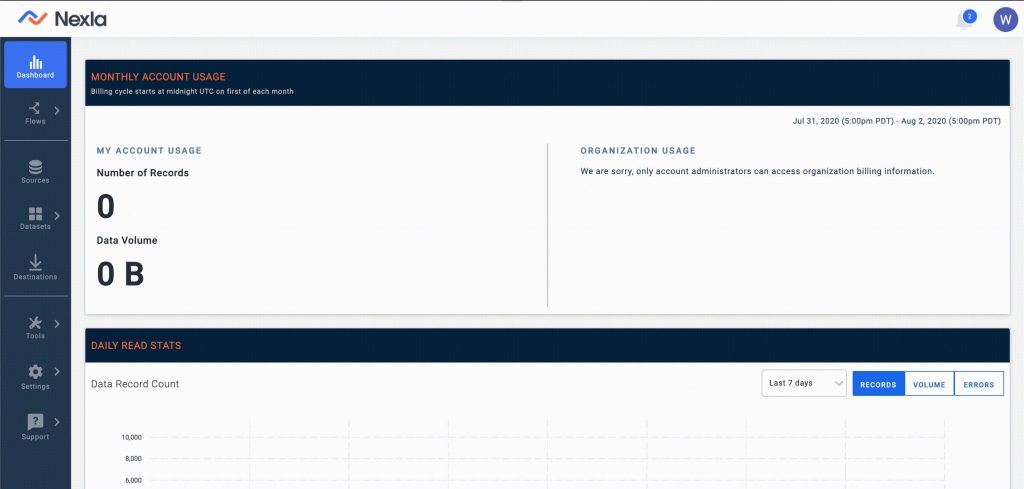
After creating an account, navigate to Nexla’s online platform and log in to your dashboard by entering your account credentials from the email in step 1.a. The following screenshot shows your dashboard the first time you log in. The left sidebar options include Dashboard, Flows, Sources, Datasets, Destinations, Tools, Settings, and Support. The main panel shows your starting monthly account usage as 0 as well as a section for your Daily Read Stats.
c. Create a data flow
To create a data flow, do the following:
-
- In the left sidebar, choose Flows.
- From the drop-down menu, choose Create New Flow. This takes you to the data flow creation screen.
- Choose the Create New Source. This takes you to the Select page.
d. Connect to your AWS data source
In addition to the common data sources listed in the introduction, you can add new sources by submitting a request. You can even select email as a source. When you do that, a custom email address is generated for you to forward files to. Sending a file to that email address automatically integrates the files into your data flow.
For my example today, I am using a more common source, Amazon S3.
-
- To add S3 as my source, on the Select page, I choose Amazon S3. Alternatively, in the upper left, you can enter S3 into the search bar.
- Choose the Next. This takes you to the Authenticate page.
- To enter your AWS access credentials, choose Add a New Credential. The options to authenticate are: Access Key, Amazon Resource Number (ARN) and External ID, or Instance Role. I selected Access Key from the Authenticate Using drop-down menu and entered my AWS Access Key and AWS Secret Key into their respective fields. For more information on finding your access key and secret key, consult the AWS user guide.
- Choose Save and then Next. This takes you to the Configure page.
- Verify your information is correct and then chose the Save.
Nexla will now scan your source and create a Nexset, a logical representation of your data that functions as data-as-a-product.
e. Select data slices and add transformations or criteria
Once the Nexset appears, choose the Transform button. You can now select the slices of data to pass on and apply prebuilt transformations. You can also add validation checks so that your data passes certain tests along the way. You can then select the destination for each. However, for simplicity, I am choosing to replicate the data and pass it straight to my destination without any changes, so I choose to replicate. In the blue Replicate box, I slide the toggle to the right.
Nexla has dozens of prebuilt transformations and criteria checks and can accept Python, Javascript, or JSON code injections to match your needs. Some common use cases include parsing specific Social Security Numbers (SSNs) or phone numbers from customer IDs and standardizing data formats, for example, MM-DD-YYYY. You can also convert customer sales information to the desired format for its destination.
f. Select the destination
I want to add Salesforce as a data destination, as outlined in step 1.d. To locate my data source, on the transformed Nexset, I choose Send to Destination. I select the Salesforce icon from the page. Alternatively, I can enter Salesforce into the search bar. Then do the following:
-
- Choose Salesforce.
- Choose Add a New Credential.
- Choose Authorize. This opens a new window so I can log in to Salesforce. I use my Salesforce credentials to log in.
- Once authenticated with Salesforce credentials, choose Next.
Now I have set up my data flow.
2. Monitor, track, and customize your data flow
After setting up a data flow, you can edit and customize it to suit your needs. The flow automatically scales to any amount of new data. Your Nexla dashboard tracks statistics and monitors for changes. Records that fail to process will go to your notifications for manual triage.
a. Monitor your data flow
To monitor your data flow, do the following:
-
- Navigate to your Nexla dashboard.
- In the left sidebar, choose Flows and then My Data Flows.
- Choose the magnifying glass on the flow you would like to inspect.
b. Change your notification settings
To change your notification settings, do the following:
-
- From the left sidebar, choose Settings.
- Choose Notification Management. Here you can change how you would like to be notified.
Congratulations! You can now use data flows in Nexla to reduce engineering loads and cut lead time. My Amazon S3 data now automatically flows into Salesforce, and its format and velocity can be transformed by returning to step 1e in My Data Flows. You can repeat this process for any number of new flows from any source to any destination.
Cleanup
If you decide to stop using Nexla, in order to prevent future charges, you may simply end your contract. To end your contract, do the following:
- Navigate to Data Flows.
- Choose My Data Flows.
- Choose the top-right menu for each of your flows.
- Choose Pause Flow.
This will pause your data flow and end any records from being processed. On the left, you can also navigate to Sources and delete any saved credentials to your sources using the menu in the upper right of each source.
If you’d like to close your Nexla account, do the following with your administrator credentials:
- Navigate to Settings.
- Choose Account Management.
- Choose Close account.
Conclusion
In this post, I showed how anyone can connect and transform data from Amazon S3 to Salesforce using Nexla from AWS Marketplace. This functionality can be extended to any data source or destination you need. Data will automatically flow as it is added or changed in S3, following the transformations you add into Salesforce.
Next steps
To learn more about what Nexla can do for your business, visit Nexla’s AWS Marketplace page, watch our getting-started tutorial, or contact us directly at help@nexla.com.
About the author
 Billy Allocca, Product Marketer, Nexla
Billy Allocca is a Product Marketer at Nexla working on defining Nexla’s story and integrating Nexla into more avenues to reach customers. He is a current MBA student at Yale’s School of Management.
Space
space
 Nam Le, Senior Partner Solutions Architect, AWS Marketplace
Nam Le focuses on security and governance with close to 20 years of experience in consulting, sales and engineering. He specializes in AWS Control Tower, AWS Service Catalog, AWS Marketplace, and AWS Data Exchange. As an AWS Marketplace Solutions Architect, he also works with AWS partners to build and deliver best-practices solutions to customers. Outside of work, he enjoys biking, car building, travel photography, and spending time with family.