Artificial Intelligence
Running Principal Component Analysis in Amazon SageMaker
Principal Component Analysis (PCA) is a very popular technique used by data scientists primarily for dimensionality reduction in numerous applications ranging from stock market prediction to medical image classification. Other uses of PCA include de-noising and feature extraction. PCA is also used as an exploratory data analysis tool.
To better understand PCA let’s consider an example dataset composed of the properties of trucks. These properties describe each truck by its color, size, compactness, number of seats, number of doors, size of trunk, and so on. Many of these features measured will be redundant and therefore, we should remove these redundancies and describe each truck with fewer properties. This is precisely what PCA aims to do.
In this blog post, we introduce you to the basics of PCA using a simple example of code in a Jupyter notebook using PCA running on the standard Iris dataset from UC Irvine and then introduce you to PCA running in the Amazon SageMaker environment. We will point out some of the benefits of using Amazon SageMaker.
What is PCA?
PCA is a technique used to compress d features into p<<d features, while preserving as much of the information as possible. A classic demonstration for PCA is given with images. A black and white image can be represented as an n by d matrix of integers, determining the grayscale of each pixel. PCA provides a low-rank representation of that matrix that can be stored with (n+d) p numbers, instead of nd, such that the compressed image looks almost the same as the original. In the context of machine learning (ML), PCA is a dimension reduction technique. When the number of features is large, ML algorithms either are at risk of overfitting, or require too much time to train. To that end, PCA can reduce the input dimension. The way PCA reduces the dimension is based on correlations. Two features are correlated if, given the value of one, you can make an educated guess about the value of the other. PCA, with a target dimension of p, finds p features such that a linear function of these will do the best job of predicting the original d features. This kind of information-preserving objective makes the output of PCA useful to downstream tasks.
Use case for PCA with a simple example
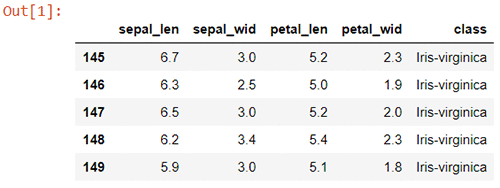
The following Python code illustrates how powerful and yet simple PCA can be as a pre-processing feature extractor and dimensionality reducer. The “Iris” dataset is a standard database that is used by data scientists to study the inner working of PCA. This dataset resides on the UCI Machine Learning Repository (https://archive.ics.uci.edu/ml/datasets/Iris), and it contains measurements from 150 Iris flowers derived from three different species. The three species are 1) Iris-setosa, 2) Iris-versicolor, and 3) Iris-virginica. The four features are dimensions in centimeters: 1) sepal length, 2) sepal width, 3) petal length, and 4) petal width. With this dataset we want to illustrate the steps involved in producing PCA using the two popular approaches: Eigen Decomposition and Singular Value Decomposition (SVD). We see that the results are the same using either of the approaches. SVD is the most popular approach because it is a much faster way of getting the PCs without have to calculate the covariance matrix. Although when the dimensionality of the data gets really big then Fast techniques such as Randomized SVD are used.
Let’s load the Iris dataset:
The following code shows how Eigen Vectors and Eigen Values are obtained from Eigen Decomposition using a normalized co-variance array. Eigenvectors are a special set of vectors associated with a linear system of equations that are sometimes also known as characteristic vectors, proper vectors, or latent vectors.
A scalar λ is called an eigenvalue of the n × n matrix A because there is a nontrivial solution x of Ax = λx. Such an x is called an eigenvector corresponding to the eigenvalue λ.
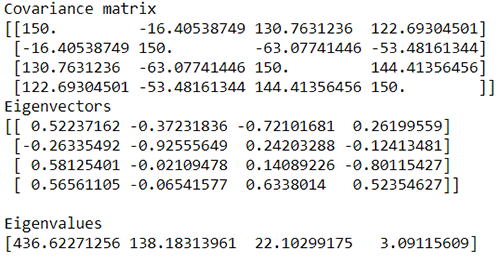
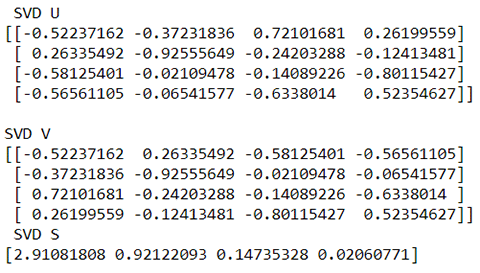
The principal component (PC) values (the transpose of V, see the following pca() function) are alternatively computed using the SVD method. The output of this matches the Eigen Vectors or PCs obtained from the previous method (Eigen Decomposition), except that for the first and the middle vector the signs are reversed. This is okay; it’s a sign reversal of the basis vectors.
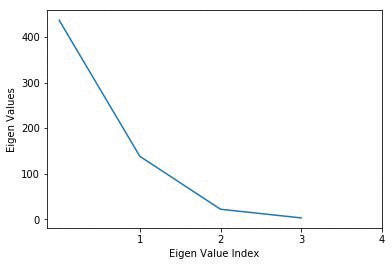
Now we choose the PCs obtained that are plotted, and we consider only those values that are significant. Those corresponding Eigen Vectors or PCs are only considered for projecting to the lower dimensionality sub-space. Based on the plots only the first two components are chosen.
The main steps involved in obtaining the PCs are the following: –
- Normalize the data into a zero mean and unit variance format.
- Obtain the covariance matrix of the normalized data.
- Obtain the Eigen values and The Eigen Vectors (PCs) either by performing Eigen Decomposition on the resulting Covariance matrix using the Eigen Decomposition approach or by obtaining the PCs and Eigen values directly using SVD.
- Figure out the significant PCs to keep by plotting the PCs.
The following code goes through these main steps and shows the resulting plot of the projected data into a 2-D space by performing a dot product operation on the normalized input matrix X_std with the resampled (eig_vecs_reshape) data.
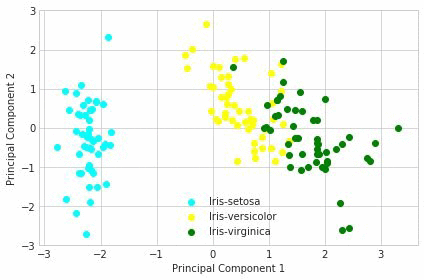
It can be seen from this scatter plot that the data in the subspace is in the form of clusters, which can be further processed using other techniques such as K-means to separate out these clusters.
Highlights of Amazon SageMaker PCA
Our implementation requires only a single pass, hence it must be able to handle both a dataset and a stream of data. The algorithm operates in mini-batches where each mini-batch contains a fixed amount of rows from a matrix. The PCA model contains the top-right singular vectors of that matrix. Compared to the naive implementation of PCA on the Iris dataset that we discussed in the previous section, the implementation of PCA on the MNIST dataset that we discuss in the following sections is a much more streamlined and optimized approach for ML computation, especially when there is big data involved. The naive approach just stores the data in local memory in a format that is not amenable to efficient computation and then performs the computation. This causes a lot of trashing back and forth from the cache and ends up being a hit on performance. This problem is alleviated by storing the big data in Amazon S3. Then the data is converted into a format that is much more amenable for computation of the algorithm ( in a RecordIO format) .
The algorithm
Amazon SageMaker PCA supports two algorithms, a basic algorithm and a randomized one.
Basic algorithm: The basic version is tuned for a moderate input dimension. It maintains both the mean row and the full dXd covariance matrix where d is the input dimension. This provides an exact solution yet requires d^2 memory and and update time of d^2 per input row.
Randomized algorithm: For inputs with a large input dimension, we provide an approximation algorithm that computes an approximation of the top singular vectors. For this version, there are three important parameters: d, the input dimension, k the number of required singular vectors, and p, a precision parameter. The algorithm requires O((k+p)d) memory and a processing time of O((k+p)d) per input row. Large values of p lead to a more accurate approximation, yet cost more in terms of memory and run-time. This implementation is based on random projections, in that it maintains a projection of the columns of the matrix.
Key properties
GPU support: Both algorithms are supported on (multi-)GPU machines, hence they allow for a blazing fast running time.
Single pass: Our implementation requires a single pass, hence, it allows for incremental updates for the model. For example, if we have a dataset that grows daily, we can update the PCA model to contain the new data in time proportional to the new data size, rather than having to retrain on the entire dataset.
Seamless parallelism: Amazon SageMaker PCA is well optimized for distributed training and can obtain near-linear scalability when training with multiple nodes.
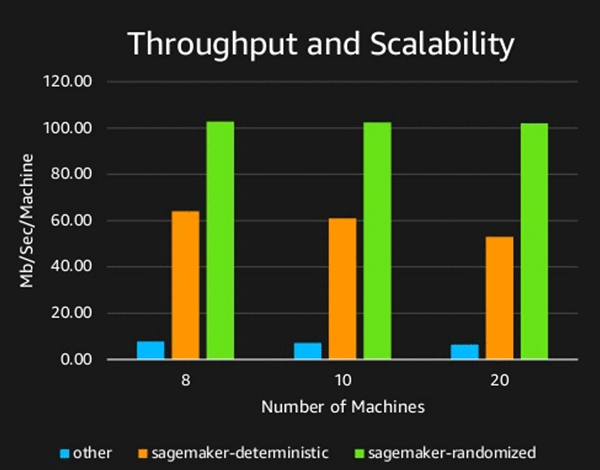
To demonstrate the speed and scalability of Amazon SageMaker PCA, we present the following image measuring the throughput of both versions and a popular alternative. The throughput presented is per machine, meaning that 10 machines with 100 MB/sec/Machine process 1GB of data per second. The efficient parallelism is seen by the fact that adding more machines does not decrease the MB/sec/Machine. The speed and advantage of using GPUs is demonstrated by the difference of the throughputs of the Amazon SageMaker version versus the alternative. In addition, the randomized version’s linear (versus square) dependence on the input dimension can be seen here as well, given its superior throughput.
The experiment was performed on a dataset of 5000 dimensions with the objective of extracting the top 100 principal components.
Getting started / examples
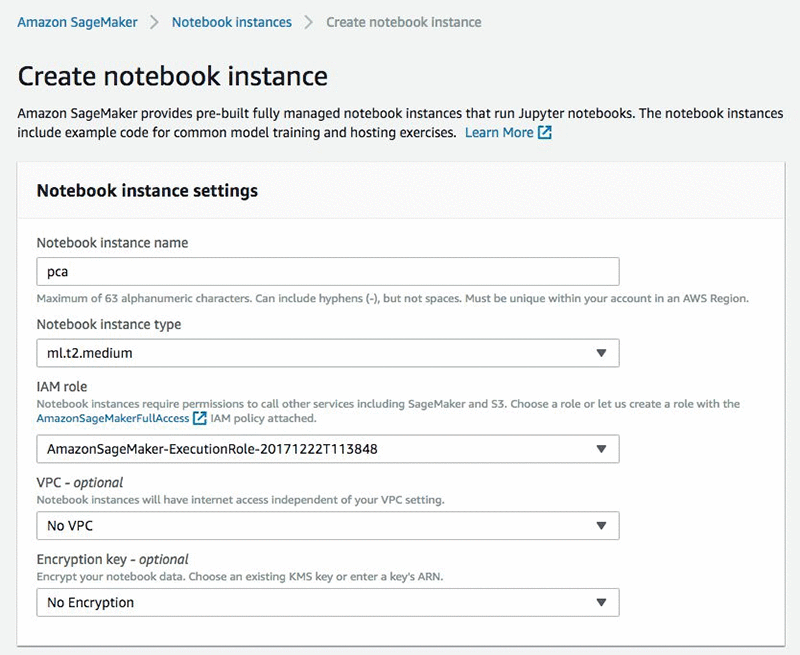
The best way to get started with Amazon SageMaker PCA is to check out our sample notebook “Introduction to PCA with MNIST.” You can find this notebook under the “Introduction to Amazon Algorithms” directory in a newly created Amazon SageMaker notebook instance. If you have not created a notebook instance yet, sign in to your AWS account, go to the Amazon SageMaker console, and choose the Create notebook instance link.
Here provide a name for your notebook instance, select an EC2 instance type, and pick up an IAM role. The rest of the fields are optional and can be left at the defaults.
After your notebook instance is created you will see a green mark under the Status column on the “Notebook instances page.
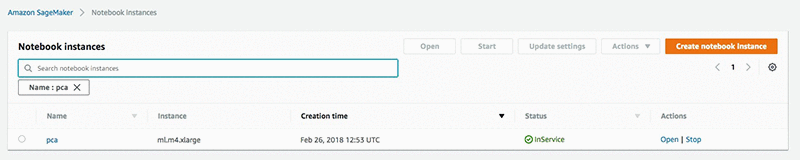
Choose the Open link under the Actions column to open the list of Jupyter notebooks hosted on your instance.
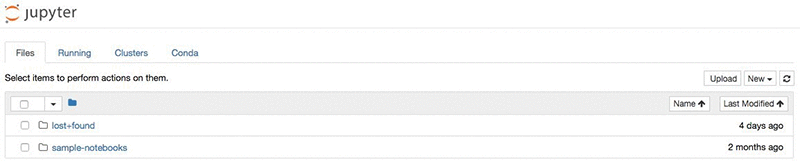
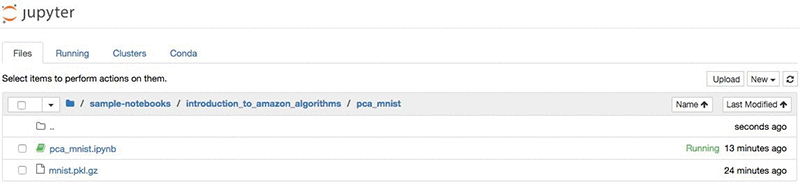
Navigate to the “sample-notebooks > introduction_to_amazon_algorithms” directory and open the pca_mnist notebook.
Our task in this notebook is to compute the eigenvectors of the handwritten digits found in the MNIST dataset. To do so, we will obtain the MNIST dataset consisting of a 50K by 728 matrix, each row representing an image. The eigenvectors, also referred as ‘Eigen digits’ later on, are 728 dimensional vectors, such that every image can be described as a linear combination of them. We will obtain the top 10 eigenvectors that can be used to create an approximate representation of each image using 10 floating points rather than 728.
One important prerequisite before running your notebook is to specify the name of the Amazon S3 bucket where you want to store the training data and the output model. Note that the S3 bucket must be within the same Region as your notebook instance. We note that while the training job is restricted to the same Region as the notebook instance, an endpoint used for inference can be set up in any Region.

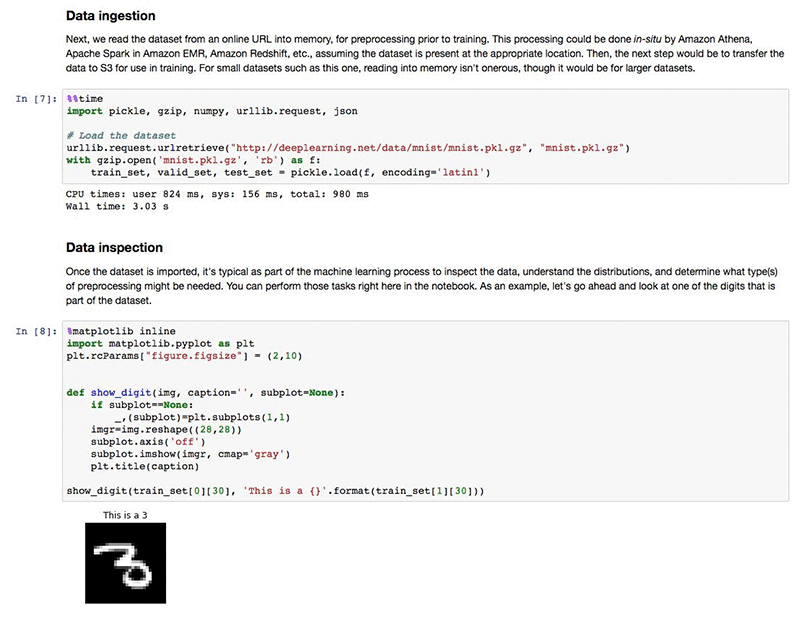
In the data ingestion and inspection steps we download the publicly available MNIST dataset from deeplearning.net. For demonstration purposes we inspect the first input in the training set. Your hosted Jupyter notebook with its Python kernel allows you to perform any type of inspection that you want.
The Amazon SageMaker PCA algorithm expects its training dataset to be in the protobuf recordIO format. This is a format optimized for large-scale datasets and high-speed reading. By using the Amazon SageMaker Python SDK, we can easily convert a numpy array into the expected format.
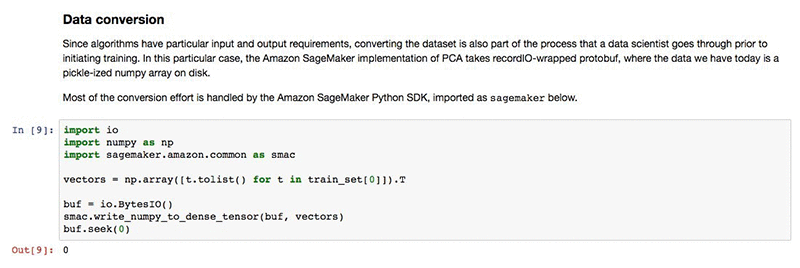
Notice that we transposed the data. When applying a PCA model on an input matrix of n rows and d columns, the resulting matrix has n rows and k columns, where k is the chosen number of principal components. This is because every row is projected down to its representation by the top principal components. Since we are interested in the principal components and not the projection of the rows, we will work on the transpose of the matrix. As a sanity check we can make sure that the dimensions make sense: We are interested in the top 10 principal components related to the 728-dimensional images. This means that we want to apply a PCA model on the transposed matrix with 728 rows and 50,000 columns to obtain the required 728 by 10 matrix whose columns are the sought 10 principal components.
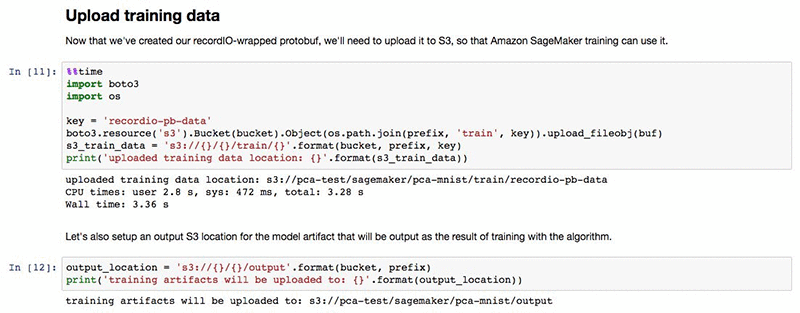
To start our training job we first need to upload our converted dataset to the Amazon S3 bucket we specified at the beginning of the notebook.
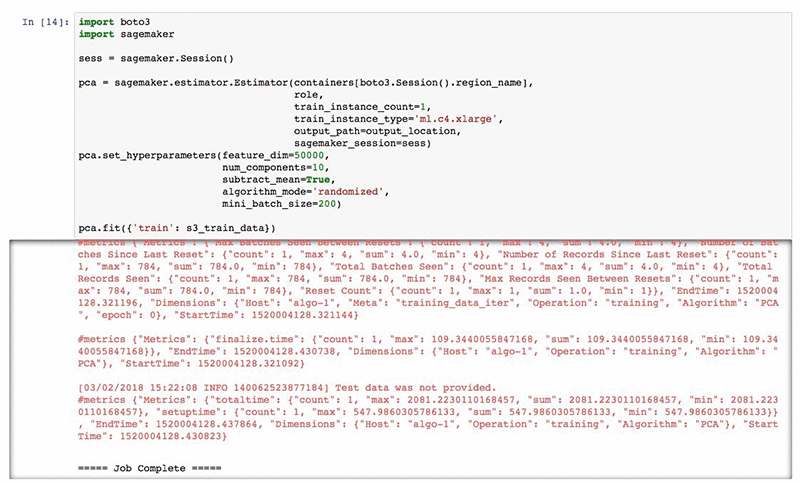
Now we are ready to start our training job. The PCA algorithm accepts a small number of hyperparameters. The most important one is num_components that defines the number of principal components our model should have by the end of the training. For our current dataset, we set num_components to 10 and specify that we want to use the randomized variant of the algorithm. Check out the official documentation for a complete list of valid hyperparameters.
Let’s submit our training job and wait for it to finish.
The last line of the cell output indicates that the job was completed successfully. This means our new PCA model is now stored in the Amazon S3 bucket we specified. In case you want to download it, simply go to your bucket and navigate to “SageMaker > pca-mnist > output > pca-<execution_id> > output”. The model.tar.gz file found in this location contains your model. The content of the model file will be described in the next section after this walkthrough.
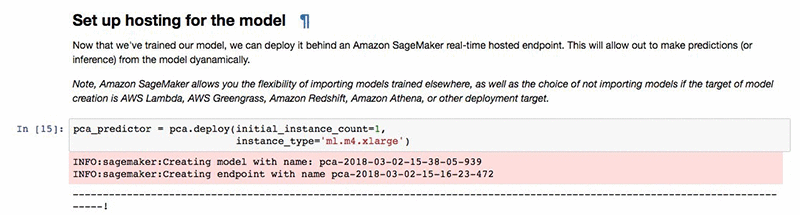
Now as a last step, let’s use our PCA model to project our (transposed) training dataset into the eigenvectors named “Eigen digits.” For that we first need to create a hosting endpoint.
Then call our endpoint to apply the model.
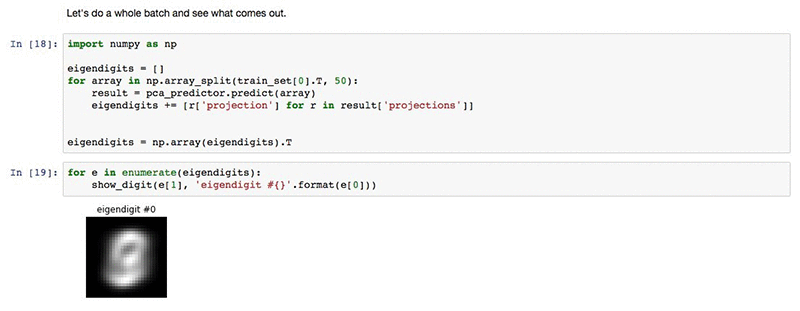
The image seen is a representation of the top eigenvector. It is not very informative, as is the case typically for eigenvectors, but along with the other eigenvectors, it plays a part in representing the digits in the data set with a dimension of 10 rather than 728.
Note: After we are done with our model we can delete the endpoint to avoid any charges from an instance being left on. At any time you can create another hosting endpoint using your S3-stored model.

Model
The model produced by a PCA training job is simple. In addition to being hosted in an Amazon SageMaker endpoint, it can also be loaded in Apache MXNet or, if you want, it can even be converted to a different data type such as numpy arrays and used in a completely different environment.
Let’s first download and extract the model that was produced in our walkthrough. Don’t not forget to change the S3 bucket and the name of the training job in your copy command. Both should match your settings.

The extracted file “model_algo-1” can now be natively loaded in Apache MXNet.
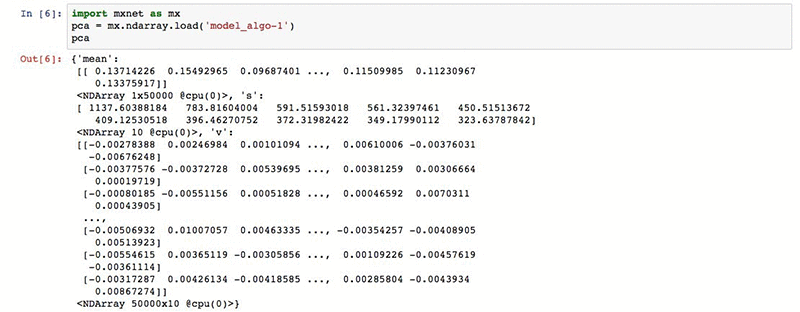
The loaded data structure is a dictionary of MXNet ndarrays. The dictionary contains three arrays:
- “mean”: The average row in the dataset. This value is only present if the subtract_mean hyperparameter was set to true, and the model makes sure to shift the data to have an average zero row before applying the PCA projection.
- “v”: The principal components, where each row is an eigenvector, ordered from least to most important.
- “s”: The singular value, ordered in ascending order. These determine the importance of each eigenvector.
Converting the model parameters into numpy arrays is as simple as calling the “asnumpy” method on an MXNet ndarray.

In this screenshot we see the singular values of the vectors, giving a measure of how important each of them are in representing the images in the mnist dataset.
Conclusion
We have presented the Amazon SageMaker PCA algorithm and reviewed the procedure for training it. The training process is convenient, fast, and scalable in both the number of samples and the input dimension, can be seamlessly parallelized, and can be made to work with different hardware types. In addition to the training process, we reviewed two ways of using the trained model. The first is by using the Amazon SageMaker endpoint, having the advantage of elastic scaling and convenience of use. The second is by downloading the model and loading it as an MXNet or numpy Ndarray, having the advantage of running locally.
About the Authors
 Harsha Viswanath is a Scientist at Amazon AI solving cutting edge customer problems in Deep Learning and Machine learning, prior to this Harsha worked at Amazon Go and Lab126 solving state of the art CV and ML problems. Harsha has worked in the industry for over 25 years and holdS a PhD in EE from the University of Arkansas, Fayetteville
 Zohar Karnin is a Principal Scientist in Amazon AI. His research interests are in the area of large scale and online machine learning algorithms. He develops infinitely scalable machine learning algorithms for Amazon SageMaker.
 Can Balioglu is a Software Development Engineer on the AWS AI Algorithms team where he is specialized in high-performance computing. In his spare time he loves to play with his homemade GPU cluster.