Artificial Intelligence
Secure Amazon S3 access for isolated Amazon SageMaker notebook instances
In this post, we will demonstrate how to securely launch notebook instances in a private subnet of an Amazon Virtual Private Cloud (Amazon VPC), with internet access disabled, and to securely connect to Amazon Simple Storage Service (Amazon S3) using VPC endpoints. This post is for network and security architects that support decentralized data science teams on AWS.
SageMaker notebook instances can be deployed in a private subnet and we recommend deploying them without internet access. Securing your notebook instances within a private subnet helps prevent unauthorized internet access to your notebook instances, which may contain sensitive information.
The examples in this post will use Notebook instance Lifecycle Configurations (LCCs) to connect to an S3 VPC endpoint and download idle-usage detection and termination scripts onto the notebook instance. These scripts are configured to be run as cron jobs, thus helping to save costs by automatically stopping idle capacity.
Solution overview
The following diagram describes the solution we implement. We create a SageMaker notebook instance in a private subnet of a VPC. We attach to that notebook instance a lifecycle configuration that copies an idle-shutdown script from Amazon S3 to the notebook instance at boot time (when starting a stopped notebook instance). The lifecycle configuration accesses the S3 bucket via AWS PrivateLink.
This architecture allows our internet-disabled SageMaker notebook instance to access S3 files, without traversing the public internet. Because the network traffic does not traverse the public internet, we significantly reduce the number of vectors bad actors can exploit in order to compromise the security posture of the notebook instance.

Prerequisites
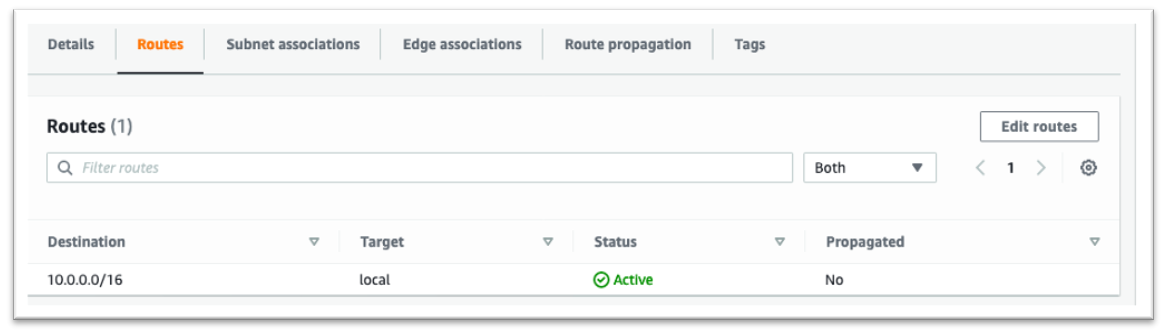
We assume you have an AWS account, in addition to an Amazon VPC with at least one private subnet that is isolated from the internet. If you do not know how to create a VPC with a public/private subnet, check out this guide. A subnet is isolated from the internet if its route table doesn’t forward traffic to the internet through the NAT gateway and Internet gateway to the internet. The following screenshot shows an example of an isolated route table. Traffic stays within the subnet; there are no NAT gateways or internet gateways that could forward traffic to the internet.
Additionally, we need an S3 bucket. Any S3 bucket with the secure default configuration settings can work. Make sure you have read and write access to this bucket from the user account. This is important when we test our solution. This entry in the S3 User Guide should clarify how to do this.
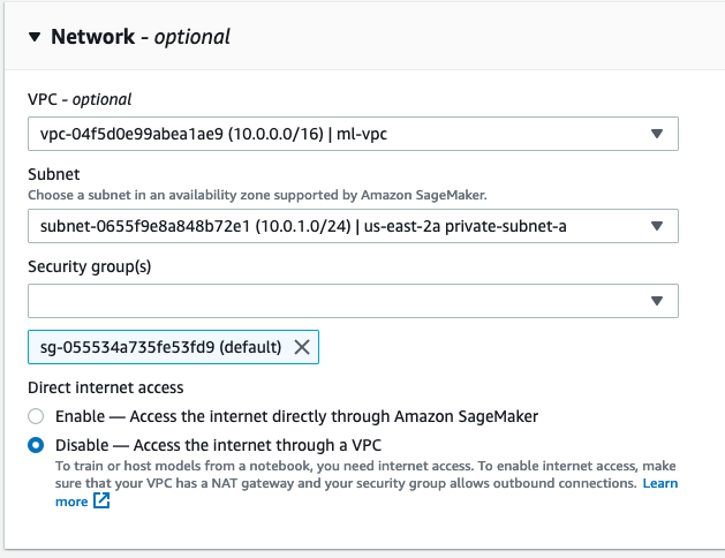
Now we create a SageMaker notebook instance. The notebook instance should be deployed into an isolated subnet with Direct Internet Access selected as Disabled.
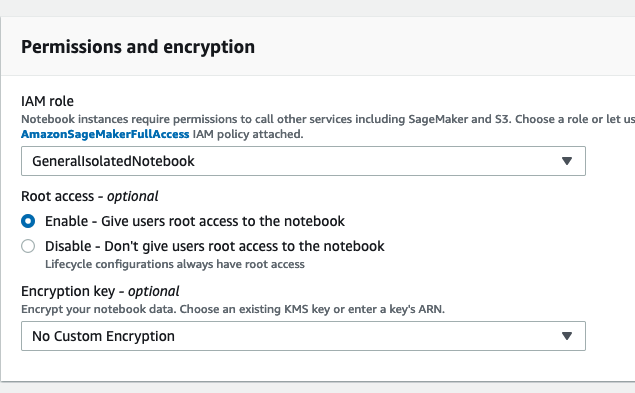
We also need to configure this notebook to run as the root user. Under Permissions and encryption, choose Enable for the Root access setting.
Once these settings have been configured, choose Create notebook instance at the bottom of the window.
Configure access to Amazon S3
To configure access to Amazon S3, complete the following steps:
- On the Amazon S3 console, navigate to the S3 bucket you use to store scripts.
Access to objects in this bucket is only granted if explicitly allowed via an AWS Identity and Access Management (IAM) policy.
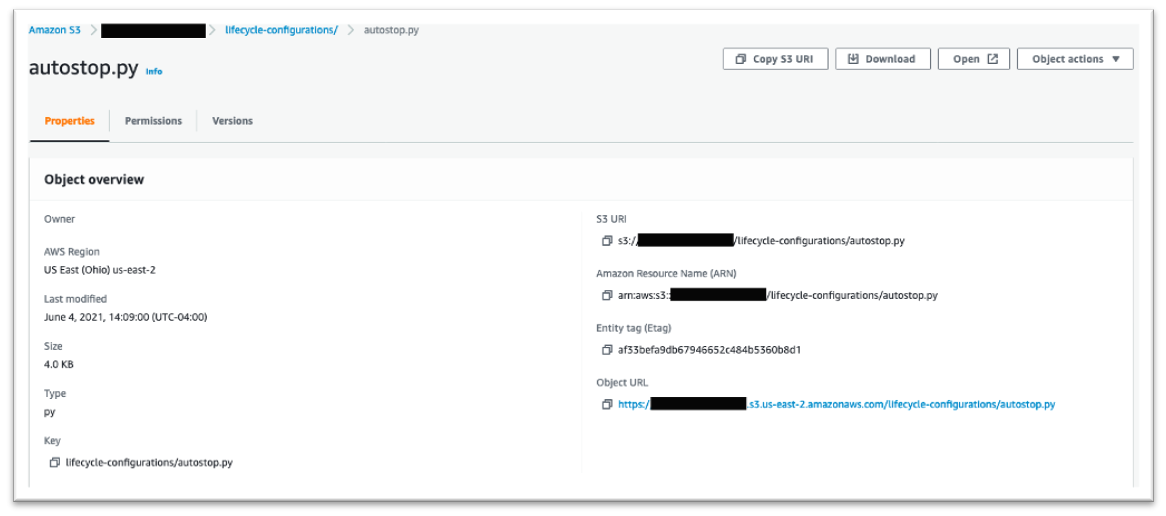
- In this bucket, create a folder called lifecycle-configurations.
- Copy the following script from GitHub and save it in your S3 bucket with the key
lifecycle-configurations/autostop.py.
We can now begin modifying our network to allow access between Amazon S3 and our isolated notebook instance.
- Write a least privilege IAM policy defining access to this bucket and the lifecycle policy script.
- Create an AWS PrivateLink gateway endpoint to Amazon S3.
- Create a SageMaker lifecycle configuration that requests the
autostop.pyscript from Amazon S3 via an API call. - Attach the lifecycle configuration to the notebook instance.
After you implement these steps, we can test the configuration by performing an Amazon S3 CLI command in a notebook cell. If the command is successful, we have successfully implemented least privilege access to Amazon S3 from an isolated network location with AWS PrivateLink.
A more robust test would be to leave the notebook instance idle and allow the lifecycle policy to run as expected. If all goes well, the notebook instance should shut down after a 5-minute idle period.
Configure AWS PrivateLink for Amazon S3
AWS PrivateLink is a networking service that creates private endpoints in your VPC for other AWS services like Amazon Elastic Compute Cloud (Amazon EC2), Amazon S3, and Amazon Simple Notification Service (Amazon SNS). These endpoints facilitate API requests to other AWS services through your VPC instead of through the public internet. This is the crucial component that allows our solution to privately and securely access the S3 bucket that contains our lifecycle configuration script.
- On the Amazon VPC console, choose Endpoints.
The list of endpoints is empty by default.
- Choose Create endpoint.
- For Service category, select AWS services.
- For Service Name, search for S3 and select the gateway option.
- For VPC, choose whichever private subnets you created earlier.
- For Configure route tables, select the default route table for that VPC.
- Under Policy, select the Custom option and enter the following policy code:
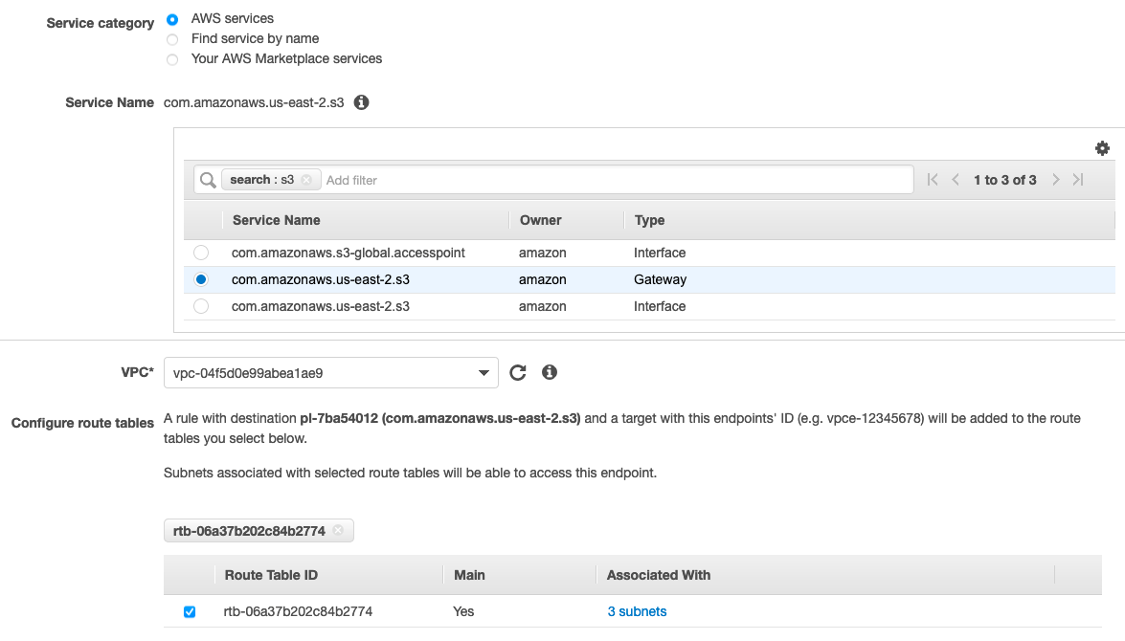
This policy document allows read-only access to the lifecycle-configurations S3 buckets. This policy restricts S3 operations to only the lifecycle-configurations bucket, we can additional buckets to the resource clause as we need. Although this endpoint’s policy isn’t least privilege access for our notebook instance, it still protects our S3 bucket resources from being modified by resources in this VPC.
- To create this endpoint with the AWS CLI, run the following command:
Gateway endpoints automatically modify the specified route tables to route traffic through to this endpoint. Although a route has been added, our VPC is still isolated. The route points to a managed prefix list, or a list of predefined IP addresses, used by the endpoint service to route traffic through this VPC to the Amazon S3 PrivateLink endpoint.
Modify the SageMaker notebook instance IAM role
We start by crafting a least privilege IAM policy for our notebook instance role’s policy document.
- On the IAM console, choose Policies.
- Choose Create policy.
- On the JSON tab, enter the following code:
This policy is an example of least privilege access, a security paradigm that is foundational to a Zero Trust architecture. This policy allows requests for GetObject and ListBucket API calls only, specifically on the Amazon S3 resources that manage our lifecycle policies. This IAM policy document can only be applied in instances where you’re downloading lifecycle policies from Amazon S3.
- Save this policy as
S3LifecycleConfigurationReadPolicy. - In the navigation pane, choose Roles.
- Search for and choose the role attached to the isolated notebook instances and edit the role’s policy document.
- Search for the newly created policy and attach it to this role’s policy document.
Now your isolated notebook has permissions to access Amazon S3 via the GetObject and ListBucket API calls. We can test this by running the following snippet in a notebook cell:
!aws s3api get-object --bucket <bucket-name> --key lifecycle-configurations/autostop.py autostop.py
At this point in the configuration, you should no longer see a permission denied error, but a timeout error. This is good; it means we have permission to access Amazon S3 but we haven’t established the network connectivity to do so. We do this in the next section.
Next, we create our IAM policy and role via the AWS Command Line Interface (AWS CLI).
- Create the following policy and save the ARN from the output for a later step:
- Create the role:
- Attach our custom policy to the new role:
aws iam attach-role-policy --role-name GeneralIsolatedNotebookRole --policy-arn policy-arn
- Repeat these steps to create a new policy called
StopNotebookInstance.
This policy gives the autostop.py script the ability to shut down the notebook instance. The JSON for this policy is as follows:
- Create and attach this policy to the notebook instance’s role using either the AWS Console for IAM or the AWS CLI.
We allow this policy to act on any notebook instance in this account. This is acceptable because we want to reuse this policy for additional notebook instances. For your implementation, be sure to craft separate least privilege access-style policies for any additional SageMaker actions that a specific notebook takes.
Create a lifecycle configuration
Lifecycle configurations are bash scripts that run on the notebook instance at startup. This feature makes lifecycle configurations flexible and powerful, but limited by the capabilities of the bash programming language. A common design pattern is to run secondary scripts written in a high-level programming language like Python. This pattern allows us to manage lifecycle configurations in source control. We can also define fairly complex state management logic using a high-level language.
The following lifecycle configuration is a bash script that copies a Python script from Amazon S3. After copying the file, the bash script creates a new entry in cron that runs the Python script every 5 minutes. The Python script makes an API call to the Jupyter process running on the notebook instance. This API is used to discern if the notebook instance has been idle for the timeout duration. If the script determines the notebook instance has been idle for the last 5 minutes, it will shutdown the notebook instance. This is a good practice for cost & emissions-savings. The 5 minute idle timeout period can be modified by changing the value of the IDLE_TIME variable.
To create a lifecycle configuration, complete the following steps:
- On the SageMaker console, choose Notebooks.
- Choose Lifecycle configurations.
- Choose Create configuration.
- On the Start notebook tab, enter the preceding bash script.
- Provide a descriptive name for the script.
- Choose Create configuration.
You can also create the lifecycle configuration with the AWS CLI (see the following code). Note that the script itself must be base64 encoded. Keep this in mind when using the AWS CLI to create these configurations.
After you create the lifecycle configuration, it appears in the list of available configurations.
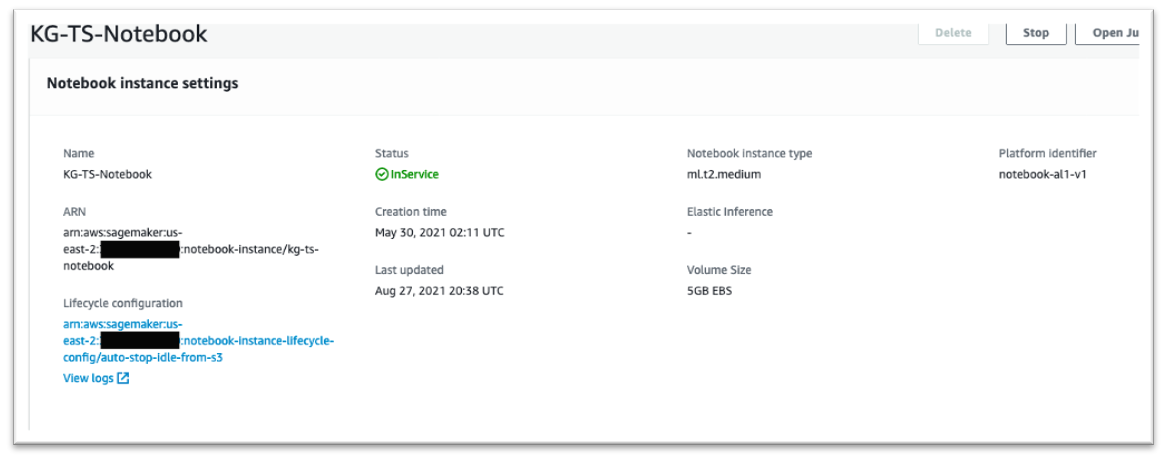
- From here, navigate back to your notebook instance. If the notebook instance is running, turn it off by selecting the notebook instance and choosing Stop on the top left corner.
- Choose Edit in the section Notebook instance settings.
- Select your new lifecycle configuration from the list and choose Update notebook instance.
The ARN of the lifecycle configuration is now attached to your notebook instance.
To do this in the AWS CLI, run the following command:
aws sagemaker update-notebook-instance --notebook-instance-name notebook-name --lifecycle-config-name lifecycle-config-name
Test Amazon S3 network access from an isolated notebook instance
To test this process, we need to make sure we can copy the Python file from Amazon S3 into our isolated notebook instance. Because we configured our lifecycle configuration to run on notebook startup, we only need to start our notebook instance to run the test. When our notebook starts, open a Jupyter notebook and examine the local file system. Our autostop.py script from the S3 bucket has now been installed onto our notebook instance.

If your notebook has root permissions, you can even examine the notebook’s crontab by running the following:
We need to run this command as the root user because the LCC adds the cron job to the cron service as the root user. This proves that the autostop.py script has been added to the crontab on notebook startup. Because this command opens the cron file, you have to manually stop the kernel command to view the output.

Clean up
When you destroy the VPC endpoint, the notebook instance loses access to the S3 bucket. This introduces a timeout error on notebook startup. Remove the lifecycle configuration from the notebook instance. To do this, select the notebook instance within the Amazon SageMaker service of the AWS Management Console and choose Edit in the section Notebook instance settings. Now the notebook instance doesn’t attempt to pull the autostop.py script from Amazon S3.
Conclusion
SageMaker allows you to provision notebook instances within a private subnet of a VPC. As an option you can also disable internet access for such notebooks to improve the security posture of these notebooks. Disabling internet access adds defense in depth against bad actors, and allows data scientists to work with notebooks in a secure environment.
About the Author
 Dan Ferguson is a Solutions Architect at Amazon Web Services, focusing primarily on Private Equity & Growth Equity investments into late-stage startups.
 Siddhanth Deshpande is an Engineering Manager at Amazon Web Services (AWS). His current focus is building best-in-class managed Machine Learning (ML) infrastructure and tooling services which aim to get customers from “I need to use ML” to “I am using ML successfully” quickly and easily. He has worked for AWS since 2013 in various engineering roles, developing AWS services like Amazon Simple Notification Service, Amazon Simple Queue Service, Amazon EC2, Amazon Pinpoint and Amazon SageMaker. In his spare time, he enjoys spending time with his family, reading, cooking, gardening and travelling the world.