AWS Physical AI Blog
Orthophotography with OpenDroneMap on AWS
Introduction
In this post, I demonstrate how to create and visualize an orthomosaic from aerial images using a technique called orthophotography. This is done through the use of OpenDroneMap (ODM), QGIS, and DroneYard. ODM is a software toolkit for processing aerial imagery and creating 3D models, maps and other geospatial products. QGIS, a Geographic Information System software that allows users to view, edit, and analyze geospatial data. Finally, I demonstrate how to use AWS on-demand compute resources to automate batch processing of multiple orthophotography tasks in a serverless architecture, using an open-source solution called DroneYard.
The blog post Photogrammetry reconstruction with 3D Flow on AWS focused on a photogrammetry use case to create digital three-dimensional (3D) assets from still photographs. Photogrammetry involves using photographs to extract information about the shape and position of objects in a scene, produce a polygonal mesh, and generate a 3D model. Similarly to photogrammetry, the basis for orthophotography operations are pictures.
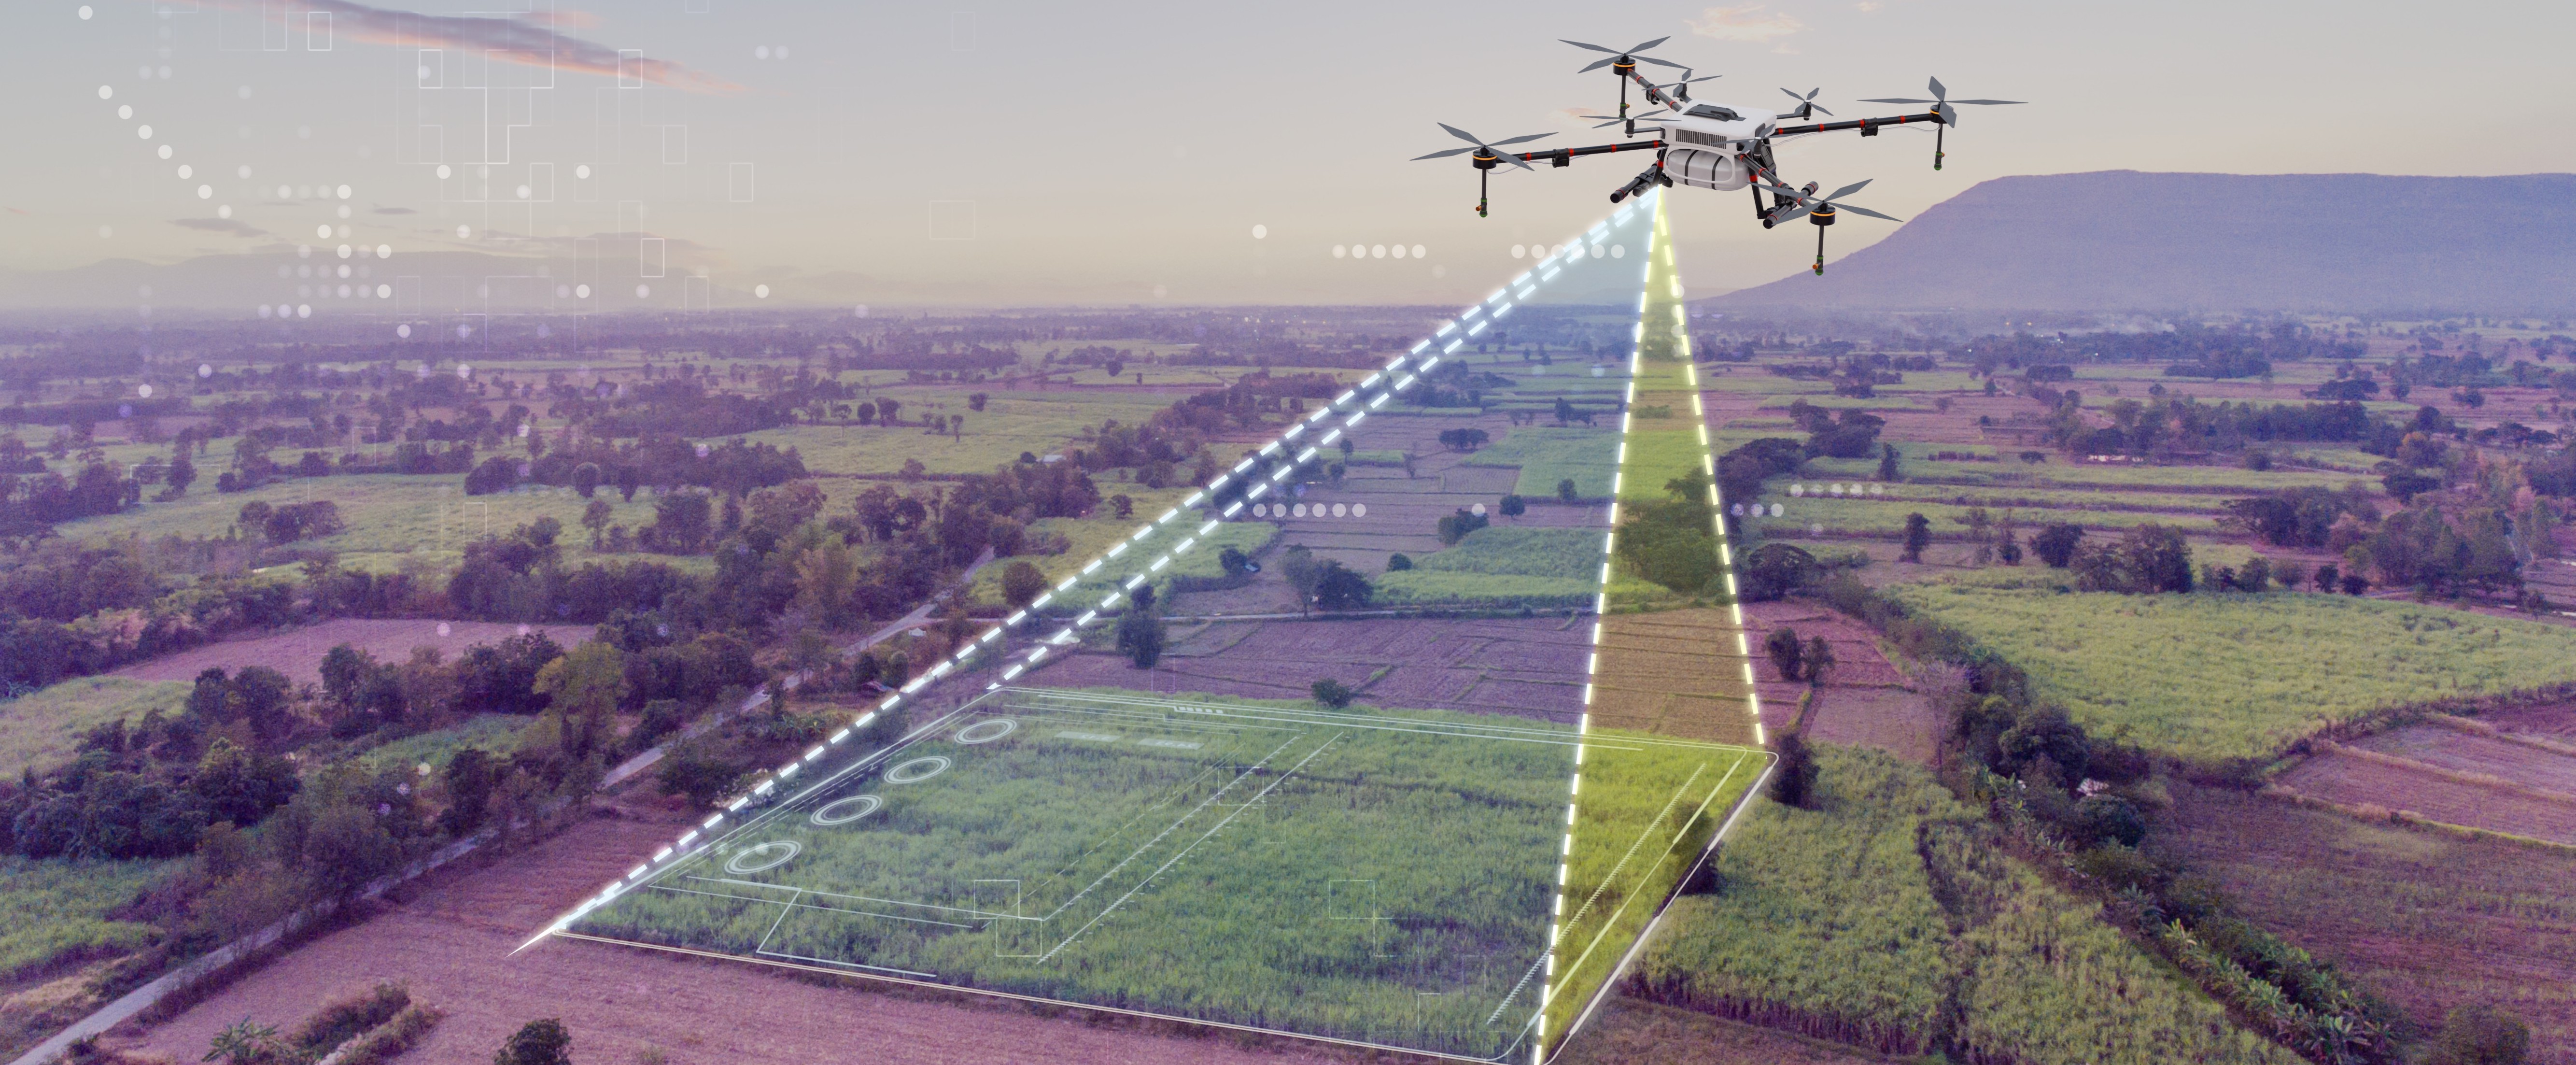
Orthophotography is the process of creating an accurate, rectified image (orthophoto) of a scene from an aerial or satellite photograph, in which the scale is uniform and the image is unaffected by the effects of relief displacement and camera tilt. This allows for measurements to be taken directly from the image, such as distance, area, and elevation. You can learn more about orthophotography here: ortophoto. Multiple images can then be merged to obtain an orthomosaic covering a large area. You can learn more about orthomosaics here: Generate an orthomosaic using the Orthomosaic wizard. Orthophotography has a variety of uses, including surveying and mapping, urban planning and infrastructure management, environmental monitoring, agriculture, transportation, homeland security and emergency response.
Both photogrammetry and orthophotography can use the same inputs (images), but will generate different outputs: 3D model for photogrammetry, 2D maps for orthophotography.
Orthorectifying (the process of removing distortions from images) large datasets can be computationally intensive and time-consuming, ranging from a few minutes to days. The input and output image datasets used for processing can be large consumers of disk space, reaching hundreds of gigabytes. Amazon Web Services (AWS) cloud compute and storage services allow you to build a cost-effective orthophotography pipeline with a pay-as-you-go model. Storage of input and processed output images can be managed through Amazon Simple Storage Service (Amazon S3), a scalable, secure, and highly available object storage service. Amazon S3 intelligent tiering can automatically move data to cost-effective storage tiers, depending on your requirements. Processing can be orchestrated through AWS Batch, a service providing easy and efficient batch computing on the cloud. Compute resources (Amazon Elastic Cloud Compute (Amazon EC2 ) instances) are provisioned only when needed, and multiple processing tasks can run in parallel. You will be billed only for the duration of the processing task.
This post goes through the deployment of DroneYard, an open-source solution which uses infrastructure as code to manage and deploy all the needed AWS and third-party services in a matter of minutes. Following the completion of this post, you will be running a serverless automated orthophotography pipeline on AWS, which requires uploading input images to the cloud to start. You will be able to download the output orthomosaic image and visualize it in QGIS, on your local machine. I also provide recommendations on the different settings to adjust when running ODM and considerations for input images.
Note: the different third-party software used or mentioned in this blog post are released under multiple licenses (ODM, QGIS, DroneYard). Make sure to read and follow the terms and conditions of those licenses.
Input dataset preparation
I recommend using an image dataset (ODMData) provided by ODM to evaluate the solution. For this blog post, I use the Brighton_Beach dataset containing images acquired from a drone with embedded geospatial information. Alternatively, you can use your own images.
Here are some recommendations regarding your input images impacting the quality of the orthophotography task output:
- Image Quality: use high quality images with minimal noise, distortion, and blur. This can be achieved by using a high-resolution camera and by verifying that the images are captured under optimal lighting conditions.
- Image Overlap: capture images with a significant overlap with each other, ideally around 60-80% for both forward and side overlap. This is important so the software can correctly identify common points in multiple images and can create a more accurate orthophoto.
- Image Geolocation: use images with accurate geolocation information, either through GPS or by manually tagging the images with their location. This allows the software to correctly orient the images and to create an accurate orthophoto.
- Image pre-processing: pre-process images to remove any lens distortion and verify that they are in a consistent format.
- Image orientation: capture images with a consistent camera orientation, ideally with the camera pointed straight down. This helps the software to correctly orient the images and to create a more accurate orthophoto.
- Image altitude: Keep the altitude of the drone consistent throughout the flight and fly high enough to capture the whole area of interest while minimizing distortion.
- Ground control points: GCPs are points on the ground identified both in the reference coordinates and in the images. Using GCPs help to accurately georeference the orthomosaic to a known coordinate system.
Following these best practices will help to increase the orthophotography output quality and accurately represent the area of interest.
Overview of solution
Time to read: 10 minutes
Time to complete: 20 minutes
Cost to complete: Less than $5
Learning level: 300
Services used: Amazon S3, AWS Lambda, AWS Batch
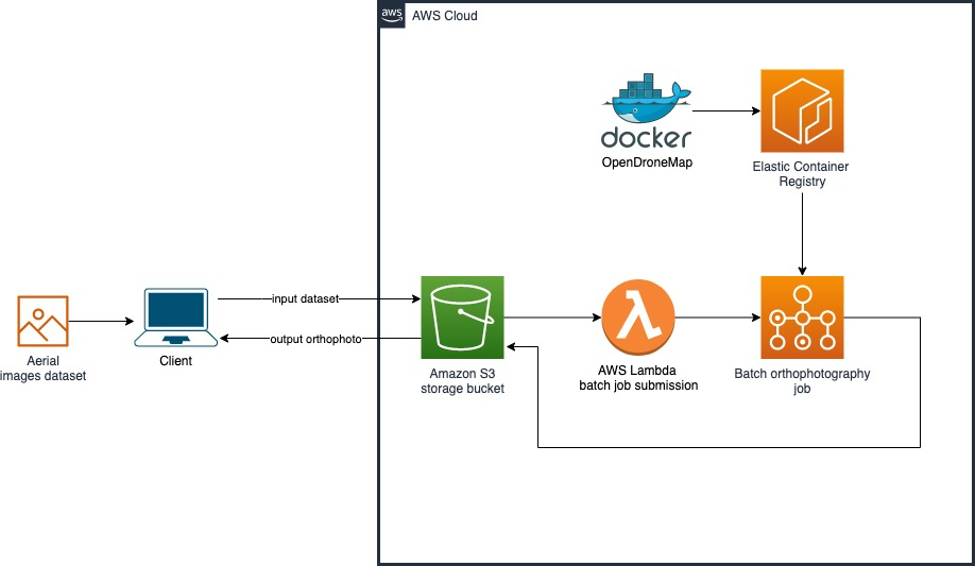
OpenDroneMap on AWS reference architecture
Architecture
Datasets containing input aerial images are uploaded by the client to an Amazon S3 bucket, in a folder. Once the user is ready to run the orthophotography workflow, they upload an ODM configuration file as well as an empty file named dispatch to the same folder. This will trigger an event which invokes an AWS Lambda function, a service which allows you to run code without provisioning or managing servers. This function will submit a job to AWS Batch. A custom Docker container built by DroneYard is pulled from the container registry and runs on an Amazon Amazon EC2 instance. Amazon EC2 provides scalable, on-demand compute capacity in the cloud. The DroneYard container copies the input dataset from Amazon S3, starts the orthophotography processing task, and uploads the generated assets back to the original location in Amazon S3.
Prerequisites
For this walkthrough, you need to have the following prerequisites:
- An AWS account
- AWS CLI and a configured profile
- Docker
- Npm, version 7 or higher
- Git
- Be familiar with the command line
Configuration
1. Open a terminal and clone the github DroneYard project to your local machine
git clone https://github.com/TotallyGatsby/DroneYard.git
2. Enter the cloned folder
cd DroneYard
3. Open the instance configuration file
nano awsconfig.json
Note: You can modify here different variables, including the instance type (the list of supported Amazon EC2 instances can be found here: Amazon EC2 instance types), whether your instance has a GPU or not, and the instance requirements (CPU/memory). For this blog post, you can leave all variables to their default value.
4. Save and close the instance configuration file
5. Configure the region where the stack will be deployed
nano sst.json
Modify the value of the parameter region depending on where you want to deploy this stack. The list of available regions can be found here: Regions, Availability Zones, and Local Zones.
6. Save and close the file
Deployment
1. Install the project
npm install
2. Deploy it to your account. You can use any stage name, for this blog post, I used test.
npm run deploy --stage test
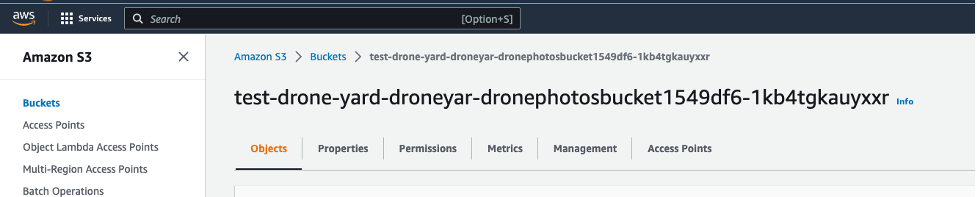
DroneYard uses AWS Cloud Development Kit (AWS CDK) to deploy all the resources in your account. The project will first build the Docker image on your machine, upload it to Amazon Elastic Container Registry, deploy all the AWS services listed previously, and set permissions. Once the deployment is done, the project will output the name of the created output Amazon S3 bucket in the console, for instance:
BucketName: test-drone-yard-droneyar-dronephotosbucket1549df6-1kb4tgkauyxxr
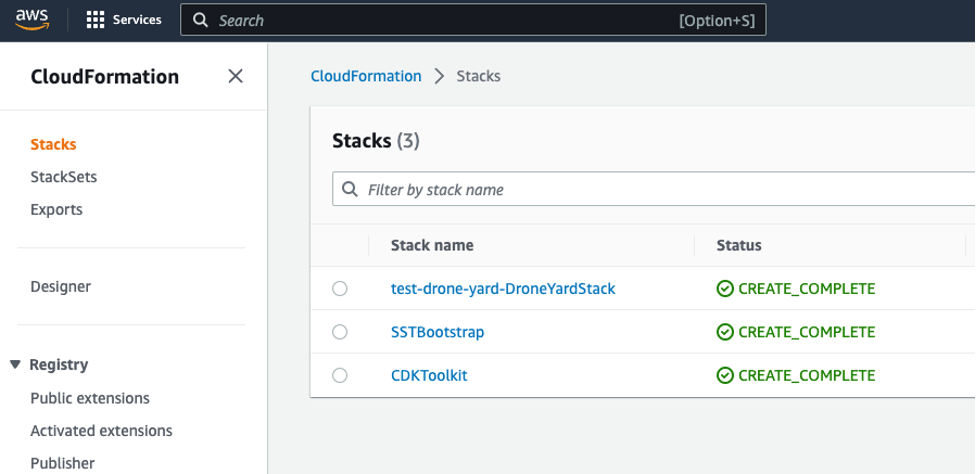
3. Sign in to the AWS CloudFormation console, in the region you specified during the configuration step, and select Stacks. Confirm you see three different stacks created by DroneYard, with the status CREATE_COMPLETE
Cloudformation created stacks
4. Browse to the Amazon S3 console and verify that the bucket was correctly created.
Amazon S3 created bucket
Usage
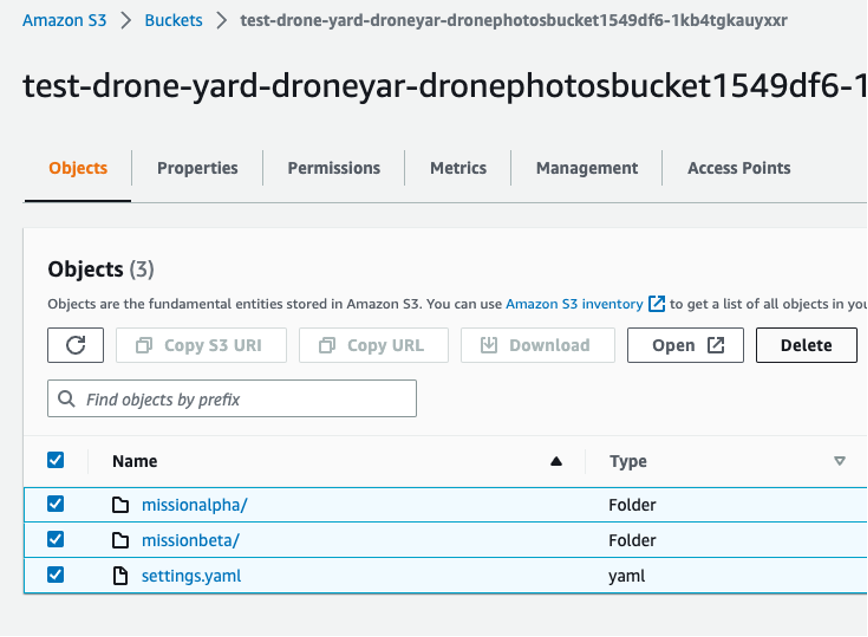
1. Create a new folder in your bucket for your processing task and upload images
a. Browse to the Amazon S3 console.
b. Locate and open the ingestion bucket created during the previous step.
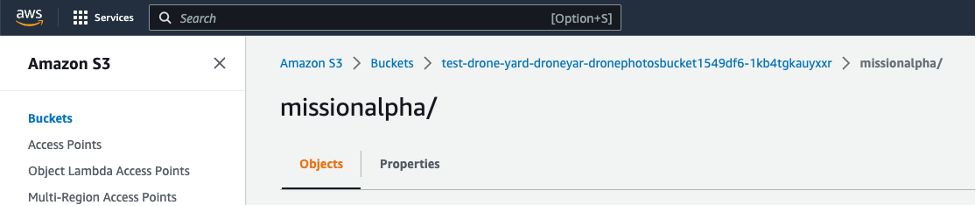
c. Create a folder with a meaningful name for your orthophotography task. I will use here missionalpha. The outcome of the orthophotography workflow will be uploaded to this location.
Amazon S3 bucket folder containing inputs and outputs of orthophotography
d. Upload your input image dataset to the folder. Choose Upload, and either drag and drop the files on the browser window or browse to them on disk.
e. Optional: upload an ODM configuration file.
The Amazon S3 bucket can contain at its root a file called settings.yaml. This file will be copied to the Docker container and specifies specific configuration parameters for ODM. If you want to have a different set of parameters for each processing task, upload to each folder a settings.yaml file with the desired parameters. This file will overwrite the file located at the root of the bucket. OpenDroneMap provides documentation (options and flags) regarding all the parameters used. For this post, you can use the default file located at the root of the Amazon S3 bucket.
f. Upload an empty dispatch file, named dispatch (without extension).
On your local machine, create an empty file called dispatch and upload it to the same folder.
2. Verify the processing task status
Uploading an empty dispatch file to the folder will trigger an event to invoke an AWS Batch job. You can view these jobs through the AWS Batch console.
a. Browse to the AWS Batch console.
b. Choose Jobs from the left menu.
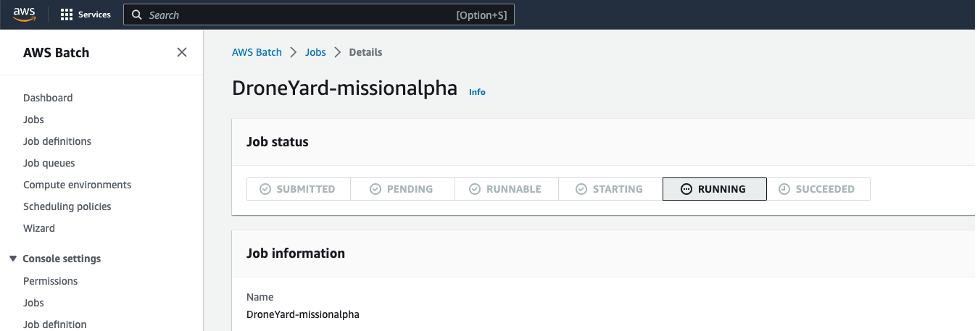
Confirm you have the DroneYardQueue job queue selected, and then click the job corresponding to the folder you created earlier (missionalpha) containing your uploaded images in the previous step (e.g., “DroneYard-missionalpha”). The job will take a few minutes to be in a running state as AWS Batch will provision the compute resources and fetch the ODM container from the registry.
AWS Batch Job status
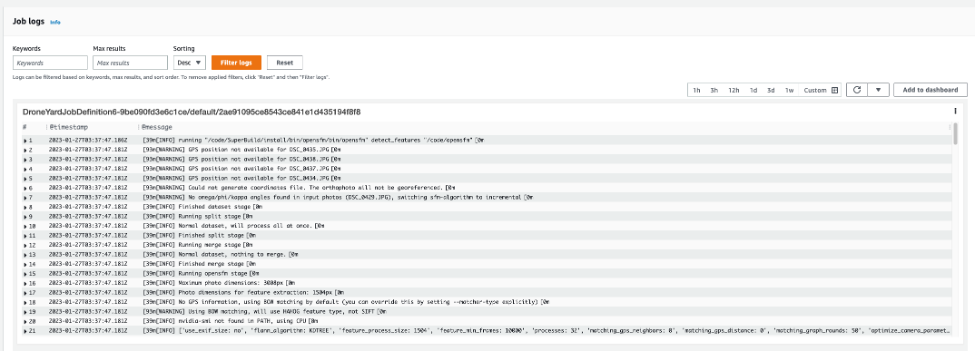
Once the job is running, you can scroll down to the Job logs section. Those logs come from the OpenDroneMap container running the orthophotography task.
OpenDroneMap container logs
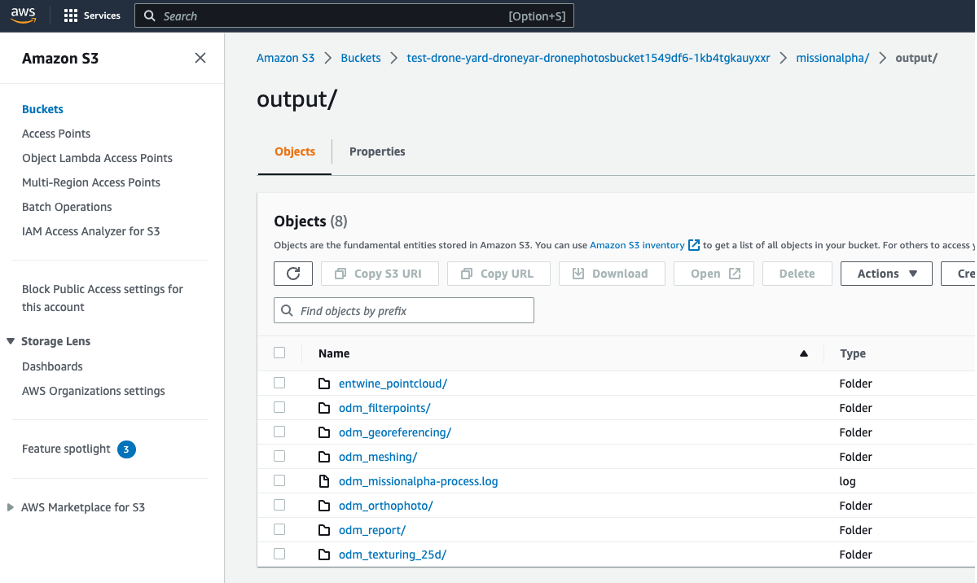
c. Finally, once the job is completed, go back to your S3 folder. Confirm a new folder called output is present, containing all the artifacts generated by ODM.
OpenDroneMap generated artifacts
3. Visualize and review the generated orthomosaic
a. Download the assets. On your local machine, open a terminal and use the AWS CLI to download the artifacts:
aws s3 cp s3://bucket-name/missionalpha ~/destination-folder --recursive
b. Import the generated assets to QGIS. Open the file browser in QGIS and drag and drop files from your folder’s output/odm_orthophoto into the layers window. You can also add Openstreetmap by selecting the service from the XYZ tiles in the browser window. You will see the mosaic image superposed on the map.
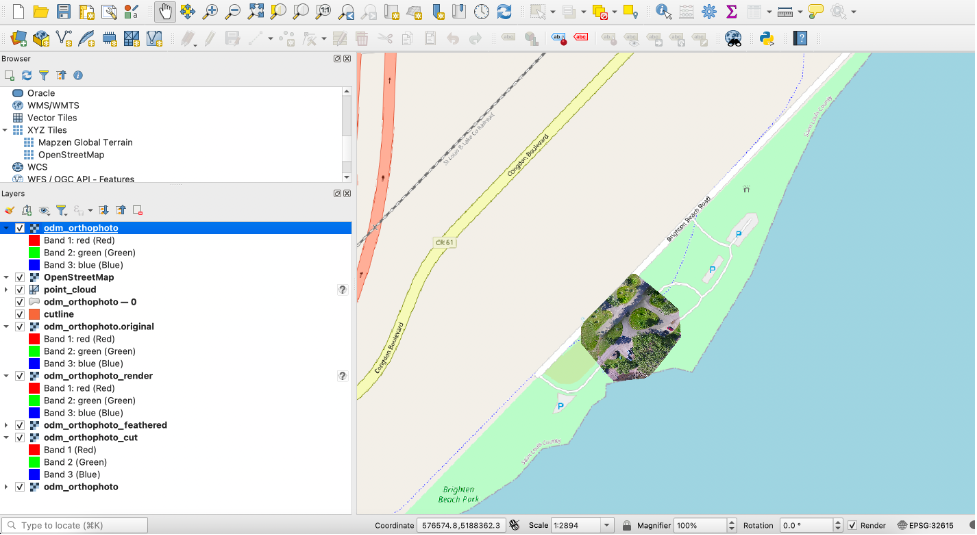
Orthophotography results in QGIS
Cleaning up
To avoid incurring future charges, delete the resources.
- Open your DroneYard job queue and verify there are no jobs in the queue.
- Delete all the content of the created S3 bucket. You can refer to the CloudFormation stack to find the name of your bucket. Select all objects in the bucket and click on delete.
Delete uploaded Amazon S3 bucket content
3. On your local machine, open a terminal, go to the DroneYard folder and run:
npm run remove --stage stage-name
4. Also verify that the created container in the Amazon Elastic Container Registry (Amazon ECR) has been deleted.
Once done, all the resources deployed in this post will be removed.
Next steps
There are several areas where one can focus for next steps.
First, images could be streamed to your Amazon S3 Bucket as you acquire them. You can activate a feature on your bucket called Amazon S3 Transfer Acceleration that enables faster data uploads to Amazon S3 by using a global network of edge locations to accelerate uploads. You can use the Amazon S3 Transfer Acceleration Speed Comparison tool to compare accelerated and non-accelerated upload speeds across Amazon S3 Regions. If you are streaming your images over the cellular network, you can use services like AWS Wavelength that allows customers to deploy their applications on the edge of 5G networks provided by telecommunications companies. It provides ultra-low latency access to AWS services and enables building 5G-enabled applications.
Pre-processing steps could also be performed before running the orthophotography workflow, for instance, quality control checks on the acquired images. Manual verification of the input images could be done to follow the recommendations I mentioned at the beginning of this post (quality, overlap, etc.) to make sure the output orthophoto will accurately represent the area of interest. For instance, Amazon Step Functions could be used to coordinate the different steps of the verification using visual workflows. Amazon Simple Notification Service provides flexible messaging service for event-driven architectures, and would notify a Quality Insurance Engineer when a review of the input images is needed. Amazon Eventbridge, a serverless event bus that ingests, processes and routes events from different sources, could upload the trigger dispatch file only if the images are meeting the quality requirements. This will allow you to avoid paying for storage and compute resources for datasets not meeting the quality criteria.
Finally, you can use services like Amazon Rekognition, an AI-powered service for image and video analysis, to remove undesired elements from your images. It is not uncommon to capture in images elements like cars, humans, or animals, which can impact the quality of your output as they are moving between 2 captured images.
Conclusion
In this post, I demonstrated how to deploy and run an automated orthophotography pipeline using on demand compute services, with a consumption-based billing. This was achieved by using the open source solutions: DroneYard, OpenDroneMap, and QGIS, as well by deploying several AWS services including Amazon S3, AWS Batch, and AWS Lambda.