Artificial Intelligence
Intelligently search your Jira projects with Amazon Kendra Jira cloud connector
July 2023: This post was reviewed for accuracy.
Organizations use agile project management platforms such as Atlassian Jira to enable teams to collaborate to plan, track, and ship deliverables. Jira captures organizational knowledge about the workings of the deliverables in the issues and comments logged during project implementation. However, making this knowledge easily and securely available to users is challenging due to it being fragmented across issues belonging to different projects and sprints. Additionally, because different stakeholders such as developers, test engineers, and project managers contribute to the same issue by logging it and then adding attachments and comments, traditional keyword-based search is rendered ineffective when searching for information in Jira projects.
You can now use the Amazon Kendra Jira cloud connector to index issues, comments, and attachments in your Jira projects, and search this content using Amazon Kendra intelligent search, powered by machine learning (ML).
This post shows how to use the Amazon Kendra Jira cloud connector to configure a Jira cloud instance as a data source for an Amazon Kendra index, and intelligently search the contents of the projects in it. We use an example of Jira projects where team members collaborate by creating issues and adding information to them in the form of descriptions, comments, and attachments throughout the issue lifecycle.
Solution overview
A Jira instance has one or more projects, where each project has team members working on issues in that project. Each team member has set of permissions about the operations they can perform with respect to different issues in the project they belong to. Team members can create new issues, or add more information to the issues in the form of attachments and comments, as well as change the status of an issue from its opening to closure throughout the issue lifecycle defined for that project. A project manager creates sprints, assigns issues to specific sprints, and assigns owners to issues. During the course of the project, the knowledge captured in these issues keeps evolving.
In our solution, we configure a Jira cloud instance as a data source to an Amazon Kendra search index using the Amazon Kendra Jira connector. Based on the configuration, when the data source is synchronized, the connector crawls and indexes the content from the projects in the Jira instance. Optionally, you can configure it to index the content based on the change log. The connector also collects and ingests access control list (ACL) information for each issue, comment, and attachment. The ACL information is used for user context filtering, where search results for a query are filtered by what a user has authorized access to.
Prerequisites
To try out the Amazon Kendra connector for Jira using this post as a reference, you need the following:
- An AWS account with privileges to create AWS Identity and Access Management (IAM) roles and policies. For more information, see Overview of access management: Permissions and policies and policies for Jira data sources.
- Basic knowledge of AWS and working knowledge of Jira administration.
- Admin access to a Jira cloud instance.
Jira instance configuration
This section describes the Jira configuration used to demonstrate how to configure an Amazon Kendra data source using the Jira connector, ingest the data from the Jira projects into the Amazon Kendra index, and make search queries. You can use your own Jira instance for which you have admin access or create a new project and carry out the steps to try out the Amazon Kendra connector for Jira.
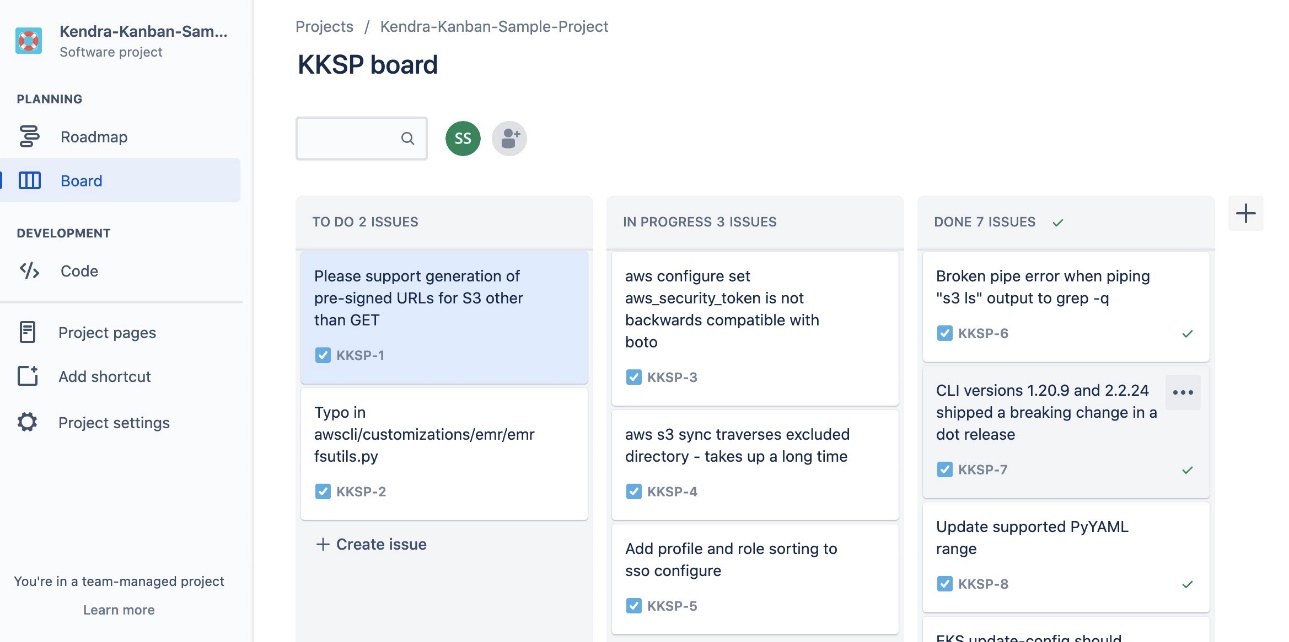
In our example Jira instance, we created two projects to demonstrate that the search queries made by users return results from only the projects to which they have access. We used data from the following public domain projects to simulate the use case of real-life software development projects:
- AWS CLI Community Contributions GitHub project
- A project from the popular Deep Learning Library PyTorch

The following is a screenshot of our Kanban-style board for project 1.
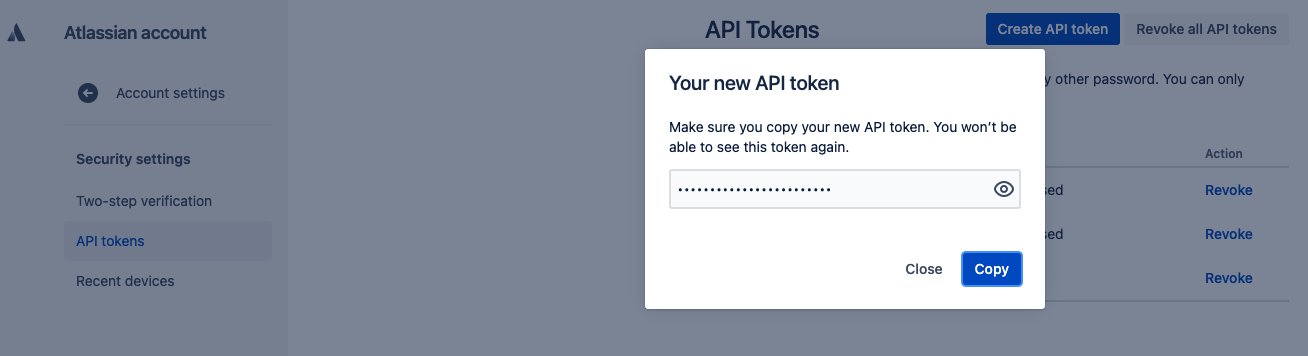
Create an API token for the Jira instance
To get the API token needed to configure the Amazon Kendra Jira connector, complete the following steps:
- Log in to https://id.atlassian.com/manage/api-tokens.
- Choose Create API token.
- In the dialog box that appears, enter a label for your token and choose Create.
- Choose Copy and enter the token on a temporary notepad.
You can’t copy this token again, and you need it to configure the Amazon Kendra Jira connector.
Configure the data source using the Amazon Kendra connector for Jira
To add a data source to your Amazon Kendra index using the Jira connector, you can use an existing index or create a new index. Then complete the following steps. For more information on this topic, refer to Amazon Kendra Developer Guide.
- On the Amazon Kendra console, open your index and choose Data sources in the navigation pane.
- Choose Add data source.
- Under Jira, choose Add connector.

- In the Specify data source details section, enter the details of your data source and choose Next.
- In the Define access and security section, for Jira Account URL, enter the URL of your Jira cloud instance.
- Under Authentication, you have two options:
- Choose Create to add a new secret using the Jira API token you copied from your Jira instance and use the email address used to log in to Jira as the Jira ID. (This is the option we choose for this post.)
- Use an existing AWS Secrets Manager secret that has the API token for the Jira instance you want the connector to access.
- For IAM role, choose Create a new role or choose an existing IAM role configured with appropriate IAM policies to access the Secrets Manager secret, Amazon Kendra index, and data source.

- Choose Next.

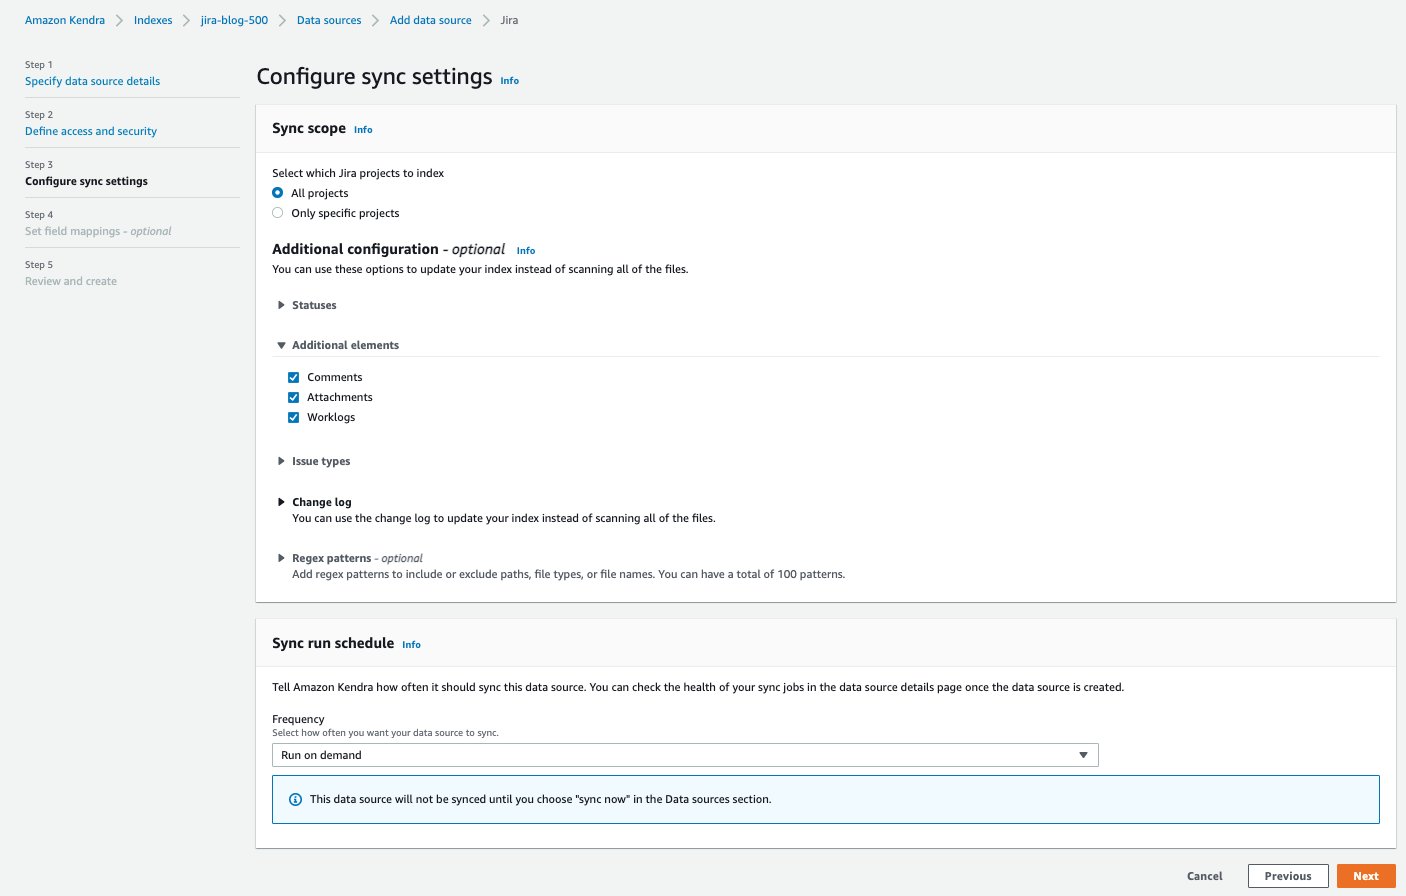
- In the Configure sync settings section, provide information about your sync scope and run schedule.
- Choose Next.
- In the Set field mappings section, you can optionally configure the field mappings, or how the Jira field names are mapped to Amazon Kendra attributes or facets.
- Choose Next.
- Review your settings and confirm to add the data source.
- After the data source is added, choose Data sources in the navigation pane, select the newly added data source, and choose Sync now to start data source synchronization with the Amazon Kendra index.
The sync process can take about 10–15 minutes. Let’s now enable access control for the Amazon Kendra index. - In the navigation pane, choose your index.
- In the middle pane, choose the User access control tab.
- Choose Edit settings and change the settings to look like the following screenshot.
- Choose Next and then choose Update.

Perform intelligent search with Amazon Kendra
Before you try searching on the Amazon Kendra console or using the API, make sure that the data source sync is complete. To check, view the data sources and verify if the last sync was successful.

- To start your search, on the Amazon Kendra console, choose Search indexed content in the navigation pane.
You’re redirected to the Amazon Kendra Search console. - Expand Test query with an access token and choose Apply token.

- For Username, enter the email address associated with your Jira account.
- Choose Apply.

Now we’re ready to search our index. Let’s use the query “where does boto3 store security tokens?”

In this case, Kendra provides a suggested answer from one of the cards in our Kanban project on Jira.
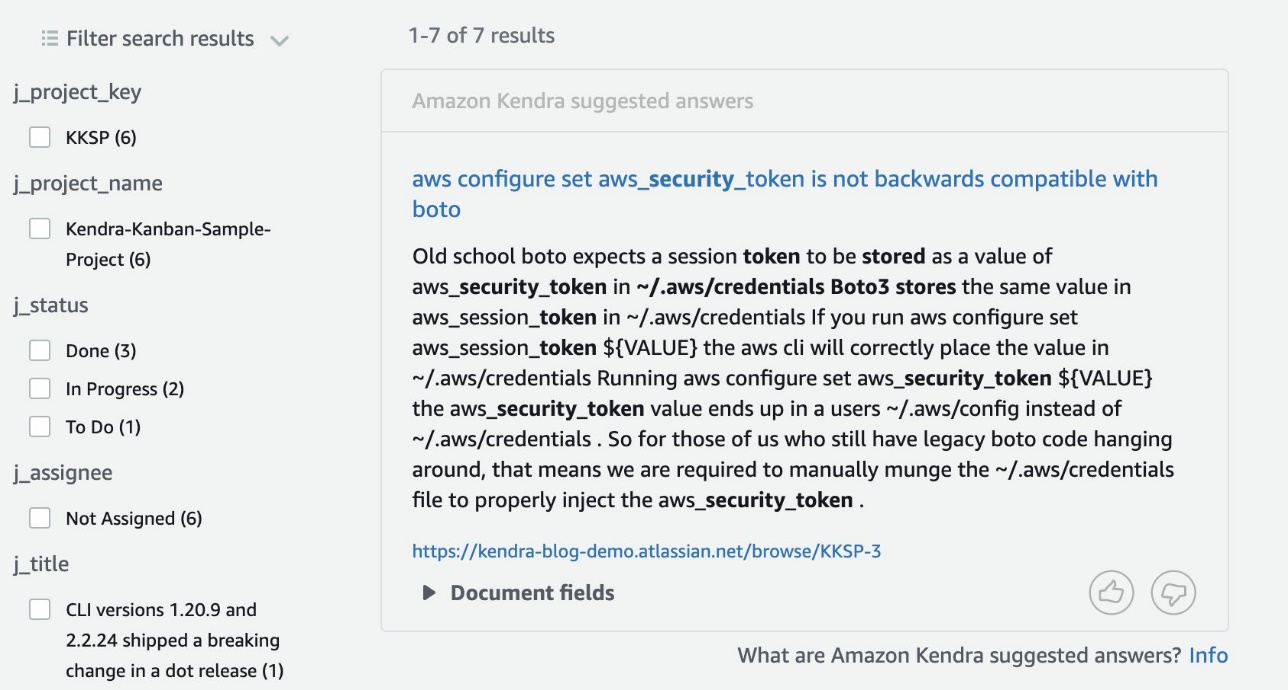
Note that this is also a suggested answer pointing to an issue discussing AWS security tokens and Boto3. You may also build search experience with multiple data sources including SDK documentation and wikis with Amazon Kendra, and present results and related links accordingly. The following screenshot shows another search query made against the same index.

Note that when we apply a different access token (associate the search with a different user), the search results are restricted to projects that this user has access to.

Lastly, we can also use filters relevant to Jira in our search. First, we navigate to our index’s Facet definition page and check Facetable for j_status, j_assignee, and j_project_name. For every search, we can then filter by these fields, as shown in the following screenshot.

Clean up
To avoid incurring future costs, clean up the resources you created as part of this solution. If you created a new Amazon Kendra index while testing this solution, delete it. If you only added a new data source using the Amazon Kendra connector for Jira, delete that data source.
Conclusion
With the Amazon Kendra Jira connector, your organization can make invaluable knowledge in your Jira projects available to your users securely using intelligent search powered by Amazon Kendra.
To learn more about the Amazon Kendra Jira connector, refer to the Amazon Kendra Jira connector section of the Amazon Kendra Developer Guide.
For more information on other Amazon Kendra built-in connectors to popular data sources, refer to Unravel the knowledge in Slack workspaces with intelligent search using the Amazon Kendra Slack connector and Search for knowledge in Quip documents with intelligent search using the Quip connector for Amazon Kendra.
About the Authors
 Shreyas Subramanian is an AI/ML specialist Solutions Architect, and helps customers by using Machine Learning to solve their business challenges on the AWS Cloud.
 Abhinav Jawadekar is a Principal Solutions Architect focused on Amazon Kendra in the AI/ML language services team at AWS. Abhinav works with AWS customers and partners to help them build intelligent search solutions on AWS.