AWS Public Sector Blog
Automating creation of a FedRAMP Integrated Inventory Workbook
Compliance reporting is not usually an engineer’s favorite topic. In the United States, Federal Risk and Authorization Management Program (FedRAMP) compliance is required for all federal agencies and cloud services. To achieve and maintain FedRAMP authorization, organizations are required to deliver a monthly FedRAMP Integrated Inventory Workbook as part of the System Security Plan (SSP).
Did you know Amazon Web Services (AWS) can help deliver an automated solution for creating the FedRAMP Integrated Inventory Workbook? This workbook needs to be updated and submitted to the FedRAMP Project Management Office (PMO) monthly for continuous monitoring. Automating this workbook saves manual work hours. Any customer going through the FedRAMP authorization process can leverage this workbook. Read on to understand how to gather an inventory of AWS resources from AWS Config data to create the FedRAMP Integrated Inventory Workbook.
Armed with this blog post and AWS Systems Manager Software Inventory you can extend the solution to include the software inventory data. These services are discussed in this blog post:
- AWS Config allows you to continuously monitor and record your AWS resource configurations and is treated as the source for inventory information.
- AWS Lambda is used as the compute resource to execute the report generation code without provisioning or managing servers.
- AWS Security Token Service (AWS STS) is a web service that enables you to request temporary, limited-privilege credentials for AWS Identity and Access Management (IAM) users and will be used for cross-account access.
- Amazon CloudWatch Events is used to create a rule that self-triggers on an automated schedule to start the report generation process.
- Amazon Simple Storage Service (Amazon S3) is a highly available and durable object store used to store the AWS Lambda package and the FedRAMP Integrated Inventory Workbook.
- AWS CloudFormation provides a common language for you to describe and provision all the infrastructure resources in your cloud environment. You’ll use it to provision all the resources described in this solution.
Prerequisites
This solution has the following prerequisites:
- AWS Config should be enabled in your AWS account. For more information, see Getting Started with AWS Config.
- Multi-AWS account strategy. This solution gathers inventory information from multiple AWS accounts; however, you can tailor the solution to a single-account setup.
- AWS Command Line Interface (AWS CLI) should be installed and configured on your machine.
All of the code necessary to deploy the solution is available on the fedramp-integrated-inventory-workbook GitHub repository. The “Deploying the Solution” section walks through the deployment process. Let’s start with a walkthrough of the solution’s design.
Overview of solution

Figure 1 – Solution overview
In Figure 1, (1) a scheduled AWS CloudWatch event is used to trigger an AWS Lambda which (2) queries AWS Config across multiple AWS accounts to gather the inventory information, creates the FedRAMP Integrated Inventory Workbook using the OpenPyXL library, and (3) uploads the workbook to an Amazon S3 bucket. Let’s take a closer look at the AWS Lambda function’s design.
The version of OpenPyXL used to author this blog post was 3.0.1. The Pipfile included in the source code, will automatically pull the latest version of OpenPyXL whenever the pipenv install command is executed.

Figure 2 – Static Class Diagram
Figure 2 depicts the major modules and classes that make up the inventory Python package. This package has been separated into the following modules that encapsulate the major behaviors which create the inventory workbook.
- Handler – module used as entry point for AWS Lambda function
- Readers – module containing classes used to gather inventory information. Currently, only AWS Config is supported
- Mappers – module containing classes used to map data from data structure returned by AWS Config into a common data structure (represented by the InventoryData class)
- Reports – module containing classes used to write and upload the inventory workbook
Walkthrough
Let’s review the steps outlined in Figure 2 diagram.
1. Lambda Handler
The Handler module exposes the function (lambda_handler) invoked by AWS Lambda and creates the report by coordinating the classes in the modules, as seen in the following code snippet.
def lambda_handler(event, context):
   inventory = AwsConfigInventoryReader(lambda_context=context).get_resources_from_all_accounts()
   report_path = CreateReportCommandHandler().execute(inventory)
   report_url = DeliverReportCommandHandler().execute(report_path)

   return {'statusCode': 200,
            'body': {
                    'report': { 'url': report_url }
                }
            }
2. Readers module
AWS Config is the only inventory source supported and is queried using the select_resource_config API. The results are filtered to only the subset of resources we need included in the report. There are five resource types supported in our example (“AWS::EC2::Instance”, “ElasticLoadBalancingV2::LoadBalancer”, “’AWS::ElasticLoadBalancing::LoadBalancer”, “’AWS::DynamoDB::Table”, “’AWS::RDS::DBInstance”); though you may need to include more. The structure of the configuration field is varied based on the resource type (e.g. AWS::EC2::Instance, AWS::DynamoDB::Table), which is where the mappers come in.
next_token: str = ''
while True:
    next_token: str = ''
    resources_result = config_client.select_resource_config(Expression="SELECT arn, resourceType, configuration, tags "
                                                                       "WHERE resourceType IN ('AWS::EC2::Instance', 'AWS::ElasticLoadBalancingV2::LoadBalancer', "
                                                                           "'AWS::ElasticLoadBalancing::LoadBalancer', 'AWS::DynamoDB::Table', 'AWS::RDS::DBInstance')",
                                                            NextToken=next_token)

    next_token = resources_result.get('NextToken', '')
    results: List[str] = resources_result.get('Results', [])
    _logger.debug(f"page returned {len(results)} and next token of '{next_token}'")
    yield results
    if not next_token:
        break
3. Mappers
The role of the mapper classes is to map the structure from the various AWS Config resource types to a structure that matches the fields needed to create the inventory workbook, represented by the InventoryData class. The difference of how mappers handle this is seen in the code snippet. The inspiration for the mapper classes is the data mapper design pattern. The base class for all data mappers is DataMapper and implements the basic functionality common across all subclasses.
class RdsDataMapper(DataMapper):
    def _get_supported_resource_type(self) -> List[str]:
        return ["AWS::RDS::DBInstance"]

    def _do_mapping(self, config_resource: dict) -> List[InventoryData]:
        data = { "asset_type": "RDS",
                 "unique_id": config_resource["arn"],
                 "is_virtual": "Yes",
                 "software_vendor": "AWS",
                 "is_public": "Yes" if config_resource["configuration"]["publiclyAccessible"] else "No",
                 "hardware_model": config_resource["configuration"]["dBInstanceClass"],
                 "software_product_name": f"{config_resource['configuration']['engine']}-{config_resource['configuration']['engineVersion']}",
                 "network_id": config_resource['configuration']['dBSubnetGroup']['vpcId'] if "dBSubnetGroup" in config_resource['configuration'] else '',
                 "owner": _get_tag_value(config_resource["tags"], "owner") }

        return [InventoryData(**data)]

class DynamoDbTableDataMapper(DataMapper):
    def _get_supported_resource_type(self) -> List[str]:
        return ["AWS::DynamoDB::Table"]

    def _do_mapping(self, config_resource: dict) -> List[InventoryData]:
        data = { "asset_type": "DynamoDB",
                 "unique_id": config_resource["arn"],
                 "is_virtual": "Yes",
                 "is_public": "No",
                 "software_vendor": "AWS",
                 "software_product_name": "DynamoDB",
                 "owner": _get_tag_value(config_resource["tags"], "owner") }

        return [InventoryData(**data)]
4. Report creation
Once the data from AWS Config is normalized into the InventoryData structure, the CreateReportCommandHandler creates the inventory workbook using the OpenPyXL Python library.
class CreateReportCommandHandler():
    def _write_cell_if_value_provided(self, worksheet: Worksheet, column:int, row: int, value: str):
        if value:
            worksheet.cell(column=column, row=row, value=value)

    def execute(self, inventory: List[InventoryData]) -> str:
        workbook = load_workbook(_workbook_template_file_name)
        reportWorksheetName = os.environ.get("REPORT_WORKSHEET_NAME", "Inventory")
        reportWorksheet = workbook[reportWorksheetName]
        rowNumber: int = int(os.environ.get("REPORT_WORKSHEET_FIRST_WRITEABLE_ROW_NUMBER", DEFAULT_REPORT_WORKSHEET_FIRST_WRITEABLE_ROW_NUMBER))

        _logger.info(f"writing {len(inventory)} rows into worksheet {reportWorksheetName} starting at row {rowNumber}")

        for inventory_row in inventory:
            self._write_cell_if_value_provided(reportWorksheet, 1, rowNumber, inventory_row.unique_id)
            self._write_cell_if_value_provided(reportWorksheet, 2, rowNumber, inventory_row.ip_address)
            self._write_cell_if_value_provided(reportWorksheet, 3, rowNumber, inventory_row.is_virtual)
            self._write_cell_if_value_provided(reportWorksheet, 4, rowNumber, inventory_row.is_public)
            self._write_cell_if_value_provided(reportWorksheet, 5, rowNumber, inventory_row.dns_name)
            self._write_cell_if_value_provided(reportWorksheet, 7, rowNumber, inventory_row.mac_address)
            self._write_cell_if_value_provided(reportWorksheet, 8, rowNumber, inventory_row.authenticated_scan_planned)
            self._write_cell_if_value_provided(reportWorksheet, 9, rowNumber, inventory_row.baseline_config)
            self._write_cell_if_value_provided(reportWorksheet, 12, rowNumber, inventory_row.asset_type)
            self._write_cell_if_value_provided(reportWorksheet, 13, rowNumber, inventory_row.hardware_model)
            self._write_cell_if_value_provided(reportWorksheet, 15, rowNumber, inventory_row.software_vendor)
            self._write_cell_if_value_provided(reportWorksheet, 16, rowNumber, inventory_row.software_product_name)
            self._write_cell_if_value_provided(reportWorksheet, 21, rowNumber, inventory_row.network_id)
            self._write_cell_if_value_provided(reportWorksheet, 22, rowNumber, inventory_row.owner)
            self._write_cell_if_value_provided(reportWorksheet, 23, rowNumber, inventory_row.owner)

            rowNumber += 1

        workbook.save(_workbook_output_file_path)

        _logger.info(f"completed saving inventory into {_workbook_output_file_path}")

        return str(_workbook_output_file_path)
5. Report upload
Once the inventory workbook is written, DeliverReportCommandHandler class uploads the file to an S3 bucket using the Boto3 Amazon S3 client, and a timestamp to give the report a unique name for each execution.
class DeliverReportCommandHandler():
    def __init__(self, s3_client=boto3.client('s3')):
        self._s3_client = s3_client

    def execute(self, report_file_name: str) -> str:
        target_bucket = os.environ["REPORT_TARGET_BUCKET_NAME"]
        report_s3_key = os.path.join(os.environ["REPORT_TARGET_BUCKET_PATH"], f"{_workbook_output_file_path.stem}-{datetime.now().strftime('%Y-%m-%d-%H-%M-%S')}.xlsx")

        _logger.info(f"uploading file '{report_file_name}' to bucket '{target_bucket}' with key '{report_s3_key}'")

        object_data = open(report_file_name, "rb")

        self._s3_client.put_object(Bucket=target_bucket, Key=report_s3_key, Body=object_data)

        _logger.info(f"completed file upload")

        return f"https://{target_bucket}.s3.amazonaws.com/{report_s3_key}"
Deploying the solution
You can use this solution for both multi-account and single-account scenarios. In this two-account setup, the account hosting the AWS Lambda function is referred to as the master-account and the account from which the data is being collected is referred to as domain-account-1. Have these details available before working through the deployment steps:
- Friendly Name and AWS account IDs of both the master-account and domain-account-1. Follow these instructions for finding the AWS account ID.
- Make sure AWS Config recorder is turned ON and setup properly. Follow these instructions from Managing the Configuration Recorder for more details.
- Download these files to a local directory on your workstation:
- From within the master-account, select an appropriate S3 bucket of your choice and upload the fedramp-inventory-lambda.zip file to that bucket. The name of this S3 bucket and the zip file will be used during the stack creation.
Deployment steps:
Deploy a total of three templates in this setup consisting of two AWS accounts.
- Two templates using InventoryCollector.yml and InventoryCollector-Role.yml in the master-account.
- One template using InventoryCollector-Role.yml in the domain-account-1.
Let’s go through the steps:
- Deploying InventoryCollector template in the master-account:
- Login to the master-account with appropriate permissions to launch CloudFormation templates.
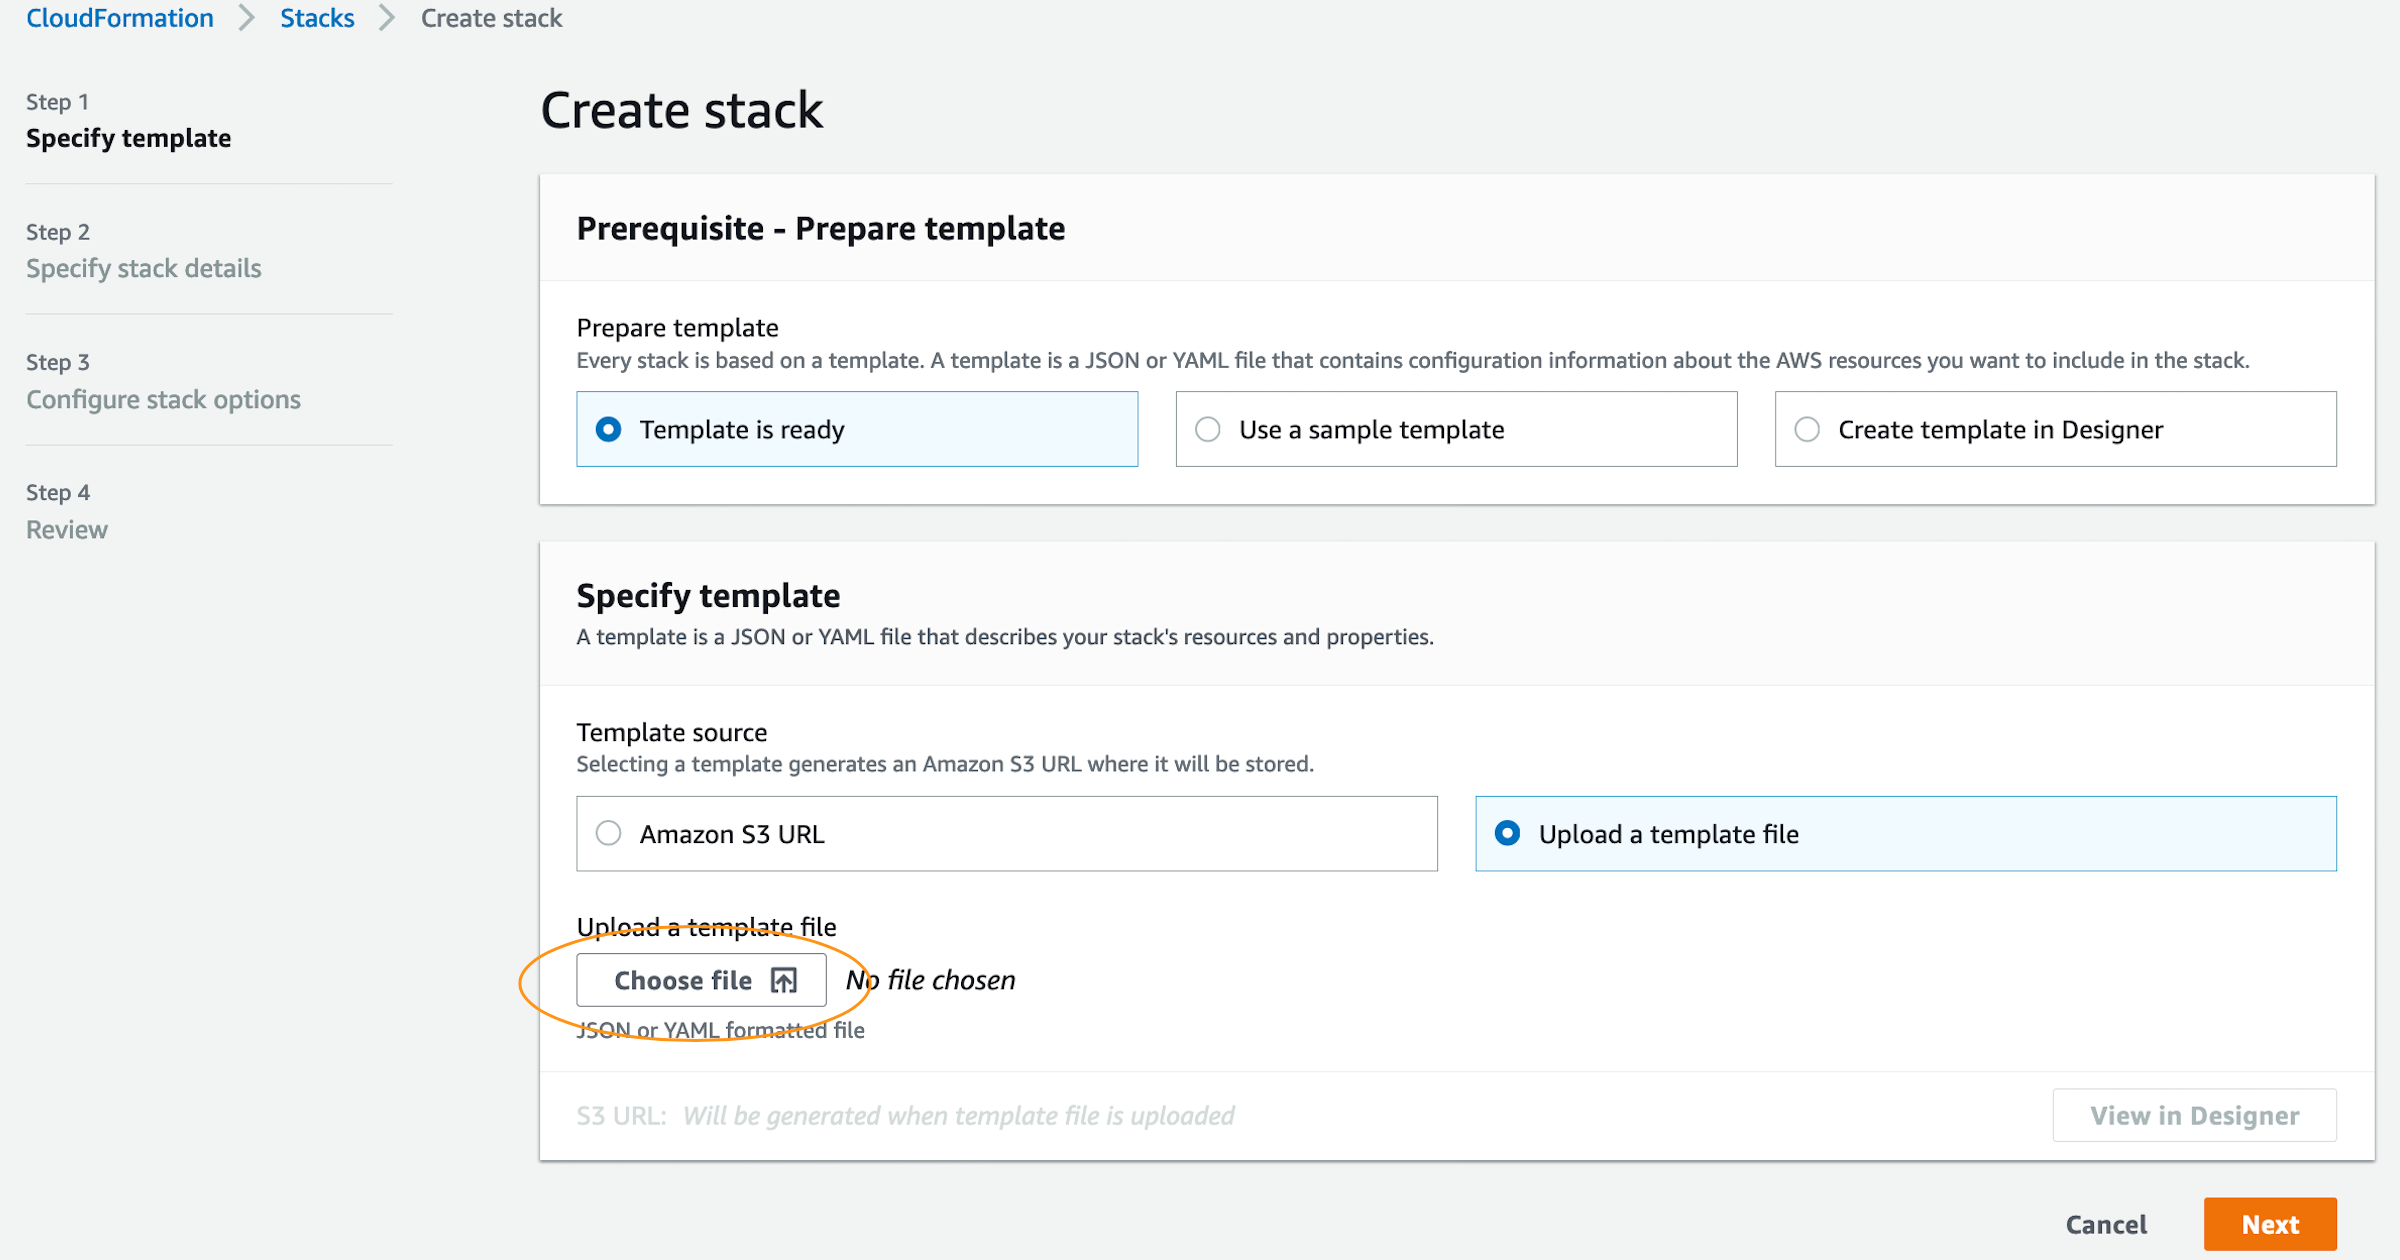
- Navigate to the AWS CloudFormation Console and select Create stack.

- In the Create Stack page, select Upload a template file and select Choose file.

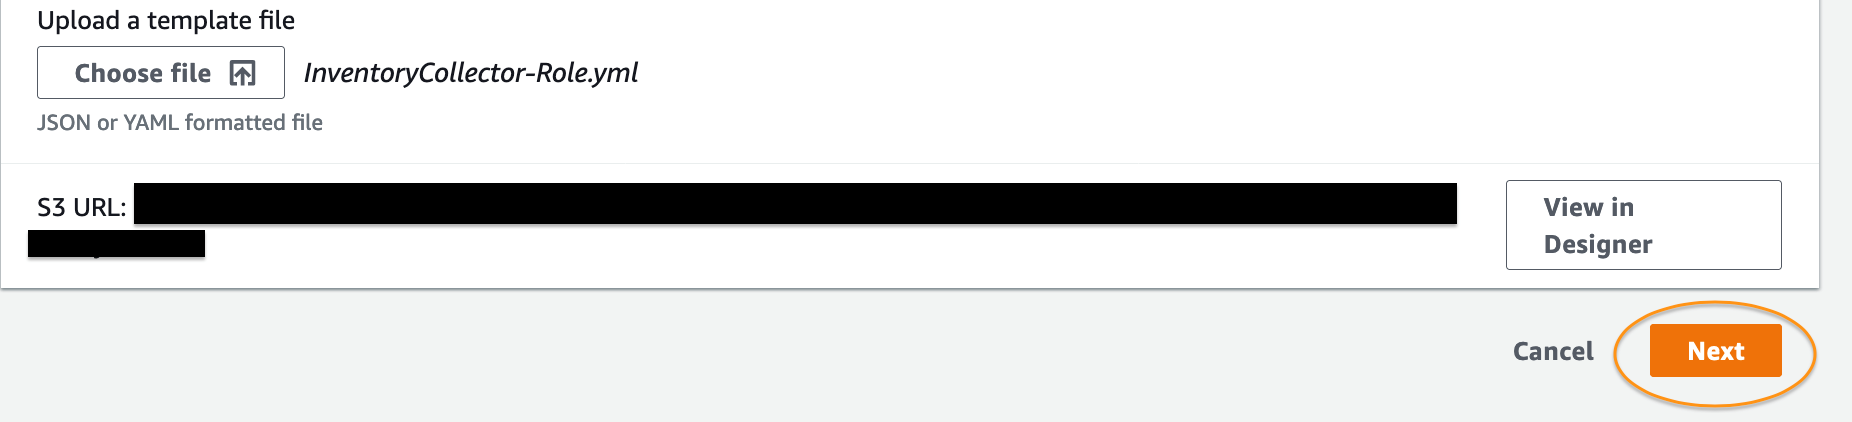
- Select the previously downloaded InventoryCollector.yml file and select Next.

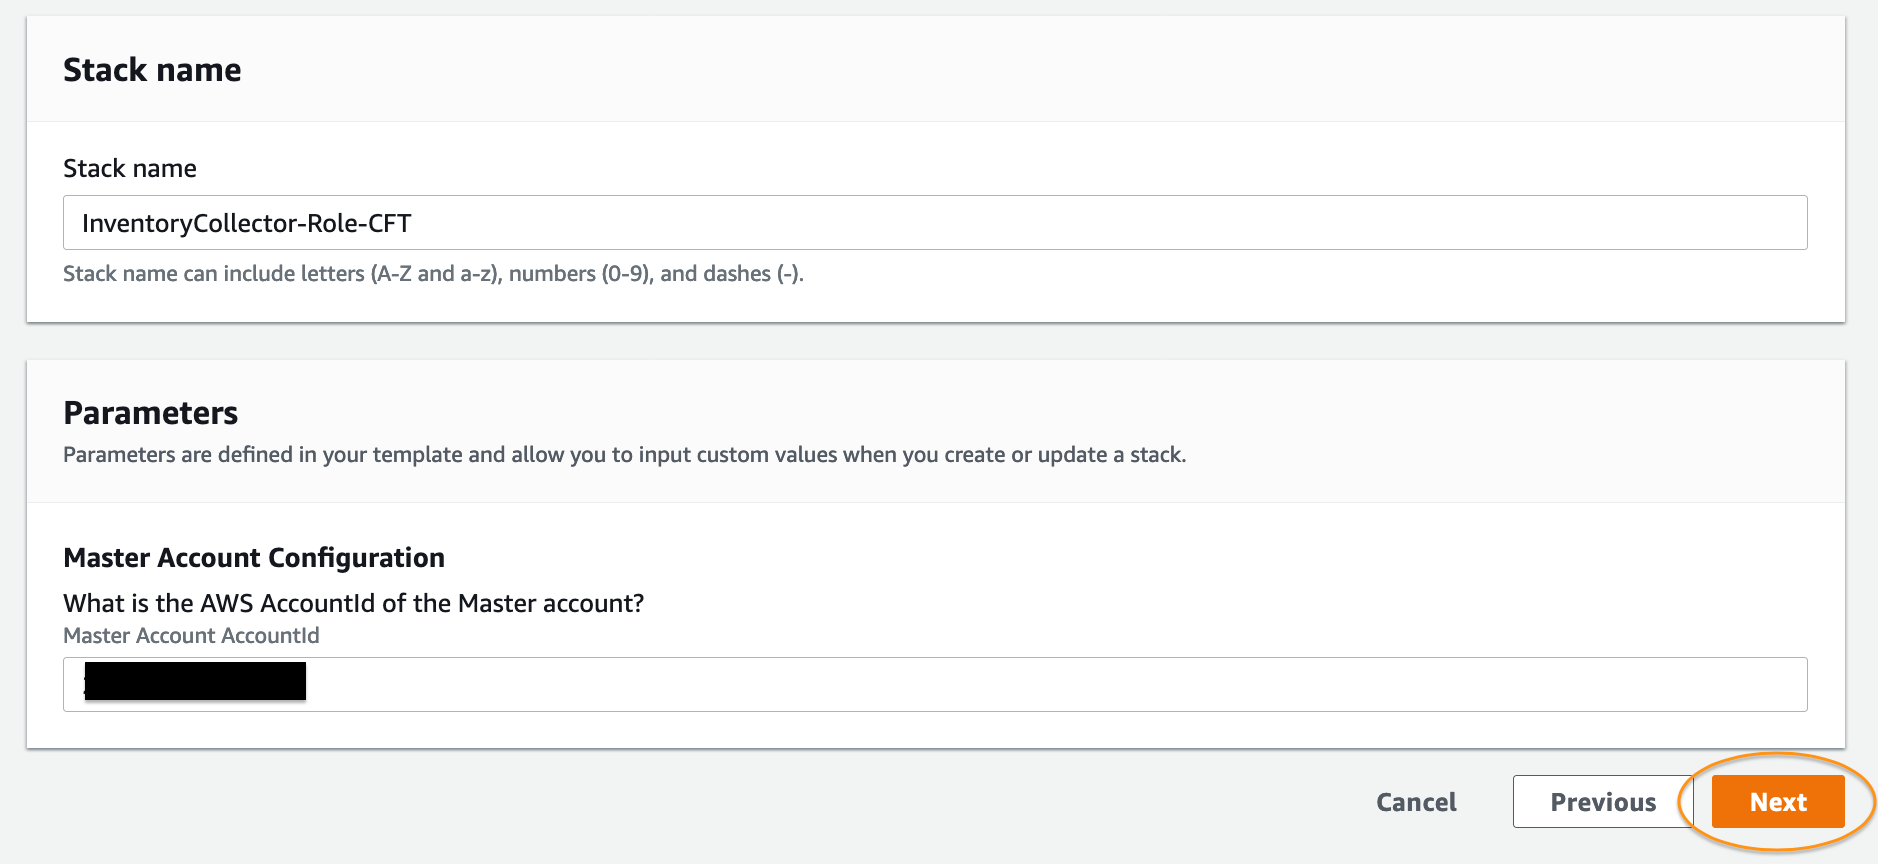
- Fill in the Stack name, friendly name for the master and domain accounts, the AWS account ID of the domain account, name of the S3 Bucket and Amazon S3 object key for the Lambda package, the Cron expression of how often the report should be created and choose Next.

- Review the provided details, acknowledge that CloudFormation might create AWS Identity and Access Management (IAM) resources with custom names and choose Create stack.

- On successful completion, this template should deploy five AWS resources:
- An S3 Bucket for hosting the generated inventory reports.
- An AWS Lambda function named InventoryCollector.
- An AWS IAM role named InventoryCollectorLambdaExecuteRole. This role will be used by the InventoryCollector Lambda during execution.
- AWS Lambda Permissions resource that grants access to Amazon CloudWatch to invoke InventoryCollector Lambda based on a set schedule.
- An Amazon CloudWatch Event rule with Scheduleexpression for invoking the InventoryCollector Lambda.

- Deploy the InventoryCollector-Role template in both the master-account and domain-account-1:
- Follow step 1.a thru 1.c, choose the previously downloaded InventoryCollector-Role.yml template during the upload template step, then choose Next.

- Fill the Stack name, provide the AWS AccountId of the master-account, and choose Next.

- Check the checkbox acknowledging that CloudFormation might create IAM resources with custom names and choose Create stack.
- On successful completion, this template should deploy only one AWS resource:
- An AWS IAM Role named InventoryCollector-for-Lambda which will be assumed by the InventoryCollector Lambda function deployed in the master-account for collecting the inventory details.

- An AWS IAM Role named InventoryCollector-for-Lambda which will be assumed by the InventoryCollector Lambda function deployed in the master-account for collecting the inventory details.
- Follow step 1.a thru 1.c, choose the previously downloaded InventoryCollector-Role.yml template during the upload template step, then choose Next.


The InventoryCollector Lambda function is then invoked as per the set CloudWatch Event schedule.
Viewing the report
When invoked, the InventoryCollector Lambda aggregates the relevant details from both the master-account and the domain-account-1. All these aggregated details upload to an Amazon S3 bucket created in Step-1. Login to the master-account, navigate to the Amazon S3 Bucket and download the file.

Cleaning up
To avoid incurring future charges, delete the deployed AWS CloudFormation stacks in both the master-account and domain-account-1.
Enhancements
In this walkthrough, we’ve kept the architecture and code simple to make the solution easier to follow. You can further customize the solution through the following enhancements:
- Create a new reader to use AWS Systems Manager Software Inventory and include the list of software installed on your Amazon EC2 instances.
- The GitHub repository codebase includes unit tests written using pytest, unittest.mock, and callee. Explore and see how you can test your code without making API calls to Amazon services.
- If you are using AWS Organizations, consider changing the code to get the list of AWS accounts using the ListAccounts API instead of relying on an environment variable for the account list.
- Errors encountered during the retrieval of inventory information from AWS Config are logged; however, processing continues. Consider adding a notification for when this occurs.
- Use AWS CodeBuild, AWS CodeDeploy, and AWS CodePipeline to create a fully automated Continuous Integration/Continuous Deployment (CI/CD) pipeline.
In this post, we showed how you can leverage AWS Lambda and AWS Config to automate the creation of the FedRAMP Integrated Inventory Workbook. We also used AWS CloudFormation to automate the AWS resource provisioning and Amazon CloudWatch Events to schedule the execution. Teams needing to fulfill FedRAMP reporting requirements can use this post to start automated compliance reporting.