Artificial Intelligence
Find answers accurately and quickly using Amazon Q Business with the SharePoint Online connector
Amazon Q Business is a fully managed, generative artificial intelligence (AI)-powered assistant that helps enterprises unlock the value of their data and knowledge. With Amazon Q, you can quickly find answers to questions, generate summaries and content, and complete tasks by using the information and expertise stored across your company’s various data sources and enterprise systems. At the core of this capability are native data source connectors that seamlessly integrate and index content from multiple repositories into a unified index. This enables the Amazon Q large language model (LLM) to provide accurate, well-written answers by drawing from the consolidated data and information. The data source connectors act as a bridge, synchronizing content from disparate systems like Salesforce, Jira, and SharePoint into a centralized index that powers the natural language understanding and generative abilities of Amazon Q.
To make this integration process as seamless as possible, Amazon Q Business offers multiple pre-built connectors to a wide range of data sources, including Atlassian Jira, Atlassian Confluence, Amazon Simple Storage Service (Amazon S3), Microsoft SharePoint, Salesforce, and many more. This allows you to create your generative AI solution with minimal configuration. For a full list of Amazon Q supported data source connectors, see Supported connectors.
One of the key integrations for Amazon Q is with Microsoft SharePoint Online. SharePoint is a widely used collaborative platform that allows organizations to manage and share content, knowledge, and applications to improve productivity and decision-making. By integrating Amazon Q with SharePoint, businesses can empower their employees to access information and insights from SharePoint more efficiently and effectively.
With the Amazon Q and SharePoint Online integration, business users can do the following:
- Get instant answers – Users can ask natural language questions and Amazon Q will provide accurate, up-to-date answers by searching and synthesizing information from across the organization’s SharePoint sites and content.
- Accelerate research and analysis – Instead of manually searching through SharePoint documents, users can use Amazon Q to quickly find relevant information, summaries, and insights to support their research and decision-making.
- Streamline content creation – Amazon Q can assist in generating drafts, outlines, and even complete content pieces (such as reports, articles, or presentations) by drawing on the knowledge and data stored in SharePoint.
- Automate workflows and tasks – Amazon Q can be configured to complete routine tasks and queries (such as generating status reports, answering FAQs, or requesting information) by interacting with the relevant SharePoint data and applications.
- Enhance collaboration – By making SharePoint content more accessible and actionable through Amazon Q, the integration facilitates better knowledge sharing, problem-solving, and collaboration across the organization.
In this post, we guide you through the process of setting up the SharePoint Online connector in Amazon Q Business. This will enable your organization to use the power of generative AI to unlock the full value of your SharePoint investment and empower your workforce to work smarter and more efficiently.
Find accurate answers from content in Microsoft SharePoint using Amazon Q Business
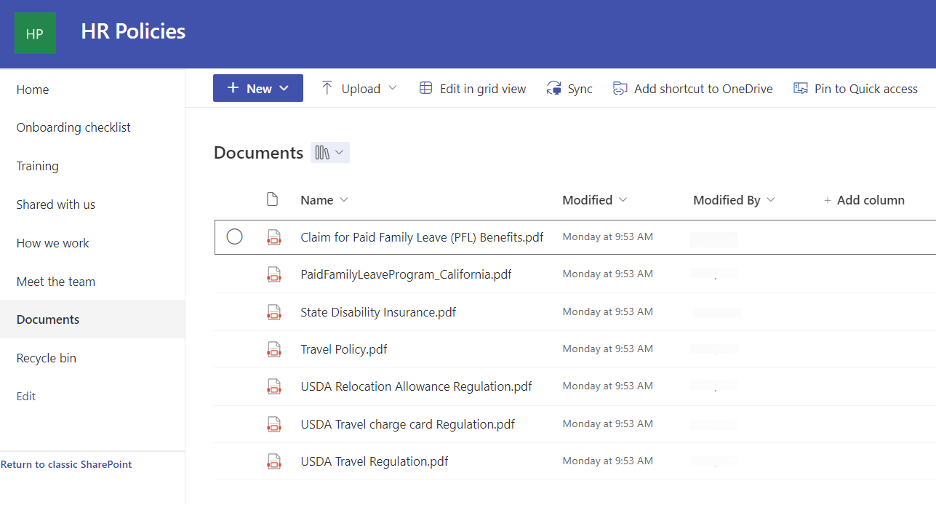
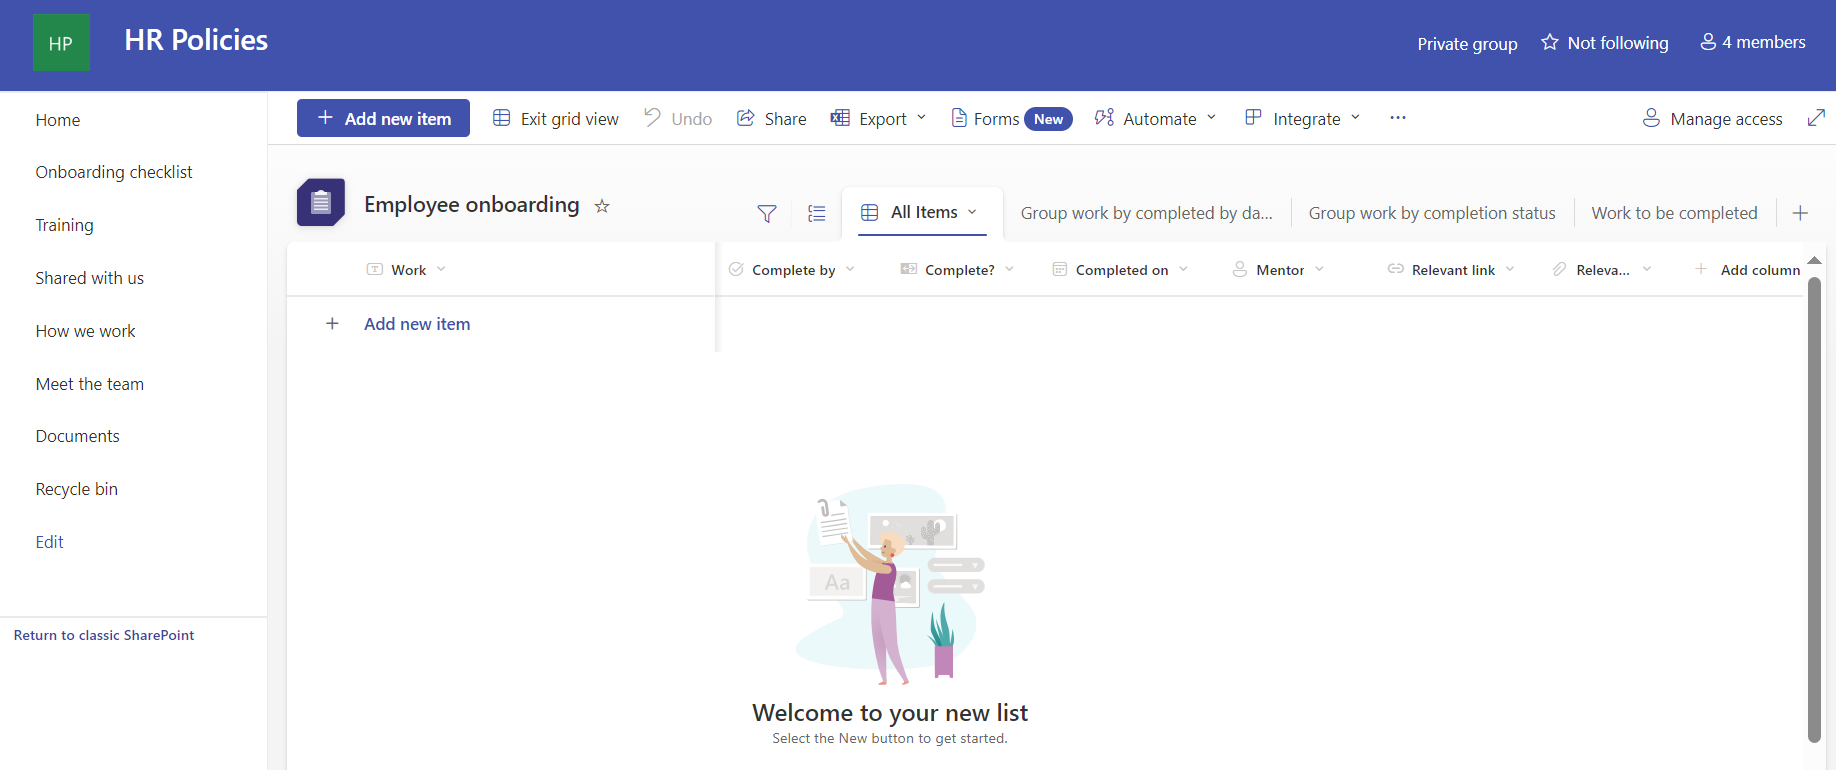
After you integrate Amazon Q Business with Microsoft SharePoint, users can ask questions from the body of the document. For this post, we use a SharePoint Online site named HR Policies that has information about the travel policy, state disability insurance policy, payroll taxes, and paid family leave program for California stored in document libraries. Some of the questions you can ask Amazon Q Business might include the following:
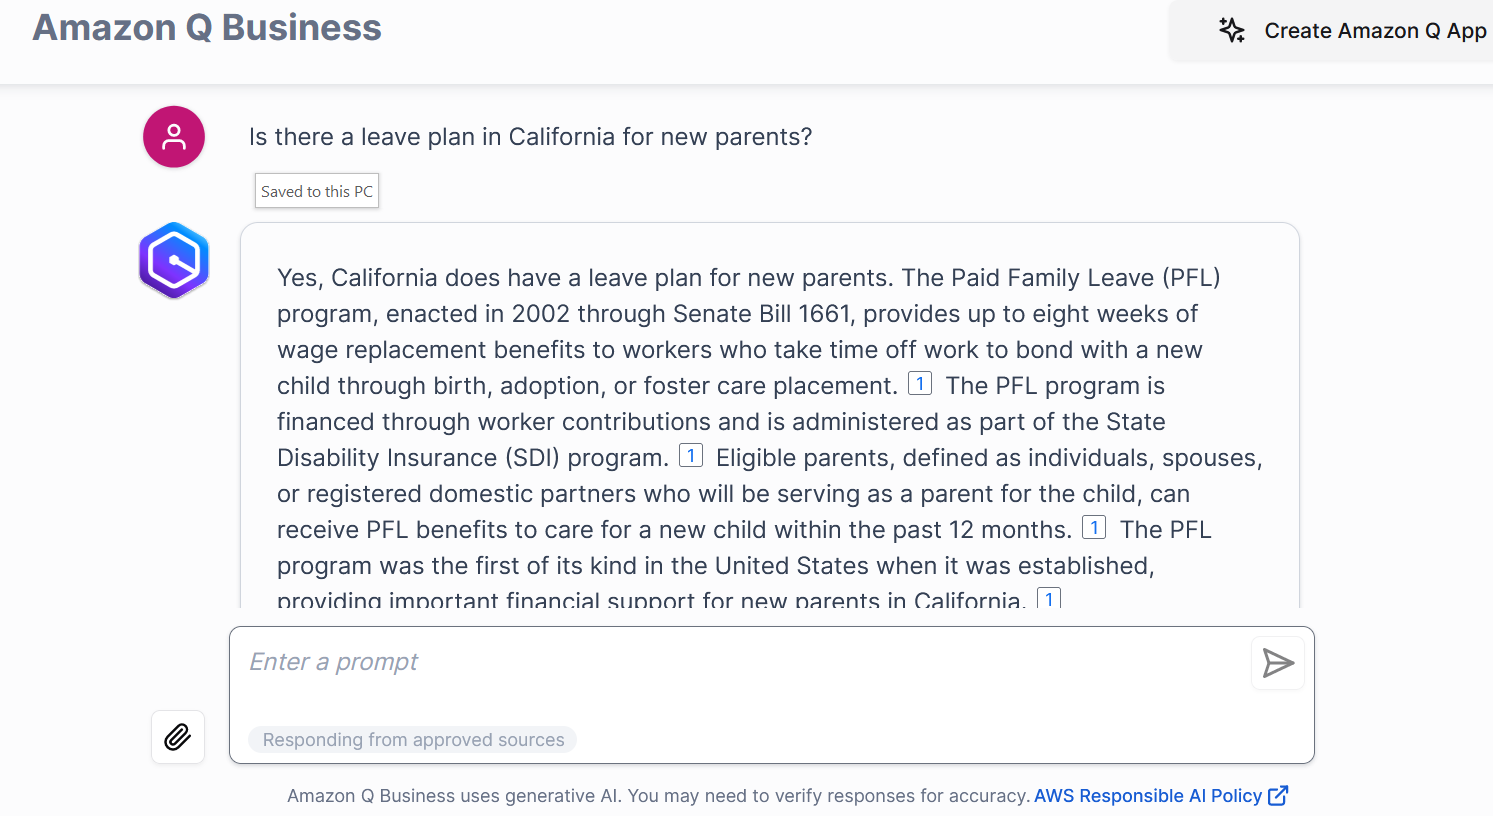
- Is there a leave plan in California for new parents?
- Can I claim disability insurance during this time?
- Before applying for leave, I want to submit my submit expense report, how can I do it?
- Is there any limit on spending on a business trip?
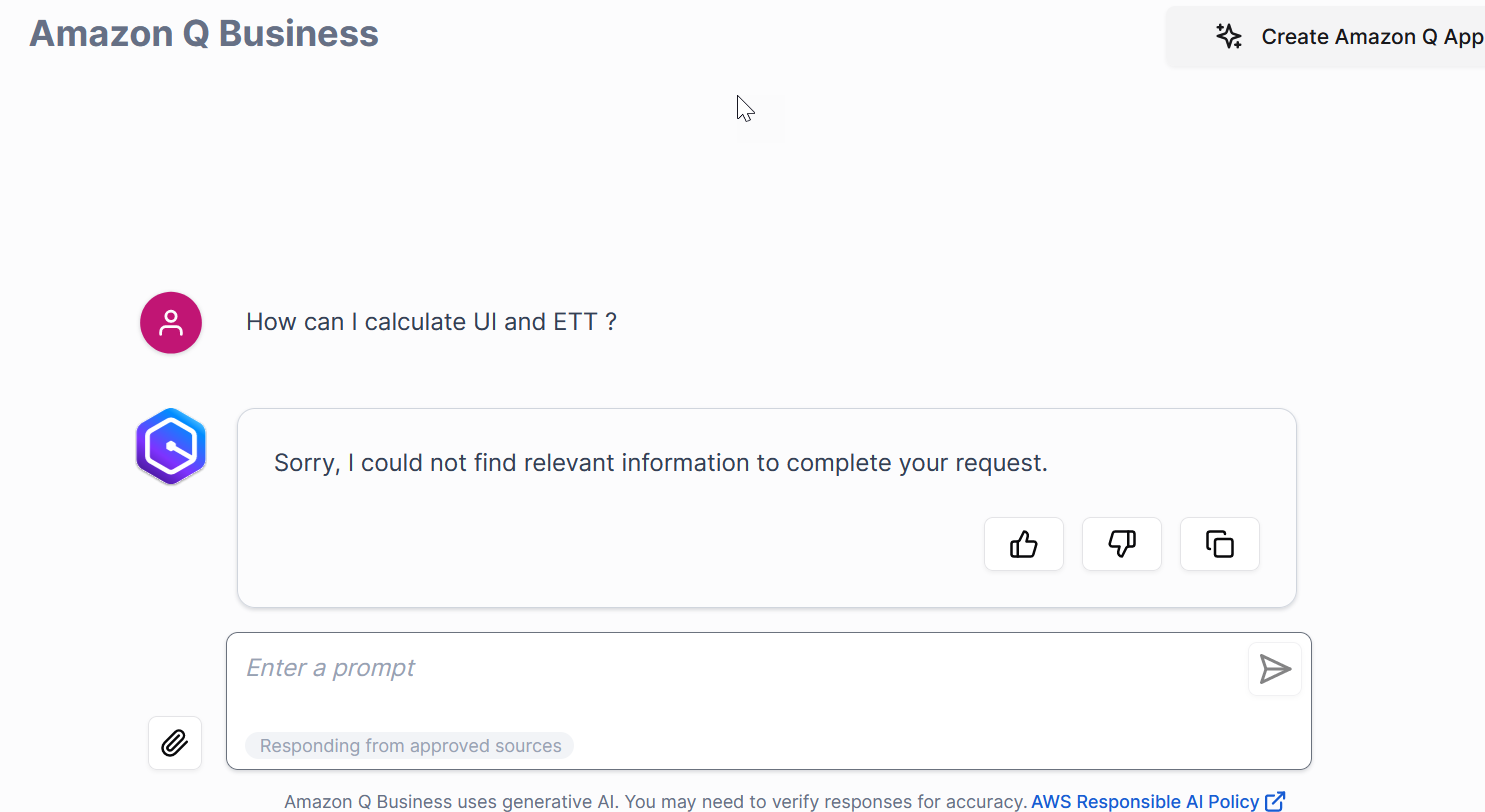
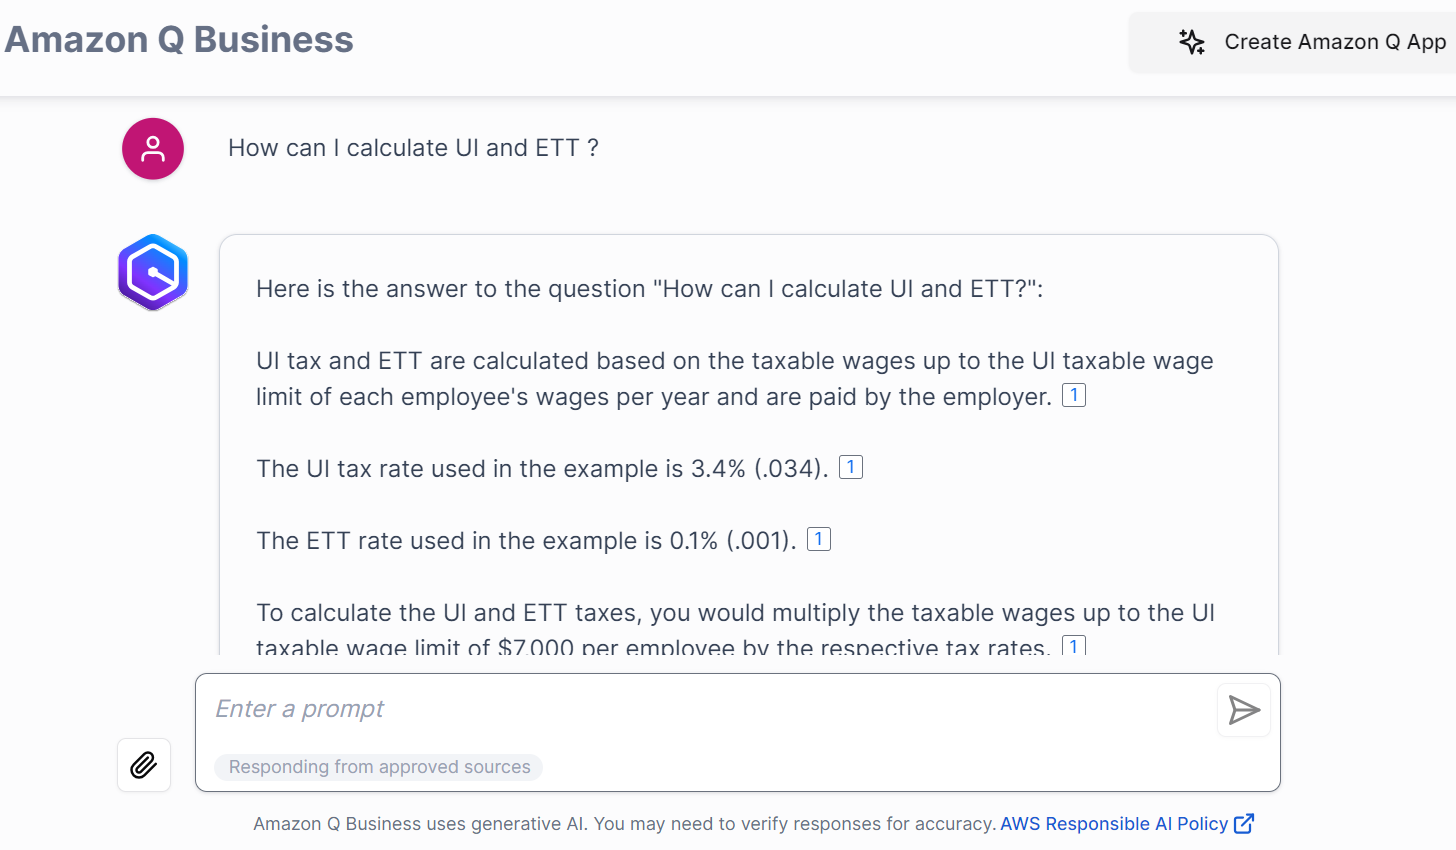
- How can I calculate UI and ETT?
Overview of the data source
SharePoint is a website-based collaboration system that is used as a secure place to store, organize, share, and access information from any device. SharePoint empowers teamwork with dynamic and productive team sites for every project team, department, and division.
SharePoint is available in two options: SharePoint Server and SharePoint Online. SharePoint Server is a locally hosted platform that your company owns and operates. You’re responsible for everything from server architecture, active directory, to file storage. SharePoint Server 2016, SharePoint Server 2019, and SharePoint Server Subscription Edition are the active SharePoint Server releases. SharePoint Online is a cloud-based service provided directly from Microsoft. They take care of identity management architecture, and site management. SharePoint Sever and SharePoint Online contain pages, files, attachments, links, events, and comments that can be crawled by Amazon Q SharePoint connectors for SharePoint Server and SharePoint Online.
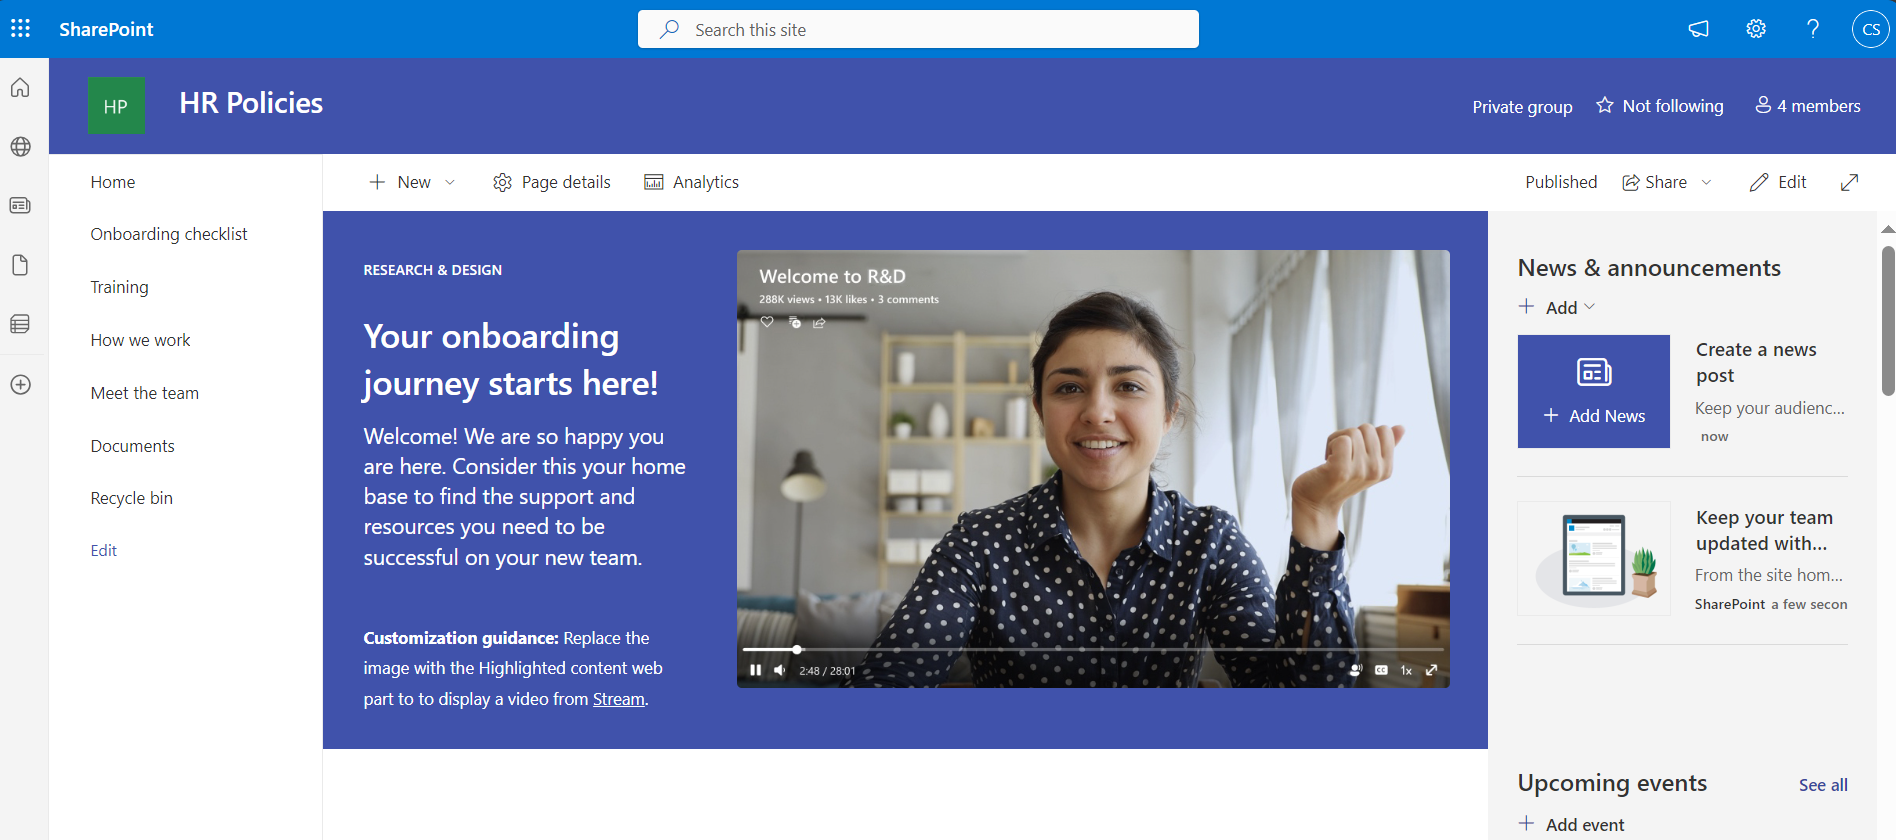
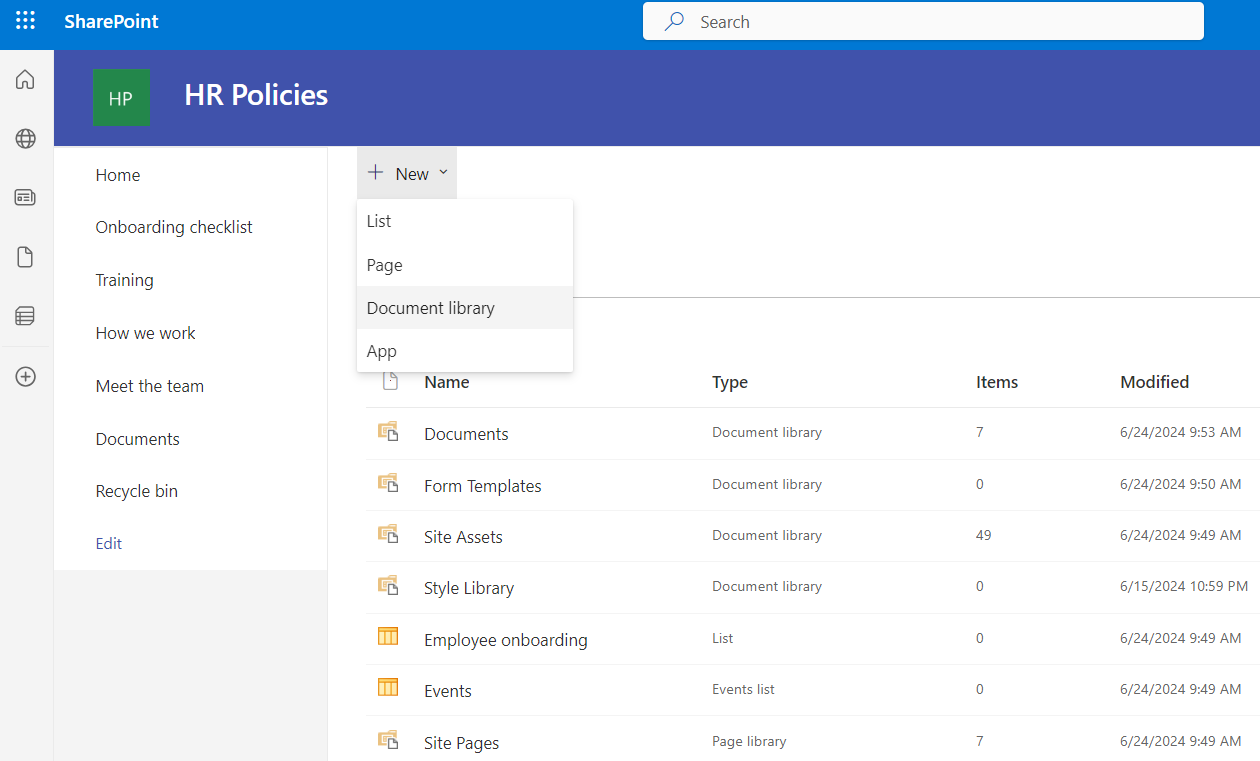
SharePoint Online and SharePoint Server offer a site content space where site owners can view a list of all pages, libraries, and lists for their site. The site content space also provides access to add lists, pages, document libraries, and more.
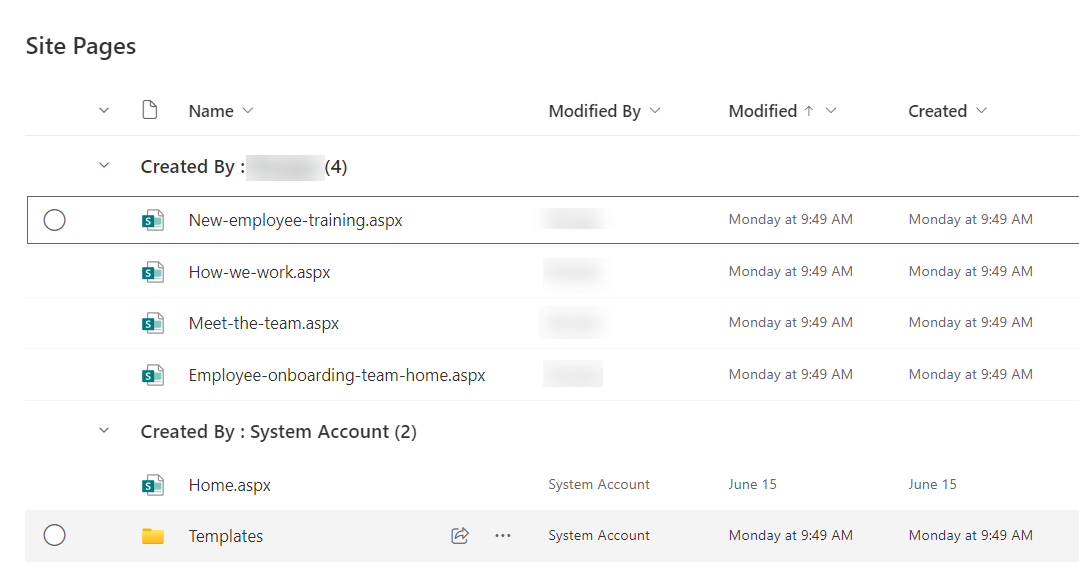
Pages are the contents stored on webpages; these are meant to display information to the end-user.
A document library provides a secure place to store files where you and your coworkers can find them easily. You can work on them together and access them from any device at any time.
A list is one of the data storage mechanisms within SharePoint. It provides the UI to view the items in a list. You can add, edit, and delete items or view individual items.
Overview of the SharePoint Online connector for Amazon Q Business
To crawl and index contents from SharePoint Online, you can configure the Amazon Q Business SharePoint Online connector as a data source in your Amazon Q business application. When you connect Amazon Q Business to a data source and initiate the sync process, Amazon Q Business crawls and indexes documents from the data source into its index.
Let’s look at what are considered as documents in the context of Amazon Q business SharePoint Online connector. A document is a collection of information that consists of a title, the content (or the body), metadata (data about the document), and access control list (ACL) information to make sure answers are provided from documents that the user has access to.
The following entities in SharePoint are crawled and indexed as documents along with their metadata and access control information:
- Files
- Events
- Pages
- Links
- Attachments
- Comments
Amazon Q Business crawls data source document attributes or metadata and maps them to fields in your Amazon Q index. Refer to Amazon Q Business SharePoint Online data source connector field mappings for more details.
Configure and prepare the Amazon Q connector
Before you index the content from Microsoft SharePoint online, your need to first establish a secure connection between the Amazon Q Business connector for SharePoint Online with your SharePoint Online instance. To establish a secure connection, you need to authenticate with the data source.
The following are the supported authentication mechanisms for the SharePoint connector:
- Basic Authentication
- OAuth 2.0 with Resource Owner Password Credentials Flow
- Azure AD App-Only (OAuth 2.0 Certificate)
- SharePoint App-Only with Client Credentials Flow
- OAuth 2.0 with Refresh Token Flow
Secure querying with ACL crawling, identity crawling, and user store
Secure querying is when a user runs a query and is returned answers from documents that the user has access to and not from documents that the user does not have access to. To enable users to do secure querying, Amazon Q Business honors ACLs of the documents. Amazon Q Business does this by first supporting the indexing of ACLs. Indexing documents with ACLs is crucial for maintaining data security, because documents without ACLs are considered public. At query time, the user’s credentials (email address) are passed along with the query so that answers from documents that are relevant to the query and which the user is authorized to access are displayed.
A document’s ACL contains information such as the user’s email address and the local groups or federated groups (if Microsoft SharePoint is integrated with an identity provider (IdP) such as Azure Active Directory/Entra ID) that have access to the document. The SharePoint online data source can be optionally connected to an IdP such as Okta or Microsoft Entra ID. In this case, the documents in SharePoint Online can have the federated group information.
When a user logs in to a web application to conduct a search, the user’s credentials (such as an email address) need to match that’s in the ACL of the document to return results from that document. The web application that the user uses to retrieve answers would be connected to an IdP or AWS IAM Identity Center. The user’s credentials from the IdP or IAM Identity Center are referred to here as the federated user credentials. The federated user credentials such as the email address are passed along with the query so that Amazon Q can return the answers from the documents that this user has access to. However, sometimes this user’s federated credentials may not be present in the SharePoint Online data source or the SharePoint document’s ACLs. Instead, the user’s local user alias, local groups that this local user alias is a part of, or the federated groups that the federated user is a part of are available in the document’s ACL. Therefore, there is a need to map the federated user credential to the local user alias, local groups, or federated groups in the document ACL.
To map this federated user’s email address to the local user aliases, local groups, or federated groups, certain Amazon Q Business connectors, including the SharePoint Online connector, provide an identity crawler to load the identity information (local user alias, local groups, federated groups, and their mappings, along with any other mappings to a federated user) from the connected data sources into a user store. At query time, Amazon Q Business retrieves the associated local user aliases, local groups, and any federated groups from the user store and uses that along with the query for securely retrieving passages from documents that the user has access to.
If you need to index documents without ACLs, you must make sure they’re explicitly marked as public in your data source.
Refer to How Amazon Q Business connector crawls SharePoint (Online) ACLs for more details.
Amazon Q indexes the documents with ACLs and sets the user’s email address or user principal name for the user and the group name [site URL hash value | group name] for the local group in the ACL. If the SharePoint Online data source is connected to an IdP such as Azure AD/Entra ID or Okta, the AD group name visible in the SharePoint site is set as the federated group ACL. The identity crawler sets these the same as the principals along with the available mappings in the user store. Any additional mappings need to be set in the user store using the user store APIs.
Overview of solution
This post presents the steps to create a certificate and private key, configure Azure AD (either using the Azure AD console or a PowerShell script), and configure Amazon Q Business.
For this post, we use a SharePoint Online site named HR Policies that hosts policy documents in a Documents library and payroll tax documents in a Payroll Taxes library to walk you through the solution.
In one of the scenarios that we validate, a SharePoint user (Carlos Salazar) is part of the SharePoint site members group, and he has access only to policy documents in the Documents library.
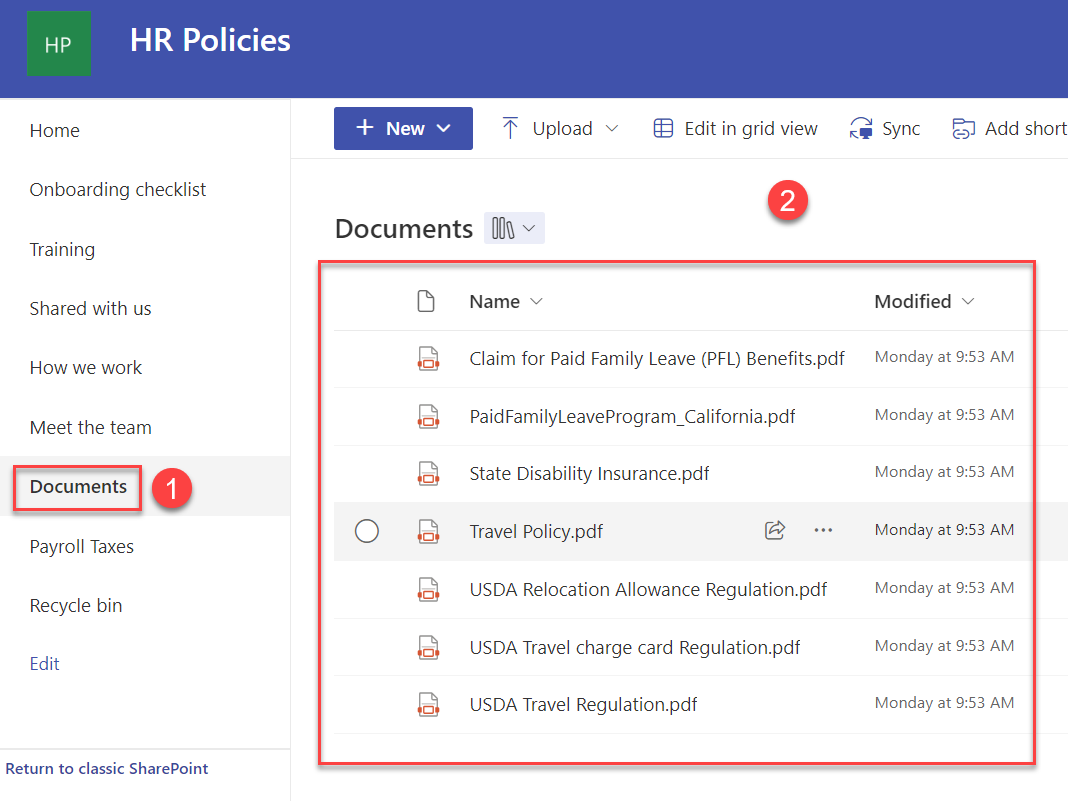
Carlos Salazar can receive responses for queries related to HR policies, as shown in the following example.
However, for questions related to payroll tax, he did not receive any response.
Another SharePoint user (John Doe) is part of the SharePoint site owners group and has access to both the Documents and Payroll Taxes libraries.
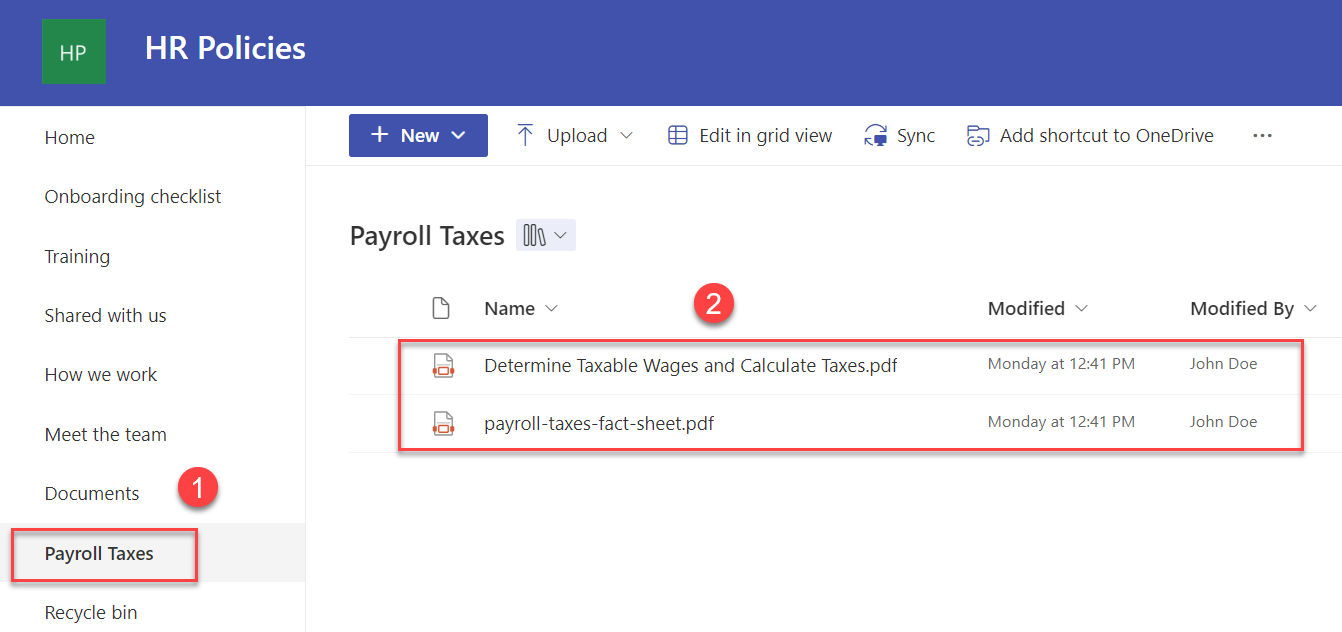
John Doe receives responses for queries related to payroll taxes, as shown in the following example.
Prerequisites
You should meet the following prerequisites:
- The user performing these steps should be a global administrator on Azure AD/Entra ID.
- Configure Microsoft Entra ID and IAM Identity Center integration.
- You need a Microsoft Windows instance to run PowerShell scripts and commands with PowerShell 7.4.1+. Details of the required PowerShell modules are described later in this post.
- The user should have administrator permissions on the Windows instance.
- Make sure that the user running these PowerShell commands has the right M365 license (for example, M365 E3).
Create the certificate and private key
In Azure AD, when configuring App-Only authentication, you typically use a certificate to request access. Anyone with the certificate’s private key can use the app and the permissions granted to the app. We create and configure a self-signed X.509 certificate that will be used to authenticate Amazon Q against Azure AD, while requesting the App-Only access token. The following steps walk you through the setup of this model.
For this post, we use Windows PowerShell to run a few PowerShell commands. You can use an existing Windows instance or spin up a Windows EC2 instance or Windows workstation to run the PowerShell commands.
You can use the following PowerShell script to create a self-signed certificate. You can also generate the self-signed certificate through the New-PnPAzureCertificate command.
- Run the following command:
You will be asked to give a password to encrypt your private key, and both the .PFX file and the .CER file will be exported to the current folder (where you ran the PowerShell script from). Verify that you now have a .cer and .pfx file.
- Upload this .cer file to an S3 location that your Amazon Q IAM role has GetObject permissions for. You can let Amazon Q create this role for you in future steps outlined later in this post, and the correct permissions will be added for you if you choose.
Now you extract the private key contents from the .pfx file and save it for Amazon Q connector configuration. This .pfx file will be present in the folder where you have saved the certificate.
- Run the following command to extract the private key:
You will be prompted for the import password. Enter the password that you used to protect your key pair when you created the .pfx file (client ID, in our case). You will be prompted again to provide a new password to protect the .key file that you are creating. Store the password to your key file in a secure place to avoid misuse. (When you enter a password, the window shows nothing if you’re using the Windows CMD window. Enter your password and choose Enter.)
- Run the following command to decrypt the private key:
- Run the following command to extract the certificate:
This decrypted key and certificate will be used by the connector for authentication purposes.
- Upload the X.509 certificate (ending with .crt) to an S3 bucket. This will be used when configuring the SharePoint Online connector for Amazon Q.
- Verify the contents of the file
amazonqbusinessdemo-decrypted.keystarts with the standardBEGIN PRIVATE KEYheader. - Copy and paste the contents of the
amazonqbusinessdemo-decrypted.keyfor use later in our Amazon Q setup.
- Verify the contents of the file
Configure Azure AD
You can configure Azure AD using either of the following methods:
- Using the Azure AD console GUI. This is a manual step-by-step process.
- Using the provided PowerShell script. This is an automated process that takes in the inputs and configures the required permissions.
Follow the steps for either option to complete the Azure AD configuration.
Configure Azure AD using the Azure AD console
To configure Azure AD using the GUI, you first register an Azure AD application in the Azure AD tenant that is linked to the SharePoint Online/O365 tenant. For more details, see Granting access via Azure AD App-Only.
- Open the Office 365 Admin Center using the account of a user member of the Tenant Global Admins group.
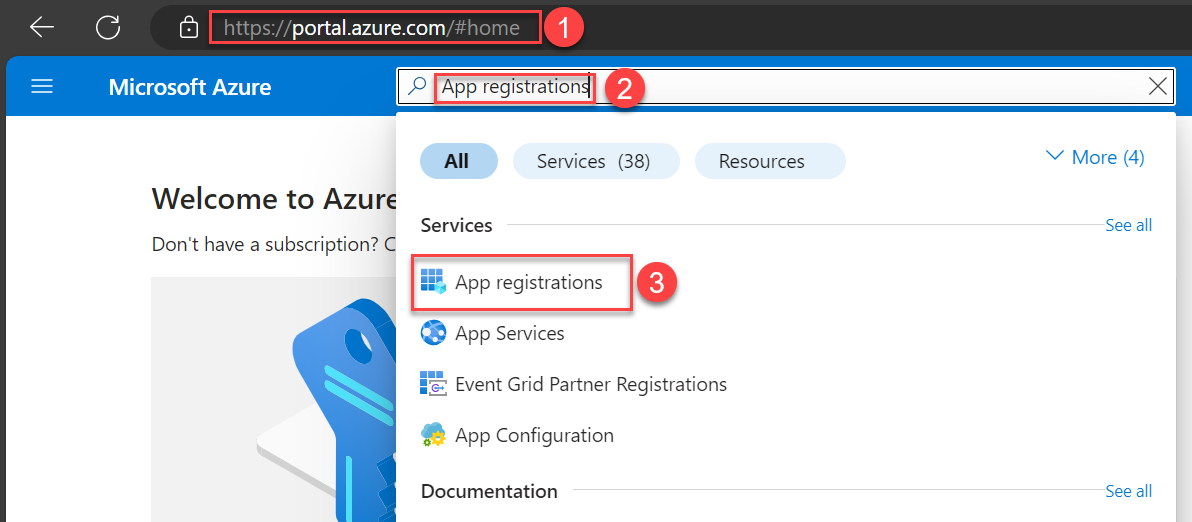
- Navigate to Microsoft Azure Portal.
- Search for and choose App registrations.
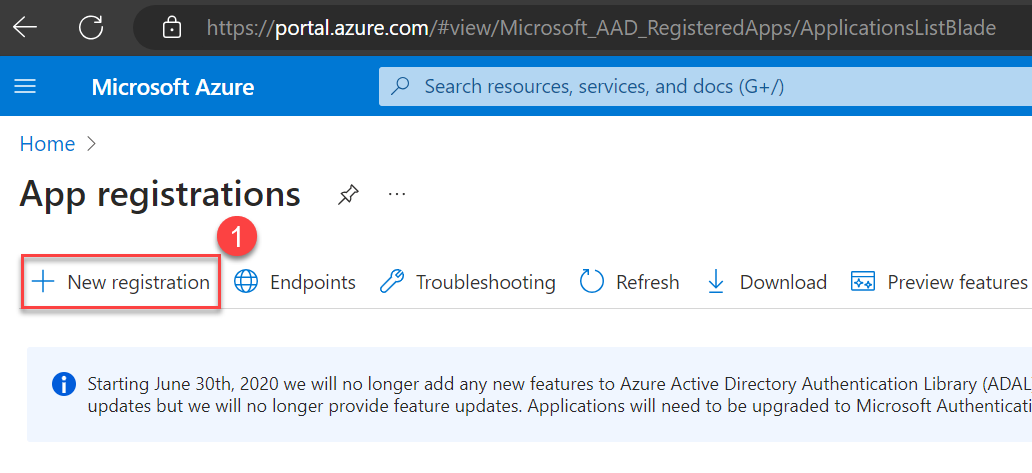
- Choose New registration.
- Enter a name for your application, select who can use this application, and choose Register.
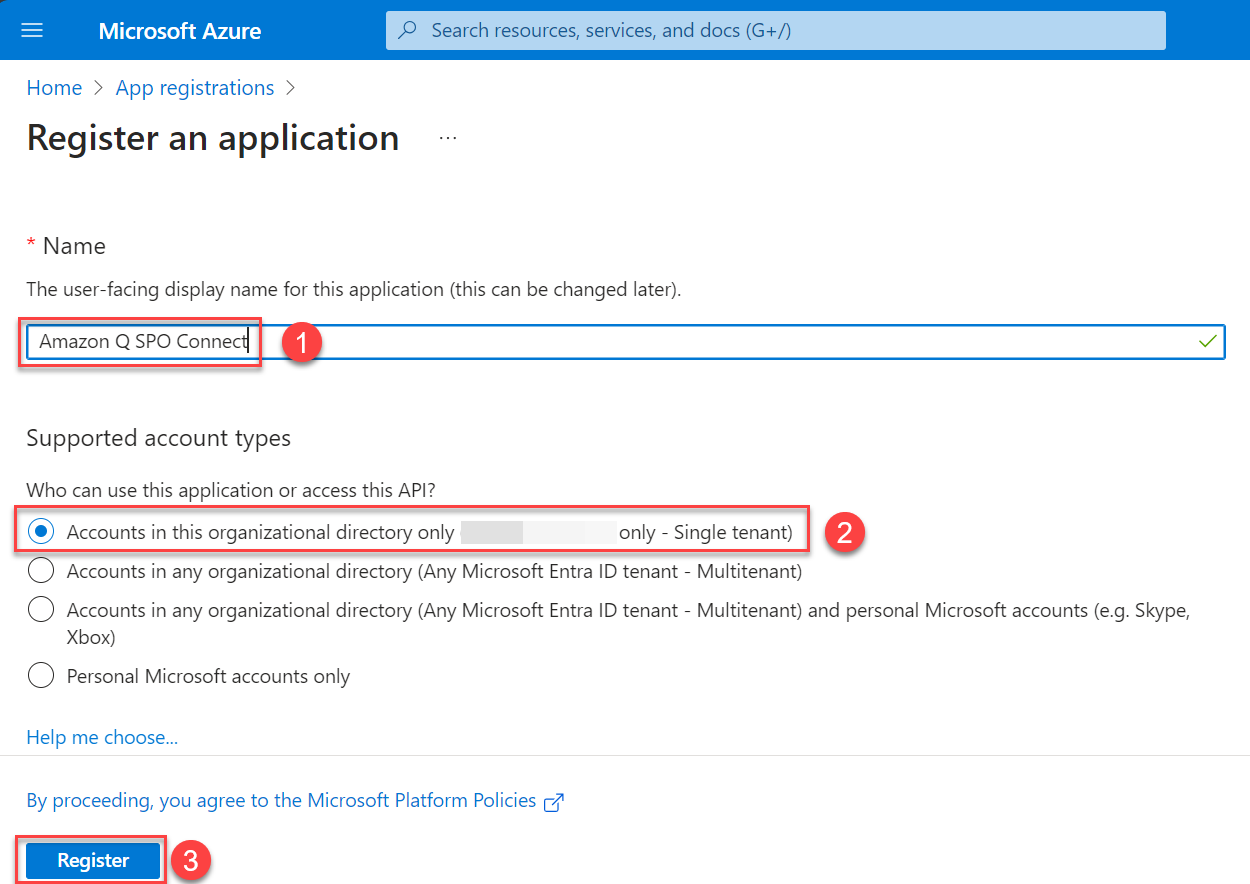
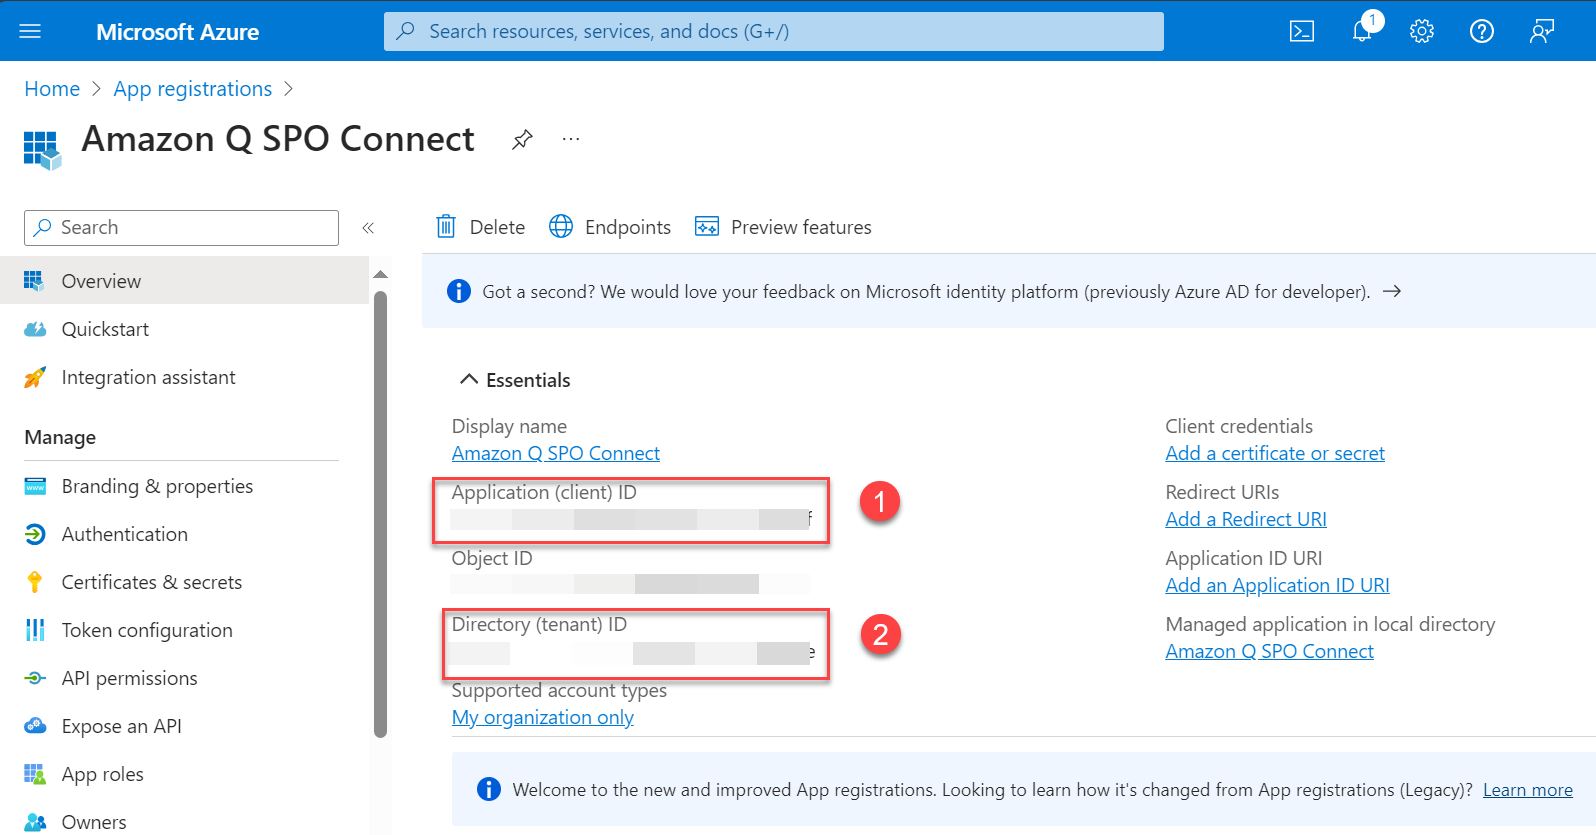
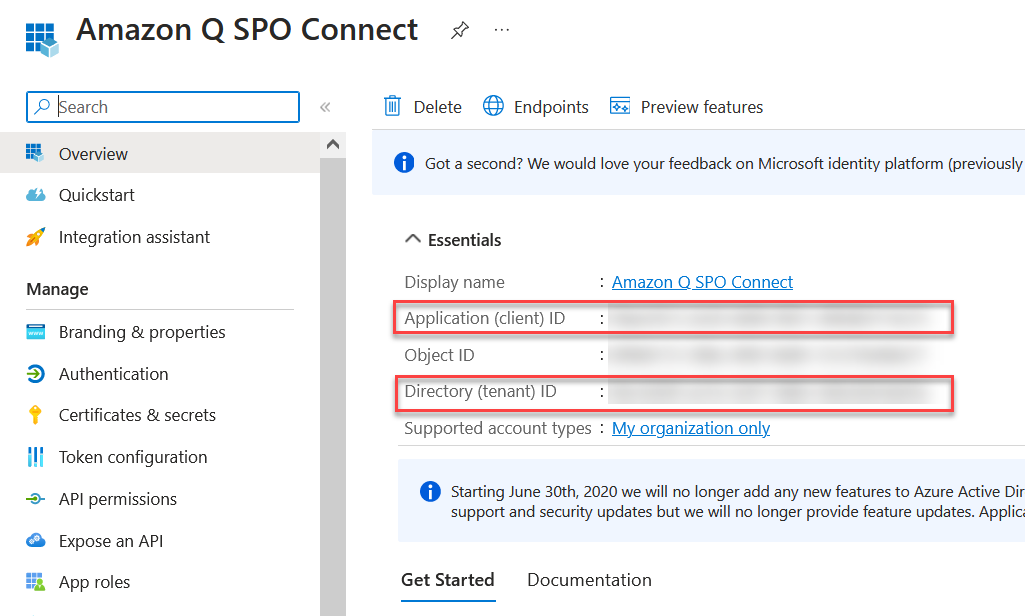
An application will be created. You will see a page like the following screenshot.
- Note the application (client) ID and the directory (tenant) ID.
These IDs will be different than what is shown in the screenshot.
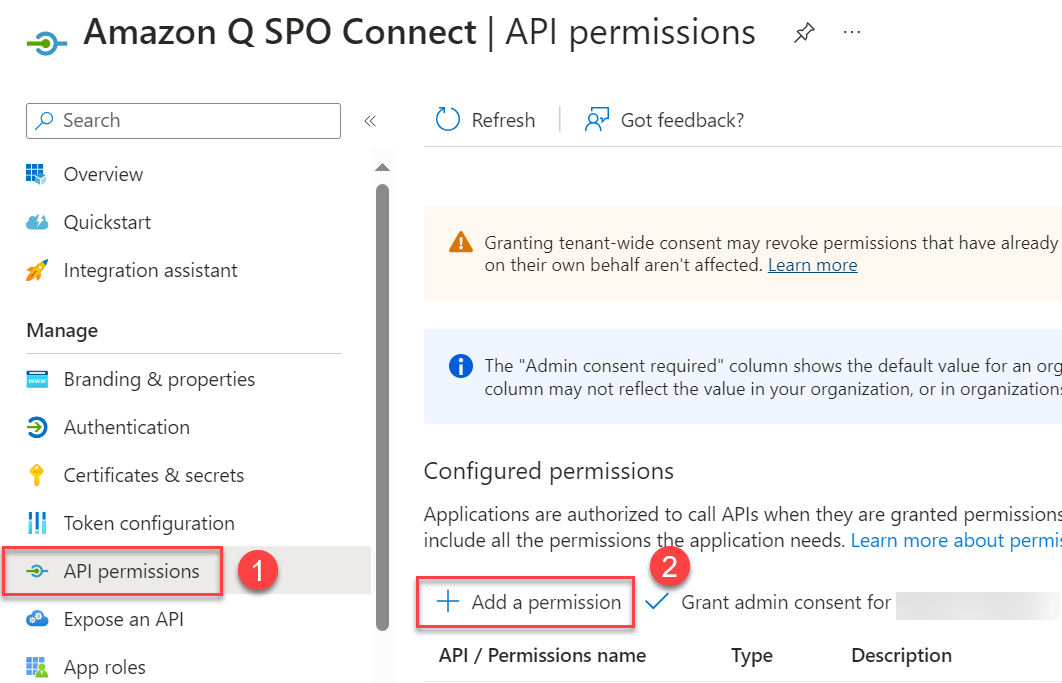
Now you can configure the newly registered application for SharePoint permissions.
- Choose API permissions in the navigation pane.
- Choose Add a permission to add the permissions to your application.
- Choose SharePoint from the list of applications.
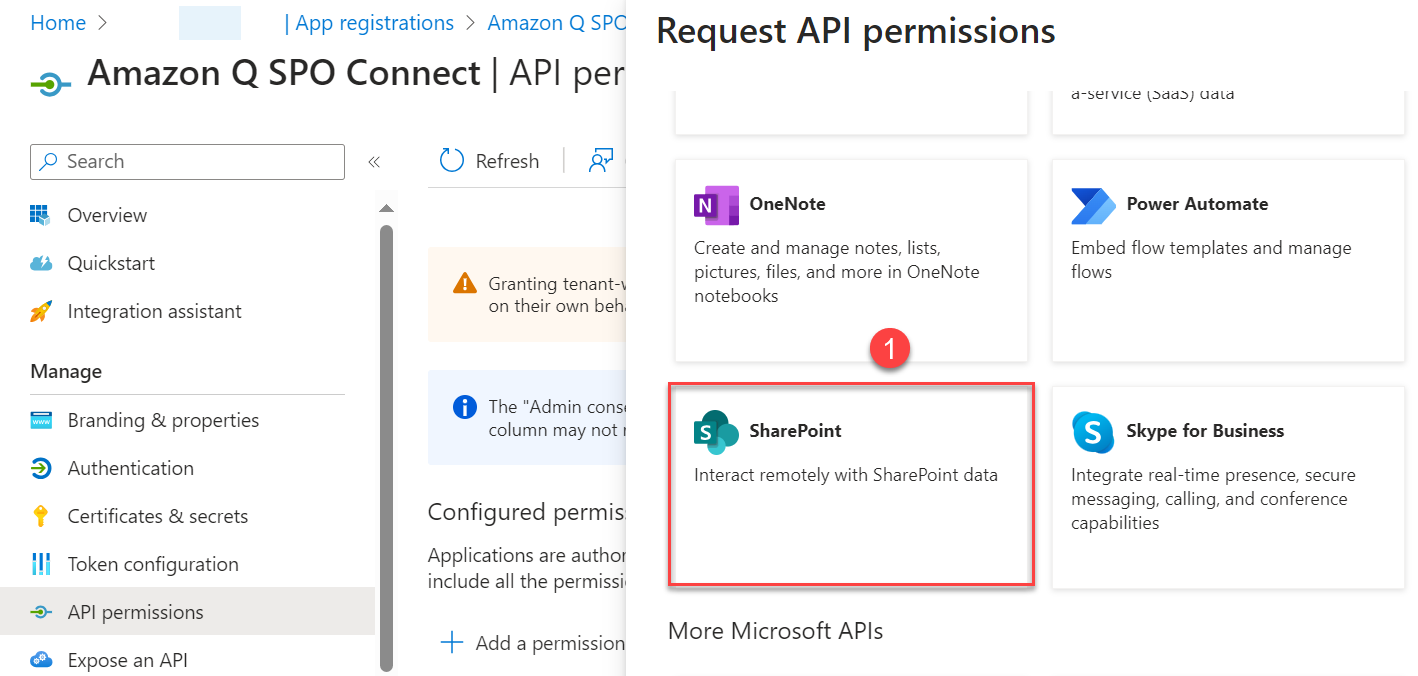
- Configure permissions.
There are two different ways to configure SharePoint permissions.
To configure permissions to access multiple SharePoint Site collections (using Azure AD App-Only permissions), select Site.FullControl.All to allow full control permissions to all the SharePoint site collections and to read the ACLs from these site collections.
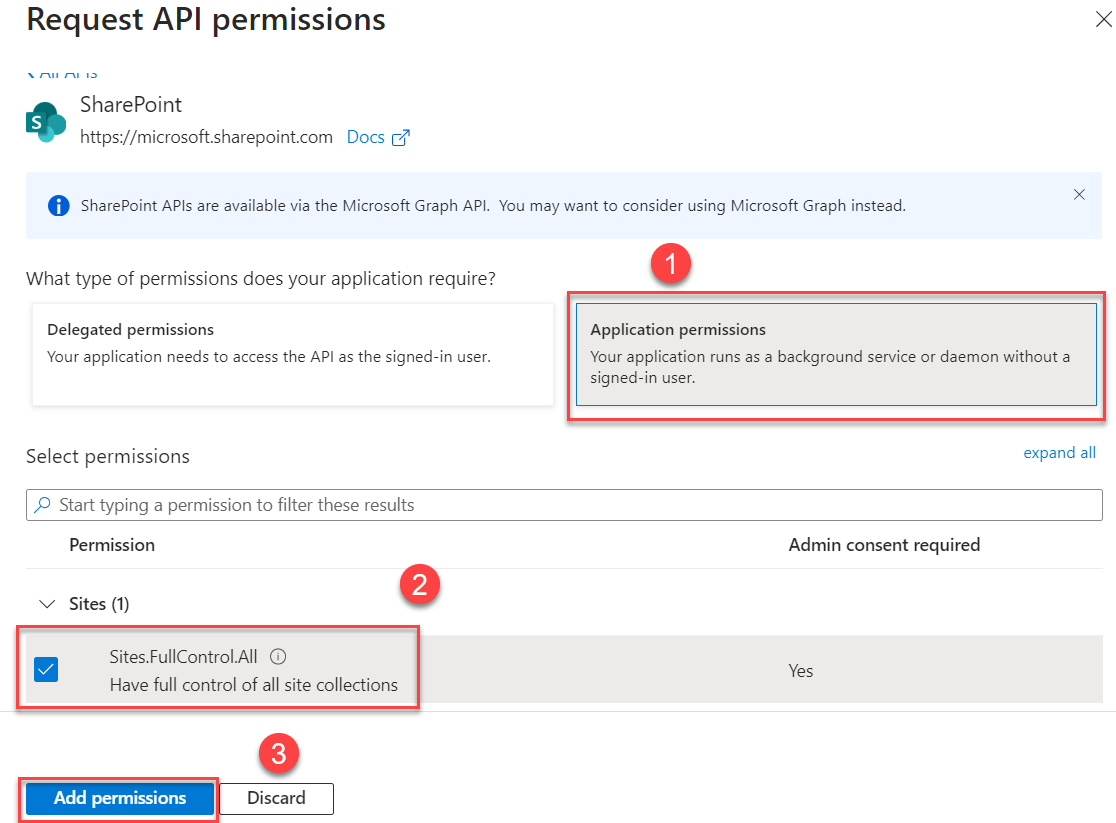
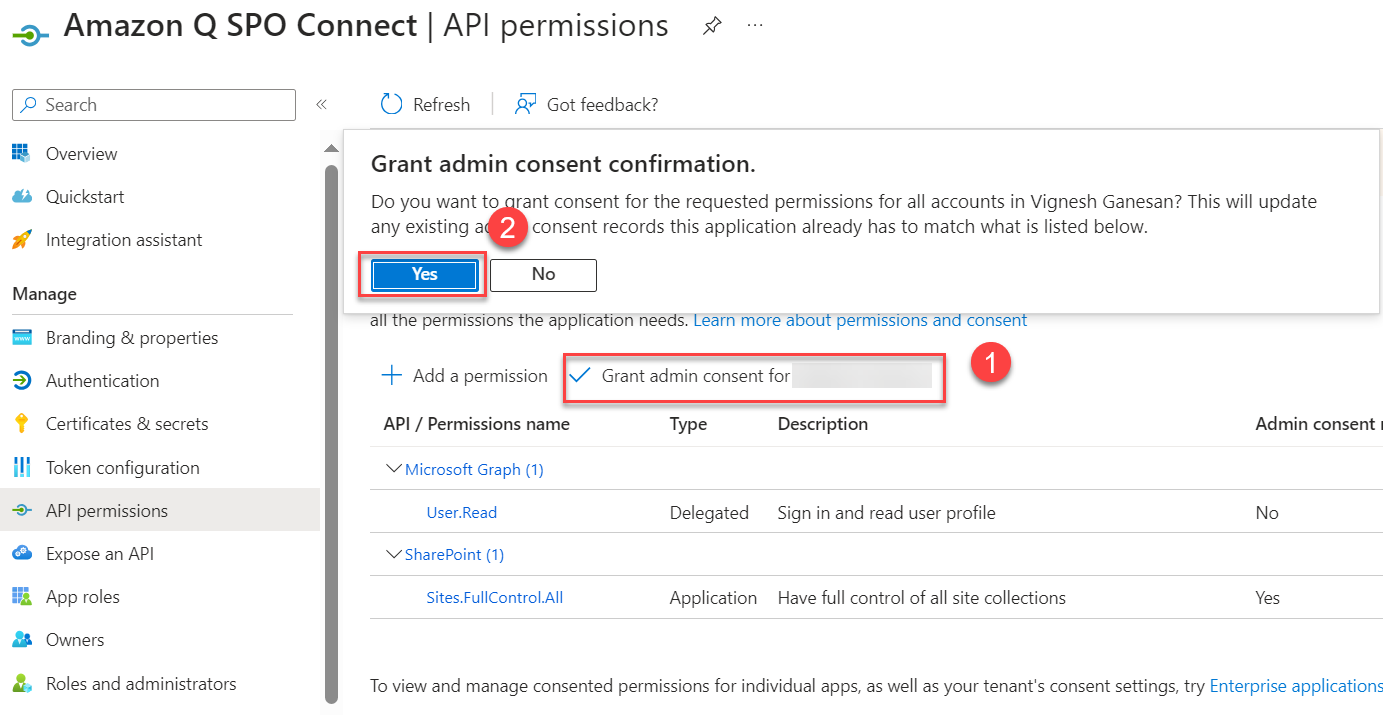
This permission requires admin consent in a tenant before it can be used. To do so, choose Grant admin consent for <organization name> and choose Yes to confirm.
Alternatively, to configure permissions to access specific SharePoint site collections, select Sites.Selected to allow access to a subset of site collections without a signed-in user. The specific site collections and the permissions granted will be configured in SharePoint Online.
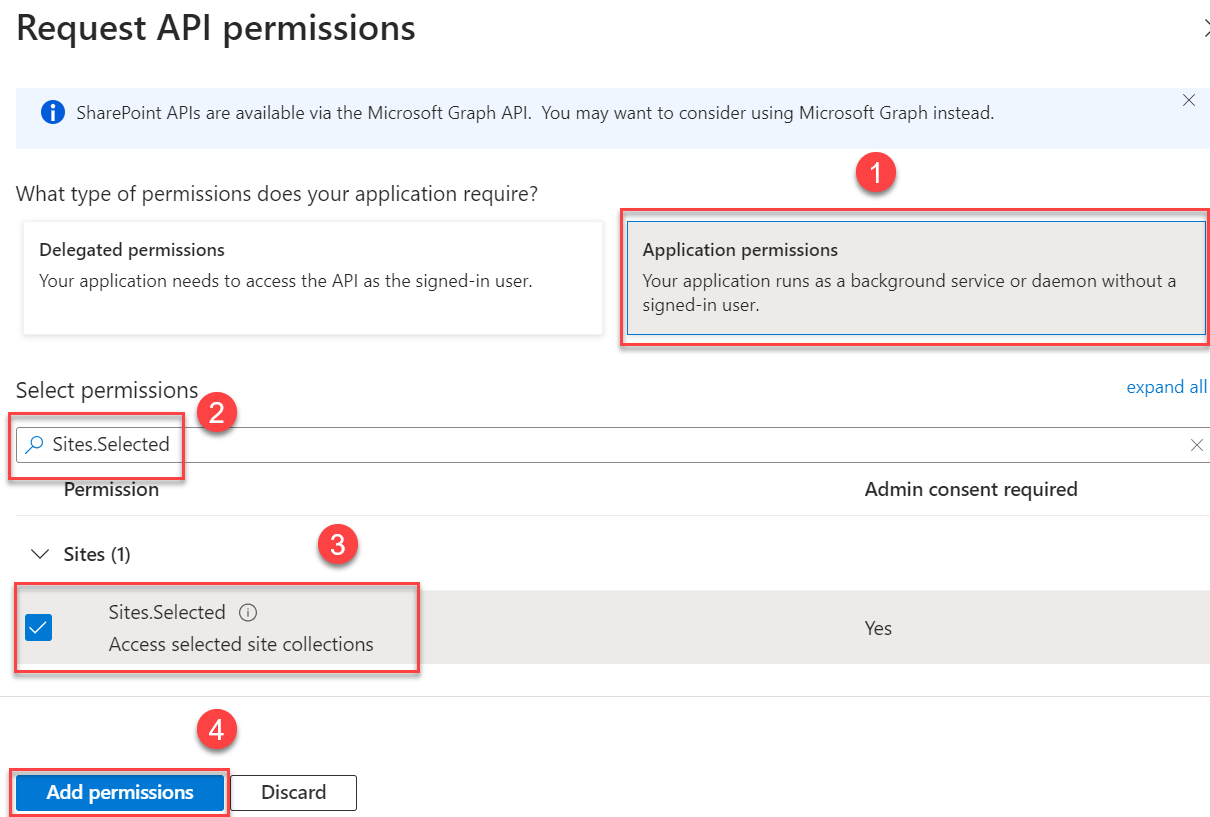
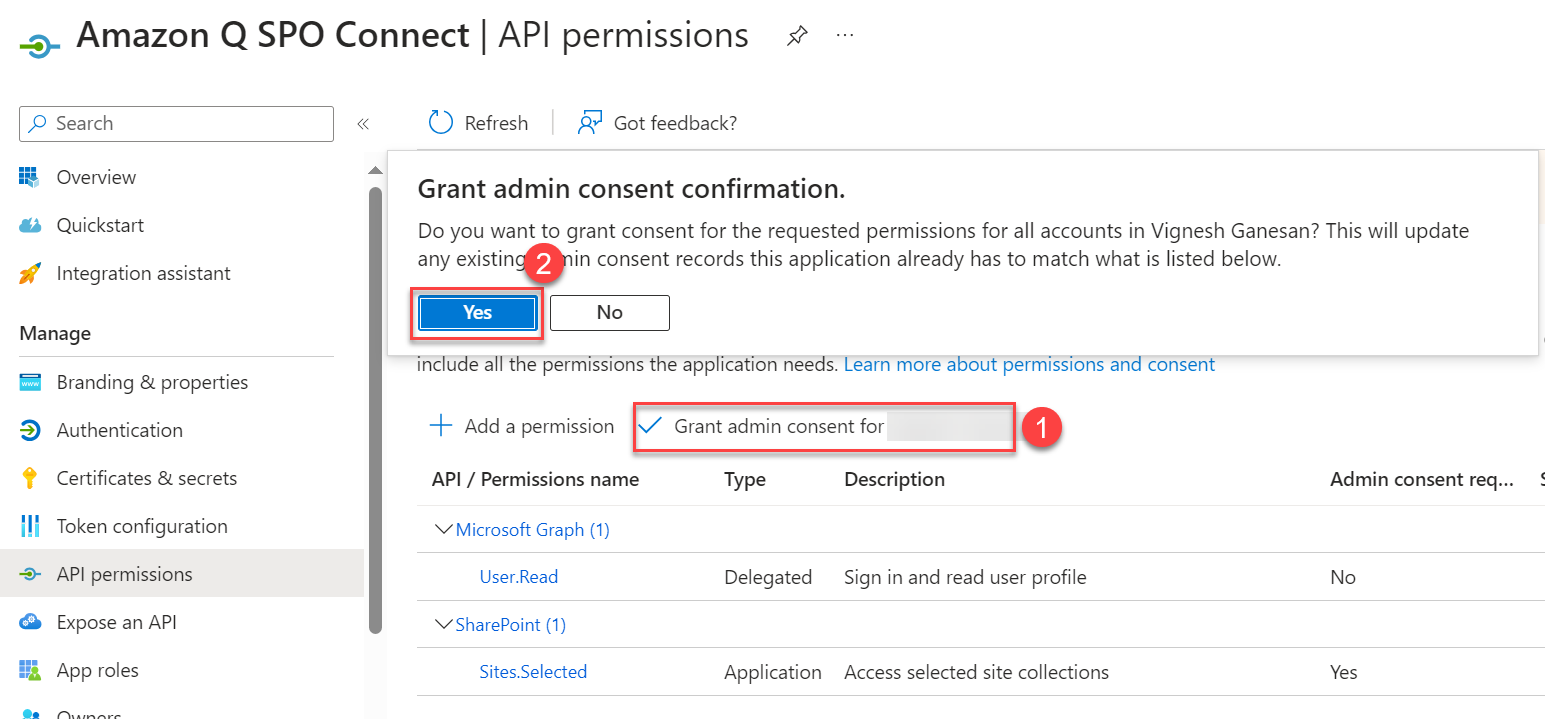
This permission requires admin consent in a tenant before it can be used. To do so, choose Grant admin consent for <organization name> and choose Yes to confirm.
Next, you grant Azure AD app permissions to one or more SharePoint site collections. Make sure the following prerequisites are in place:
- You must have Windows Server/Workstation with PowerShell 7.4.1+.
- The user running these PowerShell commands must have the right M365 license (for example, M365 E3).
- Install the PowerShell modules using
Install-Module -Name PnP.PowerShell -AllPreRelease. - If this is your first-time running PowerShell commands, run the
Connect-PnPOnline -Url <site collection url> -PnPManagementShellPowerShell command and complete the consent process to use PnP cmdlets. Alternatively, run theRegister-PnPManagementShellAccesscmdlet, which grants access to the tenant for the PnP management shell multi-tenant Azure AD application.
- Open PowerShell and connect to SharePoint Online using the Connect-PnPOnline command:
- Add the Azure AD app to one or more specific site collection permissions using Grant-PnPAzureADAppSitePermission:
If you want to configure permissions to more than one SharePoint Online site collection, then you must repeat the preceding PowerShell commands for every collection.
Now you’re ready to connect the certificate.
- Choose Certificates & secrets in the navigation pane.
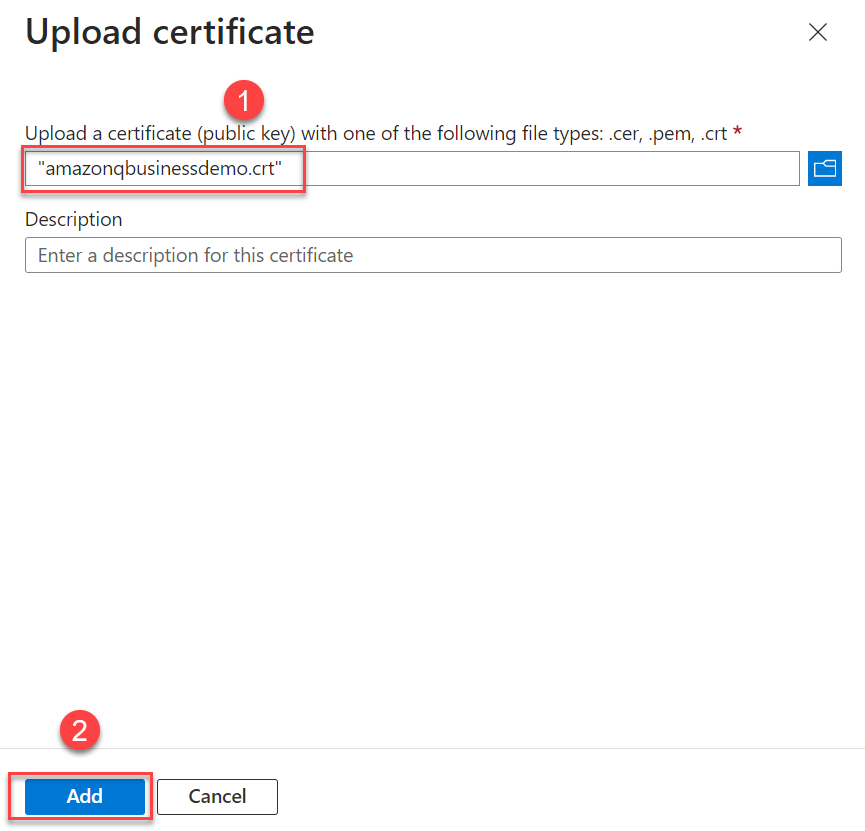
- On the Certificates tab, choose Upload certificate.
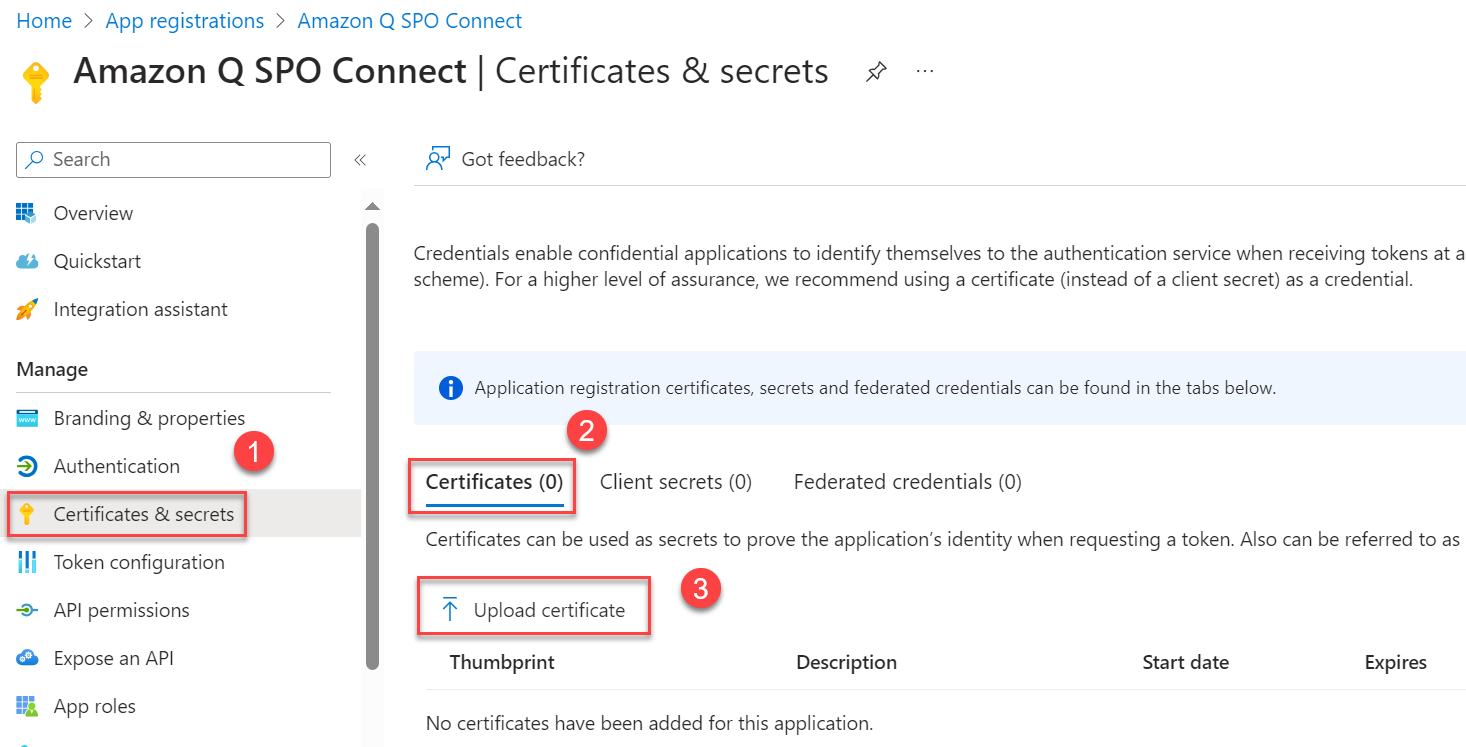
- Choose the .cer file you generated earlier and choose Add to upload it.
This completes the configuration on the Azure AD side.
Configure Azure AD using the provided PowerShell script
The user running this PowerShell script should be an Azure AD tenant admin or have tenant admin permissions. Additionally, as a prerequisite, install the MS Graph PowerShell SDK.
Complete the following steps to run the PowerShell script:
- Run the PowerShell script and follow the instructions.
This script will do the following:
- Register a new application in Azure AD/Entra ID
- Configure the required SharePoint permissions
- Provide admin consent for the permissions
The output from the PowerShell script will look like the following screenshot.

- If you chose Selected as the permission to target a specific SharePoint Site collection, continue with the steps to configure a specific SharePoint Site collection as mentioned earlier.
- If you have more than one SharePoint site collection to be crawled, repeat the previous step to configure each collection.
Configure Amazon Q
Make sure you have set up Amazon Q Business with Entra ID as IdP as mentioned in the prerequisites. Also, make sure the email ID is in lowercase letters while creating the users in Entra ID.
Follow the instructions in Connecting Amazon Q Business to SharePoint (Online) using the console.
For Step 9 (Authentication), we choose Azure AD App-Only authentication and configure it as follows:
- For Tenant ID, enter the tenant ID of your SharePoint account. This will be directory (tenant) ID in your registered Azure application, in the Azure Portal, as shown in the following screenshot (the IDs will be different for your setup).
- For Certificate path, enter the full S3 path to your certificate (for example,
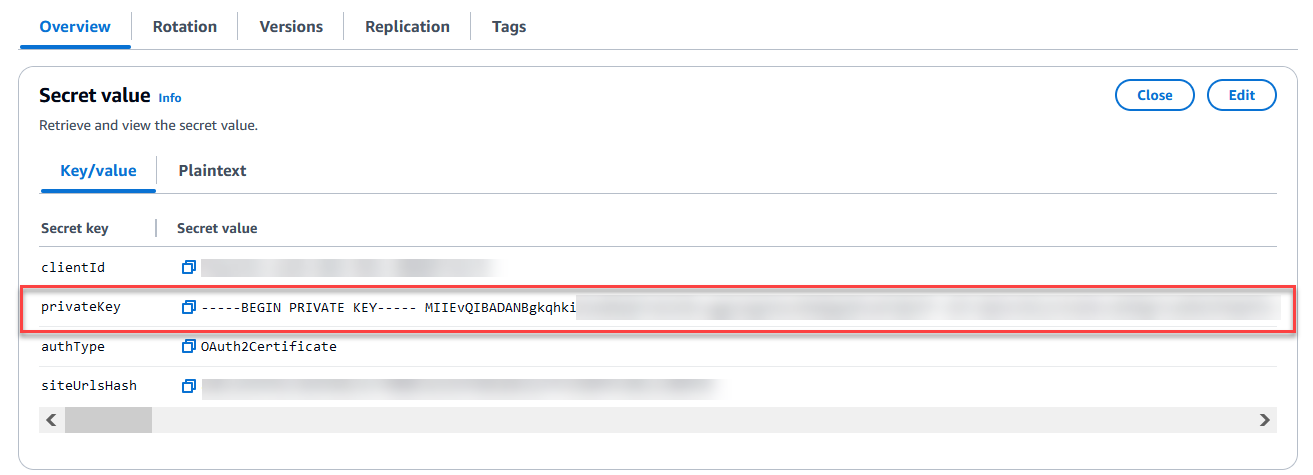
s3://certBucket/azuread.crt). This is the Azure AD self-signed X.509 certificate to authenticate the connector for Azure AD. This certificate was created earlier. - For AWS Secrets Manager secret, create a secret in AWS Secrets Manager to store your SharePoint authentication credentials:
- For Secret name, enter a name for your secret.
- For Client ID, enter the Azure AD client ID generated when you registered SharePoint in Azure AD. This is the application (client) ID created in the Azure Portal when registering the SharePoint application in Azure, as described earlier.
- For Private key, enter a private key to authenticate the connector for Azure AD. This is the contents of the .pfx file you created when registering your Azure SharePoint application, as described earlier. Enter the decrypted contents of that .pfx file in its entirety. Choose Show private key to verify it matches the contents for your .pfx file.
Continue with the rest of the steps in Connecting Amazon Q Business to SharePoint (Online) using the console.
Access the web experience on Amazon Q
To access the web experience, complete the following steps:
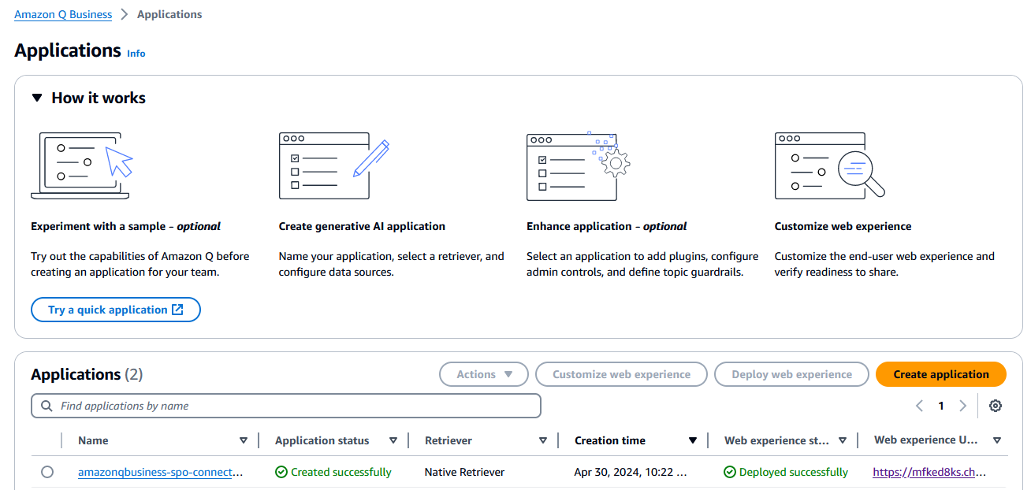
- On the Amazon Q Business console, choose Applications in the navigation pane.
- Choose the application you created.
- Choose the link under Web experience URL to browse Amazon Q.
- When prompted, authenticate with Entra ID/Azure AD.
After you’re authenticated, you can access Amazon Q. You can ask Amazon Q a question and get a response based on the permissions of the logged-in user.
References
- For instructions on how to create an Amazon Q Business application with IAM Identity Center, refer to Configure SAML and SCIM with Microsoft Entra ID and IAM Identity Center.
- Use the following PowerShell script to configure Azure AD:
- You can test if the
Grant-PnPAzureADAppSitePermissioncmdlet worked by connecting to the SharePoint site using the Azure AD app that has the SharePoint.Sites.Selected permission and run a few SharePoint API calls:
-
- Make a note of the certificate thumbprint as shown earlier.
- Install the certificate for the current user in the Windows Certificate Management Store.
- Run the following PowerShell cmdlet to connect to the SharePoint site collection using
PnPOnline:
-
- Run
Get-PnPListto list all the SharePoint lists in the site collection and confirm that the permissions are configured correctly:
- Run
Troubleshooting
For troubleshooting guidance, refer to Troubleshooting your SharePoint (Online) connector.
Clean up
Complete the following steps to clean up your resources:
- Open the Office 365 Admin Center using the account of a user member of the Tenant Global Admins group.
- Navigate to the Microsoft Azure Portal.
- Search for and choose App registrations.
- Select the app you created earlier, then choose Delete.
- On the Amazon Q Business console, choose Applications in the navigation pane.
- Select the application you created, and on the Actions menu, choose Delete.
Conclusion
In this post, we explored how Amazon Q Business can seamlessly integrate with SharePoint Online to help enterprises unlock the value of their data and knowledge. With the SharePoint Online connector, organizations can empower their employees to find answers quickly, accelerate research and analysis, streamline content creation, automate workflows, and enhance collaboration.
We walked you through the process of setting up the SharePoint Online connector, including configuring the necessary Azure AD integration and authentication mechanisms. With these foundations in place, you can start unlocking the full potential of your SharePoint investment and drive greater productivity, efficiency, and innovation across your business.
Now that you’ve learned how to integrate Amazon Q Business with your Microsoft SharePoint Online content, it’s time to unlock the full potential of your organization’s knowledge and data. To get started, sign up for an Amazon Q Business account and follow the steps in this post to set up the SharePoint Online connector. Then you can start asking Amazon Q natural language questions and watch as it surfaces the most relevant information from your company’s SharePoint sites and documents.
Don’t miss out on the transformative power of generative AI and the Amazon Q Business platform. Sign up today and experience the difference that Amazon Q can make for your organization’s SharePoint-powered knowledge and content management.
About the Authors
 Vijai Gandikota is a Principal Product Manager on the Amazon Q and Amazon Kendra team of Amazon Web Services. He is responsible for the Amazon Q and Amazon Kendra connectors, ingestion, security, and other aspects of Amazon Q and Amazon Kendra.
 Satveer Khurpa is a Senior Solutions Architect on the GenAI Labs team at Amazon Web Services. In this role, he uses his expertise in cloud-based architectures to develop innovative generative AI solutions for clients across diverse industries. Satveer’s deep understanding of generative AI technologies enables him to design scalable, secure, and responsible applications that unlock new business opportunities and drive tangible value.
 Vijai Anand Ramalingam is a Senior Modernization Architect at Amazon Web Services, specialized in enabling and accelerating customers’ application modernization, transitioning from legacy monolith applications to microservices.
 Ramesh Jatiya is a Senior Solutions Architect in the Independent Software Vendor (ISV) team at Amazon Web Services. He is passionate about working with ISV customers to design, deploy, and scale their applications in the cloud to derive business value. He is also pursuing an MBA in Machine Learning and Business Analytics from Babson College, Boston. Outside of work, he enjoys running, playing tennis, and cooking.
 Neelam Rana is a Software Development Engineer on the Amazon Q and Amazon Kendra engineering team. She works on Amazon Q connector design, development, integration, and test operations.
 Dipti Kulkarni is a Software Development Manager on the Amazon Q and Amazon Kendra engineering team of Amazon Web Services, where she manages the connector development and integration teams.