AWS Public Sector Blog
How to deliver performant GIS desktop applications with Amazon AppStream 2.0

Geospatial datasets are increasingly large, reaching terabyte and even petabyte scale. This can cause many challenges for geospatial analysts and educators.
First, organizations face challenges accessing cloud-hosted datasets after migrating their existing on-premise geospatial information systems (GIS) to the cloud. They perform these migrations to take advantage of scalable and cost-effective data storage services from Amazon Web Services (AWS) like Amazon Simple Storage Service (Amazon S3) and Amazon Relational Database Service (Amazon RDS). However, connecting a user’s locally-installed GIS client application to a large cloud-hosted dataset can lead to poor performance and data egress fees.
Second, there are logistical challenges delivering GIS applications to groups. Consistently delivering GIS applications and providing data access to many users during workshops or in classrooms can be complex, especially when participants bring their own devices.
Finally, lack of access to GPU resources is a common challenge: As datasets grow, certain geospatial use cases require expensive GPU-backed hardware that may not be readily available or prohibitively expensive for users.
Amazon AppStream 2.0 provides solutions to these challenges. In this blog, we deploy QGIS, a no cost, open-source geospatial information system (GIS) application used by geospatial analysts, in Amazon AppStream 2.0. We also load an example dataset with nearly seven million polygons into an Amazon RDS database and access the data from QGIS. This demonstrates how desktop GIS application users can access large, cloud-hosted geospatial datasets with high performance by keeping the data and compute components together on the cloud, and streaming the desktop application instead of downloading the data itself.
Solution overview
The solution can be deployed in your environment using the provided AWS CloudFormation template available here. During the stack creation process, the following resources are created:
 Figure 1. Architectural diagram of the solution described in this blog. The major components are an Amazon S3 bucket, Amazon RDS instance, Amazon EC2 instance, and AppStream 2.0 resources.
- An Amazon S3 bucket, which hosts a virtual hard disk (VHDX) file containing the QGIS application.
- An AppStream 2.0 app block, application, and Elastic fleet for QGIS.
- An Amazon RDS PostgreSQL database instance to host our example dataset.
- A temporary Amazon Elastic Compute Cloud (Amazon EC2) instance. The instance installs QGIS onto a VHDX image and uploads it to an Amazon S3 bucket for use with Amazon AppStream 2.0. This instance also installs the PostGIS extension on the Amazon RDS database and uploads sample data from the Speedtest by Ookla Global Fixed and Mobile Network Performance Maps dataset* into the database. Finally, the instance terminates itself to reduce on-going cost.
Once the CloudFormation stack has been deployed, the Amazon AppStream 2.0 QGIS application can be accessed by users via a browser using the instructions provided below.
Prerequisites
To deploy the solution described in this blog, you need the following:
1. An AWS account.
2. An AWS Identity and Access Management (AWS IAM) admin user or role with sufficient permission to create the following resources:
-
- CloudFormation stacks
- Amazon S3 buckets
- Amazon EC2 instances and security groups
- AppStream 2.0 resources such as app blocks, applications, fleets, and stacks.
- AWS Lambda functions
- IAM policies and roles
3. Access to the AWS Management console.
4. A virtual private cloud (VPC) with at least two private subnets and outbound Internet access. The VPC must be located in a Region which supports AppStream 2.0. See AWS Regional Services to determine whether AppStream 2.0 is available in a particular region. If you need assistance with creating the correct networking environment for this blog, you can leverage the VPC Quick Start to build a VPC with private subnets that have outbound connectivity to the Internet and Amazon S3.
5. The AmazonAppStreamServiceAccess service role must be present in your AWS account. This IAM role is automatically created when you first create resources in AppStream 2.0. Visit the Checking for the AmazonAppStreamServiceAccess Service Role and Policies AppStream 2.0 documentation for instructions to check whether this role is present.
Deployment steps
1. Download the CloudFormation template onto your local machine.
2. Visit the AWS CloudFormation console in the Region of your choice. This must be a Region where AppStream 2.0 is supported. Check AWS Regional Services to determine whether AppStream 2.0 is available in a particular Region.
3. Choose Create stack and then choose With new resources (standard).
4. On the Create stack page, select Upload a template and then select the CloudFormation template cloudformation-osgeo4w-appstream.yaml. This is the template you downloaded in Step 1.
5. Provide input for the following parameters. For this guide, it’s recommended that you keep the default values for all other parameters.
- Stack Name: The name of this stack (e.g. QGIS-AppStream-Stack )
- VHDXBucketName: A globally unique name for an Amazon S3 bucket that is created and used to store a VHDX file containing QGIS (e.g. qgis-appstream-<region>-<account_id>)
- AS2Subnet1: A private subnet with outbound Internet access for your AppStream 2.0 fleet.
- AS2Subnet2: A second private subnet with outbound Internet access for your AppStream 2.0 fleet.
- AS2VPC: Select the VPC in which your AppStream 2.0 fleet is deployed. This must match the VPC of the subnets you selected for AS2Subnet1 and AS2Subnet2.
- DBMasterUserPassword: A secure password for DBMasterUsername. This password must contain 8-128 characters and any printable American Standard Code for Information Interchange (ASCII) character except / , ` , or @.
6. Choose Next on the Configure stack options page.
7. Select the following check box:
I acknowledge that AWS CloudFormation might create IAM resources.
8. Choose Create stack. The stack deploys in approximately 30 minutes and creates the following resources:
a. An Amazon S3 bucket and VHD file containing the QGIS application.
b. An AppStream 2.0 application and app block for QGIS.
c. An AppStream 2.0 stack and Elastic fleet
d. A temporary URL which can be used to access QGIS in AppStream 2.0 for one hour after the stack creation time. This allows the administrator to test that the deployment is working as expected and QGIS is populated with test data.
9. In the CloudFormation console, wait for the stack to have a status of CREATE_COMPLETE. Then select your stack and the Output tab. Copy the values for these keys:
a. ReadOnlyUserNameForRDS: The username of a read only user for the sample database. You’ll enter this username into QGIS in a later step.
b. ReadOnlyUserPasswordForRDS: The password for the read only user for the sample database. You’ll enter this password into QGIS in a later step. Long term, we recommend that you change this password.
c. StreamingURL: A temporary URL that can be used to test access to QGIS in your AppStream 2.0 fleet.
 Figure 2. Output values in CloudFormation stack. When your stack has a status of CREATE_COMPLETE, select the Output tab and copy the values for all three keys (ReadOnlyUserNameForRDS, ReadOnlyPasswordForRDS, and StreamingURL). We use these values in a later step.
Note: The streaming URL expires two hours after stack creation and is intended only for the administrator to test the environment. If you want to provide long-term access to your fleet for multiple users, you can create users in User Pools in AppStream 2.0 and assign them to your QGIS stack. Alternatively, you can setup SAML 2.0 federation so that users can access your AppStream 2.0 fleet from an external Identity Provider (IP).
10. In a web browser, navigate to the streaming URL you copied. You should see an AppStream 2.0 catalog with the QGIS application icon (shown in Figure 3).

Figure 3. AppStream 2.0 application catalog. After you navigate to the streaming URL in a browser, you see your AppStream 2.0 application catalog. The QGIS application is available. Click on the QGIS icon to launch the application.
11. Select the QGIS icon to reserve a session and launch the QGIS application. The process to initialize the application takes approximately 3-5 minutes.
12. When the QGIS welcome splash screen appears, select “Let’s get started” and the application launches.
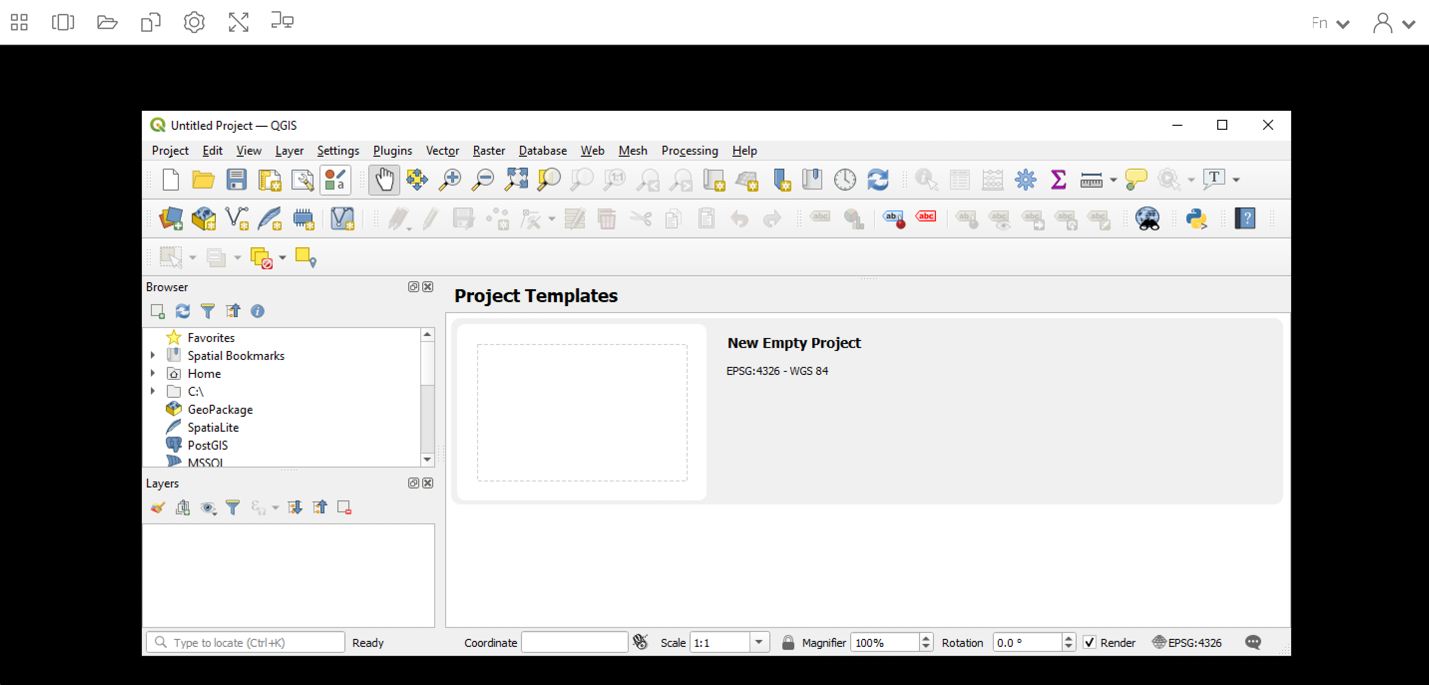
Figure 4. QGIS in AppStream 2.0. Click the QGIS icon in the application catalog and QGIS launches after approximately three minutes. Within QGIS, access the provided sample project via the Project menu.
13. In the QGIS menu, select Project and then Open Project. Open the example project (ookla-example-project.qgis) under C:\Users\PhotonUser\My Files\Temporary Files.
14. When prompted, enter the read only username and the password you copied from the CloudFormation Output tab in an earlier step. Then select Ok.

Figure 5: Enter database credentials: After opening the sample project, you are prompted for database credentials. Enter the credentials you copied from the Output tab of your CloudFormation stack in a previous step.
15. QGIS retrieves the example Ookla dataset from the PostgreSQL database. It may take some time for all data to be retrieved from the database. Each entry in the dataset is the result of an internet speed test. In this example project, speed test results have been color coded (results of less than 1 Mbps are red).
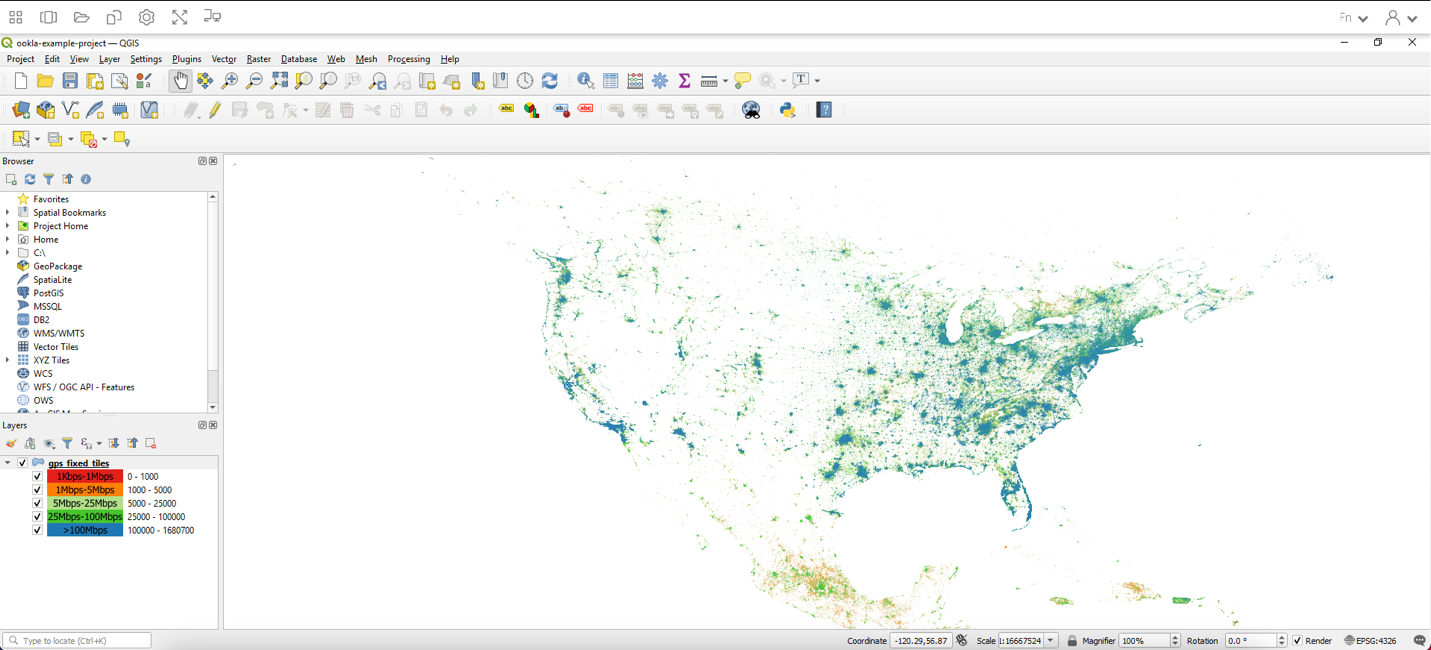
Figure 6. Ookla sample project in QGIS. After you open the sample project and enter database credentials, data populates in QGIS from the RDS database. This data is from Ookla and demonstrates Internet speed around the world.
16. In the previous steps, we used the streaming URL generated by the sample CloudFormation template to access QGIS in your AppStream 2.0 fleet. This URL expires after two hours from its creation and is intended only for the administrator to test the environment. If you’d like to configure long-term access for yourself or others, you can create users in User Pools and assign them to your QGIS in AppStream 2.0 stack. Alternatively, you can setup SAML 2.0 federation so that users can access your AppStream 2.0 fleet from an external Identity Provider like Okta, Azure AD, or AWS SSO.
17. (Optional) By default, AppStream 2.0 provides a non-persistent environment for users. This means that customizations, application settings, and files (including QGIS project files) saved within the session are lost when the session ends. You can provide persistence with the following features:
a. Enable application settings persistence to persist application customizations like user interface (UI) personalization or connection profiles in QGIS across sessions.
b. Enable home folders to persist user data and files (like project files) across AppStream 2.0 sessions. Alternatively, you can take advantage of AppStream 2.0’s native integration with Google Drive for G Suite and OneDrive for Business to provide data persistence for users.
Troubleshooting scenarios
1. Black screen when loading QGIS in AppStream 2.0
This can be caused when your AppStream 2.0 fleet has no network access to Amazon S3 and the VHD for QGIS cannot be downloaded. Check that you’ve deployed your QGIS fleet into a private subnet and that these subnets have a network path to Amazon S3 via either a network address translation (NAT) gateway or VPC gateway endpoint. If you need assistance with creating the correct networking environment for this blog, you can leverage the VPC Quick Start to build a VPC with private subnets that have outbound connectivity to the Internet and S3.
2. CloudFormation stack creation fails with ‘AmazonAppStreamServiceAccess’ is invalid/InvalidRoleException
If you’ve never deployed AppStream resources into your AWS account, you may not have the necessary AmazonAppStreamServiceAccess role. You can create this role automatically by visiting the AppStream 2.0 console and selecting Get Started.
3. CloudFormation stack creation fails with error ‘The parameter MasterUserPassword is not a valid password’
When entering a password for the DBMasterUserPassword parameter in the CloudFormation template, specify a password that contains 8-128 characters and any printable ASCII character except / , ` , or @.
4. CloudFormation stack creation fails with error ‘Your requested instance type (t3.small Windows) is not supported in your requested Availability Zone’
This error may occur if, when deploying the CloudFormation template, you choose an Availability Zone for the AS2Subnet1 parameter that does not support the t3.small instance type. You can resolve the error by either selecting a different Availability Zone for the AS2Subnet1 parameter or modifying the CloudFormation template so that the VHDBuilderEC2Instance resource uses an instance type other than t3.small (e.g. t2.small) which is supported in the Availability Zone.
Clean up
To clean up resources created in this procedure:
- Empty the contents of the Amazon S3 bucket containing the QGIS VHD file.
- Delete the CloudFormation stacks you deployed.
Conclusion
In this blog post, we configured the QGIS application to run in an AppStream 2.0 Elastic fleet. Combining AppStream 2.0 with QGIS benefits GIS practitioners’ performance and ease of access. End users running QGIS in AppStream 2.0 can see improved performance when accessing vector or raster data stored in cloud services like Amazon S3 or Amazon RDS. Plus, users can consistently access QGIS from any device via a web browser, with no need to install and configure QGIS on a local device. This can be helpful for scenarios where end users may have a wide variety of client devices (MacOS, Linux, Windows) such as at conferences, workshops, or in classrooms.
Do you have any questions about this solution, or how Amazon AppStream 2.0 can power your geospatial analytics needs? Reach out to us directly for more, or check out the AWS for Aerospace and Satellite hub and the Research and Technical Computing on AWS hub.
Related resources for geospatial analytics on AWS:
- Analyze terabyte-scale geospatial datasets with Dask and Jupyter on AWS
- Streaming ArcGIS Pro from Amazon AppStream 2.0
- Scheduling satellite contact using AWS Ground Station and Python SDK
*Dataset citation: Speedtest by Ookla Global Fixed and Mobile Network Performance Maps was accessed on February 1, 2022.
Subscribe to the AWS Public Sector Blog newsletter to get the latest in AWS tools, solutions, and innovations from the public sector delivered to your inbox, or contact us.
Please take a few minutes to share insights regarding your experience with the AWS Public Sector Blog in this survey, and we’ll use feedback from the survey to create more content aligned with the preferences of our readers.