AWS Public Sector Blog
Adding an ingress point and data management to your healthcare data lake
Data lakes can help hospitals and healthcare organizations turn data into insights and maintain business continuity, while preserving patient privacy. A data lake is a centralized, curated, and secured repository that stores all your data, both in its original form and prepared for analysis. A data lake enables you to break down data silos and combine different types of analytics to gain insights and guide better business decisions.
In my previous post, “Getting started with a healthcare data lake,” I shared how to get started using data lakes in managing healthcare data and what a good “first sprint” architecture might look like. Here, I walk through building your first solution on Amazon Web Services (AWS) using a healthcare data lake as our example workload.
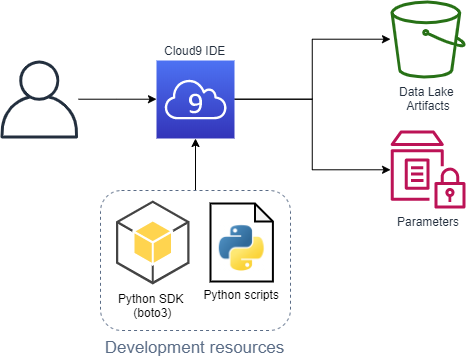
In the first sprint I shared how to do basic processing of HL7 V2 messages, converting them from ER7 to JSON, using open source and serverless technologies. The specific services introduced were Amazon Simple Storage Service (Amazon S3) for object (data) storage, AWS Lambda to run processing logic, AWS CloudFormation to manage infrastructure-as-code, and AWS Cloud9 as the integrated development environment.
In this post, I walk through a possible second iteration. New services introduced are Amazon API Gateway to provide a secured HTTP endpoint, Amazon Cognito to provide user sign-up and authentication, Amazon DynamoDB to be the data catalog, which keeps references between message IDs and the message contents as stored in S3, and AWS Systems Manager Parameter Store as a way to safely hold sensitive and reusable parameters.
For those who followed along with the first blog post, there’s been a significant code clean-up, which is also something one would typically expect as a project moves past its entry point.
“Second sprint” architecture

- To start, the client sends our user authentication credentials (username and password) to Amazon Cognito.
- Amazon Cognito returns a JSON Web Token (JWT).
- The client sends a post request containing both the JWT and an HL7 V2 message in ER7 format to an HTTP endpoint.
- The HTTP endpoint passes the request to our format converting Lambda function.
- The Lambda functions performs the following:
- On success it…
- Writes the original message to the “raw” zone.
- Writes the converted message to the “staging” zone.
- Updates “patient ids” and “messages” data catalog tables.
- Provides basic data lineage by tagging “staging” object with a “data_src” pointing to the “raw” object.
- On failure, it writes the original message to the “error” zone and notes the nature of the problem in the error table.
- On success it…
- The Lambda returns a success or failure response to the API Gateway, which passes it back to the client.
Walkthrough
Environment setup, deployment, and test
- Set up AWS Cloud9 as outlined in “Creating an EC2 Environment.”
- Run the command
git clone -b blog_2 https://github.com/aws-samples/hcls-data-lake.gitto get a copy of the code. - Navigate into the folder with the downloaded code (i.e. “hcls-data-lake”) and refer to
example_commands.txtfor the shell commands referenced next. - Run python
predeploy_artifacts.pyto deploy initial artifacts. - Run the following commands to deploy the stack:
stack="testStack" aws cloudformation create-stack --stack-name $stack --template-body file://hcdl_stack.yml --capabilities CAPABILITY_IAM --parameters ParameterKey=DataLakeBucketName,ParameterValue=healthcare-data-lake-$RANDOM$RANDOM - After the stack completes, run
python admin_create_user.py $stackto create an example Cognito user. - Run the following to send a few test messages. At the time of writing, the first two should succeed and the second two should fail.
username=$(aws ssm get-parameter --name /healthcare-data-lake/$stack/example-user/username --query 'Parameter.Value' --output text)
password=$(aws ssm get-parameter --name /healthcare-data-lake/$stack/example-user/password --with-decryption --query 'Parameter.Value' --output text)
gatewayId=$(aws cloudformation describe-stack-resource --stack-name $stack --logical-resource-id HttpAPI --query 'StackResourceDetail.PhysicalResourceId' --output text)
clientAppId=$(aws cloudformation describe-stack-resource --stack-name $stack --logical-resource-id UserPoolClient --query 'StackResourceDetail.PhysicalResourceId' --output text)
python test_er7_msg.py -s $stack -u $username -p $password -g $gatewayId -c $clientAppId
Predeployment phase
In the predeployment phase, we zip and upload the two Lambda resources, the converting function, and the HL7apy library to a bucket that holds our artifacts. Additionally, we are use the Parameter Store to hold references to these resources.
Note, this was previously part of the single deploy_data_lake.py script, which we have now separated out for better reusability.
Deployment phase

The deployment phase is done through passing our stack template to CloudFormation. There are some notable changes in the template to review.
First, expand on the “Parameters” section. Retain taking the bucket name (now randomly generated at the command line) as an input, but also now make use of the Parameter Store items set in the pre-deployment phase.
ArtifactBucket:
    Description: Bucket with artifacts such as Lambda functions and external libraries
    Type: AWS::SSM::Parameter::Value<String>
    Default: /healthcare-data-lake/artifact-bucket
Second, there are two new Cognito elements: a user pool that serves as a directory for users who are going to be authorized to access the API, and a client app that serves as an interface point to authenticate with the user pool.
Third, there are six new API Gateway elements:
- The API Gateway itself, using HTTP APIs.
- A default stage (lifecycle state), for now we’re not expanding beyond $default.
- An integration describing for our API Gateway how to use our Lambda function.
- An authorizer describing for our API Gateway how to use our Cognito user pool client as an available authorization layer.
- A route with the HTTP method and path we want to provide for users (“
POST /hl7v2/er7“) along with instructions to use our Lambda function and authorizer for it. - A new permission allowing our API Gateway to invoke our Lambda function.
There are now several DynamoDB tables to serve as our comprehensive data catalog.
Creating our example user
One of the main features of Cognito is the ability for users to self-register and sign in through the client app. This process requires confirmation, typically through email or phone, but for the example create the user as an administrator.
As part of the creation process, use a dummy username, generate a random password as per the user pool password requirements, and store both in our Parameter Store.
Sending a message
With all pieces in place, send a test message.
First, pull the needed variables: the username and password from the Parameter Store and the app client ID and API Gateway ID from the stack resources. By using the options, we have to control CLI output to query for the specific items and to have the output in plain text in order to not include things like quotes. We can use the logical resource ID to retrieve the corresponding physical resource ID and directly assign to a variable.
The HTTP request has two main components: the JWT token and the actual HL7 message in ER7 format. Obtain the JWT by authenticating with our app client using the username and password. For the HL7 message, we use a simple sample message and encode it in Base64. We do this to preserve the content in transition and prevent errors from occurring due to special characters (ex. newline, carriage return, quotes, etc.) being embedded as part of the message.
With the required components, put the JWT into the request header and our Base64 encoded string into the request body and send to our HTTP endpoint. If the message is processed successfully, it is added to the data lake bucket and we get a “200 OK” response. If there is an error, we get back a “400 Bad Request.”
Processing the message
Our Lambda function, in addition to parsing and bucket zone placement, now also updates the data catalog.
DynamoDB is a key-value and document database. Each item in the database must have a unique primary key that is composed of a hash/partition key and optionally a range/sort key. The partition key determines where the item is physically stored and the sort key the order items in that partition are kept in. This facilitates efficient queries when designed in accordance with the specific query patterns to be run on the table.
Because HL7 V2 can have multiple patient IDs (PIDs), we put in a simple mapping table to correlate them together with a universally unique identifier (UUID). Because we can expect to be querying by both the UUID and a “local” ID, we make use of a global secondary index (GSI), which allows us to define a completely different primary key on a table. In the design, the main table is uuid (hash) and local (range), and the GSI is local (hash) and uuid (local).
To facilitate efficient message retrieval, we also keep a simple list of messages we’ve received with pointers to their location within the staging bucket.
Making updates to the stack
One of the main reasons the pre-deployment is decoupled from the end architecture is to help make frequent changes through template modification and use CloudFormation to get to the new end state through stack updates.
A complexity that emerges in this comes from our use of a random number in the name of our data lake bucket. This can be remediated by using the stack logical resource id (“DataLakeBucket”) to obtain the physical id as done when sending the test message.
bucketName=$(aws cloudformation describe-stack-resource --stack-name $stack --logical-resource-id DataLakeBucket --query 'StackResourceDetail.PhysicalResourceId' --output text)From here, an update-stack is almost identical to a create-stack.
aws cloudformation update-stack --stack-name $stack --template-body file://hcdl_stack.yml --capabilities CAPABILITY_IAM --parameters ParameterKey=DataLakeBucketName,ParameterValue=$bucketNameSummary
In the words of AWS chief technology officer (CTO) Werner Vogels, “Dance like nobody’s watching, encrypt like everybody is.” The AWS services we are using provide encryption either by default or, at most, with a simple parameter. Thus, we meet encryption in-transit through the HTTPS API Gateway endpoint (though it is called HTTP to distinguish it from REST) and all data at-rest is encrypted in both Amazon S3 and DynamoDB.
Our data lake remains extensible in many directions. Some possible options include:
- Adding the next zone, which typically follows “staging,” “refined,” where we would start leveraging the features provided by AWS Lake Formation for improved security, optimization (such as compaction, partitioning, compression, and formatting), accessibility, and advanced features such as record matching.
- Utilize AWS Step Functions Express Workflows into more granular parts to break up the Lambda function; the idempotency of the transformation operations suits this to their at-least-once workflow execution.
- Expanding usage of API Gateway to include GET operations to query and retrieve data.
- Include an additional ingestion mechanism through Kinesis to collect and process high-volume real-time streaming data.
Leave your thoughts in the comment section, and learn more about how AWS can help your organization by reading about our work in healthcare in the public sector, or contact us.