Artificial Intelligence
Visualizing TensorFlow training jobs with TensorBoard
TensorBoard is an open source toolkit for TensorFlow users that allows you to visualize a wide range of useful information about your model, from model graphs; to loss, accuracy, or custom metrics; to embedding projections, images, and histograms of weights and biases.
This post demonstrates how to use TensorBoard with Amazon SageMaker training jobs, write logs from TensorFlow training scripts to Amazon Simple Storage Service (Amazon S3), and ways to run TensorBoard: locally, using Amazon Elastic Container Service (Amazon ECS) on AWS Fargate, or inside of an Amazon SageMaker notebook instance.
Generating training logs using tf.summary
TensorFlow comes with a tf.summary module to write summary data, which it uses for monitoring and visualization. The module’s API provides methods to write scalars, audio, histograms, text, and image summaries, and can trace information that’s useful for profiling training jobs. An example command to write the accuracy of the first step of training looks like the following:
To use the summary data after the training job is complete, it’s important to write the files to a persistent storage. This way, you can visualize your past jobs or compare different runs during the hyperparameter tuning phase. The tf.summary module allows you to use Amazon S3 as the destination for log files, passing the S3 bucket URI directly into the create_file_writer method. See the following code:
Keras users can use keras.callbacks.TensorBoard as one of the callbacks provided to the Model.fit() method. This callback provides an abstraction of a low-level tf.summary API and collects a lot of the data automatically. With TensorBoard callbacks, you can collect data to visualize training graphs, metrics plots, activation histograms, and run profiling. See the following code:
For a detailed example of how to collect summary data in the training scripts, see the TensorBoard Keras example notebook on the Amazon SageMaker examples GitHub repo or inside a running Amazon SageMaker notebook instance on the Amazon SageMaker Examples tab. This notebook uses TensorFlow 2.2 and Keras to train a Convolutional Neural Network (CNN) to recognize images from the CIFAR-10 dataset. Code in the notebook runs the training job locally inside the notebook instance one time, and then another 10 times during the hyperparameter tuning job. All training jobs write log files under one Amazon S3 prefix, so the log destination path for every run follows the format s3://<bucket_name>/<project_name>/logs/<training_job_name>, where the project name is tensorboard_keras_cifar10.

The notebook also demonstrates how to run TensorBoard inside of the Amazon SageMaker notebook instance. This method has some limitations; for example, the TensorBoard command blocks the run of the notebook and lives as long as the notebook instance is alive, but allows you to quickly access the dashboard and make sure the training is running correctly.
In the following sections, we look at other ways to run TensorBoard.
Running TensorBoard on your local machine
If you want to run TensorBoard locally, the first thing you need to do is to install TensorFlow:
An independent distribution of TensorBoard is also available, but it has limited functionality if run without TensorFlow. For this post, we use TensorBoard as part of the TensorFlow distribution.
Assuming your AWS Command Line Interface (AWS CLI) is installed and configured properly, we simply run TensorBoard pointing to the Amazon S3 directory containing the generated summary data:
You must specify the region where your S3 bucket is located. You can find the right region in the list of buckets on the Amazon S3 console.
The user you use must have read access to the specified S3 bucket. For more information about securely granting access to S3 buckets to a specific user, see Writing IAM Policies: How to Grant Access to an Amazon S3 Bucket.
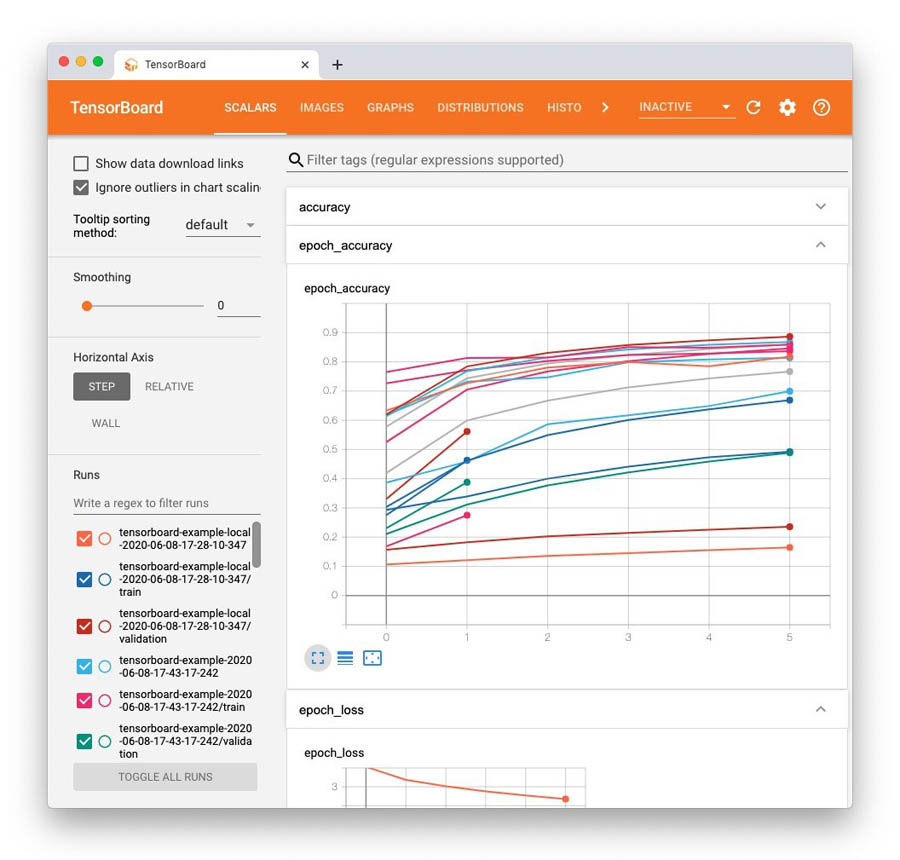
You should see something similar to the following screenshot.
Running TensorBoard on Amazon ECS on AWS Fargate
If you prefer to have an instance of TensorBoard permanently running and accessible to your whole team, you can deploy it as an independent application in the cloud. One of the easiest ways to do this without managing servers is AWS Fargate, a serverless compute engine for containers. The following diagram illustrates this architecture.

You can deploy an example TensorBoard container image with all required roles and an Application Load Balancer by using the provided AWS CloudFormation template:
![]()
This template has five input parameters:
- TensorBoard container image – Use
tensorflow/tensorflowfor a standard distribution or a custom container image if you want to enable the Profiler plugin - S3Bucket – Enter the name of the bucket where TensorFlow logs are stored
- S3Prefix – Enter the path to the TensorFlow logs inside of the bucket; for example,
tensorboard_keras_cifar10/logs/ - VpcId – Select the VPC where you want TensorBoard to be deployed to
- SubnetId – Select two or more subnets in the selected VPC
This example solution doesn’t include authorization and authentication mechanisms. Remember that if you deploy TensorBoard to a publicly accessible subnet, your TensorBoard instance and training logs are accessible to everyone on the internet. You can secure TensorBoard with the following methods:
- Require authorization in the Application Load Balancer settings. For instructions, see Simplify Login with Application Load Balancer Built-in Authentication.
- Deploy TensorBoard into a private subnet and use a VPN to access it. For instructions, see How do I create a secure connection between my office network and Amazon Virtual Private Cloud?
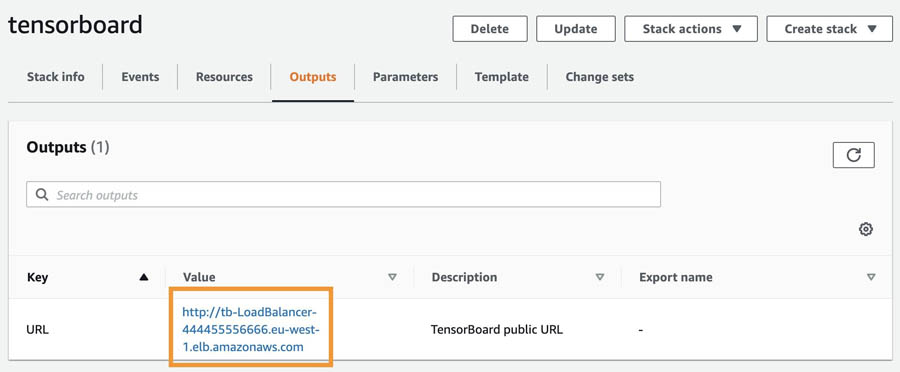
After you create the CloudFormation stack, you can find the link to the deployed TensorBoard on the Outputs tab on the AWS CloudFormation console.
Using a custom TensorBoard container image
Because TensorBoard is part of the TensorFlow distribution, we can use the official tensorflow Docker container image hosted on Docker Hub.
Optionally, we can build a custom image with the optional Profiler TensorBoard plugin to visualize profiling data:
You can build and test the container locally:
After testing the container, you need to push it to a container image repository of your choice. Detailed instructions on deploying an application aren’t in the scope of this post. To set up Amazon ECS and Elastic Load Balancer, see Building, deploying, and operating containerized applications with AWS Fargate.
Conclusion
In this post, I showed you how to use TensorBoard to visualize TensorFlow training jobs using Amazon S3 as storage for the logs. You can use this solution and the example notebooks to build and train a model with Amazon SageMaker and run a hyperparameter tuning job. You can use TensorBoard to compare hyperparameters from different training runs, generate and display confusion matrices for the classifier, and profile and visualize the training job’s performance.
About the Author
 Yegor Tokmakov is a solutions architect at AWS, working with startups. Before joining AWS, Yegor was Chief Technology Officer at a healthcare startup based in Berlin and was responsible for architecture and operations, as well as product development and growth of the tech team. Yegor is passionate about novel AI applications and data analytics. You can find him at @yegortokmakov on Twitter.