AWS Machine Learning Blog
Performing simulations at scale with Amazon SageMaker Processing and R on RStudio
Statistical analysis and simulation are prevalent techniques employed in various fields, such as healthcare, life science, and financial services. The open-source statistical language R and its rich ecosystem with more than 16,000 packages has been a top choice for statisticians, quant analysts, data scientists, and machine learning (ML) engineers. RStudio is an integrated development environment (IDE) designed for data science and statistics for R users. However, an RStudio IDE hosted on a single machine used for day-to-day interactive statistical analysis isn’t suited for large-scale simulations that can require scores of GB of RAM (or more). This is especially difficult for scientists wanting to run analyses locally on a laptop or a team of statisticians developing in RStudio on one single instance.
In this post, we show you a solution that allows you to offload a resource-intensive Monte Carlo simulation to more powerful machines, while still being able to develop your scripts in your RStudio IDE. This solution takes advantage of Amazon SageMaker Processing.
Amazon SageMaker and SageMaker Processing
Amazon SageMaker is a fully managed service that provides every developer and data scientist with the ability to build, train, and deploy ML models quickly. SageMaker removes the heavy lifting from each step of the ML process to make it easier to develop high-quality ML artifacts. Running workloads on SageMaker is easy. When you’re ready to fit a model in SageMaker, simply specify the location of your data in Amazon Simple Storage Service (Amazon S3) and indicate the type and quantity of SageMaker ML instances you need. SageMaker sets up a distributed compute cluster, performs the training, outputs the result to Amazon S3, and tears down the cluster when complete.
SageMaker Processing allows you to quickly and easily perform preprocessing and postprocessing on data using your own scripts or ML models. This use case fits the pattern of many R and RStudio users, who frequently perform custom statistical analysis using their own code. SageMaker Processing uses the AWS Cloud infrastructure to decouple the development of the R script from its deployment, and gives you flexibility to choose the instance it’s deployed on. You’re no longer limited to the RAM and disk space limitations of the machine you develop on; you can deploy the simulation on a larger instance of your choice.
Another major advantage of using SageMaker Processing is that you’re only billed (per second) for the time and resources you use. When your script is done running, the resources are shut down and you’re no longer billed beyond that time.
Statisticians and data scientists using the R language can access SageMaker features and the capability to scale their workload via the Reticulate library, which provides an R interface to the SageMaker Python SDK library. Reticulate embeds a Python session within your R session, enabling seamless, high-performance interoperability. The Reticulate package provides an R interface to make API calls to SageMaker with the SageMaker Python SDK. We use Reticulate to interface SageMaker Python SDK in this post.
Alternatively, you can access SageMaker and other AWS services via Paws. Paws isn’t an official AWS SDK, but it covers most of the same functionality as the official SDKs for other languages. For more information about accessing AWS resources using Paws, see Getting started with R on Amazon Web Services.
In this post, we demonstrate how to run non-distributed, native R programs with SageMaker Processing. If you have distributed computing use cases using Spark and SparkR within RStudio, you can use Amazon EMR to power up your RStudio instance. To learn more, see the following posts:
- Statistical Analysis with Open-Source R and RStudio on Amazon EMR
- Crunching Statistics at Scale with SparkR on Amazon EMR
- Launch an edge node for Amazon EMR to run RStudio
- Deploy an Amazon EMR edge node with RStudio using AWS Systems Manager
Use case
In many use cases, more powerful compute instances are desired for developers conducting analyses on RStudio. For this post, we consider the following use case: the statisticians in your team have developed a Monte Carlo simulation in the RStudio IDE. The program requires some R libraries and it runs smoothly with a small number of iterations and computations. The statisticians are cautious about running a full simulation because RStudio is running on an Amazon Elastic Compute Cloud (Amazon EC2) instance shared by 10 other statisticians on the same team. You’re all running R analyses at a certain scale, which that makes the instance very busy most of the time. If anyone starts a full-scale simulation, it slows everyone’s RStudio session and possibly freezes the RStudio instance.
Even for a single user, running a large-scale simulation on a small- or a mid-sized EC2 instance is a problem that this solution can solve.
To walk through the solution for this use case, we designed a Monte Carlo simulation: given an area of certain width and length and a certain number of people, the simulation randomly places the people in the area and calculates the number of social distancing violations; each time a person is within 6 units of another, two violations are counted (because each person is violating the social distance rules). The simulation then calculates the average violation per person. For example, if there are 10 people and two violations, the average is 0.2. How many violations occur is also a function of how the people in the area are positioned. People can be bunched together, causing many violations, or spread out, causing fewer violations. The simulation performs many iterations of this experiment, randomly placing people in the area for each iteration (this is the characteristic that makes it a Monte Carlo simulation).
Solution overview
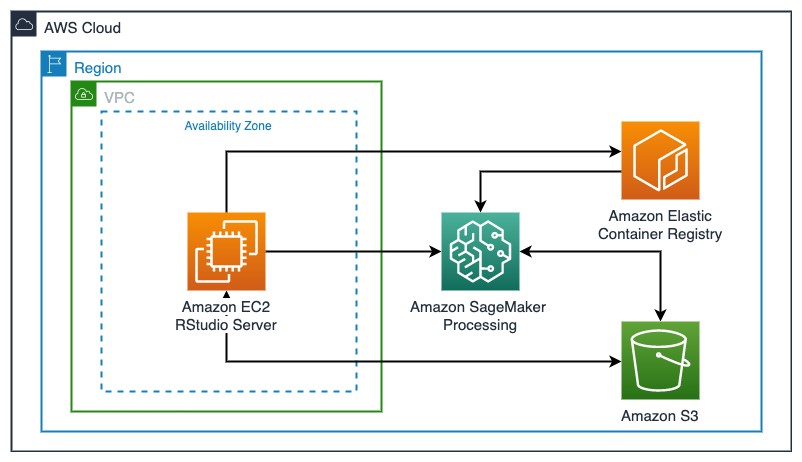
With a couple of lines of R code and a Docker container that encapsulates the runtime dependencies, you can dispatch the simulation program to the fully managed SageMaker compute infrastructure with the desired compute resources at scale. You can interactively submit the simulation script from within RStudio hosted on an EC2 instance to SageMaker Processing with a user-defined Docker container hosted on Amazon Elastic Container Registry (Amazon ECR) and data located on Amazon S3 (we discuss Docker container basics in the Building an R container in RStudio IDE and hosting it in Amazon ECR section). SageMaker Processing takes care of provisioning the infrastructure, running the simulation, reading and saving the data to Amazon S3, and tearing tear down the compute without any manual attention on the infrastructure.
The following diagram illustrates this solution architecture.
Deploying the resources
We first deploy an RStudio Server on an EC2 instance inside a VPC using an AWS CloudFormation template, which is largely based on the post Using R with Amazon SageMaker with some modifications. In addition to the RStudio Server, we install the Docker engine, SageMaker Python SDK, and Reticulate as part of the deployment. To deploy your resources, complete the following steps:
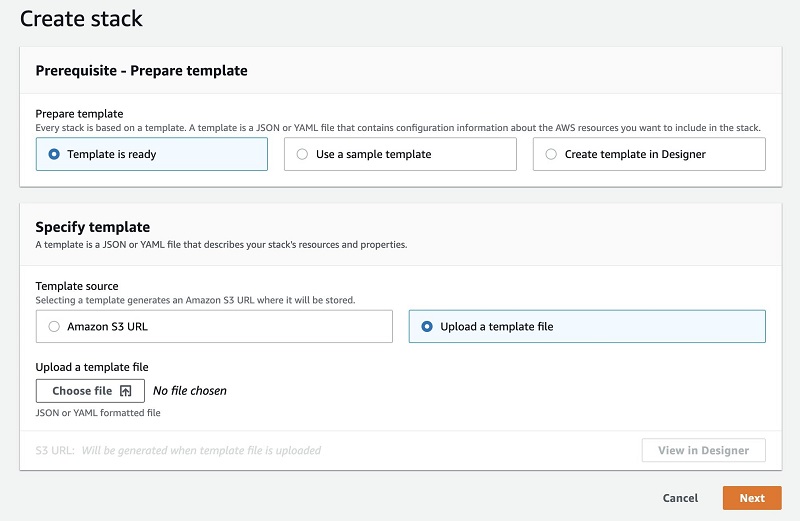
- Download the CloudFormation template
- On the AWS CloudFormation console, choose Template is ready.
- Choose Upload a template file.
- Choose Choose file.
- Upload the provided
ec2_ubuntu_rstudio_sagemaker.yamltemplate.
The template is designed to work in the following Regions:
us-east-1us-east-2us-west-2eu-west-1
In the YAML file, you can change the instance type to a different instance. For this workload, we recommend an instance no smaller than a t3.xlarge for running RStudio smoothly.
- Choose Next.
- For Stack name, enter a name for your stack.
- For AcceptRStudioLicenseAndInstall, review and accept the AGPL v3 license for installing RStudio Server on Amazon EC2.
- For KeyName, enter an Amazon EC2 key pair that you have previously generated to access an Amazon EC2 instance.
For instructions on creating a key pair, see Amazon EC2 key pairs and Linux instances.
- Choose Next.
- In the Configure stack options section, keep everything at their default values.
- Choose Next.
- Review the stack details and choose Create stack.
Stack creation takes about 15-20 minutes to complete.
- When stack creation is complete, go to the stack’s Outputs tab on the AWS CloudFormation console to find the RStudio IDE login URL:
ec2-xx-xxx-xxx-xxx.us-west-2.compute.amazonaws.com:8787. - Copy the URL and enter it into your preferred browser.
You should then see the RStudio sign-in page, as in the following screenshot.
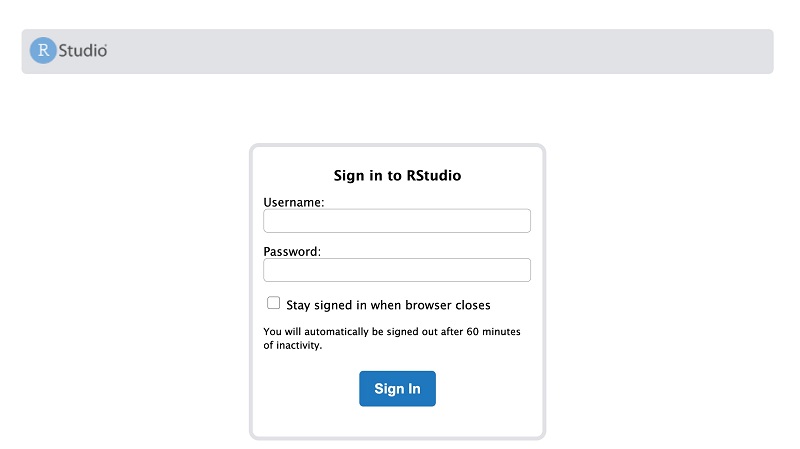
- Log in to the RStudio instance with the username
ubuntuand passwordrstudio7862.
This setup is for demonstration purposes. Using a public-facing EC2 instance and simple login credential is not the best security practice to host your RStudio instance.
You now clone the code repository via the command-line terminal in the RStudio IDE.
- Switch to Terminal tab and execute the command:
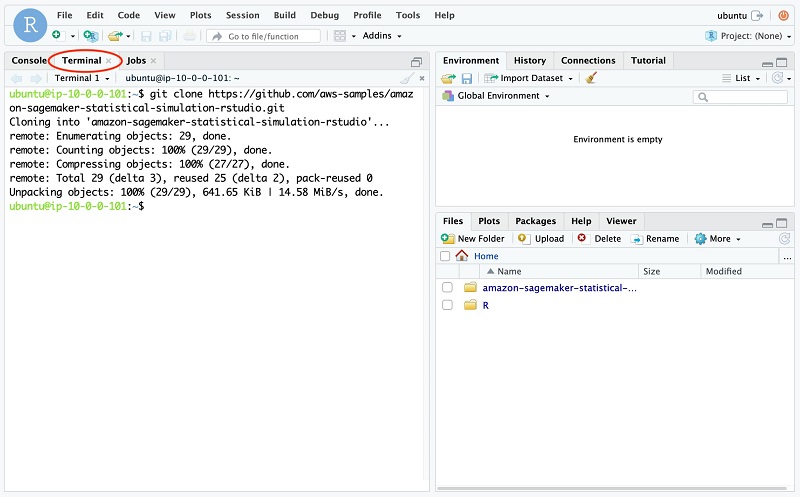
This repository contains the relevant scripts needed to run the simulations and the files to create our Docker container.
Running small simulations locally
On the R console (Console tab), enter the following code to set the working directory to the correct location and install some dependencies:
For illustration purposes, we run small simulations on the development machine (the EC2 instance that RStudio is installed on). You can also find the following code in the script Local_Simulation_Commands.R.
On the R Console, we run a very small simulation with 10 iterations:
The result is a mean number of 0.11 violations per person, and the time it took to calculate this result was about 5.5 seconds on a t3.xlarge (the precise number of violations per person and time it takes to perform the simulation may vary).
You can play around with running this simulation with different numbers of iterations. Every tenfold increase corresponds to approximately a tenfold increase in the time needed for the simulation. To test this, I ran this simulation with 10,000 iterations, and it finished after 1 hour and 33 minutes. Clearly, a better approach is needed for developers. (If you’re interested in running these, you can find the code in Local_Simulation_Commands.R.)
Building an R container in RStudio IDE and hosting it in Amazon ECR
SageMaker Processing runs your R scripts with a Docker container in a remote compute infrastructure. In this section, we provide an introduction to Docker, how to build a Docker container image, and how to host it in AWS to use in SageMaker Processing.
Docker is a software platform that allows you to build once and deploy applications quickly into any compute environment. Docker packages software into standardized units called containers that have everything the software needs to run, including libraries, system tools, code, and runtime. Docker containers provide isolation and portability for your workload.
A Docker image is a read-only template that defines your container. The image contains the code to run, including any libraries and dependancies your code needs. Docker builds images by reading the instructions from a Dockerfile, which is a text document that contains all the commands you can call on the command line to assemble an image. You can build your Docker images from scratch or base them on other Docker images that you or others have built.
Images are stored in repositories that are indexed and maintained by registries. An image can be pushed into or pulled out of a repository using its registry address, which is similar to a URL. AWS provides Amazon ECR, a fully managed Docker container registry that makes it easy to store, manage, and deploy Docker container images.
Suppose that the Social_Distancing_Simulations.R was originally developed with R 3.4.1 Single Candle from a version of RStudio on ubuntu 16.04. The program uses the library doParallel for parallelism purposes. We want to run the simulation using a remote compute cluster exactly as developed. We need to either install all the dependencies on the remote cluster, which can be difficult to scale, or build a Docker image that has all the dependencies installed in the layers and run it anywhere as a container.
In this section, we create a Docker image that has an R interpreter with dependent libraries to run the simulation and push the image to Amazon ECR so that, with the image, we can run our R script the exact way on any machine that may or may not have the compatible R or the R packages installed, as long as there is a Docker engine on the host system. The following code is the Dockerfile that describes the runtime requirement and how the container should be executed.
Each line is an instruction to create a layer for the image:
FROMcreates a layer from theubuntu:16.04Docker imageRUNruns shell command lines to create a new layerENTRYPOINTallows you configure how a container can be run as an executable
The Dockerfile describes what dependency (ubuntu 16.04, r-base, or doParallel) to include in the container image.
Next, we need to build a Docker image from the Dockerfile, create an ECR repository, and push the image to the repository for later use. The provided shell script build_and_push_docker.sh performs all these actions. In this section, we walk through the steps in the script.
Execute the main script build_and_push_docker.sh that we prepared for you in the terminal:
The shell script takes two input arguments: a name for the container image and repository, followed by a tag name. You can replace the name r_simulation_container with something else if you want. v1 is the tag of the container, which is the version of the container. You can change that as well. If you do so, remember to change the corresponding repository and image name later.
If all goes well, you should see lots of actions and output indicating that Docker is building and pushing the layers to the repository, followed by a message like the following:
You may receive warnings regarding storage of credentials. These warnings don’t interfere with pushing the container to ECR, but can be fixed. For more information, see Credentials store.
In the script, the docker build command builds the image and its layers following the instruction in the Dockerfile:
The following commands interact with Amazon ECR to create a repository:
Finally, the script tags the image and pushes it to the ECR repository:
At this point, we have created a container and pushed it to a repository in Amazon ECR. We can confirm it exists on the Amazon ECR console.
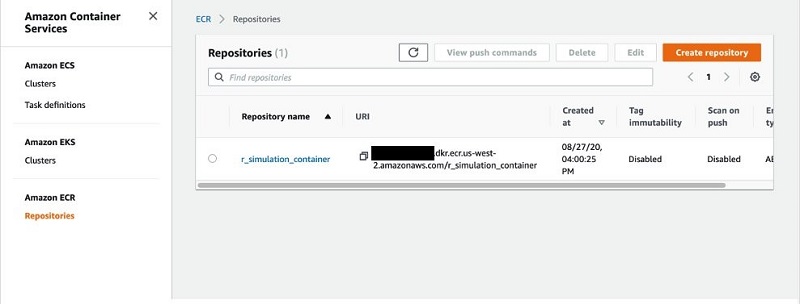
Copy and save the URI for the image; we need it in a later step.
We can use this image repeatedly to run any R scripts that use doParallel. If you have other dependencies, either R native packages that can be downloaded and installed from CRAN (the Comprehensive R Archive Network) with install.packages() or packages that have other runtime dependencies. For instance, RStan, a probabilistic package that implements full Bayesian statistical inference via Markov Chain Monte Carlo that depends on Stan and C++, can be installed into a Docker image by translating their installation instructions in a Dockerfile.
Modifying your R script for SageMaker Processing
Next, we need to modify the existing simulation script so it can talk to the resources available to the running container in the SageMaker Processing compute infrastructure. The resource we need to make the script aware is typically input and output data from S3 buckets. The SageMaker Processing API allows you to specify where the input data is and how it should be mapped to the container so you can access programmatically in the script.
For example, in the following diagram, if you specify the input data s3://bucket/path/to/input_data to be mapped to /opt/ml/processing/input, you can access your input data within the script and container in /opt/ml/processing/input. SageMaker Processing manages the data transfer between the S3 buckets and the container. Similarly, for output, if you need to persist any artifact, you can save the them to /opt/ml/processing/output within the script. The files are then available in the s3://bucket/path/to/output_data.

The only change for the Social_Distancing_Simulations.R script is where the output file gets written to. Instead of a file path on the local EC2 instance, we change it to write to /opt/ml/processing/output/output_result_mean.txt.
Submitting your R script to SageMaker Processing
Very large simulations may be slow on a local machine. As we saw earlier, doing 10,000 iterations of the social distancing simulation takes about 1 hour and 33 minutes on the local machine using 1 vCPU. Now we’re ready to run the simulation with SageMaker Processing.
With SageMaker Processing, we can use the remote compute infrastructure to run the simulation and free up the local compute resources. SageMaker spins up a Processing infrastructure, takes your script, copies your input data from Amazon S3 (if any), and pulls the container image from Amazon ECR to perform the simulation.
SageMaker fully manages the underlying infrastructure for a Processing job. Cluster resources are provisioned for the duration of your job, and cleaned up when a job is complete. The output of the Processing job is stored in the S3 bucket you specified. You can treat your RStudio instance as a launching station to submit simulations to remote compute with various parameters or input datasets.
The complete SageMaker API is accessible through the Reticulate library, which provides an R interface to make calls to the SageMaker Python SDK. To orchestrate these steps, we use another R script.
Copy the following code into the RStudio console. Set the variable container to the URI of the container with the tag (remember to include the tag, and not just the container). It should look like XXXXXXXXXXXX.dkr.ecr.us-west-2.amazonaws.com/r_simulation_container:v1. You can retrieve this URI from the Amazon ECR console by choosing the r_simulation_container repository and copying the relevant URI from the Image URI field (this code is also in the SageMaker_Processing_SDS.R script):
In the preceding code, we’re off-loading the heavy simulation work to a remote, larger EC2 instance (instance_type = 'ml.m5.4xlarge'). Not only do we not consume any local compute resources, but we also have an opportunity to optimally choose a right-sized instance to perform the simulation on a per-job basis. The machine that we run this simulation on is a general purpose instance with 64 GB RAM and 16 virtual CPUs. The simulation runs faster in the right-sized instance. For example, when we used the ml.m5.4xlarge (64 GB RAM and 16 vCPUs), the simulation took 10.8 minutes. By way of comparison, we performed this exact same simulation on the local development machine using only 1 vCPU and the exact same simulation took 93 minutes.
If you want to run another simulation that is more complex, with more iterations or with a larger dataset, you don’t need to stop and change your EC2 instance type. You can easily change the instance with the instance_type argument to a larger instance for more RAM or virtual CPUs, or to a compute optimized instance, such as ml.c5.4xlarge, for cost-effective high performance at a low price per compute ratio.
We configured our job (by setting wait = TRUE) to run synchronously. The R interpreter is busy until the simulation is complete even though the job is running in a remote compute. In many cases (such as simulations that last many hours) it’s more useful to set wait = FALSE to run the job asynchronously. This allows you to proceed with your script and perform other tasks within RStudio while the heavy-duty simulation occurs via the SageMaker Processing job.
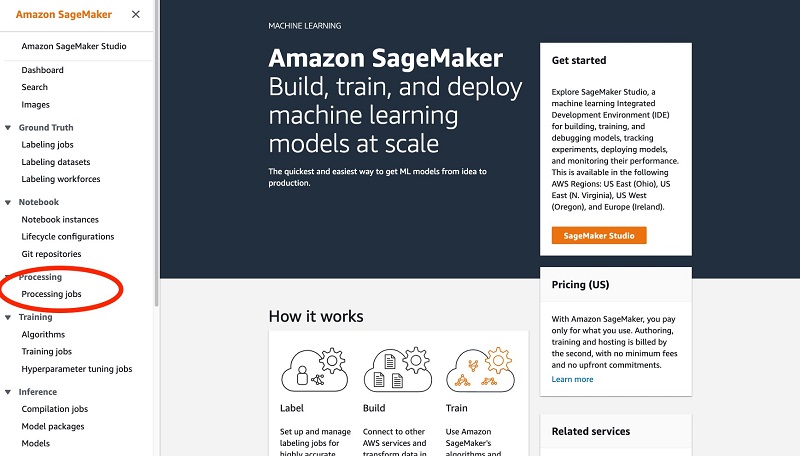
You can inspect and monitor the progress of your jobs on the Processing jobs page on the SageMaker console (you can also monitor jobs via API calls).
The following screenshot shows the details of our job.

The Monitoring section provides links to Amazon CloudWatch logs for your jobs. This important feature allows you to monitor the logs in near-real time as the job runs, and take necessary action if errors or bugs are detected.
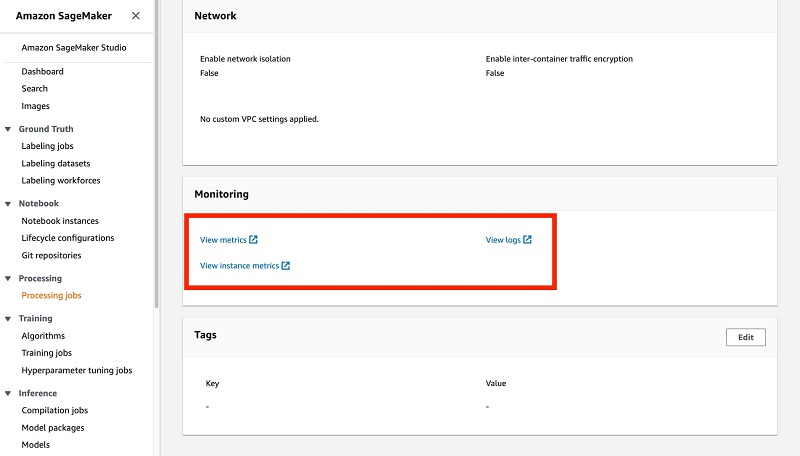
Because logs are reported in near-real time, you don’t have to wait until an entire job is complete to detect problems; you can rely on the emitted logs.
For more information about how SageMaker Processing runs your container image and simulation script, see How Amazon SageMaker Processing Runs Your Processing Container Image.
Accessing simulation results from your R script
Your processing job writes its results to Amazon S3; you can control what is written and in what format it’s written. The Docker container on which the processing job runs writes out the results to the /opt/ml/processing/output directory; this is copied over to Amazon S3 when the processing job is complete. In the Social_Distancing_Simulations.R script, we write the mean of the entire simulation run (this number corresponds to the mean number of violations per person in the room). To access those results, enter the following code (this code is also in SageMaker_Processing_SDS.R script):
In the preceding code, we point to the S3 bucket where the results are stored, read the result, and display it. For our use case, our processing job only writes out the mean of the simulation results, but you can configure it to write other values as well.
The following table compares the total time it took us to perform the simulation on the local machine one time, as well as two other instances you can use for SageMaker Processing. For these simulations, the number of iterations changes, but x_length, y_length, and num_people equal 1000 in all cases.
| Instance Type | |||
| Number of Iterations | t3.xlarge (local machine) | ml.m5.4xlarge (SageMaker Processing) | ml.m5.24xlarge (SageMaker Processing) |
| 10 | 5.5 (seconds) | 254 | 285 |
| 100 | 87 | 284 | 304 |
| 1,000 | 847 | 284 | 253 |
| 10,000 | 5602 | 650 | 430 |
| 100,000 | Not Tested | Not Tested | 1411 |
For testing on the local machine, we restrict the number of virtual CPUs (vCPU) to 1; the t3.xlarge has 4 vCPUs. This restriction mimics a common pattern in which a large machine is shared by multiple statisticians, and one statistician might not distribute work to multiple CPUs for fear of slowing down their colleagues’ work. For timing for the ml.m5.4xlarge and the ml.m5.24xlarge instances, we use all vCPUs and include the time taken by SageMaker Processing to bring up the requested instance and write the results, in addition to the time required to perform the simulation itself. We perform each simulation one time.
As you can see from the table, local machines are more efficient for fewer iterations, but larger machines using SageMaker Processing are faster when the number of iterations gets to 1,000 or more.
(Optional) Securing your workload in your VPC
So far, we have submitted the SageMaker Processing jobs to a SageMaker managed VPC and accessed the S3 buckets via public internet. However, in healthcare, life science, and financial service industries, it’s usually required to run production workloads in a private VPC with strict networking configuration for security purposes. It’s a security best practice to launch your SageMaker Processing jobs into a private VPC where you can have more control over the network configuration and access the S3 buckets via an Amazon S3 VPC endpoint. For more information and setup instructions, see Give SageMaker Processing Jobs Access to Resources in Your Amazon VPC.
We have provisioned an Amazon S3 VPC endpoint attached to the VPC as part of the CloudFormation template. To launch a job into a private VPC, we need to add the network configuration to an additional argument network_config to the ScriptProcessor construct:
When you run processor$run(...), the SageMaker Processing job is forced to run inside the specified VPC rather than the SageMaker managed VPC, and access the S3 bucket via the Amazon S3 VPC endpoint rather than public internet.
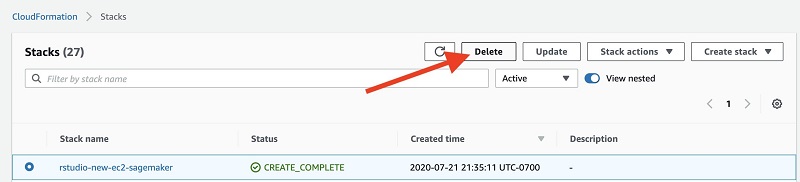
Cleaning up
When you complete this post, delete the stack from the AWS CloudFormation console by selecting the stack and choosing Delete. This cleans up all the resources we created for this post.
Conclusion
In this post, we presented a solution using SageMaker Processing as a compute resource extension for R users performing statistical workload on RStudio. You can obtain the scalability you desire with a few lines of code to call the SageMaker API and a reusable Docker container image, without leaving your RStudio IDE. We also showed how you can launch SageMaker Processing jobs into your own private VPC for security purposes.
A question that you might be asking is: Why should the data scientist bother with job submission in the first place? Why not just run RStudio on a very, very large instance that can handle the simulations locally? The answer is that although this is technically possible, it could be expensive, and doesn’t scale to teams of even small sizes. For example, assume your company has 10 statisticians that need to run simulations that use up to 60 GB of RAM; they need to run in aggregate 1,200 total hours (50 straight days) of simulations. If each statistician is provisioned with their own m5.4xlarge instance for 24/7 operation, it costs about 10 * 24 * 30 * $0.768 = $5,529 a month (on-demand Amazon EC2 pricing in us-west-2 as of December 2020). By comparison, provisioning one m5.4xlarge instance to be shared by 10 statisticians to perform exploratory analysis and submit large-scale simulations in SageMaker Processing costs only $553 a month on Amazon EC2, and an additional $1,290 for the 1,200 total hours of simulation on ml.m5.4xlarge SageMaker ML instances ($1.075 per hour).
For more information about R and SageMaker, see the R User Guide to Amazon SageMaker. For details on SageMaker Processing pricing, see the Processing tab on Amazon SageMaker pricing.
About the Authors

Michael Hsieh is a Senior AI/ML Specialist Solutions Architect. He works with customers to advance their ML journey with a combination of AWS ML offerings and his ML domain knowledge. As a Seattle transplant, he loves exploring the great mother nature the city has to offer, such as the hiking trails, scenery kayaking in the SLU, and the sunset at the Shilshole Bay.

Joshua Broyde is an AI/ML Specialist Solutions Architect on the Global Healthcare and Life Sciences team at Amazon Web Services. He works with customers in healthcare and life sciences on a number of AI/ML fronts, including analyzing medical images and video, analyzing machine sensor data and performing natural language processing of medical and healthcare texts.