Networking & Content Delivery
How to automatically parse Route 53 Resolver query logs
September 8, 2021: Amazon Elasticsearch Service has been renamed to Amazon OpenSearch Service. See details.
Introduction
For the majority of applications, DNS resolution is an essential requirement, whether they’re running on premises or in the cloud. Inside each of your Amazon VPCs, name resolution is provided by the Route 53 Resolver service. Being the center of all VPC DNS resolution gives Route 53 Resolver unique visibility into any DNS queries your VPC resources make. The launch of Route 53 Resolver query logging makes it easy to access this information. You can find out exactly what names were queried, by which resource, and see the response. This is useful for troubleshooting, security, and to better understand your network.
Route 53 Resolver handles all DNS queries from resources inside VPCs. It’s capable of resolving public domains in addition to any private hosted zones associated with your VPCs. You can even integrate it with on-premises environments through Route 53 Resolver endpoints.
In this blog post, we show how to automatically parse Route 53 Resolver query logs. Our example shows how to mark any query for a domain matching a pre-defined list, and identify where it came from. For example, you could use this to find out when an EC2 instance sends a DNS query for a potentially malicious hostname known for distributing malware.
Solution overview
Identifying queries
When you turn on Route 53 Resolver logging for a VPC, you specify where you’d like to send the logs:
- Amazon S3 bucket
- Amazon CloudWatch Logs
- Amazon Kinesis Data Firehose Delivery Stream
The first two are a good choice for long-term storage and batch processing of data. Here, in order to handle large volumes of incoming streaming log data in near-real-time, we are using Kinesis Data Firehose as the log destination.
The following diagram shows the complete log parsing architecture.
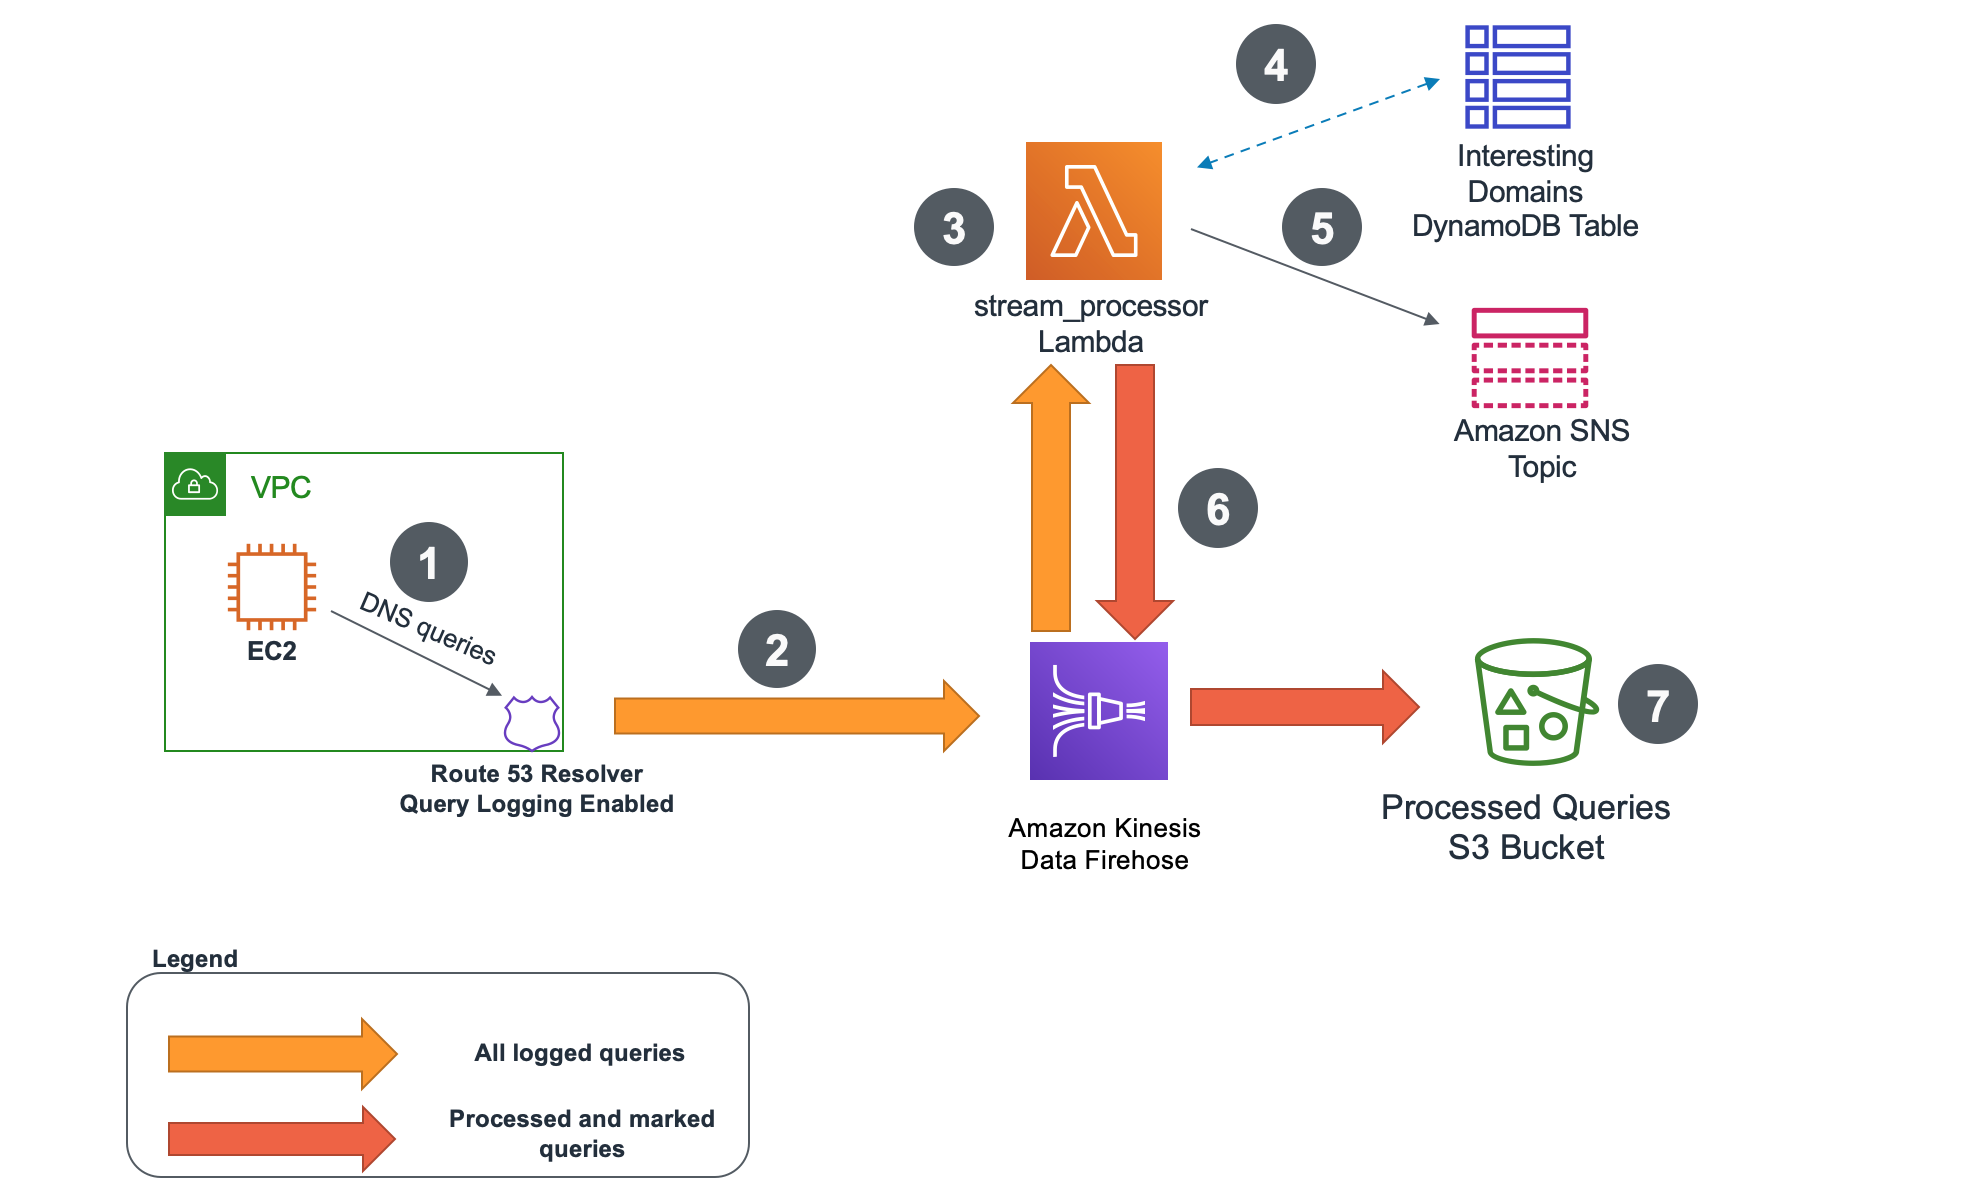
Figure 1: Architecture overview
- An EC2 instance, or any other VPC-based resource, sends DNS queries to Route 53 Resolver.
- Route 53 Resolver query logging is configured to forward all DNS query logs to Kinesis Data Firehose delivery stream.
- An AWS Lambda stream_processor function processes all the incoming logs. It uses a Python TLD library to validate if the query is for a valid top-level domain. It also extracts the first-level* domain from the query.
- The stream_processor function checks if first-level domain from the query is listed in an Amazon DynamoDB table of interesting domains. This table contains all the domains that we want to track queries for.
- Optionally, the stream_processor Lambda function can send a notification to Amazon Simple Notification Service topic for each found match. Subscribers to the topic can receive email or SMS messages.
- Before being forwarded back to Kinesis Data Firehose delivery stream, each processed query would get a new field added to it titled: isMatchedDomain. If the first-level domain from the query matches any of the first-level domains from the DynamoDB table that field would get updated to ‘Y’. If the query wasn’t a match, it would be set to ‘N’.
- Finally, all the queries would get forwarded to an S3 bucket of your choice for further analysis. For example, you can use Amazon Athena to analyze the Amazon S3 data in bulk.
* In the context of this blog post we’re using the same terminology as the Python TLD library. The first-level domain refers to the registered domain (example.com or example.co.uk) and top-level domain to the extension (.com, .co.uk).
The diagram that follows shows an example Route 53 Query log before and after being processed by stream_processor Lambda function. The processed version has a new field added that indicates if the query was identified as matching an interesting domain in the DynamoDB table.

Figure 2: Route 53 Resolver log processing result
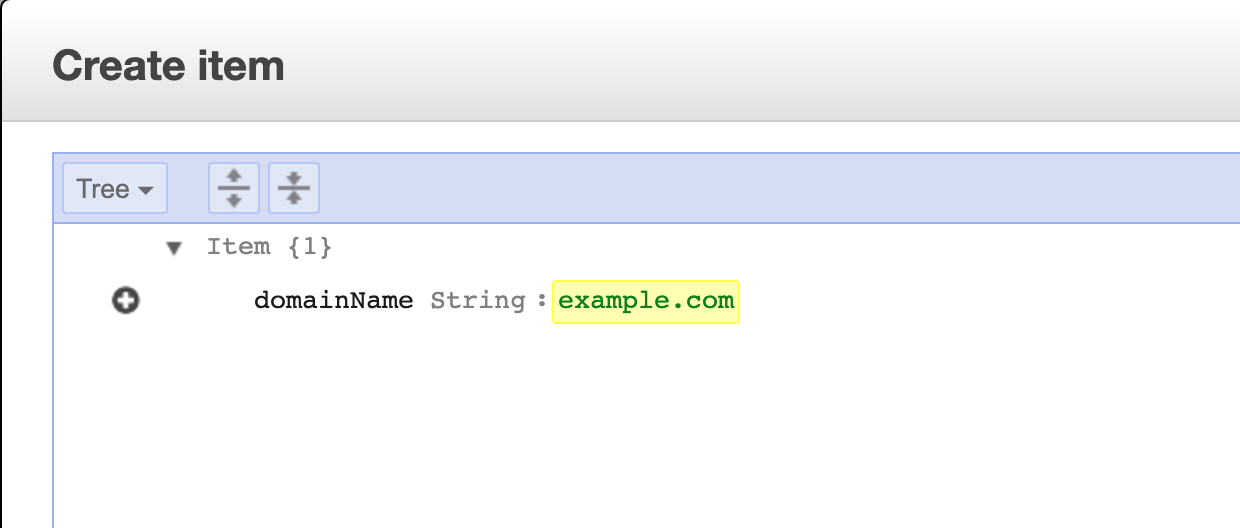
Importing interesting domains (optional)
The preceding architecture relies on a DynamoDB table with a list of interesting domains to match queries against. You can populate that list manually or you can import using the Lambda-based mechanism included in the solution. The import process is described below.

Figure 3: Importing interesting domains to DynamoDB table
- Administrator uploads a list of domains in text format into an S3 bucket. The import_interesting_domains Lambda is using regular expressions to pull out only the domains from a list and ignores any non-domain entries.
- The import_interesting_domains Lambda function parses the list and using Python TLD library extracts only valid first-level domains. This means that non-existent top-level domains do not get imported.
- Only valid first-level domains get added to the DynamoDB table. For example, foo.bar.example.com would get imported as example.com.
Prerequisites
The solution covered in this post consists out of multiple components—Lambda functions, S3 buckets, DynamoDB table, SNS topic, and Kinesis Data Firehose delivery stream. You also must create the right IAM roles and policies to ensure that the components have the right permissions to communicate to one another.
To streamline the setup process, we use AWS Serverless Application Model (AWS SAM). All the components and their interactions are defined in the AWS SAM template that can be easily deployed into your AWS account.
To use the AWS SAM Command Line Interface (CLI), you need the following tools.
- AWS SAM CLI – Install the AWS SAM CLI
- Python 3.8 installed
Walkthrough
Deploy the AWS SAM template
1. Download the AWS SAM template including all the code from the AWS Samples GitHub repository.
2. Go into the directory with the downloaded files and run the commands below. The details of all parameters are described in the README.md. Make sure to provide globally unique values for the S3 buckets created as part of the process.
#Build an AWS SAM template

 sam build
#Deploy AWS SAM template while providing parameters for each component
sam deploy -guided
NOTE: Depending on the size of your environment and volume of Route 53 Resolver Query logs, you must adjust the deployment parameters accordingly. Refer to the GitHub repository for details on each parameter.
3. Wait for the stack to deploy successfully
Successfully created/updated stack
4. In the AWS Management Console, go to AWS CloudFormation section in the Region you specified in ‘sam deploy’ command. Inspect the output of the AWS CloudFormation template created by AWS SAM. You need the details of the resources you’ve created in further sections.
Import interesting domains
Now that you have all the components deployed you can populate the DynamoDB table with first-level domains you want to identify. You can import a list you already have, use an open source list (like this one), or manually add domain names directly to the table. Make sure you upload a file in text format.
1. To import a list with domains, go to AWS Management Console S3 service and find the S3 bucket you created in the previous step. The AWS CloudFormation template has it under the ID of ‘S3InterestingDomainsBucketOutput’.
2. Upload the file in text format to the S3 bucket. Only valid domains in the file are imported. Non-domain entries and domains with invalid or non-existing TLDs are ignored.
3. Go to DynamoDB table created as part of your AWS SAM deployment and see if it’s populated with domains. If you want, you can manually add your own entries.
Enable Route 53 Resolver Query logging
1. Go to Route 53 section of AWS Management Console and open Query logging tab.
2. Select Configure query logging

3. Name your configuration and select Kinesis Data Firehose delivery stream as the destination for your logs. Use the delivery stream created during AWS SAM template deployment (it should appear in the list).

4. Select the VPCs you want to log queries for and complete the configuration. If you don’t have an Amazon VPC, follow these instructions to create one and an Amazon EC2 instance.
5. To validate it’s working, connect to the EC2 instance in a VPC with query logging enabled and generate queries for domains listed in your DynamoDB table. All matched queries should be marked irrespective if they resolve successfully or not.
Example DNS query using dig command line tool:
dig foo.bar.example.com
The setup is completed. The queries in the VPCs with logging enabled are going through the Kinesis Data Firehose delivery stream and are checked against the DynamoDB table. Before being forwarded to the destination S3 bucket, the logs get a new field added to them – isMatchedDomain. Every query matching a domain from the list gets a value of ‘Y’ for that field. If there was no match, it gets an ‘N’.
To receive notification for any matched queries, you must subscribe to the SNS topic created during the initial AWS SAM template deployment. Follow this guide to learn how to create a subscription. You can also find the topic name in the Output section of the AWS SAM CLI CloudFormation teamplate.
Inspect the results
Having marked logs in an S3 buckets opens up many possibilities for what you can do with them. You can configure another Lambda function to listen for any incoming logs and set up your own logic to perform an action. You can perform data analysis using Amazon Athena and visualization using Amazon QuickSight or Amazon Elasticsearch.
Covering all the options is outside of the scope of this post, but we’re including a sample Athena query that runs on the destination S3 bucket to identify all matched queries.
If this is the first time you’re setting up Amazon Athena in your AWS Account follow this guide to create a database before continuing to the next step.
1. Go into Athena console and go to Query editor
2. Create a table from the S3 bucket used as your log destination. Alternatively you could use AWS Glue Crawler to identify the schema of your data.
CREATE EXTERNAL TABLE IF NOT EXISTS default.route53query (
`version` float,
`account_id` string,
`region` string,
`vpc_id` string,
`query_timestamp` string,
`query_name` string,
`query_type` string,
`query_class` string,
`rcode` string,
`answers` array<string>,
`srcaddr` string,
`srcport` int,
`transport` string,
`srcids` string,
`isMatchedDomain` string
)
ROW FORMAT SERDE 'org.openx.data.jsonserde.JsonSerDe'
WITH SERDEPROPERTIES (
'serialization.format' = '1'
) LOCATION 's3://<YOUR-S3-BUCKET>/dns-query-logs/'
TBLPROPERTIES ('has_encrypted_data'='false');

3. The preceding command creates a table named route53query. You can now run a query on that table to find all of the records that matched against the DynamoDB table, and see what generated them.
SELECT query_name,srcaddr,srcids,vpc_id
FROM "default"."route53query"
WHERE isMatchedDomain = 'Y';
The results are available at the bottom of the page. You can decide which fields you are interested in seeing and you can add them to the query when needed.

As your environment grows, the Top 10 Performance Tuning Tips for Amazon Athena blog can help you with partitioning of data and consolidating data into larger files if needed.
Cost of the solution
Cost will depend on how much log data is generated, processed and stored by the solution. More information on pricing can be found on public pricing pages for each of the services:
- Amazon Route 53 Pricing
- Amazon Kinesis Data Firehose Pricing
- Amazon DynamoDB Pricing
- AWS Lambda Pricing
- Amazon S3 Pricing
- Amazon SNS Pricing
Cleanup
To clean up the setup follow these steps:
- Delete the S3 buckets hosting your interesting domain list and logs
- Delete the Route 53 Query Logging configuration in Route 53 Console
- Delete CloudWatch logs automatically generated for the Lambda functions
- Delete the SNS topic and subscriptions
- Delete the AWS CloudFormation Stack created by AWS SAM CLI in AWS CloudFormation Console
- Delete the test VPC and EC2 instance if you had to create a new one during the setup
Conclusion
In this blog post we’ve covered how you can start parsing Amazon VPC Route 53 Resolver Query logs. You can check domains used in DNS queries from inside your VPC against a DynamoDB table and mark the ones that match. You can generate notifications when matches are found. All the results go into an S3 bucket from where you can further analyze the data.